

Follow us on Instagram for more fun ideas for kids!
Watch the video below to see this fun Lung Anatomy in a Bottle Activity for Kids in action. Make sure to subscribe to our YouTube channel for more fun videos!

This clever lung anatomy in a bottle for kids activity is a great way to teach children how lungs work in a visual way.
This clever lung anatomy project is from the book: Maker Lab: 28 Super Cool Projects.
Teaching our children all about how various parts of the body work can happen at any age. When you can combine education and fun, you’ll be able to see their minds working in ways that you never thought possible.
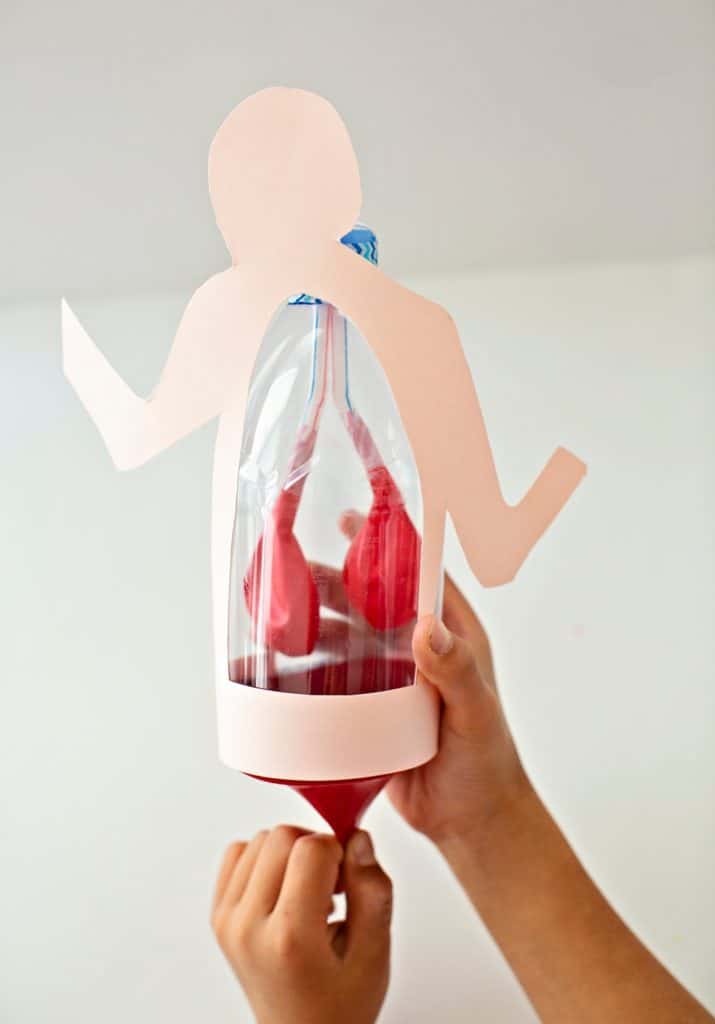
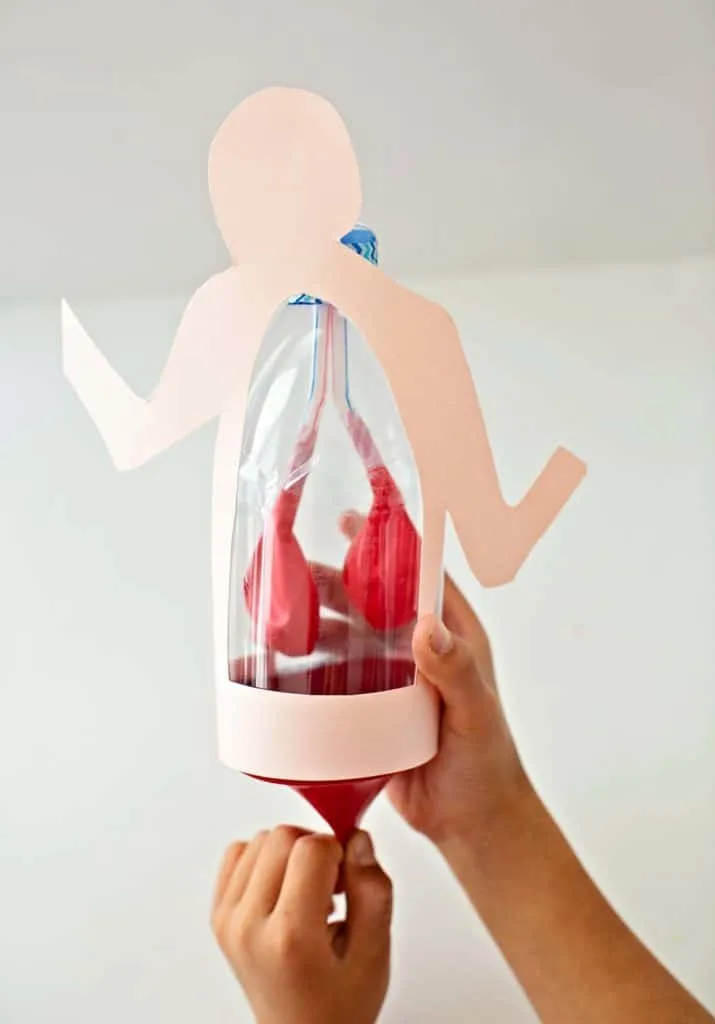
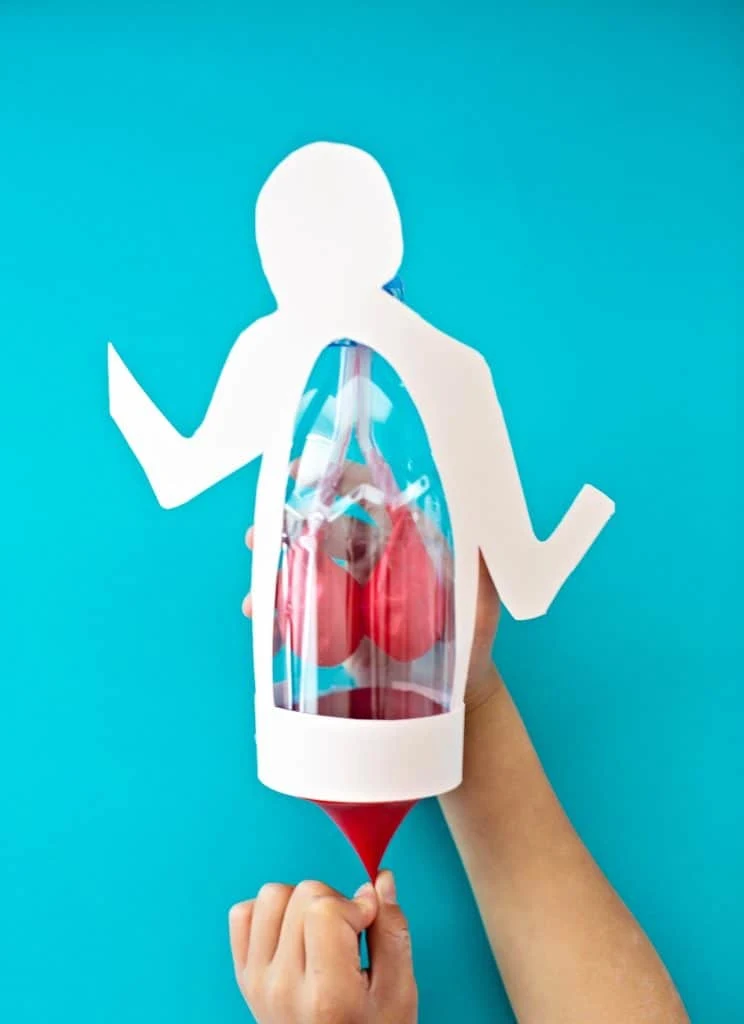
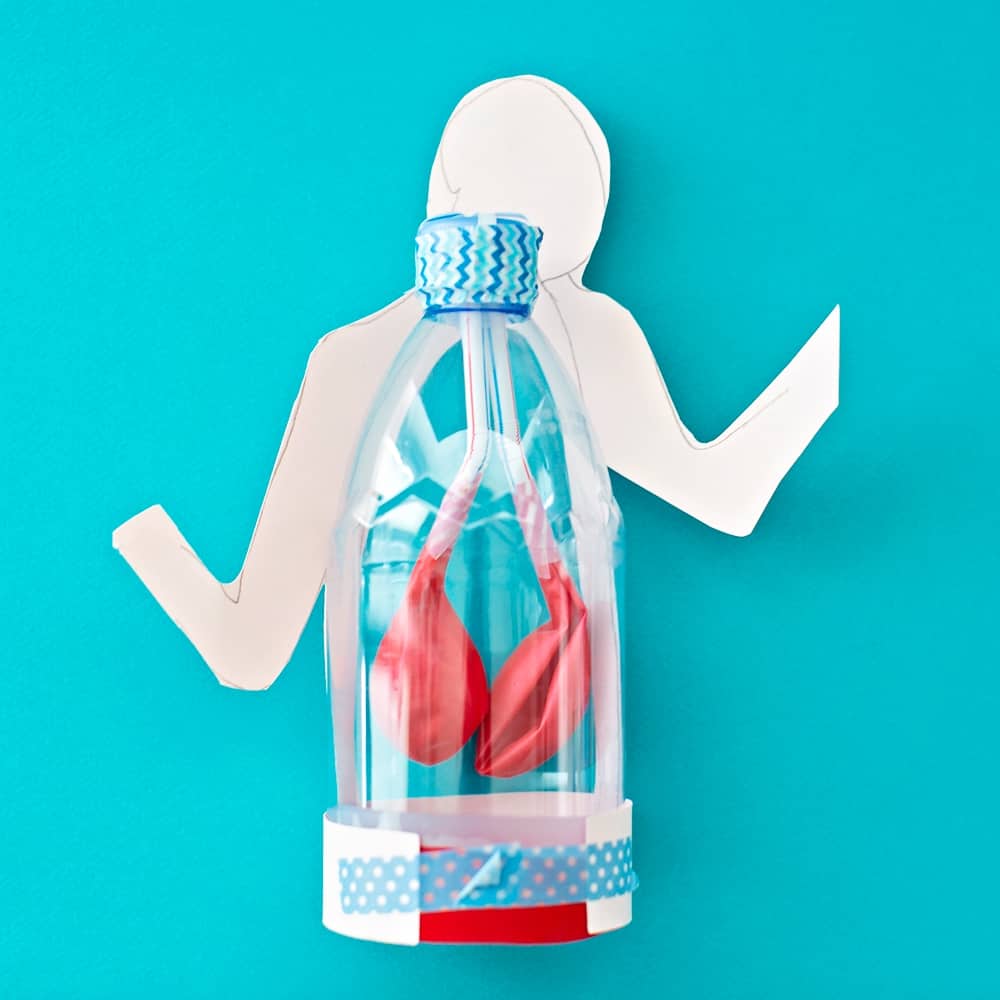
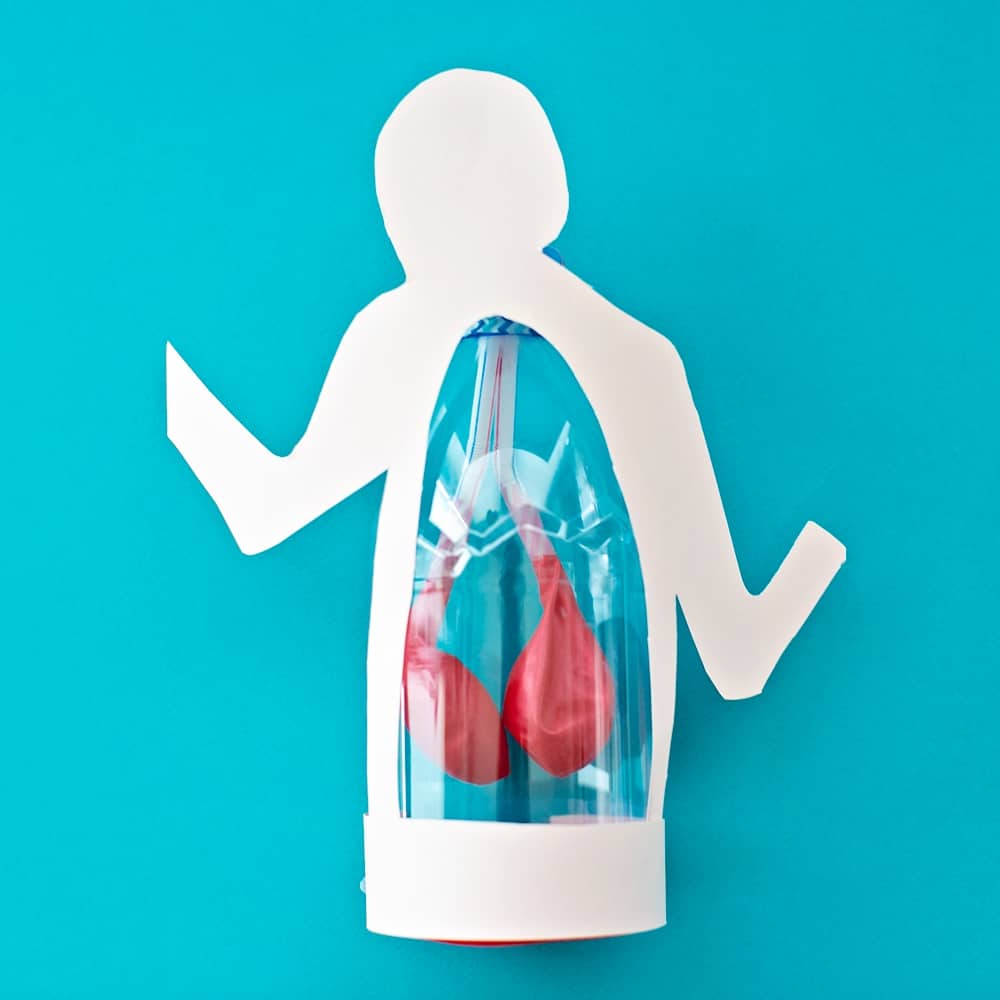
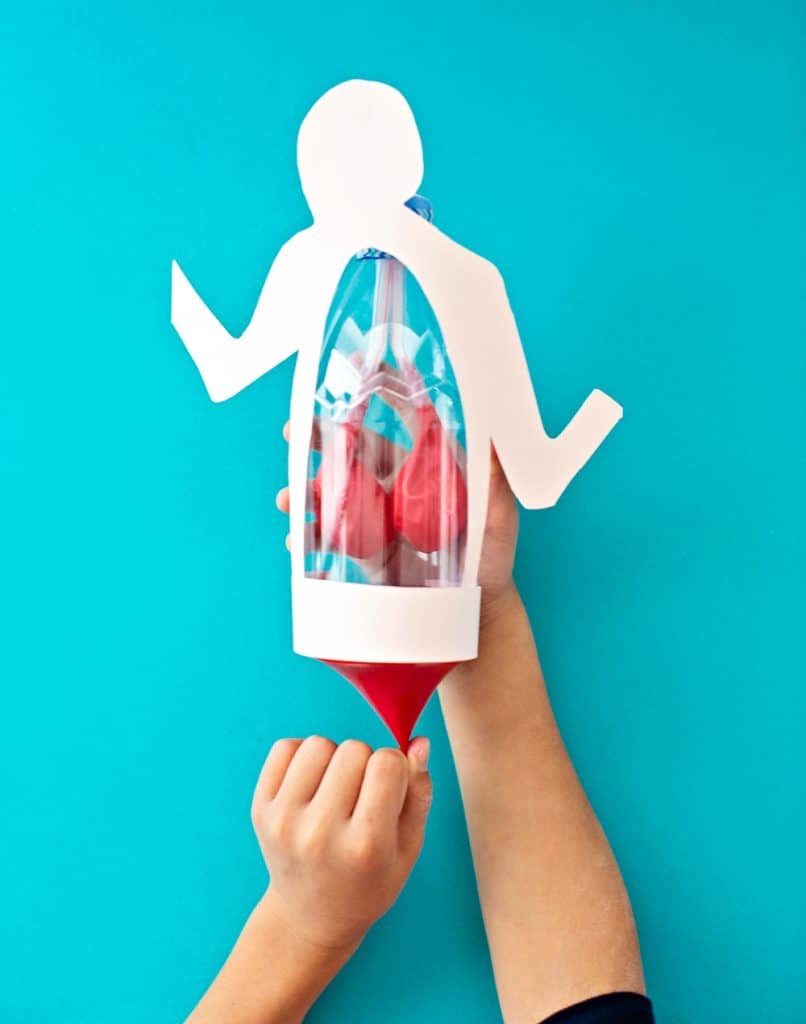
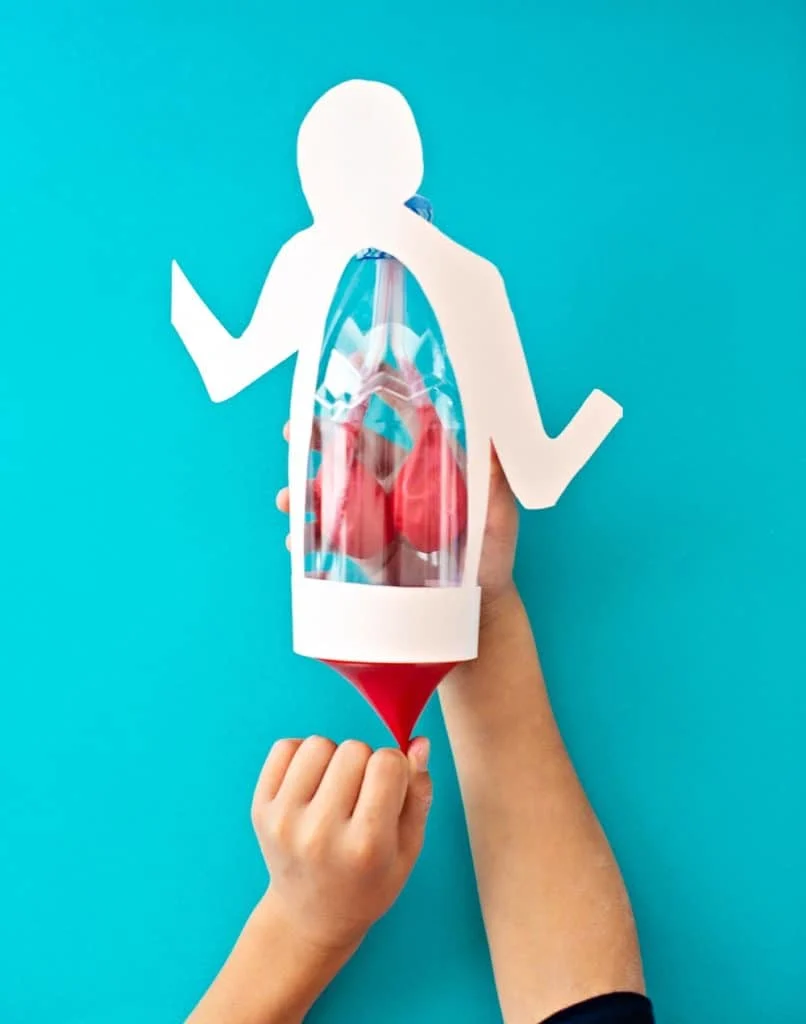
This Lung Anatomy in a Bottle Activity for Kids showcases how the human lungs really work.
Instead of reading anatomy to your child from a book or trying to explain to them via a printed picture, why not use this fun and educational activity instead?
Not only will they get to visually see how the lungs work but they’ll get to use their fine motor skills and tinkering skills by helping build it as well.
I hope that your child understands just how truly amazing the human body is because of this creative lung anatomy bottle activity.


This lung anatomy activity is a great STEM biology science project.
Not only is this a clever recycled activity for kids, it also gets kids thinking about using everyday objects (in this case a recycled water bottle) to create visual learning models.
We don’t need difficult bells and whistles, expensive props and materials to create this lung anatomy.
All you need is a bottle, balloon, paper, straw, and tape. Simple, creative tools every kid should have in their tinkering drawer!
What age level is this lung anatomy in a bottle activity good for?
If you’re asking me, I don’t think a child is ever too young to start learning, but this is a great visual experiment for the preschool set and older.
Young learners may not fully understand exactly what you’re showing them, but you’re still taking the time to create and interact, which is always good.
Think about making this activity multiple times as your child continues to age. The older they get, the more that they’ll start to understand just how cool and important this lung activity truly is.
Older children can definitely help create this activity by helping tape and piece together the parts.
What resources would be good to accompany this activity?
We recommend printing out our lung anatomy printable to go along with this activity as another fun hands-on model.
We also recommend taking a look at these 10 Fun Ways to Teach Kids Anatomy.
Some children are visual learners while others like to learn by doing. The more learning resources that you can have for them to see, read and explore, the better. This visual anatomy learning apron is something we also have and a great learning toy.
How to set up this Lung anatomy in a bottle activity
As we mentioned at the top of the post, this lung anatomy in a bottle is from this awesome science book for kids we have. We highly recommend getting it not only for this project but for all the other fascinating and fun science activities your kids will learn. If you want to get all the details on how to make this bottle lung anatomy, get the book you won’t regret it!
The great part about this lung anatomy activity is that it’s really quite easy to build. You’re going to just need a few simple supplies and you’ll be created human-looking lungs in no time at all.
Don’t forget to encourage your child to join in on the creativity as well. The more that they can do and take charge of, the more that they’re going to learn and absorb.
Here’s a quick run-down of what you’ll need and how it’s constructed.


Lung Anatomy in a bottle activity – Materials:
- Plastic bottle, washed out, label taken out
- 3 Small balloons
- Straw
- Construction Paper
- Tape
- Exacto knife
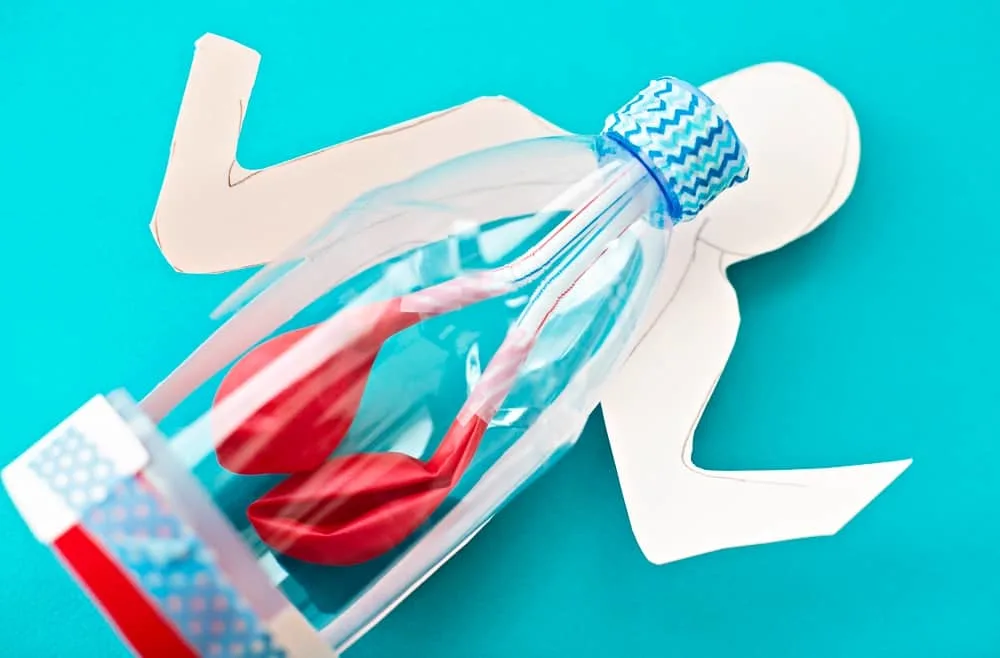
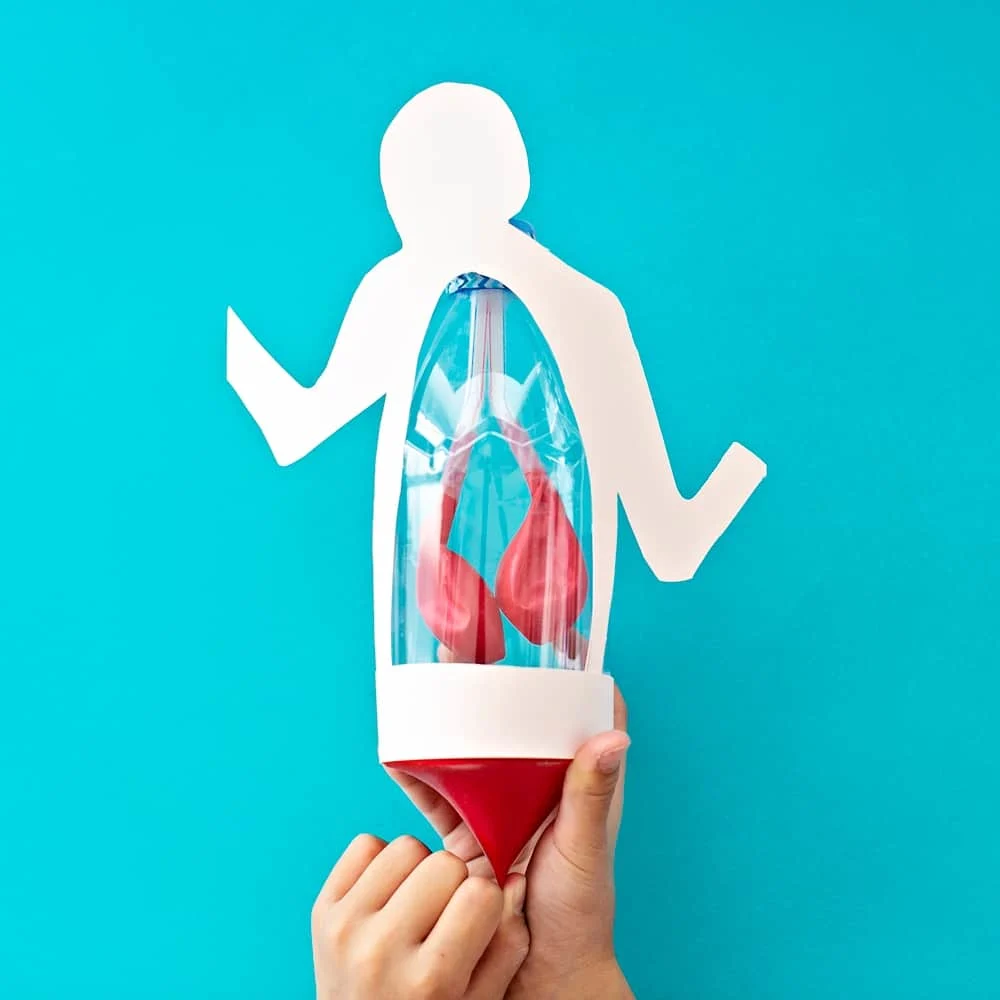
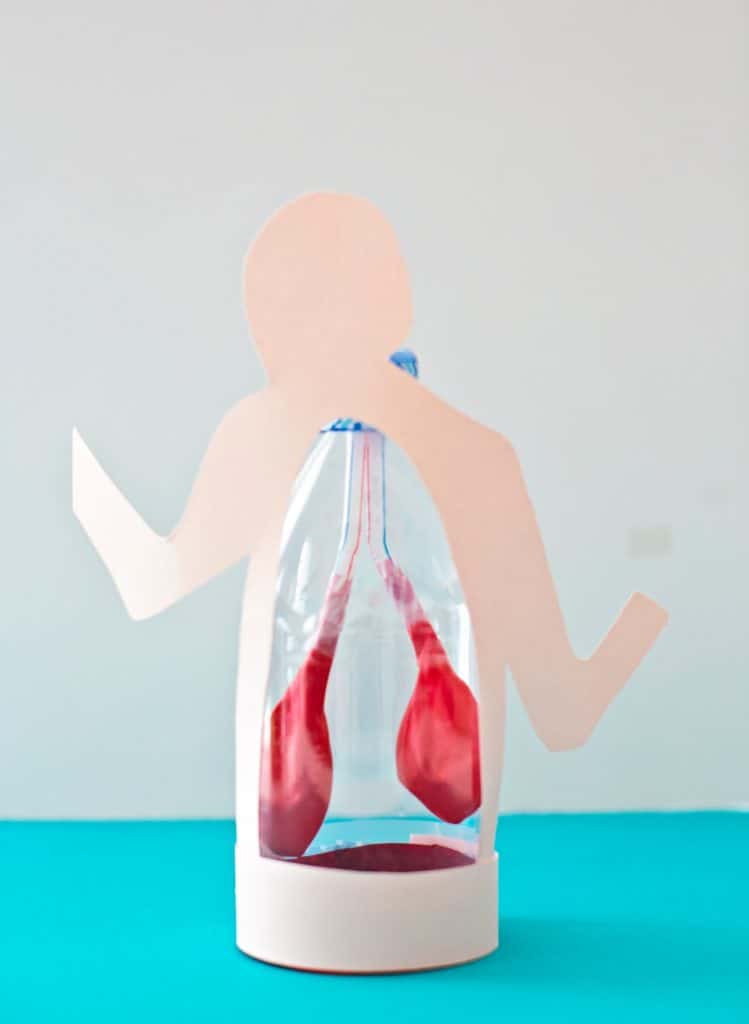
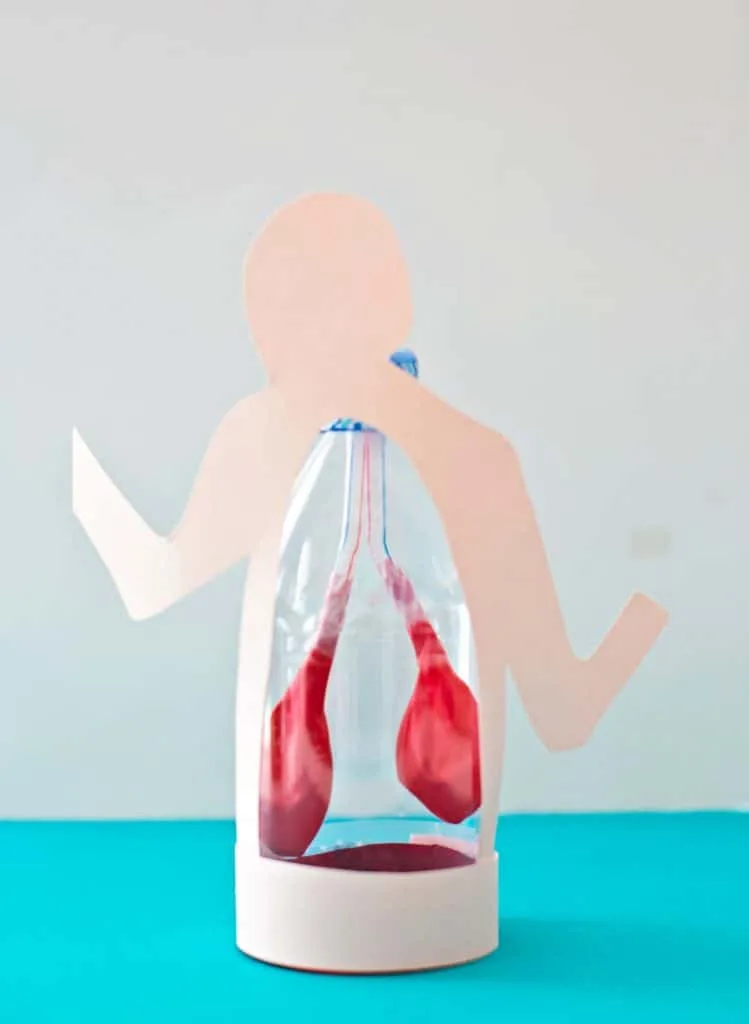
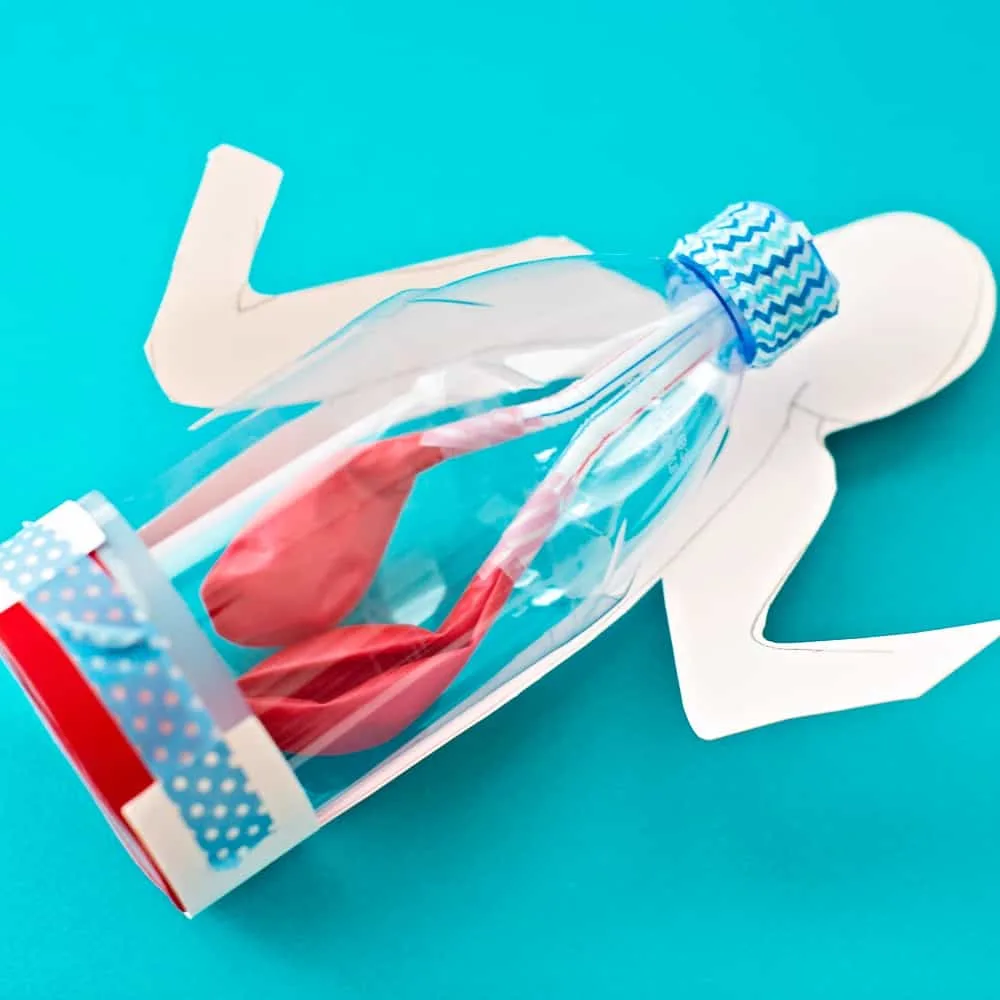
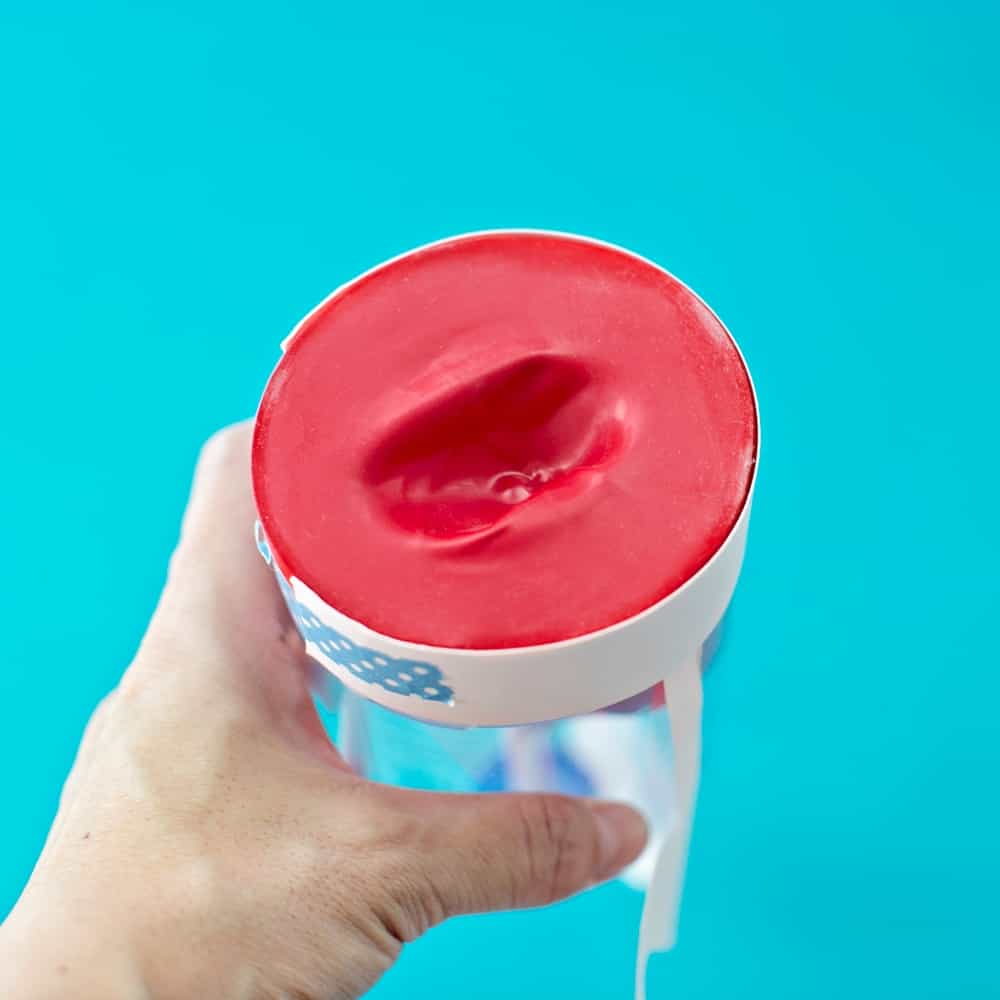
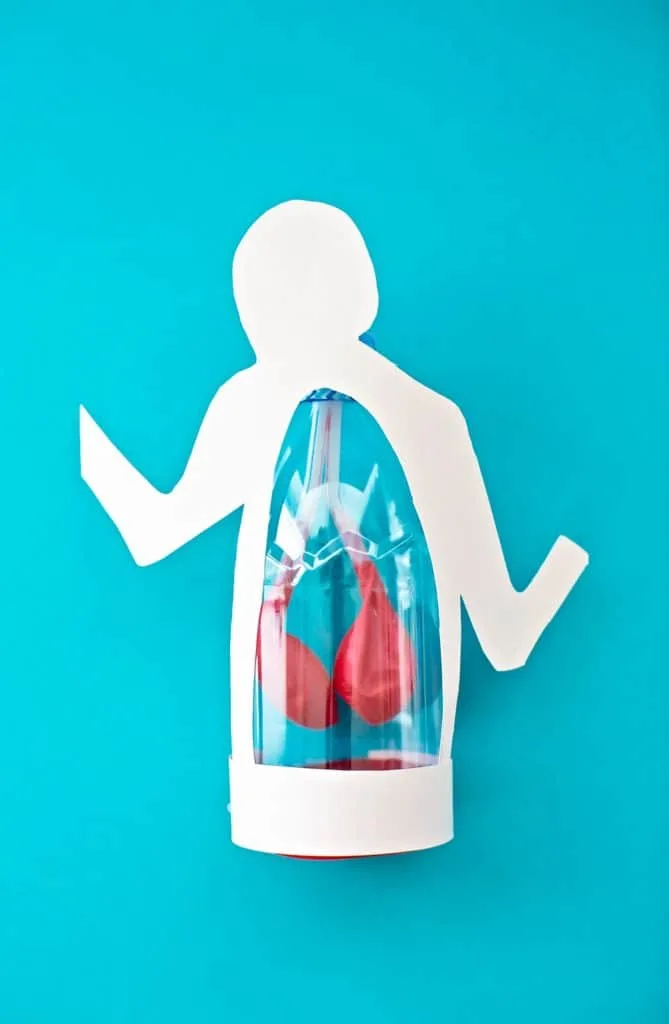
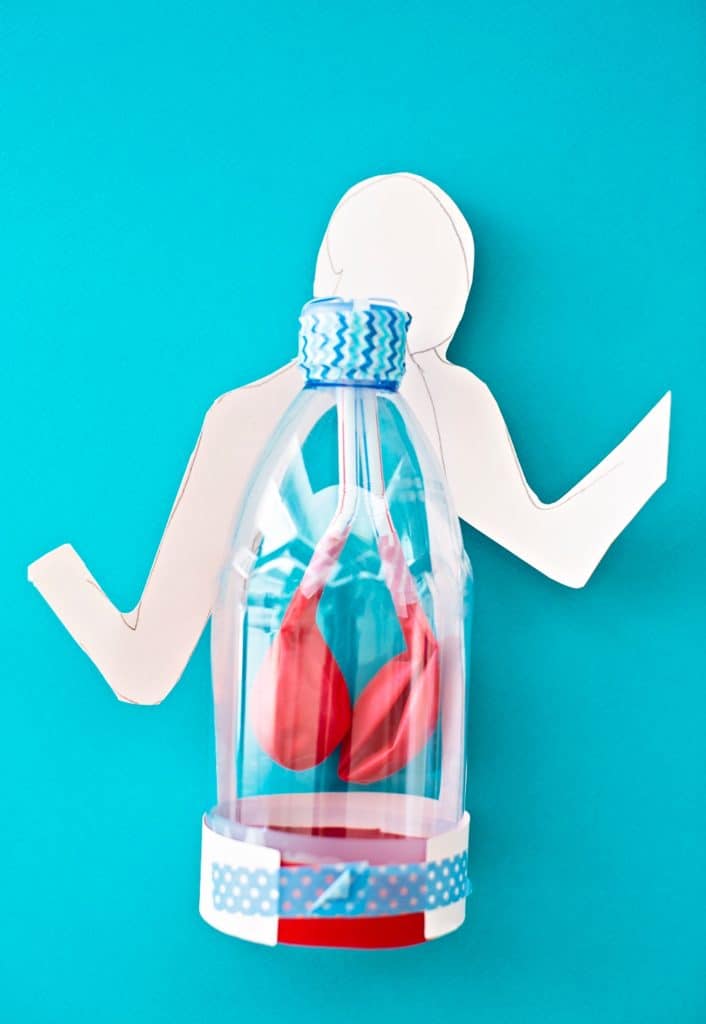
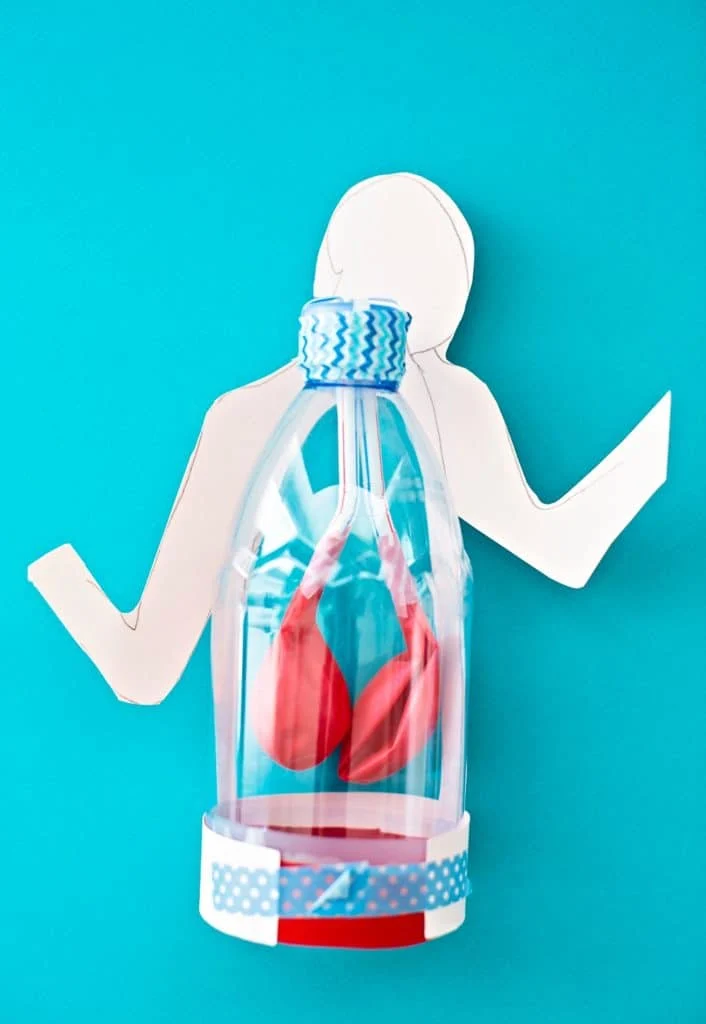
Instructions can be found under the book Maker Lab: 28 Super Cool Projects. But the basic construct is that you will cut a bottle in half; create a hole on the bottle cap and add a straw spliced in two taped to two small balloons.
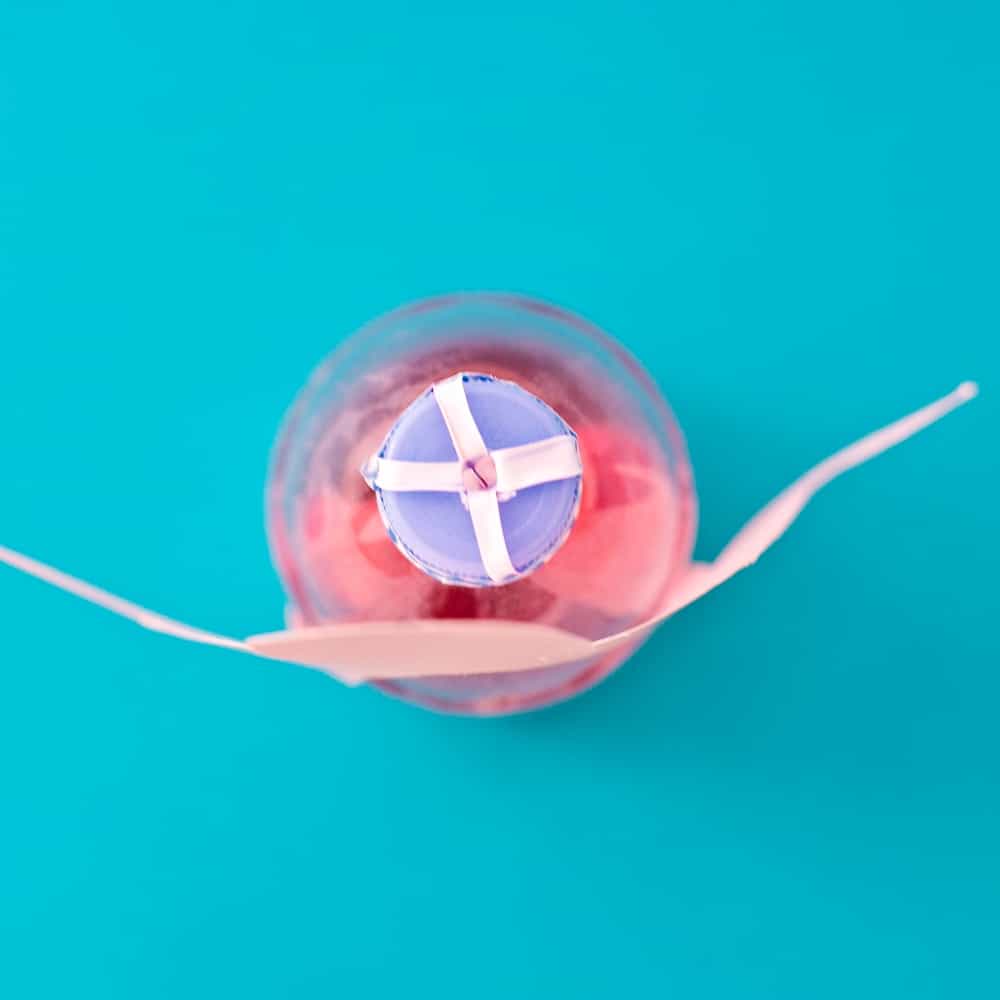
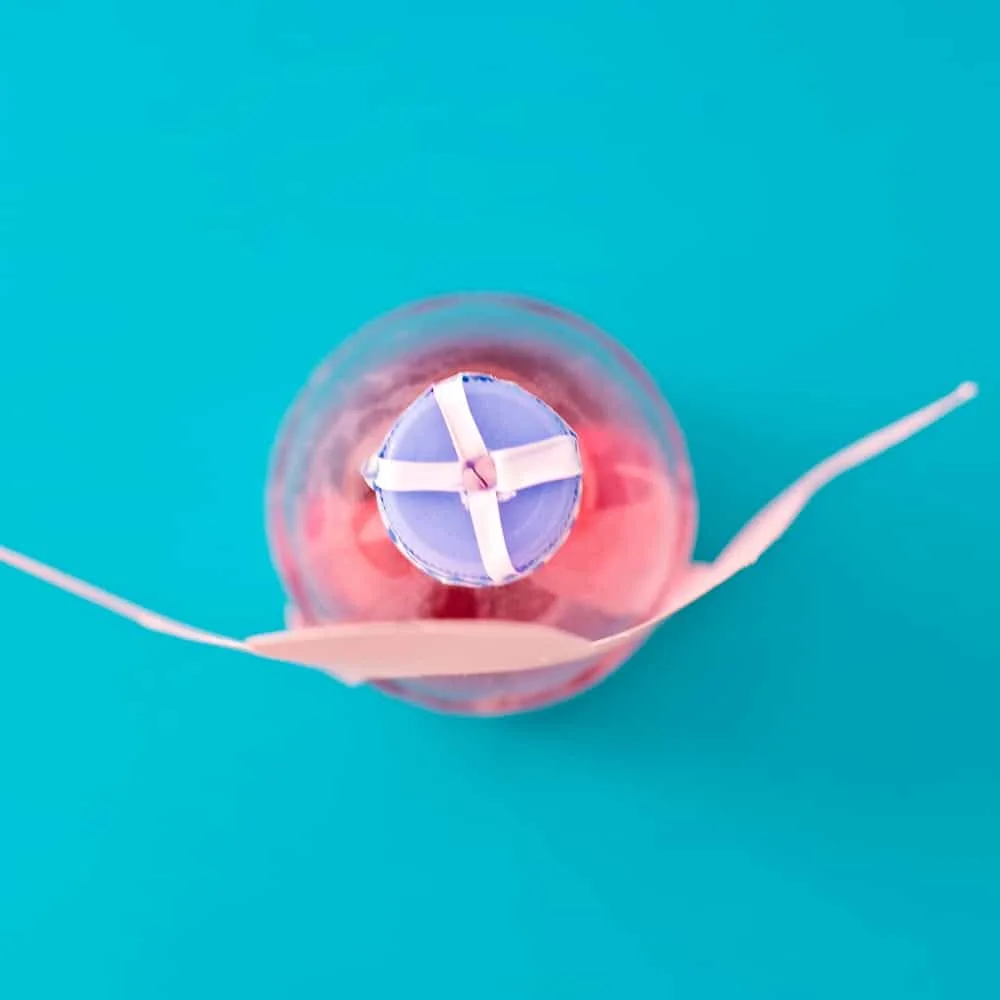
Then you will add another balloon with the top cut off to close off the end of the bottle. Kids can push the balloon in and out to inflate air and see the other two balloons (the lungs) breath or inflate and deflate. This is a very similar activity to our lung anatomy model built with plastic bags and straws!
We added this little paper cut-out to resemble a body, and just free-hand drew it, but it’s optional and certainly not necessary!

If you love this fun Lung Anatomy in a Bottle activity, make certain to check out these other learning activities as well:
How To Make a Lung Model With Kids
Anatomy Book With Beautiful Paper Cut Outs
10 Fun Ways to Teach Kids Anatomy


Agnes Hsu is a mom of three and has been inspiring parents and kids to get creative with easy activities and family friendly recipes for over 10 years. She shares her love for creative play and kids food to her 2MM+ followers online. Agnes' commitment to playful learning and kindness has not only raised funds for charity but also earned features in prestigious nationwide publications.