

By using this site, you agree to our Terms of Use. This post may contain affiliate links. Read our disclosure policy.
Follow us on Instagram for more fun ideas for kids!
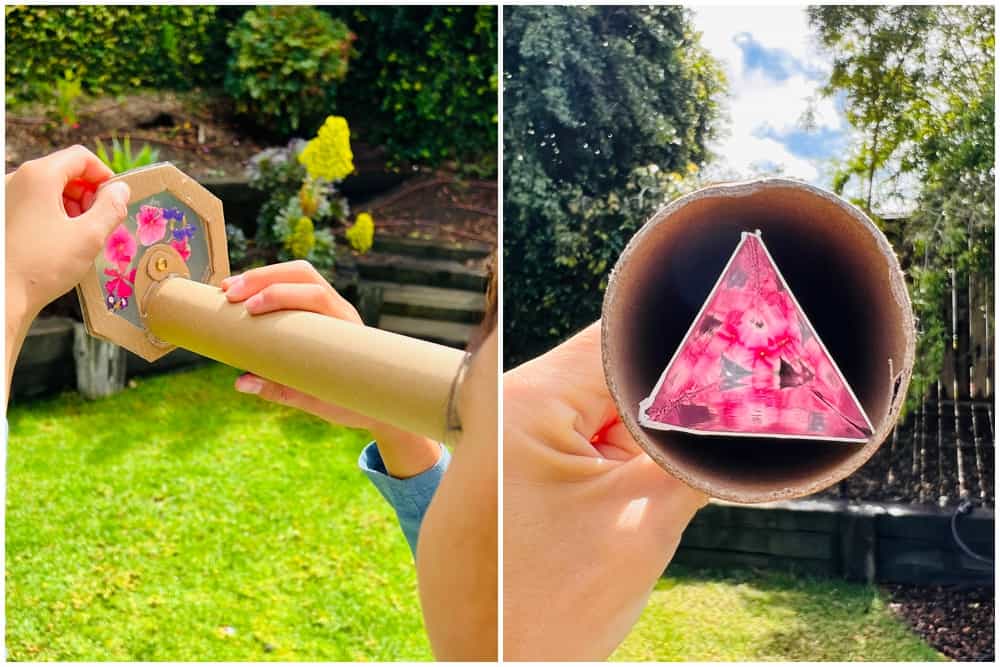
The kids will love this DIY Cardboard Kaleidoscope! It’s the perfect way to see shapes, flowers, colors, and more! A cute nature craft!
Anytime that you can use things in a new way, it’s such a great project to make with the kids. Recycled crafts are some of our favorite projects – and I think that this one should be at the top of your list. The kids will be able to use flowers and be as creative as they want!
We have so much fun with this project because we change it up every time. Sometimes we make a nature kaleidoscope, and sometimes we’ll work on just adding various colors without any real rhyme or reason.


What is a kaleidoscope?
A typical kaleidoscope that you’d buy from a store is a plastic object that’s fun of little beads of color that twist and turn and create fun illusions and pictures.
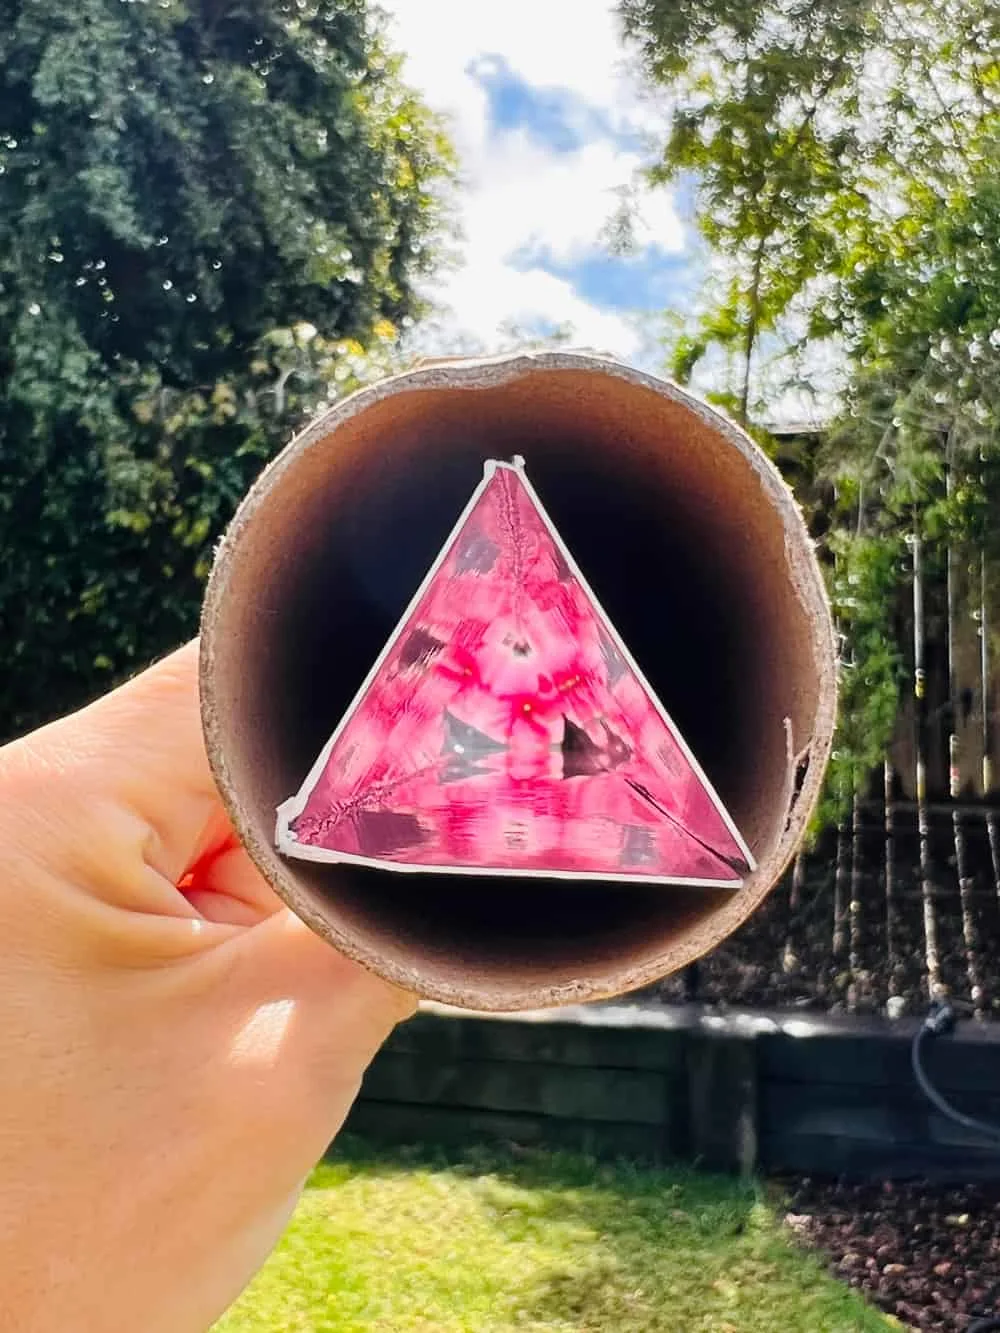
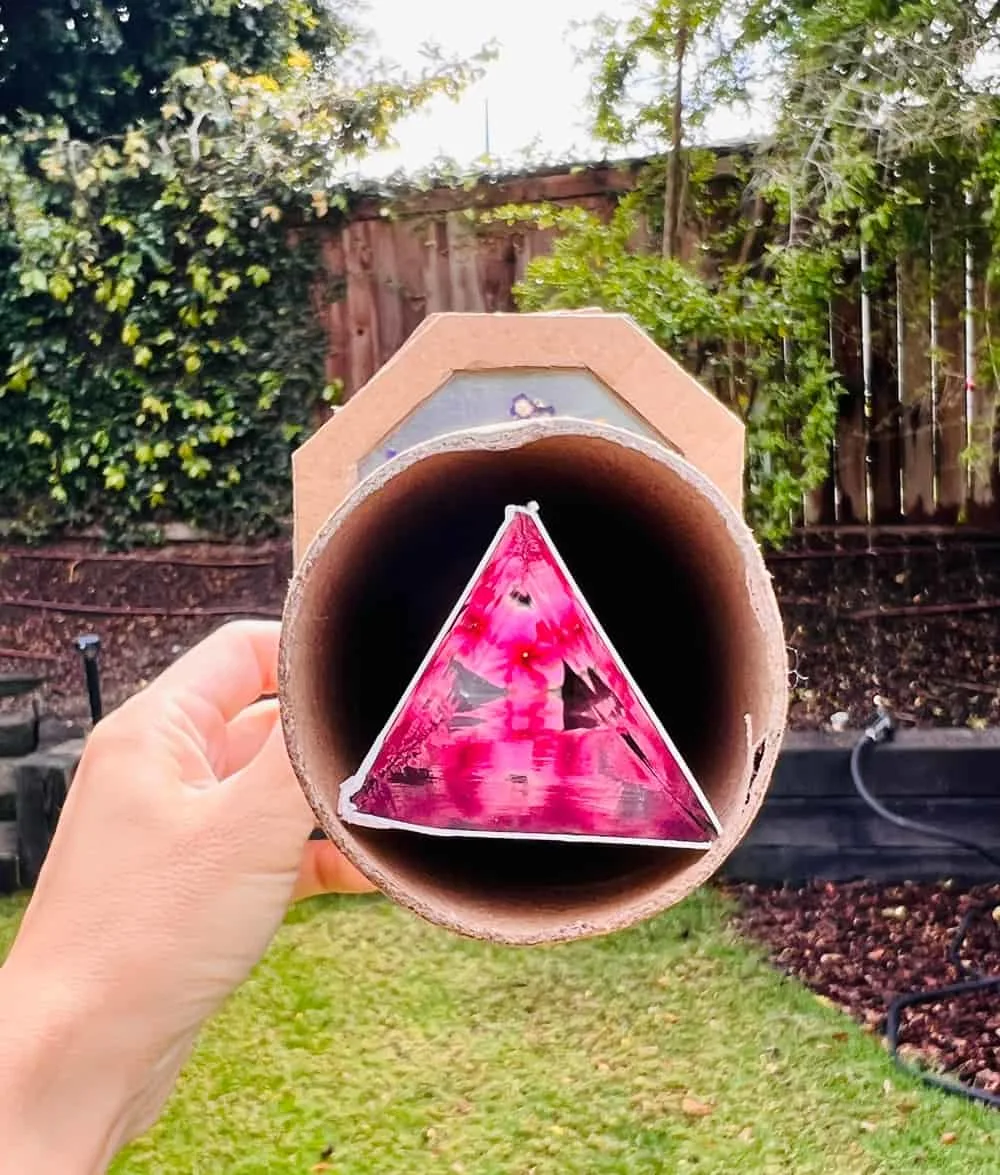
This homemade kaleidoscope is a little bit different in that it uses flowers on the inside, but it’s still a great way to see fun colors and patterns immerge.
What is another word for kaleidoscope?
While kaleidoscope is the most popular name, there are other names that it goes by. Sometimes we’ll call this the “changing scene” or “complex pattern,” or really anything else that we can think of!
The kids will also call it their cardboard viewer, too! Kids say the cutest things!


Do you need to make an octagon shape?
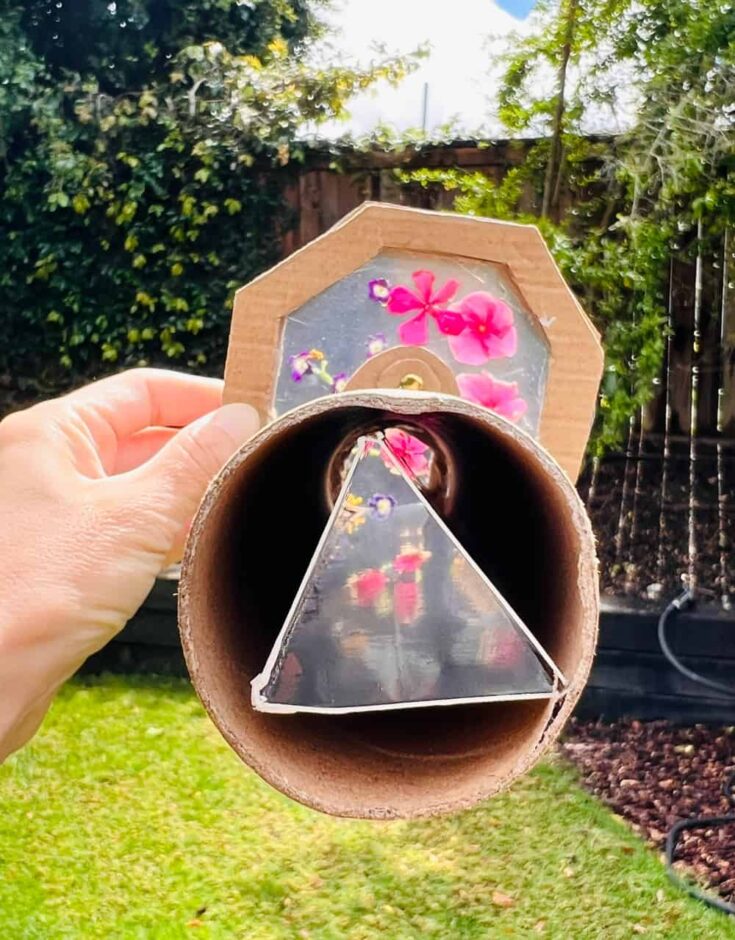
No! You can make it a circle or any other shape. The most important shape to keep is the inside triangle in the paper tube.
What else can you view other than flowers?
Try any flat colored objects, or even patterned papers! Leaves would be great too! Have your kids experiment and have fun!


DIY Cardboard Kaleidoscope – Materials
- cardboard tube
- shiny metallic paper
- clear plastic craft paper (or you can recycle clear plastic clamshell packaging)
- small craft flower/real flowers
- scissors
- hot glue gun
- Paper fastener
- Cardboard


How to use a kaleidoscope
Once you follow the steps below in the “how to” card, it’s time for the kids to play and be creative. The kaleidoscope is perfect for imaginative play and is a great way for them to create with their hands and then be able to play with it for hours, days, and weeks.
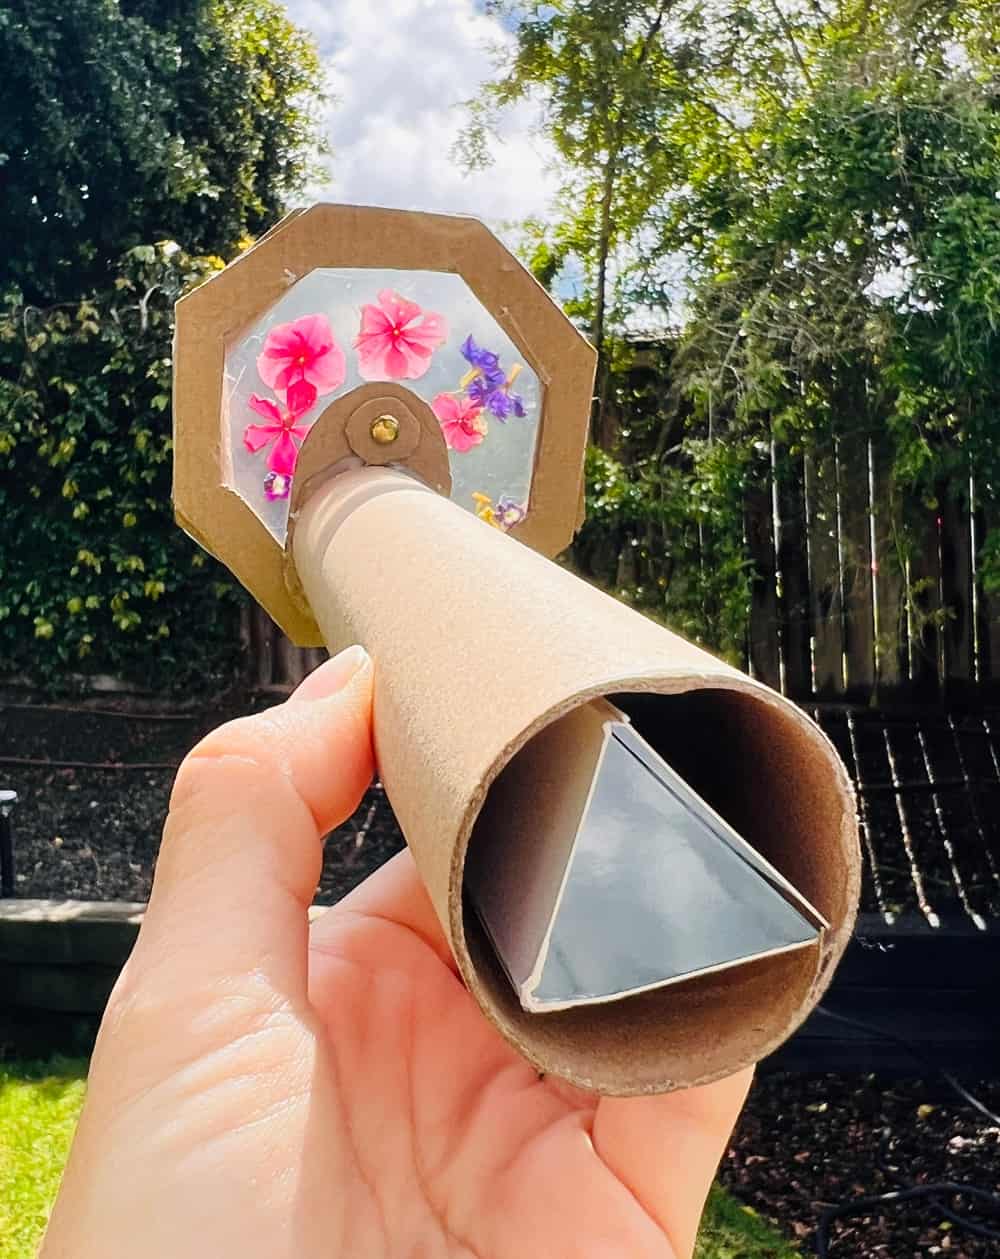
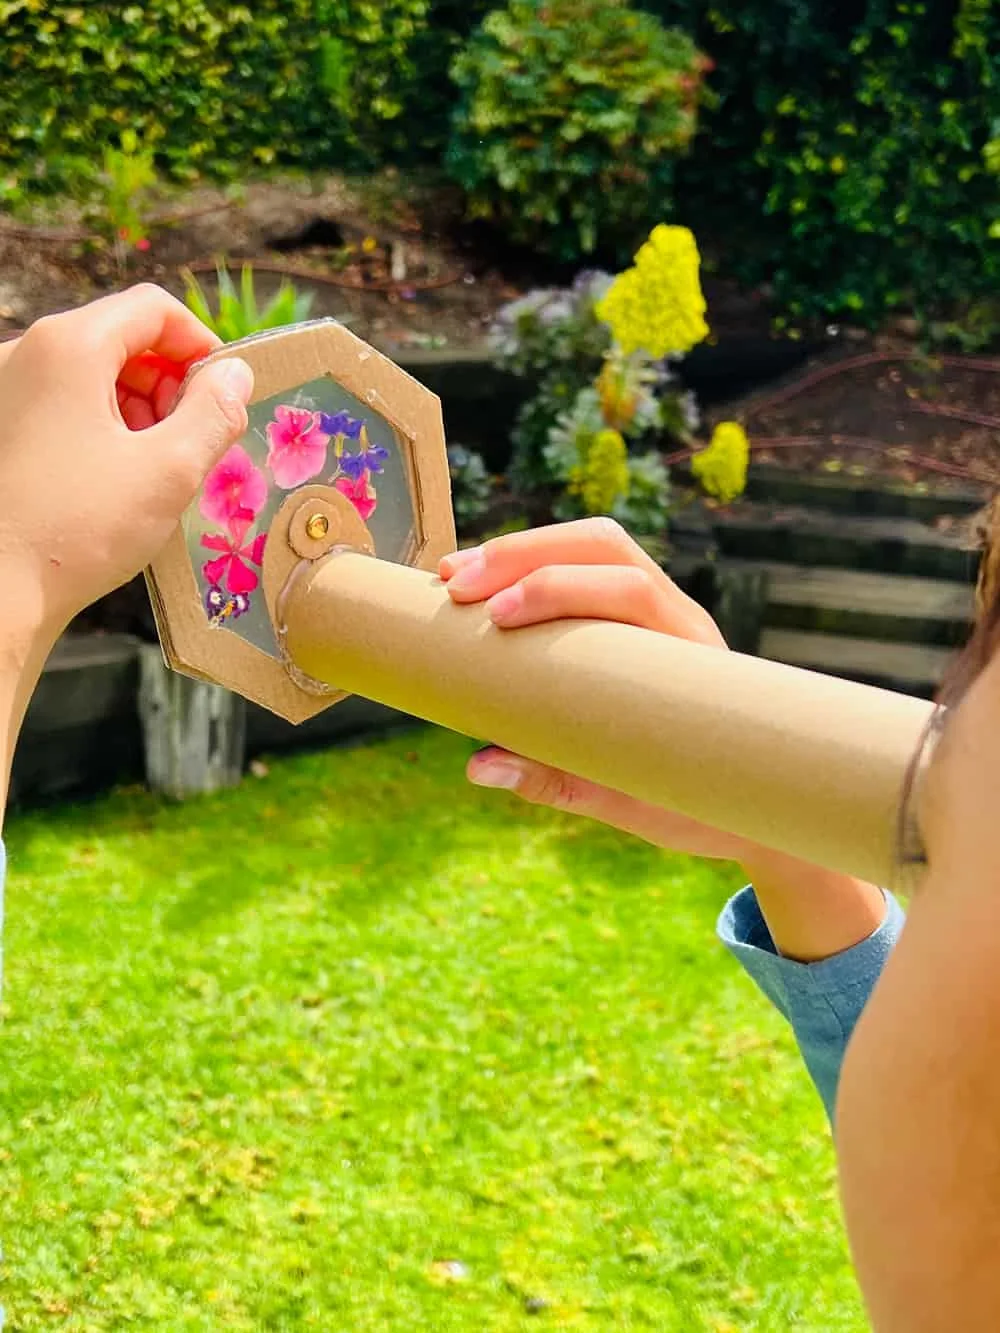
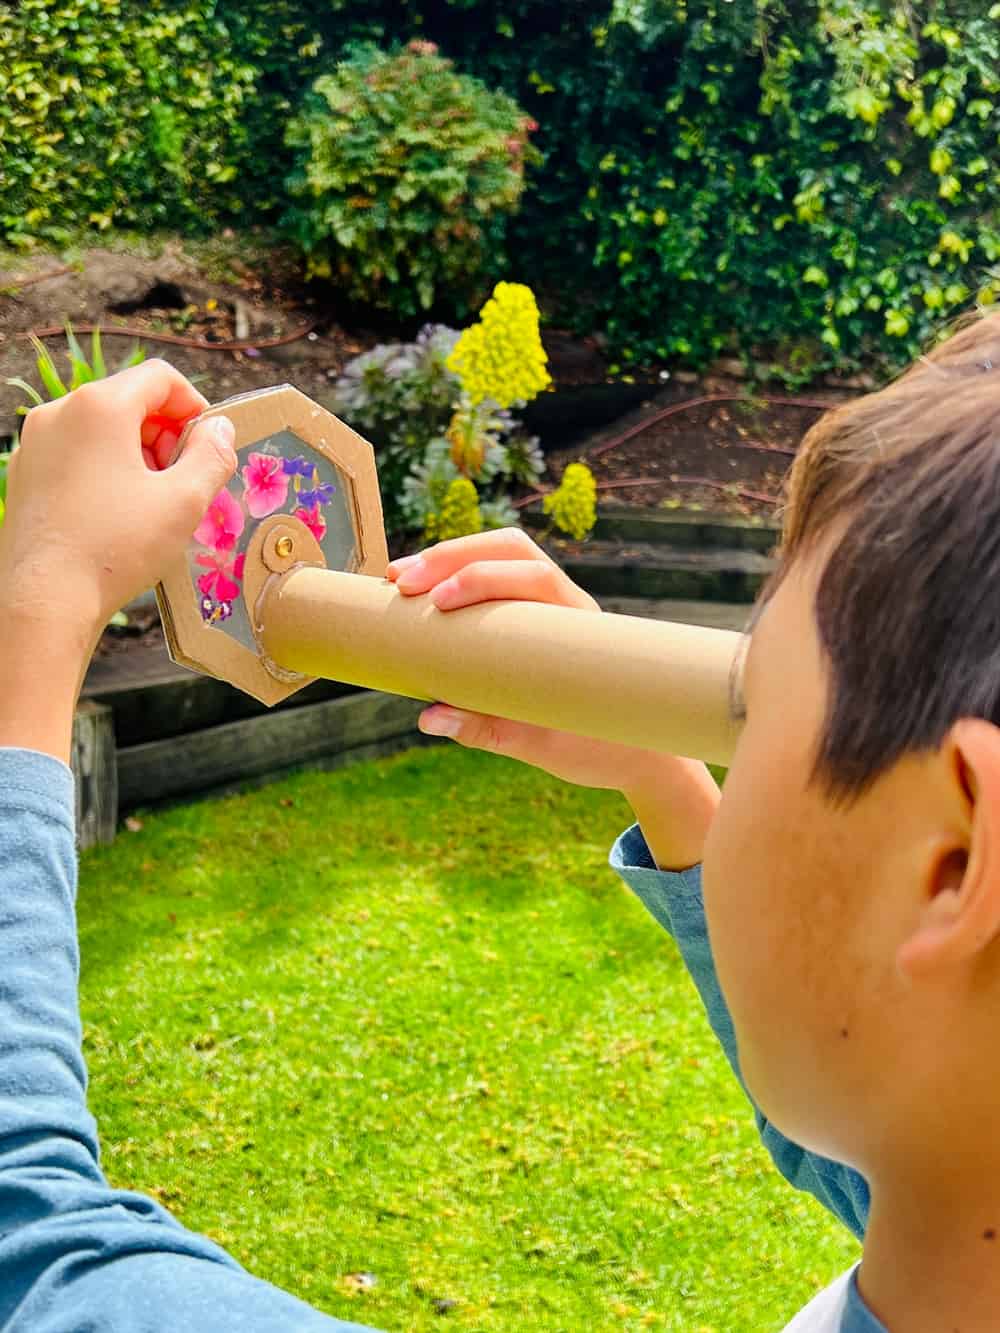
They just need to hold the cardboard tube in their hand and then twist the shaped cardboard with the flowers on the inside around in a circle. The light will filter through, and they’ll see lovely patterns and colors!
Have so much fun with this adorable craft! The kids will love making this and then being able to head outside to use the sunlight to see some really great colors and looks!
Show them that creating with their hands and then using their imagination is always a great learning combination!


INSTRUCTIONS
DIY Cardboard Kaleidoscope
This DIY Cardboard Kaleidoscope is the perfect way to create a fun homemade kaleidoscope that the kids will love.
Materials
- cardboard tube
- shiny metallic paper
- clear plastic craft paper (or you can recycle clear plastic clamshell packaging)
- small craft flower/real flowers
- scissors
- hot glue gun
- Paper fastener
- Cardboard
Tools
Instructions
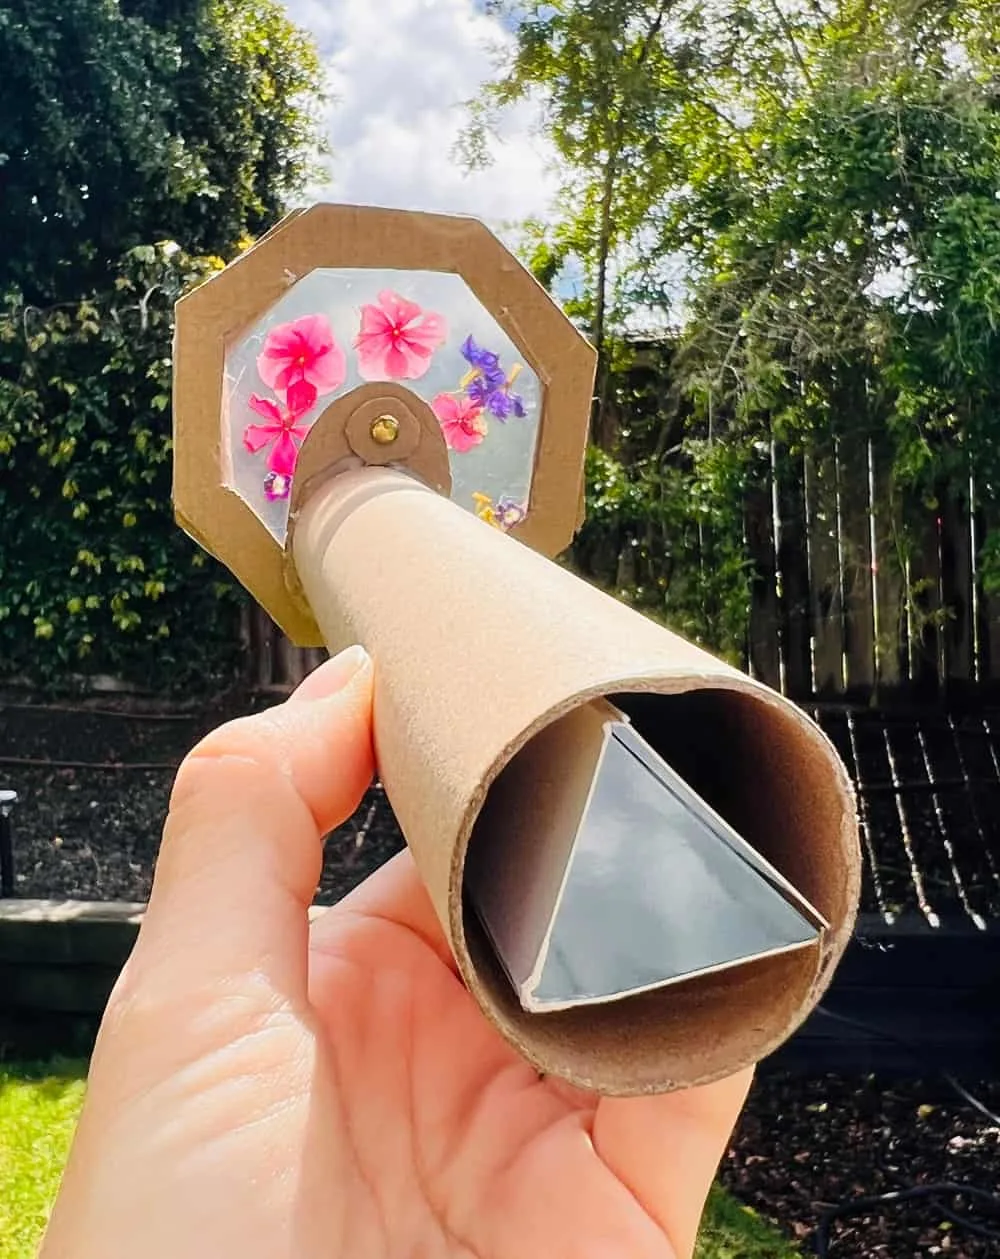
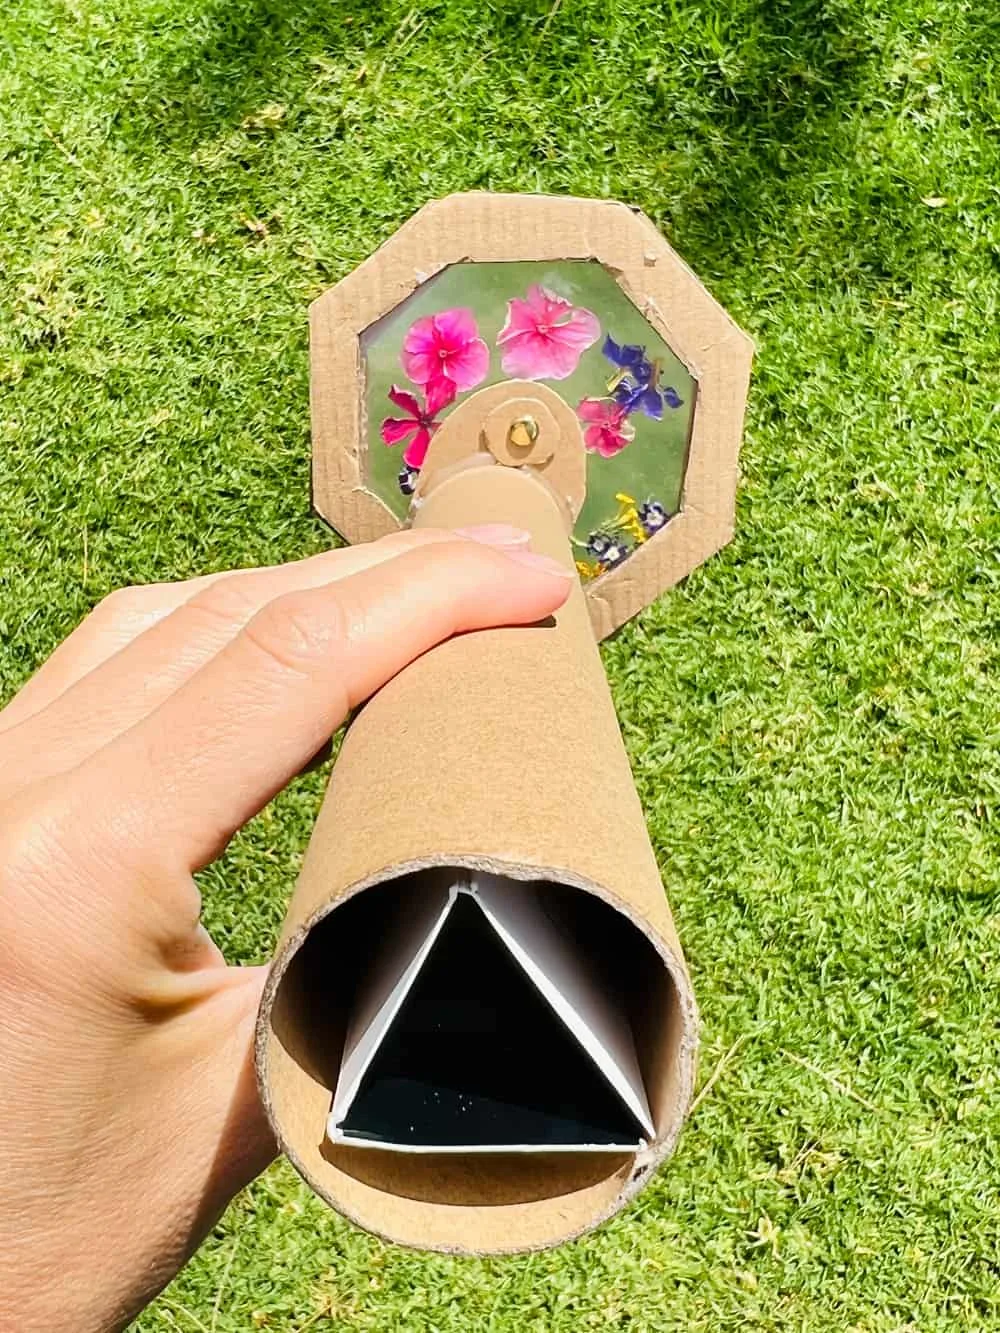
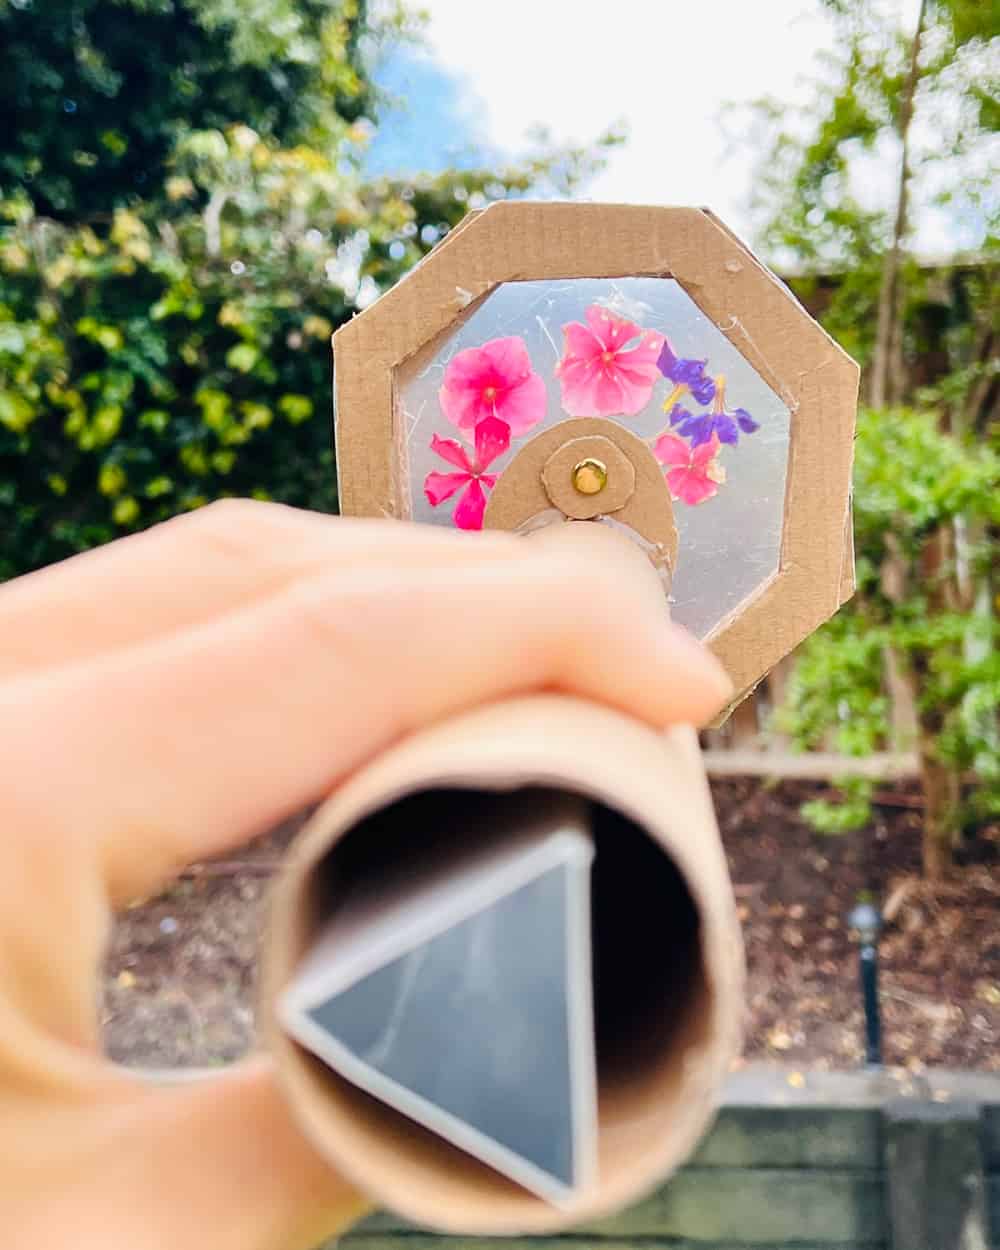
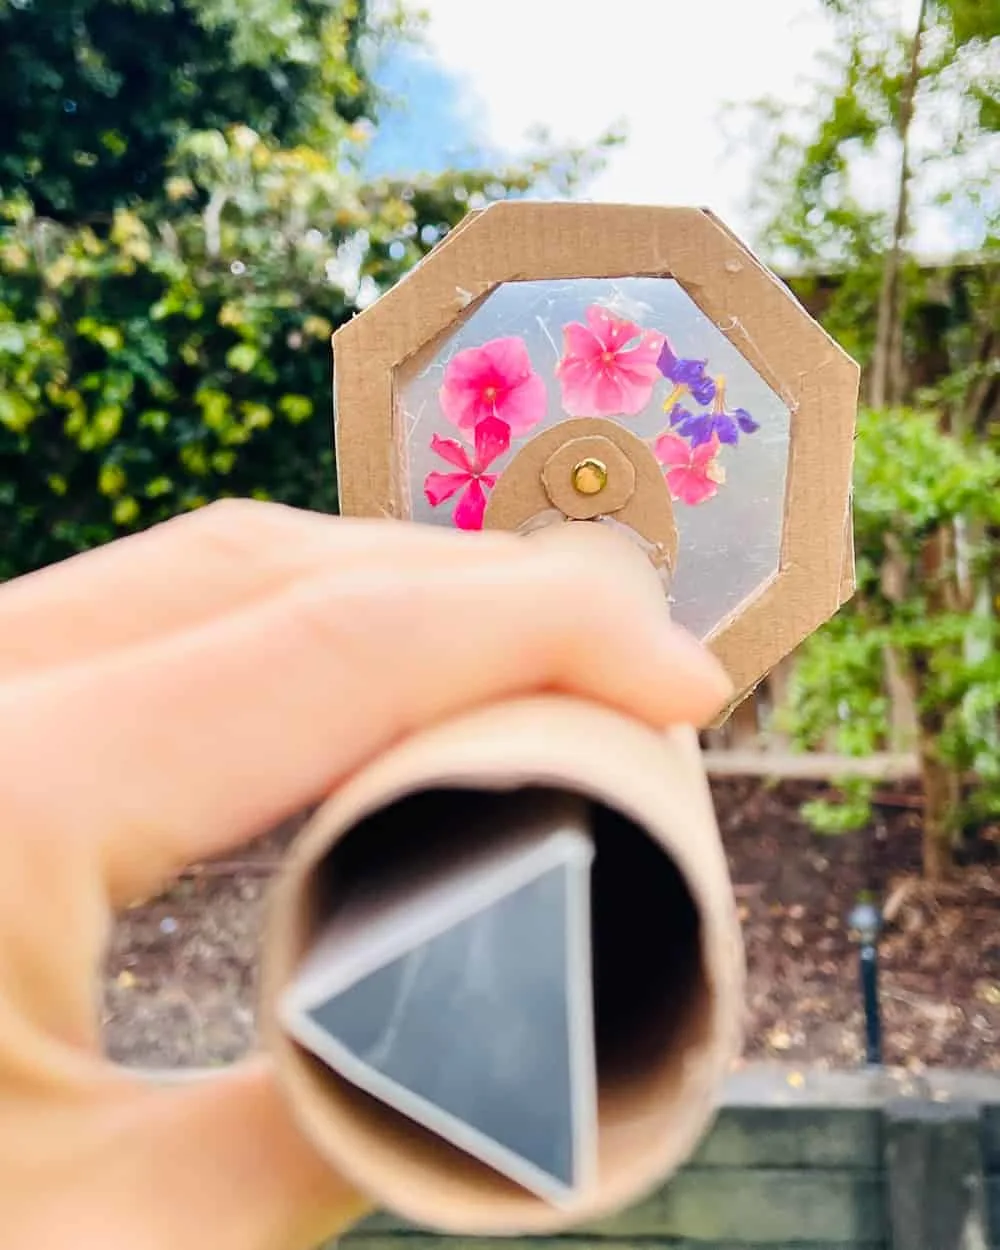
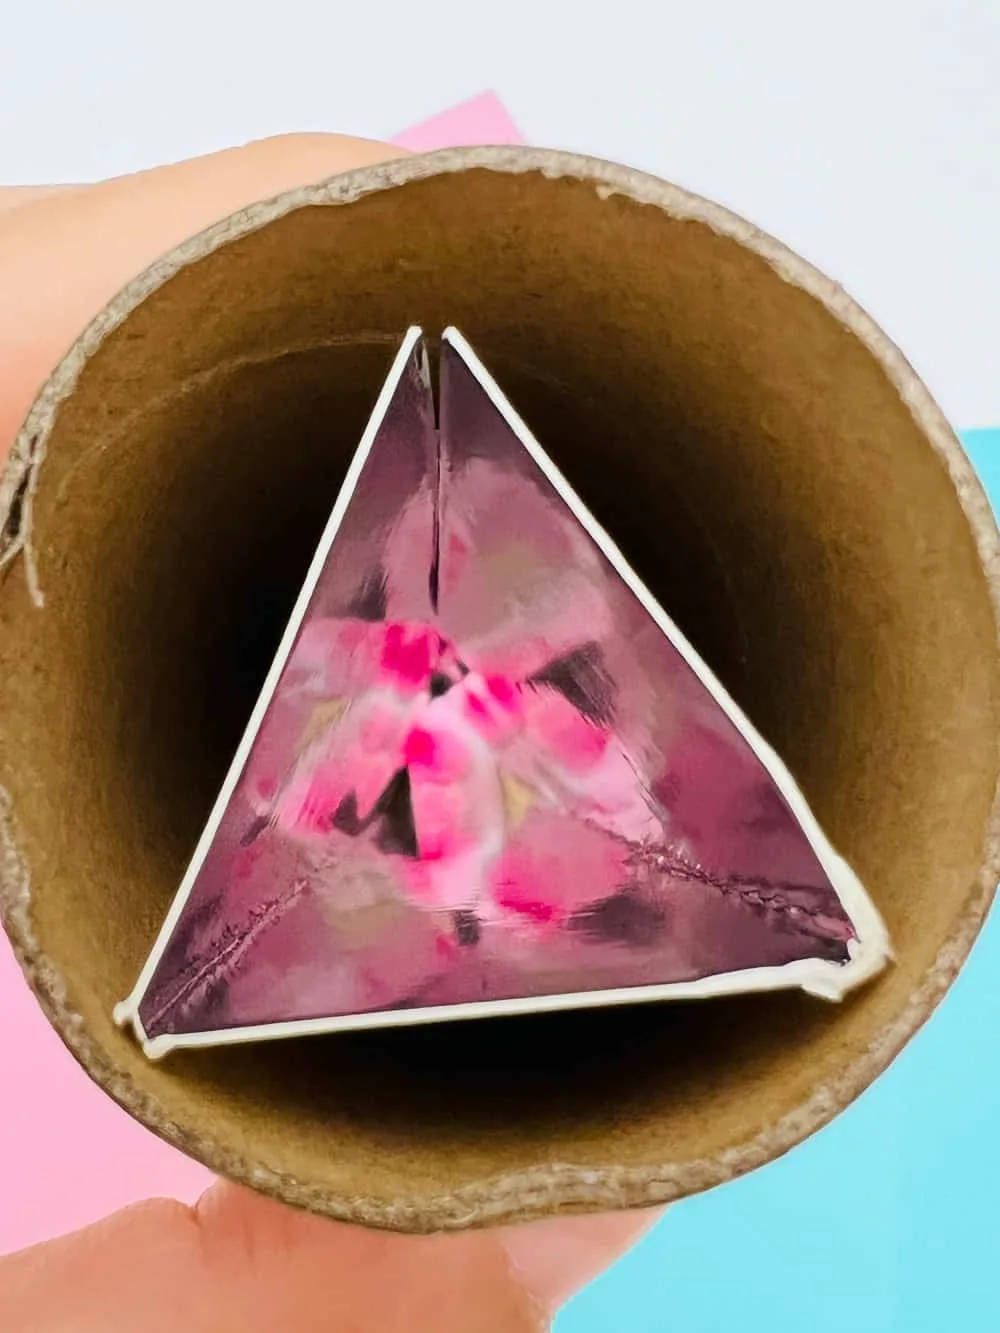
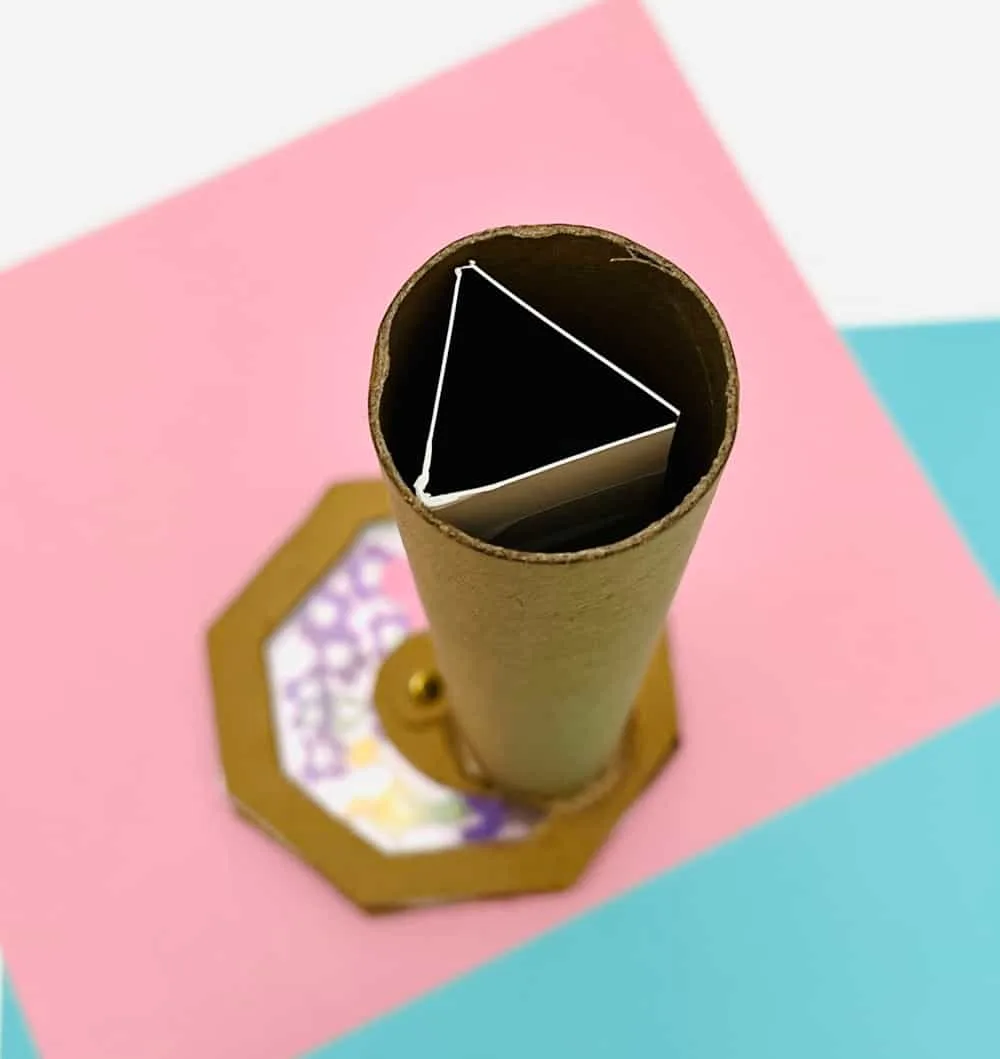
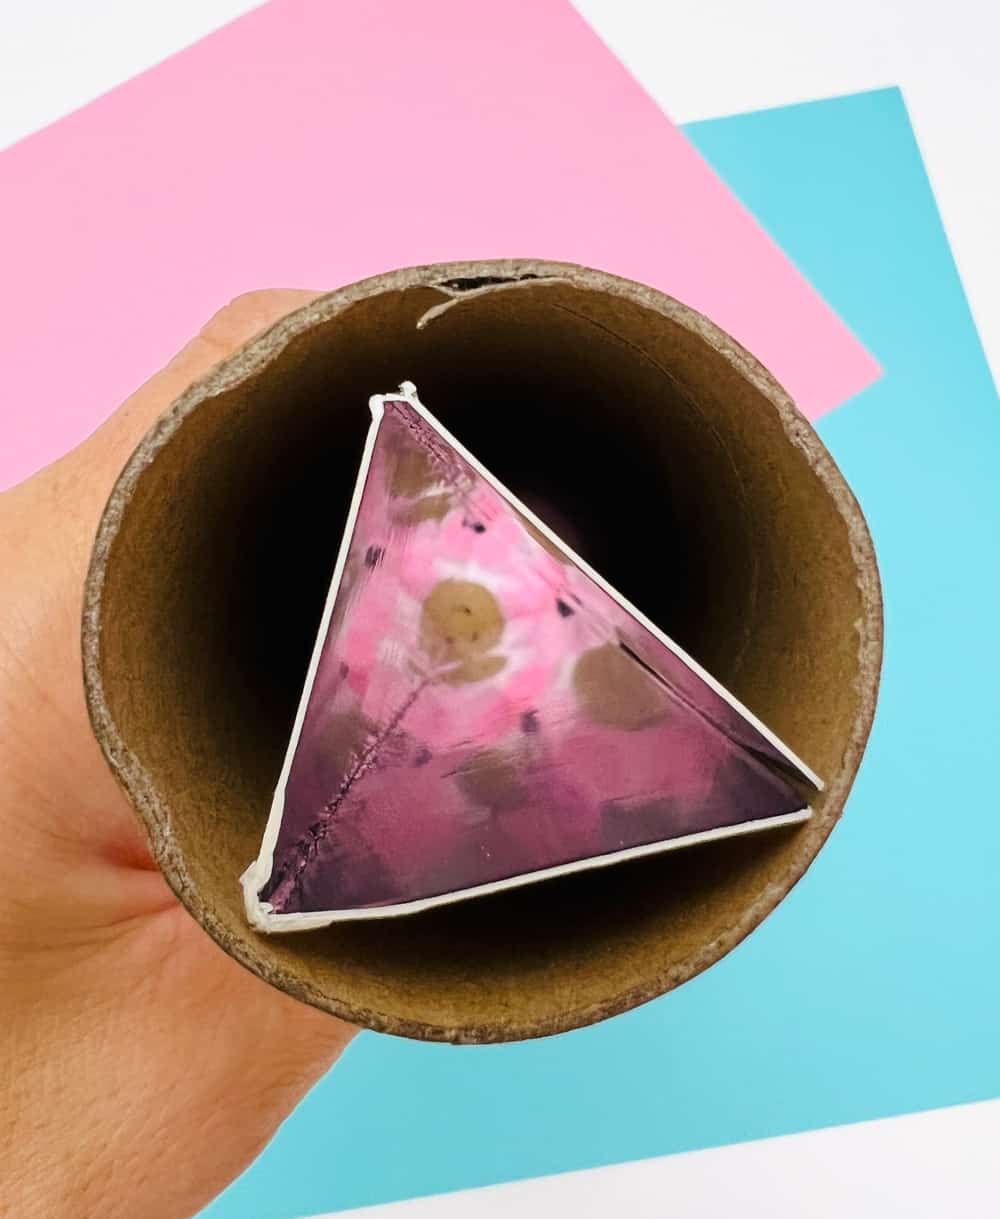
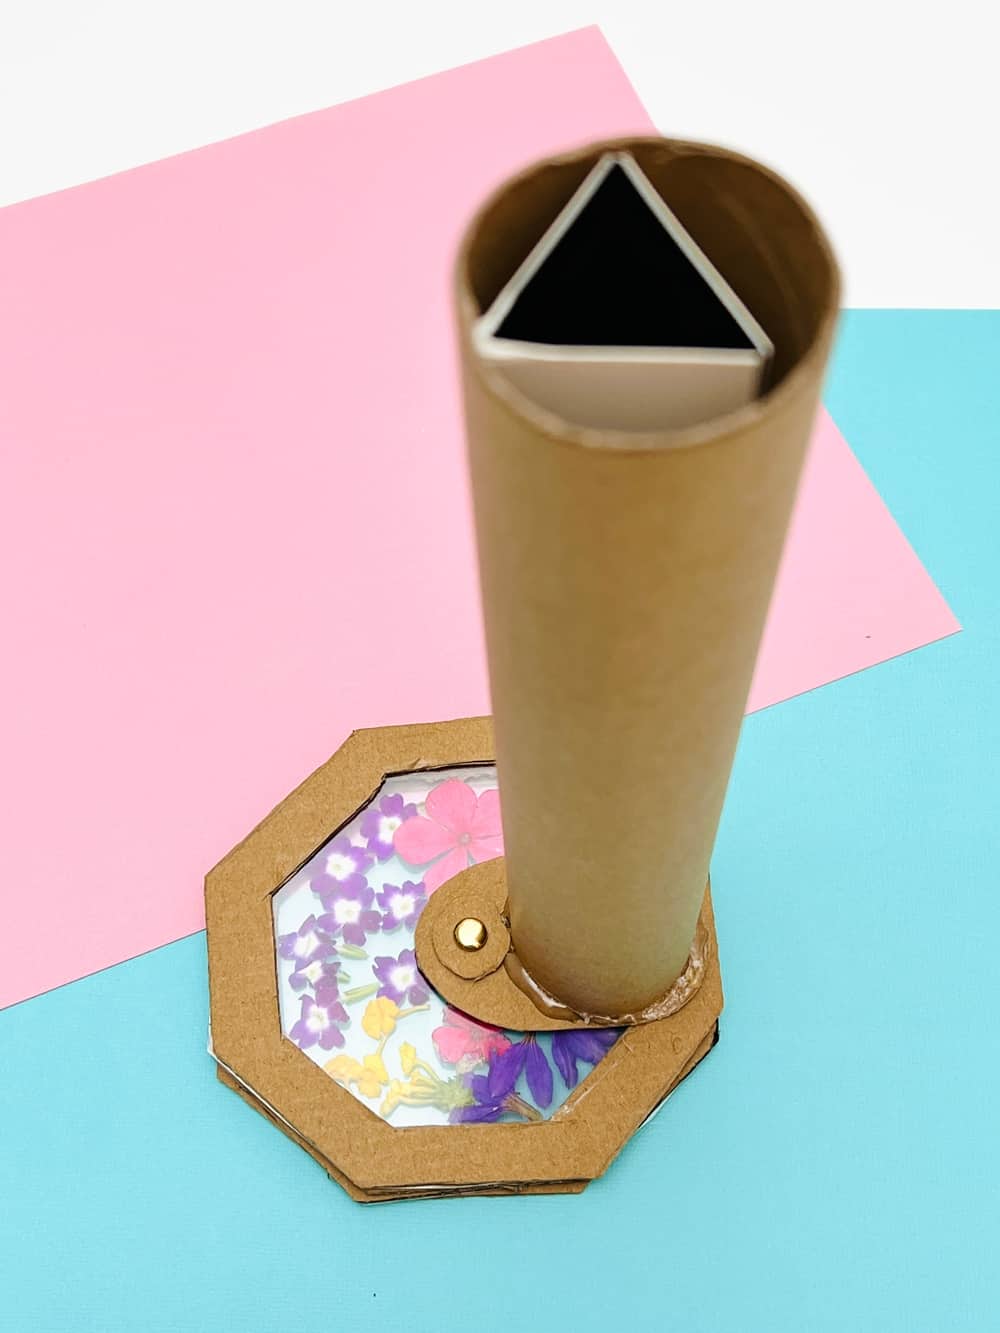
With your metallic paper, cut an equal triangle that will fit in your paper tube. Shiny side on the inside of the traingle.
Grab the cardboard tube and fit the triangle tube on the inside. Set aside.
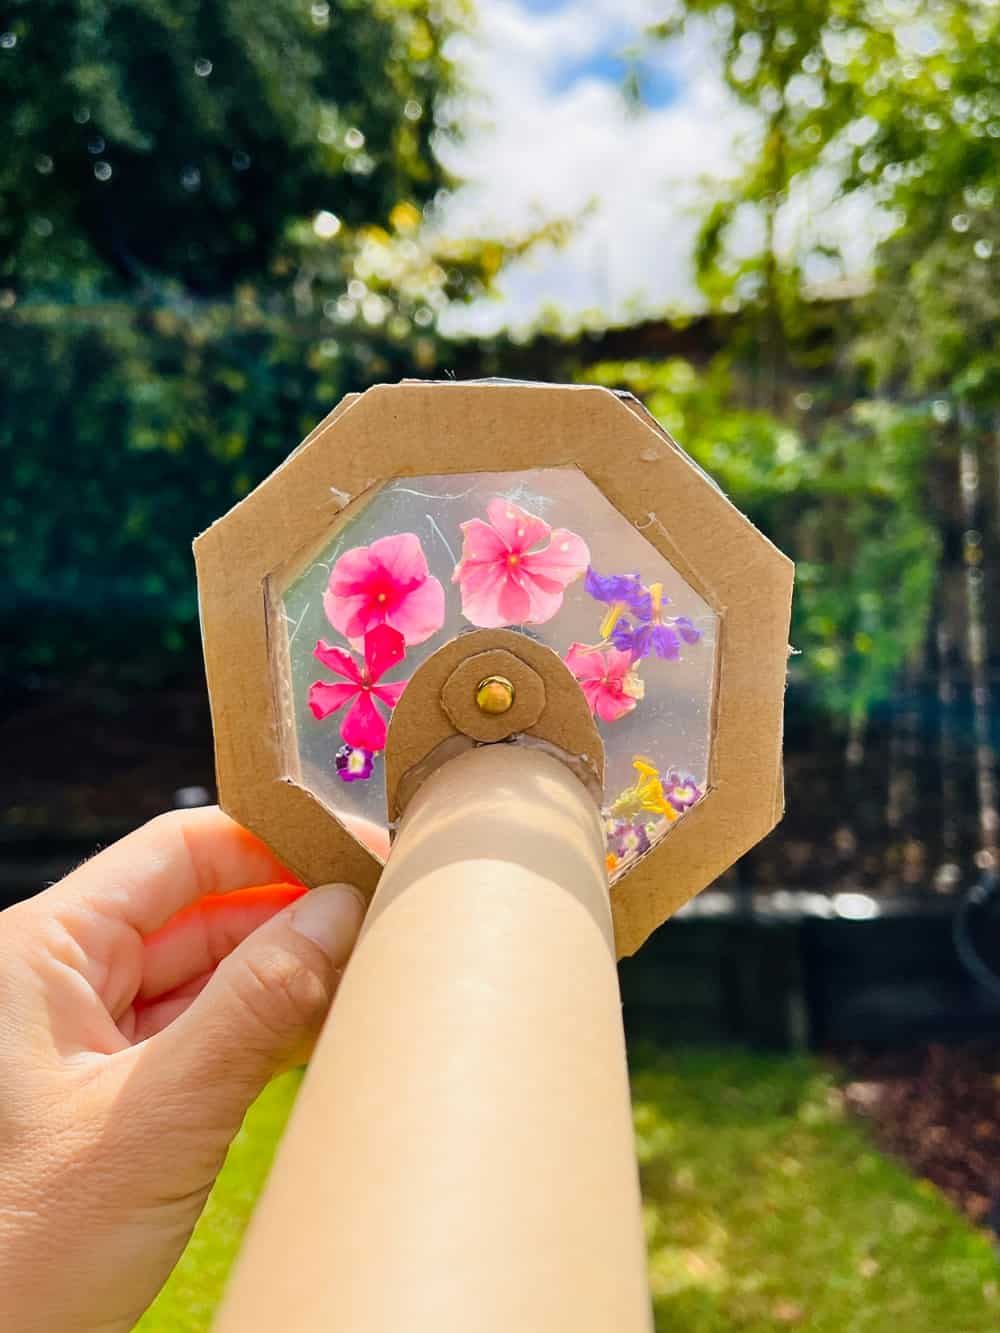
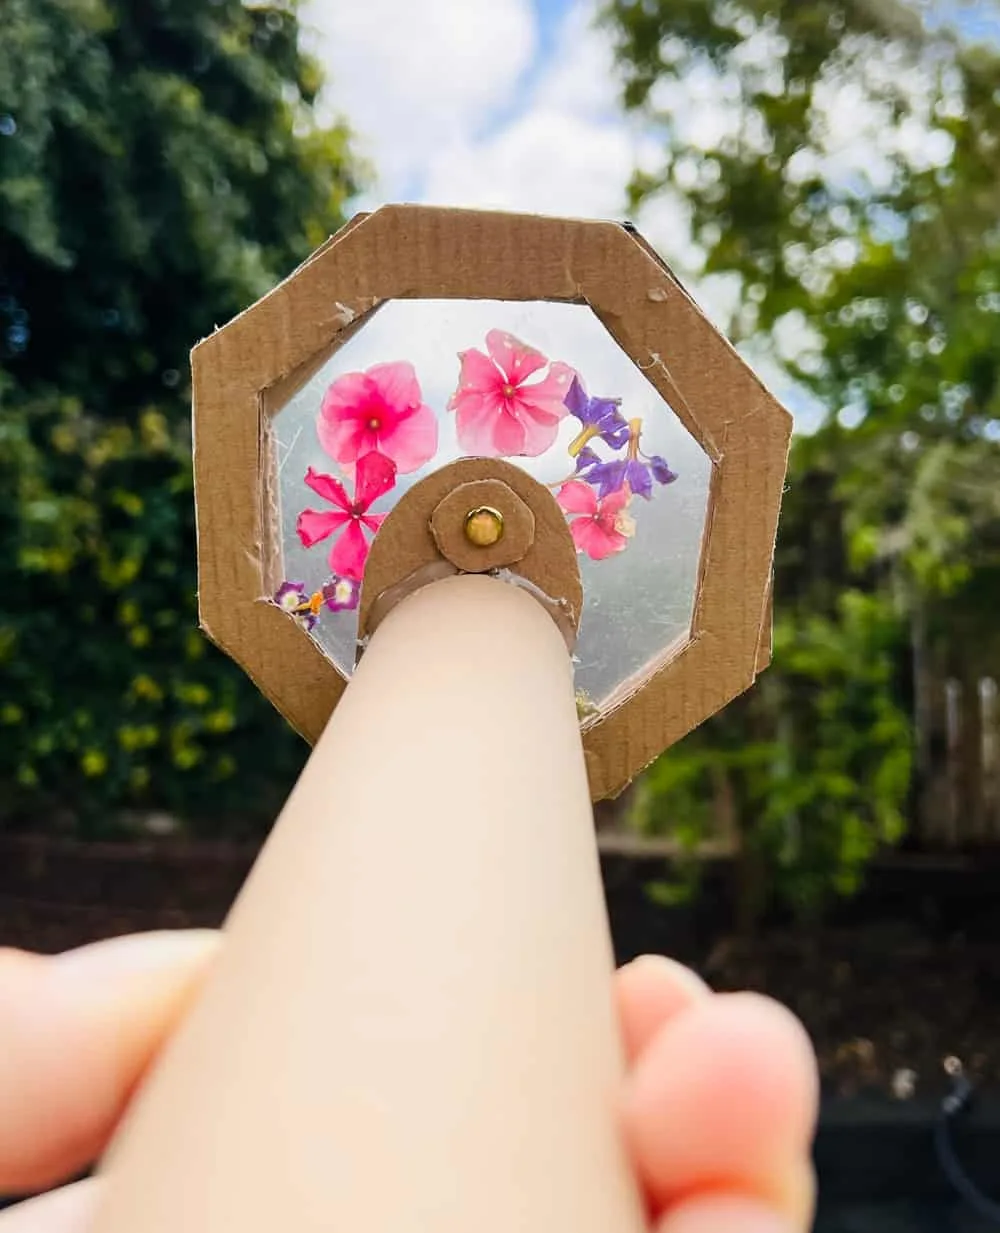
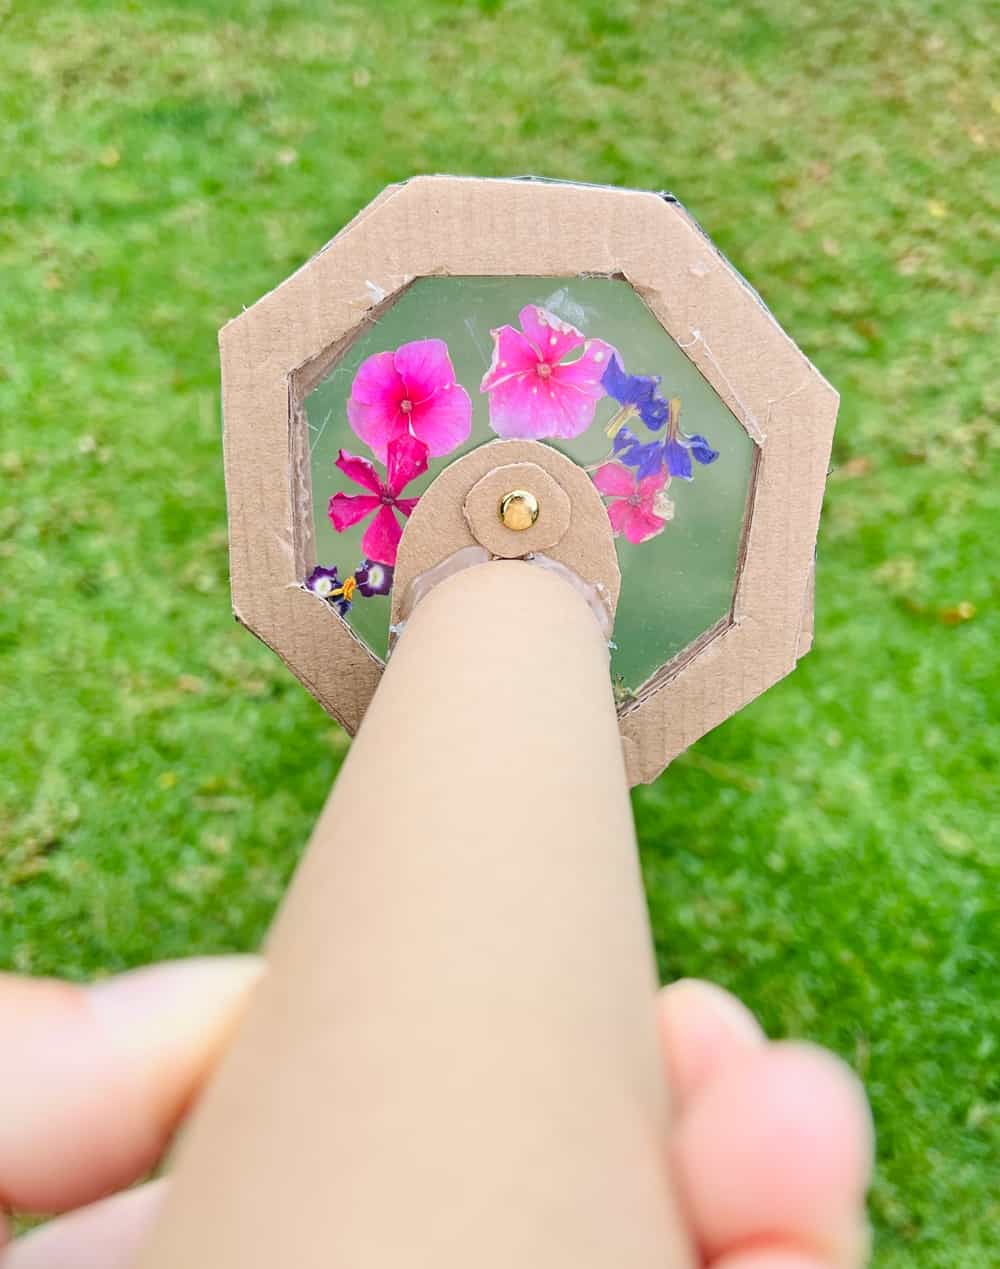
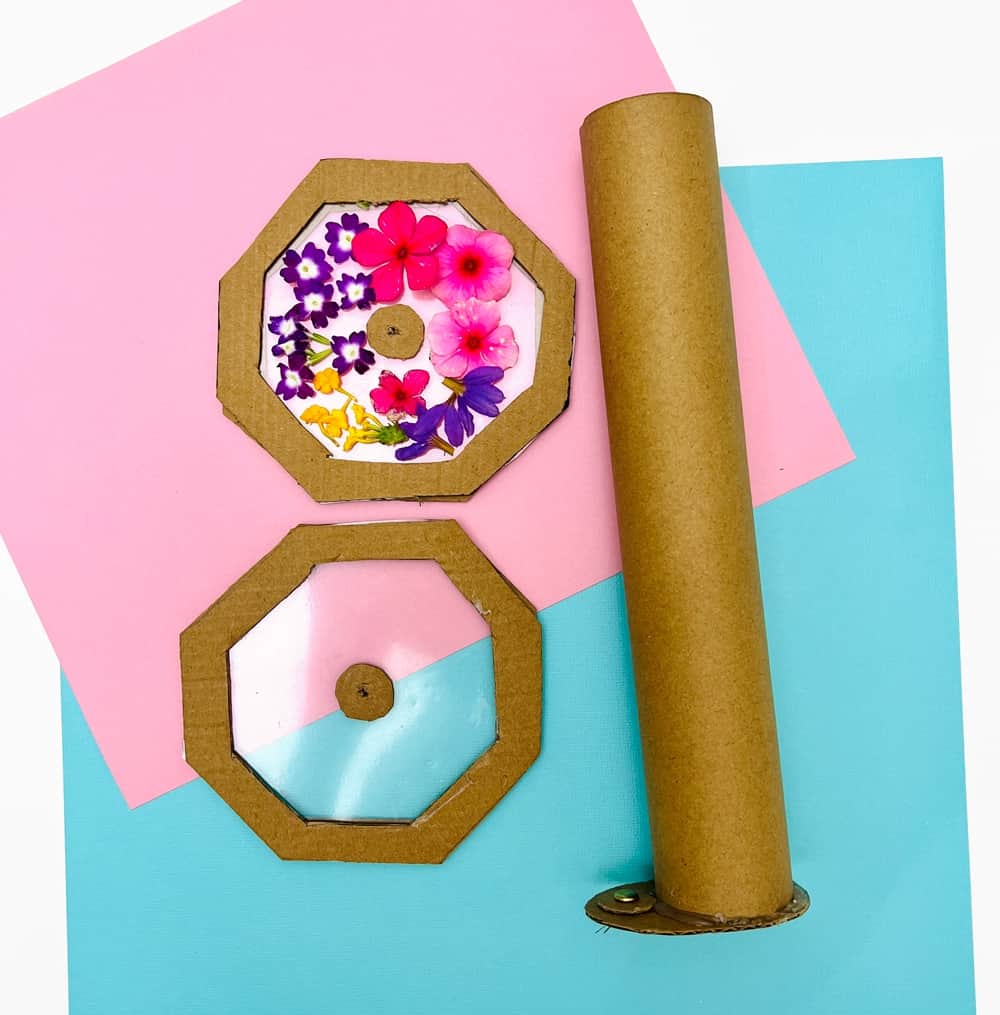
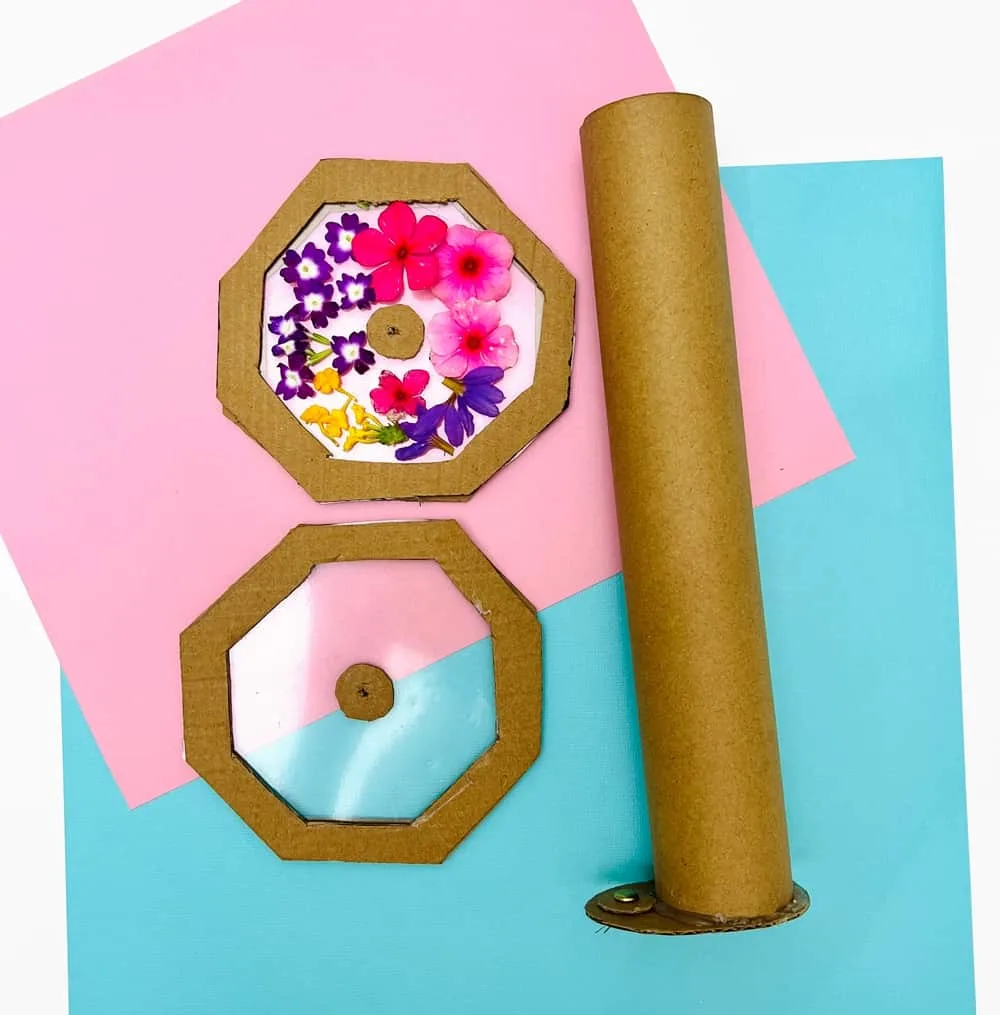
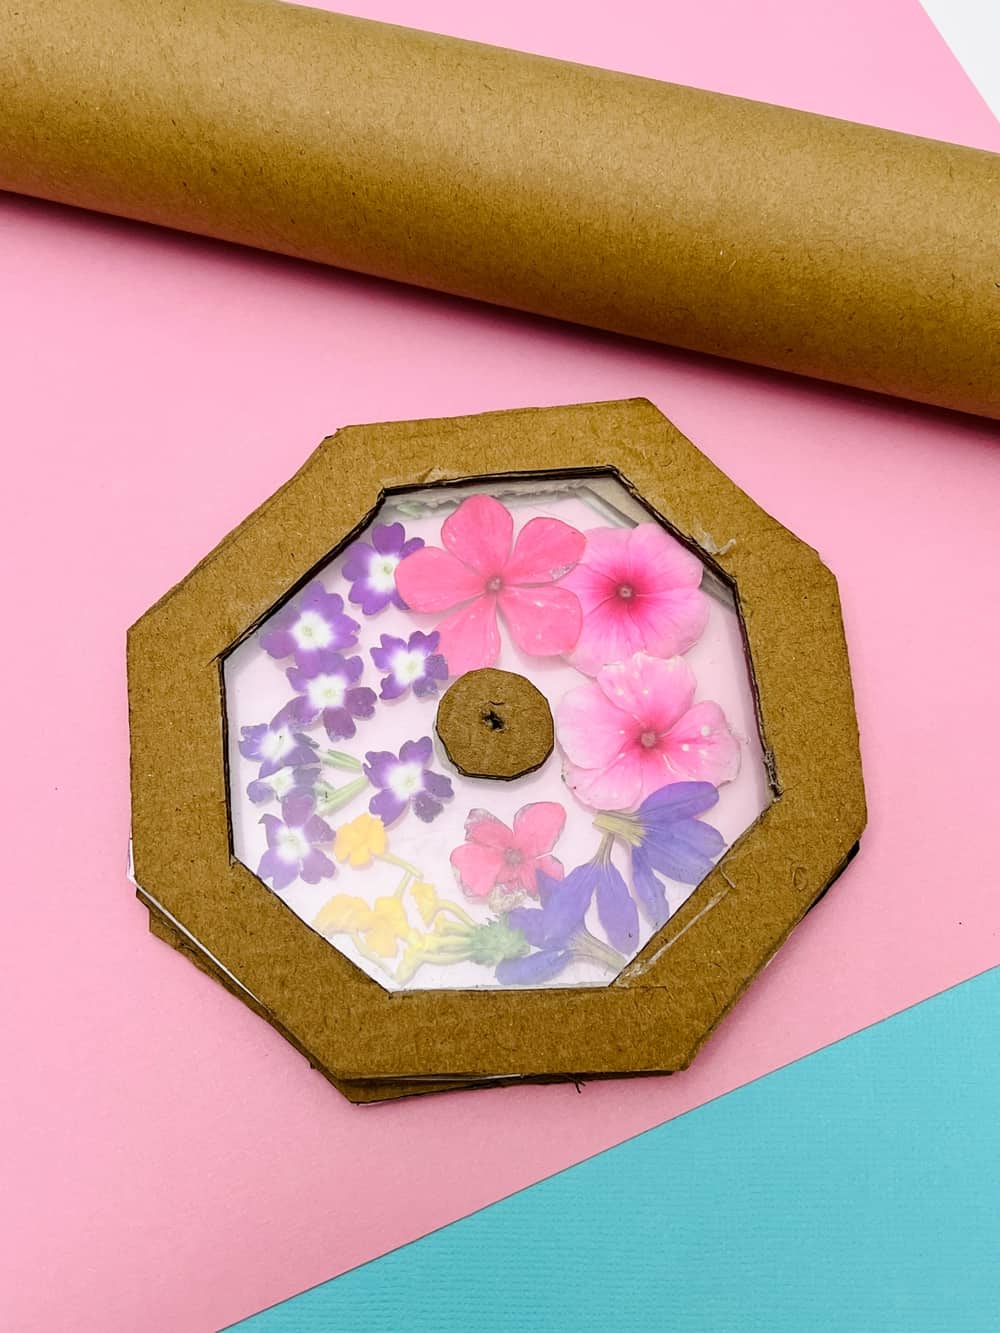
Take a pice of cardboard and cut an octagon shape (it can be any other shape we decided to make it an octagon. Cut another same size octagon. Cut out the inside and leave a cardboard border around it.
Cut your plastic paper so it can be glued on the inside border of both octagon cardboard shapes.
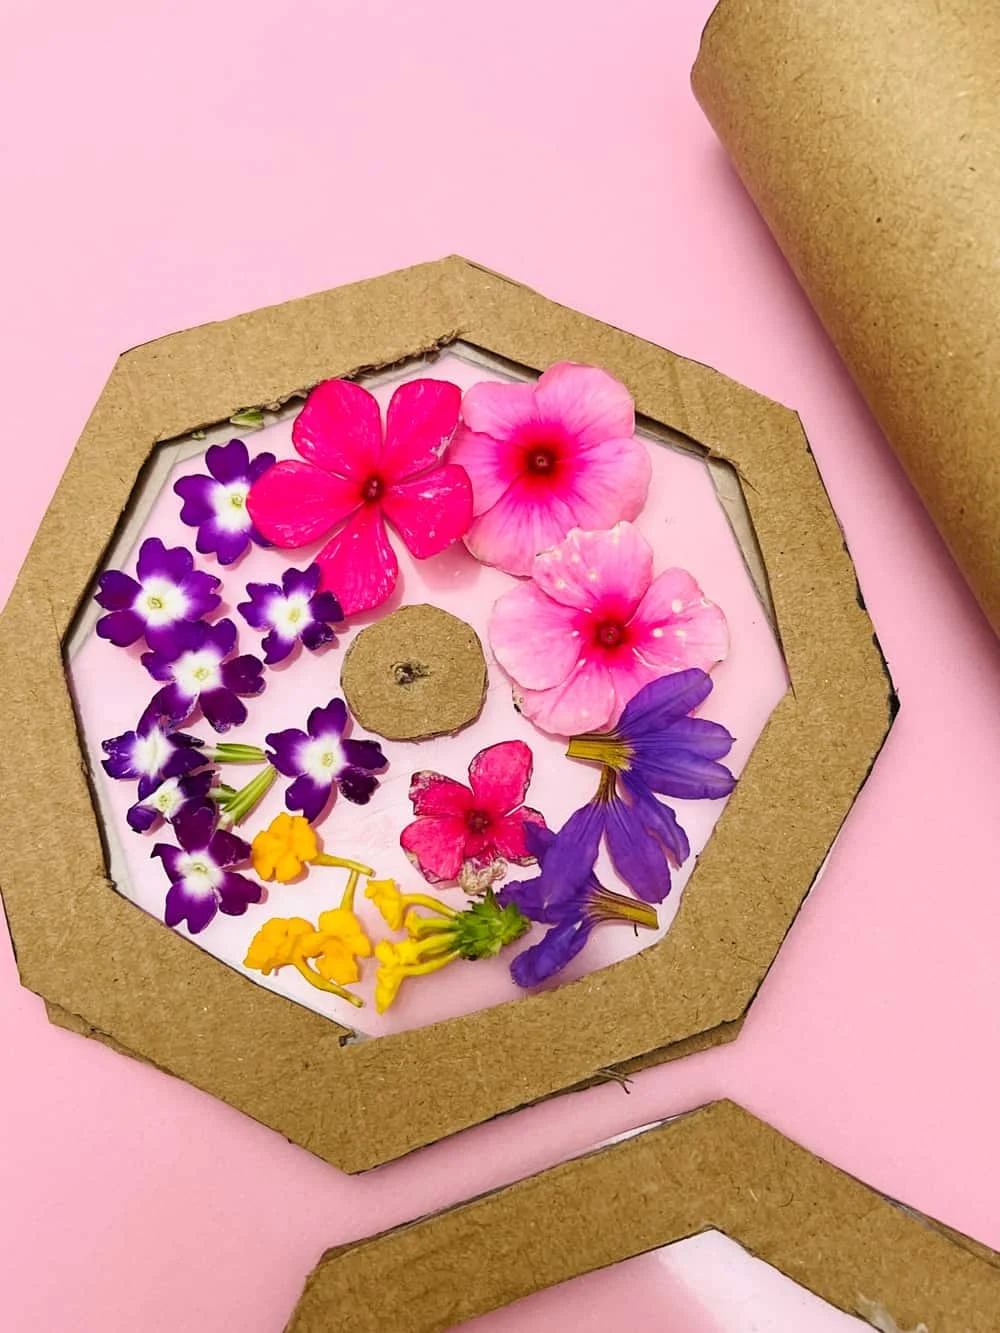
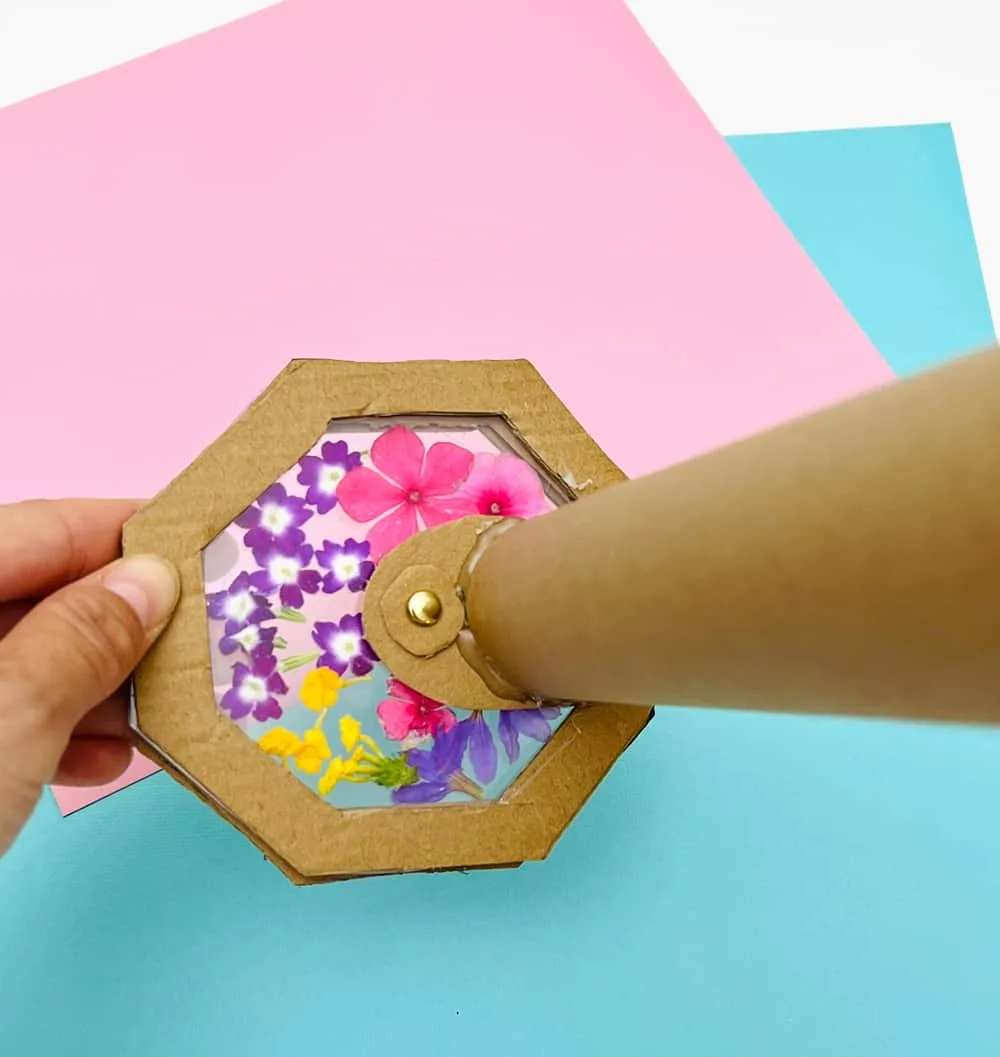
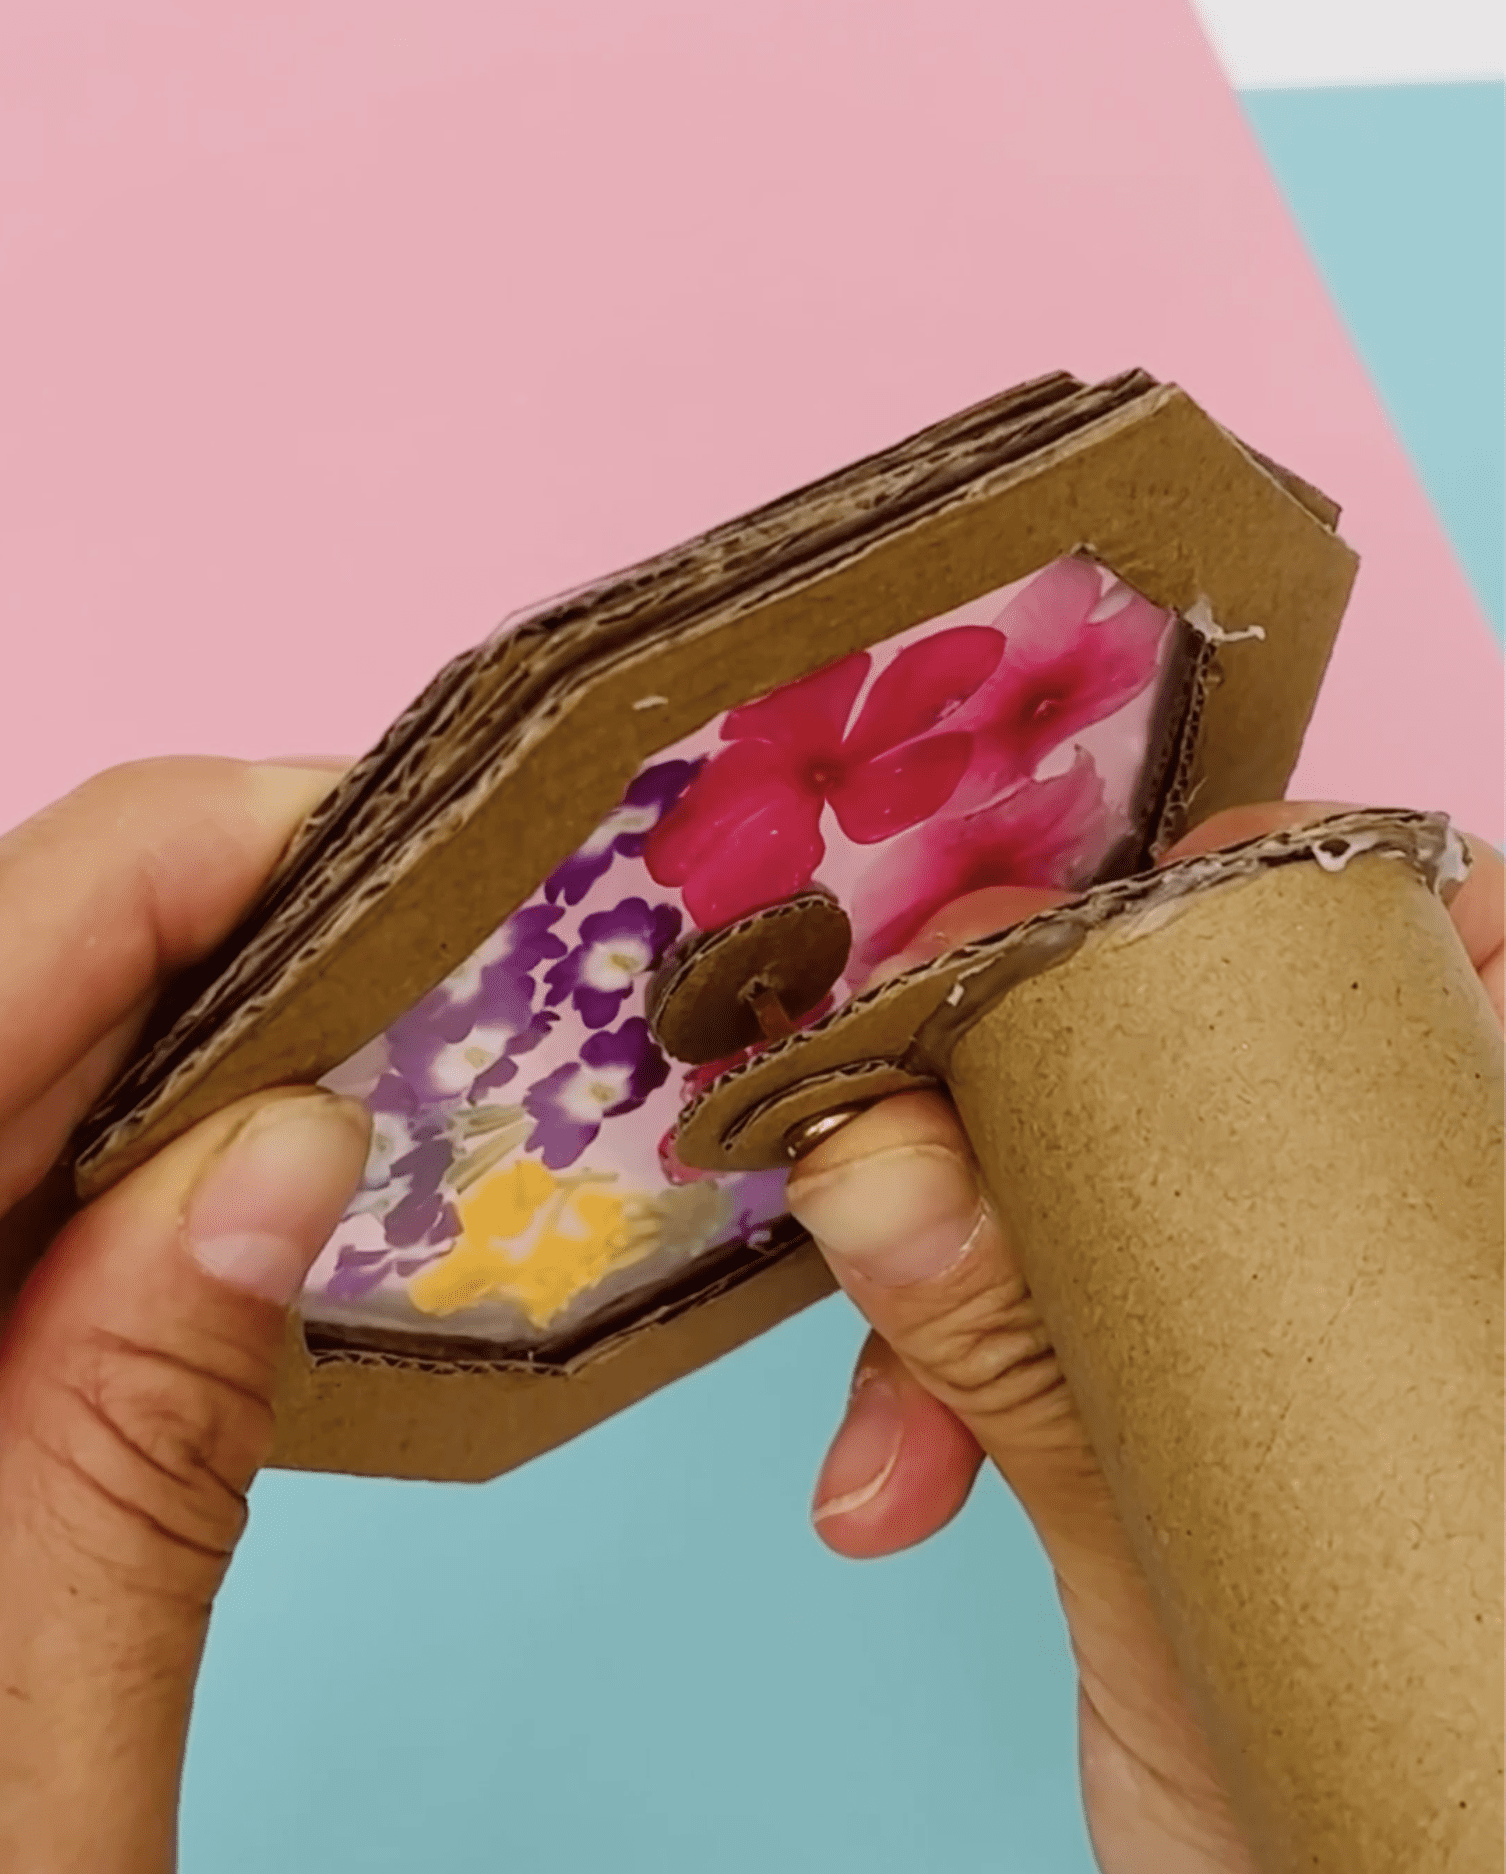
Add flowers in between your two ocatagons and line the two shapes up.
Cut a small cardboard circle and glue on top of the octagon. Use a knife or pointed opbjec to make a small hole that goes through both shapes.
Cut out a rounded oval-usg cardboard shape and glue to one end of your cardboard tube.
Cut another small circle that is the same size as the center of your octagon circle. Use a knife or sharp point to make a hole and use your paper fastener to join through the center of your octagon. The best way to see this step is to look at the close up photo in the post.
Use one hand to hold the two octagon shapes together and the other hand to turn the cardboard tube. Look inside the mirrored triangle to see your kaleidoscope!
More Fun DIY Crafts
How To Make DIY Beaded Friendship Bracelets