How To Make DIY Beaded Friendship Bracelets
By using this site, you agree to our Terms of Use. This post may contain affiliate links. Read our disclosure policy.
Follow us on Instagram for more fun ideas for kids!
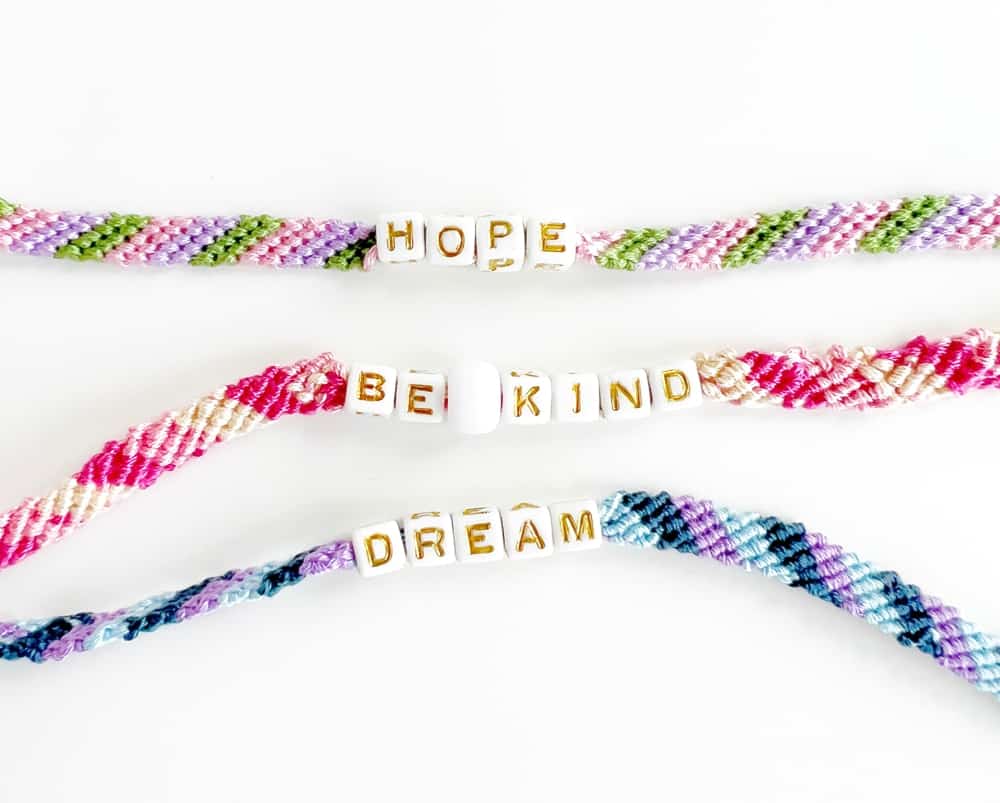
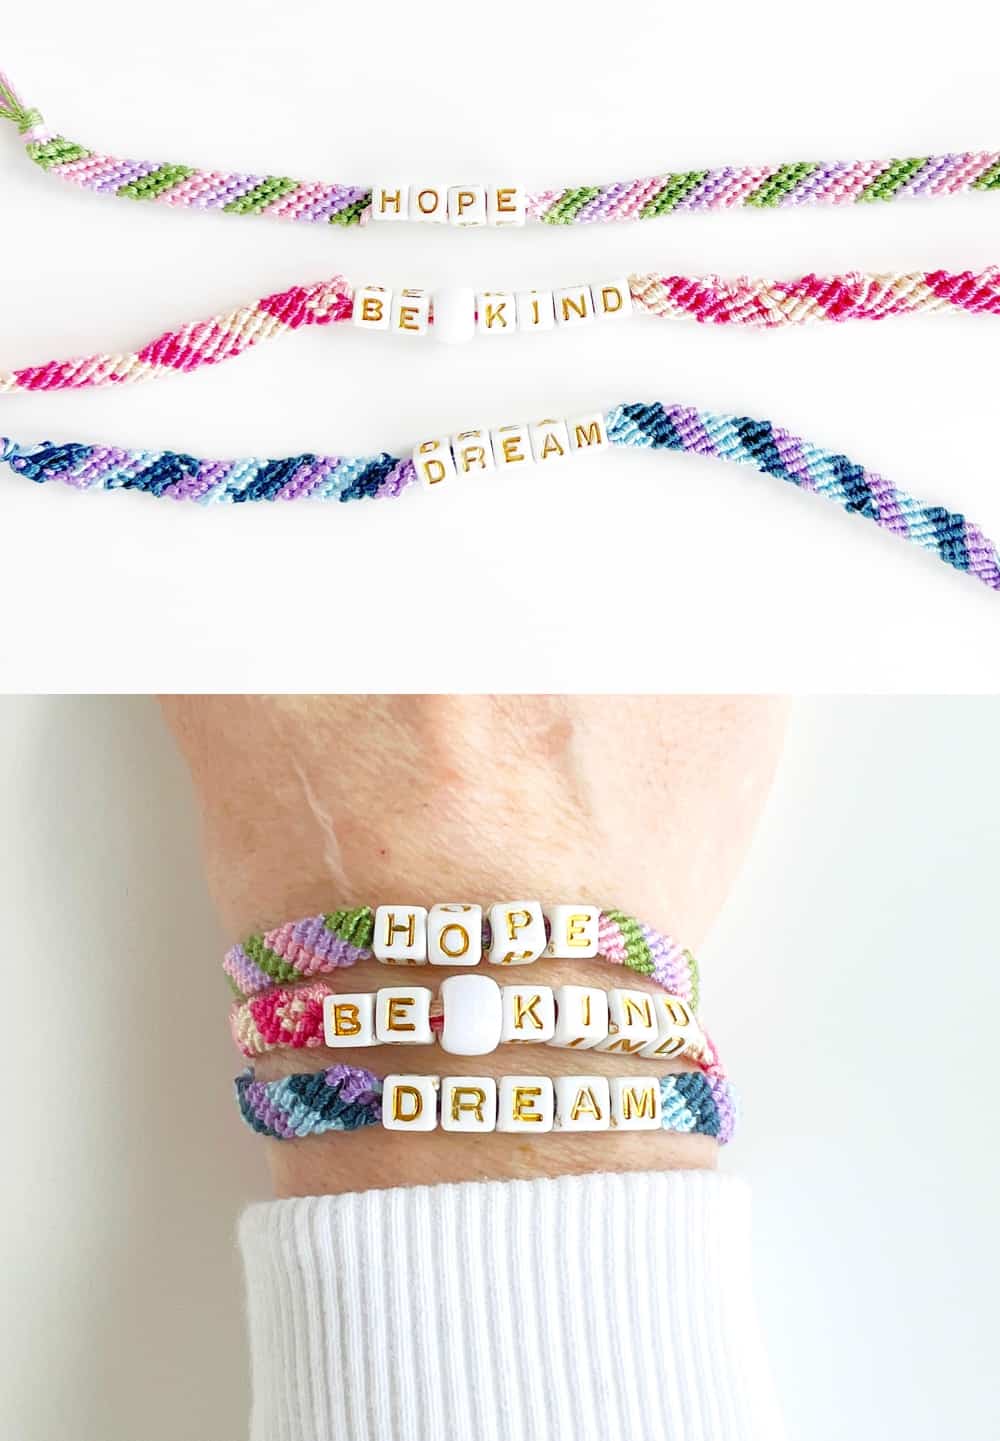
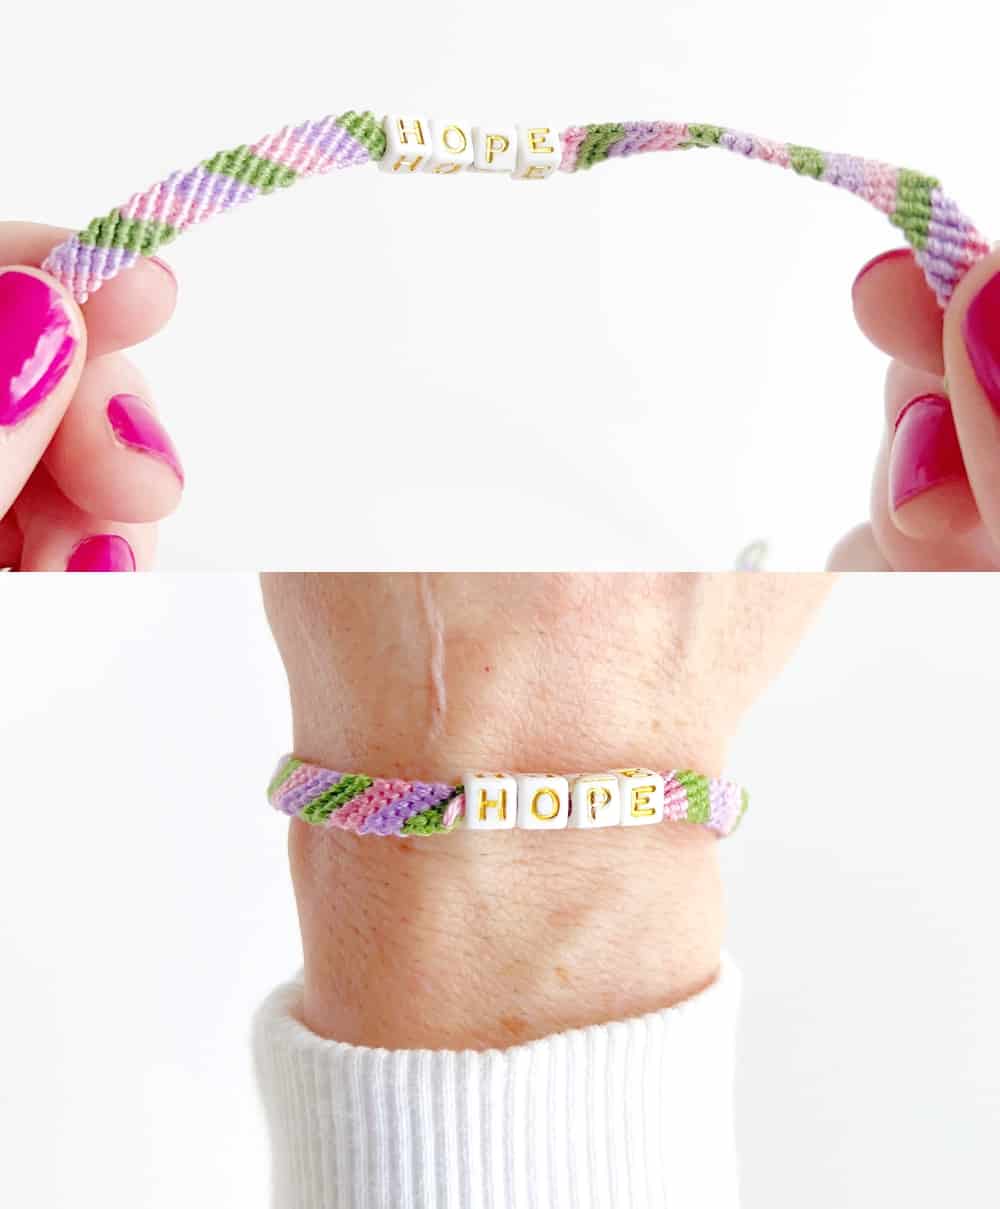
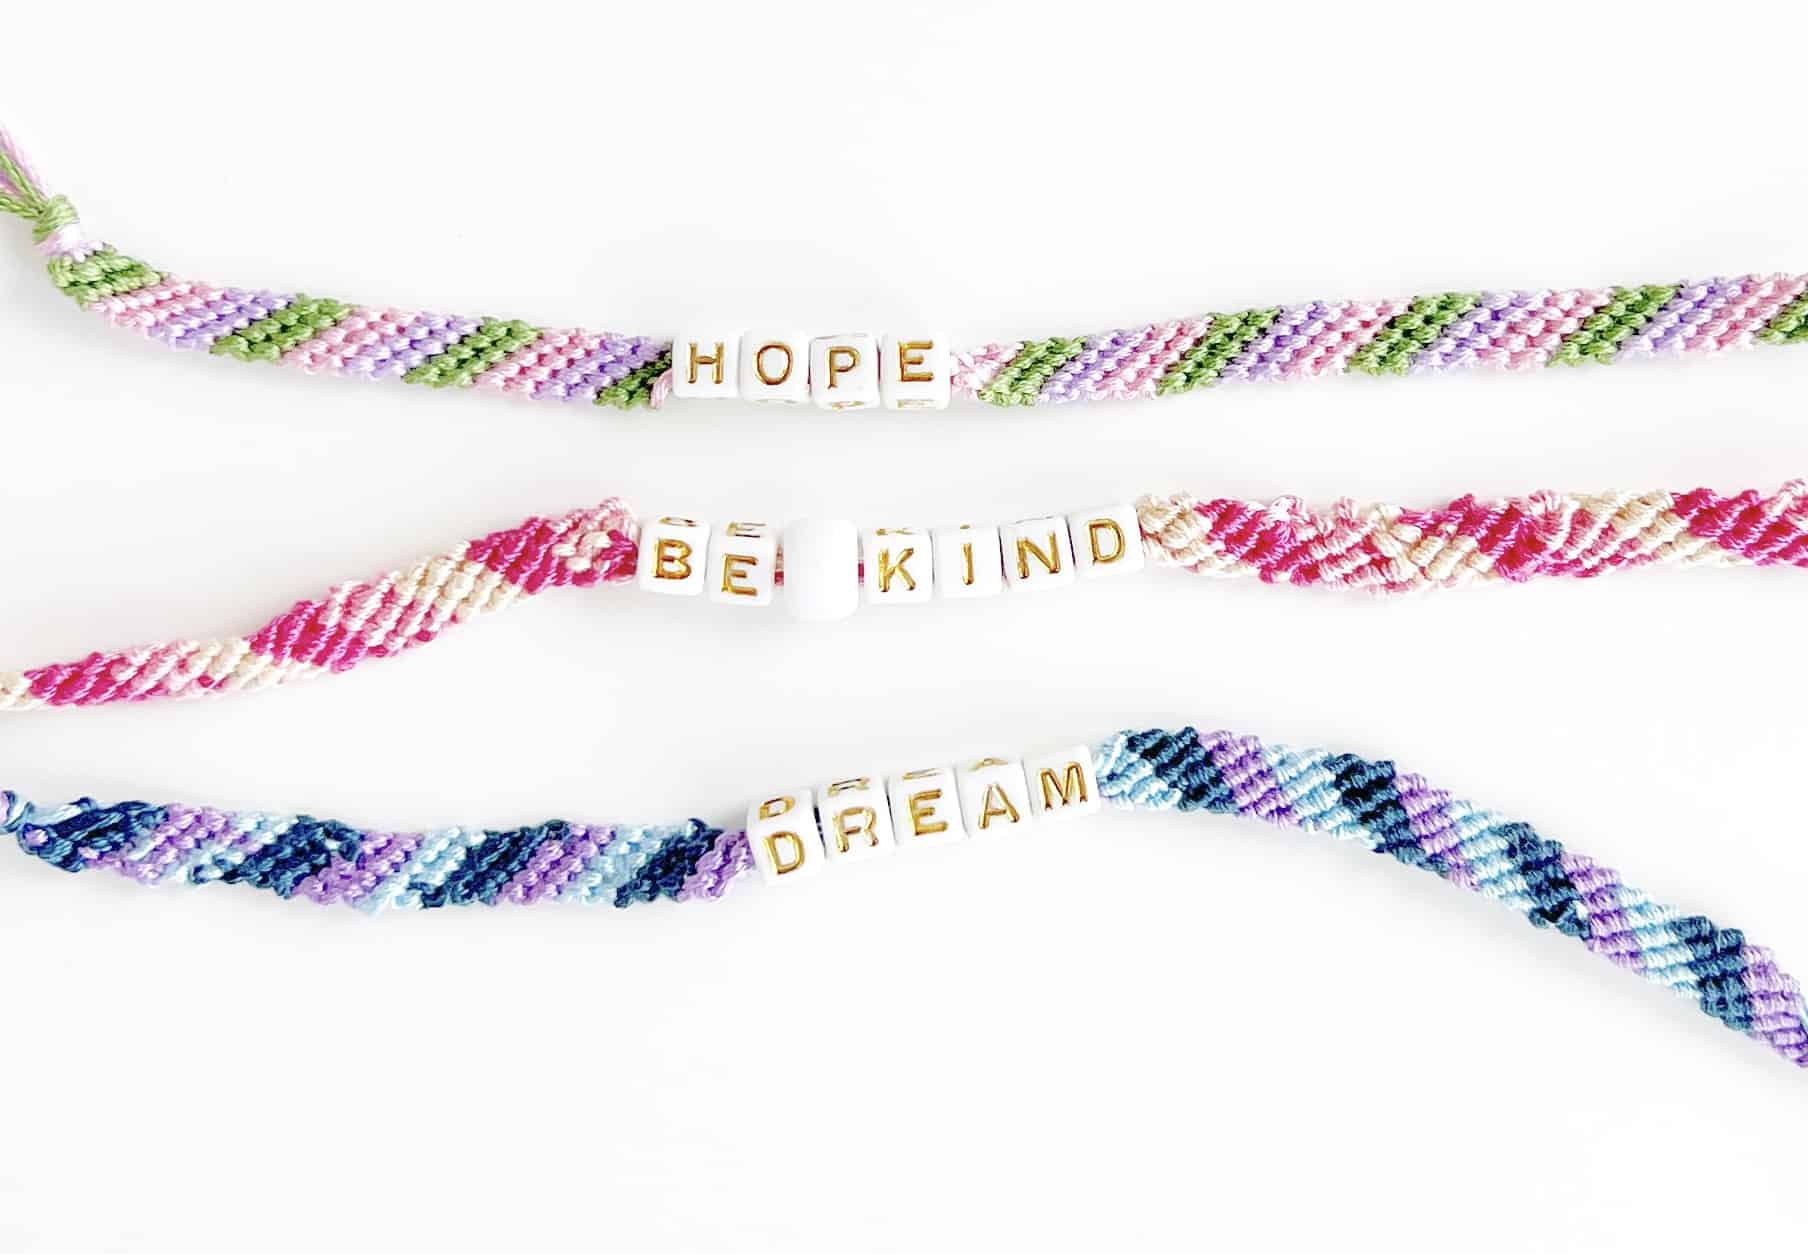
These personalized letter beaded friendship bracelets are a fun summer or camp activity for kids. They're a modern twist on popular friendship bracelets from the past made with embroidery floss!
Who remembers friendship bracelets from back in the day? The beautiful hue of embroidery floss colors braided and worn by all of our best friends brings us straight back to the 80's. We're determined to bring them back by showing you a modern twist with these beaded friendship bracelets!
Just as a lot of other trends have found their way back from when we were kids and young adults, friendship bracelets have evolved into so many different patterns and added embellishments. Today we're showing you one of the ways to make pretty bracelets, adding bead letters for an even more inspiring piece of DIY jewelry.
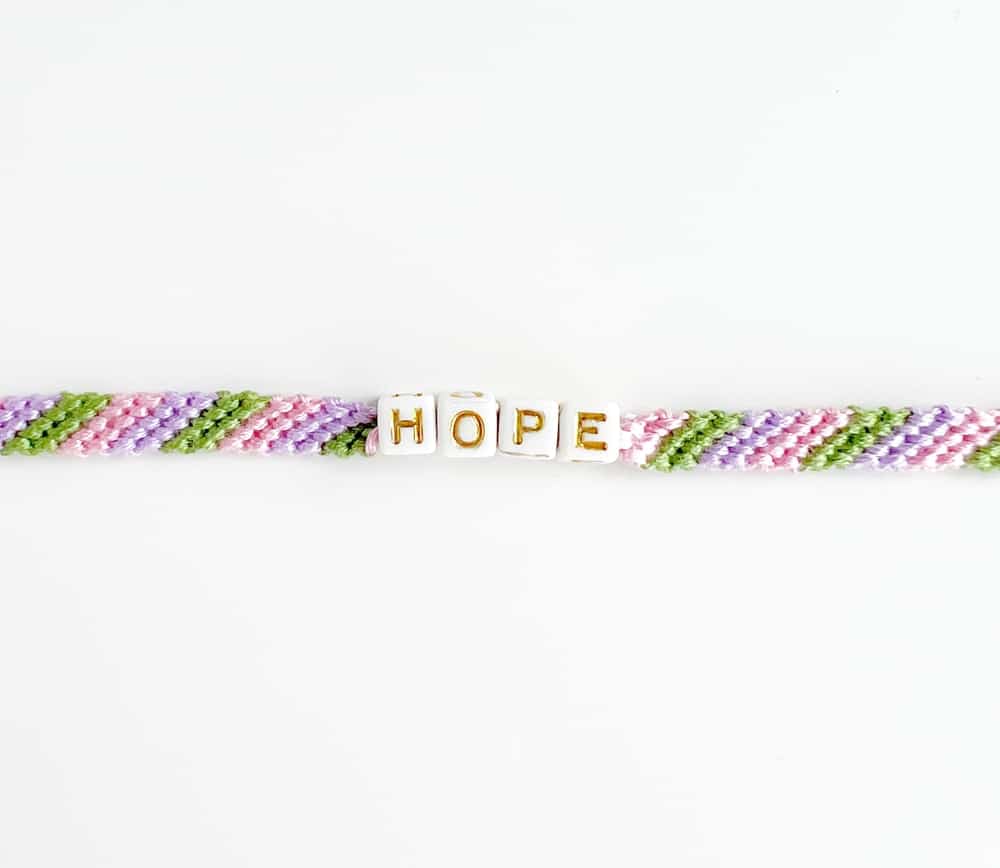
The pattern we are showing off is a fun easy pattern called Candy Stripe to get you started!
How to personalize beaded friendship bracelets
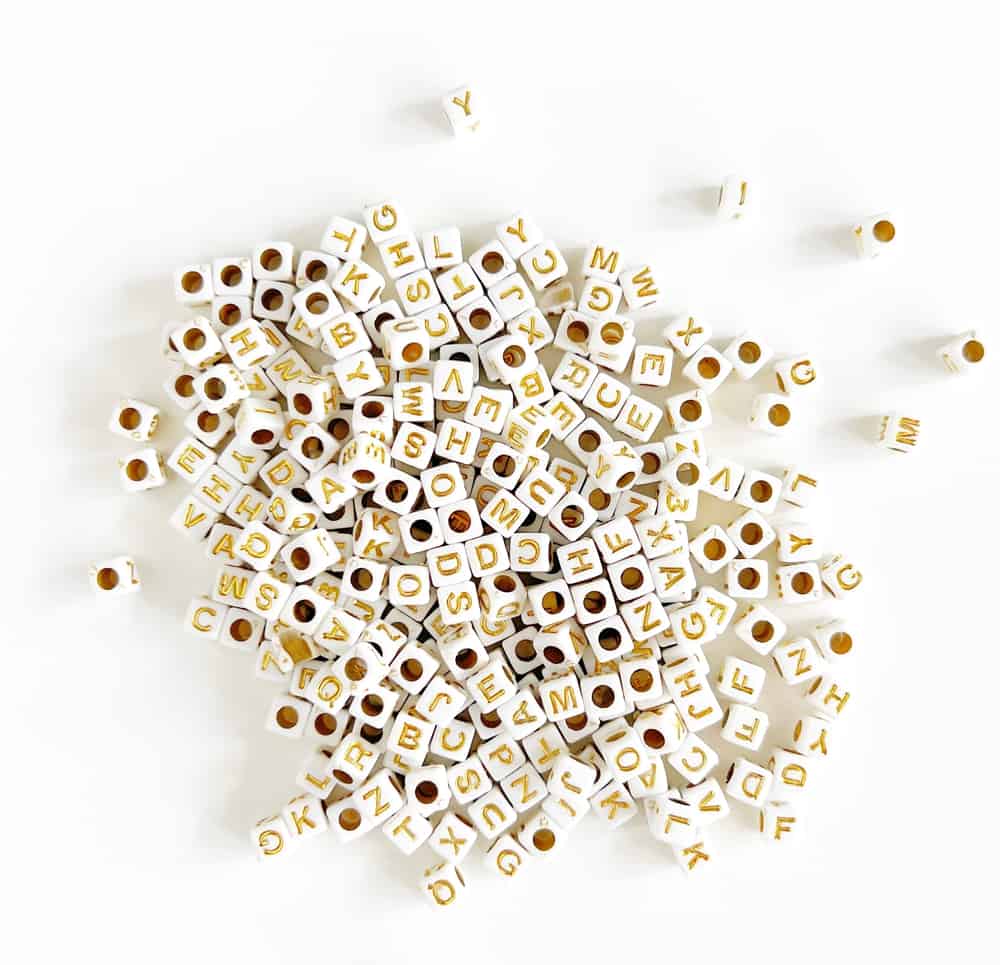
You can personalize your bracelets in so many fun and different ways by adding letter beads! Make name bracelets or choose a word that has meaning for you. These breaded friendship bracelets are meaningful, have endless possibilities, and make great gifts too!
How long should the string be for a friendship bracelet?
We tried several different starting lengths for our bracelets. With there being several different patterns you can choose from, keep in mind how many colors you're using and the pattern. The ones we made have 2 strands of each color, so we started with a 70" long string, folded it in half to make 2 halves that measure 35". For most wrists, you'll need about 6" of bracelet overall for being able to tie it and comfortable fit. With the tie method we chose, you'll end up braiding an additional 4" for tie and knot purposes.
What materials do you use to make friendship bracelets?
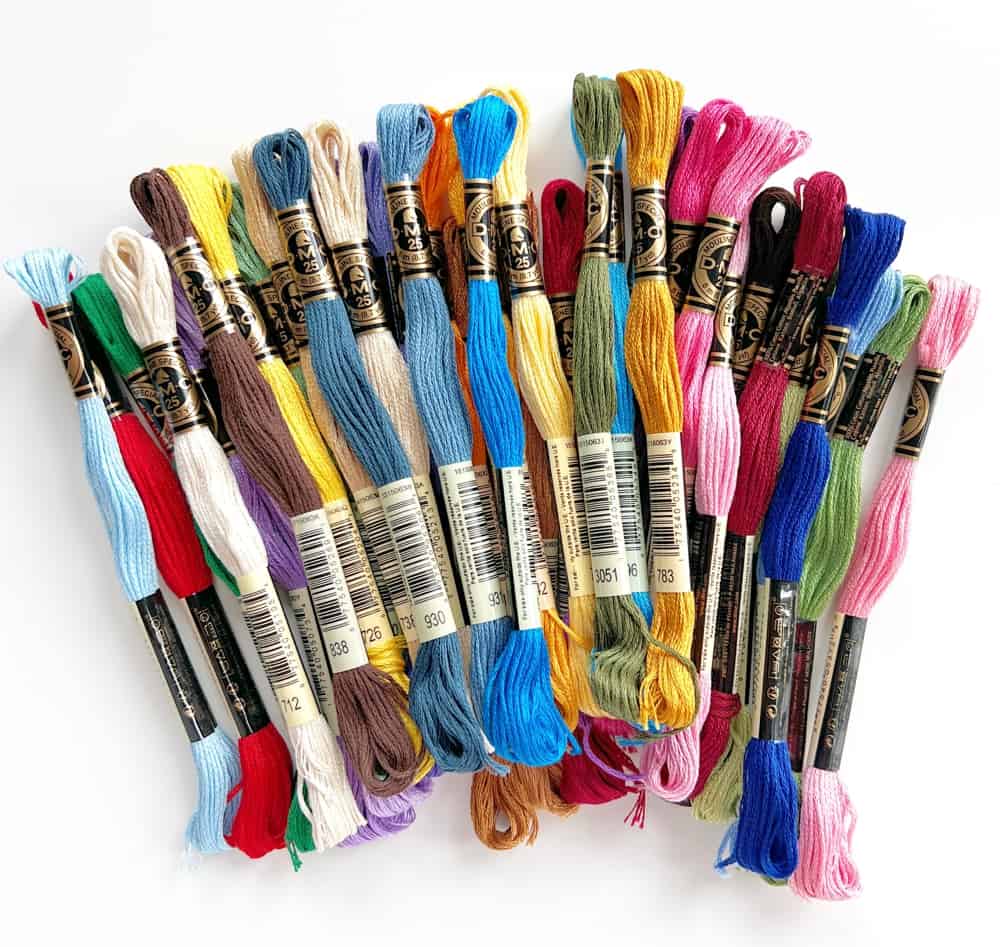
You only need a few things, embroidery floss, letter beads, threading needle and washi or painters tape.
Make them with your kids, with a favorite family show or music on in the background, or get the kids and their friends to make them together for a fun spring activity. With just a little bit of patience and focus on the pattern, they'll be exchanging and wearing them in no time.

Beaded Letter Friendship Bracelets - Materials:
Measuring Tape or Ruler
Perler Bead (if needing a spacer between words like "Be Kind")
Tape (painters or washi)
How do you make a friendship bracelet with beads?
INSTRUCTIONS: Watch the video in this post
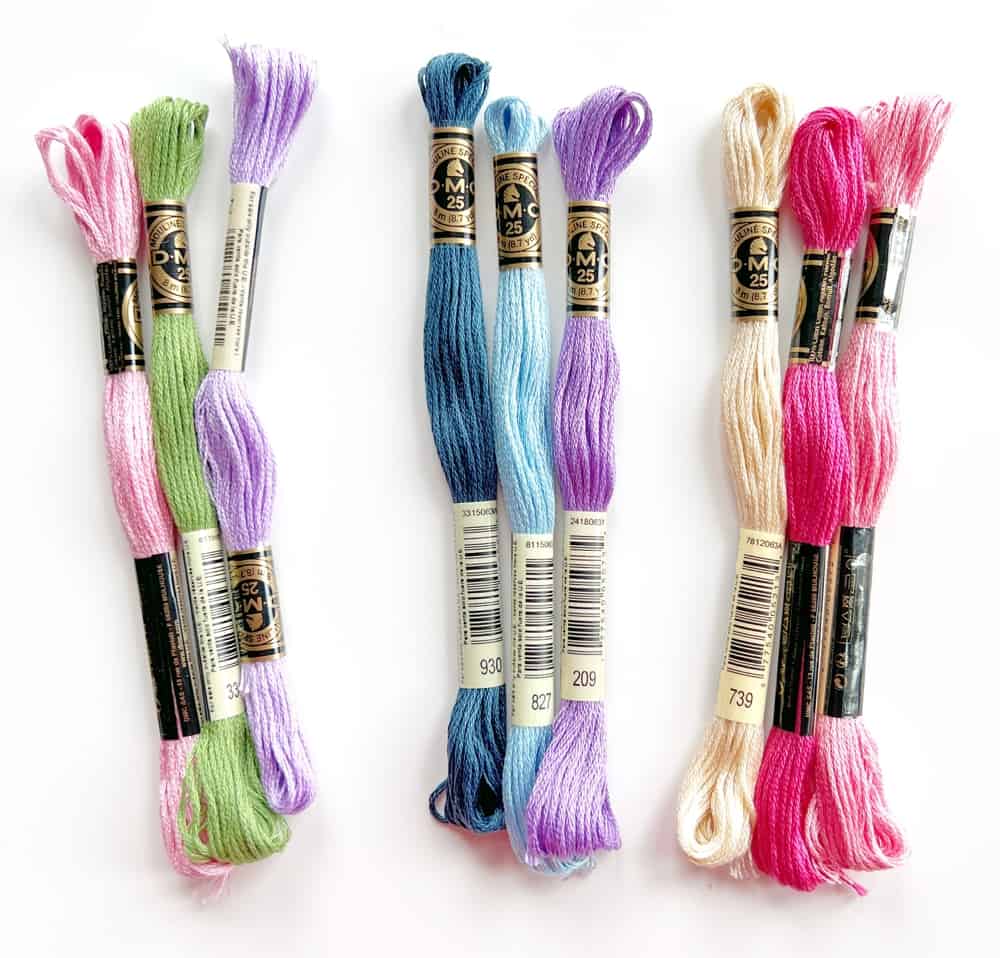
Step 1. Choose 3 colors of embroidery floss for your candy cane pattern friendship bracelet and cut each to 70" in length.
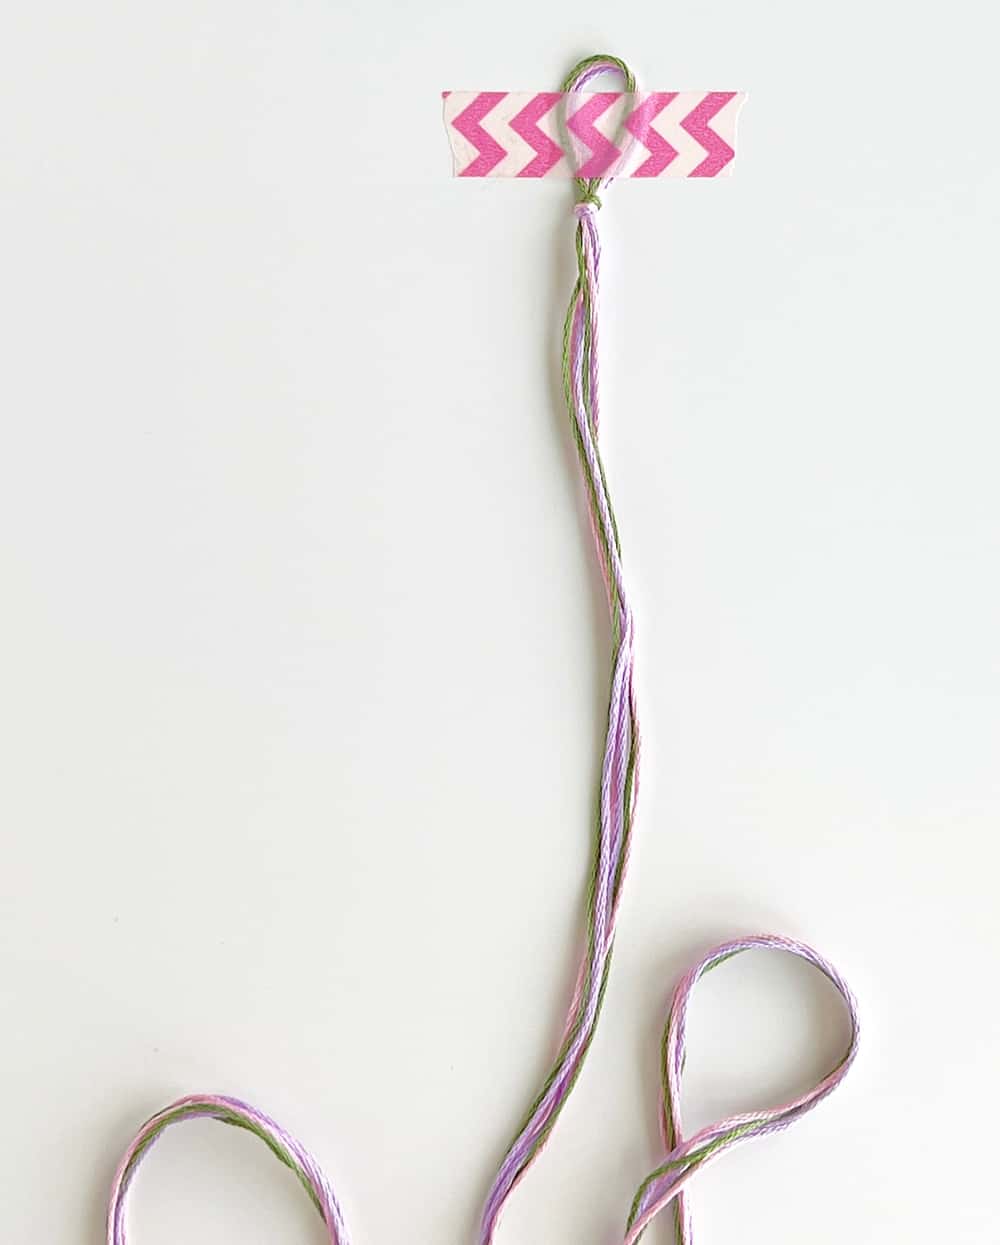
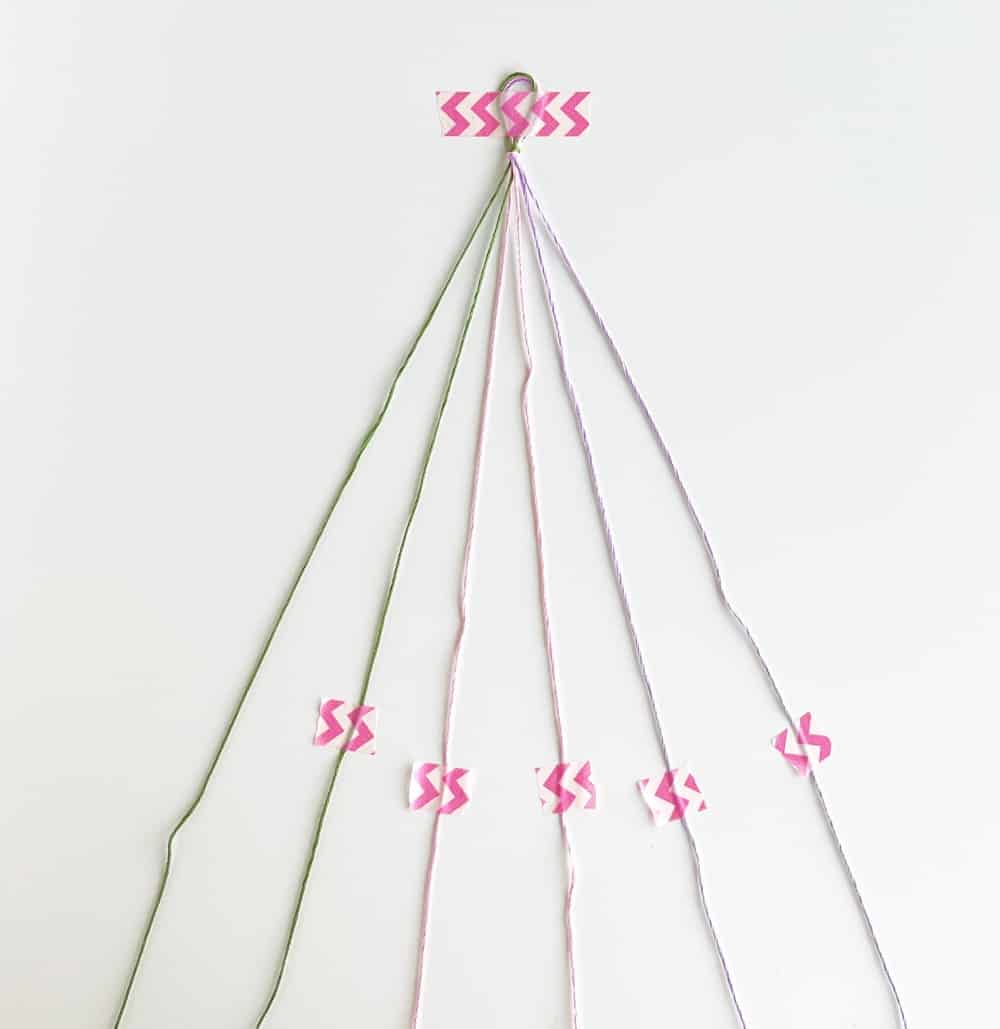
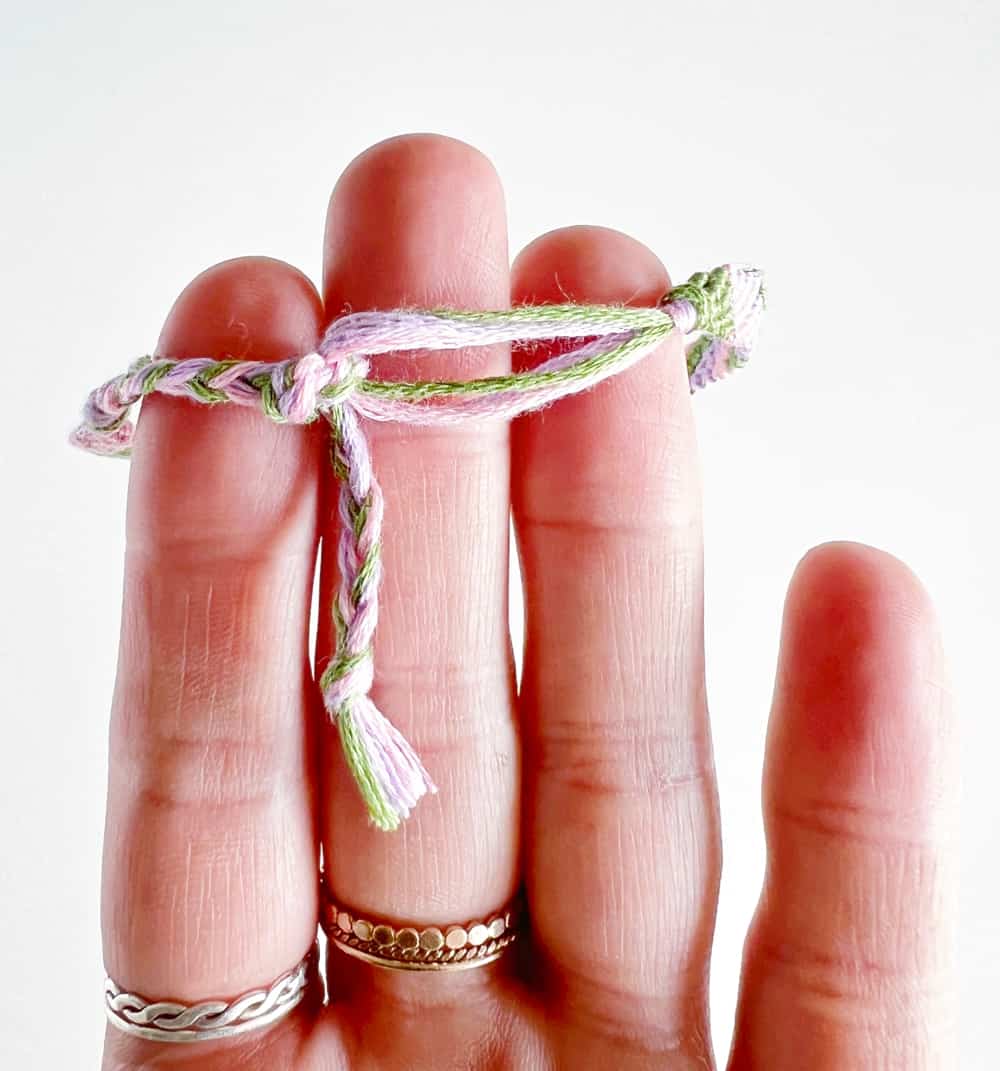
Step 2. Gather the 3 colors together and fold evenly in half. At the top, tie together with a simple knot, leaving a finger width loop (you'll cut this eventually for tying onto your wrist). Secure this loop to a flat surface with tape, giving yourself room to make the bracelet.
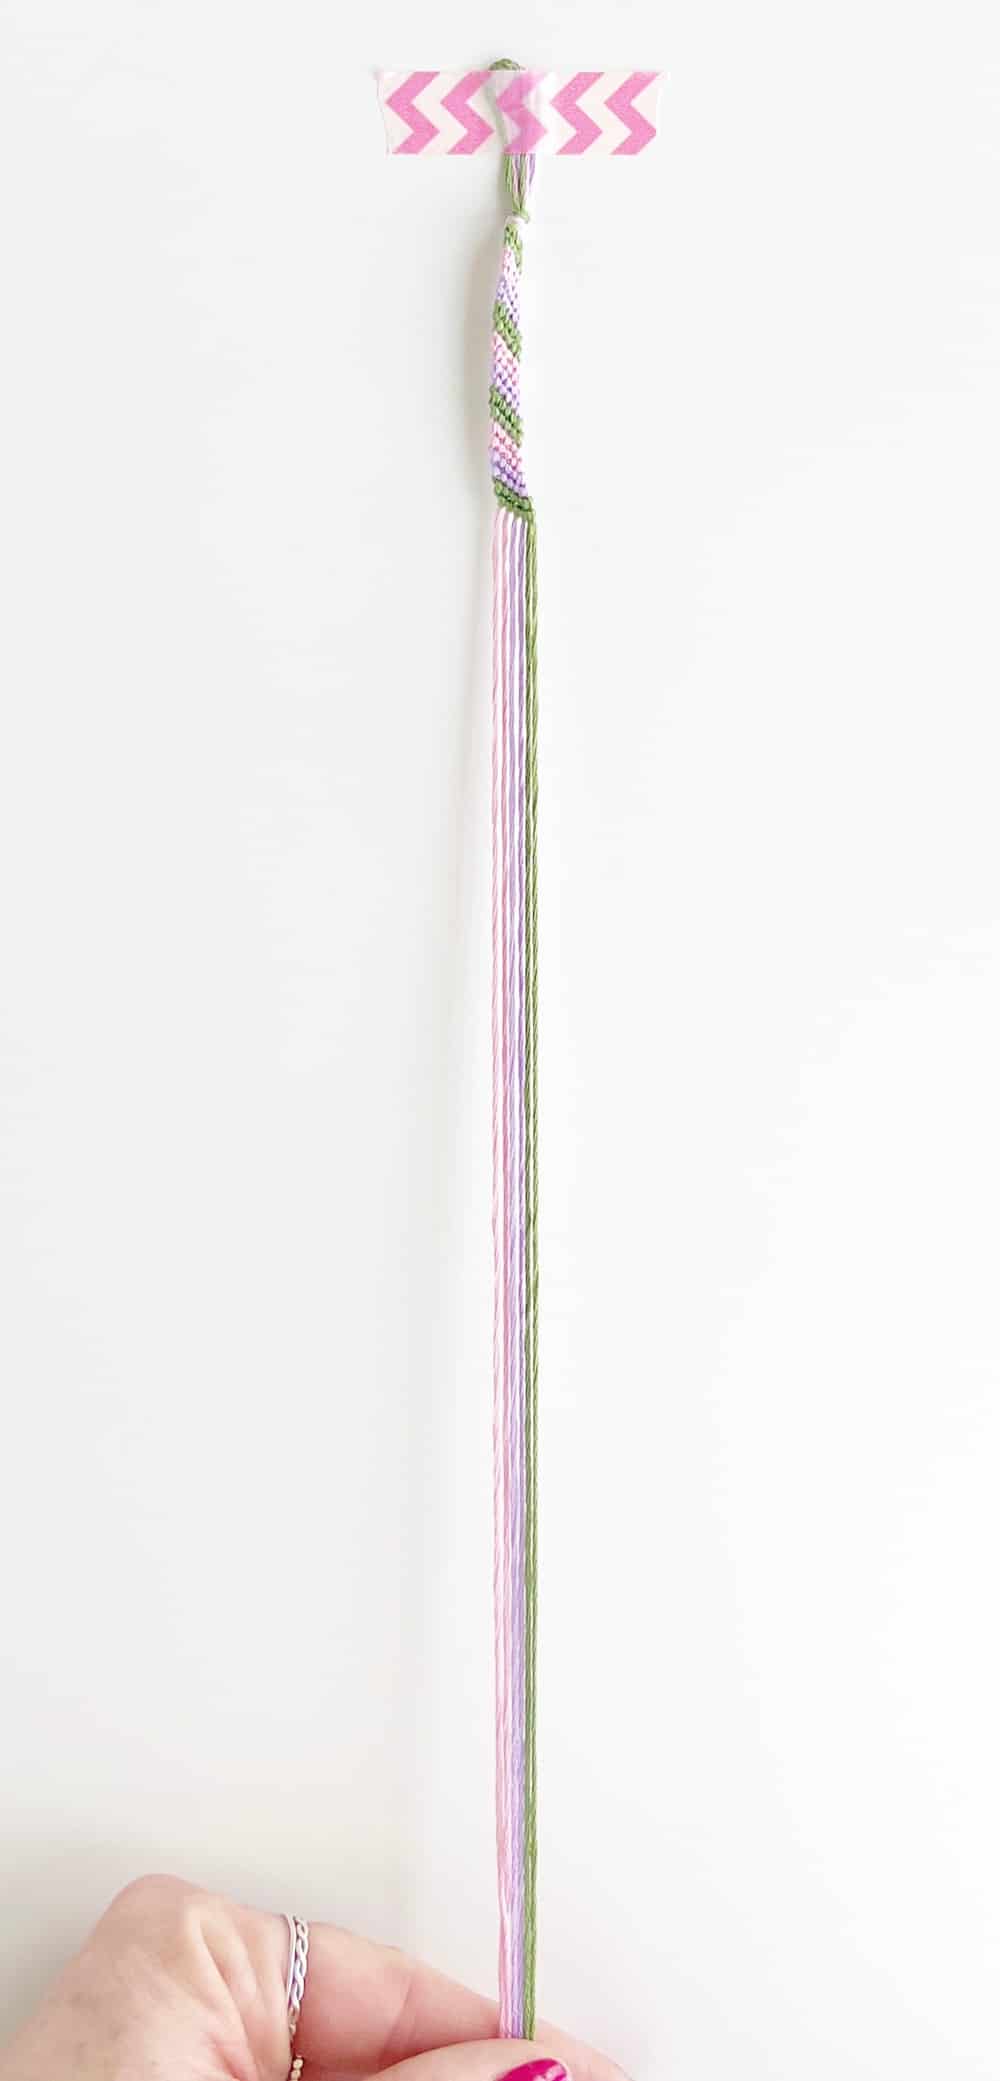
Step 3. Separate all of the strings, keeping the 2 strings of each color right next to each other.
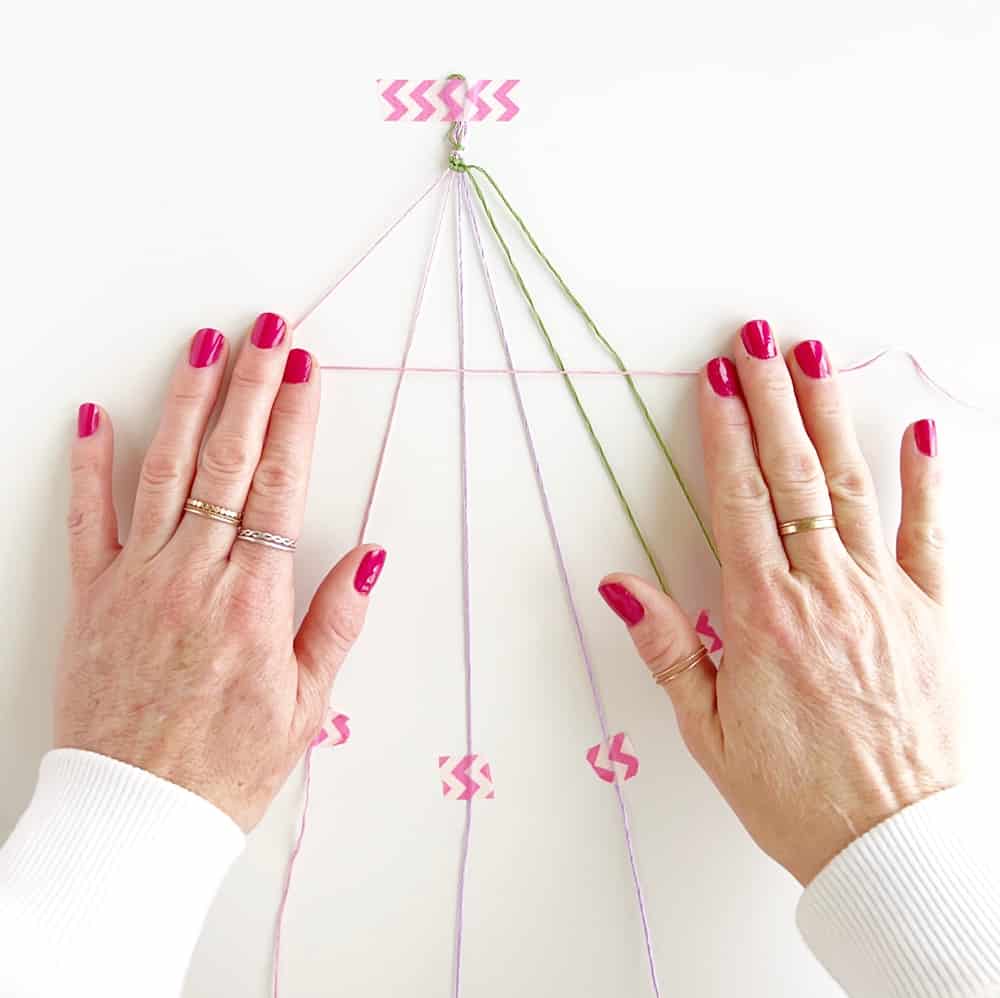
Step 4. Starting with your very left side string (for example green), create a 4 pattern over the string just to its right. Loop it under that string and pull to tighten. Do this again 1 more time, 2 times total.
Step 5. Hold onto your beginning string (the very left side green string) the whole time as you'll repeat this pattern with the next string in line.
Step 6. Continue creating a 4 pattern with each remaining string of the bracelet, loop under, pull to knot and do this twice.
Step 7. The string you started with will now be on the very right side of your strings.
Step 8. Start the pattern again with your new very left side string (the second green colored string, pink, pink, purple, purple, the first green colored string that you started your bracelet with).
Step 9. Repeat with each string, working left to right.
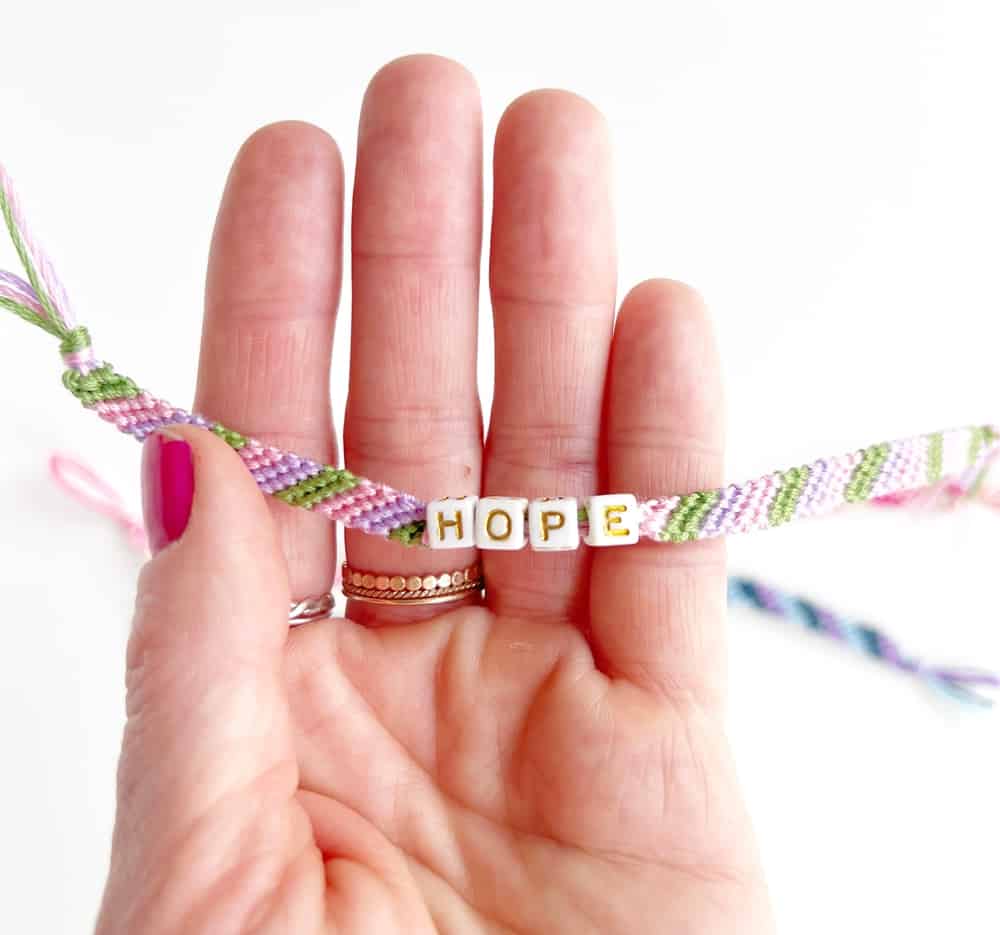
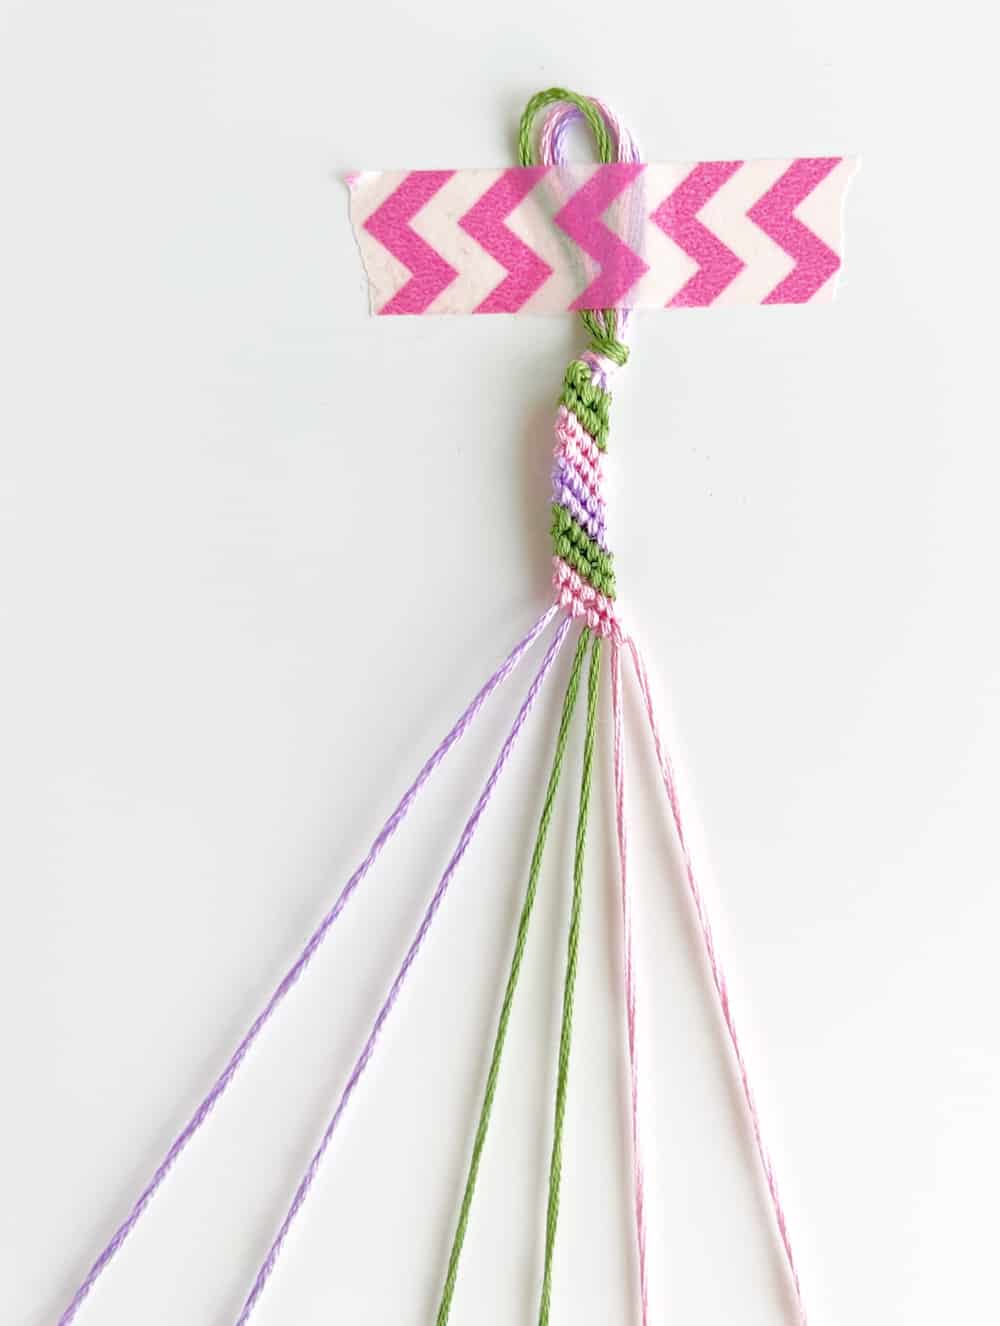
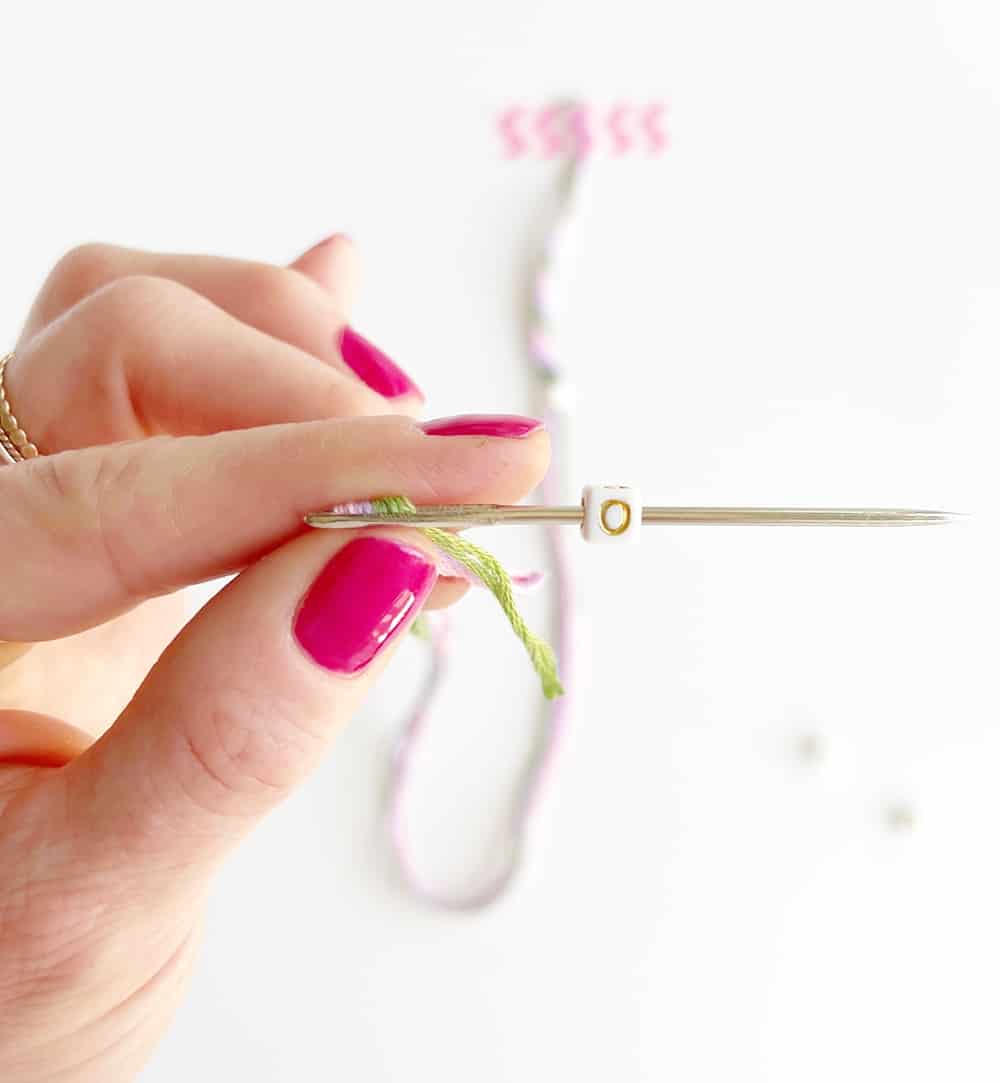
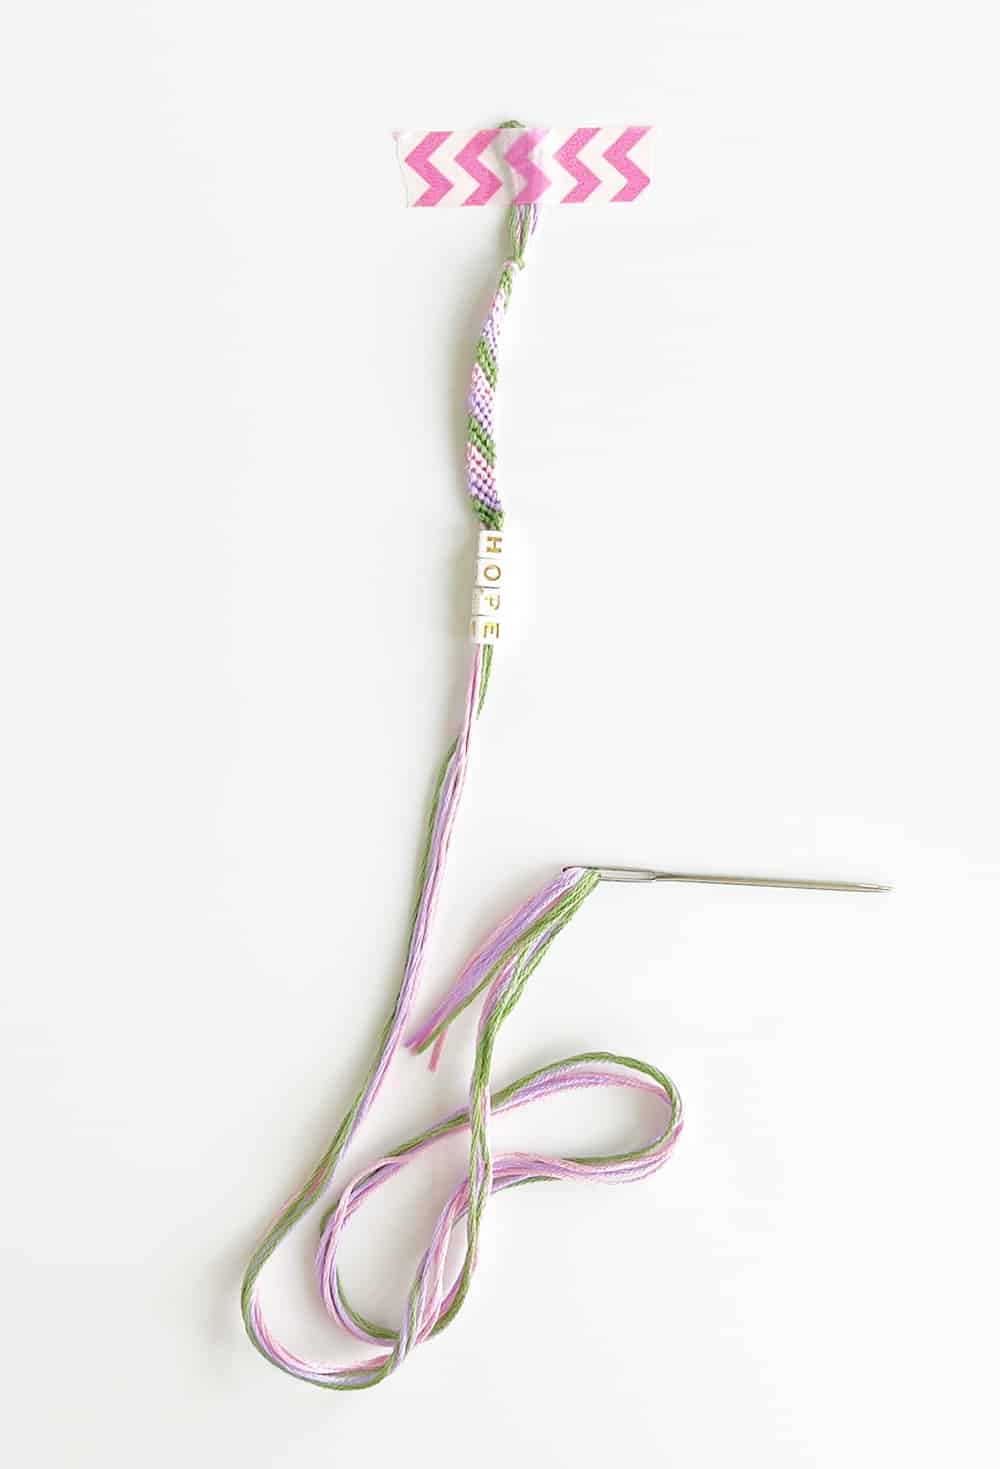
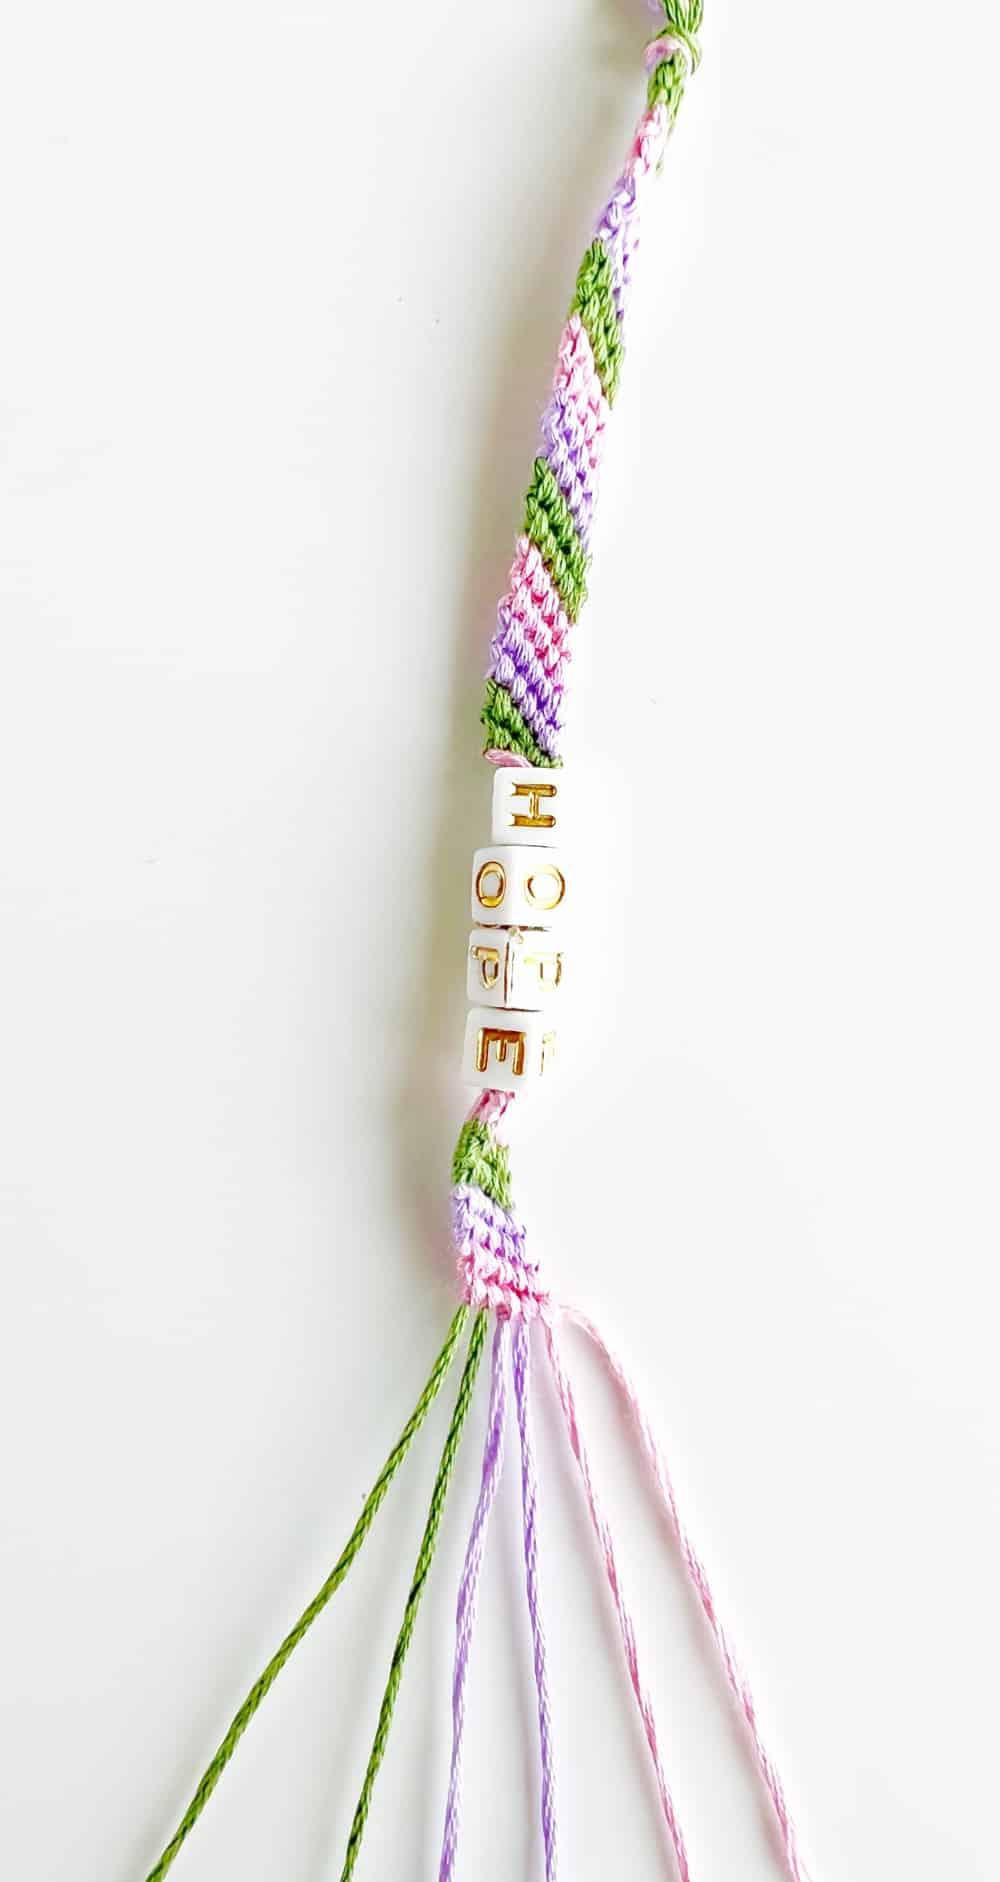
Step 10. Halfway through your bracelet pattern, using a large needle, thread the ends of all the colors of floss through. Add your bead, first letter of your word first, by inserting the needle into center of the bead, pull through and over floss all the way to where you left off on your pattern. Repeat with each letter.
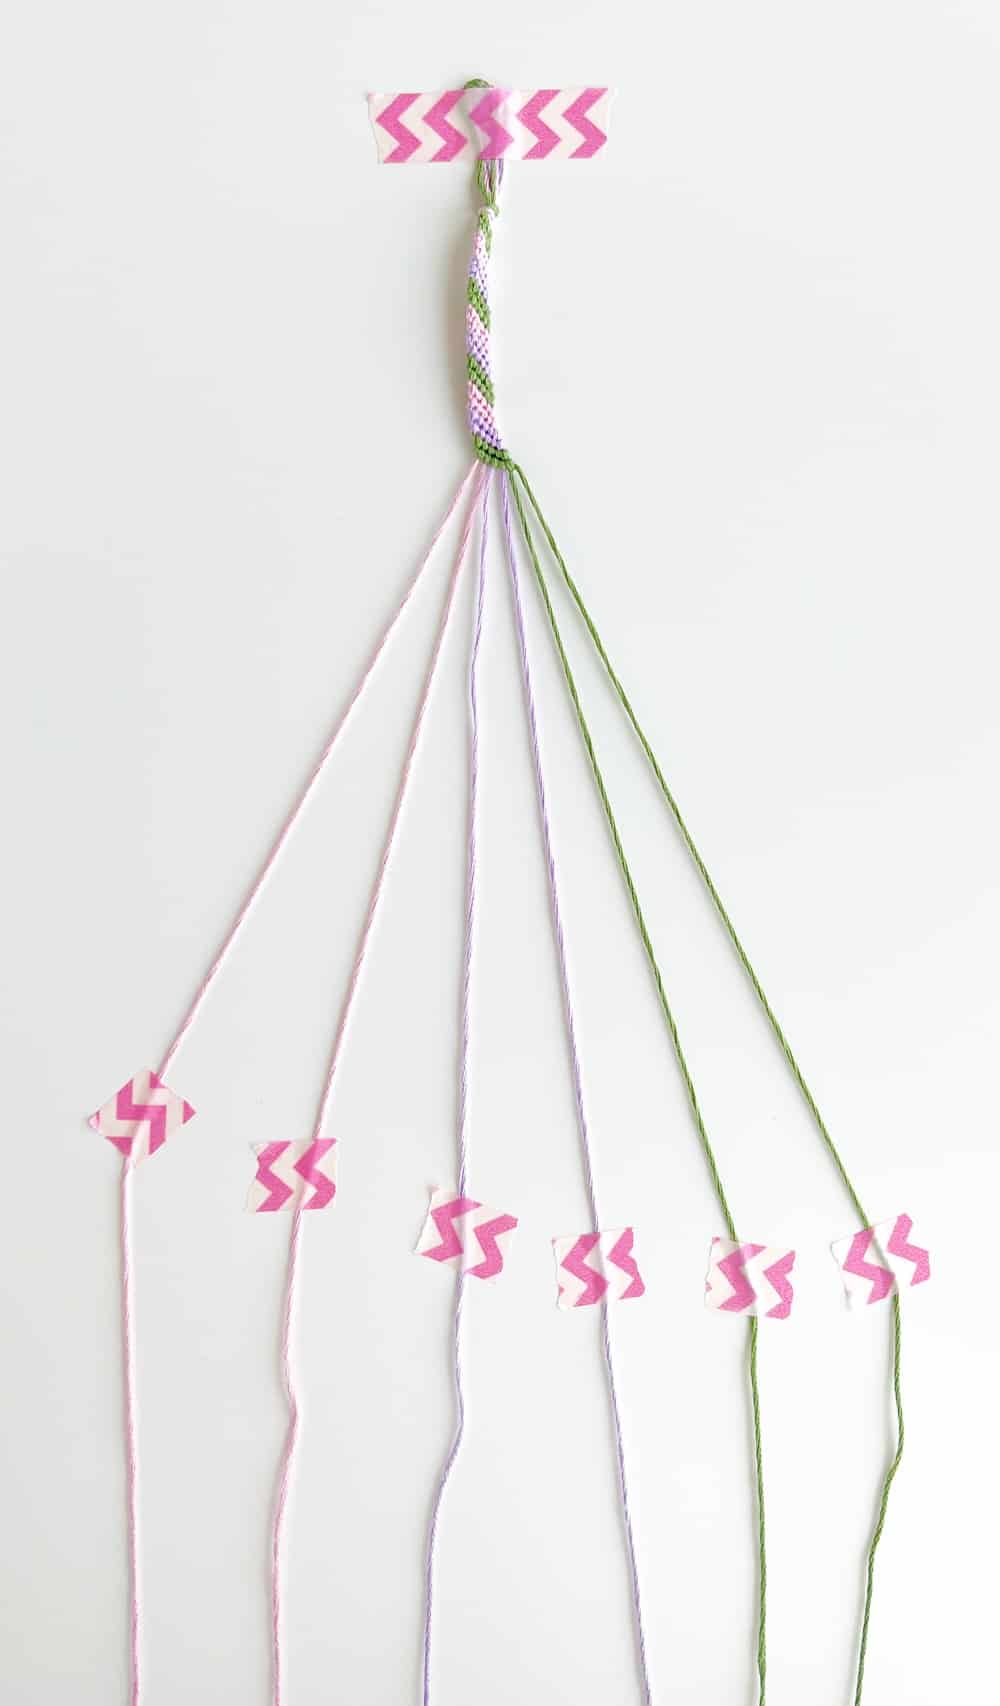
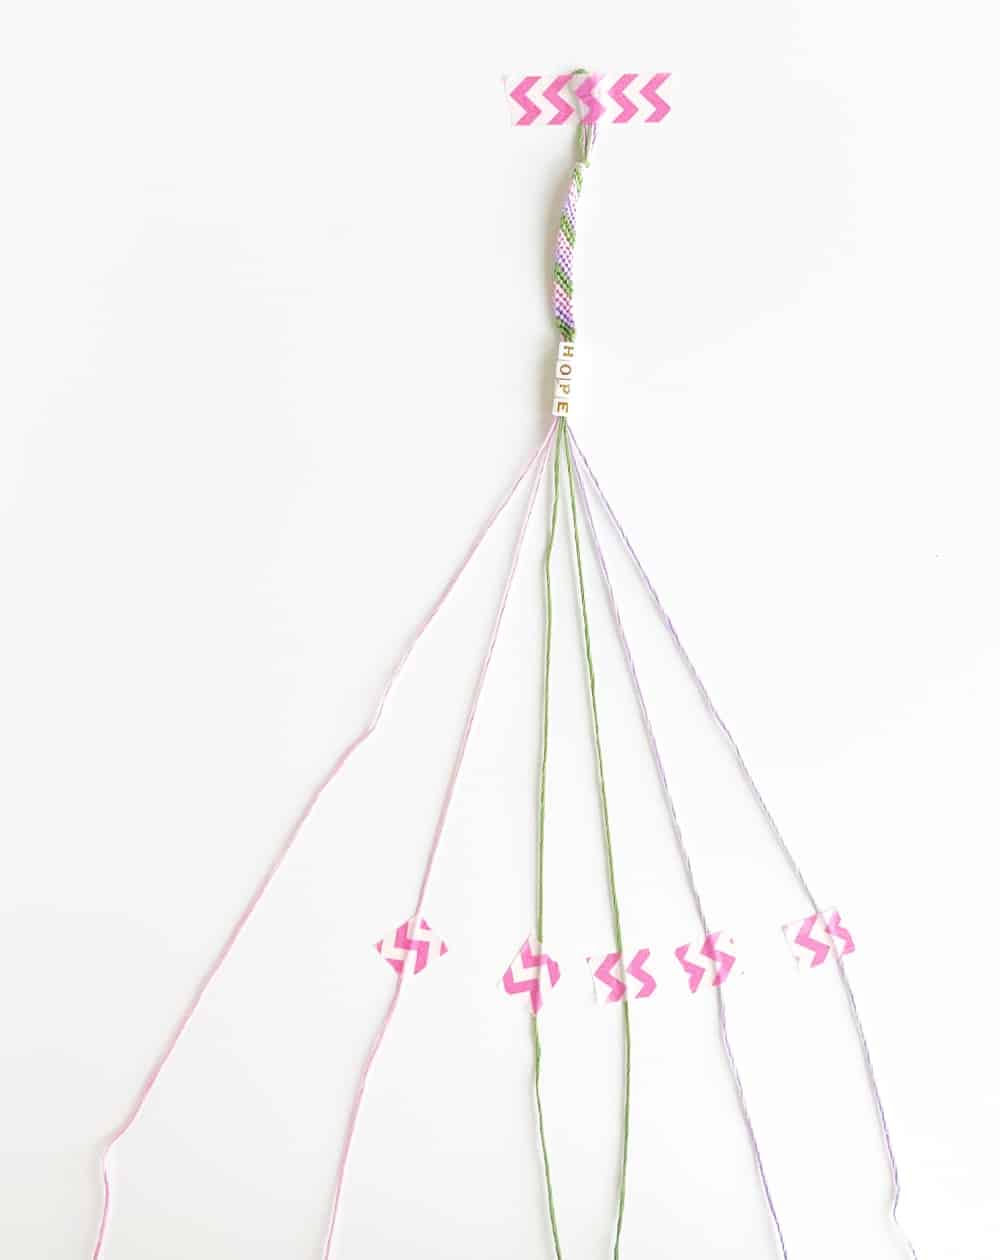
Step 11. After you've threaded all of your beads, realign your strings in order as you did in step 3 (the 2 alike colors right next to each other), add your tape to keep them in place and begin your pattern again.
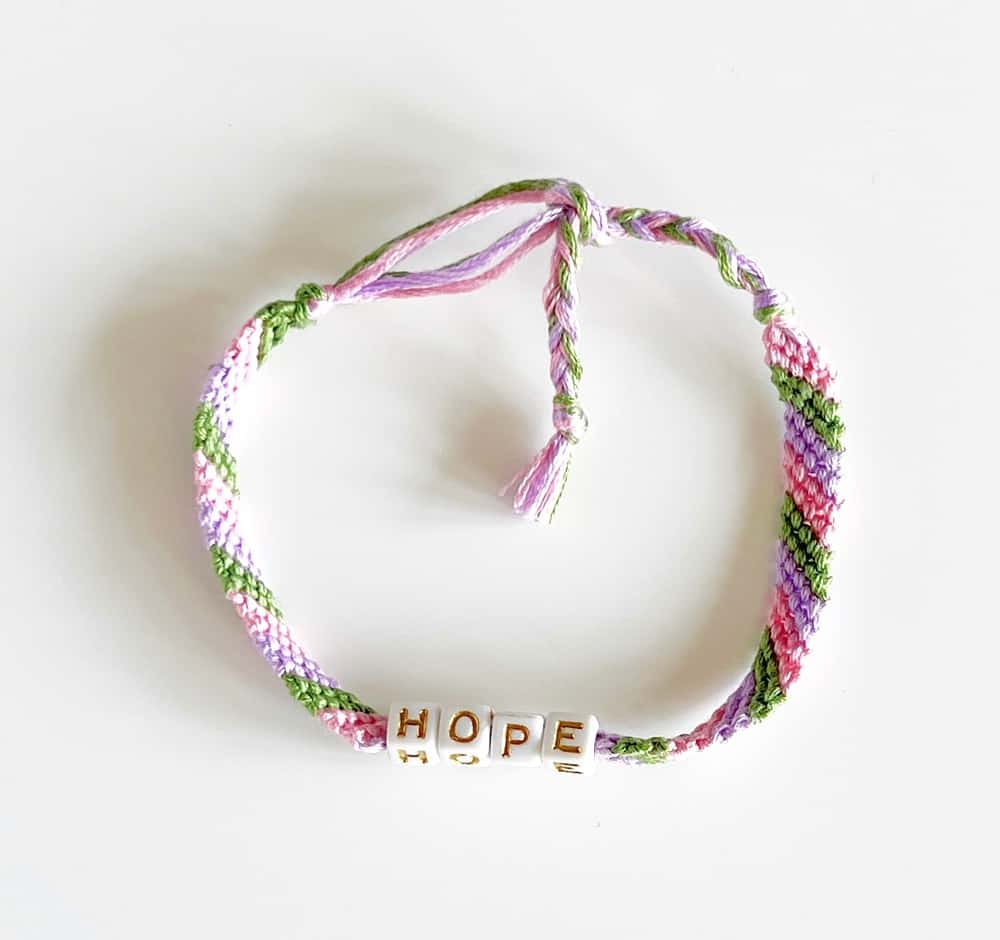
Step 12. When you're finished with your pattern, tie a knot tight to the end of the pattern.
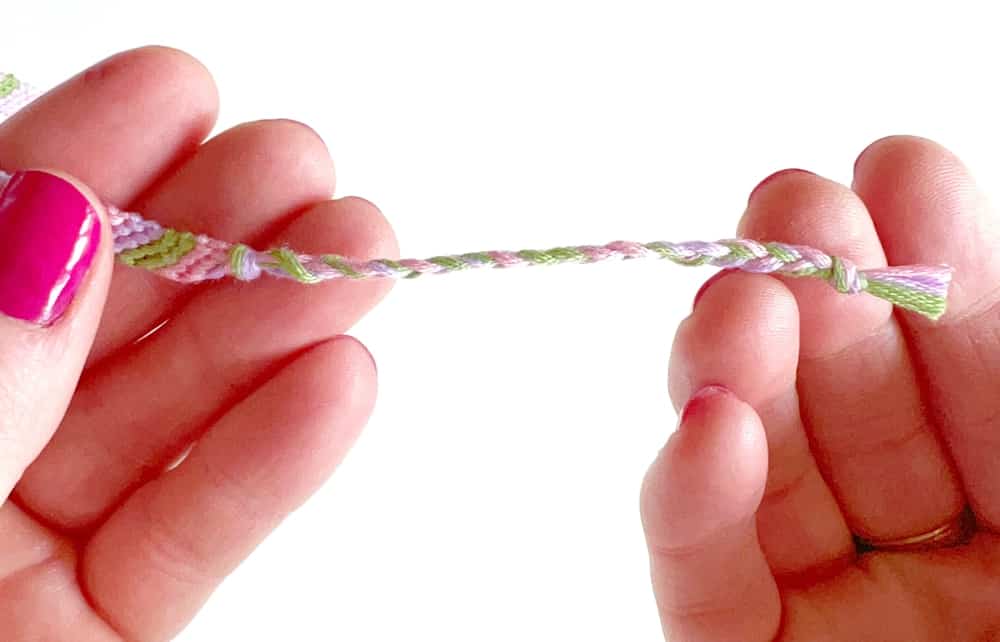
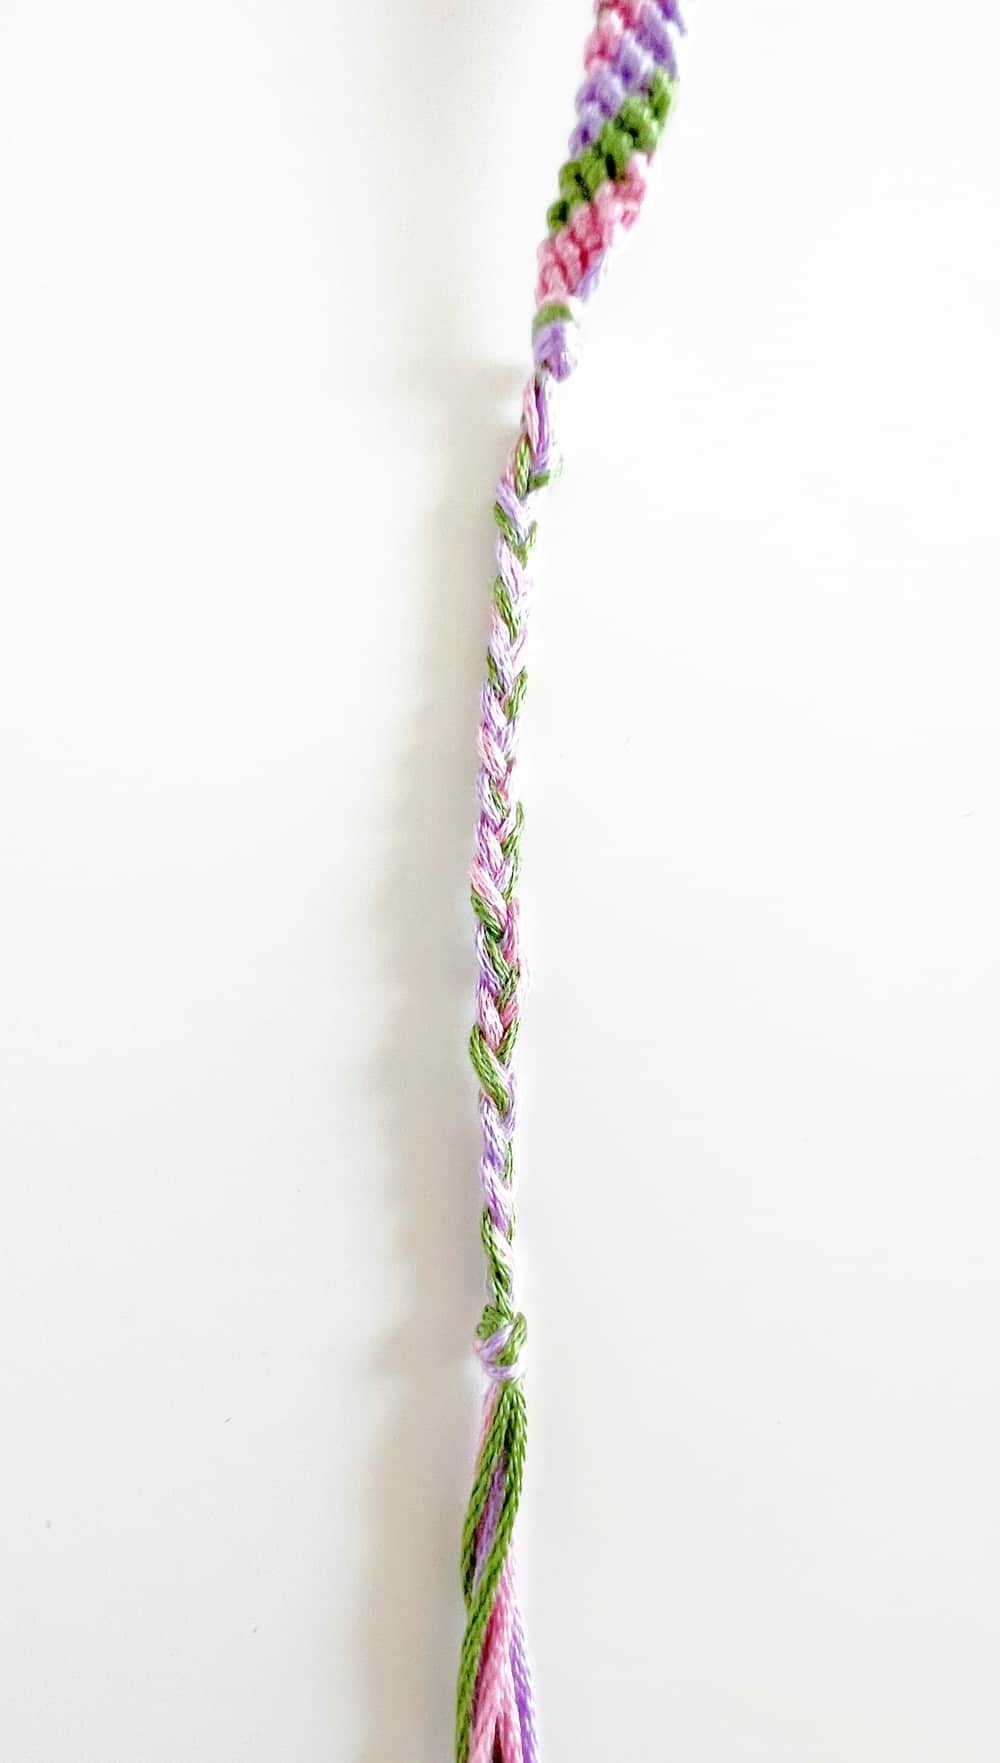
Step 13. Separate your strings into 3 equal groups for braiding. Braid about 2" of string. Knot the end and cut off the excess.
Step 14. It's much easier with a friend helping, take the braided end, put it through the loop and tie a knot to secure it.
TIPS & TRICKS:
Do not use cheap embroidery floss, they tend to separate into straggly strings and are not strong. Invest in a good embroidery thread like this one.
In place of the tape, you could use a clipboard to hold the top of the bracelet in place while making. If you need some color palette inspiration, just search online for 3 color friendship bracelets and see what inspires you.
To keep the strings from overlapping or out of order and creating a unified pattern, simply tape each string towards the bottom with washi tape or a tape you can easily remove each time you have to move the strings. Create your pattern and then when it's time to use that string, simply remove the tape and use it again once it's all the way to the right side and now the last string.
Your bracelet may end up with holes in some places. To avoid this, make sure you're tying the knots tight enough without over tightening. In any case, you'll get better with each bracelet, just as we did!
How To Make Beaded Friendship Bracelets

Materials
- Embroidery Floss
- Measuring Tape or Ruler
- Letter Beads
- Perler Bead (if needing a spacer between words like "Be Kind"
- Threading Needle
- Tape (painters or washi)
Instructions
- Step 1. Choose 3 colors of embroidery floss for your candy cane pattern friendship bracelet and cut each to 70" in length.
- Step 2. Gather the 3 colors together and fold evenly in half. At the top, tie together with a simple knot, leaving a finger width loop (you'll cut this eventually for tying onto your wrist). Secure this loop to a flat surface with tape, giving yourself room to make the bracelet.
- Step 3. Separate all of the strings, keeping the 2 strings of each color right next to each other.
- Step 4. Starting with your very left side string (for example green), create a 4 pattern over the string just to its right. Loop it under that string and pull to tighten. Do this again 1 more time, 2 times total.
- Step 5. Hold onto your beginning string (the very left side green string) the whole time as you'll repeat this pattern with the next string in line.
- Step 6. Continue creating a 4 pattern with each remaining string of the bracelet, loop under, pull to knot and do this twice.
- Step 7. The string you started with will now be on the very right side of your strings.
- Step 8. Start the pattern again with your new very left side string (the second green colored string, pink, pink, purple, purple, the first green colored string that you started your bracelet with).
- Step 9. Repeat with each string, working left to right.
- Step 10. Halfway through your bracelet pattern, using a large needle, thread the ends of all the colors of floss through. Add your bead, first letter of your word first, by inserting the needle into center of the bead, pull through and over floss all the way to where you left off on your pattern. Repeat with each letter.
- Step 11. After you've threaded all of your beads, realign your strings in order as you did in step 3 (the 2 alike colors right next to each other), add your tape to keep them in place and begin your pattern again.
- Step 12. When you're finished with your pattern, tie a knot tight to the end of the pattern
- .Step 13. Separate your strings into 3 equal groups for braiding. Braid about 2" of string. Knot the end and cut off the excess.
- Step 14. It's much easier with a friend helping, take the braided end, put it through the loop and tie a knot to secure it.
Notes
Do not use cheap embroidery floss, they tend to separate into straggly strings and are not strong. Invest in a good embroidery thread like this one.
In place of the tape, you could use a clipboard to hold the top of the bracelet in place while making. If you need some color palette inspiration, just search online for 3 color friendship bracelets and see what inspires you.
To keep the strings from overlapping or out of order and creating a unified pattern, simply tape each string towards the bottom with washi tape or a tape you can easily remove each time you have to move the strings. Create your pattern and then when it's time to use that string, simply remove the tape and use it again once it's all the way to the right side and now the last string.
Your bracelet may end up with holes in some places. To avoid this, make sure you're tying the knots tight enough without over tightening. In any case, you'll get better with each bracelet, just as we did!