How to Make Napkin Decoupage Seashells
Follow us on Instagram for more fun ideas for kids!
By using this site, you agree to our Terms of Use. This post may contain affiliate links. Read our disclosure policy. As an Amazon Influencer, I earn from qualifying purchases.
Make gorgeous trinket dishes by decoupaging seashells with bright napkin designs. A simple summer beach-inspired craft kids and adults will love making together!
Summer is officially here and we love making seashell crafts to kick off the warmer months! Looking for a creative way to add a touch of seashell coastal charm to your home decor? These DIY napkin decoupage seashell trinket dishes are not only adorable, but a beautiful crafting project that's perfect for kids and adults alike!
With just a few simple materials you can transform ordinary seashells into beautiful, one-of-a-kind trinket dishes that are perfect for holding jewelry, keys, or other small treasures.
Napkin Decoupage Seashells - Materials:
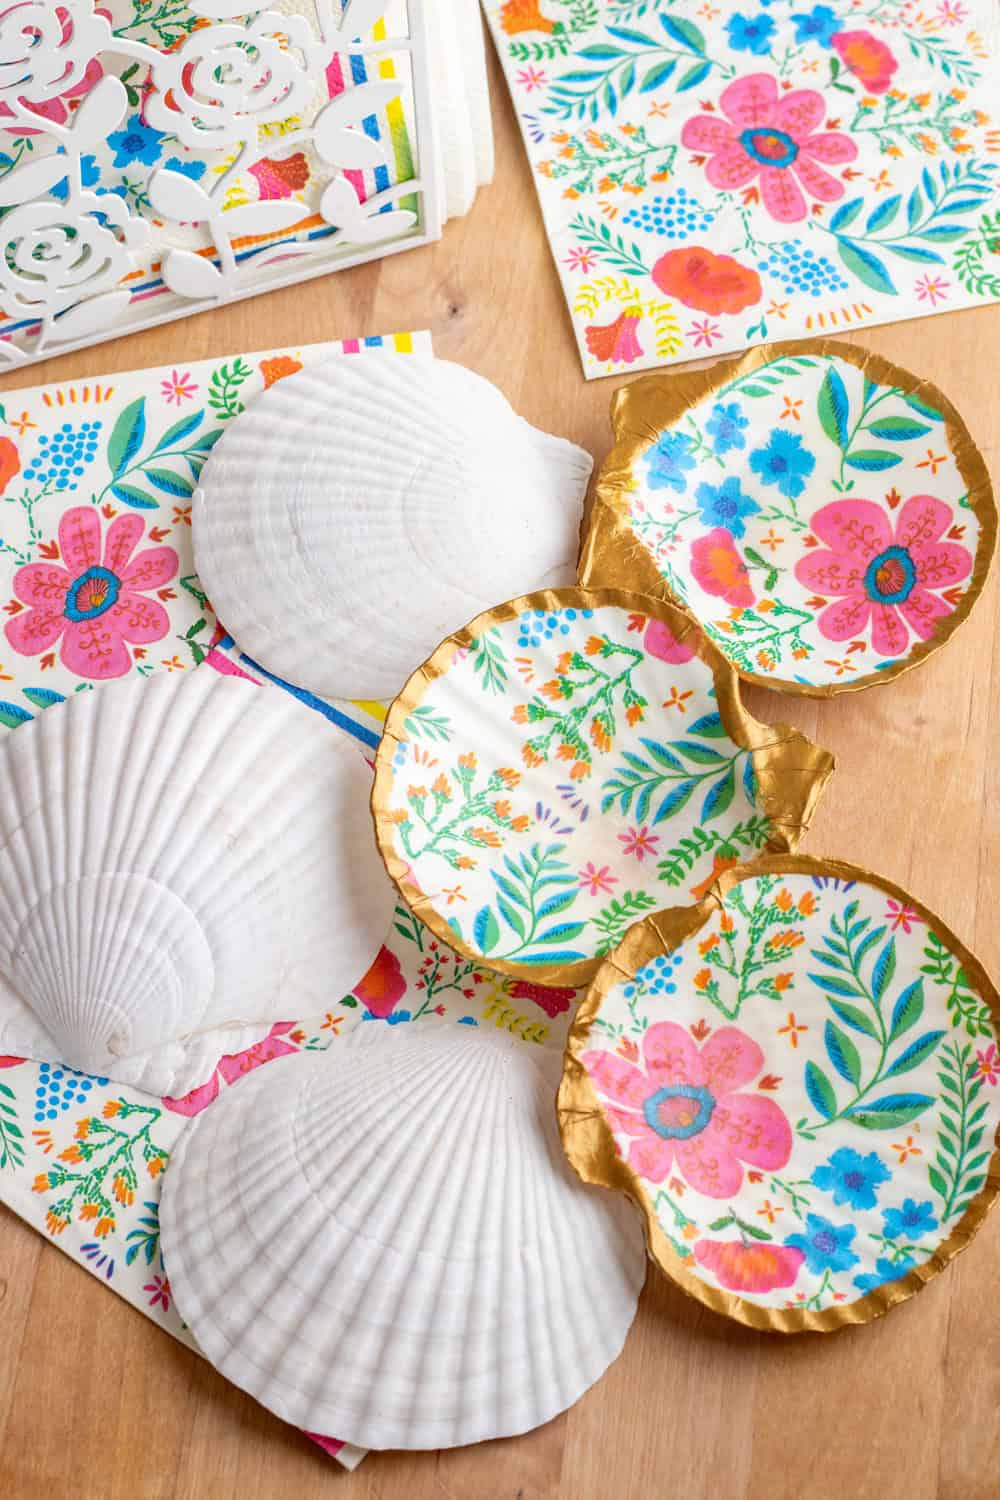
- Large seashells (ours were 4-5" wide)
- Floral napkins (or napkins with a design of your choice)
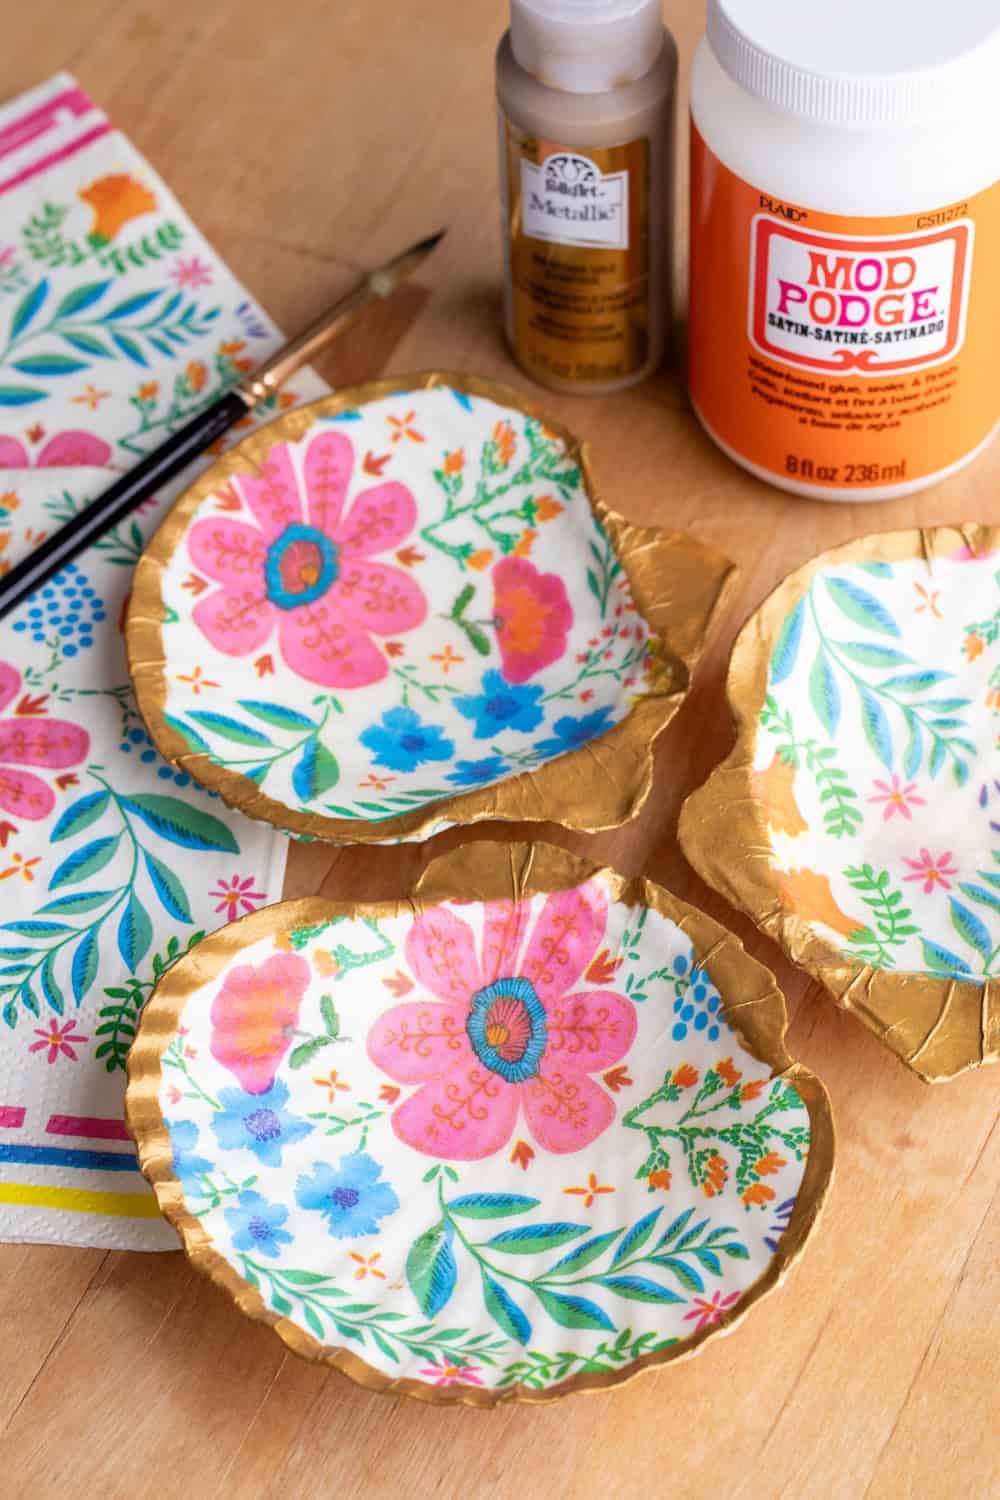
- Mod Podge Satin
- Metallic gold paint
- Paintbrushes
- Scissors
How to make Decoupage Seashell - Instructions:
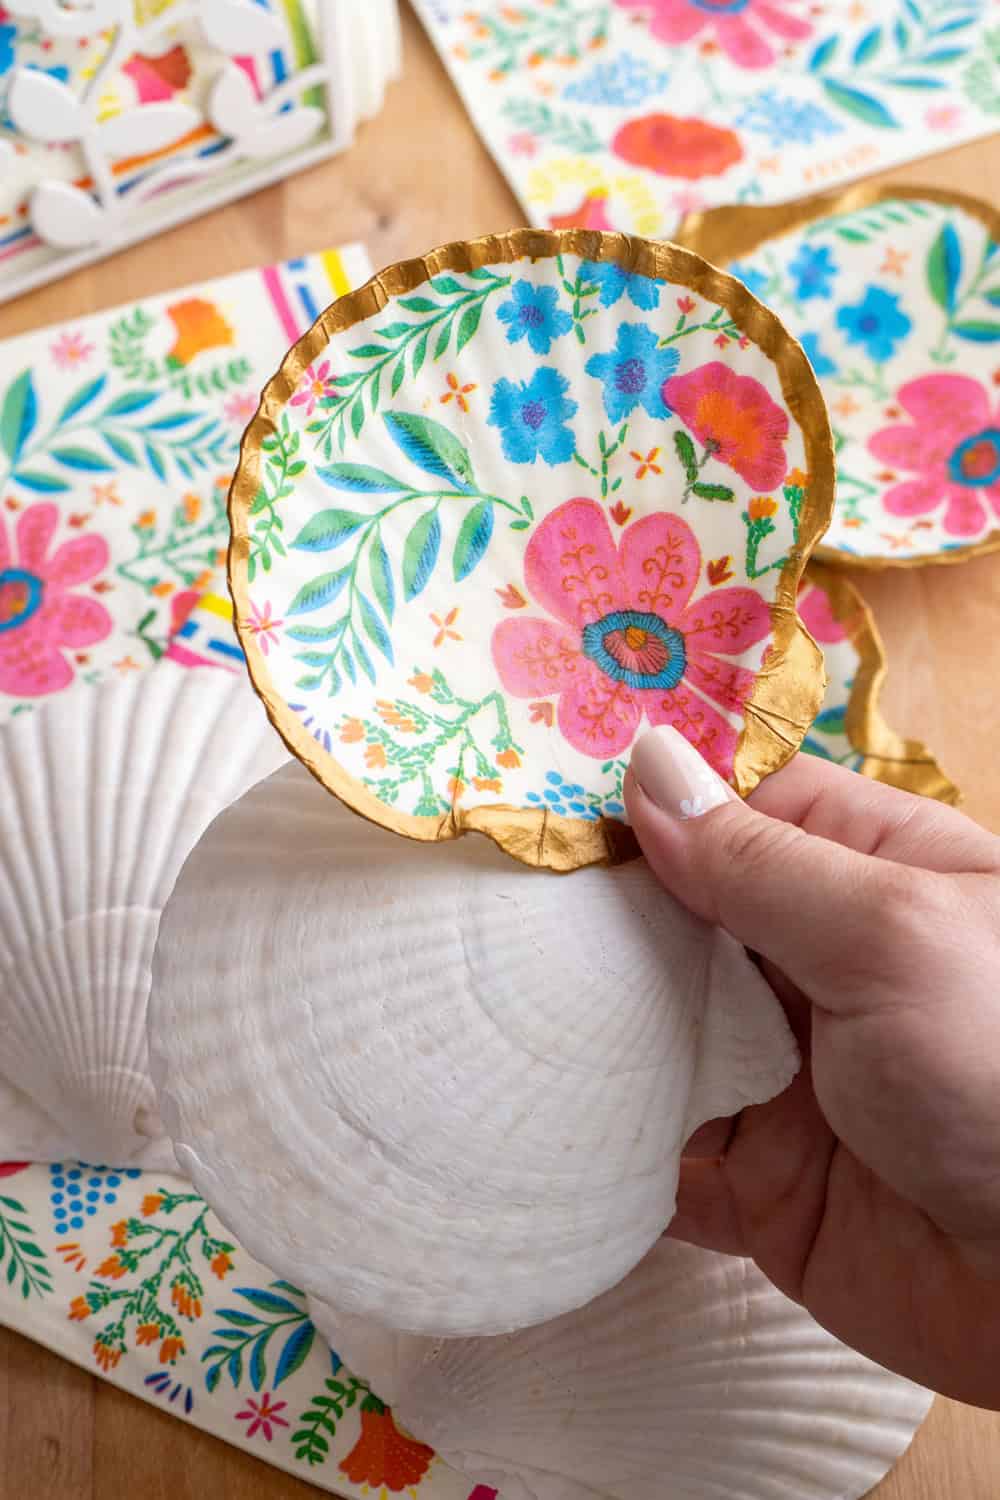
- Prepare Your Napkins: Select floral napkins or napkins with a design that you love. Place one of your shells onto the part of the napkin you’d like to use, and roughly cut out that shape.
- Decoupage Your Shells: Using a paintbrush, apply a thin layer of Mod Podge Satin onto the flat surface of each shell. Spritz the cut piece of napkin with water (this helps make the napkin pliable, and makes it easier to tear off any excess). Carefully place your cut-out napkin onto the Mod Podge-covered surface, smoothing out any wrinkles or air bubbles with your fingers.
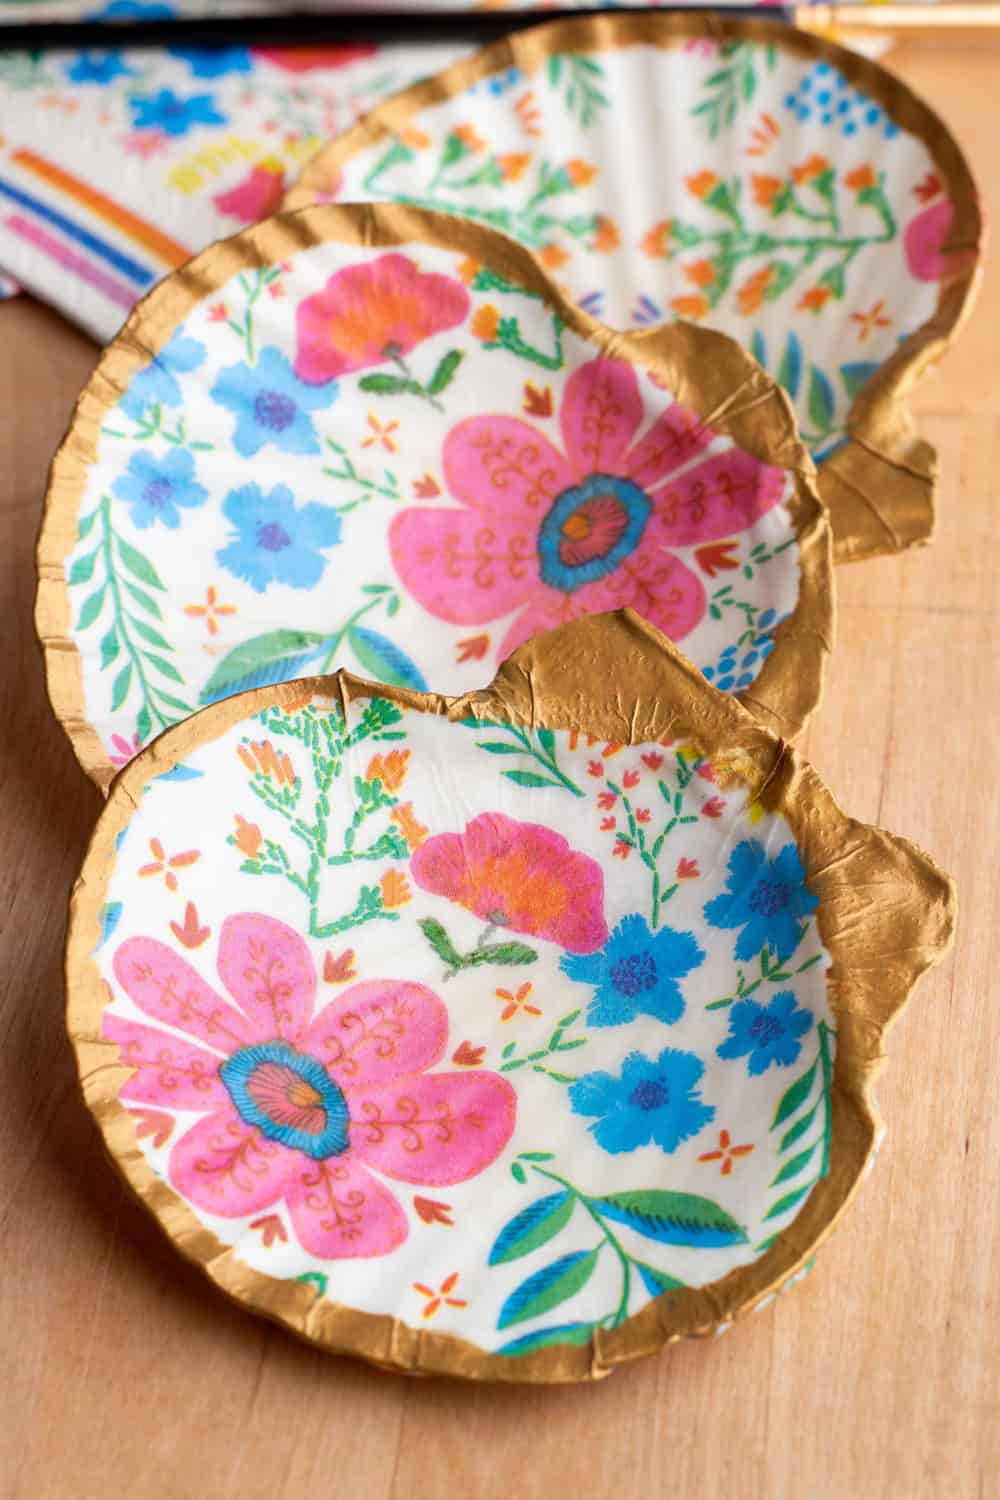
- Seal with Mod Podge: Once the napkin is in place, apply another thin layer of Mod Podge Satin over the entire surface of each shell, including the napkin. This will seal the napkin onto the shell and give it a protective finish. Carefully tear off any excess napkin hanging over the edge of the shell.
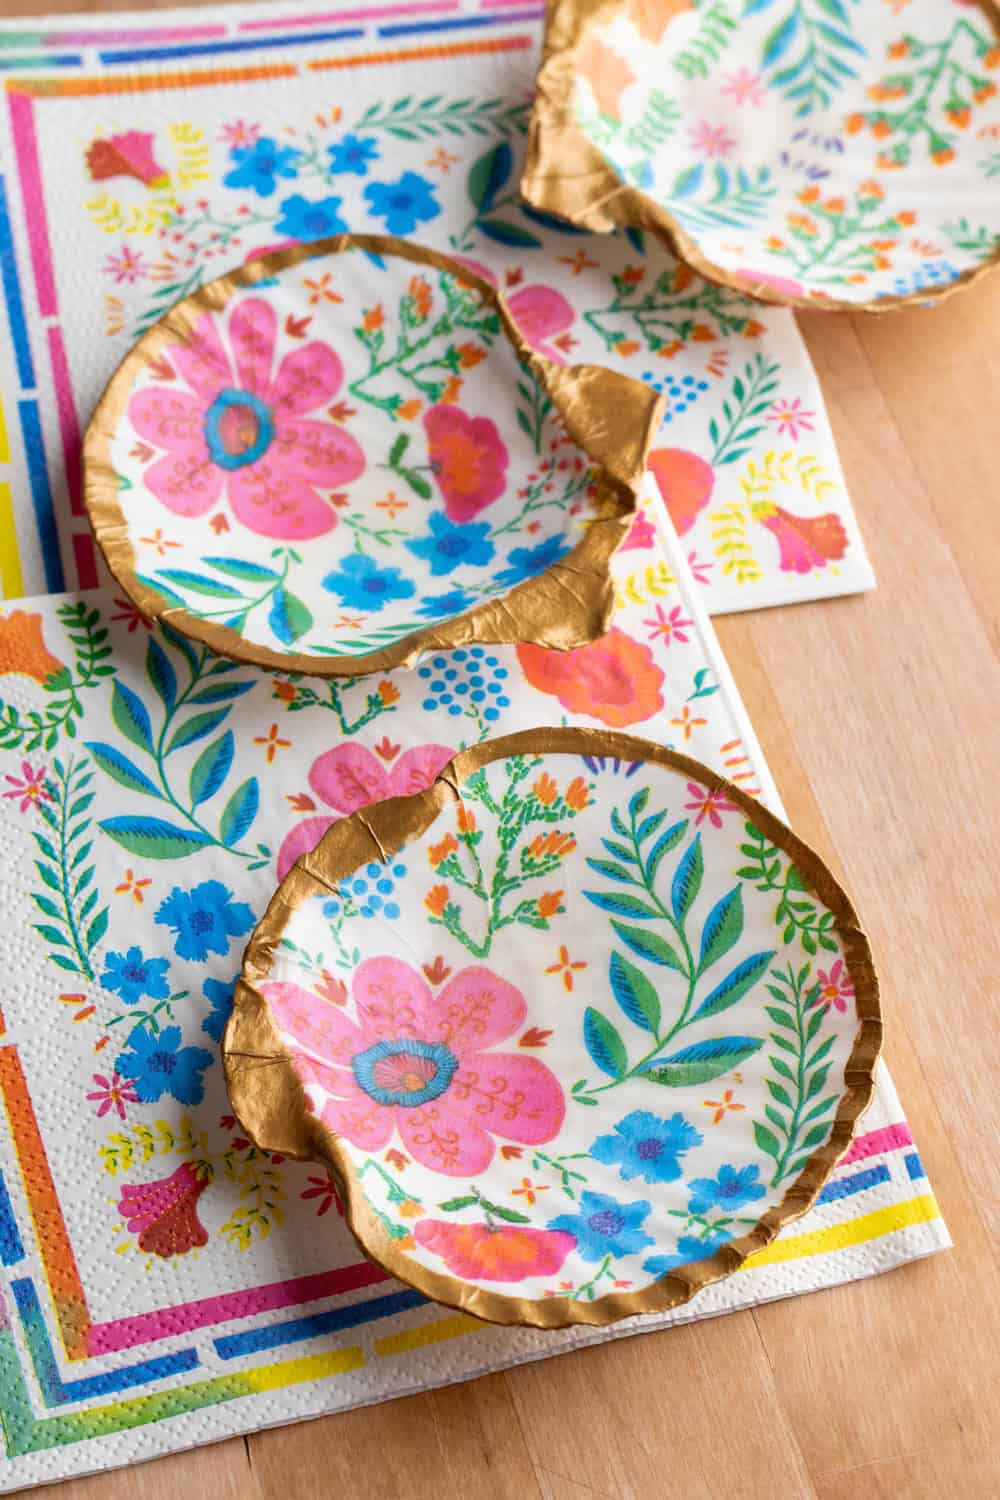
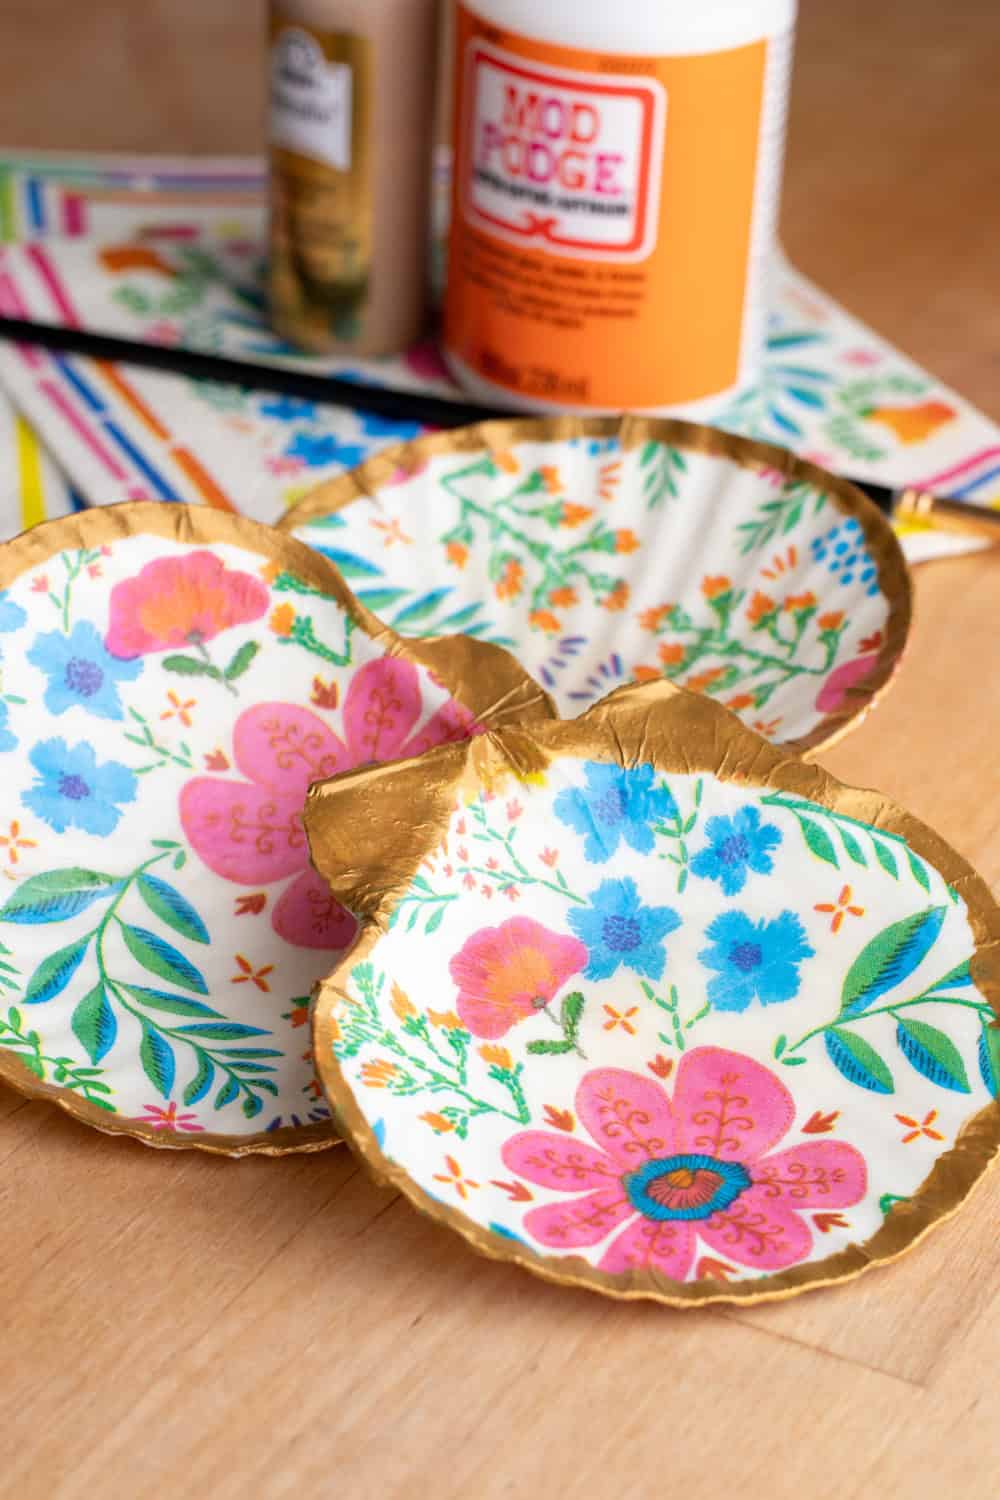
- Add Metallic Accents: For an extra touch of elegance, use metallic gold paint to add accents around the edges of your shells. You can use a small paintbrush to carefully paint a thin line of gold paint along the outer rim of each shell, creating a gilded effect.
- Let Dry and Cure: Allow your shell decoupage trinket dishes to dry completely. Once dry, let them cure for 24 hours to ensure that the Mod Podge and paint have fully set and hardened.
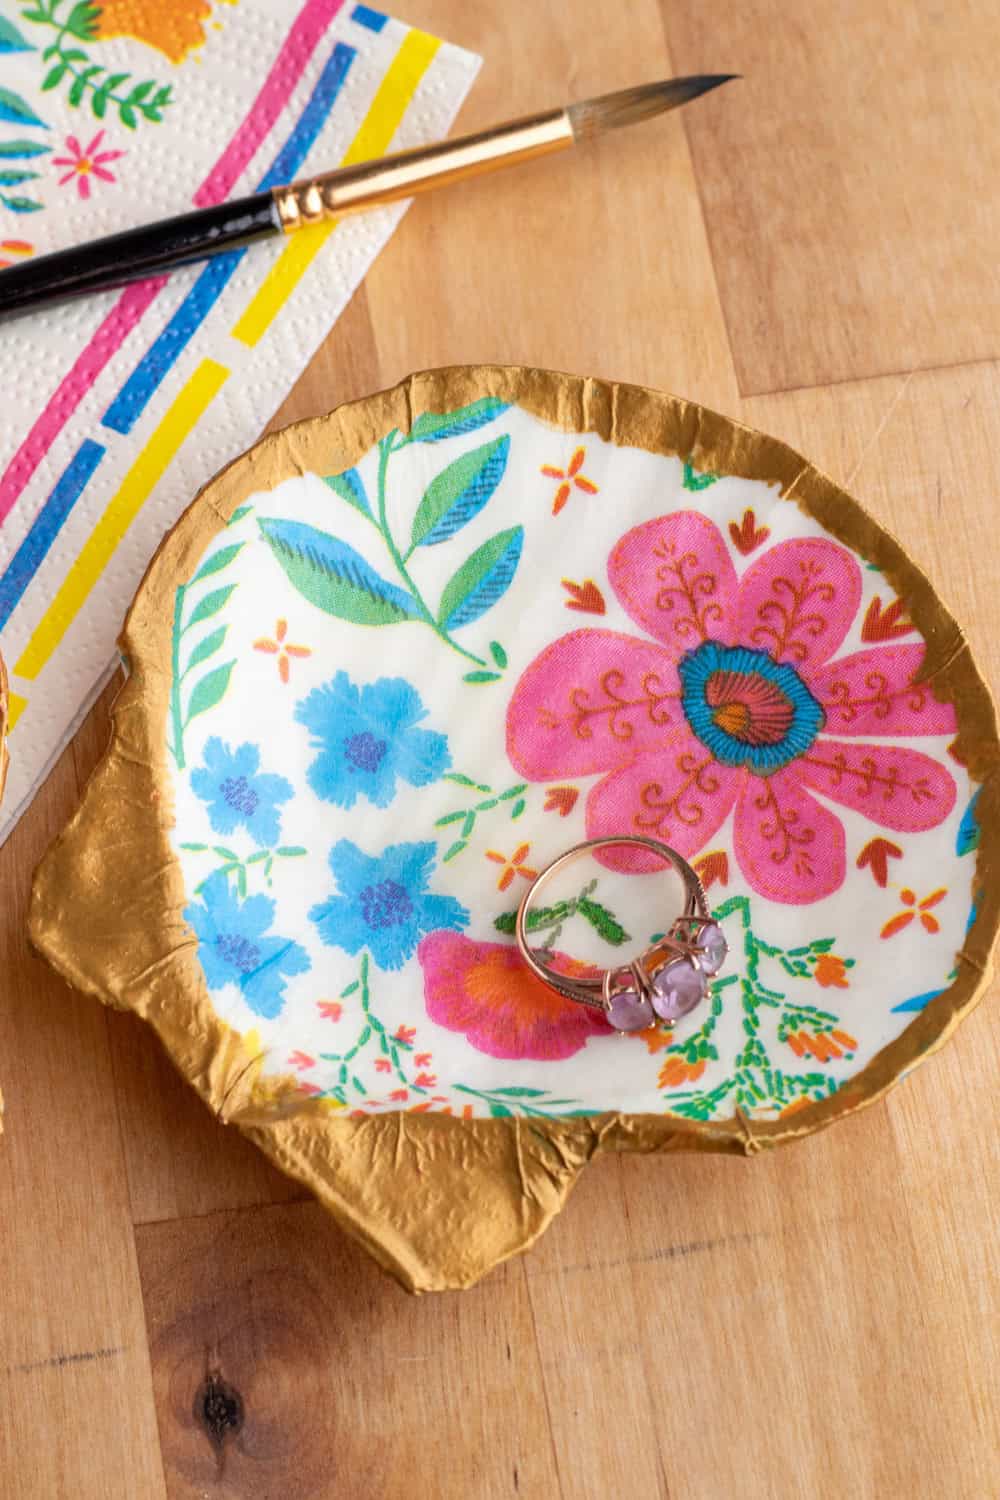
- Display and Enjoy: Once cured, your DIY shell decoupage trinket dishes are ready to use! Place them on a dresser, vanity, or coffee table to add a charming coastal touch to any room. Use them to hold jewelry, keys, coins, or any other small treasures you'd like to keep organized and easily accessible.
Final Thoughts:
These DIY shell decoupage trinket dishes are not only a fun and creative crafting project, but also a beautiful addition to your home decor. Whether you're crafting them as a solo project or making them with kids as a fun afternoon activity, they're sure to bring joy and a touch of coastal whimsy to your space.
So gather your shells, napkins, Mod Podge, and paint, and let your creativity shine as you create these charming trinket dishes. With each shell transformed into a unique work of art, you'll be amazed at the beauty you can create with just a few simple materials and a little imagination. Happy crafting!
How to Make Napkin Decoupage Seashells

Make gorgeous trinket dishes by decoupaging seashells with bright napkin designs. A simple summer beach-inspired craft kids and adults will love making together!
Materials
- Large seashells (ours were 4-5" wide)
- Floral napkins (or napkins with a design of your choice)
- Mod Podge Satin
- Metallic gold paint
- Paintbrushes
- Scissors
Instructions
- Prepare Your Napkins: Select floral napkins or napkins with a design that you love. Place one of your shells onto the part of the napkin you’d like to use, and roughly cut out that shape.
- Decoupage Your Shells: Using a paintbrush, apply a thin layer of Mod Podge Satin onto the flat surface of each shell. Spritz the cut piece of napkin with water (this helps make the napkin pliable, and makes it easier to tear off any excess). Carefully place your cut-out napkin onto the Mod Podge-covered surface, smoothing out any wrinkles or air bubbles with your fingers.
- Seal with Mod Podge: Once the napkin is in place, apply another thin layer of Mod Podge Satin over the entire surface of each shell, including the napkin. This will seal the napkin onto the shell and give it a protective finish. Carefully tear off any excess napkin hanging over the edge of the shell.
- Add Metallic Accents: For an extra touch of elegance, use metallic gold paint to add accents around the edges of your shells. You can use a small paintbrush to carefully paint a thin line of gold paint along the outer rim of each shell, creating a gilded effect.
- Let Dry and Cure: Allow your shell decoupage trinket dishes to dry completely. Once dry, let them cure for 24 hours to ensure that the Mod Podge and paint have fully set and hardened.
- Display and Enjoy: Once cured, your DIY shell decoupage trinket dishes are ready to use! Place them on a dresser, vanity, or coffee table to add a charming coastal touch to any room. Use them to hold jewelry, keys, coins, or any other small treasures you'd like to keep organized and easily accessible.