


By using this site, you agree to our Terms of Use. This post may contain affiliate links. Read our disclosure policy.
Follow us on Instagram for more fun ideas for kids!
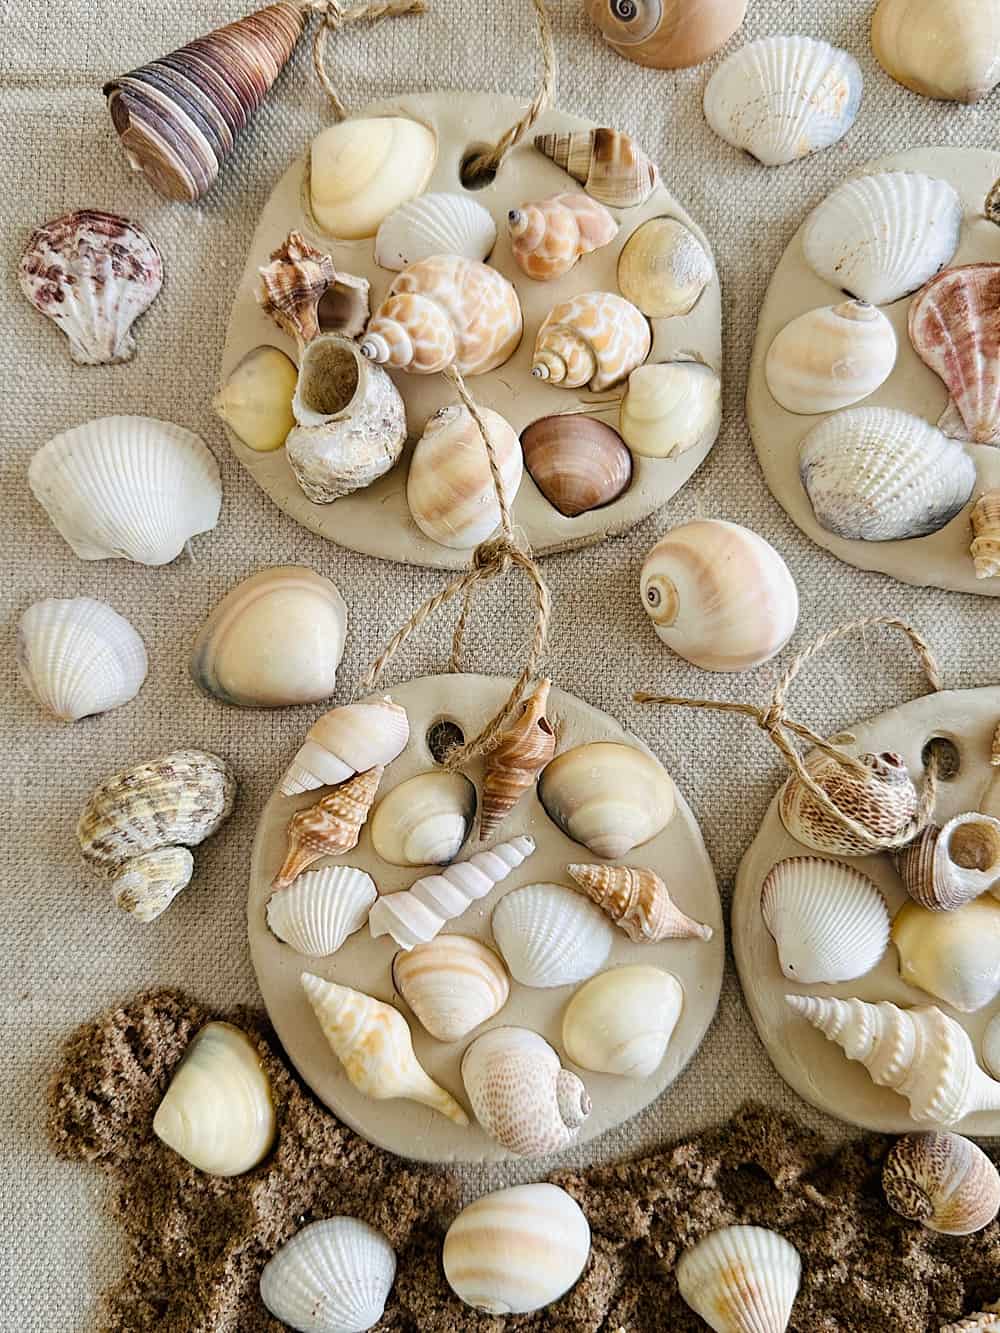
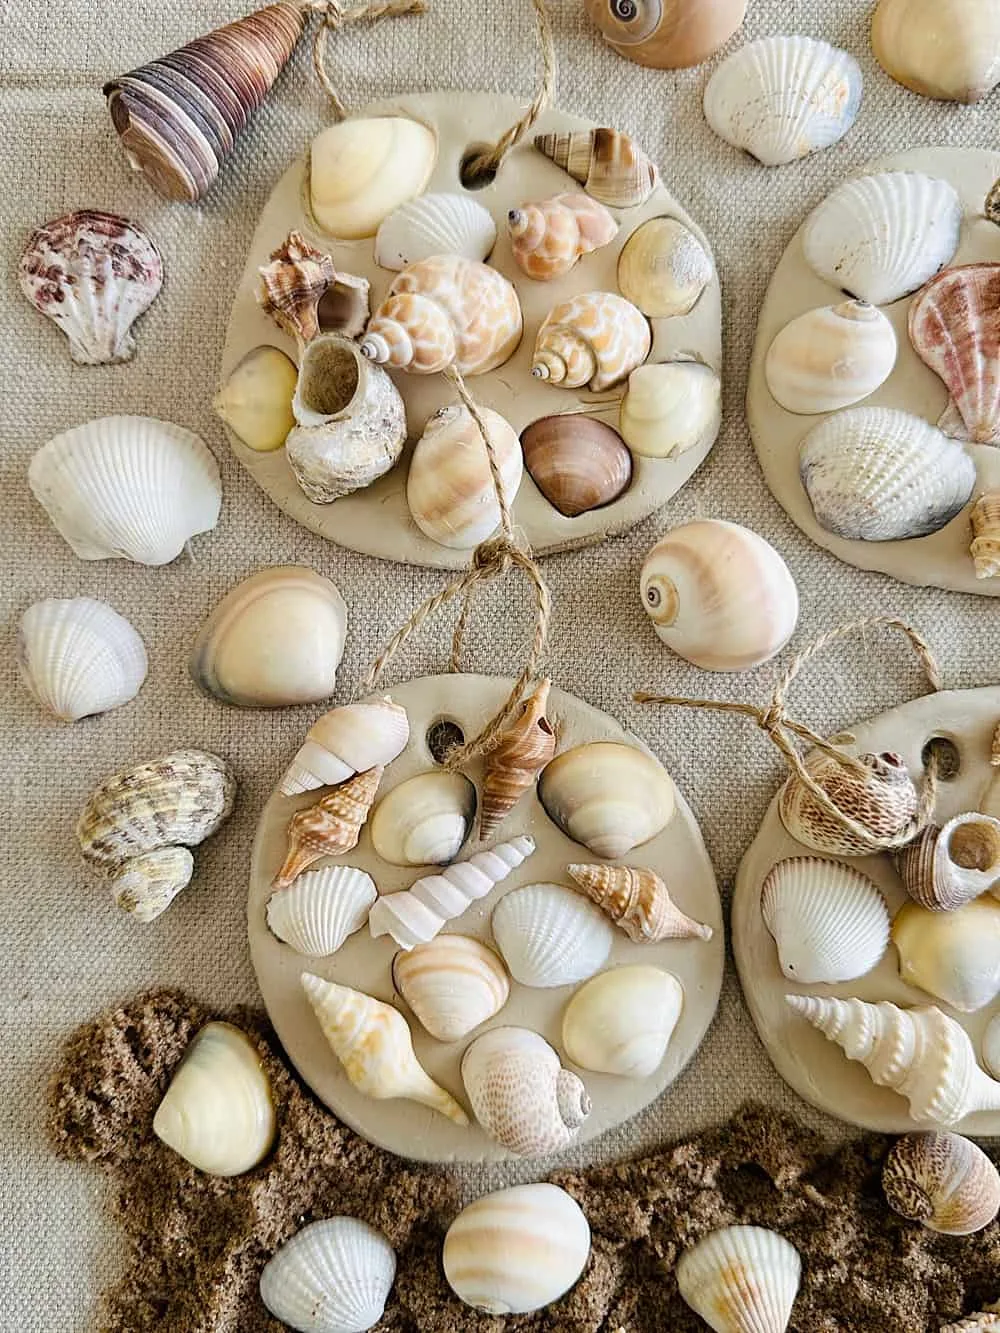
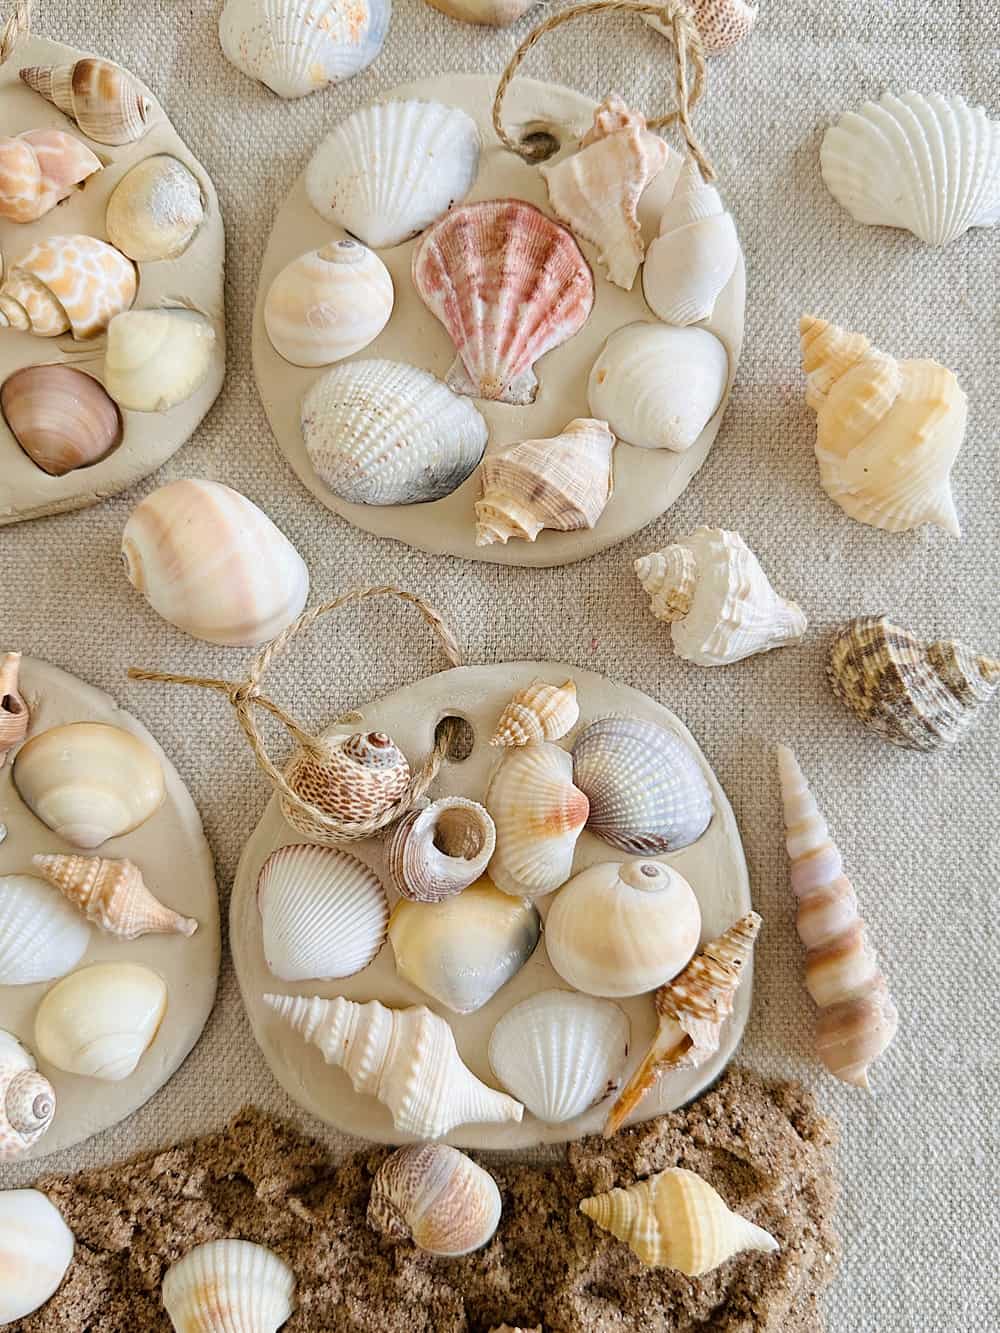
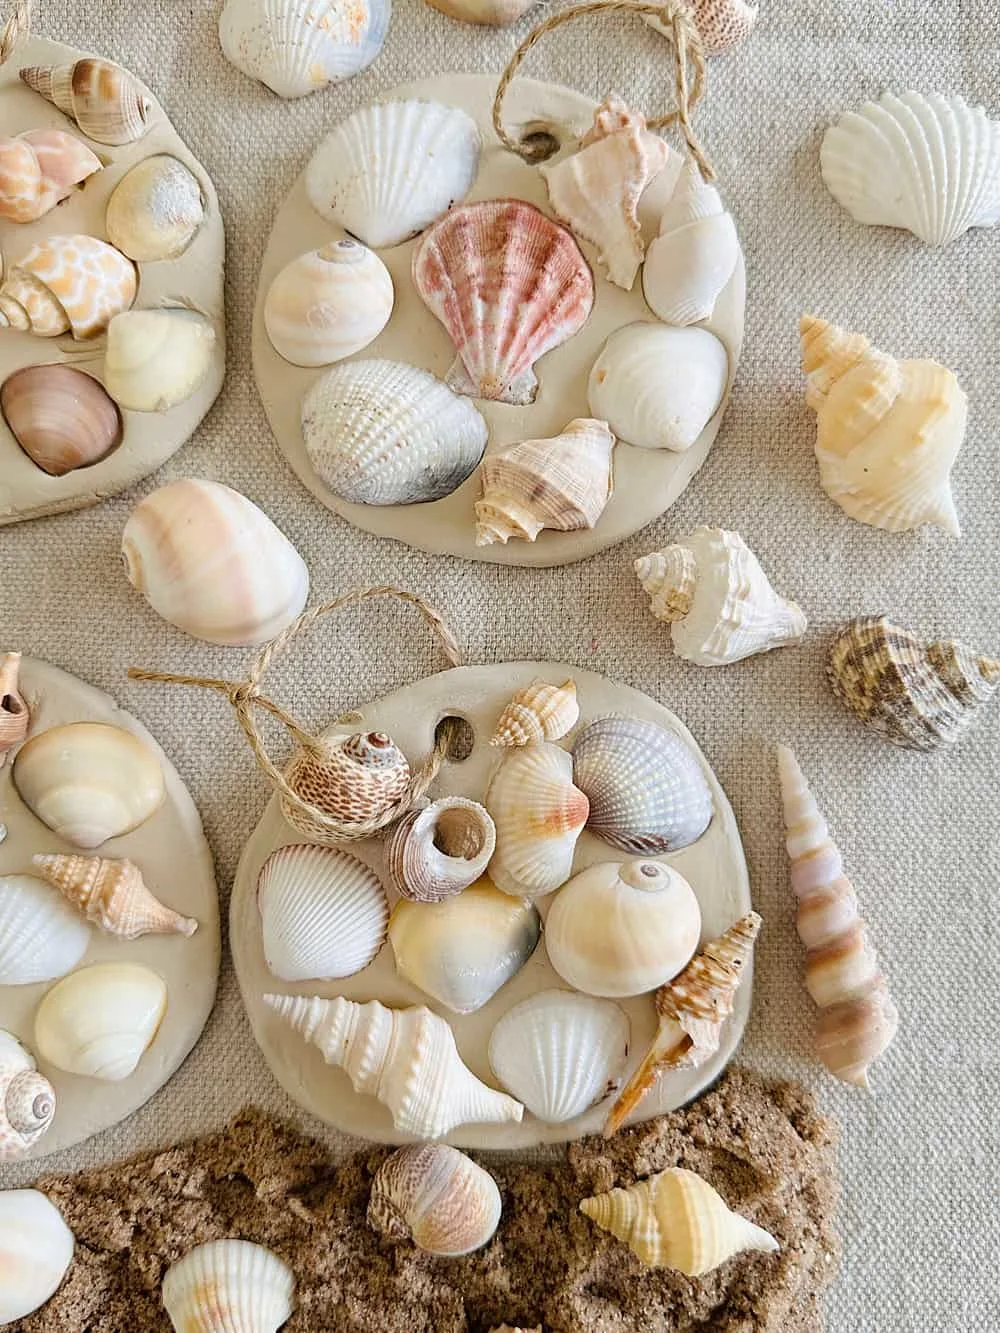
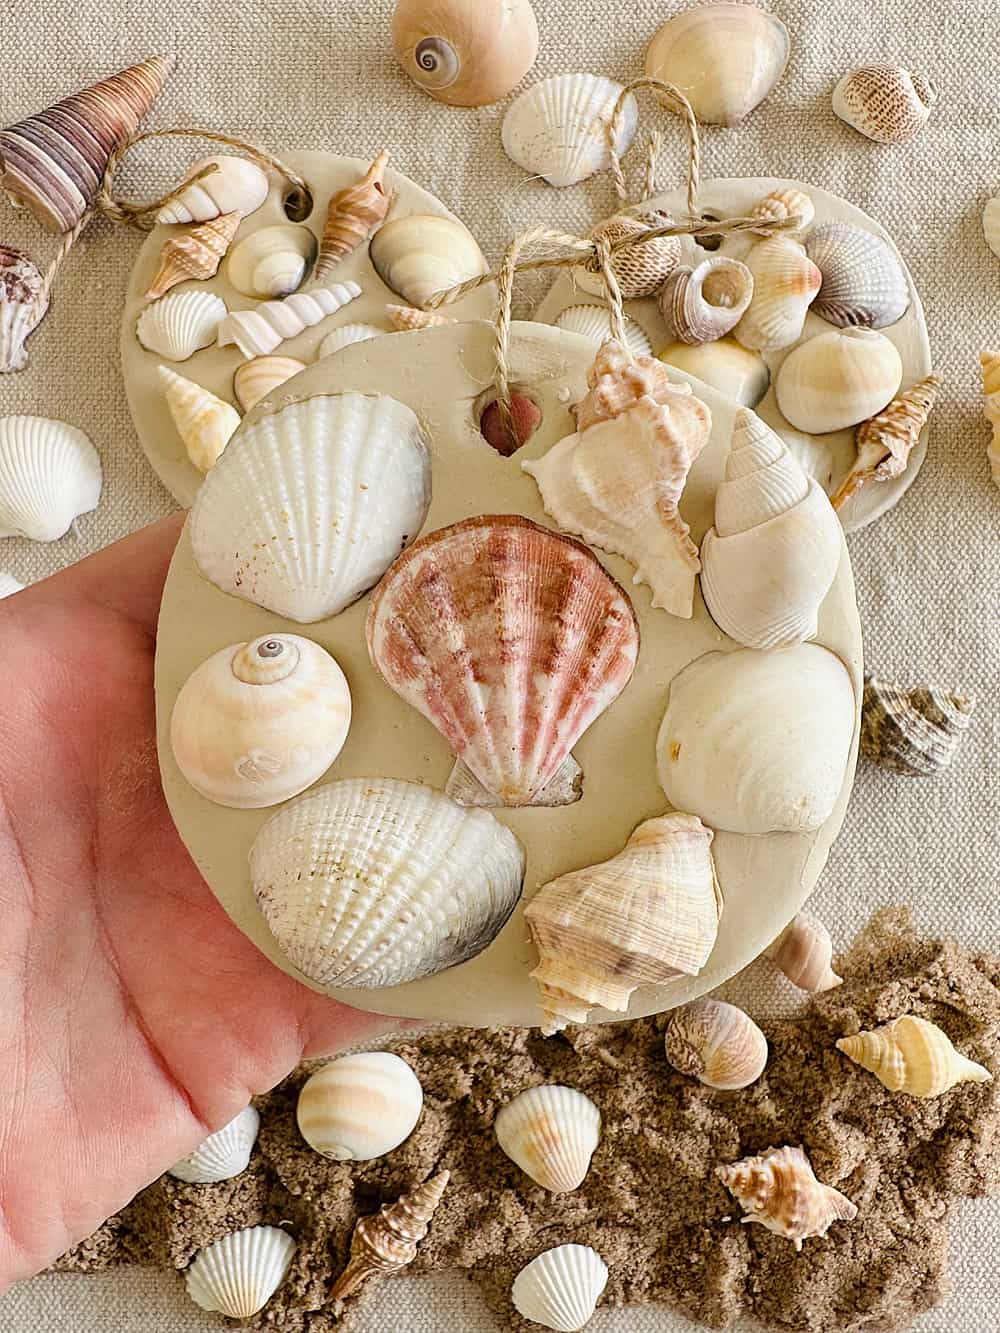
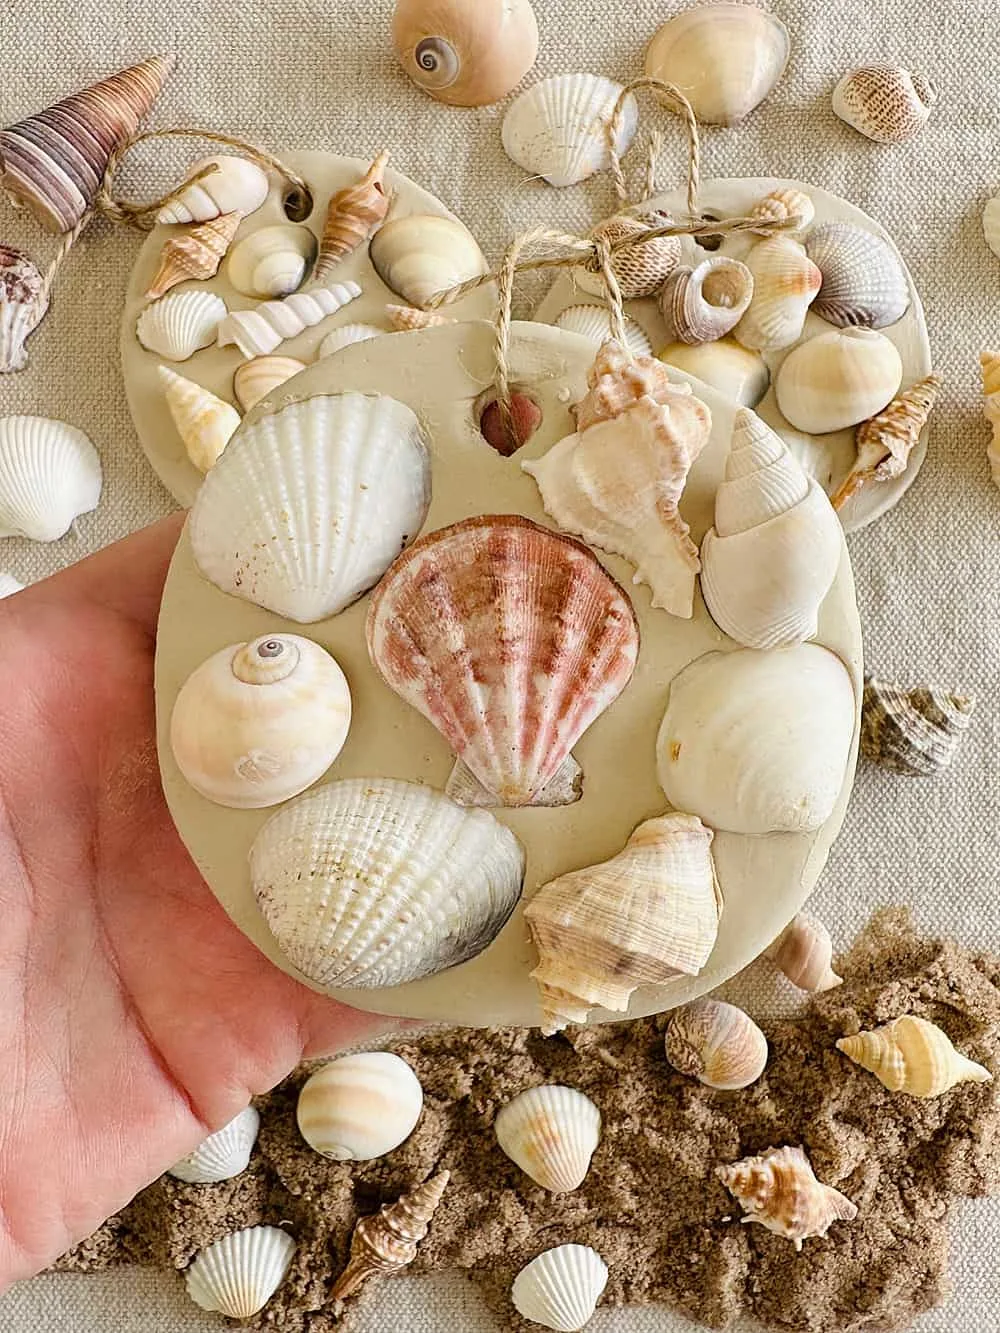
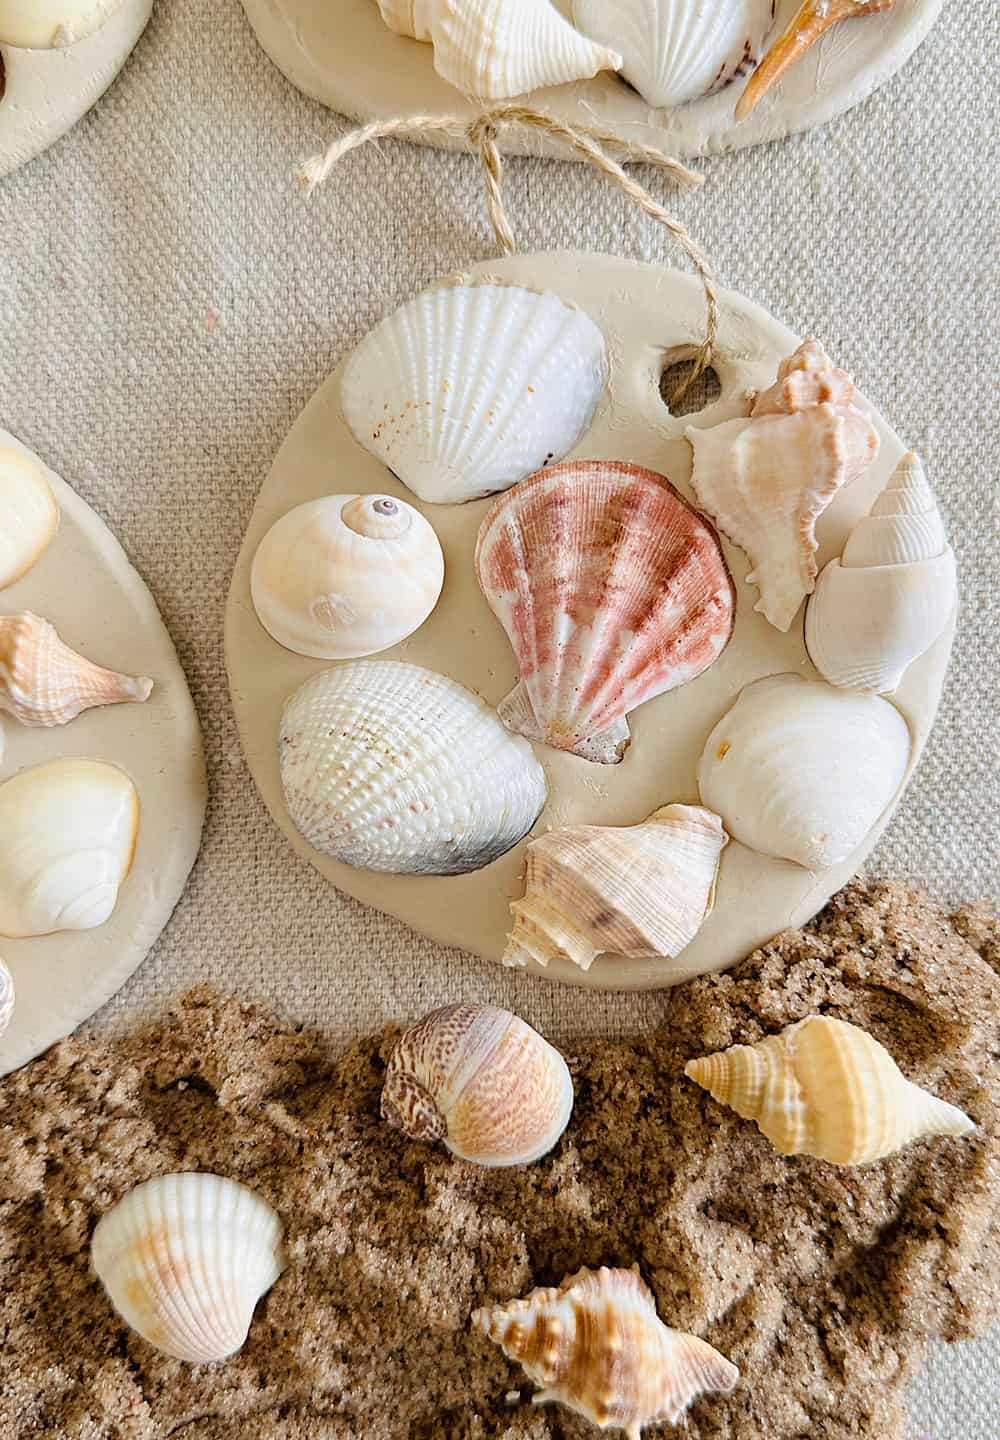
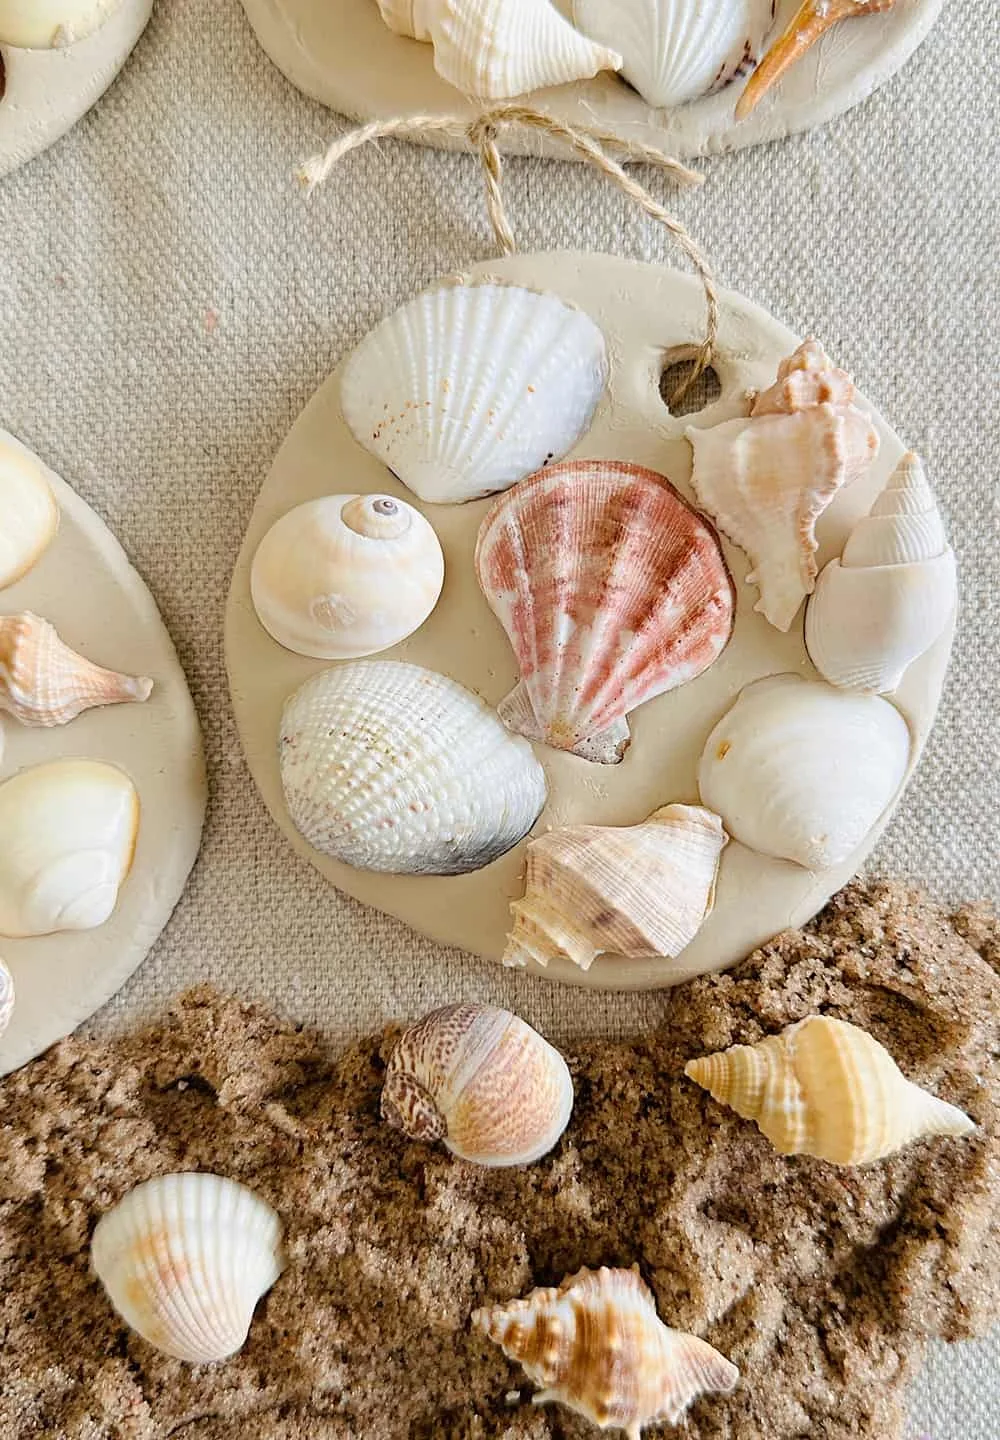
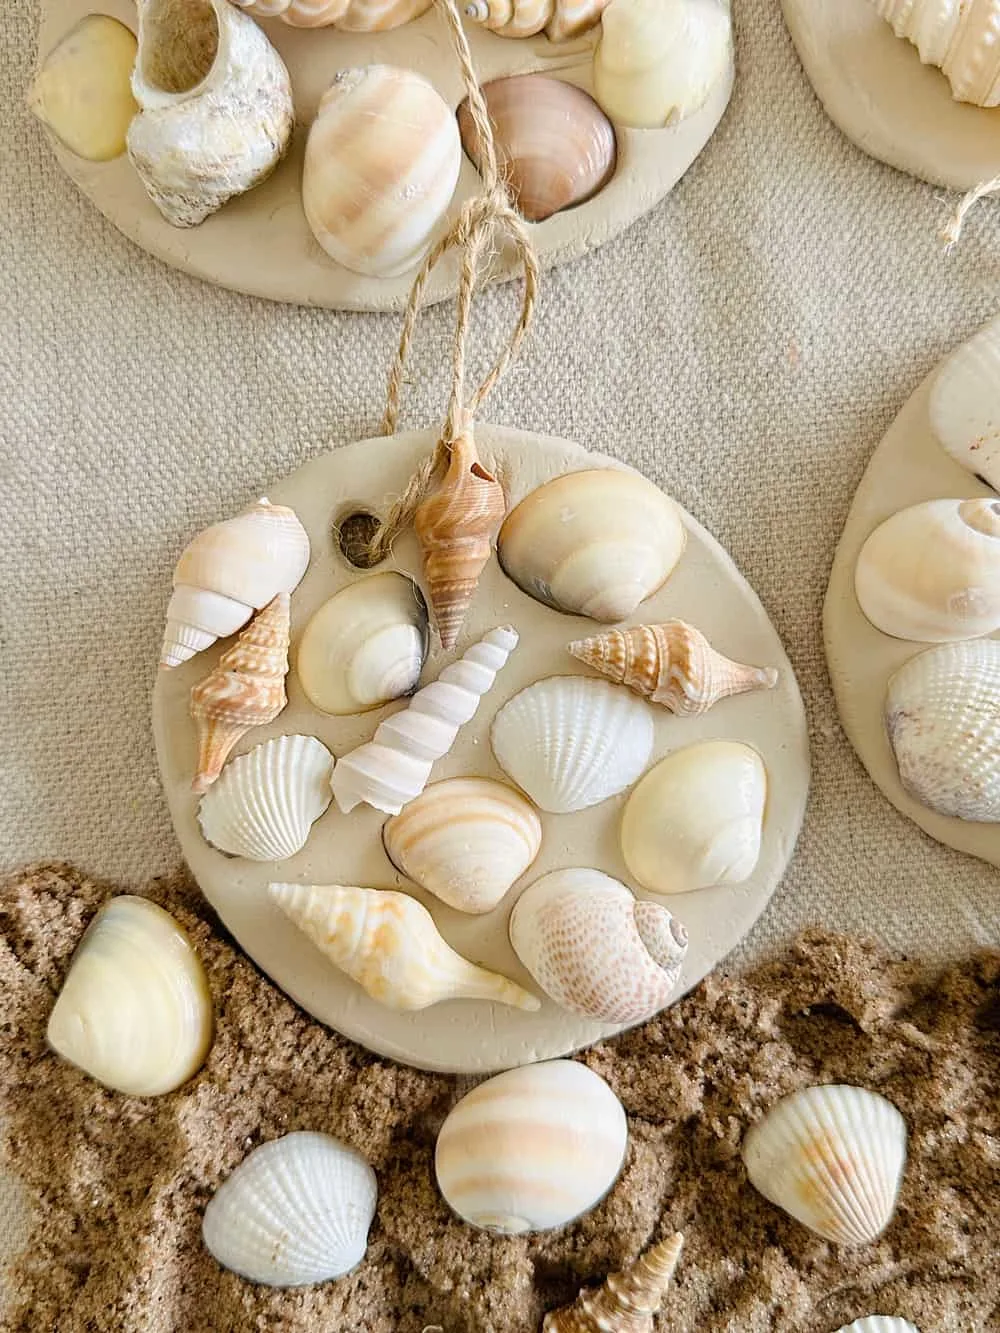
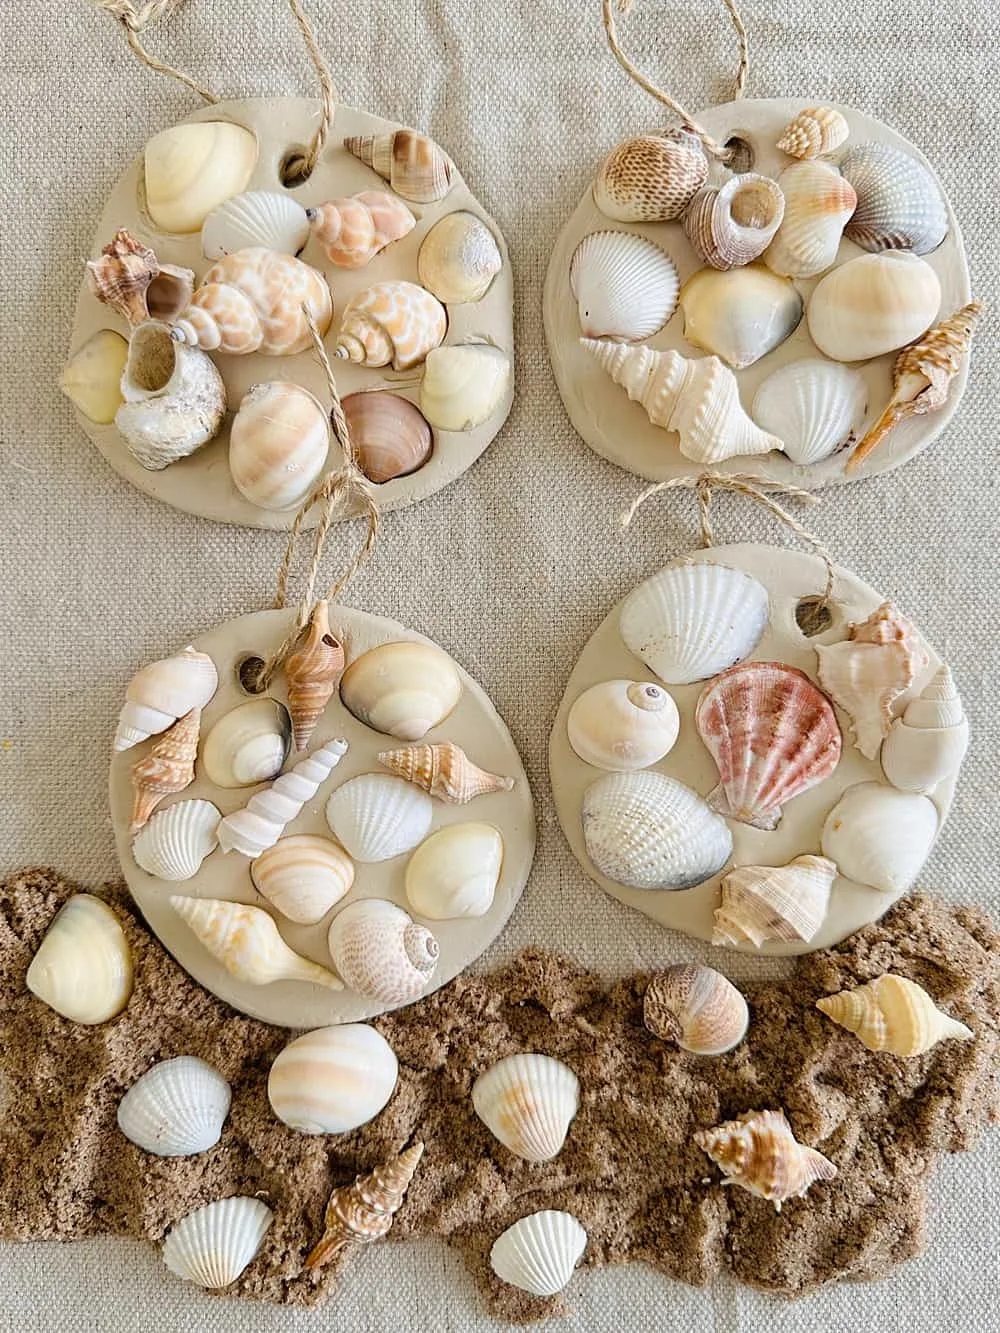
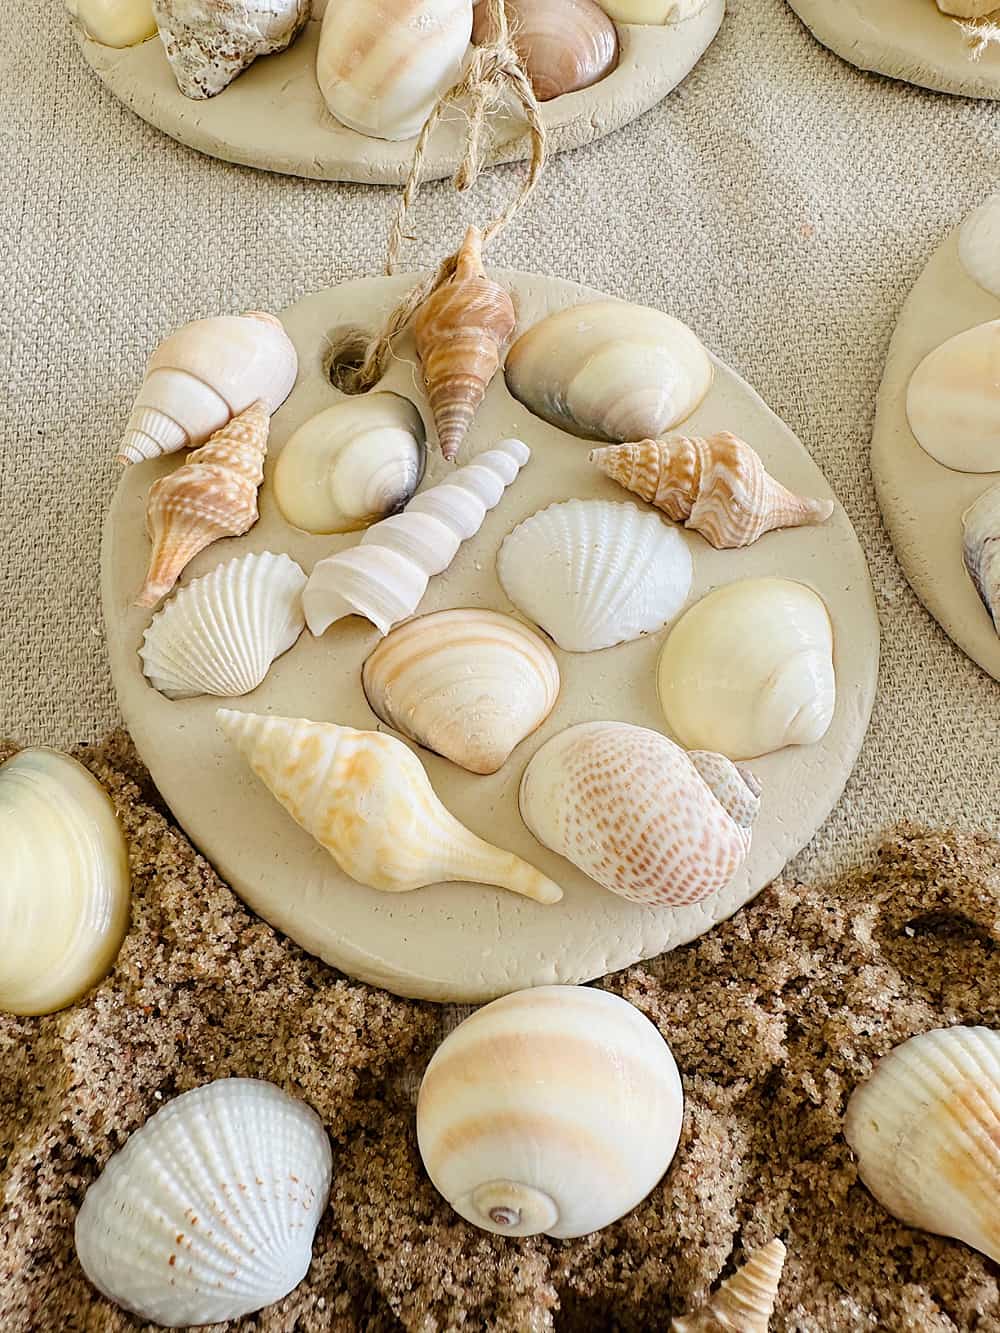
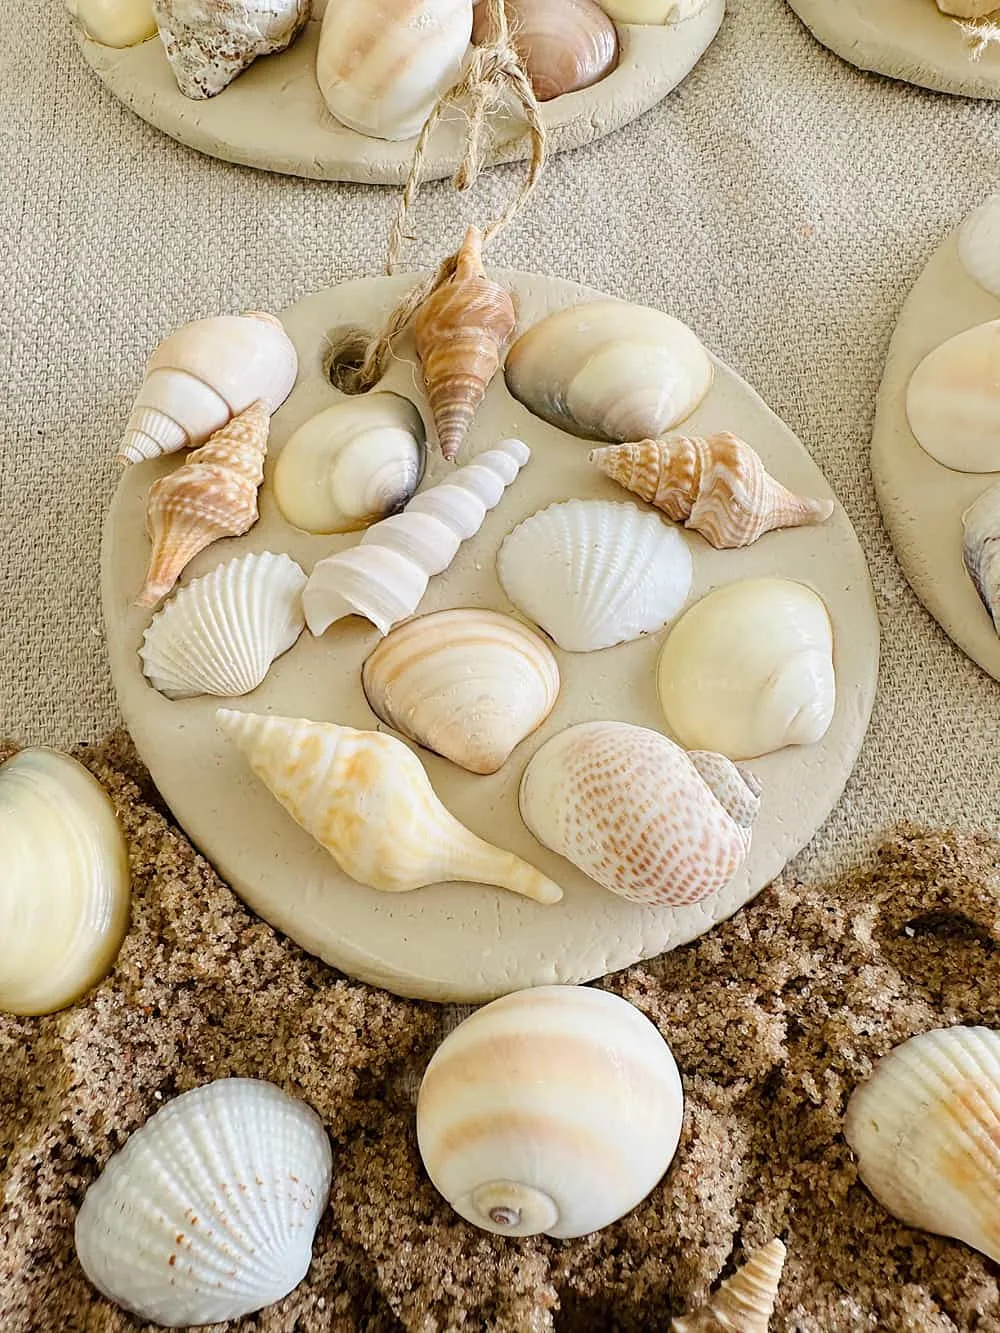
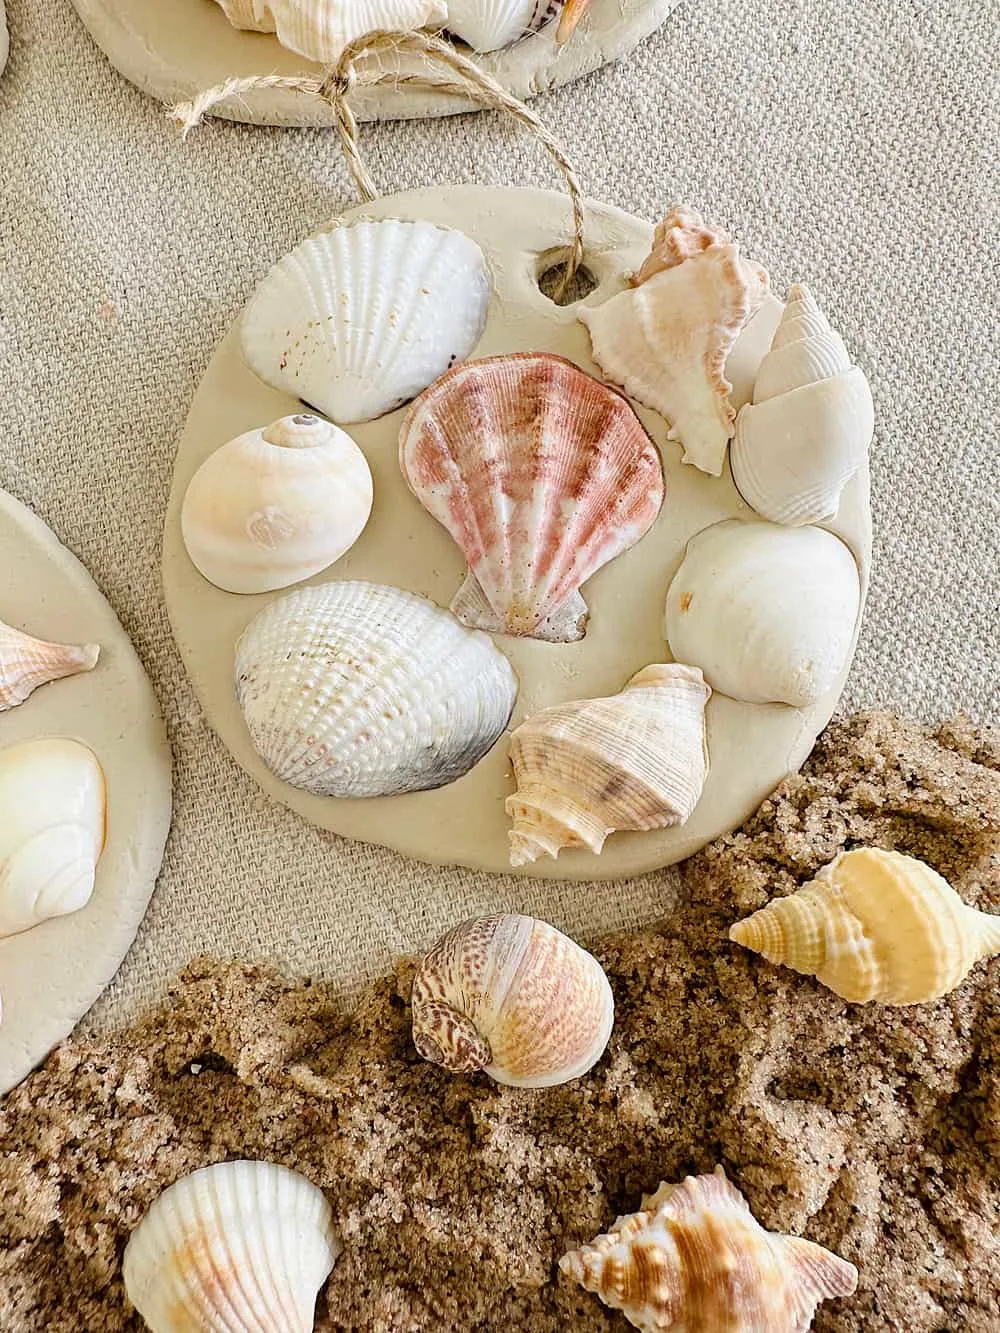
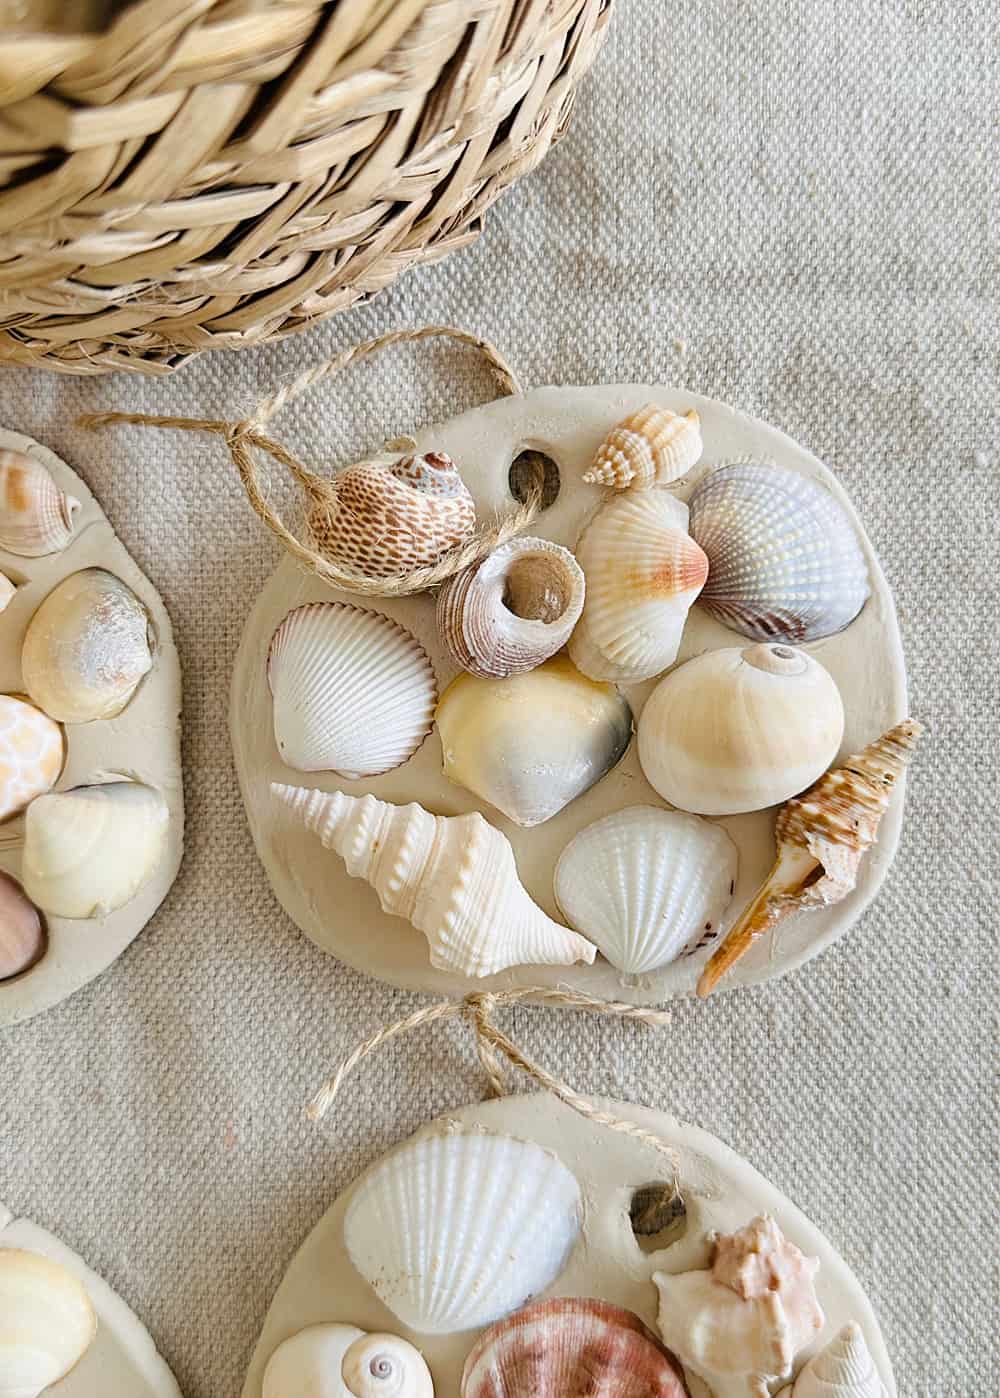
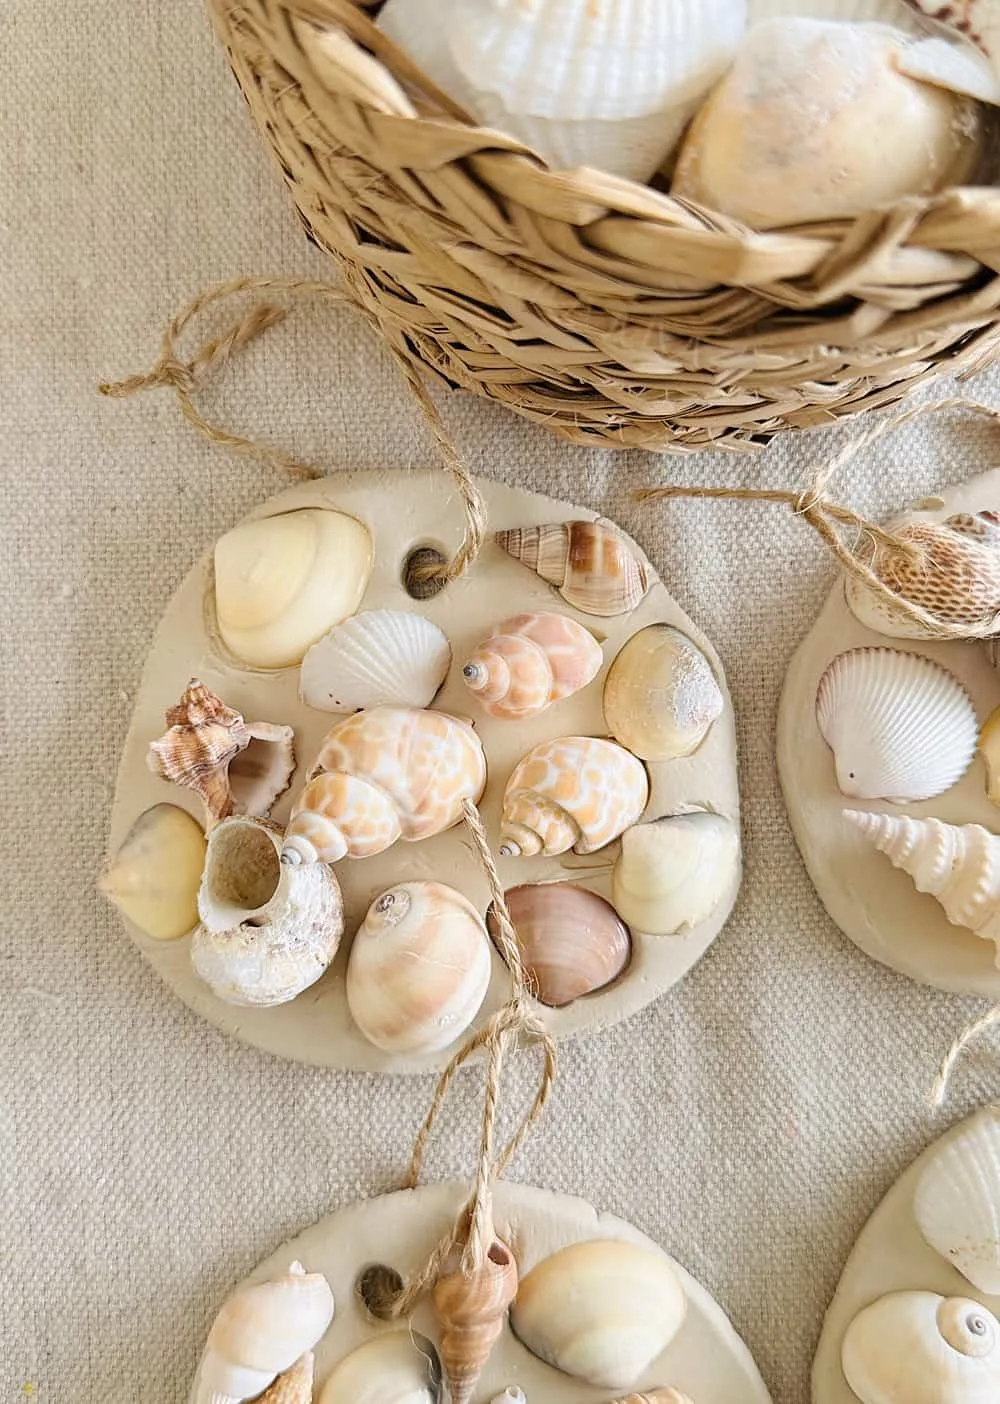
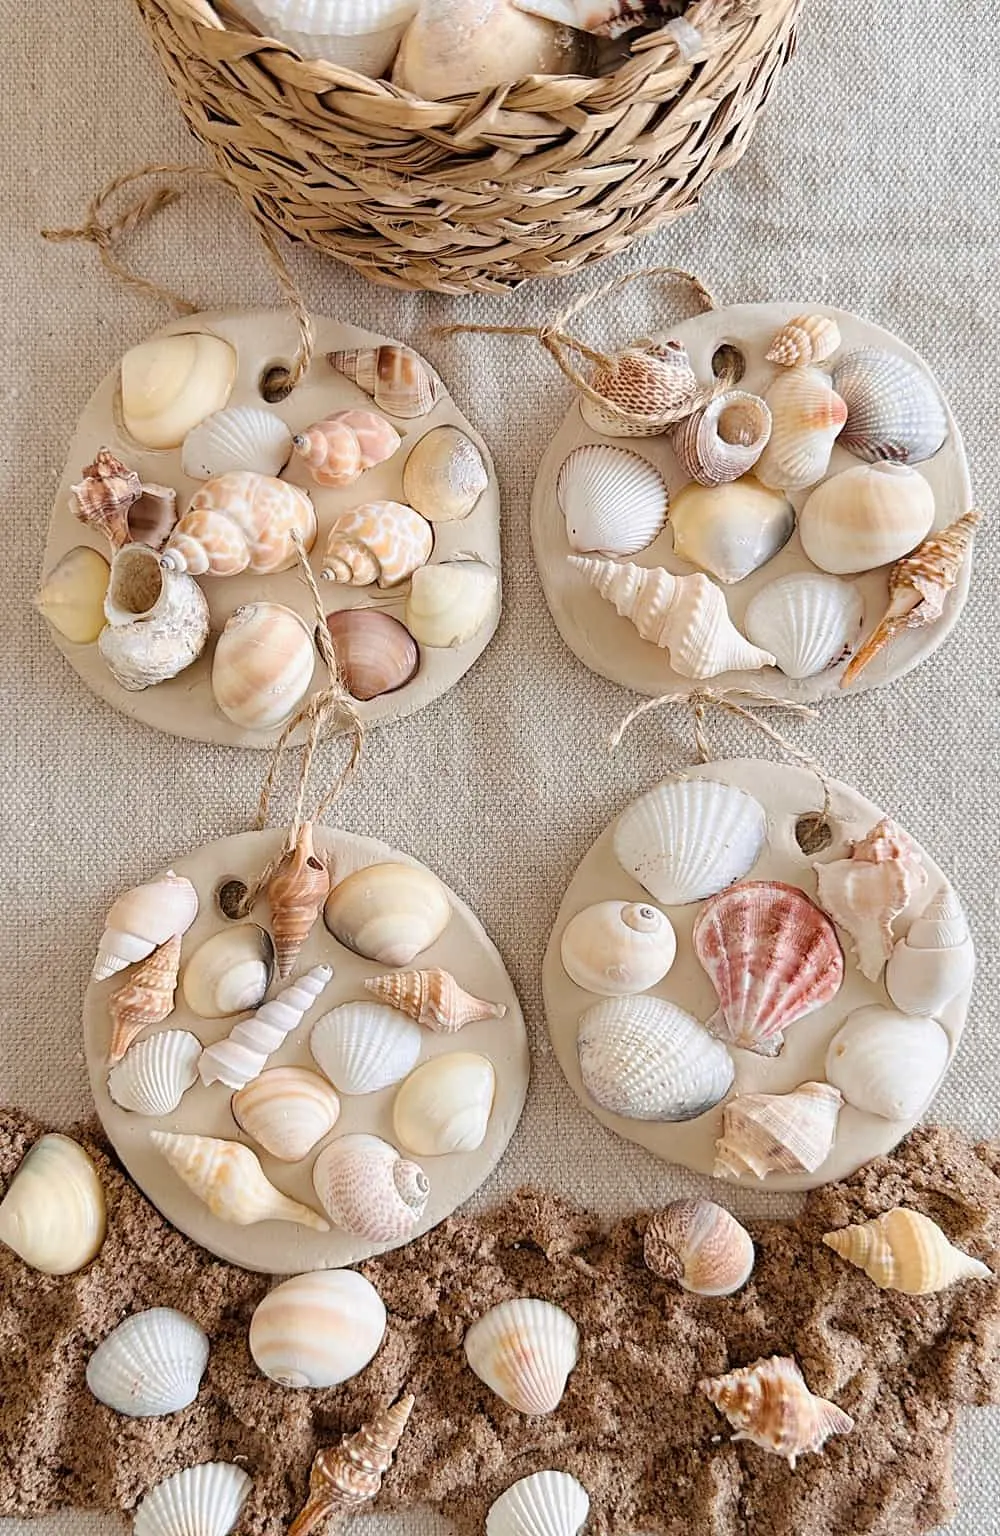
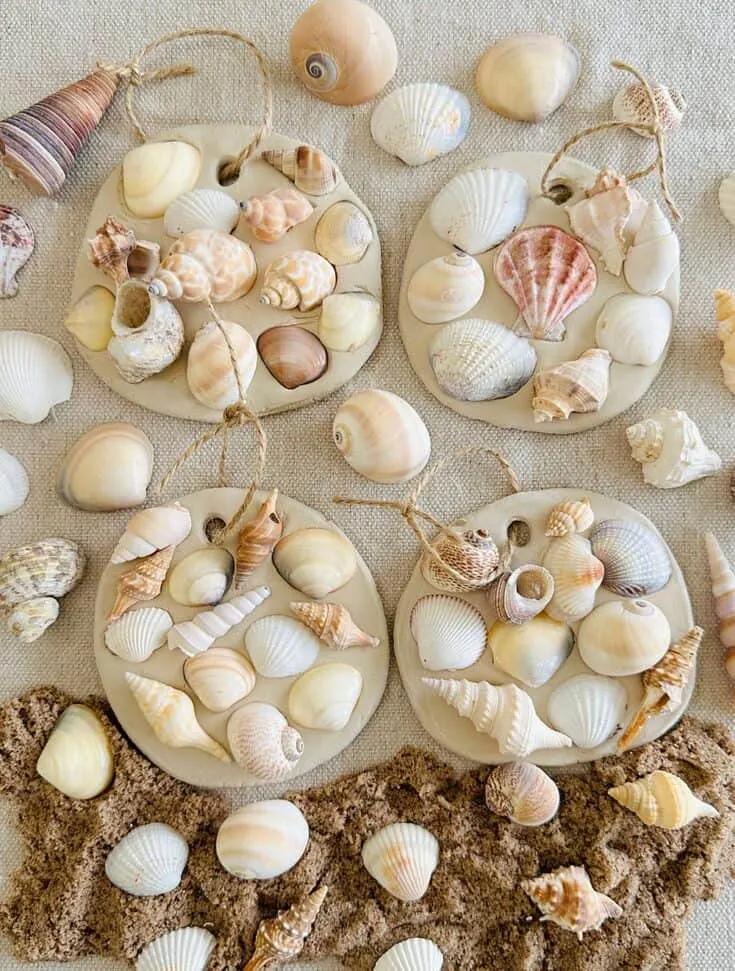
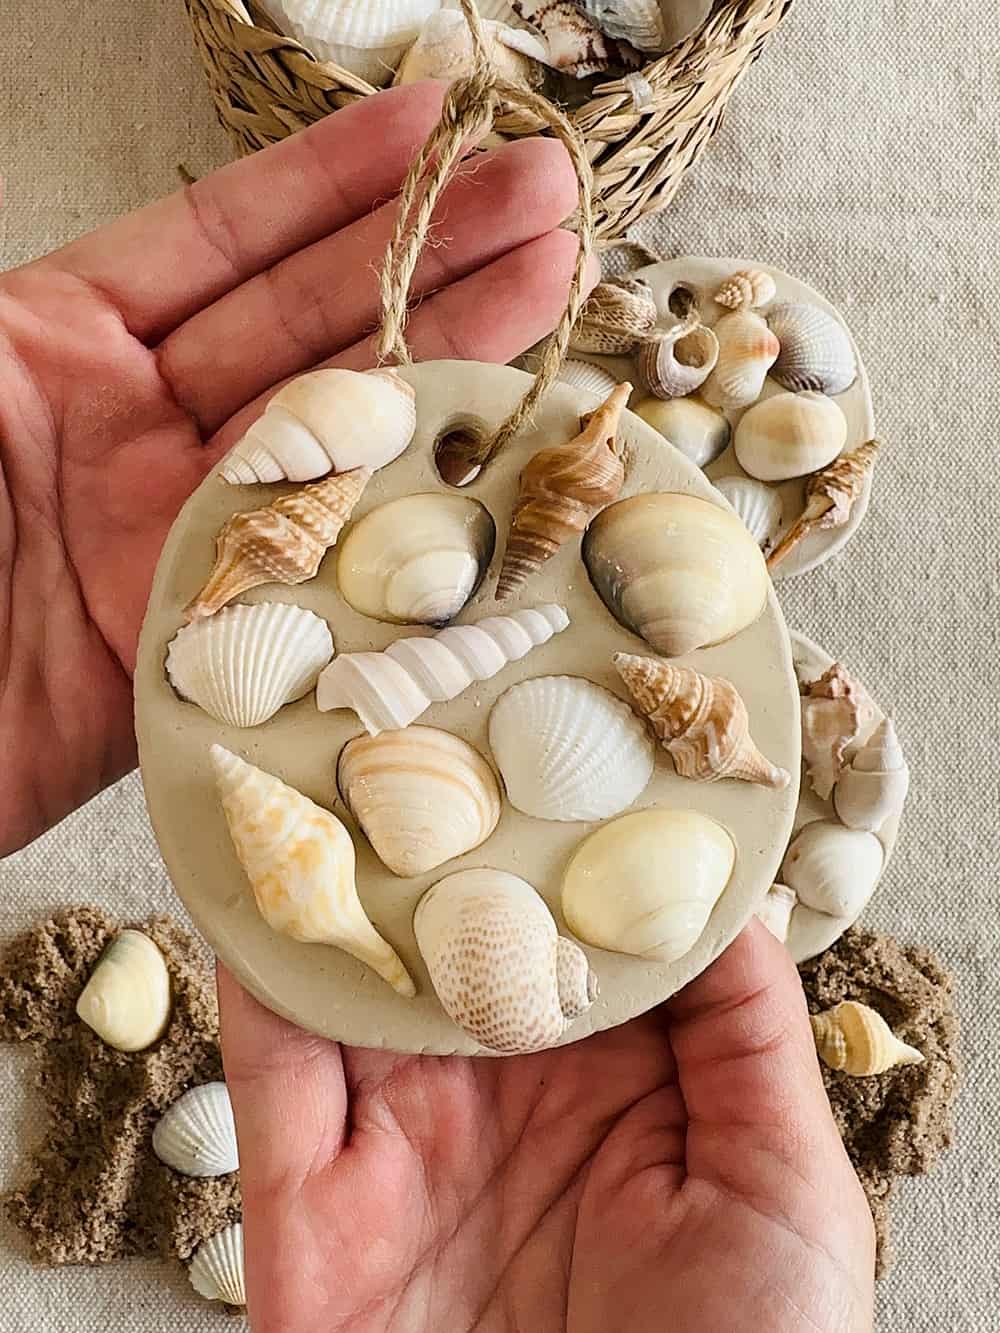
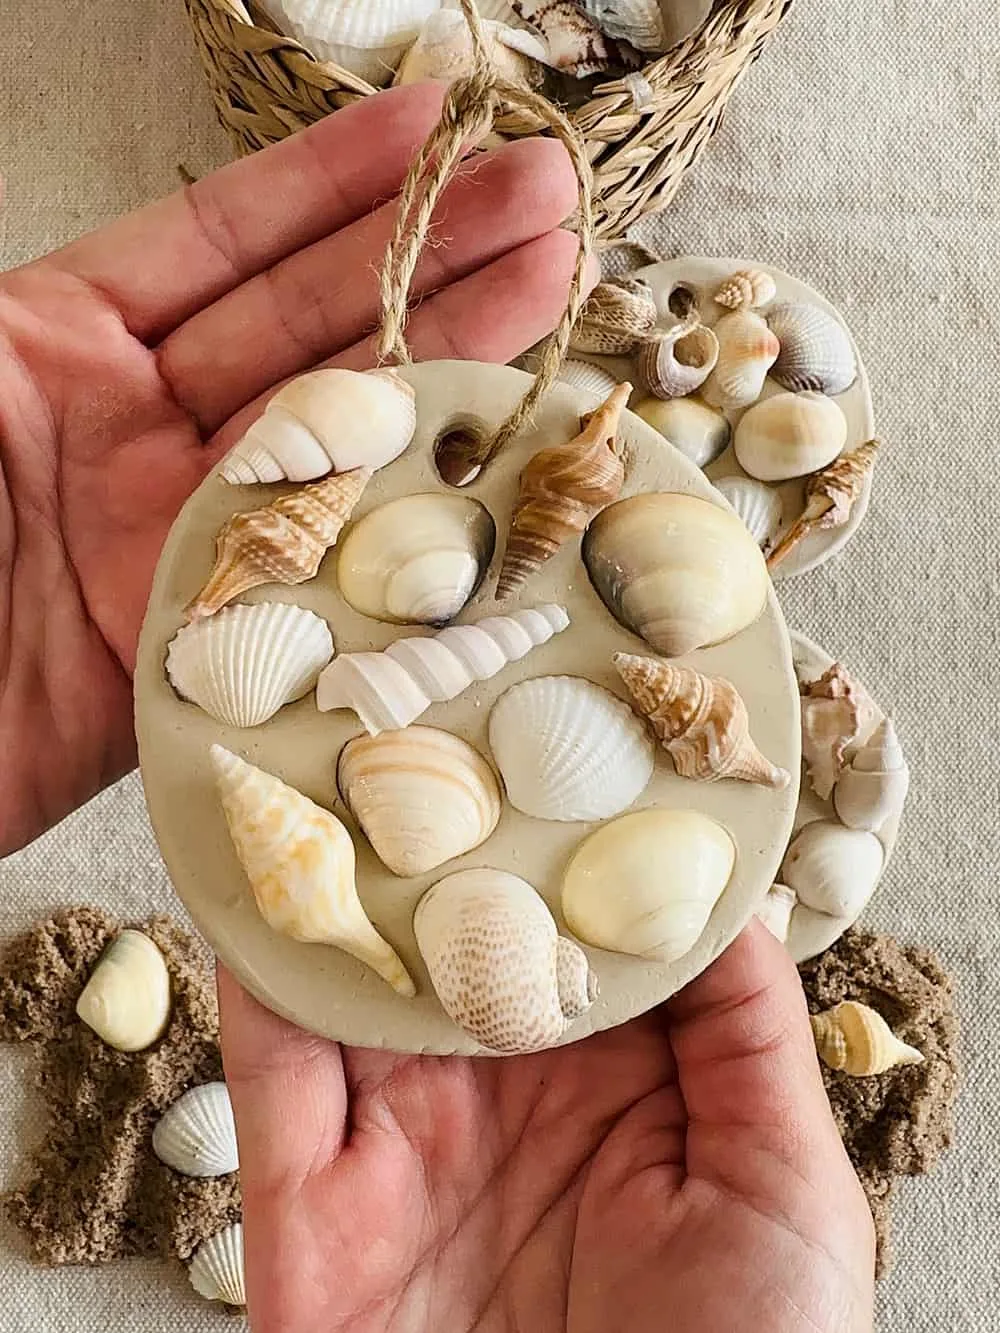
Dive into summer with this cute and easy clay seashell craft, perfect for summer crafting with the kids. Using only air-dry clay, seashells, and twine, you can create adorable hanging shell ornaments, bringing a bit of the beach into your home.
Summer is in full bloom, making it the perfect time to dive into some fun, easy, and creative activities with your little ones. Today, I’m excited to share with you an adorable beach DIY project—this clay seashell craft that can be easily made with your kiddos. This craft ticks all the boxes: it’s simple, it’s fun, and it’s affordable!
This project brings the beauty of the seaside to your home, turning simple shells and air-dry clay into adorable hanging shell ornaments. It’s a perfect way to cherish those summer beach visits and keep the kids engaged on a lazy summer afternoon.


How do you make this clay seashell craft?
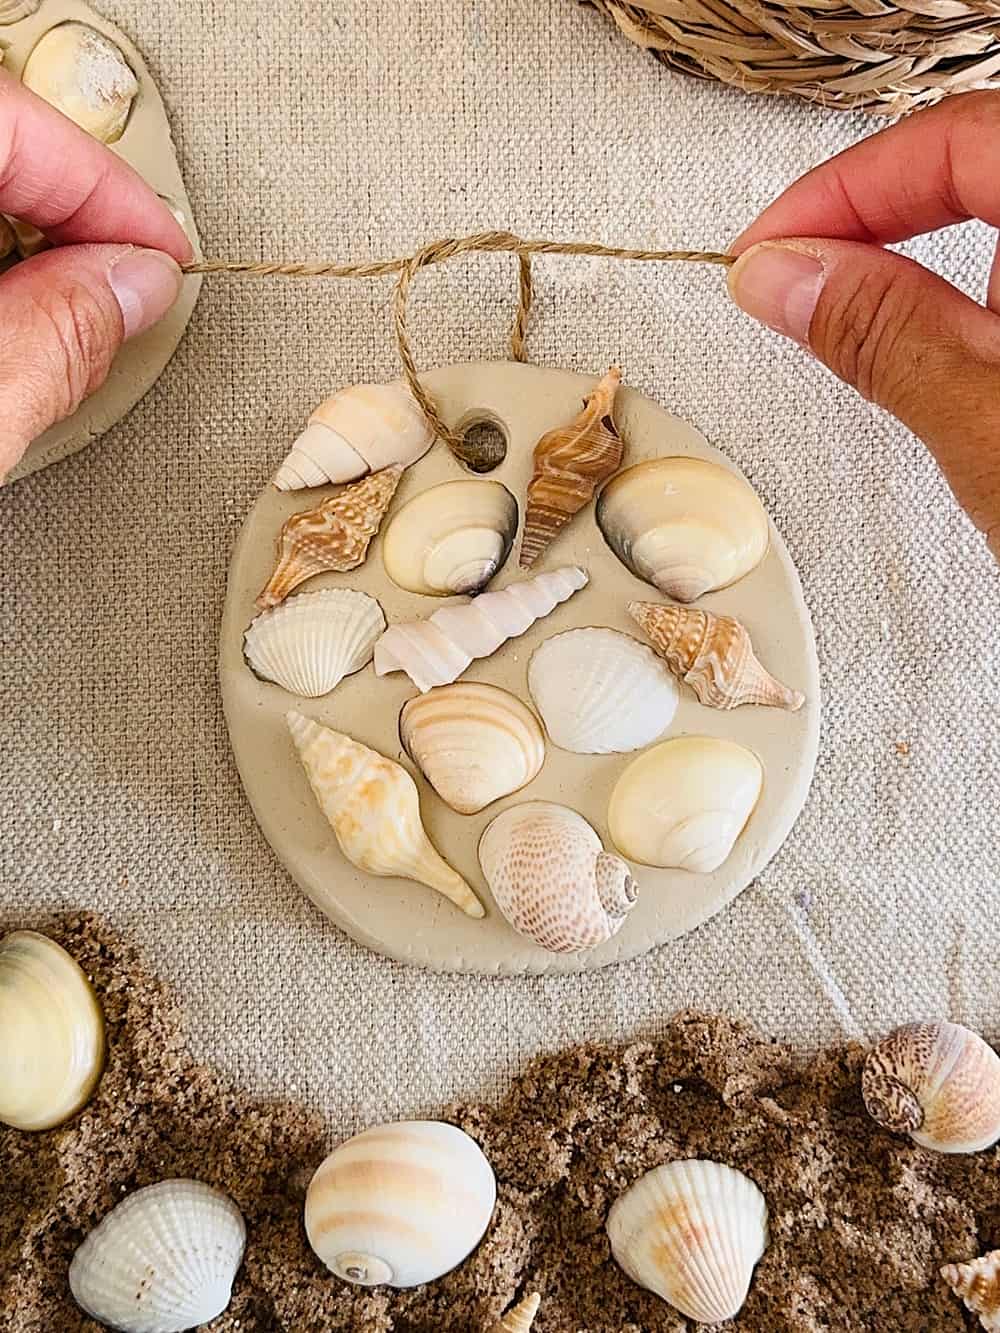
This seashell project couldn’t be simpler which is why we love it! Simply use air-dry clay (no need to bake it in the oven) and roll out into shapes. We used circles, but you can roll out into any shape. A starfish would be cute! Then simply press shells and wait a couple of days until the clay hardens. Don’t forget to use something like a straw to poke a hole when you first roll out the clay if you want to create a shell hanging.
You can also use a large cookie cutter to create fun shapes.
Where do I get seashells?
We get it, not everyone is lucky enough to live by the beach. Luckily you can get beautiful craft seashells easily at any craft store or online. They aren’t super expensive too and you can often grab a large bag for just a few dollars.
Seashell Clay Craft Materials
- Air-dry clay
- Various sea shells
- Twine
- Straw
- A small rolling pin


Seashell Ornament Tips:
- Make sure you roll out your clay thick at least 3/8 to 1/2″ thick so there is plenty of give to press down your shells. If you don’t press deeply during the drying process the clay will shrink and your shells may come off! If this happens, don’t panic and use a dot of hot glue or strong craft glue to glue them back in shape.
- Figure out your shell design before adding it to the clay so you don’t have any empty gaps or spaces
- Use a large cookie cutter to cut out fun shapes
- Create your hole with something rounded like a straw before the dough gets too soft
Ways to customize your shell craft
- You can add some gel coloring or paint to your clay and knead it a color before rolling out
- Paint your shells after they are on clay – watercolors in colors of the sea would be beautiful!
- Add biodegradable glitter for some sparkle on the shells. Add a layer of Mod Podge then sprinkle glitter over to adhere.
- Spell out a name using shell on your clay for a personalized shell display


INSTRUCTIONS
Clay Seashell Craft

Materials
- Air-dry clay
- Various sea shells
- Twine
- Straw
- A small rolling pin
Instructions
Step 1: First, roll out your air-dry clay with a rolling pin on a smooth surface. Parchment paper or cheese cloth works. Aim for about 3/8" to 1/2" thickness to ensure durability.
Step 2: Use a straw to poke a hole at the top.
Step 3: Now, it's time for the real fun! Ask your kids to press their chosen shells into the clay. Make sure they press hard enough to create an imprint, but not so hard that they break the clay.
Step 4: Let your clay shapes dry for a few days until the clay has hardened.
Step 5: After the clay has fully dried, thread a piece of twine through the hole at the top, and voila! You have created a cute, summery shell ornament.
Final Thoughts
With just a few materials and steps, you can create a beautiful keepsake of your family’s summer. These hanging shell ornaments can be used to decorate your home, used as a unique gift, or saved as a precious memory of your kids’ creativity.


Agnes Hsu is a mom of three and has been inspiring parents and kids to get creative with easy activities and family friendly recipes for over 10 years. She shares her love for creative play and kids food to her 2MM+ followers online. Agnes' commitment to playful learning and kindness has not only raised funds for charity but also earned features in prestigious nationwide publications.