DIY CLAY CACTUS CRAFT
By using this site, you agree to our Terms of Use. This post may contain affiliate links. Read our disclosure policy.
Follow us on Instagram for more fun ideas for kids!
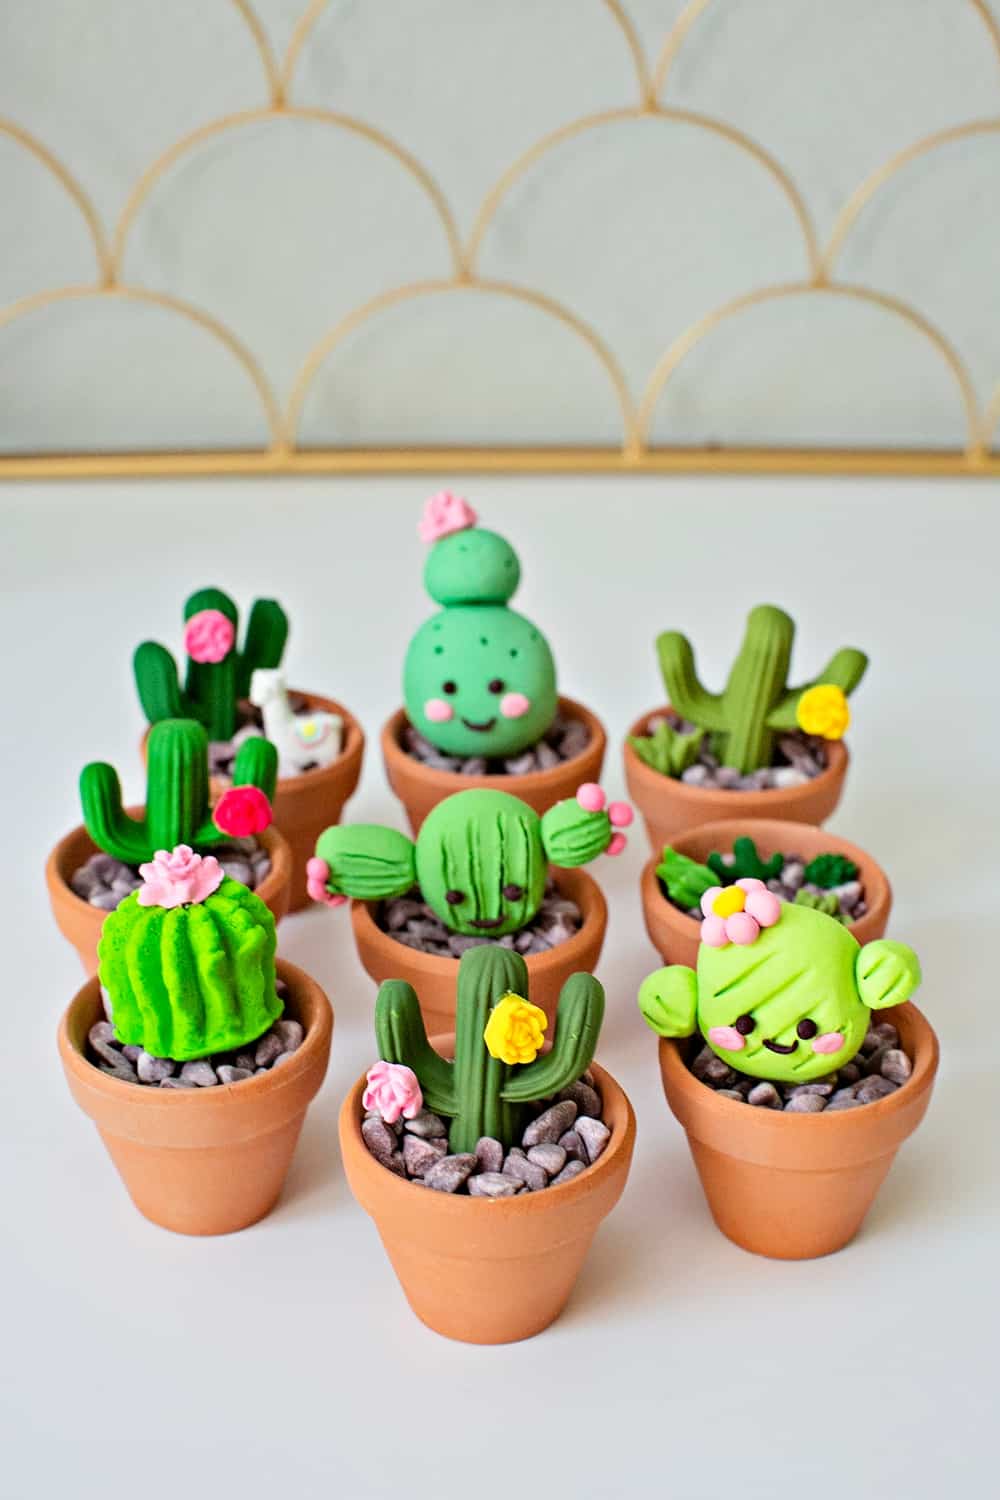
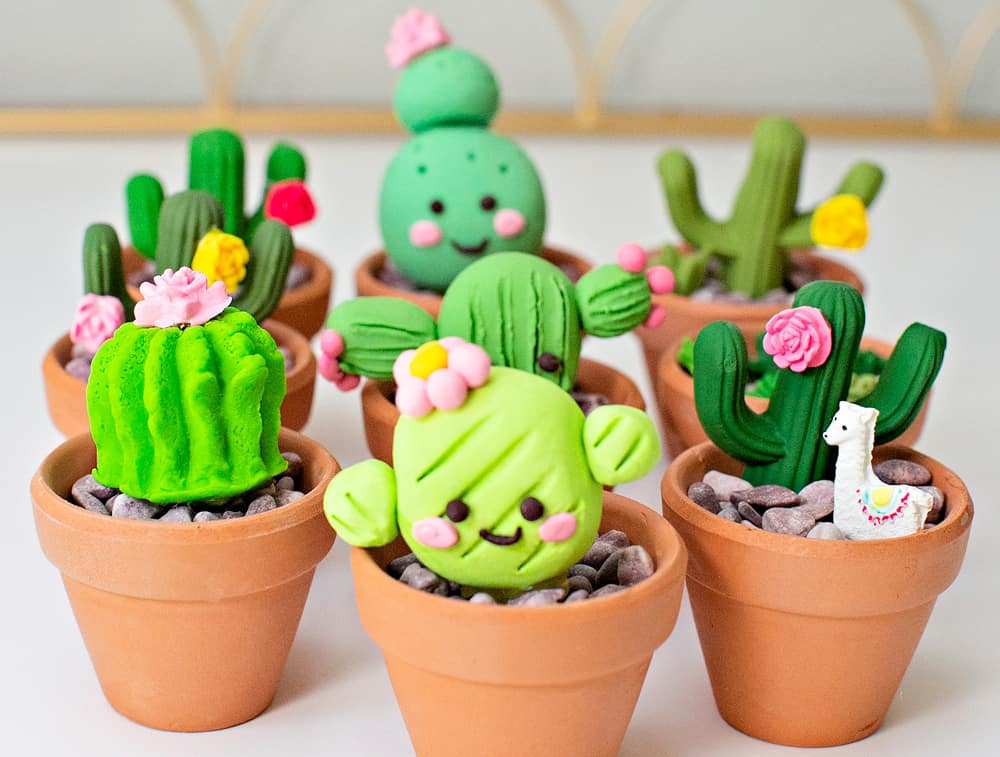
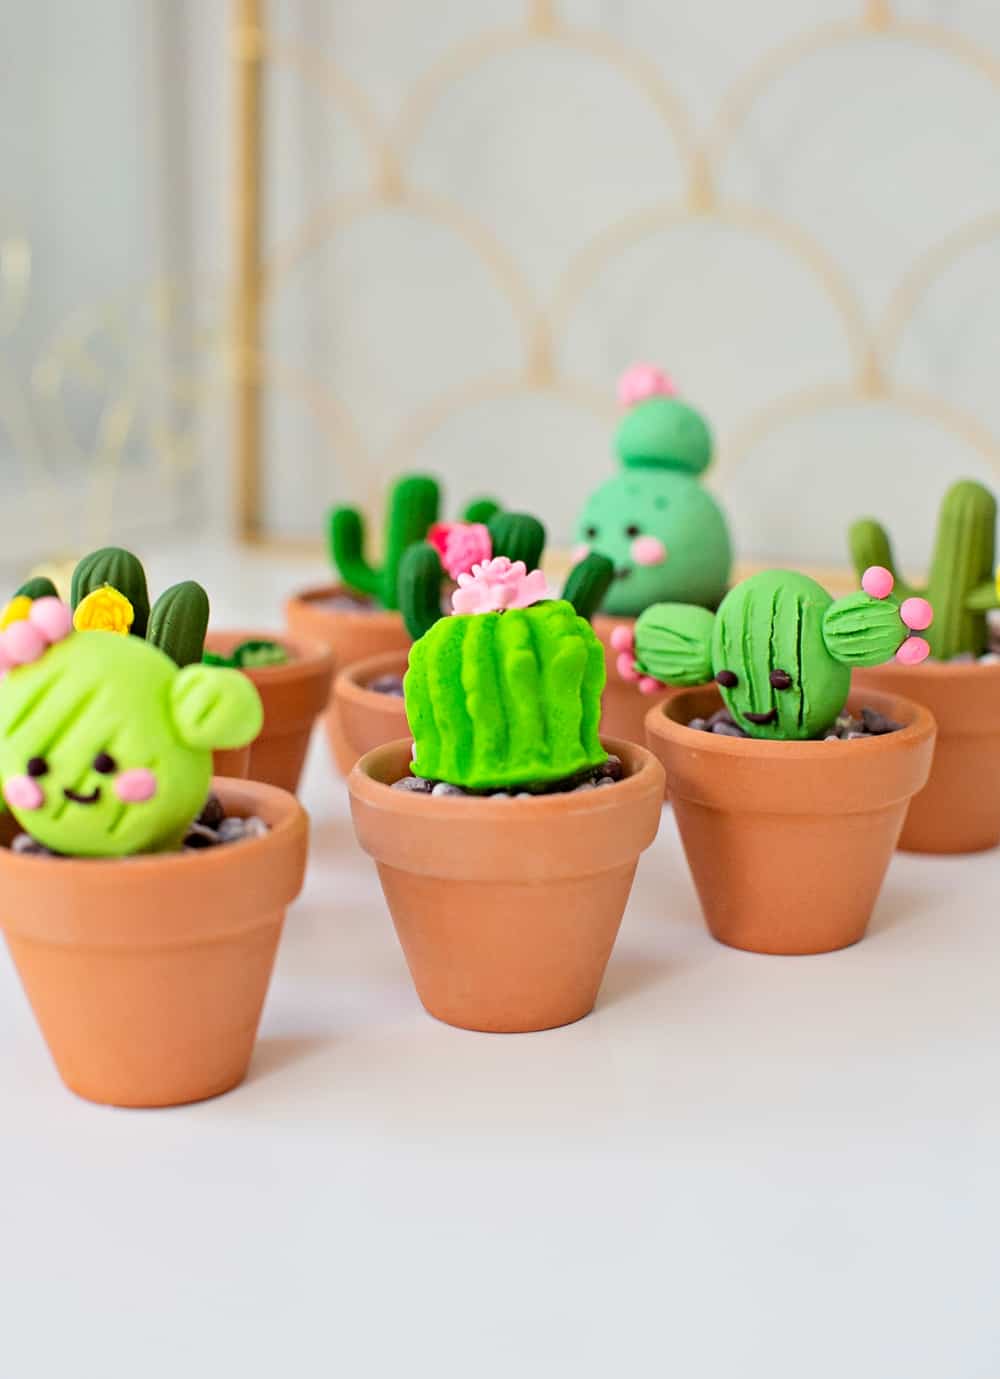
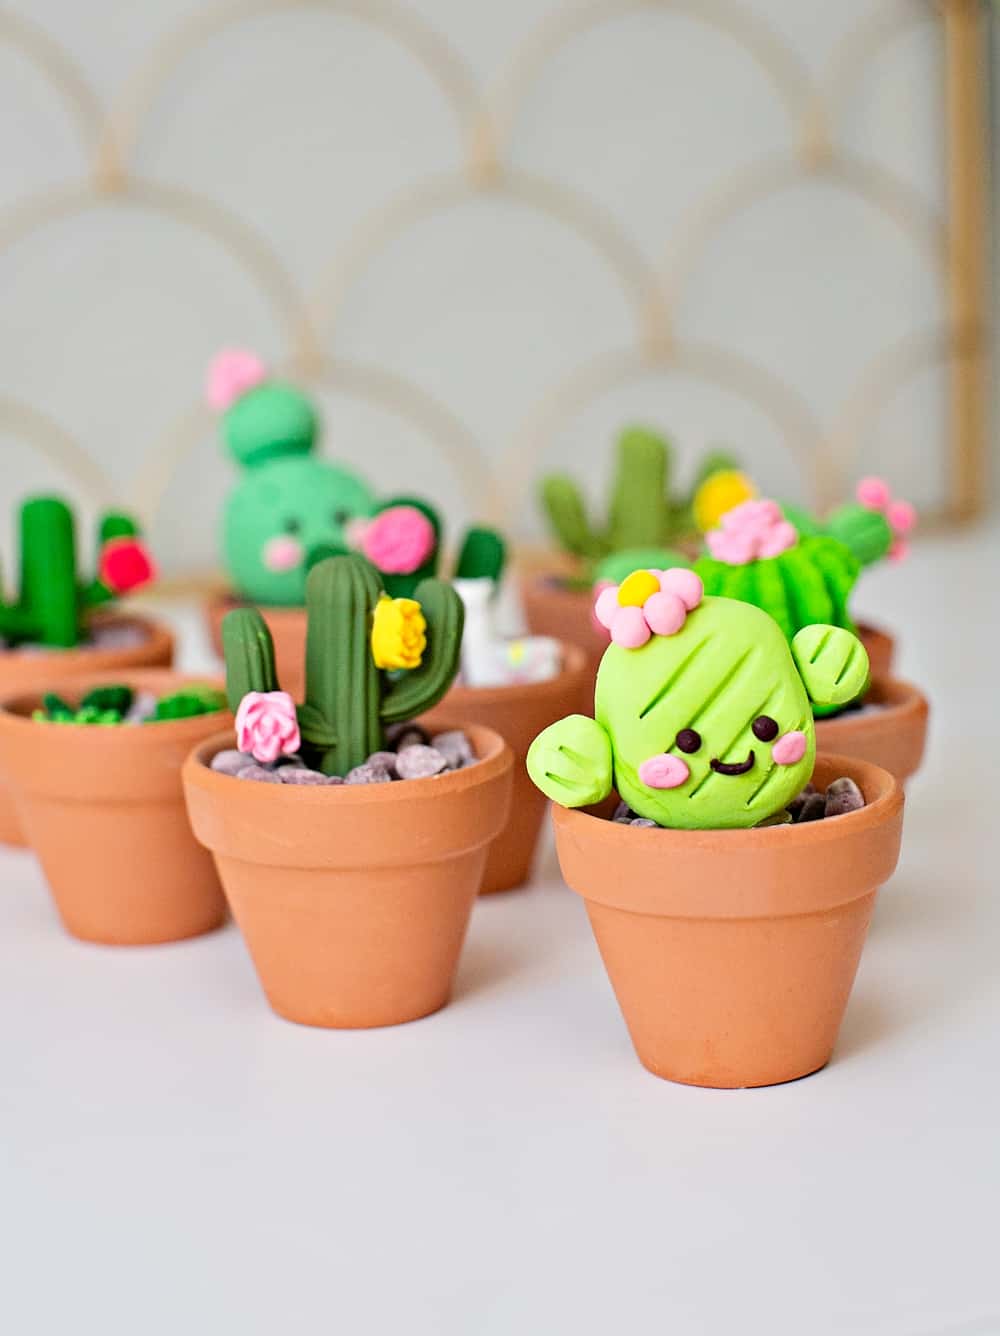
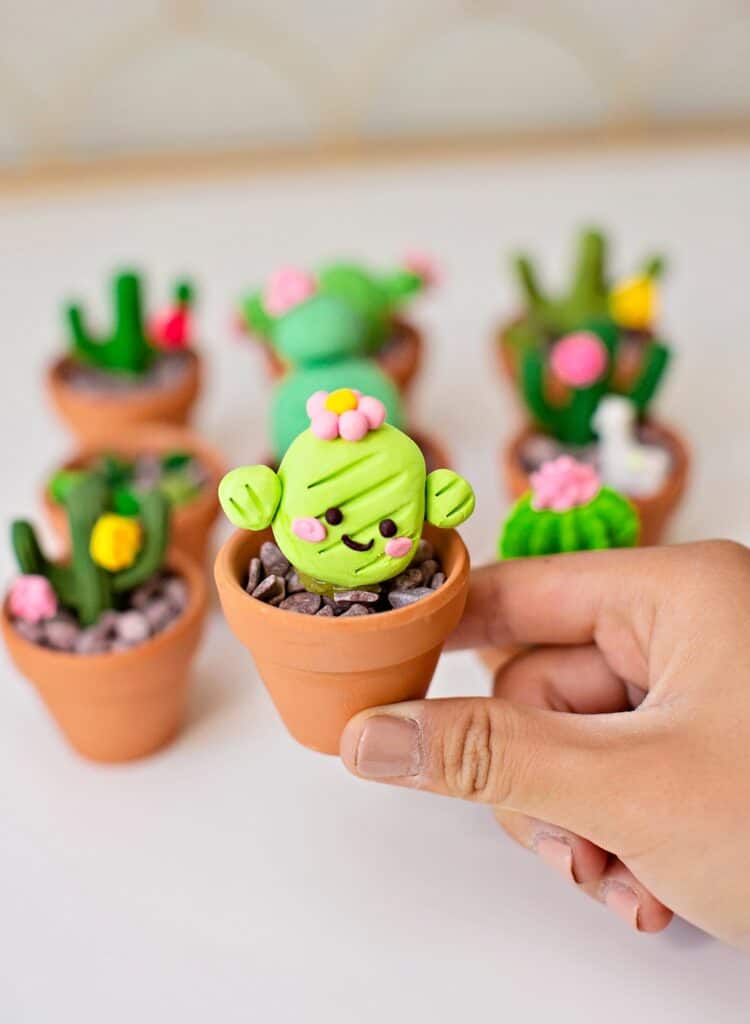
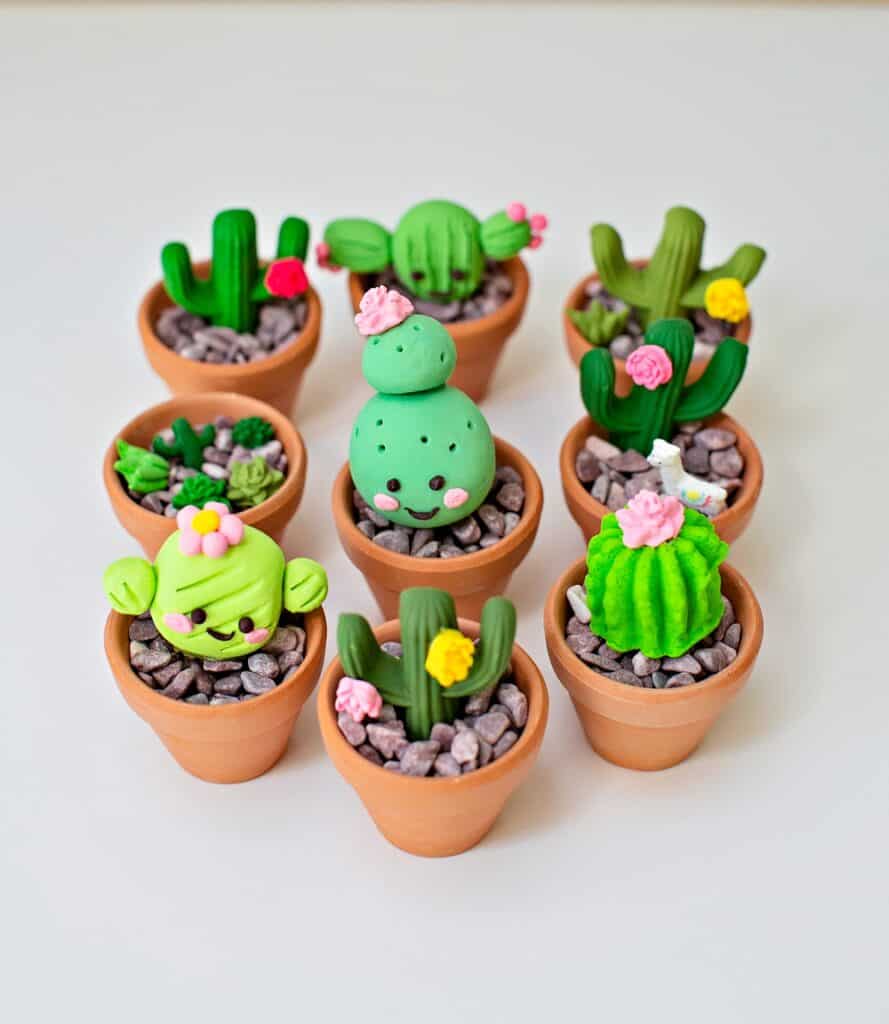
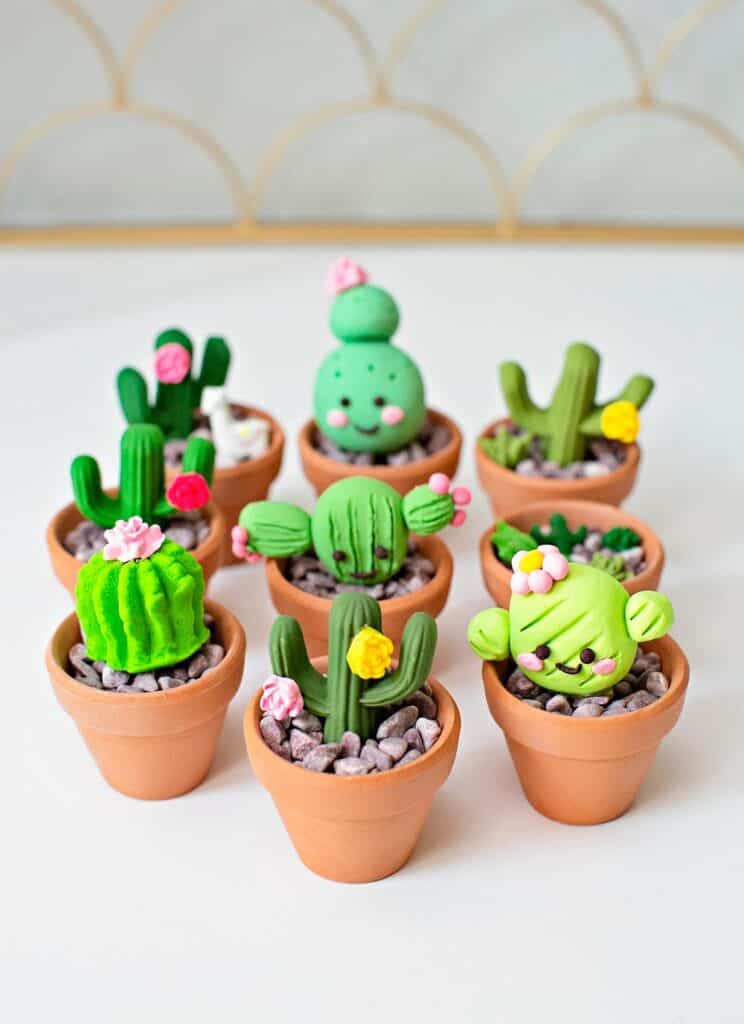
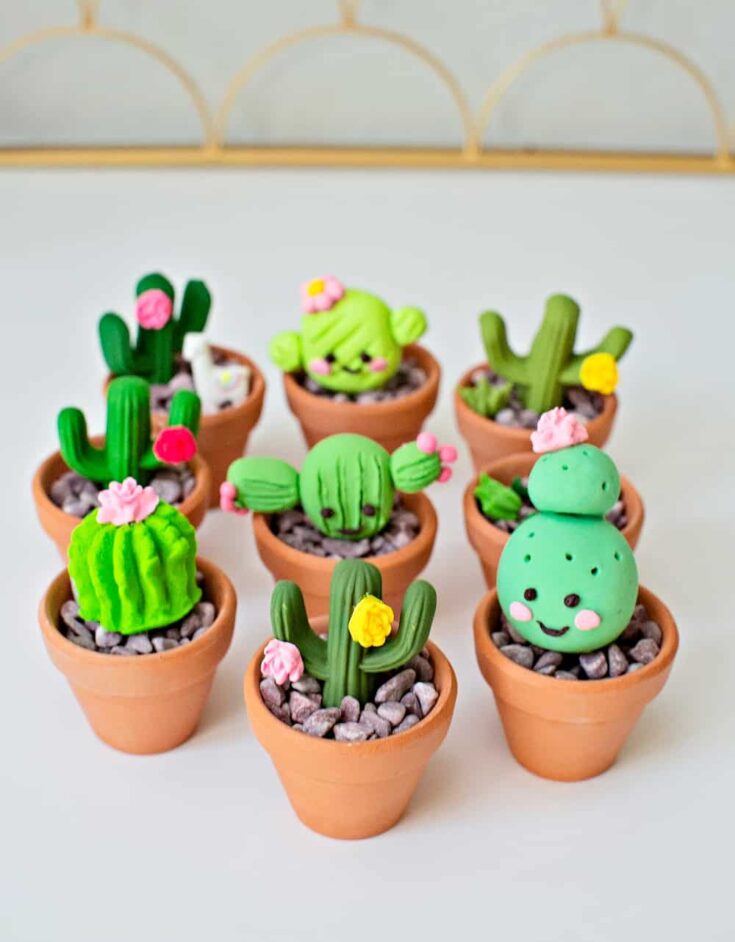
This adorable Clay Cactus craft is a fun polymer clay craft for kids! Make clay cactus and succulents easily with baked clay.
Kids love crafting with clay and this cute DIY clay cactus craft is the perfect planting craft to keep little hands busy and creating! We show you two methods here to make clay cactus and succulents: 1) with clay molds and 2) free-hand. You will definitely need some basic supplies for this craft, but you can re-use several of them (like the molds and clay molding tools) so it's worth the investment if you plan on making a lot of clay plants in the future. Are you ready to make the most adorable little clay planters? Keep reading below for the materials and instructions!
Make sure to watch the video in this post to see how to make these clay cactus pots.
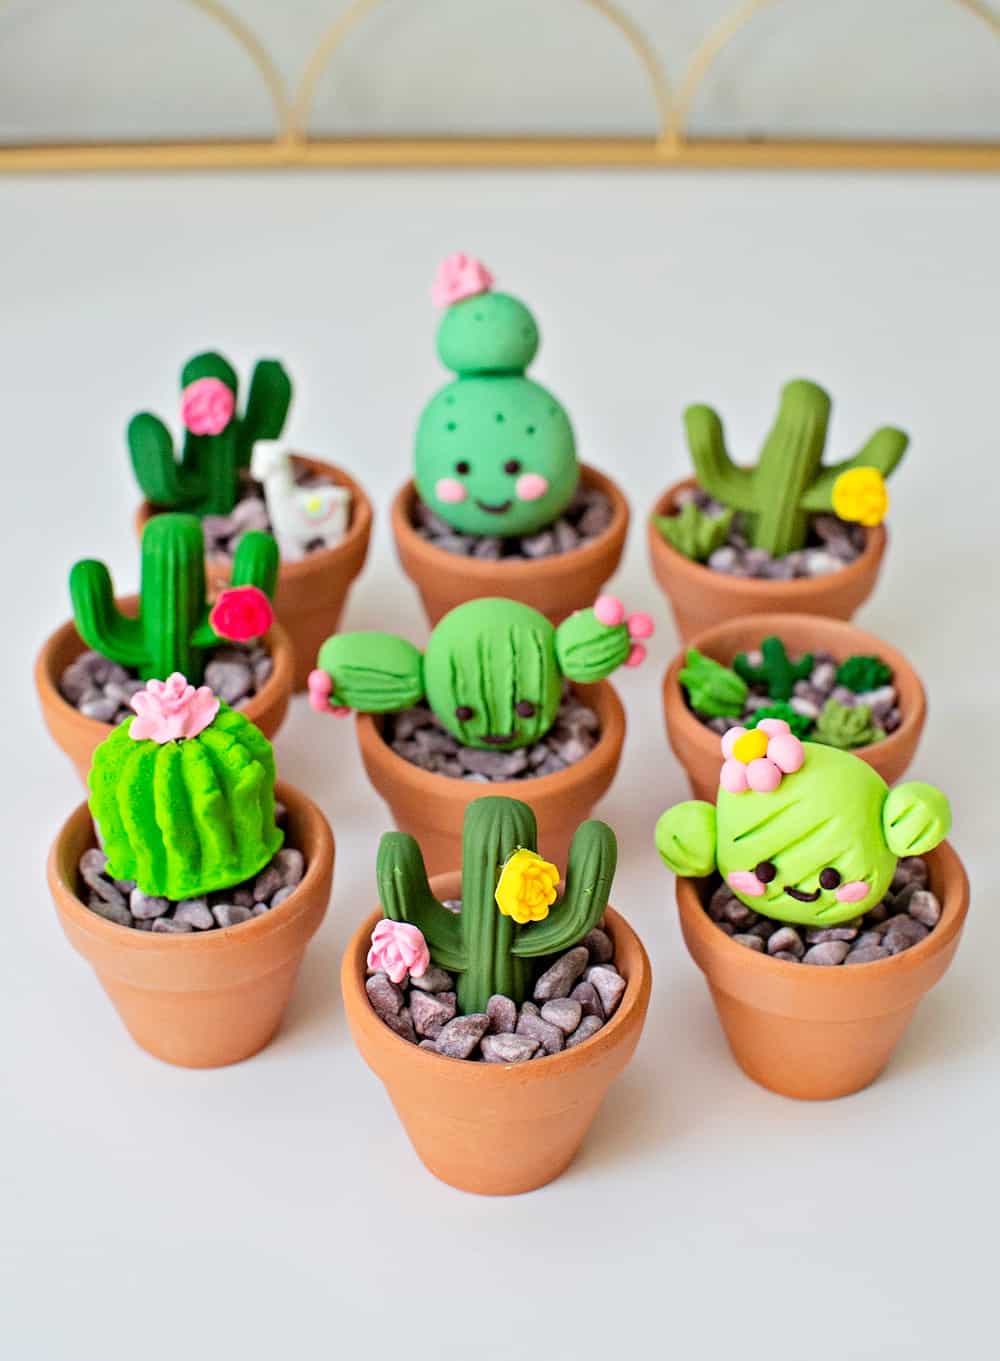

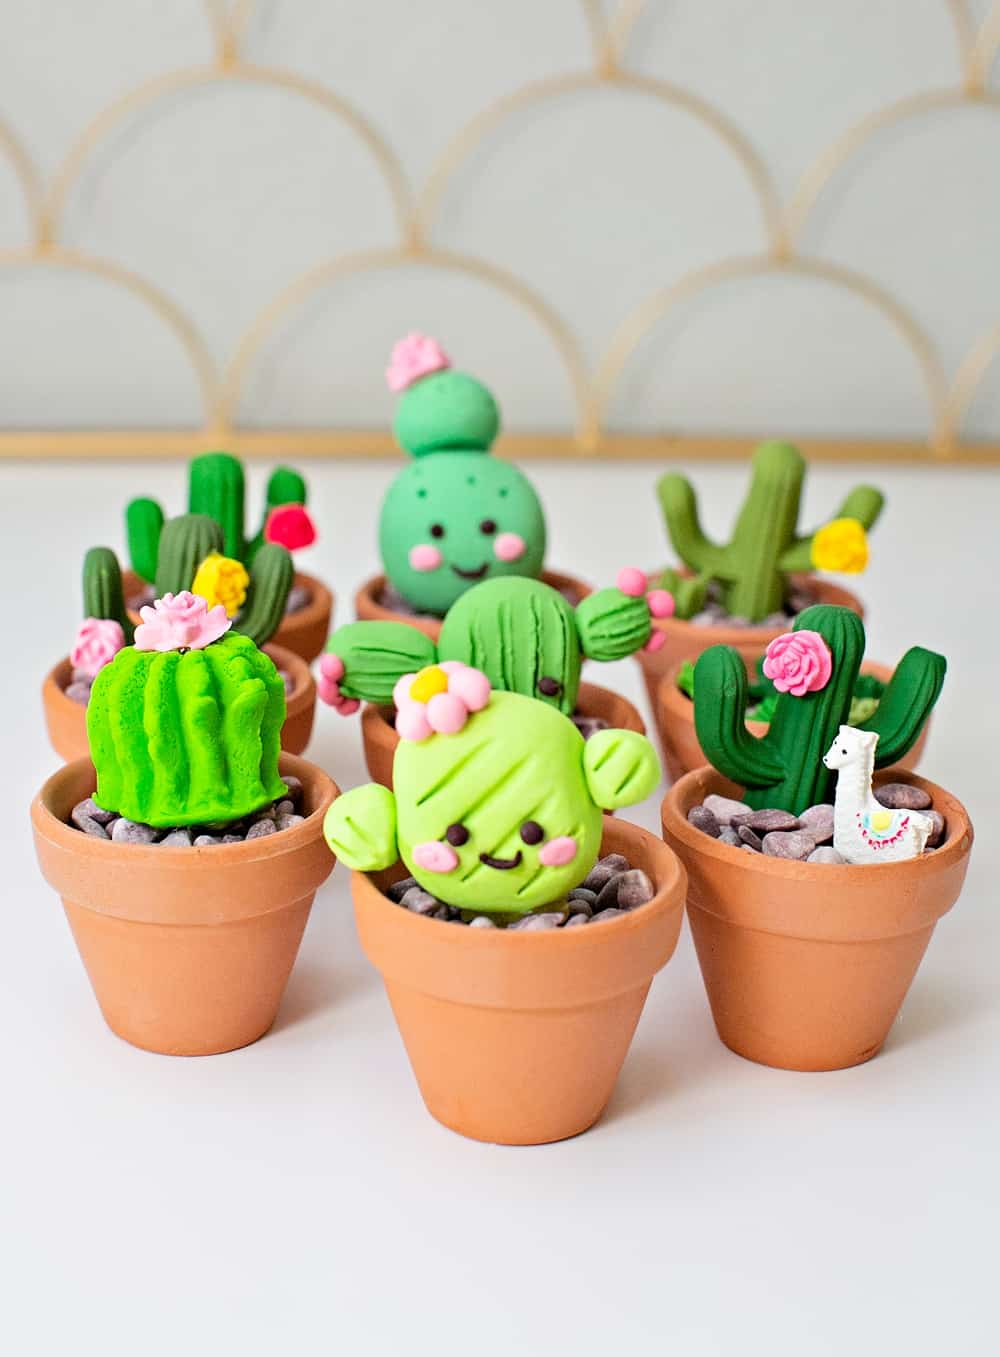
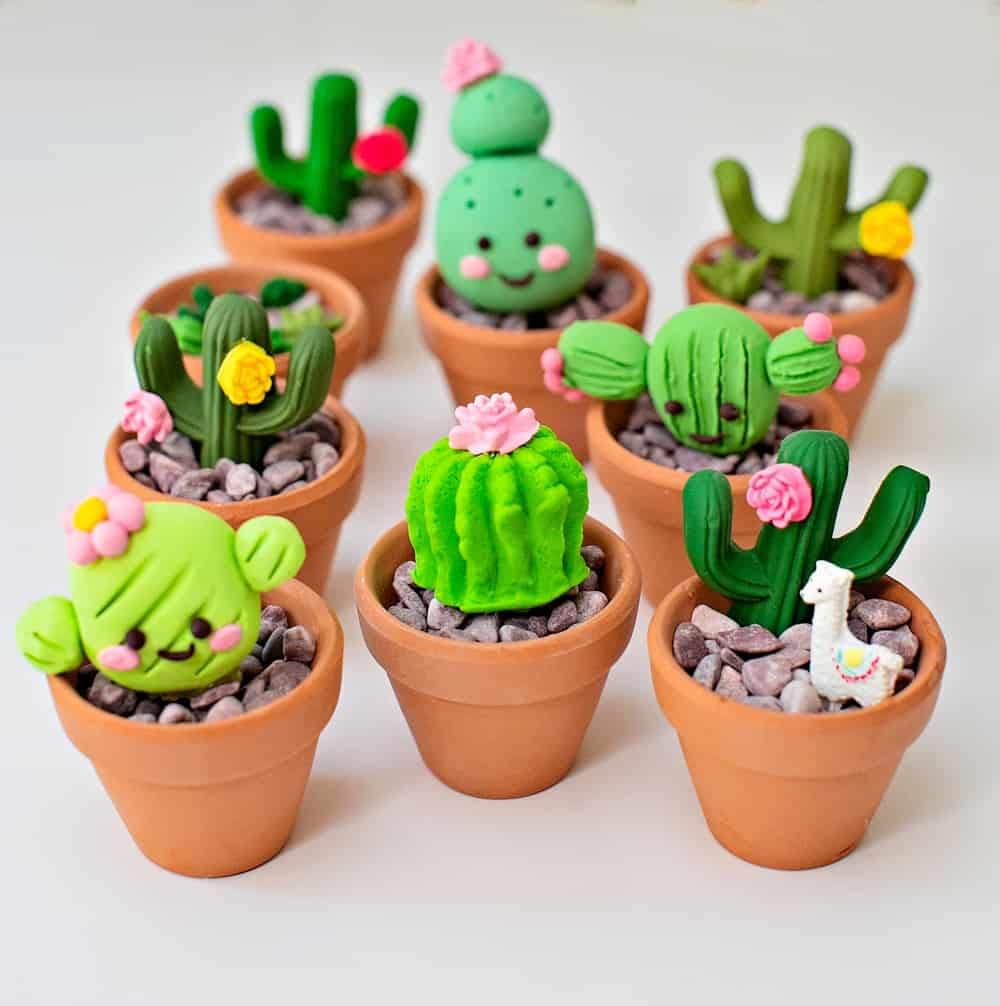
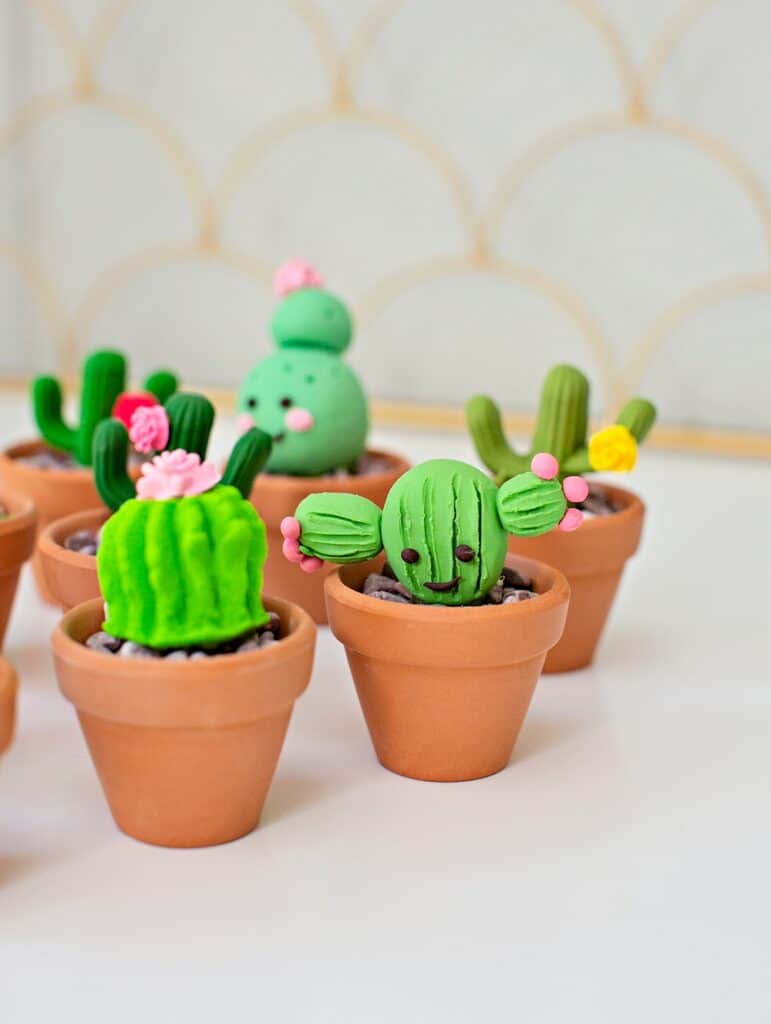
Before we get into the materials, we wanted to credit this Reddit post for inspiring some of our cactus designs! Make sure to read carefully all the details below, though, because did make our pots and some cacti differently.
What materials do you need to make polymer clay cactus?
- You will need polymer clay like Sculpey that is easy to shape and bake. Once it is baked it dries hard and is more durable than basic air dry clay this is the reason why we chose this type of clay. You will need various shades of green clay. OR you can color your own clay. Make sure you have some black clay for tiny eye details and colored clay, like pink and yellow if you plan on making faces and adding flowers.
- We used cactus silicone molds and also got some succulent molds from Etsy.
- Clay molding tools are highly recommended if you are using molds to tightly pack the clay inside.
- Toothpicks for adding details like lines.
- Liquid clay that acts as clay glue to hold parts together went they bake - you don't want regular glue fumes in your oven!
- Tiny terracotta pots and rocks or you can just add brown clay to the pot instead.
- Hot glue gun if you want to glue down your cactus to the rocks and keep them from toppling over.
This useful video shows you how to pack clay inside silicone molds.
DIY CLAY CACTUS CRAFT
Materials
- Polymer clay (we used Sculpey) in green shades, plus various colors for flowers and black for face details.
- Cactus and/or silicone molds.
- Clay molding tools.
- Toothpicks for adding details like lines.
- Liquid clay to act as "glue"
- Tiny terracotta pots and rocks
- Hot Glue gun
Tools
- Parchment paper, oven, baking tray
Instructions
- Always knead your dough well so it's soft and pliable before using.
- If using the molds, make sure you pack the clay tightly (even more than you think!). This useful video from the Etsy shop we got some of our molds is very helpful in showing how much clay to pack down silicone molds.
- Release your cactus or succulents carefully and lay down parchment paper.
- If you are free forming the cactus take small amounts of clay and make shapes out of them. A simple one is a large ball with a smaller ball on top. We also did some oval shapes with two arms sticking out. Use a toothpick to add lines before baking.
- If making faces, take tiny pieces of black or brown clay and create tiny eyes and smiles. Use pink to make cheeks.
- To add any cactus parts or face details use a tiny bit of liquid clay (either with your fingers or a toothpick). For the flowers, we baked those separately and glued on after baking. They are too heavy to use with the liquid clay before baking and would slip off.
- One of the molds we had came with a tiny llama, we used white clay for that and after it was baked added some color with markers!
- Once your cactus and succulents are created, place them on a parchment lined baking tray and bake according to your polymer clay instructions. We used Sculpey and baked ours at 275 degrees for about 25 minutes.
- Let the clay cool on the tray before removing. They should be hard and not break nor soft.
- If you created clay flowers now is the time to hot glue them on with a dab of hot glue.
- Fill your tiny pots with rocks (or you can use brown clay) and add some hot glue on top and then your cactus on top.