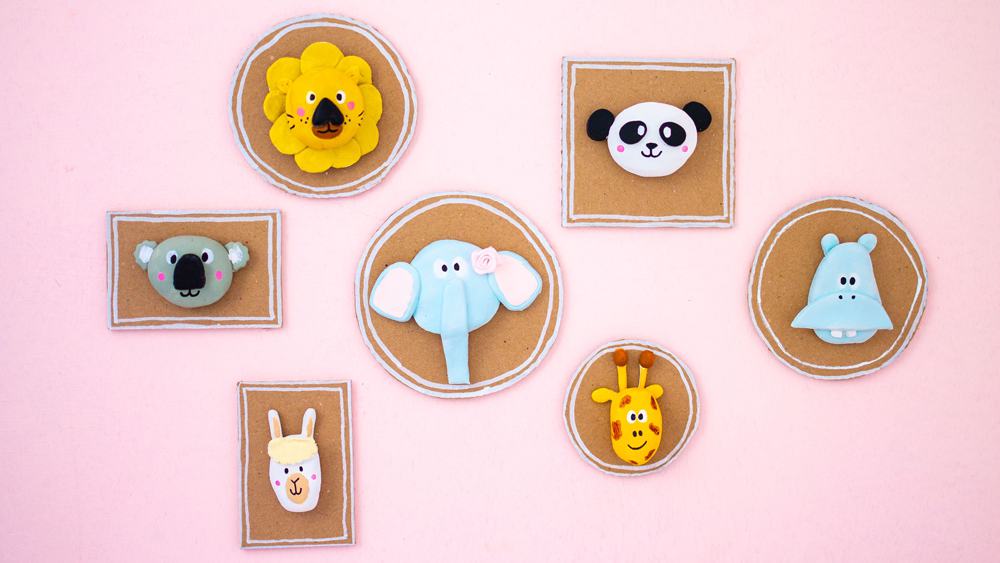
HOW TO MAKE CLAY ANIMALS
By using this site, you agree to our Terms of Use. This post may contain affiliate links. Read our disclosure policy.
Follow us on Instagram for more fun ideas for kids!
Learn how to make clay animals with his super easy creative clay craft for kids that also makes a fun recycled project!
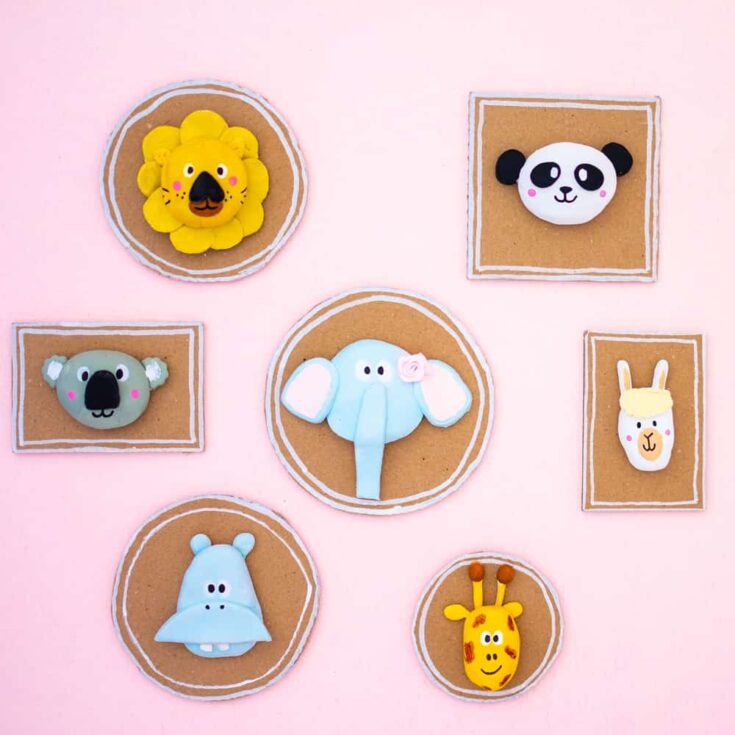
Kids love creative clay projects and making cute clay animals is no exception! In this tutorial, we will show you how to make clay animals and how to display them in an eco-friendly way on cardboard frames!
Welcome to the zoo! Emilia Elephant, Harold Hippo, Karl Koala and their friends are waiting for you! Here comes a funny ancestral gallery you will have a lot of fun with. And it also doesn't get boring because kids will love kneading clay, painting, cutting, and gluing a bit! But most of all they will have fun making these adorable clay creatures! So let's start right away!

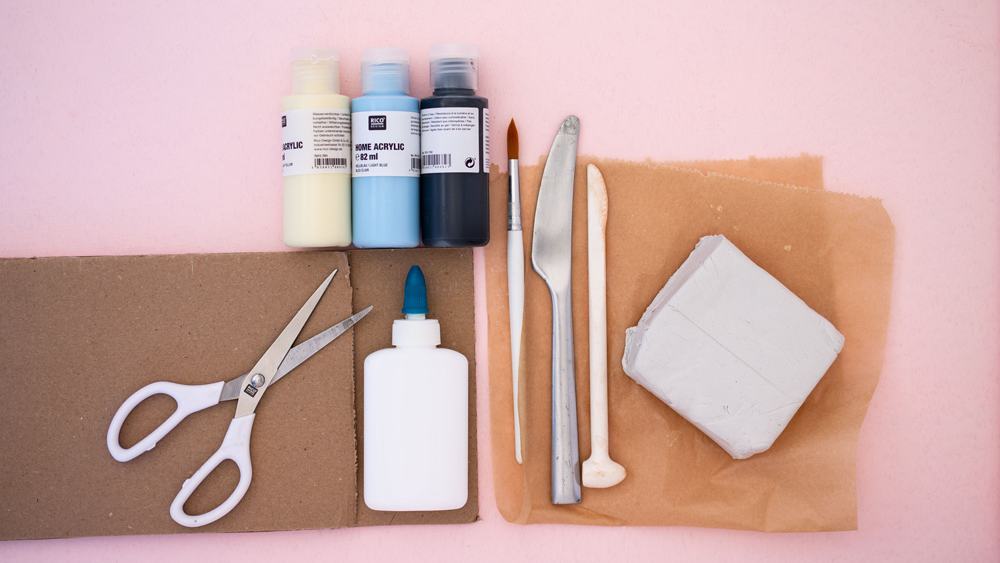
What do you need to make clay animals?
You can use any type of clay but we love the ease of air dry modeling clay so it's easy and there is no fuss with oven baking times. Just note that although it will die hard, it will be more brittle and delicate than oven bake clay which dries hard and matte. For this clay craft project, you'll also need some basic craft materials like acrylic paint, glue, and scissors as well. We used acrylic paint but you can also use Tempera or watercolor paints.
Clay Animal Craft - Materials:
air-drying modeling clay
knife
cardboard
acrylic paint
brush
glue
scissors
HOW TO MAKE CLAY ANIMALS
Materials
- Air-drying modeling clay
- Knife
- Cardboard
- Acrylic paint
- Paint brush
- Craft glue
- Scissors
Instructions
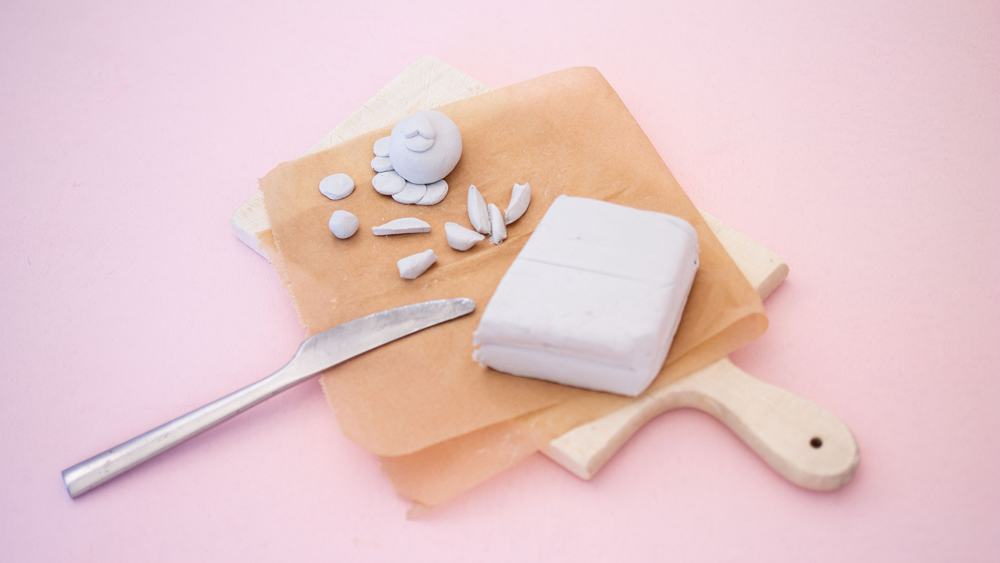
Step 1
Cut off a slice of the modeling clay with a knife and shape it into a ball. Gradually shape all the animal small parts such as ears, nose and mane.
Step 2.
Connect the pieces together well. Sometimes it helps to use a little bit of water and a knife or spoon to smooth out the transitions.
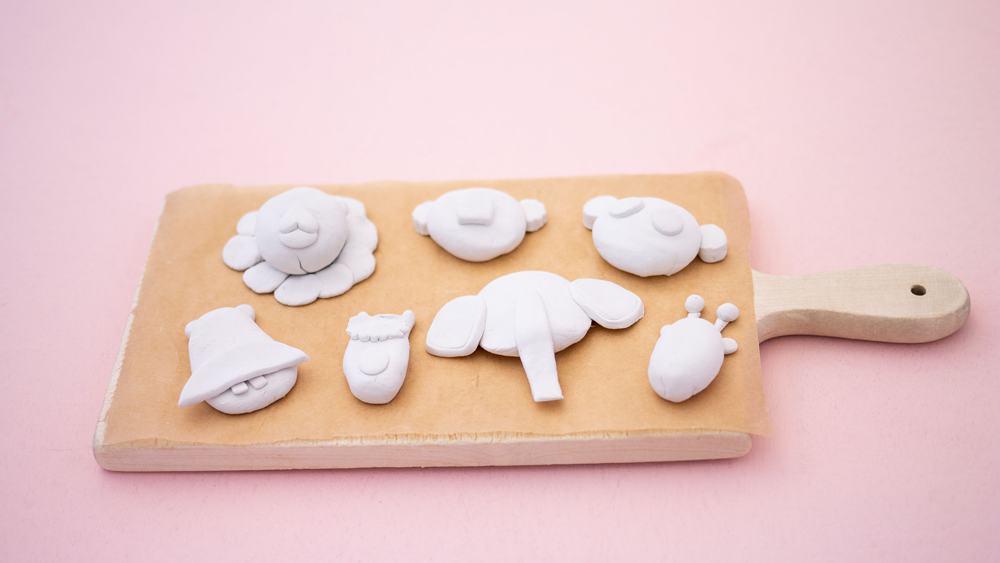
Step 3.
Now you let your work of art dry really well. At least overnight or a couple of days.
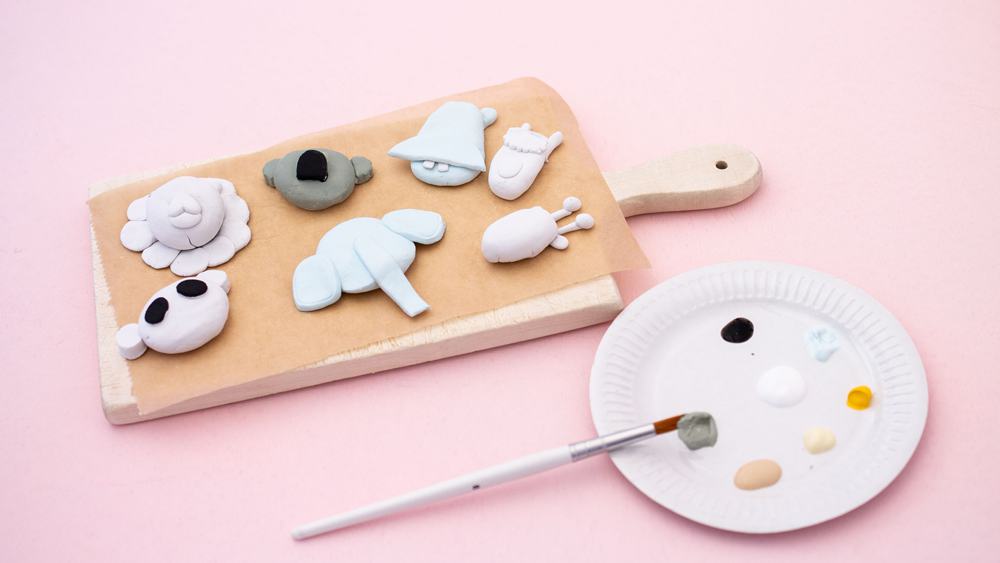
Step 4.
Now the animals can be painted. To do this you first apply the base color with acrylic paint and then add the details. Let the paint dry well.
Step 5.
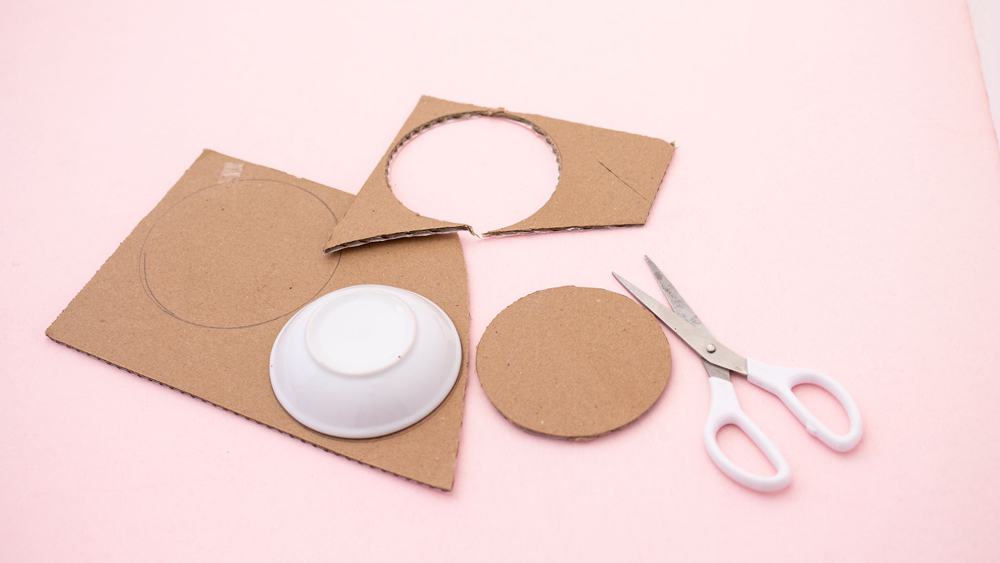
In the meantime, you can cut picture frames out of cardboard. A glass, bowl or ruler will help you draw the shapes.
Step 6.
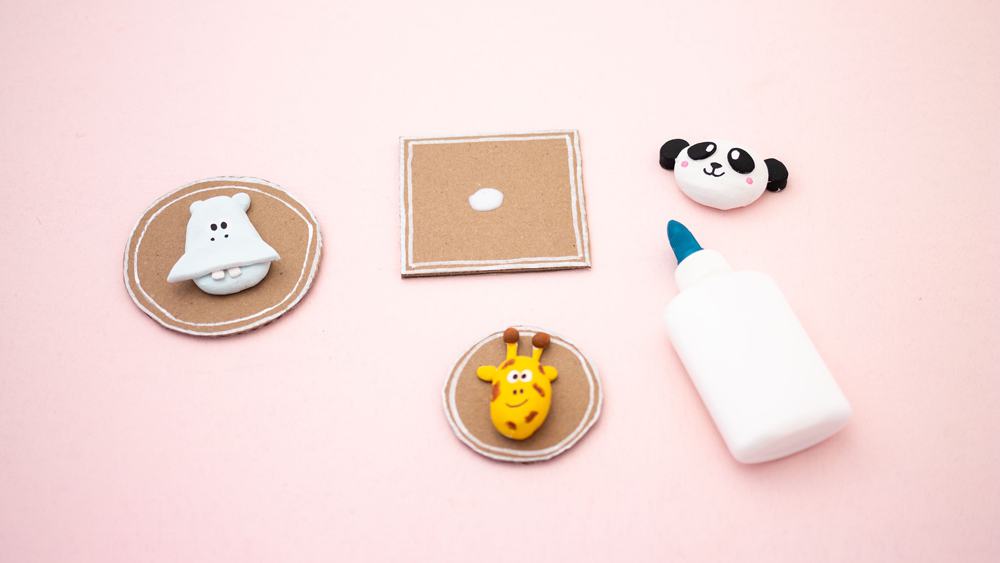
Then you can glue the animal head in the middle of the frame with craft glue or a hot glue gun.
You Might Also Like
DIY Painted Clay Fish
Clay Crab Necklace
Clay Alphabet Bead Craft
ABOUT THE AUTHOR: PIA DEGES