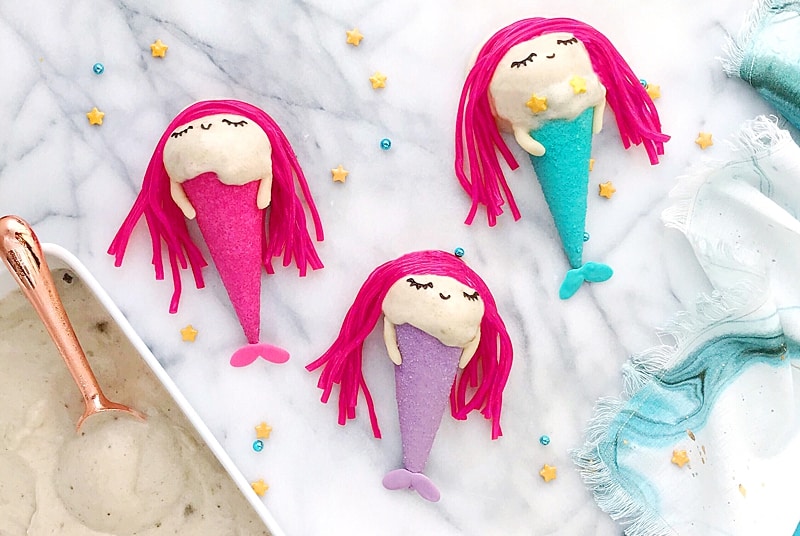
MERMAID ICE CREAM
Summer might be flying by, but there’s still plenty of time for ice cream! Frozen bananas are not only perfect for making chocolate animal pops, but when you blend them along with your favorite flavorings, they create a texture just like ice cream (often referred to as nice cream).
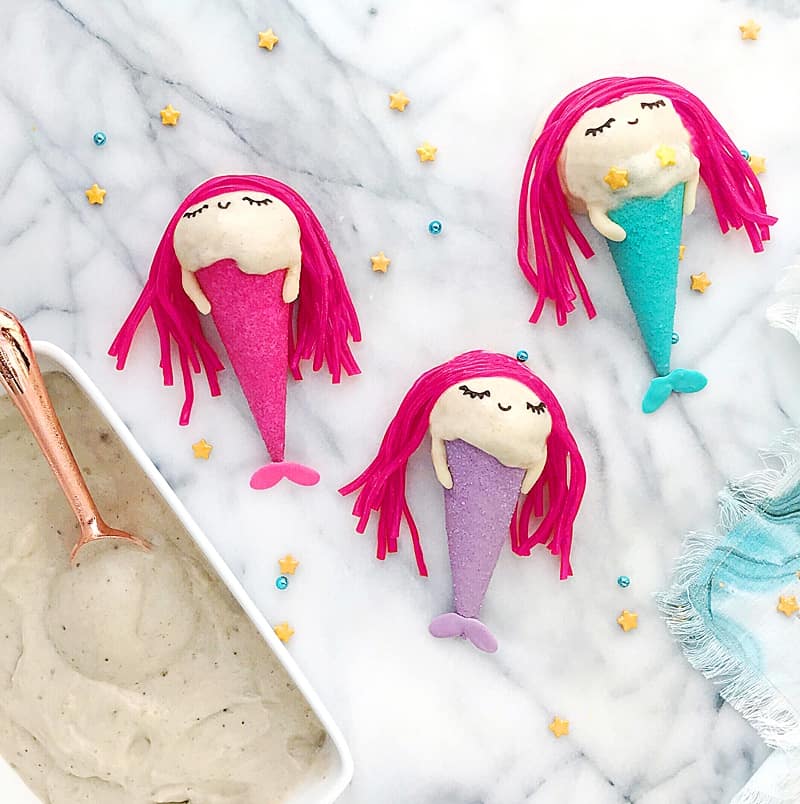
Little, and big kids alike will have a blast turning this 2 ingredient nice cream into magical mermaids complete with colorful chocolate cone tails and licorice hair. You can simplify even further by using your favorite store bought ice cream. These mermaids are sure to make a splash at snack or dessert time!
Mer-mazing Mermaid Banana Nice Cream- Ingredients & Tools: (Serves 4)
Vanilla Banana “Nice” Cream:
- 4 very ripe medium bananas
* 1 tablespoon vanilla extract
* 1-3 teaspoons honey* (optional, taste and sweeten as desired)
* Food processor or high speed blender
* Ice cream or freezer safe food storage container
Mermaid Tail Cones & Decorations:
* 4 sugar cones
* Teal, Lavender, and Bright Pink candy melts
* Pink, blue and purple sanding sugar
* Large star sprinkles
* Red Pull apart licorice candy
* ¼ cup chocolate chips
* Marzipan or mini marshmallows (for the arms)
* Wax paper
* Toothpicks
* 3 short Mason Jars or glasses for dipping
**All cutting should be done by an adult.
INSTRUCTIONS:
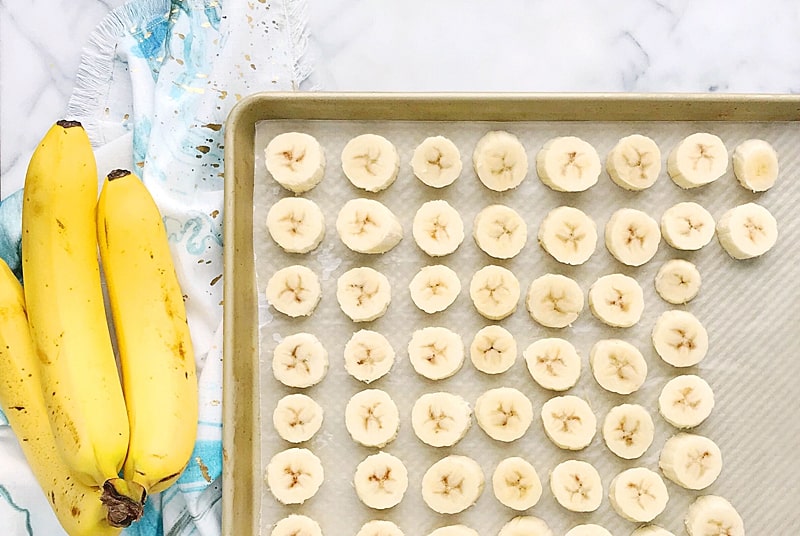
Step 1. Peel and slice each banana into ½ inch sections. Place the sections onto a baking sheet lined with wax paper, and freeze until frozen solid (about 4 hours).
Transfer the frozen banana slices to either a food processor or a high-speed blender. I find that a food processor works better for making nice cream as it doesn’t require any added liquid (if you are using a blender, you may need to add a little coconut or almond milk to get the ice cream going).
Add the vanilla extract and pulse for 3-4 minutes or until the mixture begins to turn into an ice cream like texture. You will want to stop every so often to scrape the sides of the bowl while blending.
The nice cream is ready to be enjoyed now in a soft serve like consistency, but to create scoops (and allow the bananas to set more) transfer the mixture to a freezer safe container, and place in the freezer for at least 4 hours.
Step 2. While the nice cream is setting, you can make all the fun mermaid accessories starting with the tails!
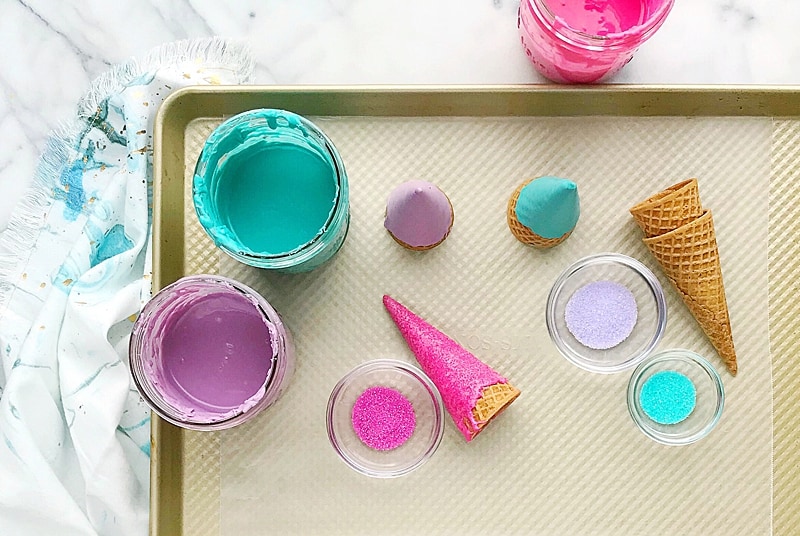
Add lavender, teal, or the bright pink candy melts to each of your 3 jars, filling halfway. Melt them in the microwave, in 30-second intervals, at 50% power, stirring between each interval, until smooth and completely melted.
If your candy melts are lumpy you can add either vegetable oil or paramount crystals, 1 teaspoon at a time, until smooth.
Hold the sugar cone at the opening, and dip, pointed side down, into the candy melts, rolling to coat the sides. Allow the excess to drip off, and then transfer them to a piece of wax paper (pointed side up) to set.
You can sprinkle each with the coordinating color of sanding sugar to give them a magical shimmery look ☺.
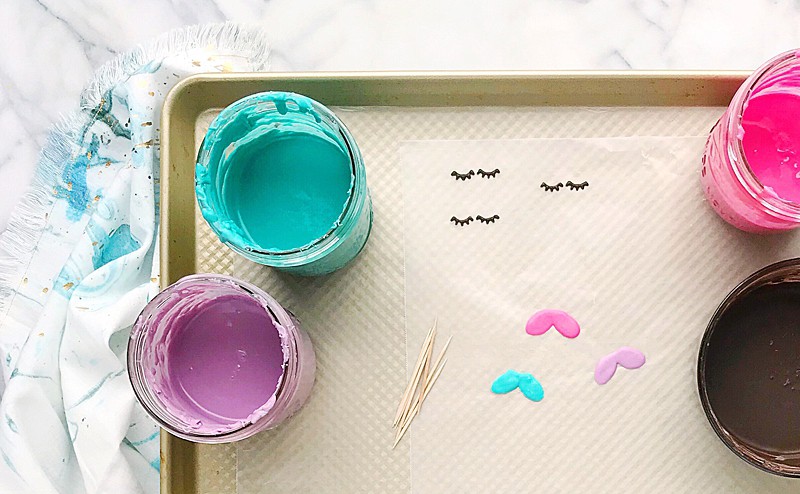
Step 3. Use a toothpick dipped into each of the candy melt colors to draw a fin for the end of your cone tails onto wax paper.
Then transfer your chocolate chips to a heatproof bowl and heat, just as you did for the candy melts, until fully melted.
Use a clean toothpick to draw sleepy eyelashes and tiny u shapes for the mouths, for each mermaid, onto the wax paper. Allow them to set. Attach the fins to each coordinating cone with a little more of the matching candy melts.
Step 4. When you are ready to enjoy the nice cream, gather all of your prepared chocolate pieces and 2 star sprinkles per mermaid, if you would like to add little star bikinis.
Pull apart the licorice pieces (I used about 5 strands per mermaid), and set aside. If you would like to give your mermaids arms simply cut a mini marshmallow in half and stick to the sides of the cone, or roll a little marzipan into long log like shapes, and press them into the cones.
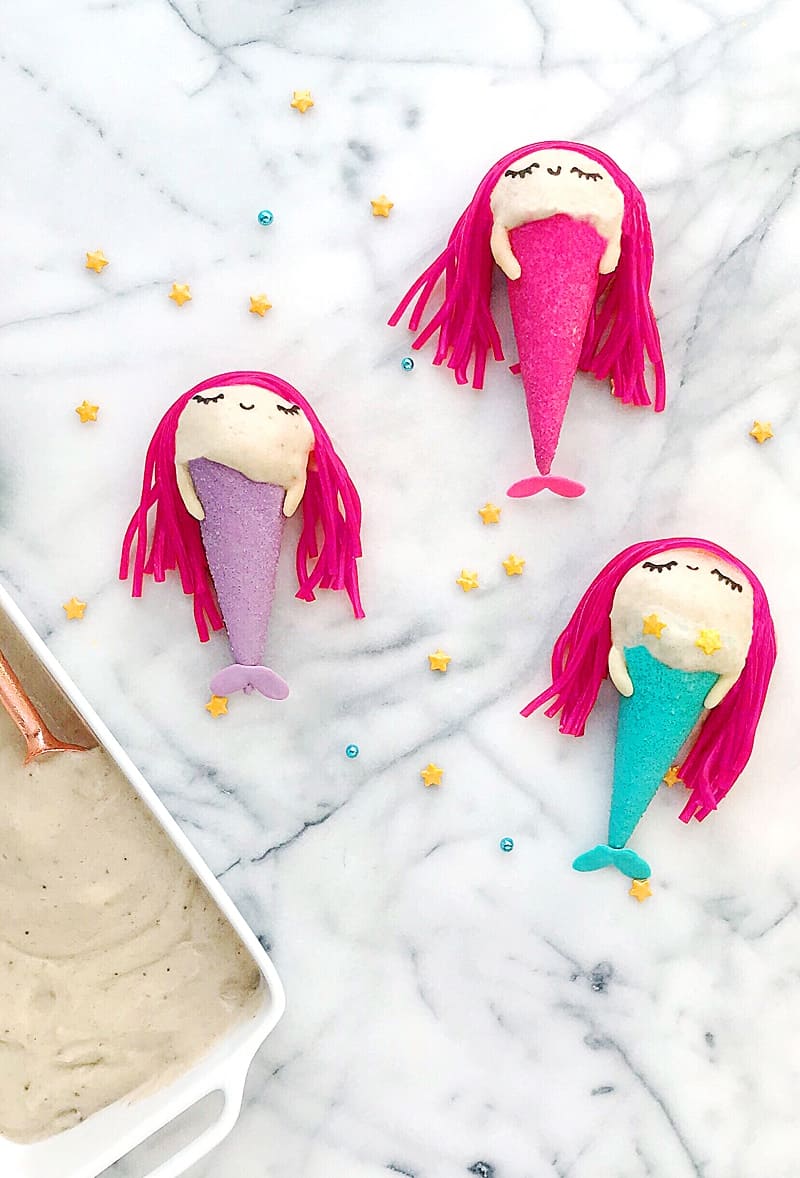
Remove the nice cream from the freezer, and place a scoop on top of each cone (you can set the cones into glasses or bowls to prevent any mess).
Use your fingers or a toothpick to transfer the face details, and press the licorice hair on top.
Now you are ready to enjoy!
Any leftover nice cream can be transferred back to the freezer for storage. You can also very easily change the flavor of the nice cream by adding a few teaspoons cocoa powder for a chocolate variety, or frozen fruit.
For even more simple sea creature food art check out these watermelon crabs or magical frozen Unicorn Pops.
Have you tried making banana nice cream before?
![]()
Jessica Lucius is a food and flatlay stylist with a fondness for baking, making, and all things cute. She’s also the founder and creative force behind her newly established blog, Luxe and the Lady, where she shares fun ways to bring her favorite animals and childhood characters to life with food. When Jessica’s not busy playing with her food, or at the grocery picking out just the right ingredient to turn into eyes and ears, you can find her trail running, working out, reading, recipe testing, and playing with her fluffy baby lionhead bunny, Marshmallow. Follow Jessica on Instagram @luxeandthelady.