
DIY Twine Pumpkins Make Simple And Beautiful Fall Decor
By using this site, you agree to our Terms of Use. This post may contain affiliate links. Read our disclosure policy.
Check out my Plaeful Printables for kids play and learning!
Create stylish, easy-to-make twine-wrapped pumpkins. A beautiful and unique, no-carve fall decor using string and a paper tube.
Fall is a magical season and one of my family’s favorite time of the year. We love heading out to the pumpkin patch and eating anything pumpkin spiced! Speaking of pumpkins, you can’t think of them without thinking of autumn as an essential part of the décor. However, if you’re looking to do something different from the usual carved or painted pumpkins, why not try making twine-wrapped pumpkins? Not only are they charming and chic, but they’re also super easy to make!
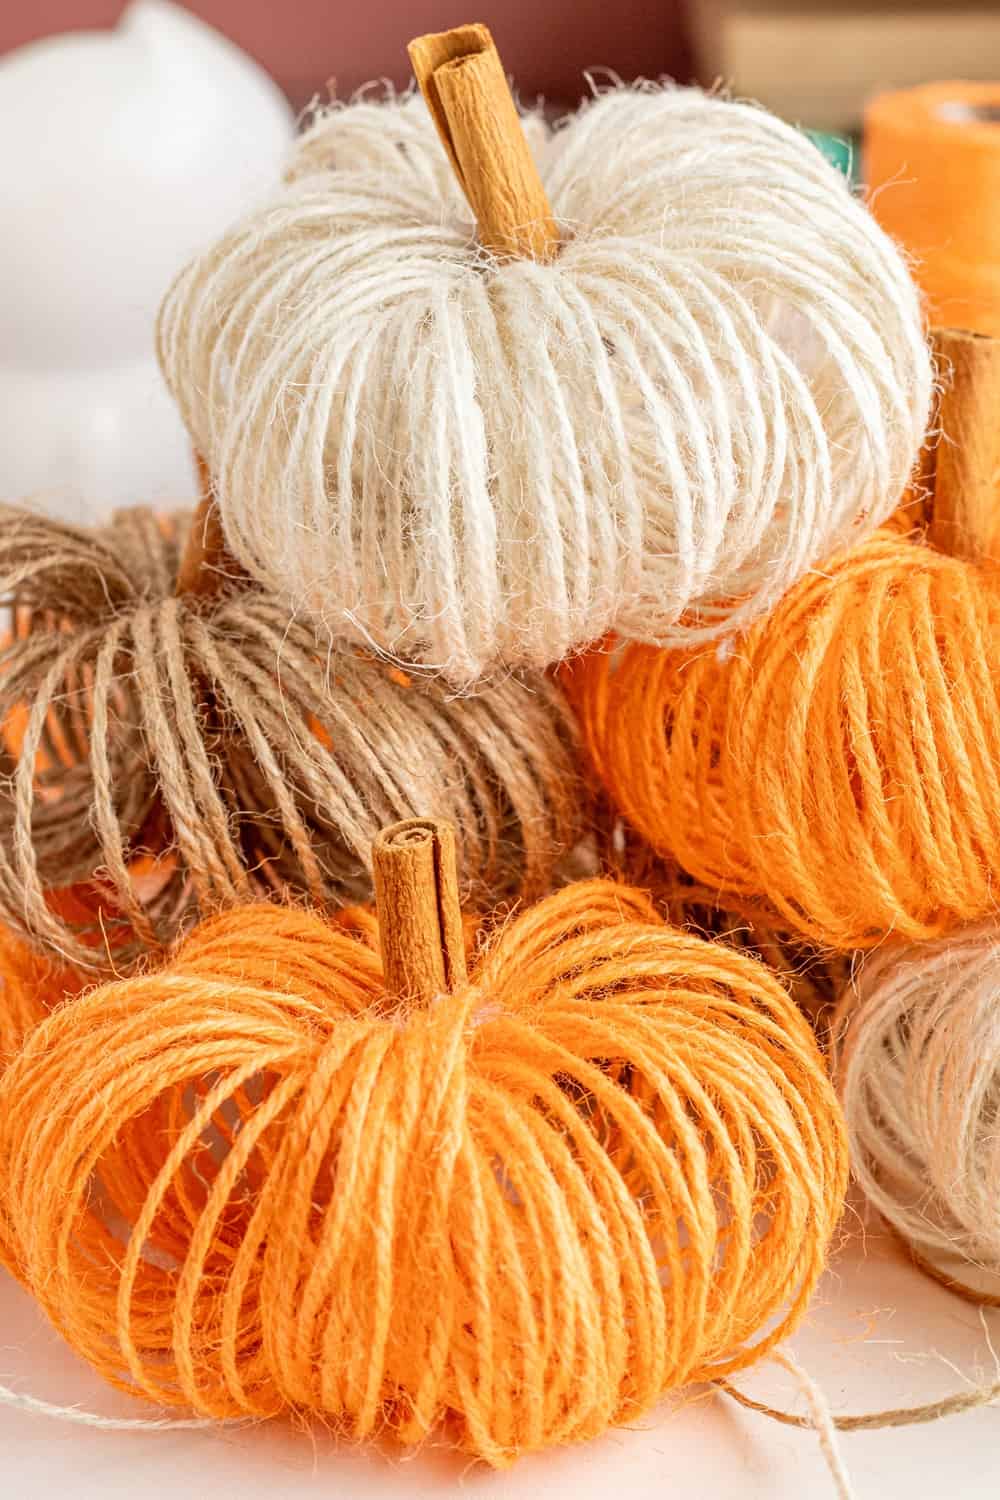
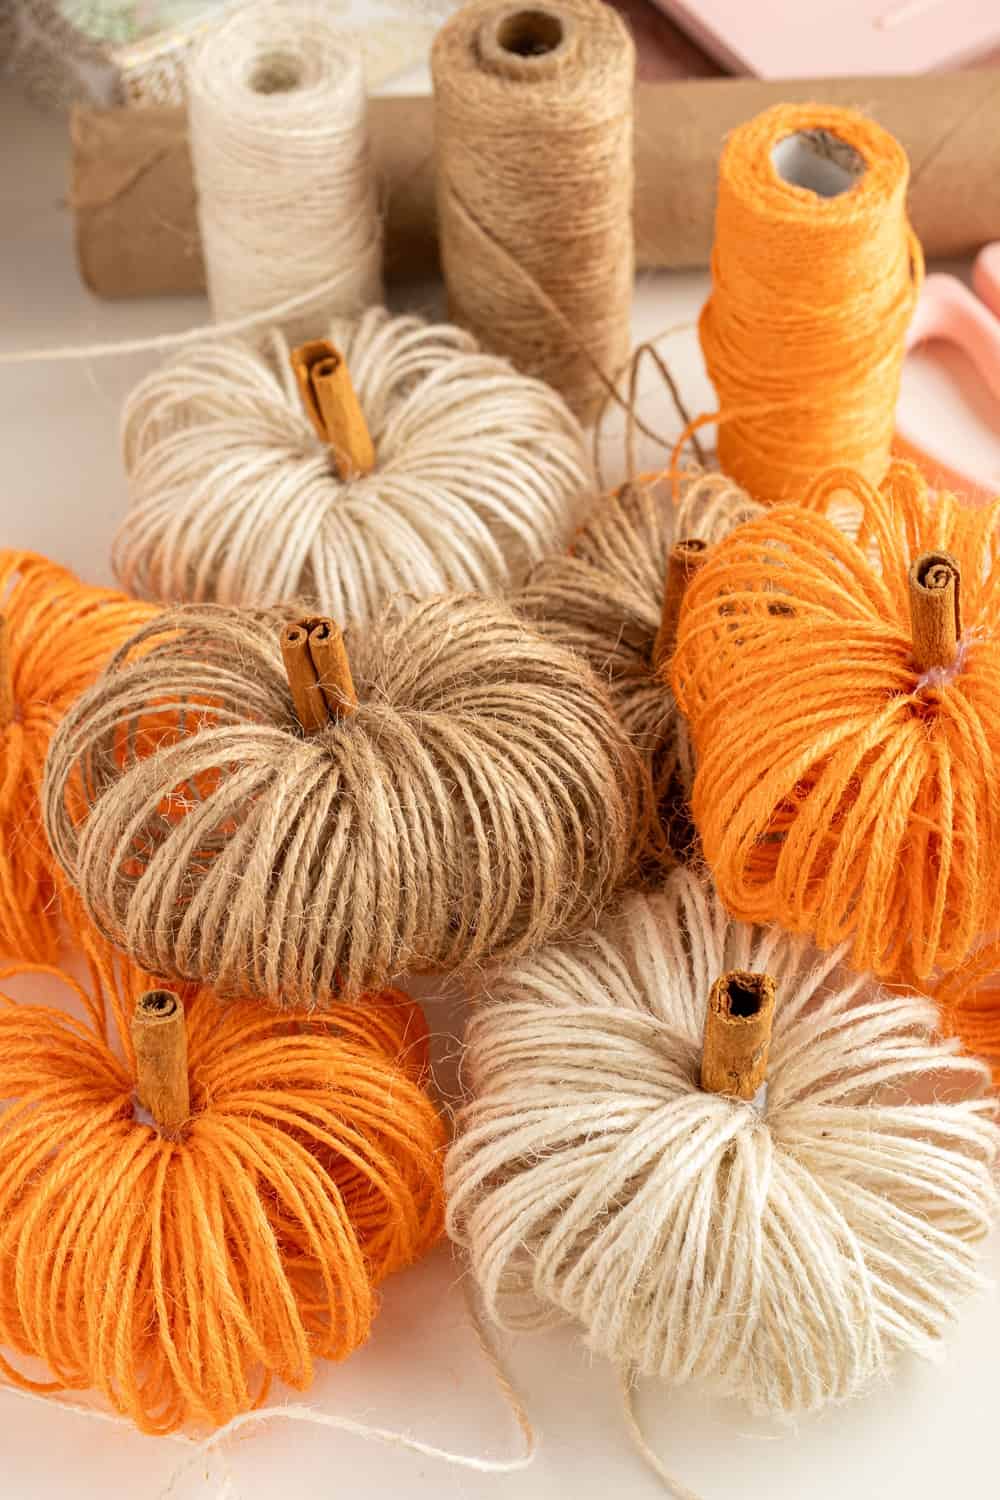
I love how these adorable pumpkins use simple materials like twine and recycled items like a paper roll tube! The cinnamon adds a nice blend of fall aroma to your home that’s pleasing and comforting.
Twine Pumpkins – Materials:
- Twine
- Empty paper towel roll
- Scissors
- Hot glue gun
- Tape
- Cinnamon sticks (for the pumpkin stem)
INSTRUCTIONS
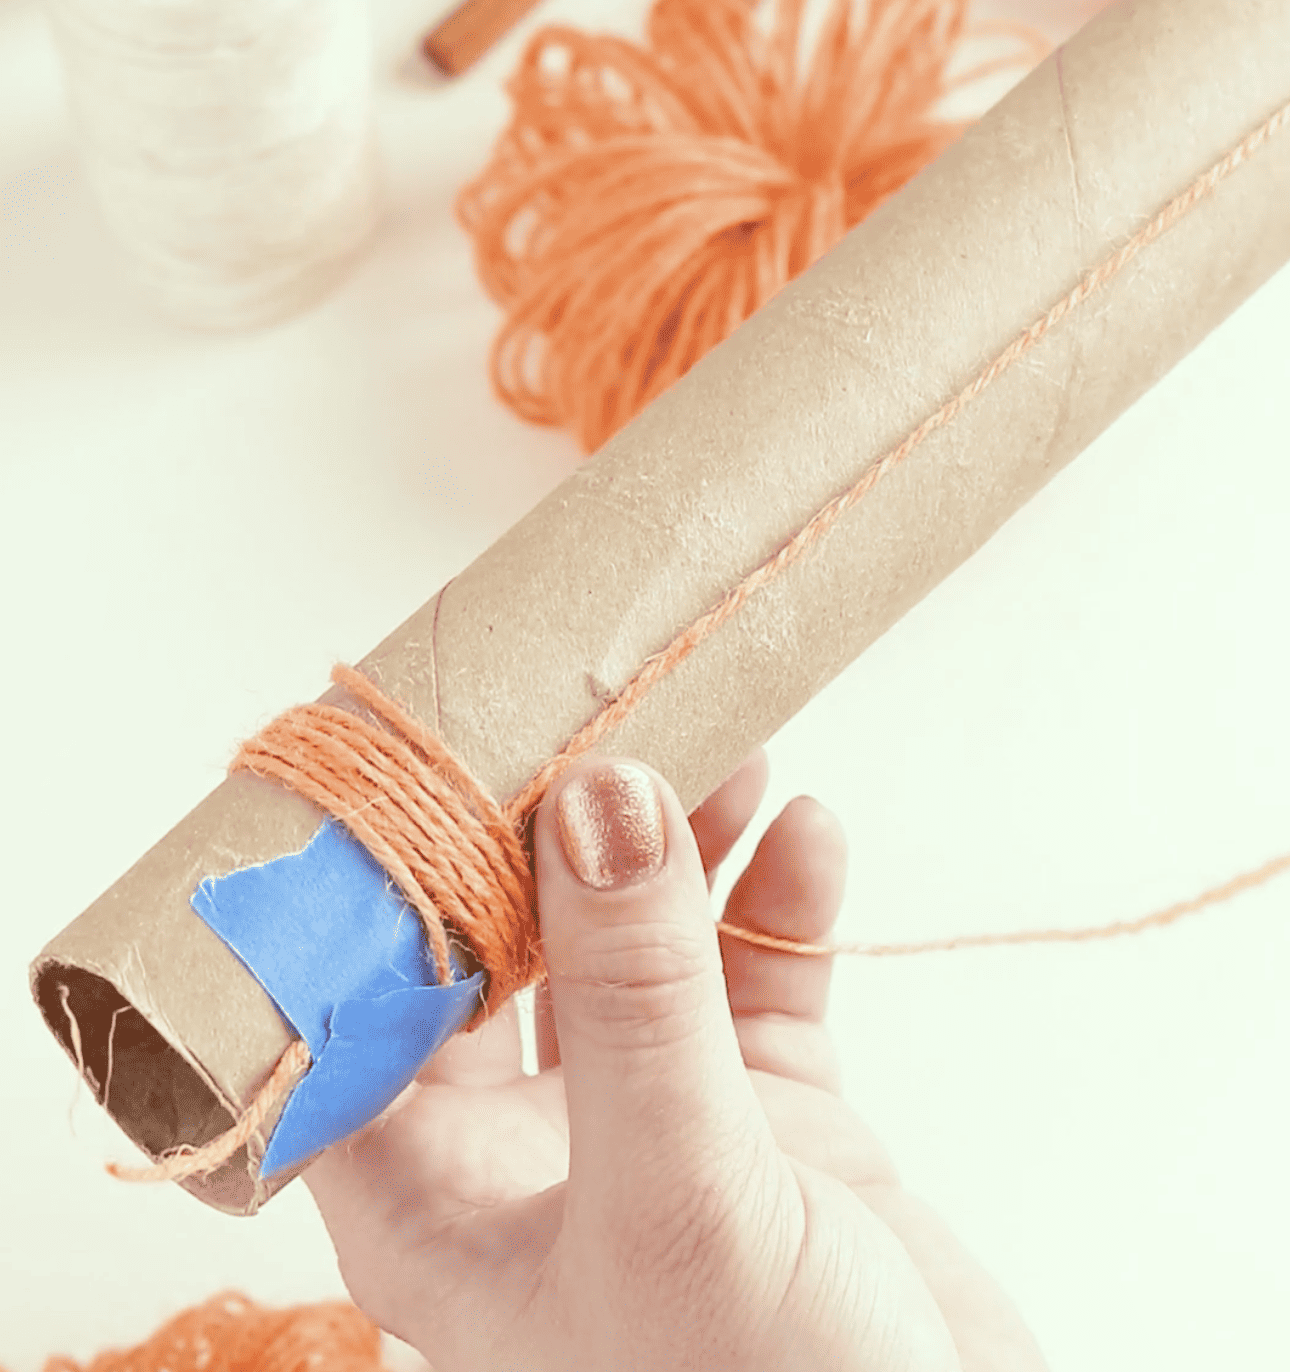
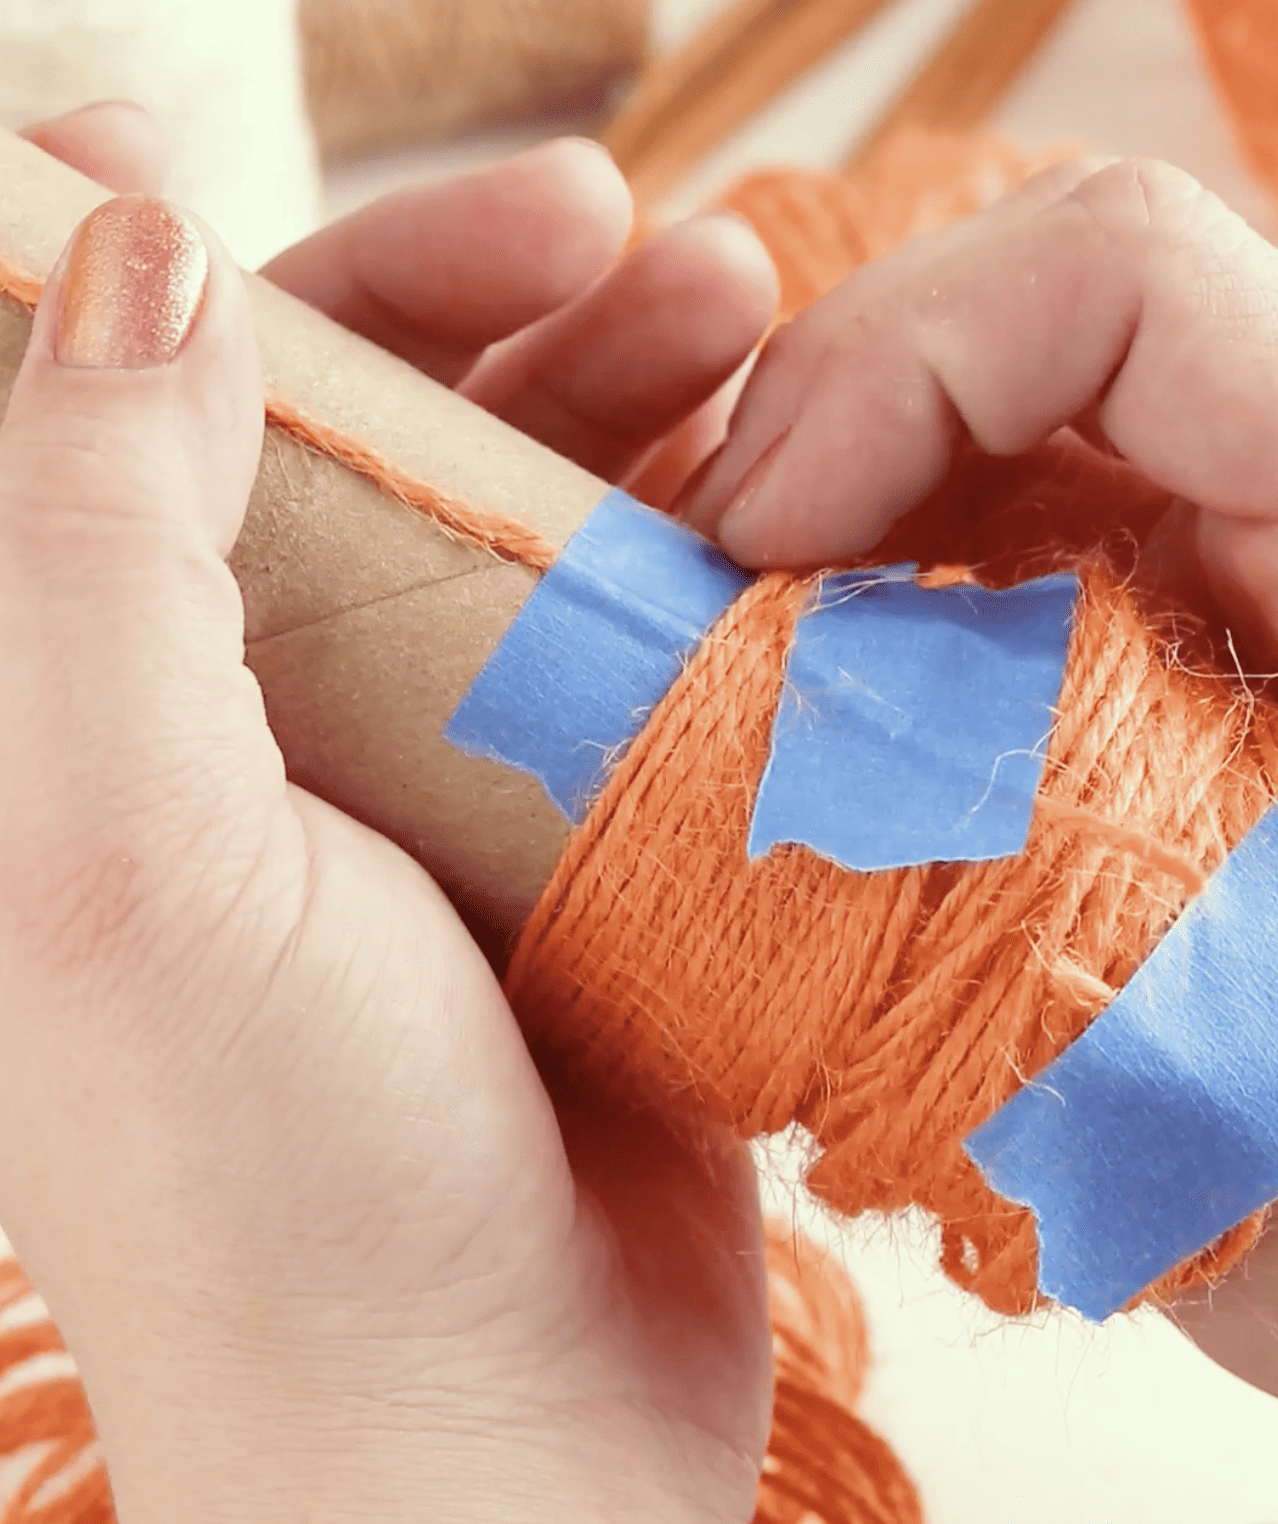
- Prep the Paper Towel Roll: Cut a length of twine that hangs 1-2 inches from the end of your tube and tape both ends down.
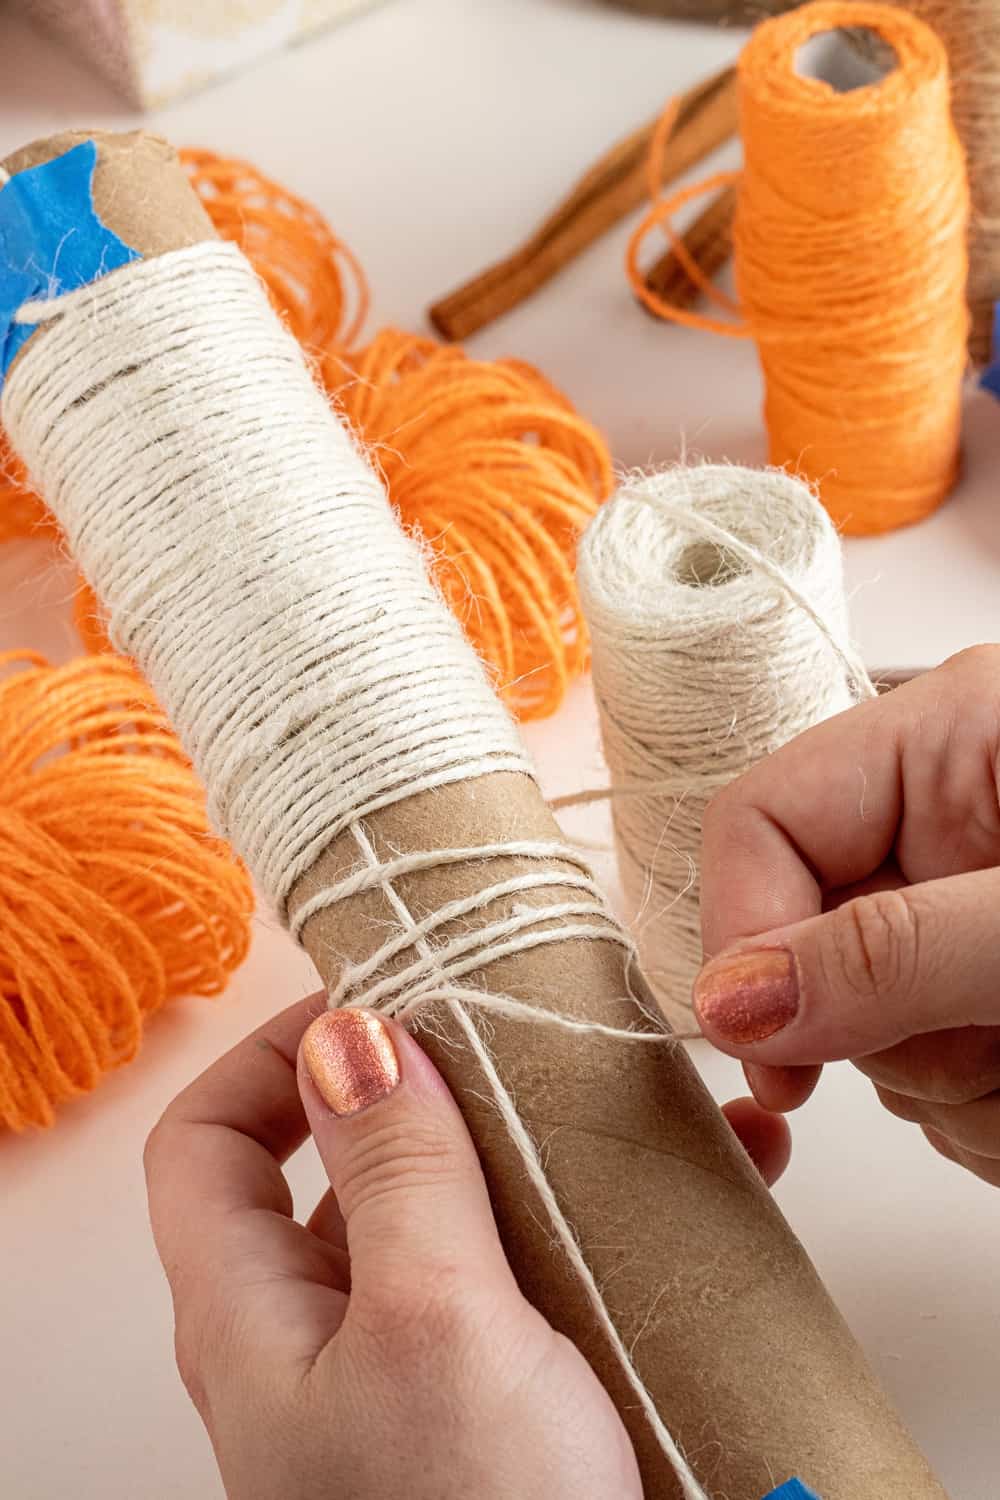
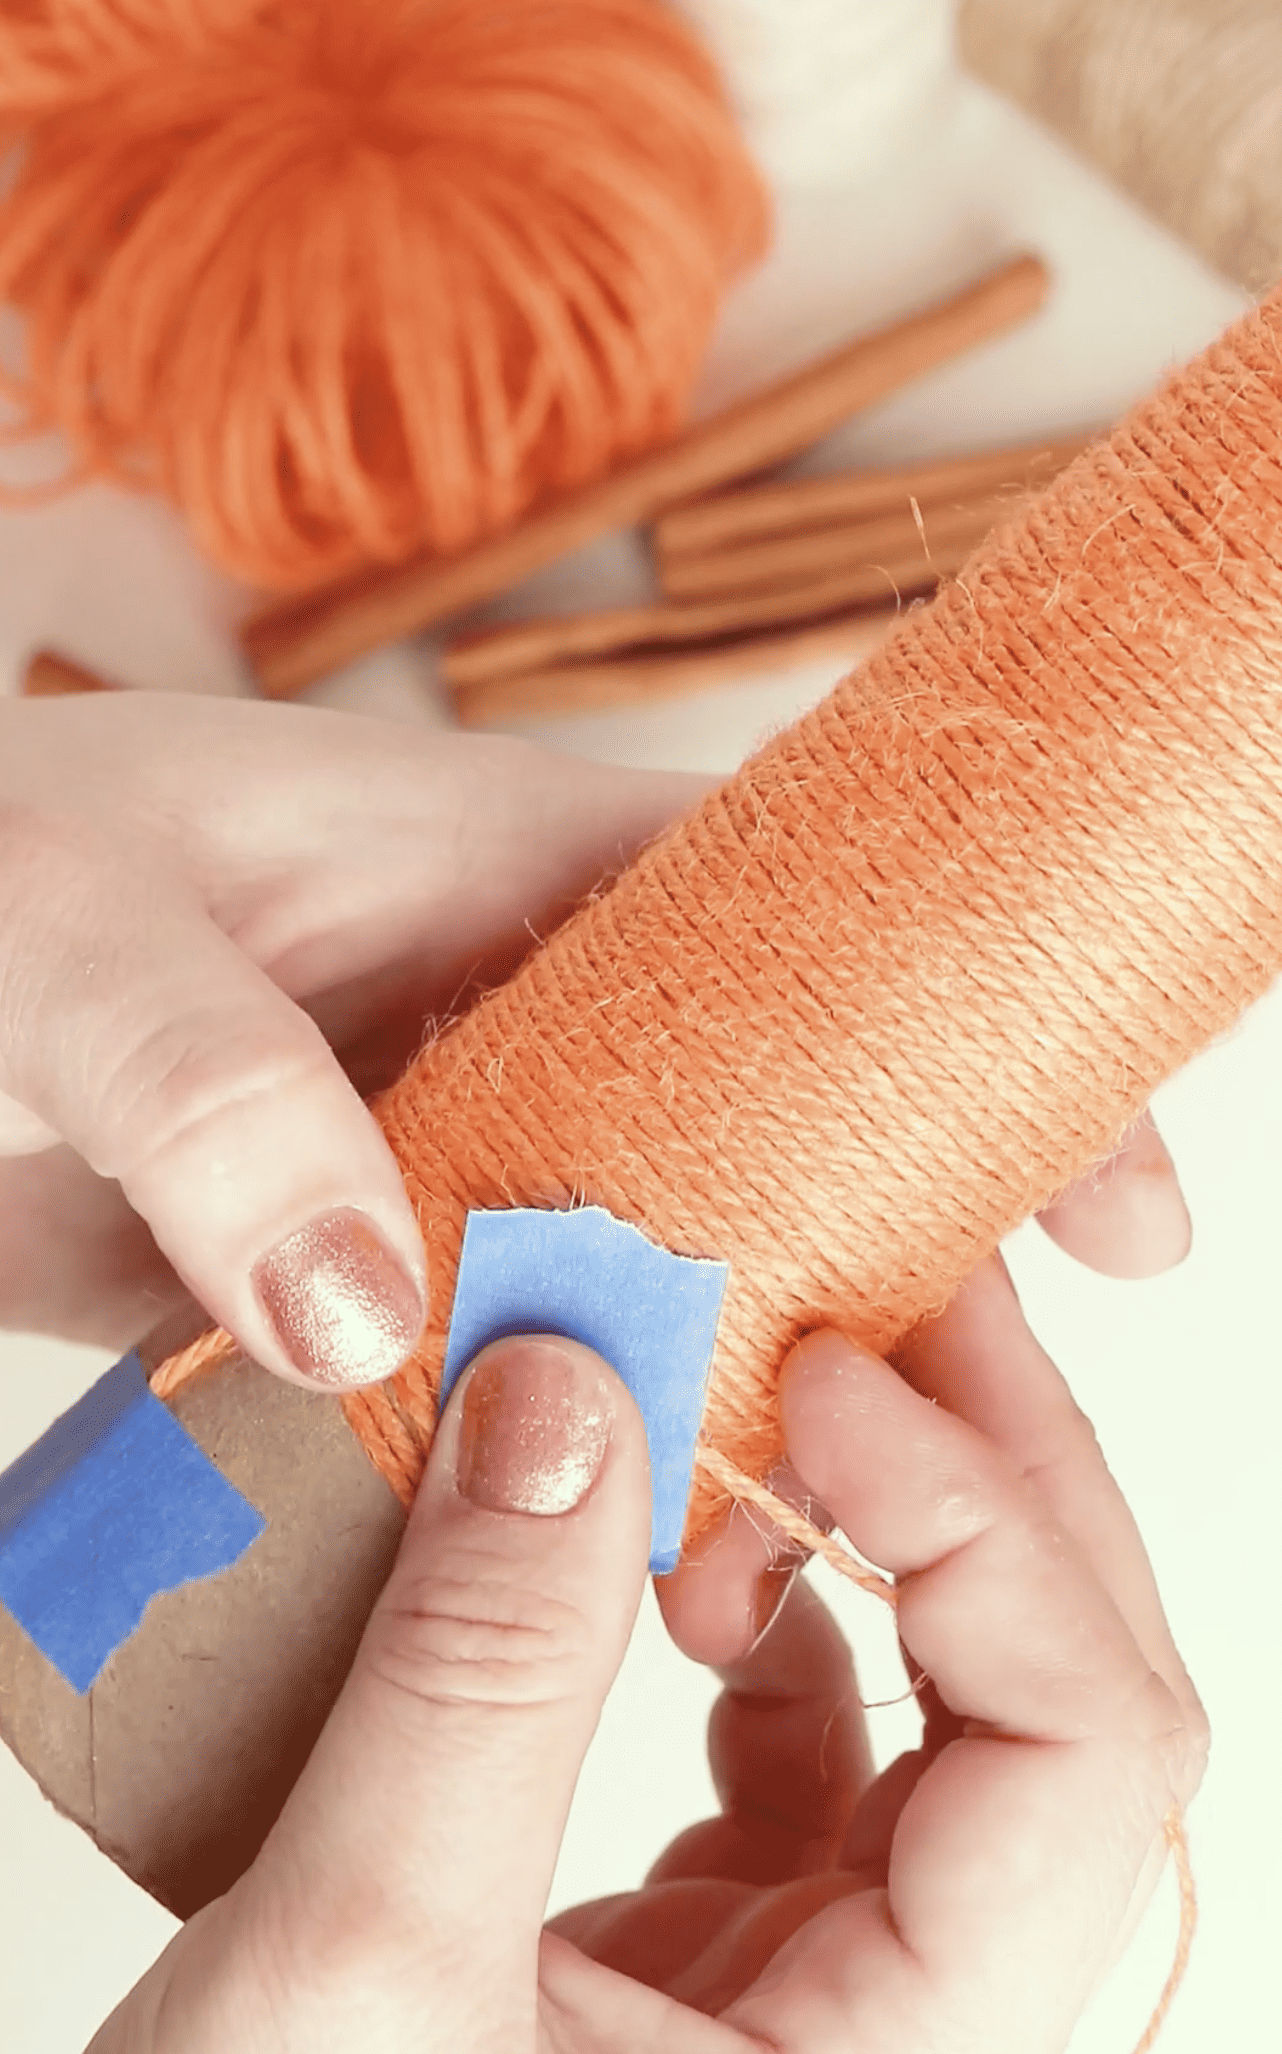
- Begin Wrapping: Take one end of the twine and tape about 2 inches from one end of the paper tube. Start wrapping the twine around the roll but don’t do it too tightly or it will be hard to remove! Ensure that the twine is close together so that the paper towel roll isn’t visible. Continue wrapping until you reach the other end, then cut off the twine leaving some extra string and tape that cut end to the wrapped portion of the tube.
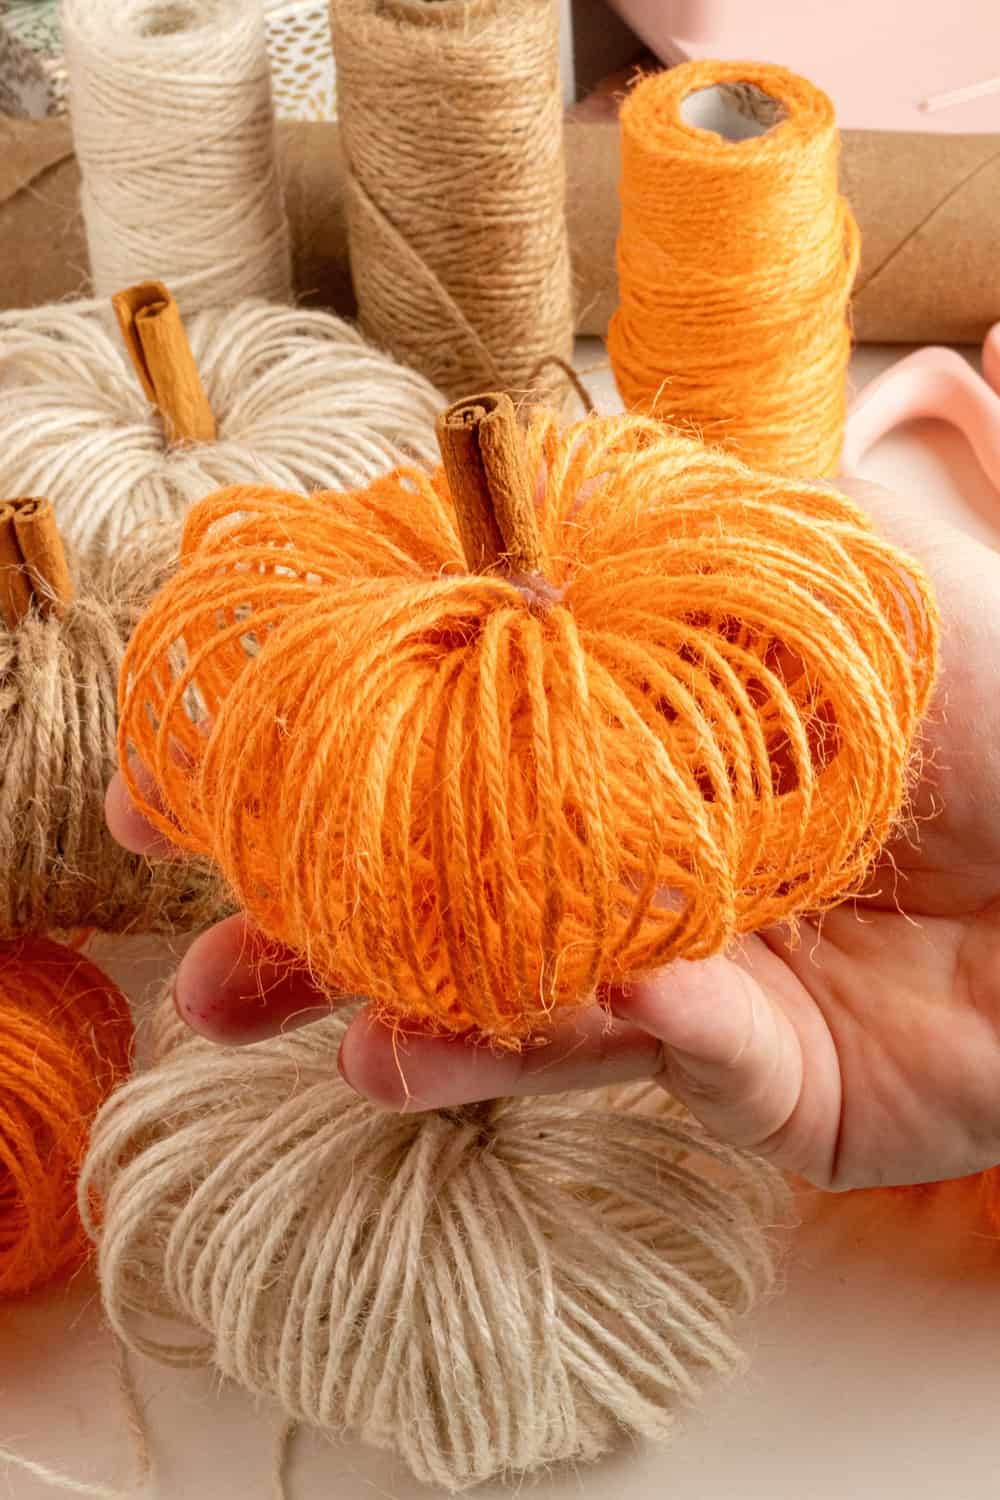
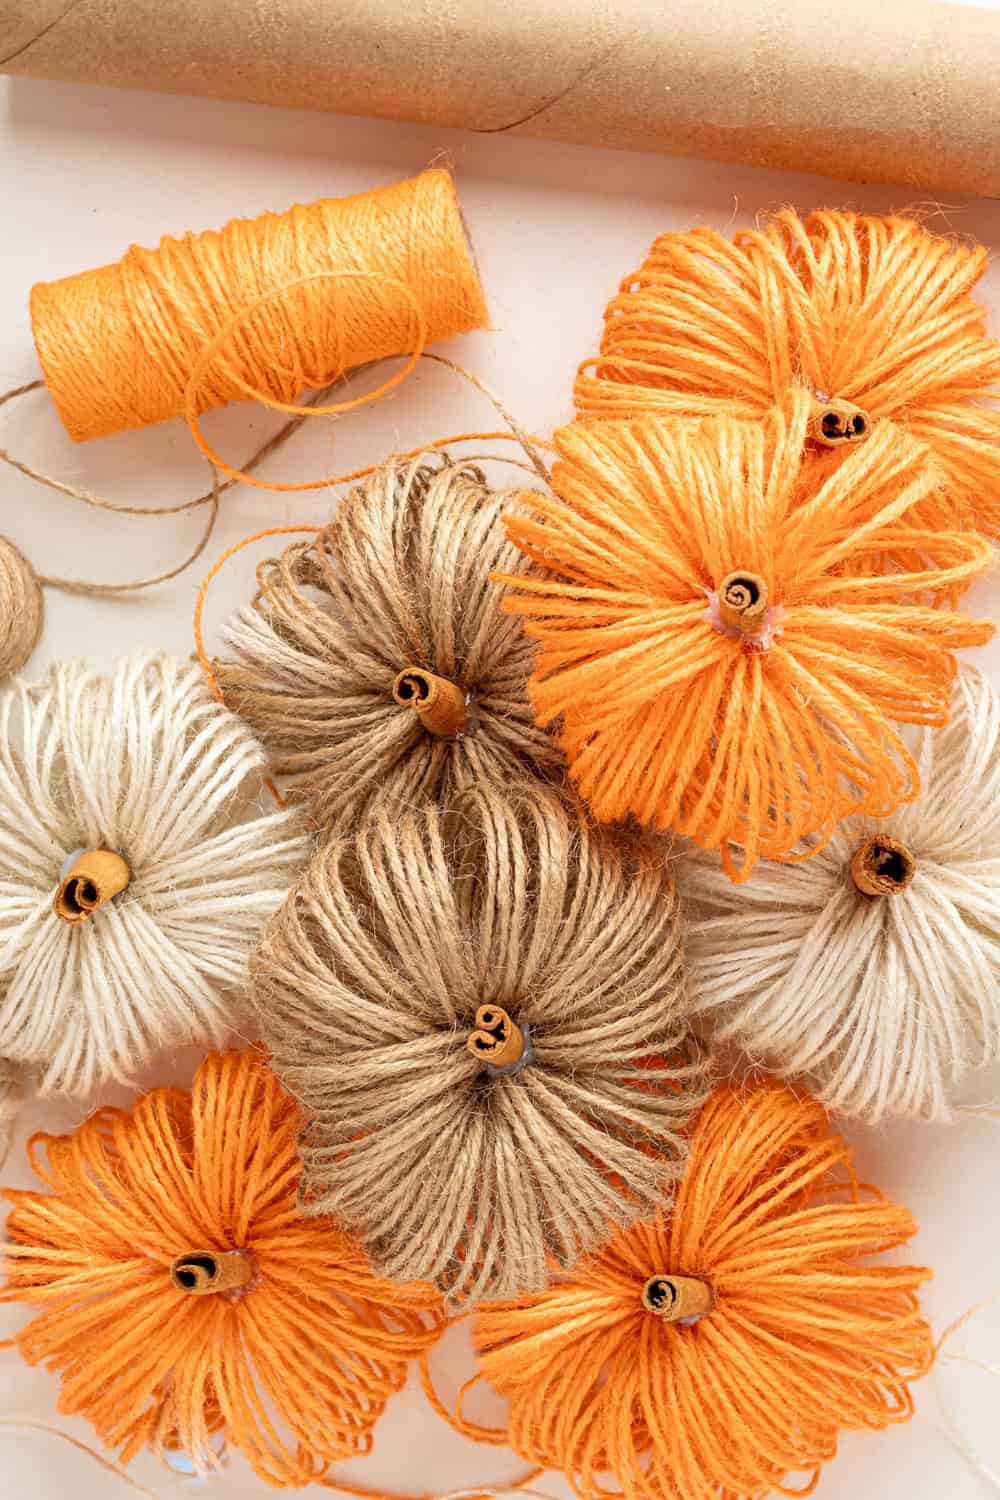
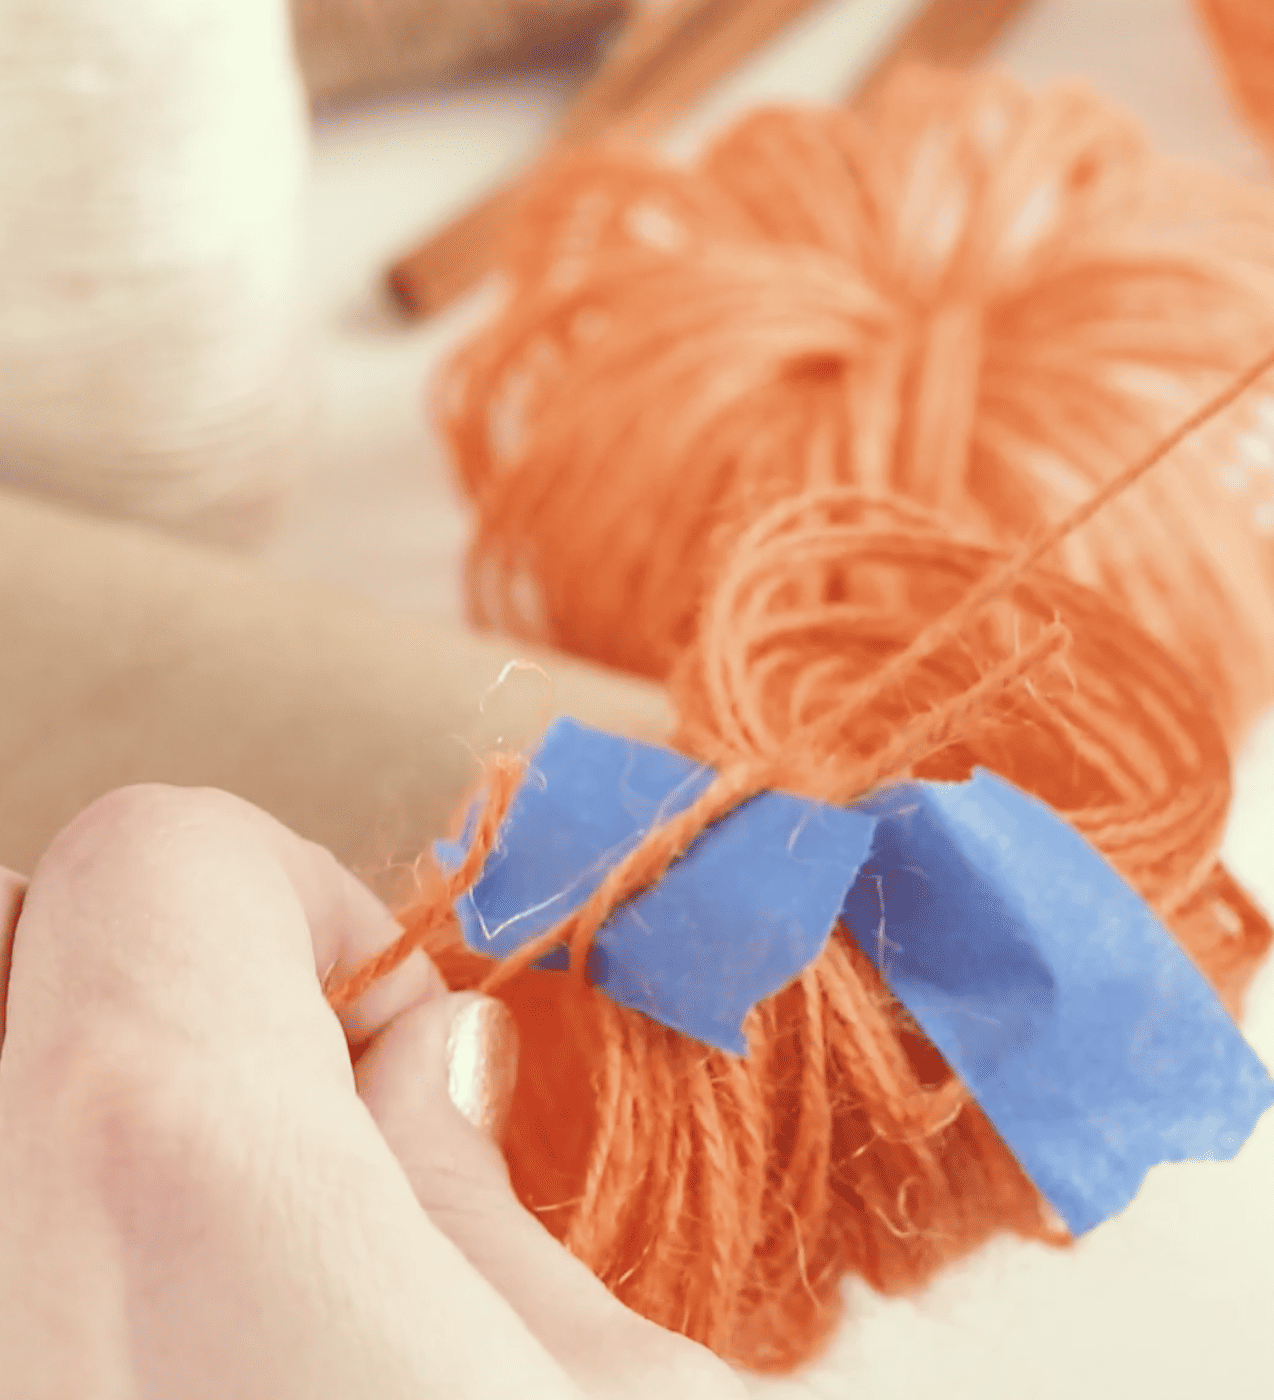
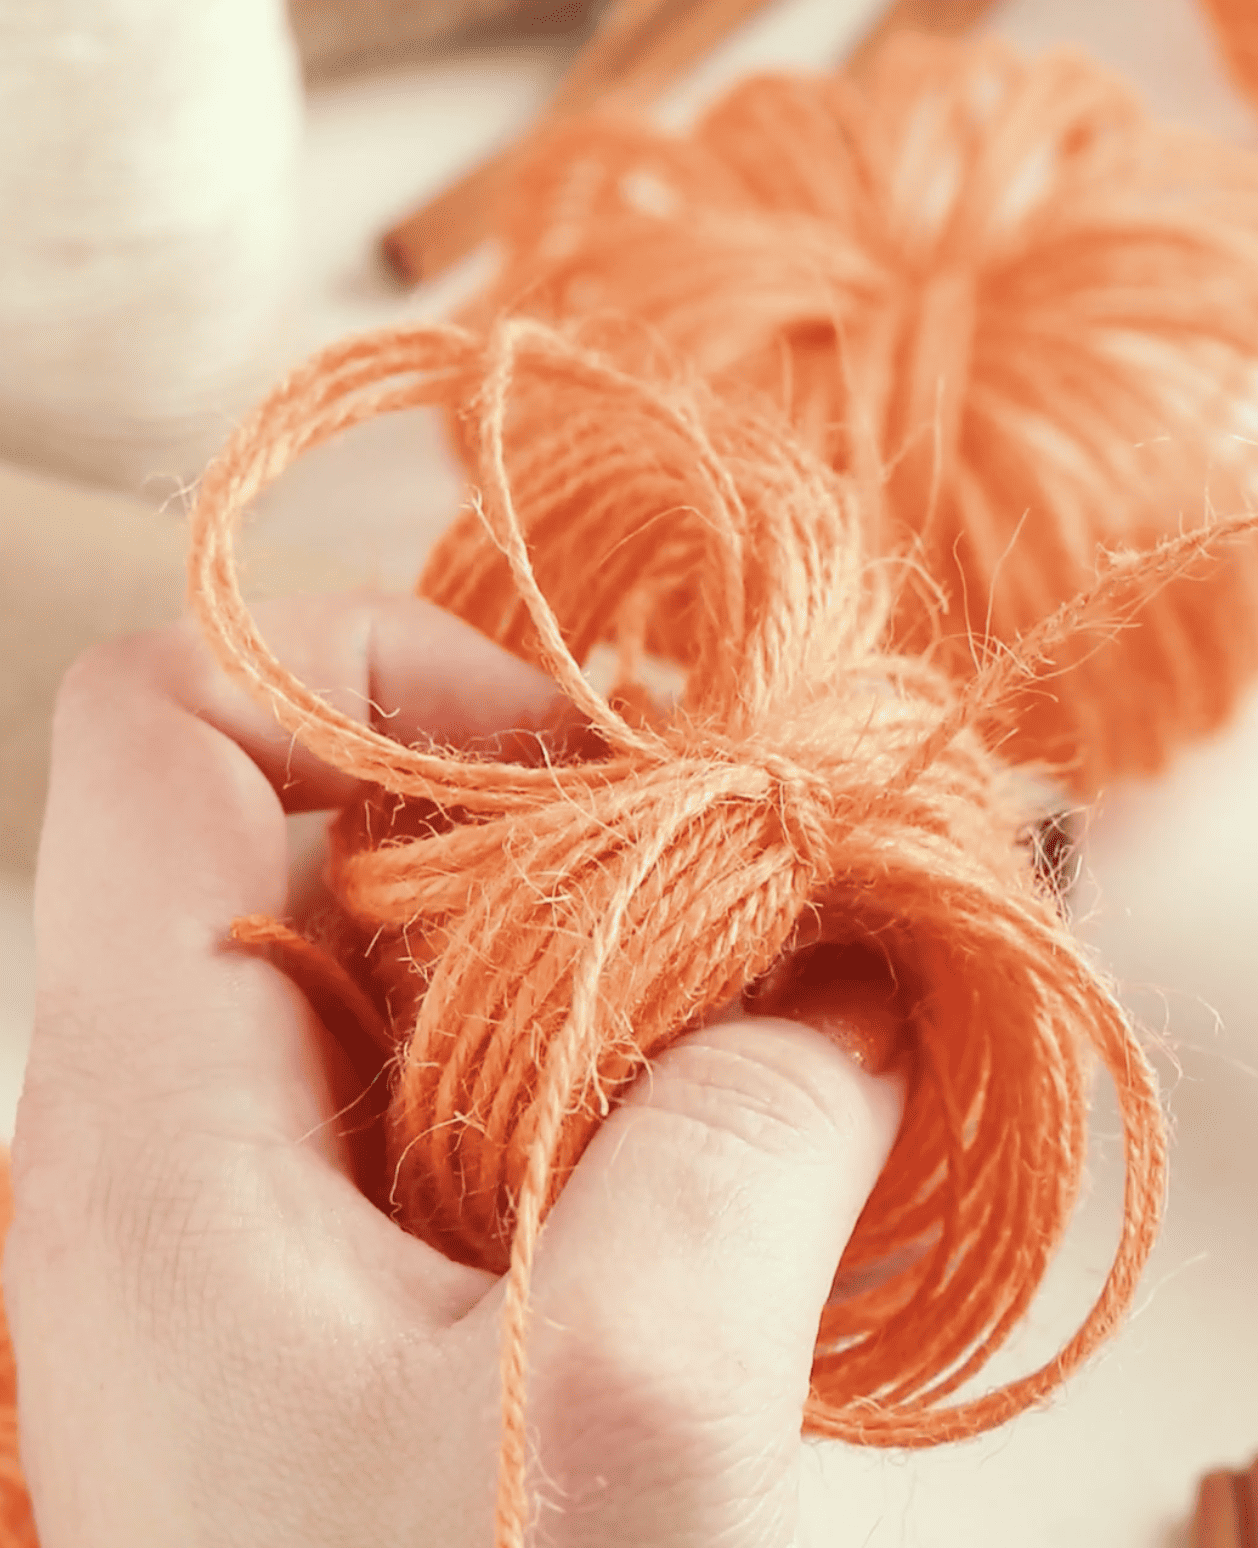
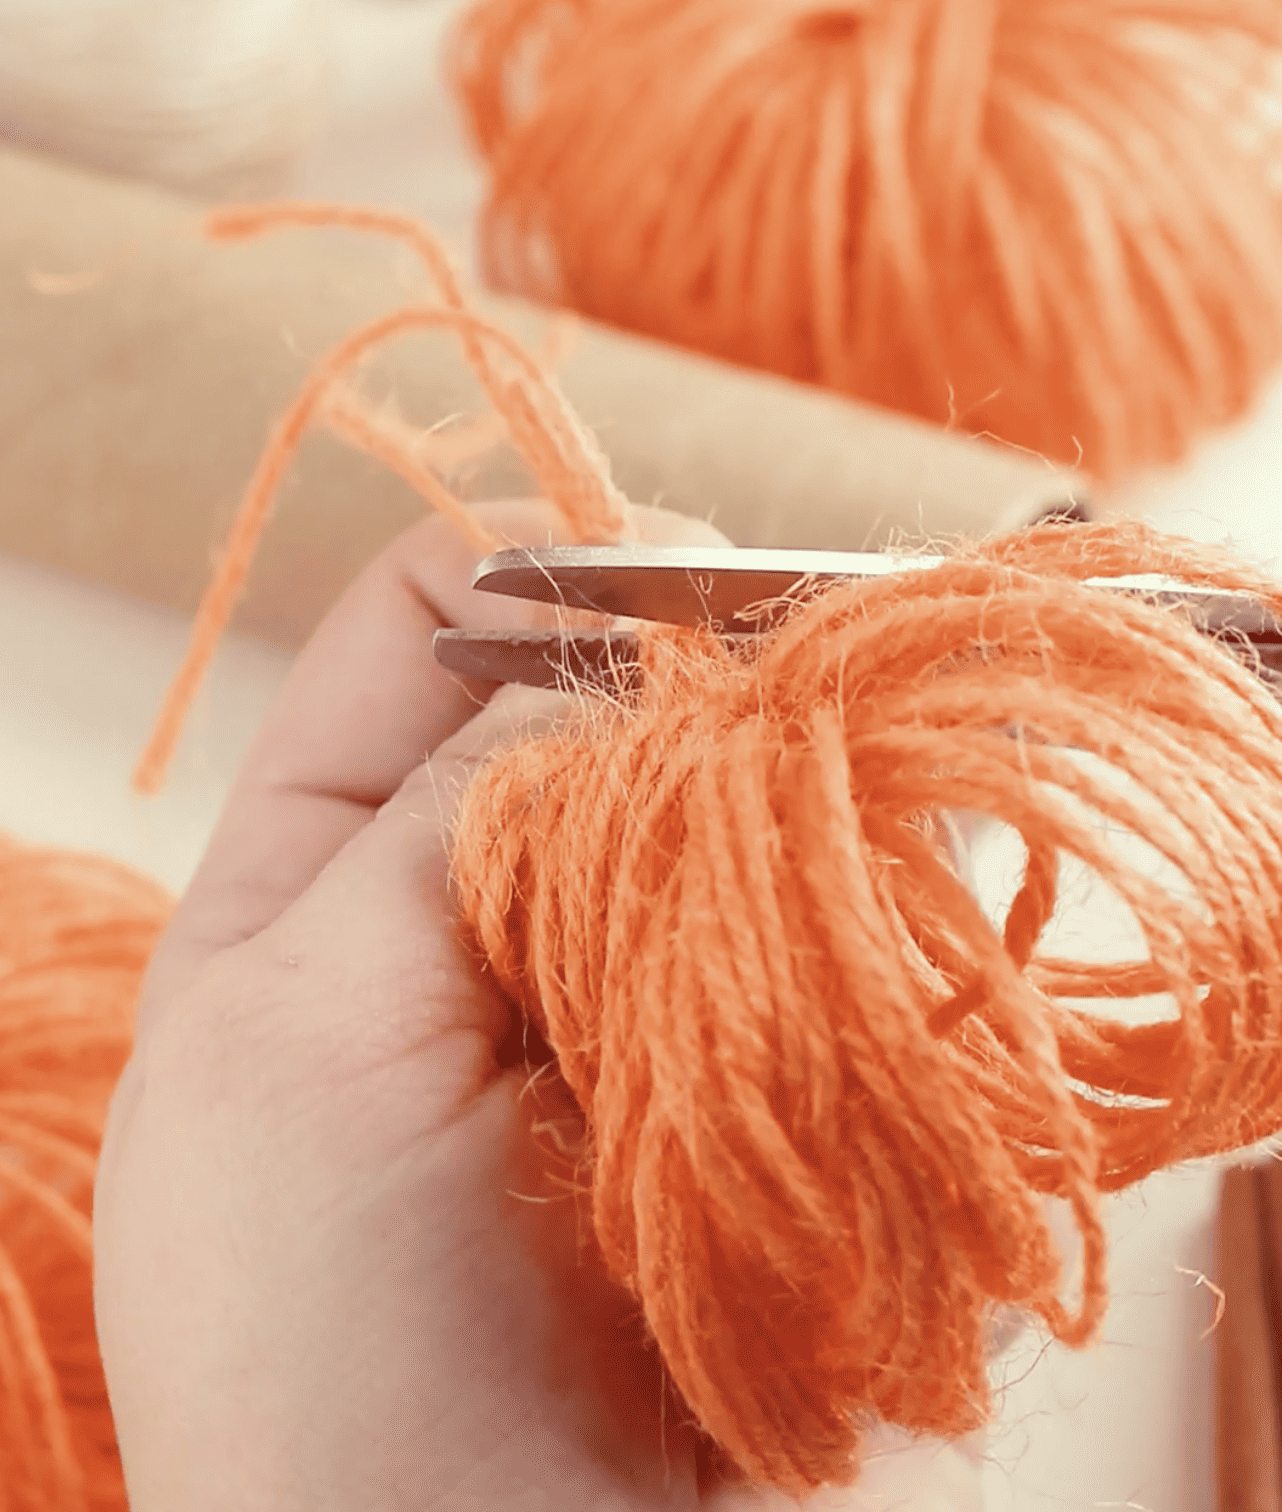
- Shape your Pumpkin: Start slowly unwrapping the loops around the paper tube and use the tape as guidance to make sure the whole thing doesn’t unravel. Eventually, you can discard the tape as you gain control of your pumpkin. Gather into a circle and use the two loose strings to tie the loops together. If you’ve ever made handmade pom poms this step will look very familiar to you. Tie very tightly 2-3 times, going around and back. Trim the ends. You will also have the other two strings you started out with and use those to tie around the loops too and cut those ends. Then fluff out the loops into a pumpkin shape using your fingers.
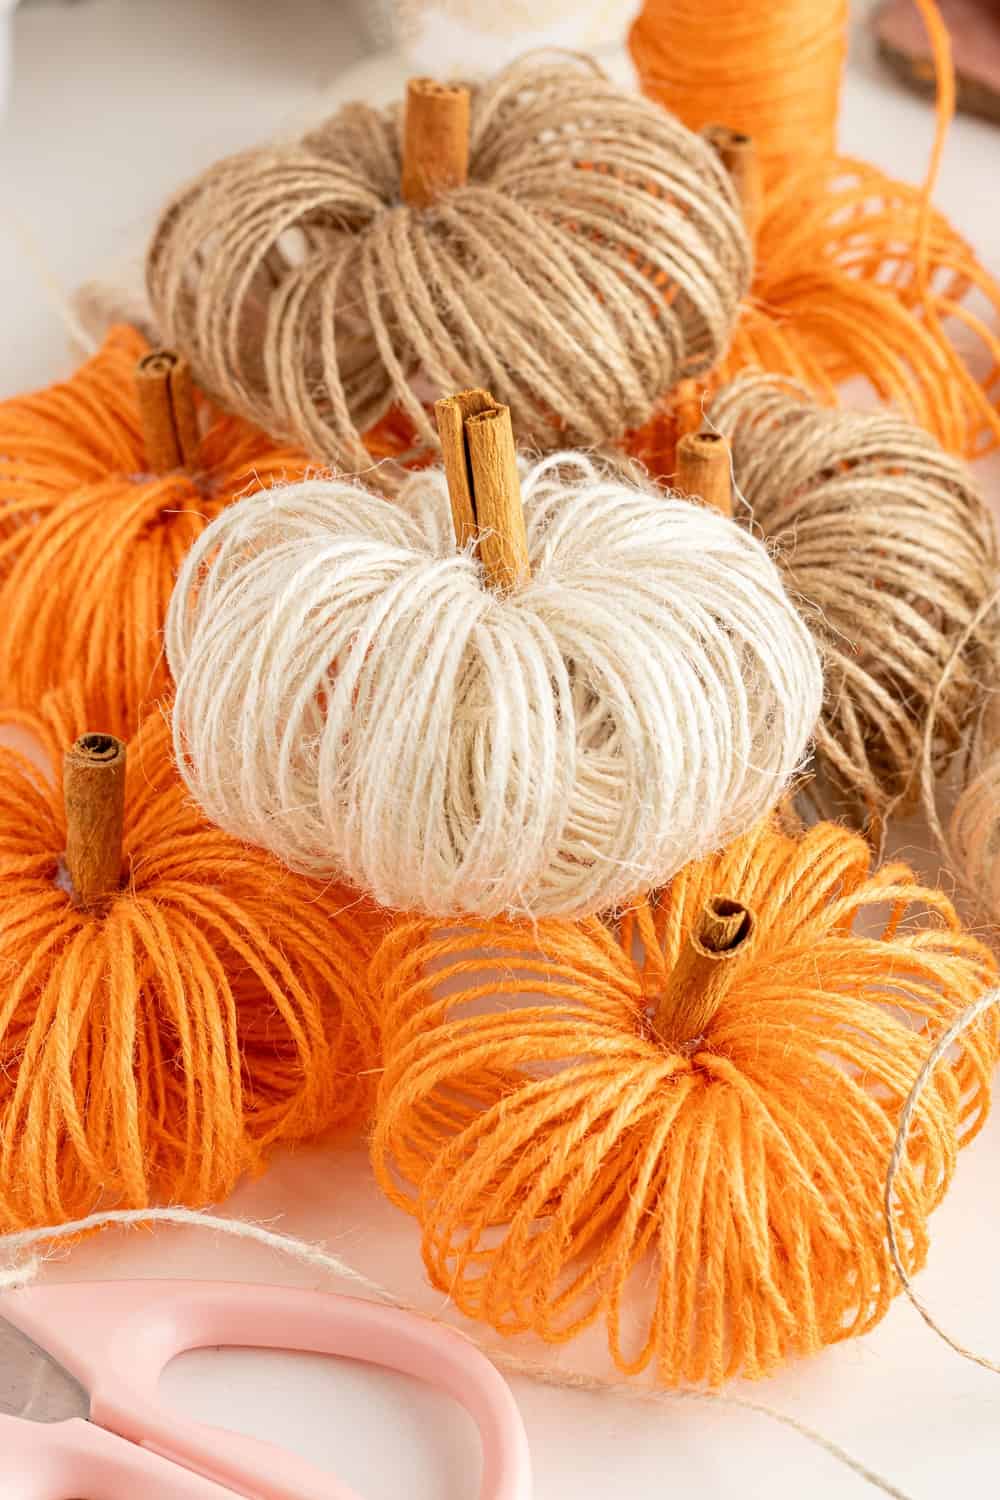
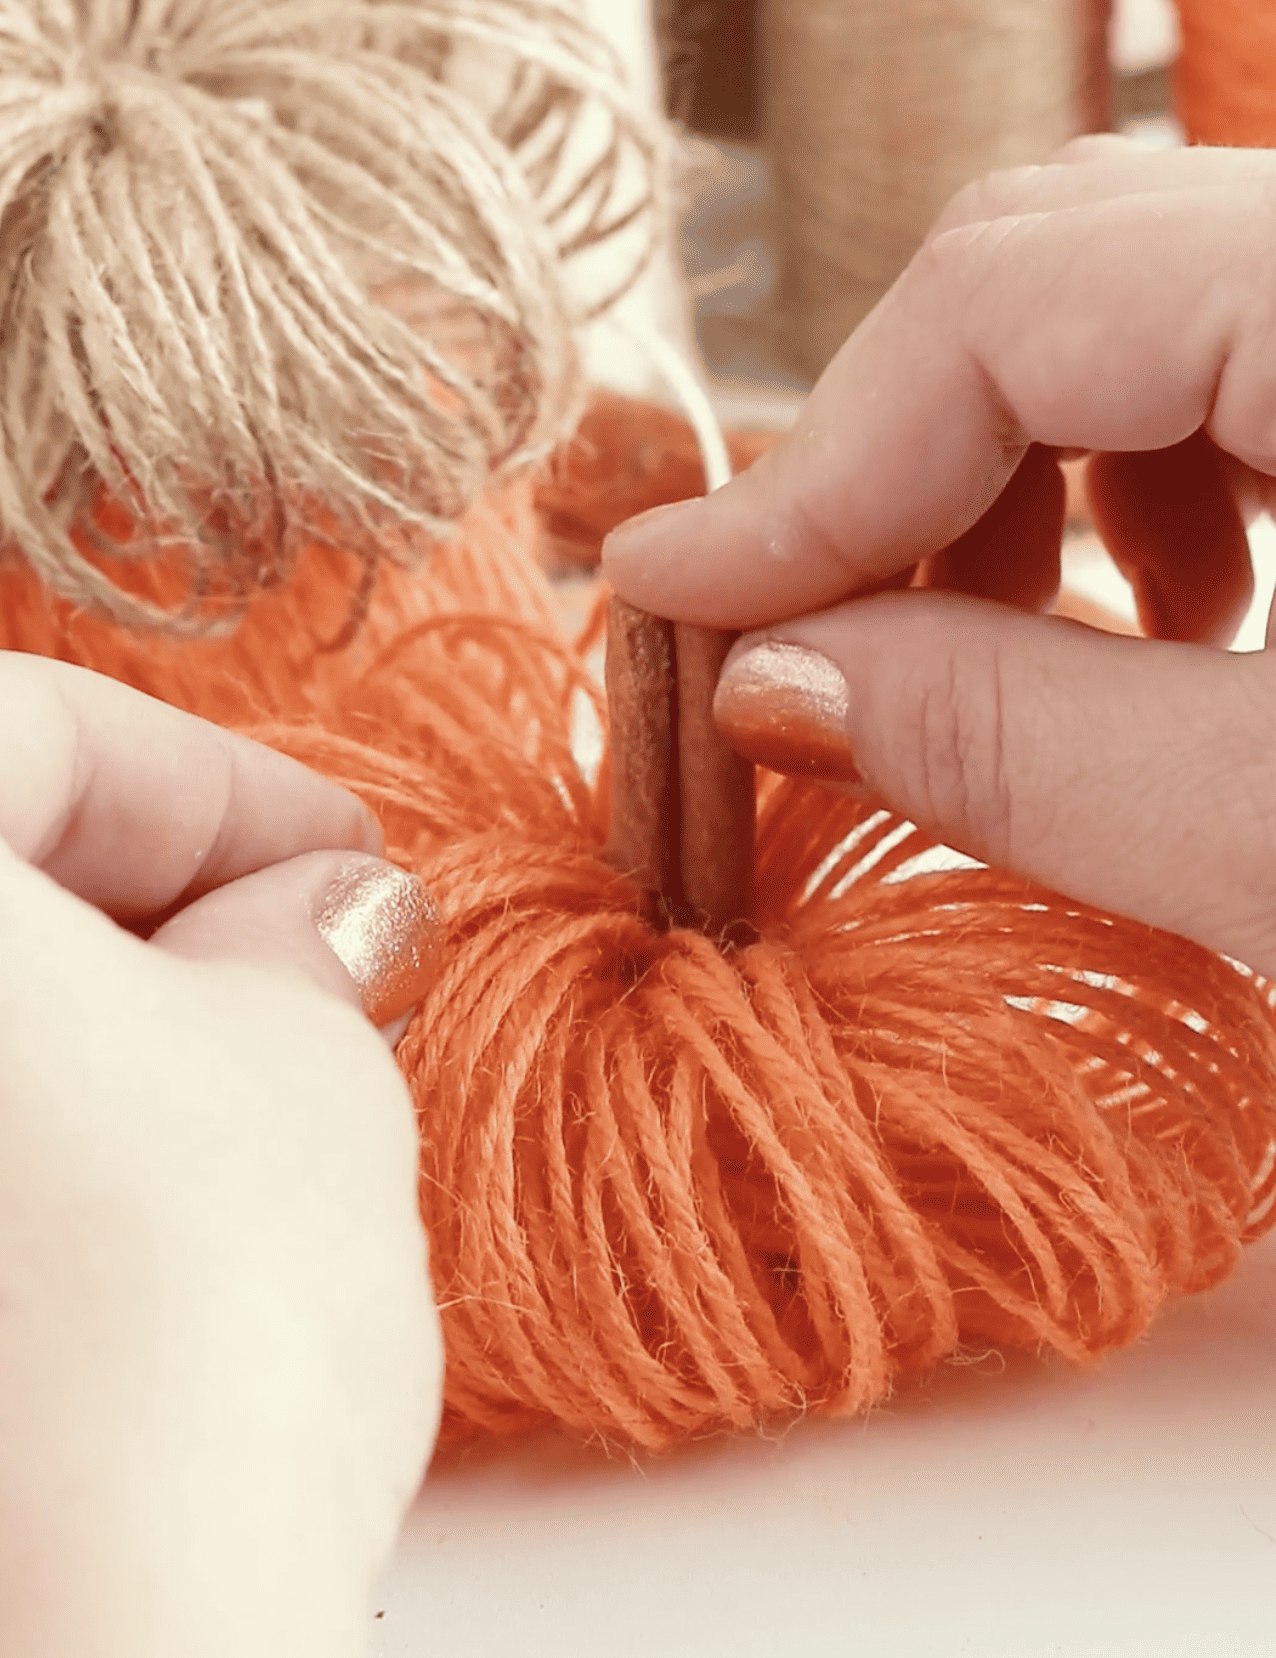
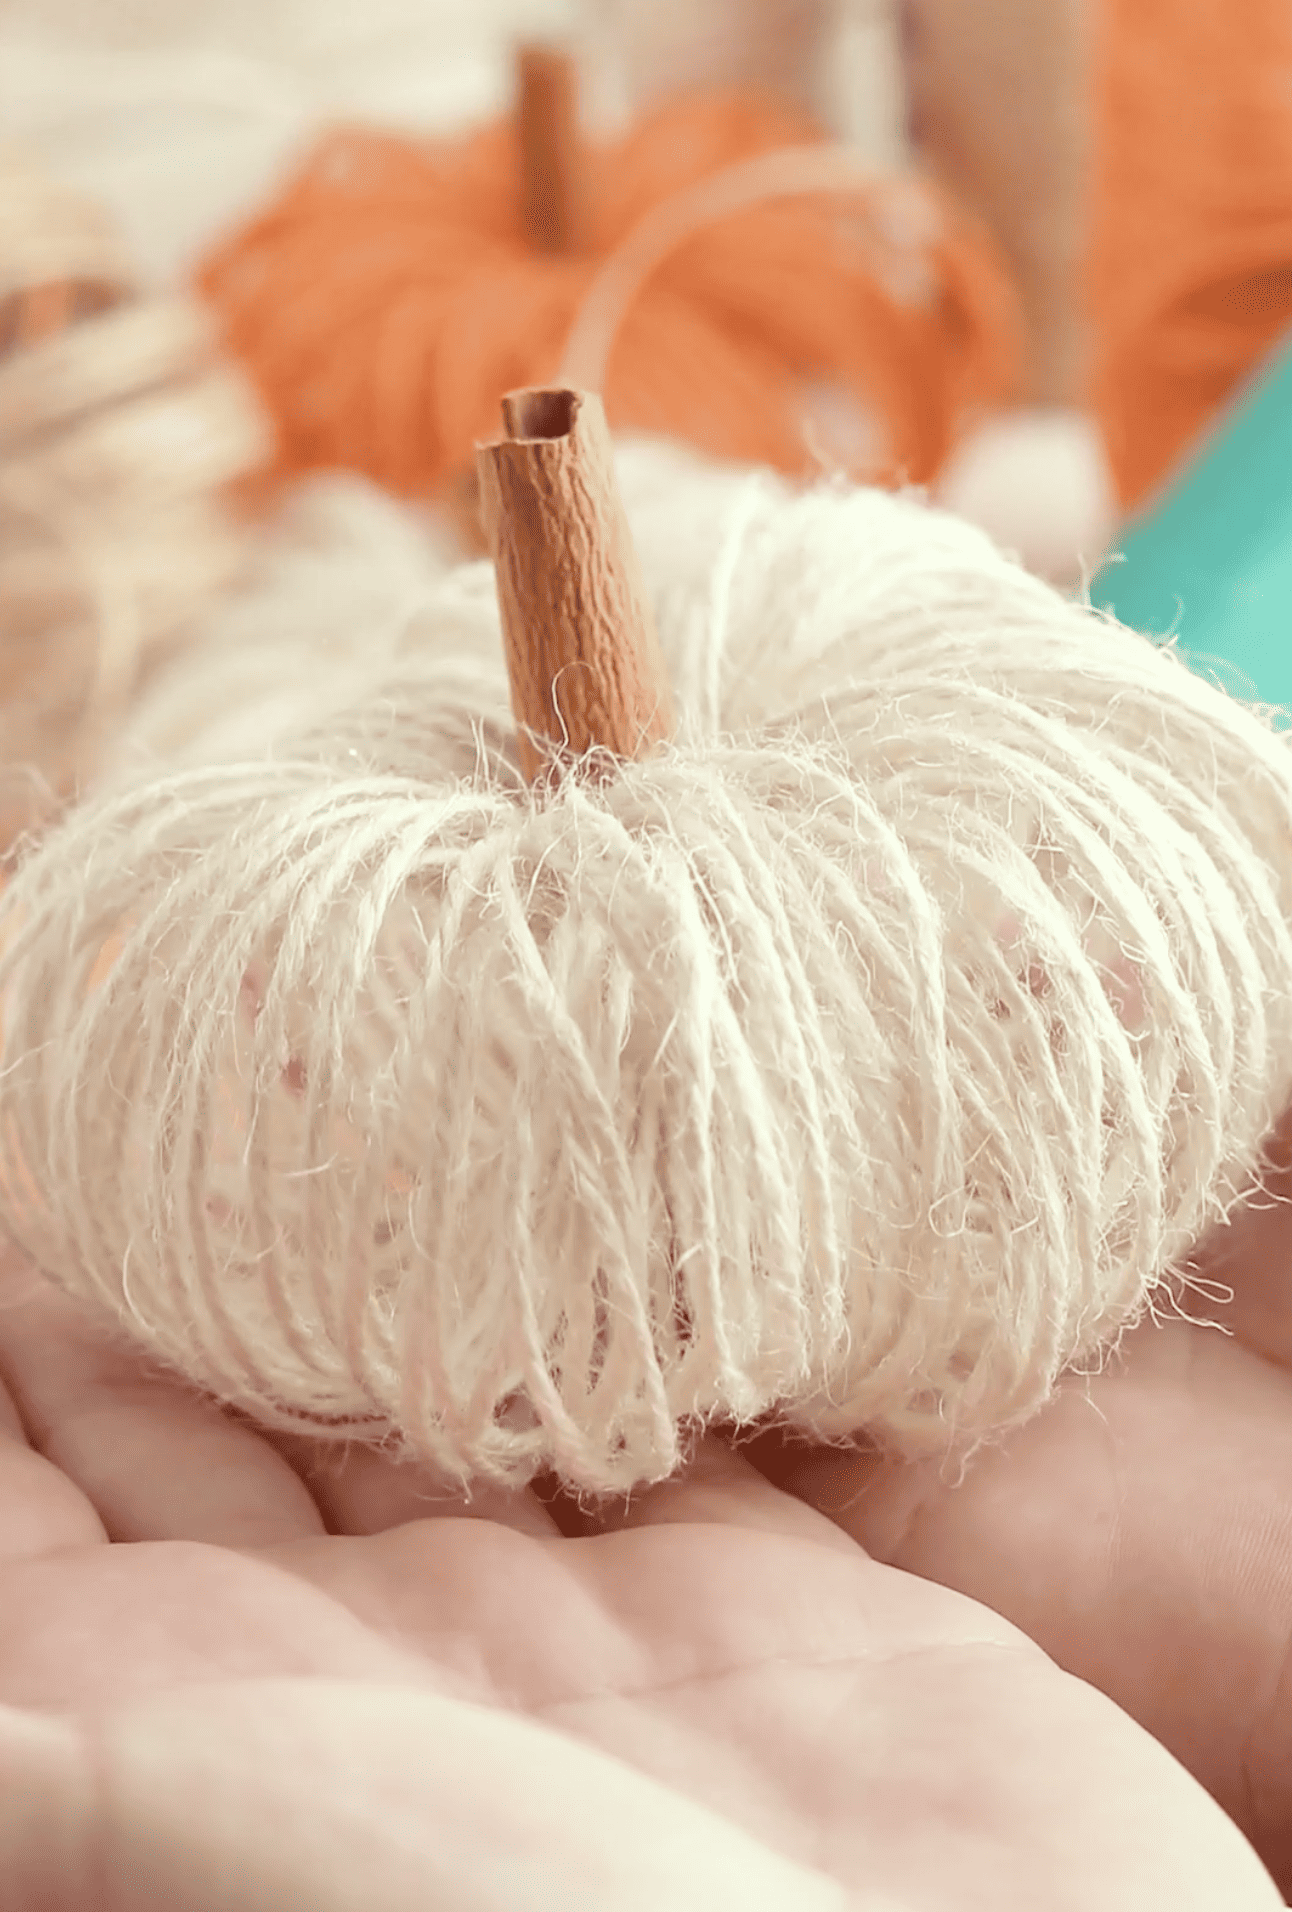
- Add the Cinnamon Stick Stem: Apply some glue to one end of a cinnamon stick and press it onto the center of the top of your twine pumpkin. The lovely thing about this is that the cinnamon stick doesn’t just act as a stem, it also gives off a faint, spicy aroma, adding to the fall vibes!
Tips:
Optional – Add Leaves: For an extra touch of fall, you can glue on a craft leaf next to the cinnamon stick. Alternatively, you can tie a ribbon around the cinnamon stick.
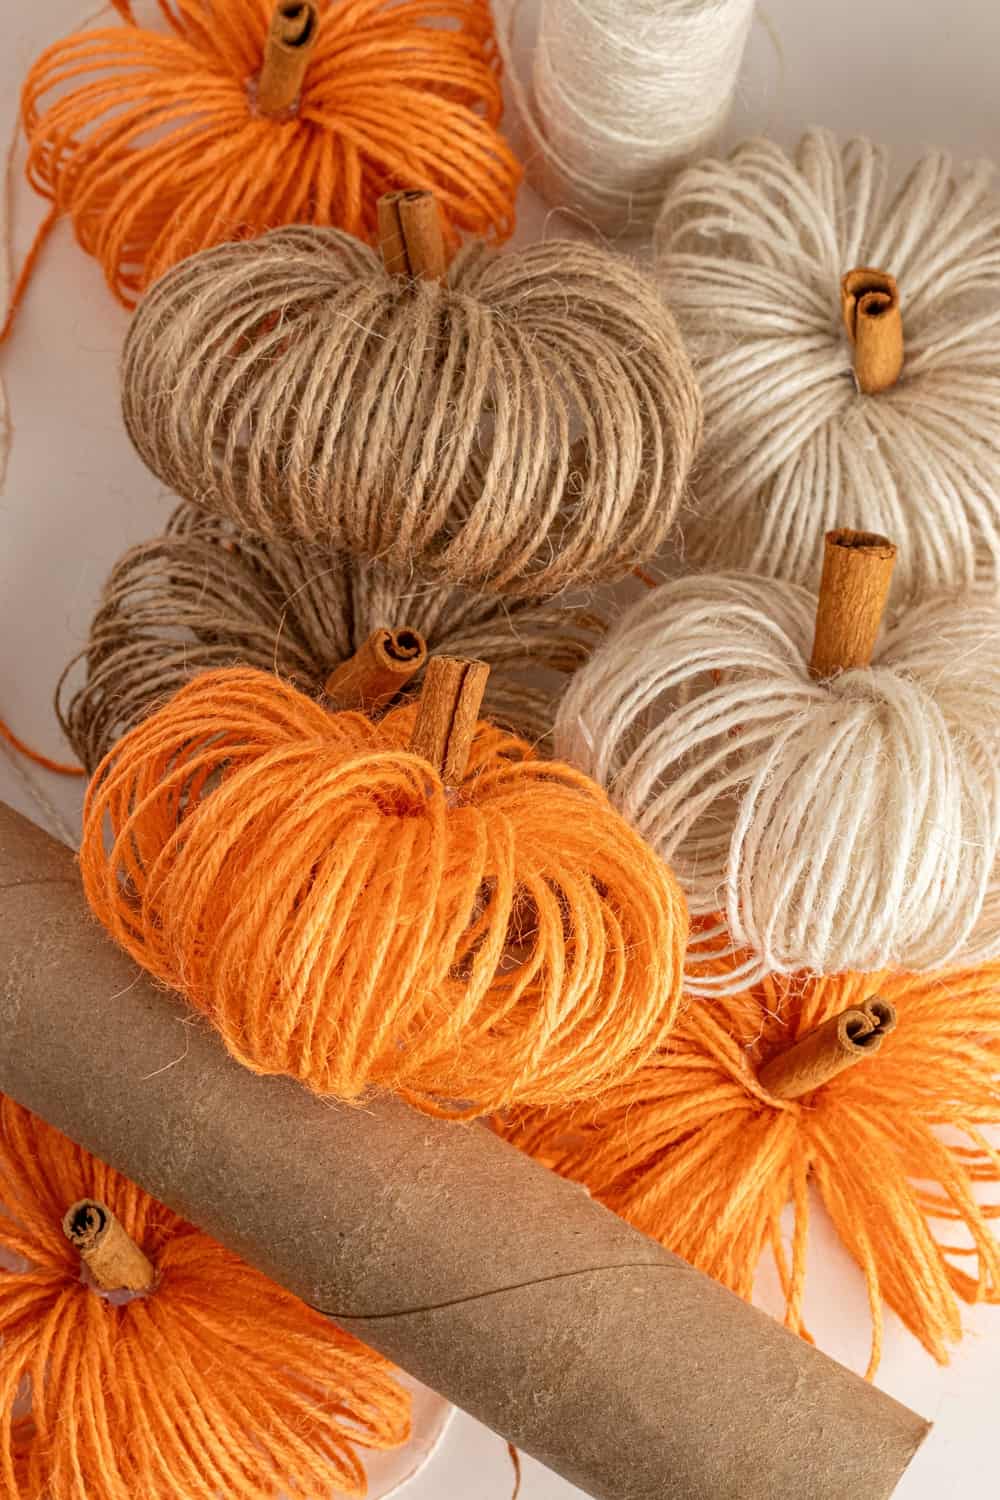
Display Your Pumpkins: Arrange your twine-wrapped pumpkins on a mantel, shelf, or as a centerpiece on a table. They also make adorable additions to a fall wreath or garland.
Make several different fall colors or bright and vibrant ones and have fun!
Conclusion:
These twine-wrapped pumpkins are the perfect blend of rustic charm and simplicity. They’re an excellent project for both adults and kids, making for a delightful family crafting afternoon. Plus, the minimal materials required means you won’t be breaking the bank to add a touch of fall to your home. So, the next time you’re sipping on that pumpkin spice latte, think of these cute DIY pumpkins and get crafting!
DIY Twine Pumpkins Make Simple And Beautiful Fall Decor

Materials
- Twine
- Empty paper towel roll
- Scissors
- Hot glue gun
- Tape
- Cinnamon sticks (for the pumpkin stem)
Instructions
- Prep the Paper Towel Roll: Cut a length of twine that hangs 1-2 inches from the end of your tube and tape both ends down.
- Begin Wrapping: Take one end of the twine and tape about 2 inches from one end of the paper tube. Start wrapping the twine around the roll but don't do it too tightly or it will be hard to remove! Ensure that the twine is close together so that the paper towel roll isn’t visible. Continue wrapping until you reach the other end, then cut off the twine leaving some extra string and tape that cut end to the wrapped portion of the tube.
- Shape your Pumpkin: Start slowly unwrapping the loops around the paper tube and use the tape as guidance to make sure the whole thing doesn't unravel. Eventually, you can discard the tape as you gain control of your pumpkin. Gather into a circle and use the two loose strings to tie the loops together. If you've ever made handmade pom poms this step will look very familiar to you. Tie very tightly 2-3 times, going around and back. Trim the ends. You will also have the other two strings you started out with and use those to tie around the loops too and cut those ends. Then fluff out the loops into a pumpkin shape using your fingers.
- Add the Cinnamon Stick Stem: Apply some glue to one end of a cinnamon stick and press it onto the center of the top of your twine pumpkin. The lovely thing about this is that the cinnamon stick doesn’t just act as a stem, it also gives off a faint, spicy aroma, adding to the fall vibes!
Notes
Tips:
Optional – Add Leaves: For an extra touch of fall, you can glue on a craft leaf next to the cinnamon stick. Alternatively, you can tie a ribbon around the cinnamon stick.
Display Your Pumpkins: Arrange your twine-wrapped pumpkins on a mantel, shelf, or as a centerpiece on a table. They also make adorable additions to a fall wreath or garland.
Make several different fall colors or bright and vibrant ones and have fun!


