
DIY Barbie Costume Using A Cardboard Box
By using this site, you agree to our Terms of Use. This post may contain affiliate links. Read our disclosure policy.
Check out my Plaeful Printables for kids play and learning!
Be the year's fun and unique standout Halloween costume with this epic DIY Barbie costume using cardboard and paint!
If you're a fan of Barbie chances are you went to see this past summer's blockbuster hit Barbie The Movie. Greta Gerwig’s new ‘Barbie’ movie made waves this past summer in movie theaters topping more than 1.38 billion worldwide per PR Newswire. The cast included Helen Mirren as the narrator, Margot Robbie and Ryan Gosling as Barbie and Ken, along with Dua Lipa, Issa Rae, Simu Liu, Michael Cera, Will Ferrell, and Kate McKinnon.
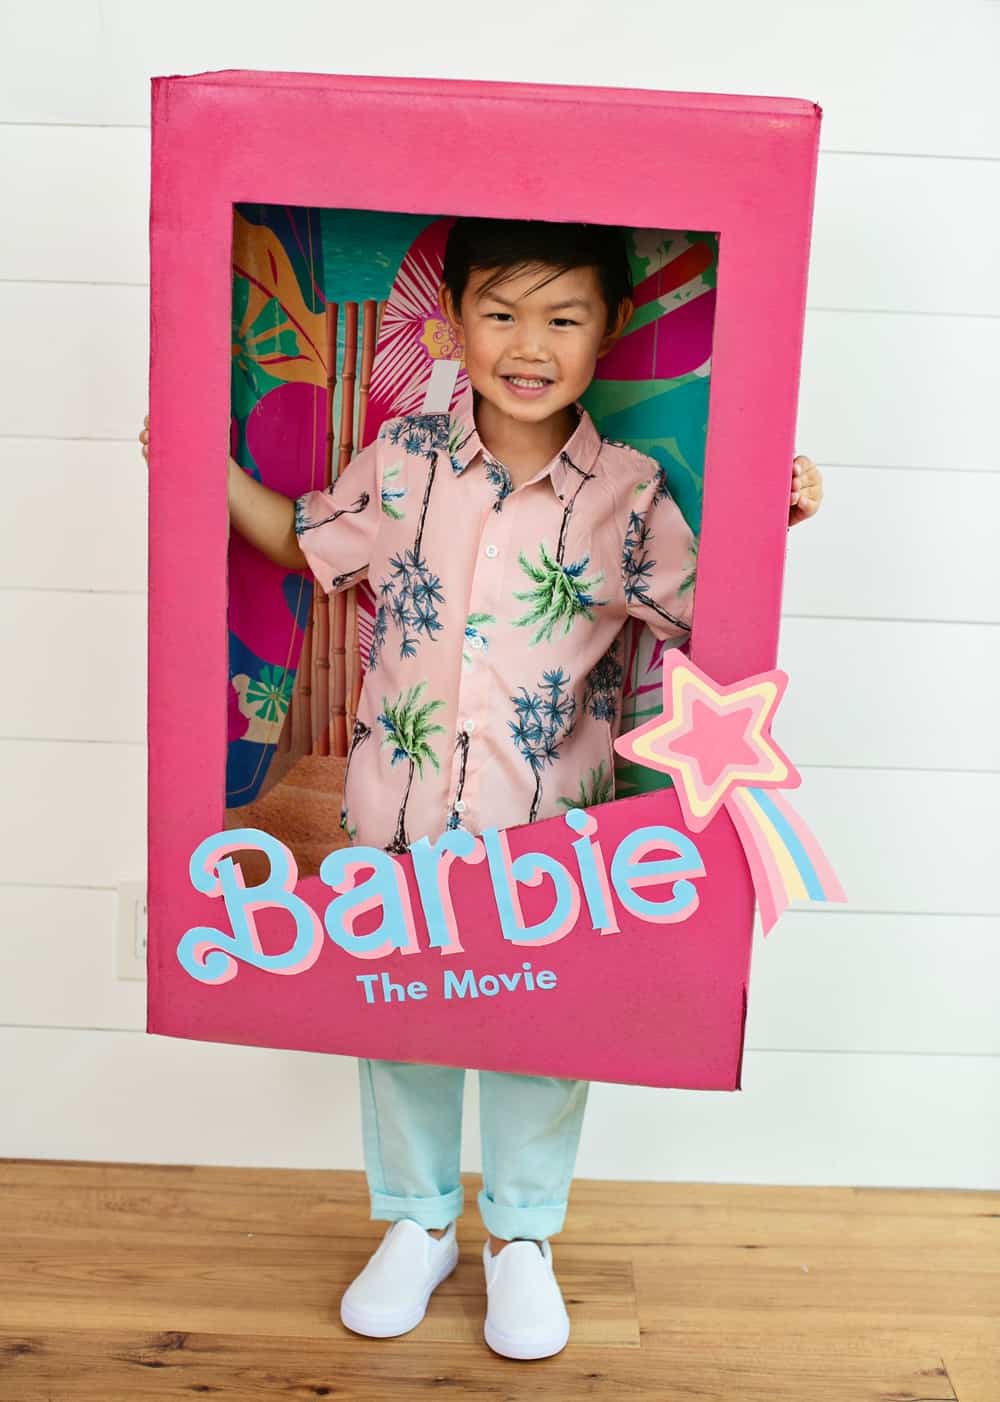
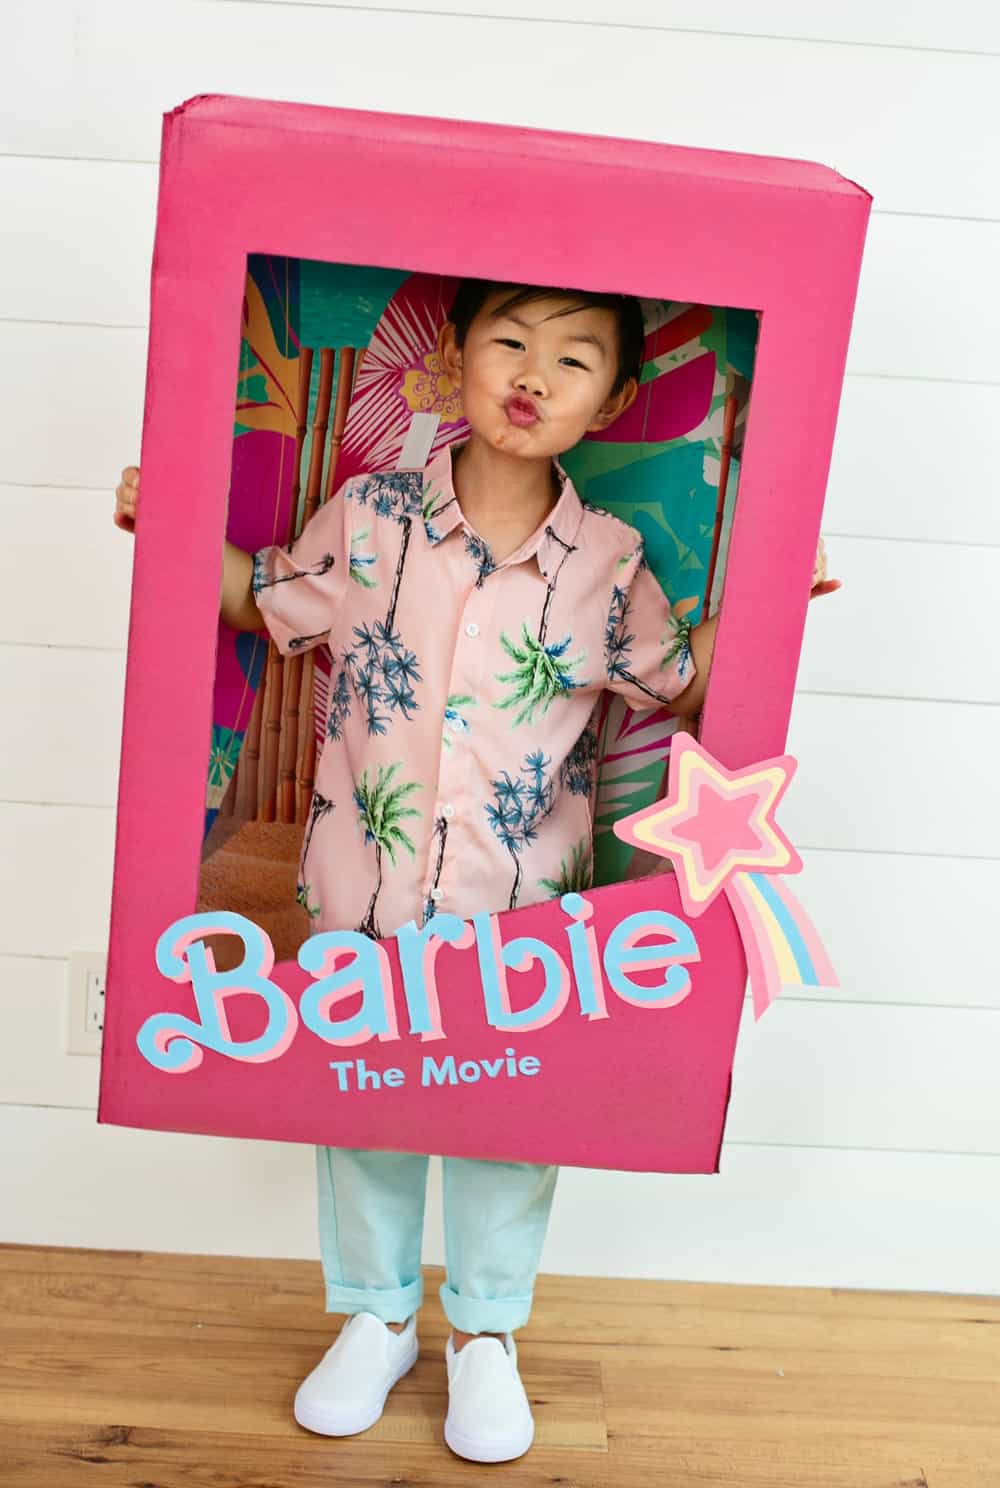
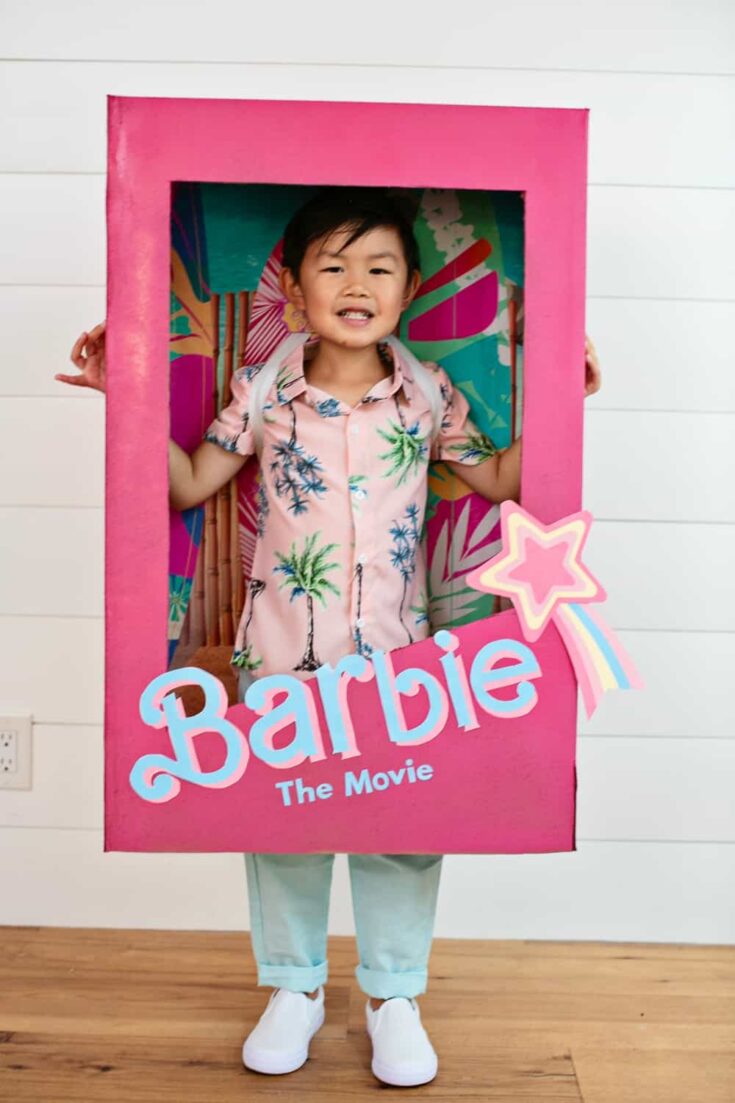
Barbie is such an iconic character that I knew creating a DIY Barbie costume would be on trend and benefit many children who wanted to be Barbie or Ken this year for Halloween! I wanted to create one DIY costume that could both be used for BOTH the Barbie and Ken doll so this particular design is based on the doll packaging for Barbie The Movie. I happen to have a "Ken" at home 🙂
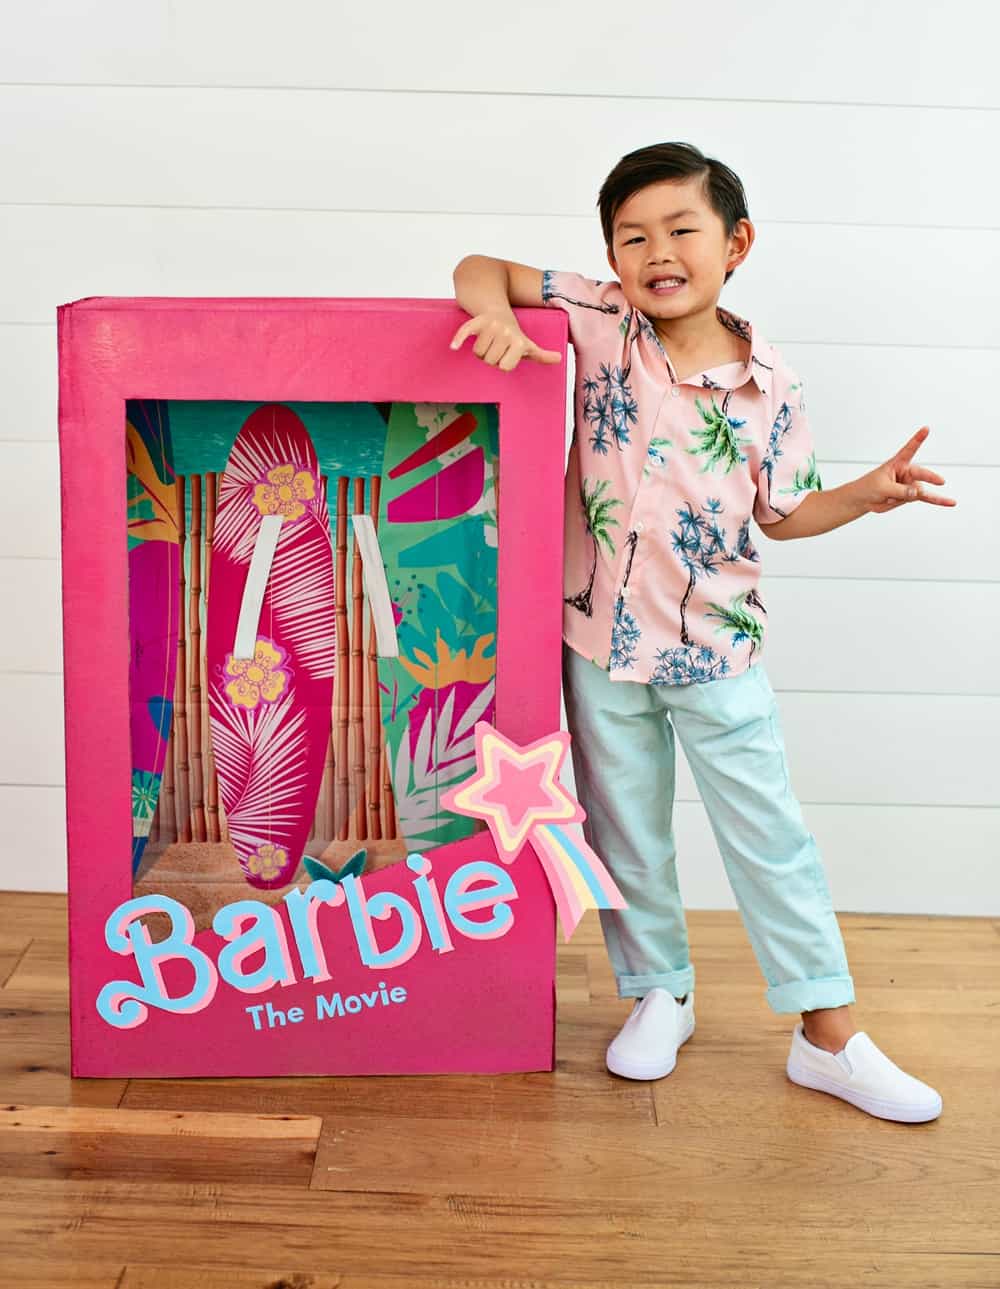
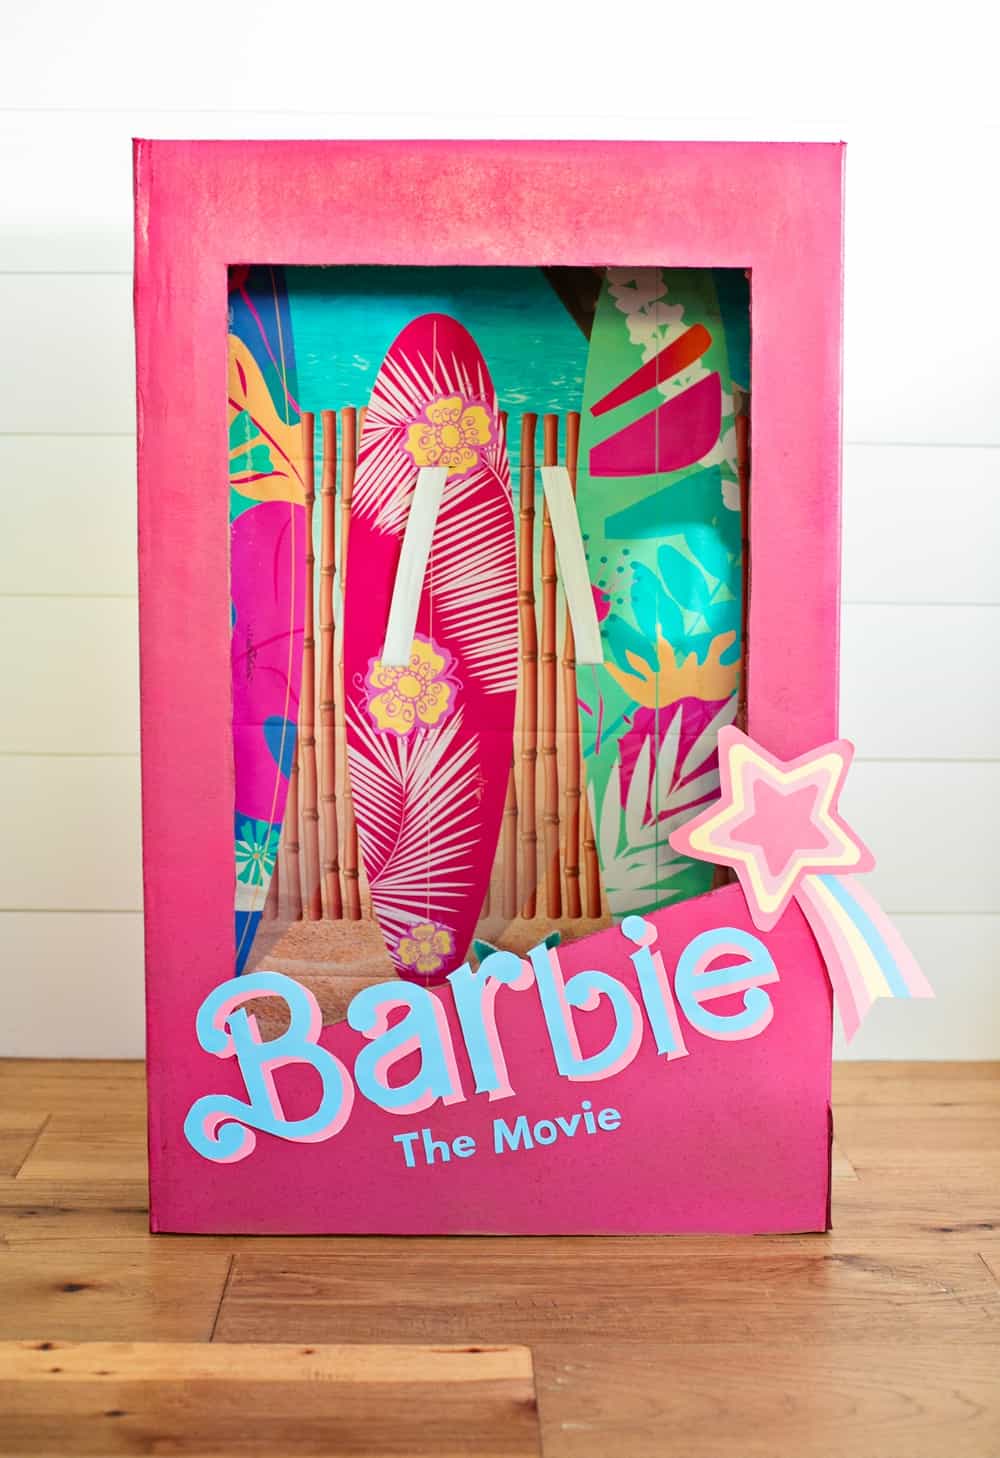
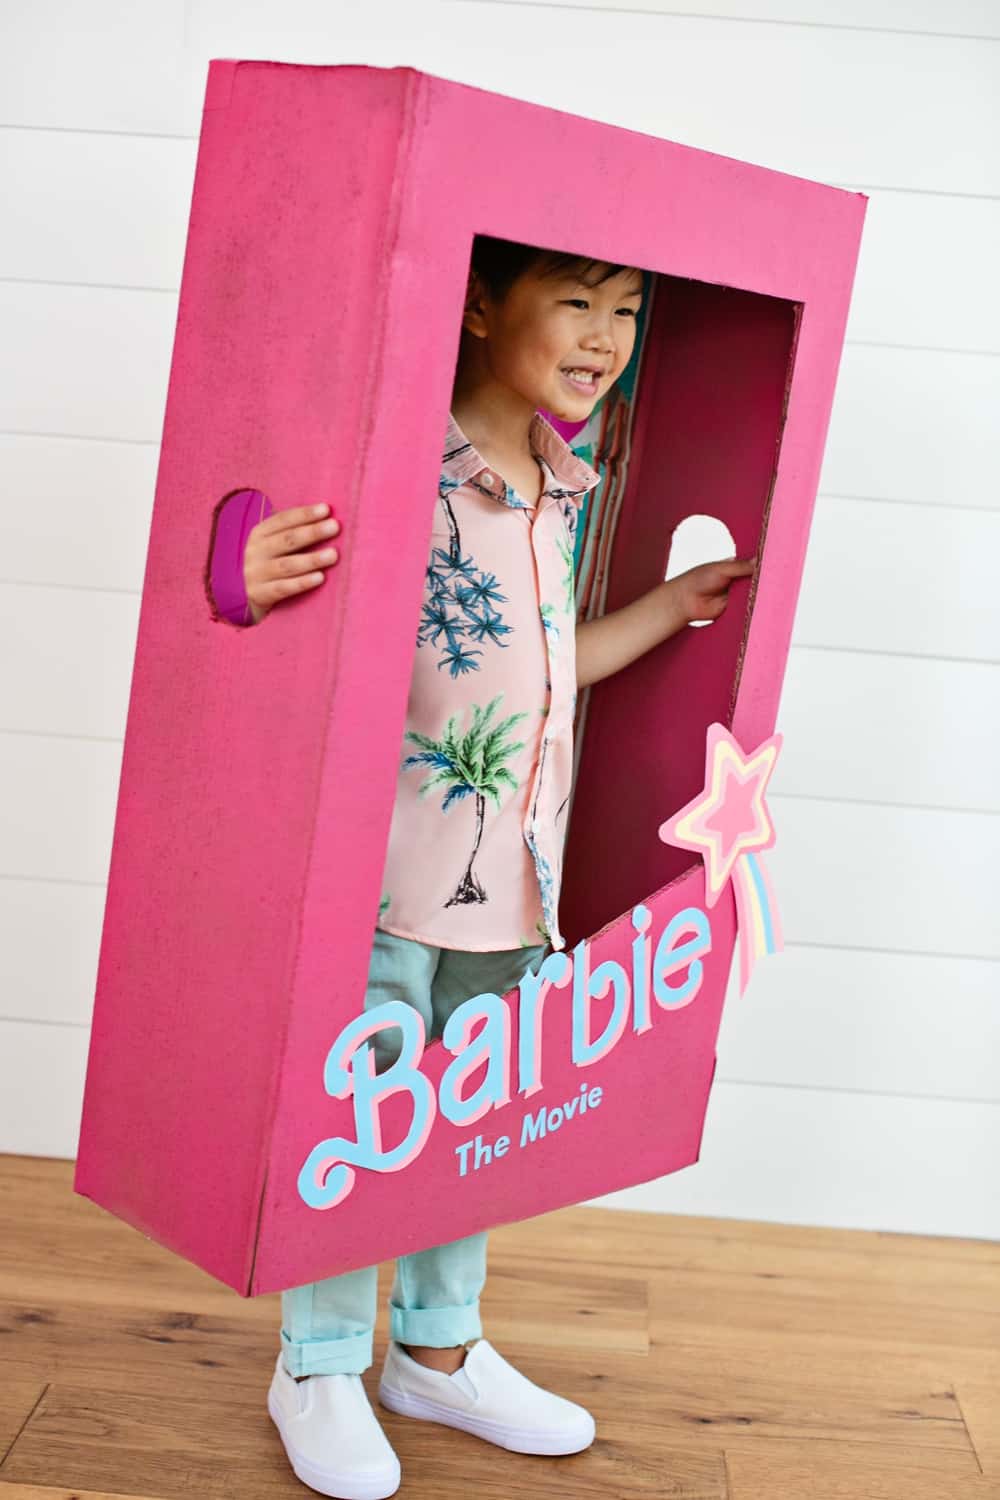
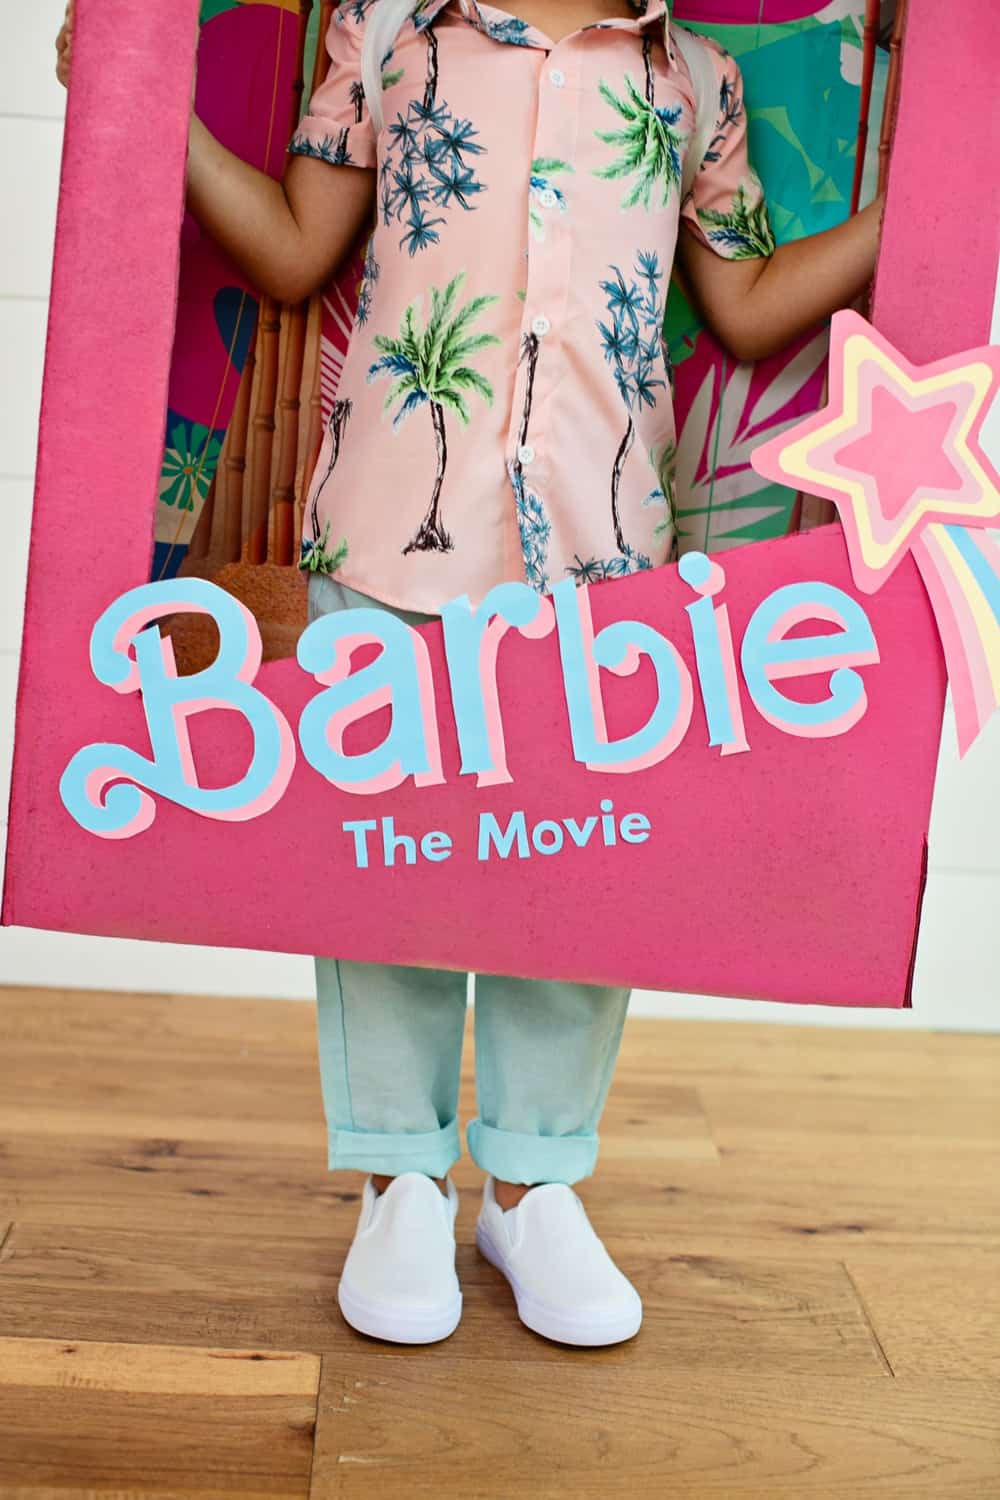
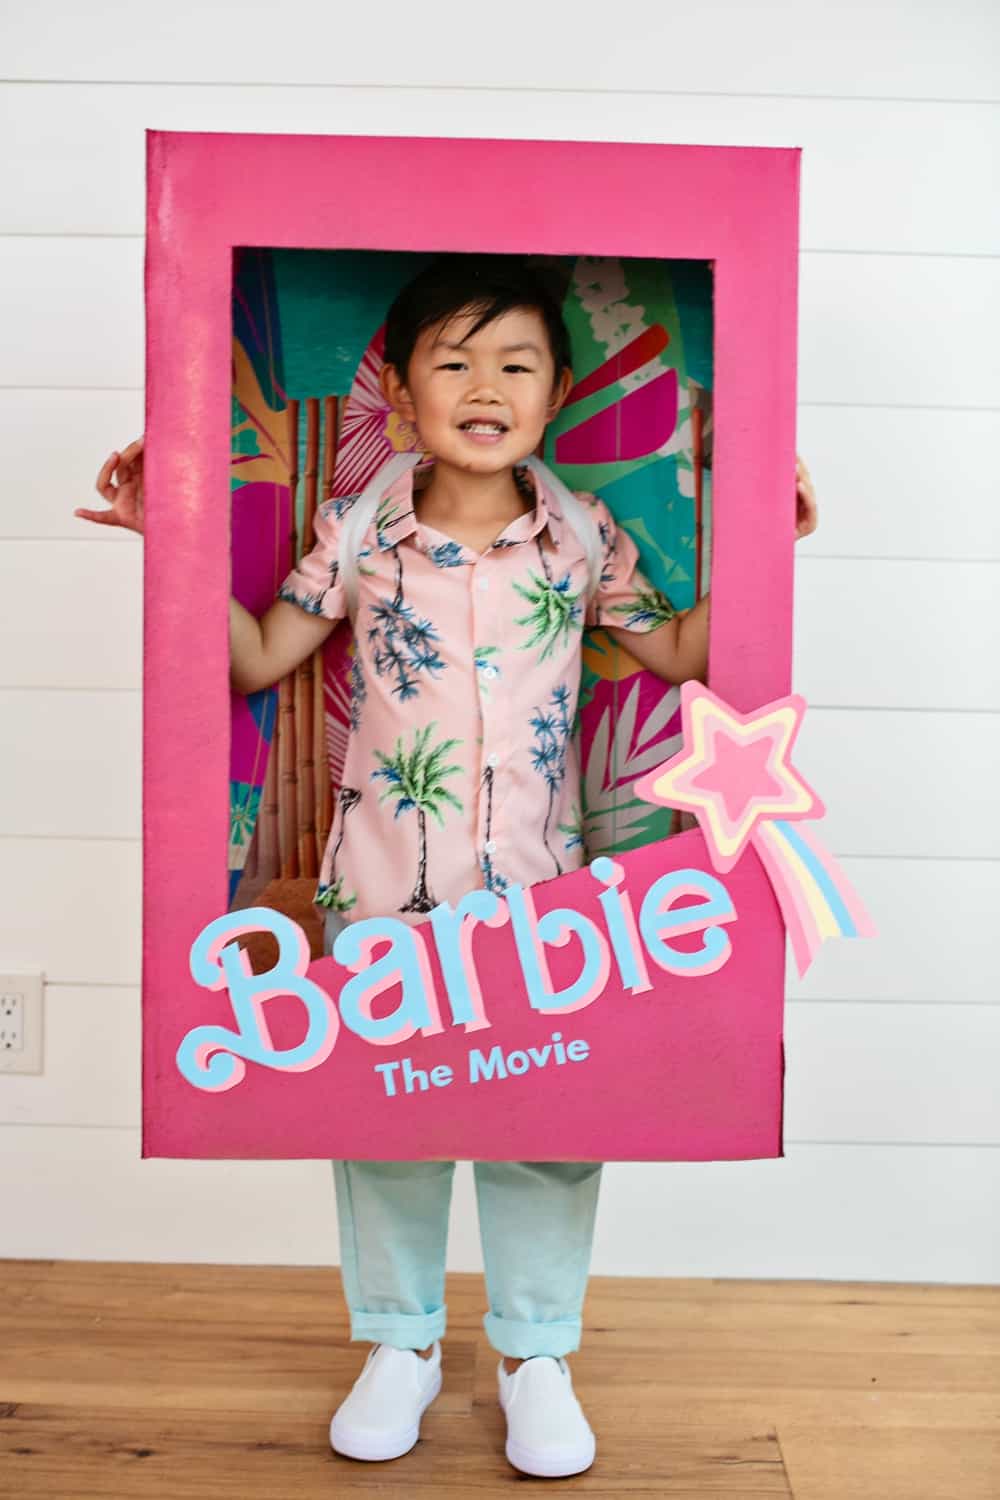
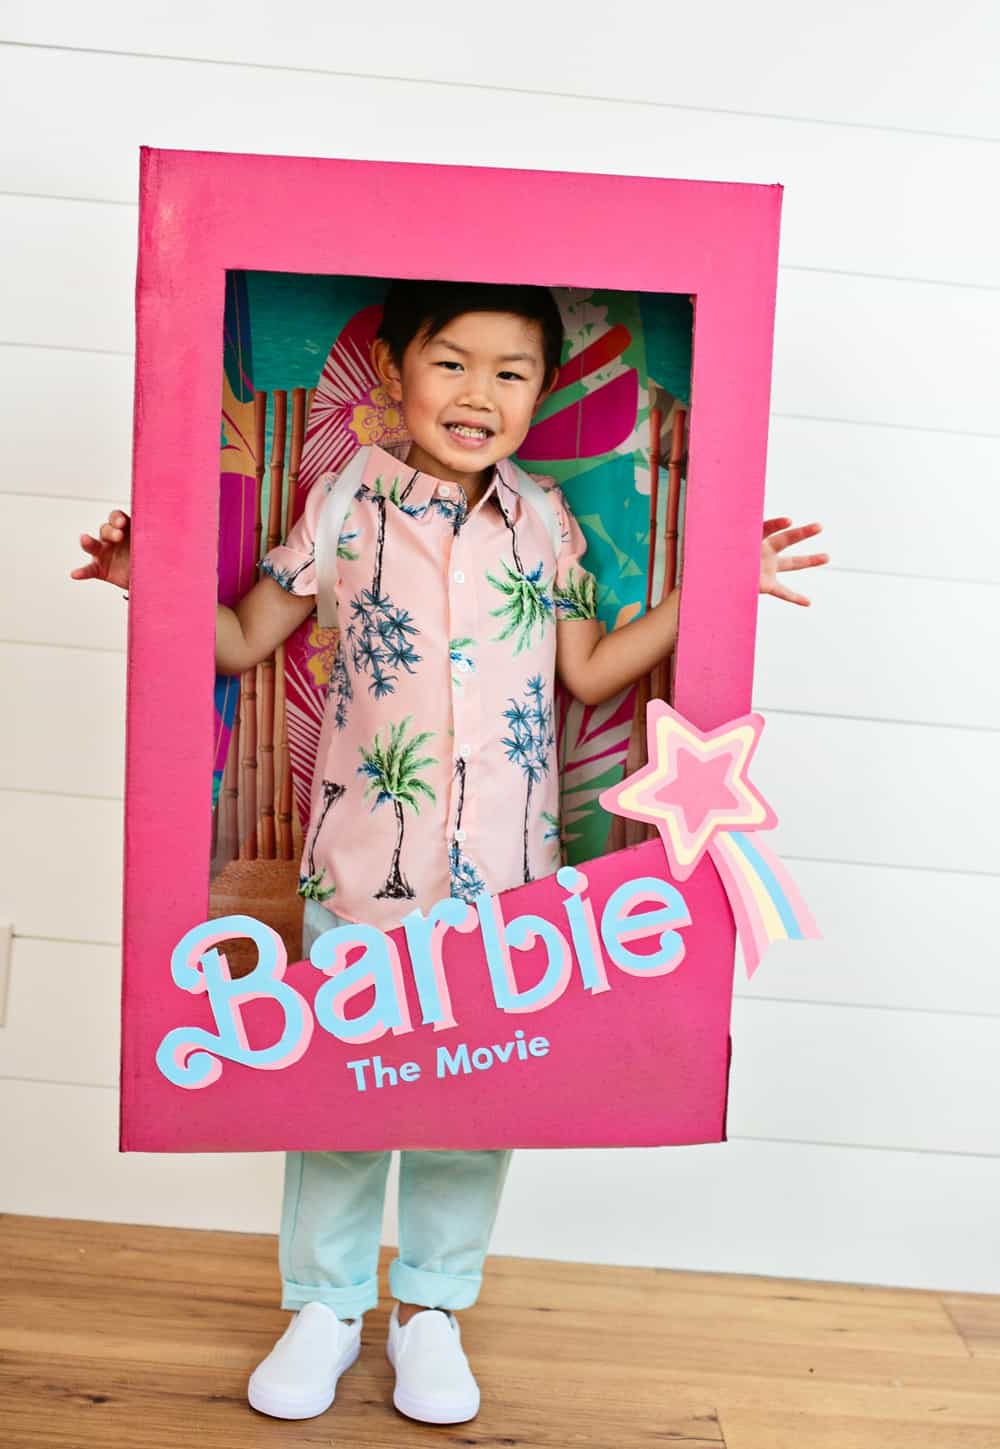
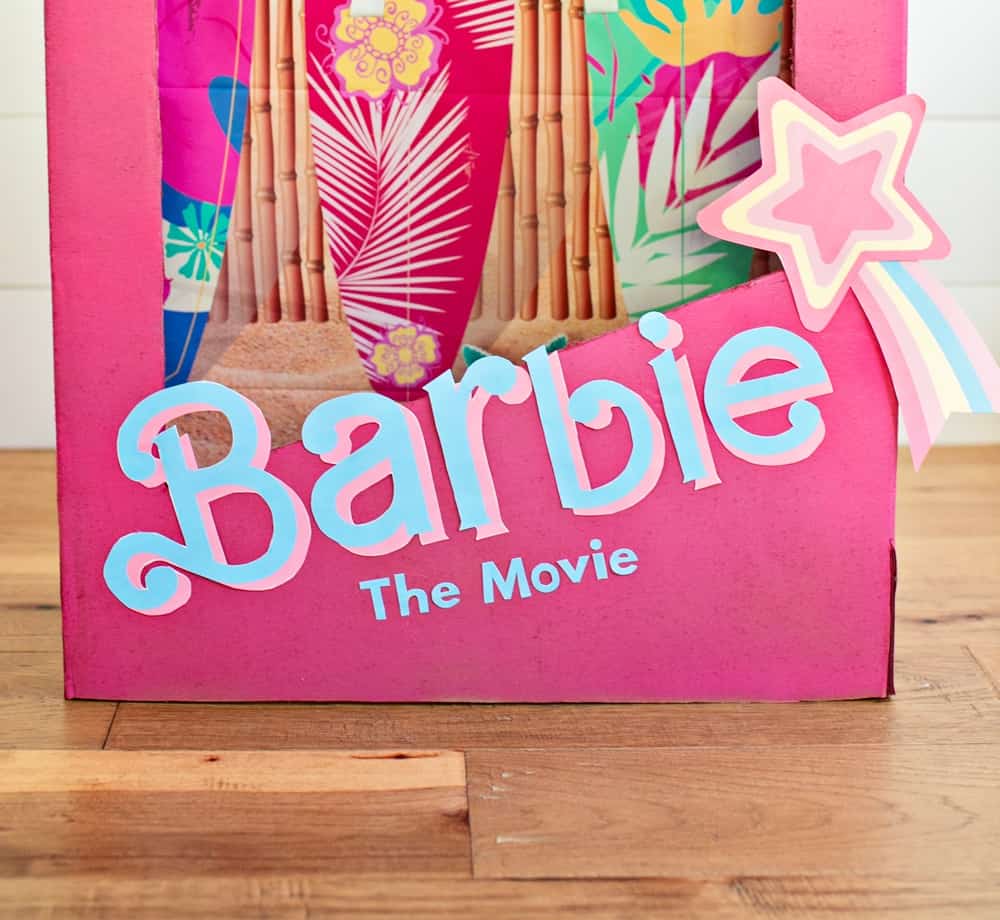
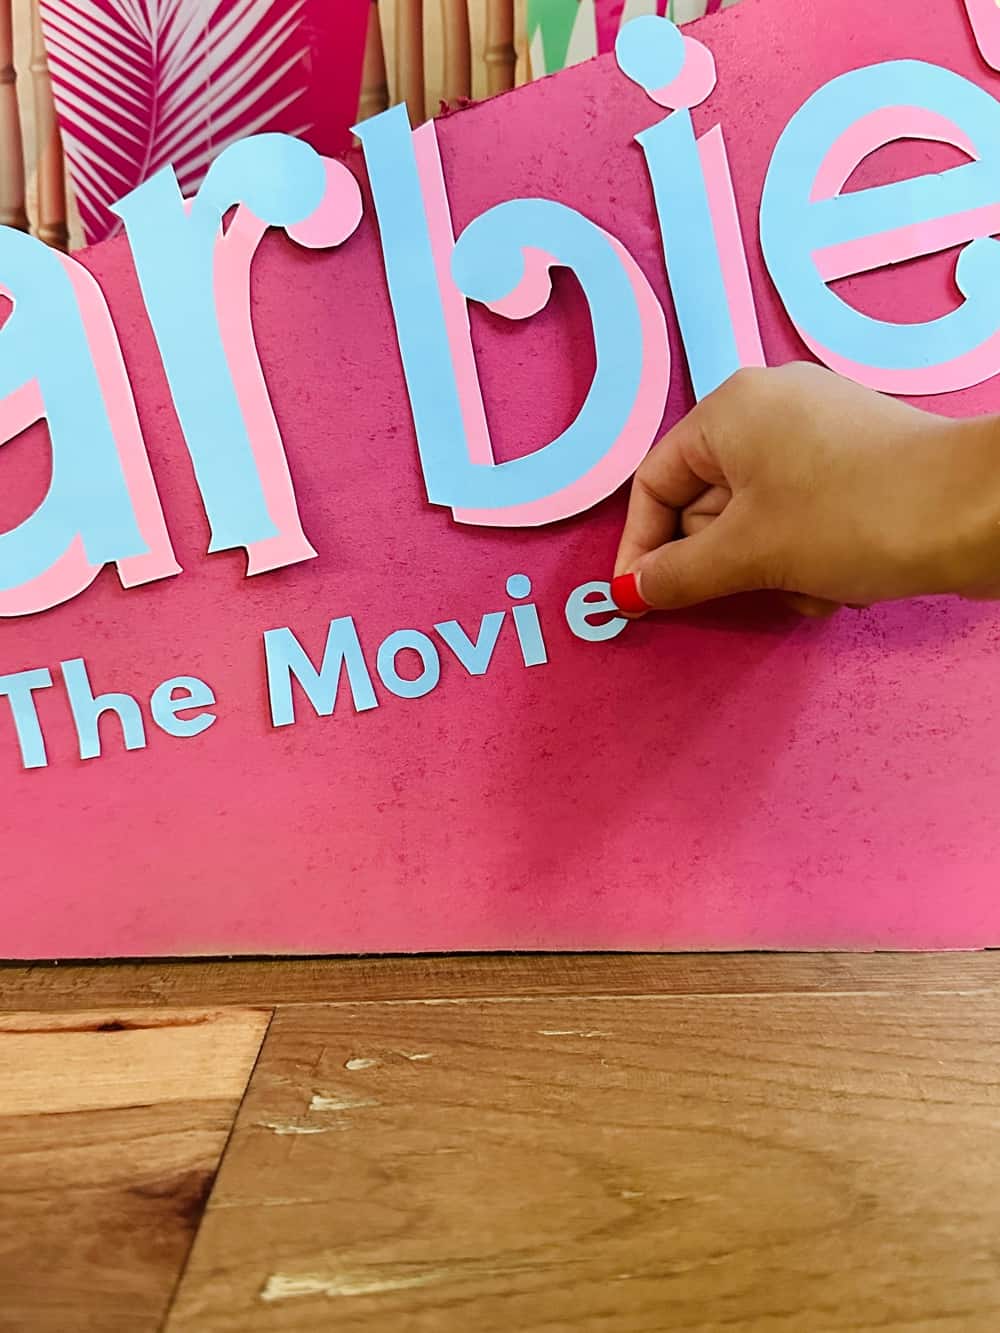
My lovable 5 year old son also happens to love pink so this was a perfect costume to make for him. We used the Barbie the Movie Ken Doll as inspiration for the costume. He dressed up as Ryan Gosling's "Ken" in fashionable California beach ware and the background was a colorful beach print. The front of the Barbie costume box has "Barbie The Movie" in iconic Barbie font with the pastel rainbow shooting star in front.
As you can tell from the Barbie the Movie Doll the packaging is the same so whether your child wants to be Ken or Barbie you can use this costume interchangeably!
You can find a similar Barbie font online to create yours. We can't share the one we made since the name is copyrighted. This was for our own personal use only. But you can still follow along to see how we constructed the cardboard costume!
What do need to make this DIY Barbie costume?
You'll need a sturdy box that is rectangular shape with a shallow width and height to fit your child. Also an elastic strap and a colorful backdrop (we used a photo backdrop linked below in the materials). You will also need elastic straps and Barbie letters and star design
Other materials are lots of hot glue and pink spray paint!
What size box did you use?
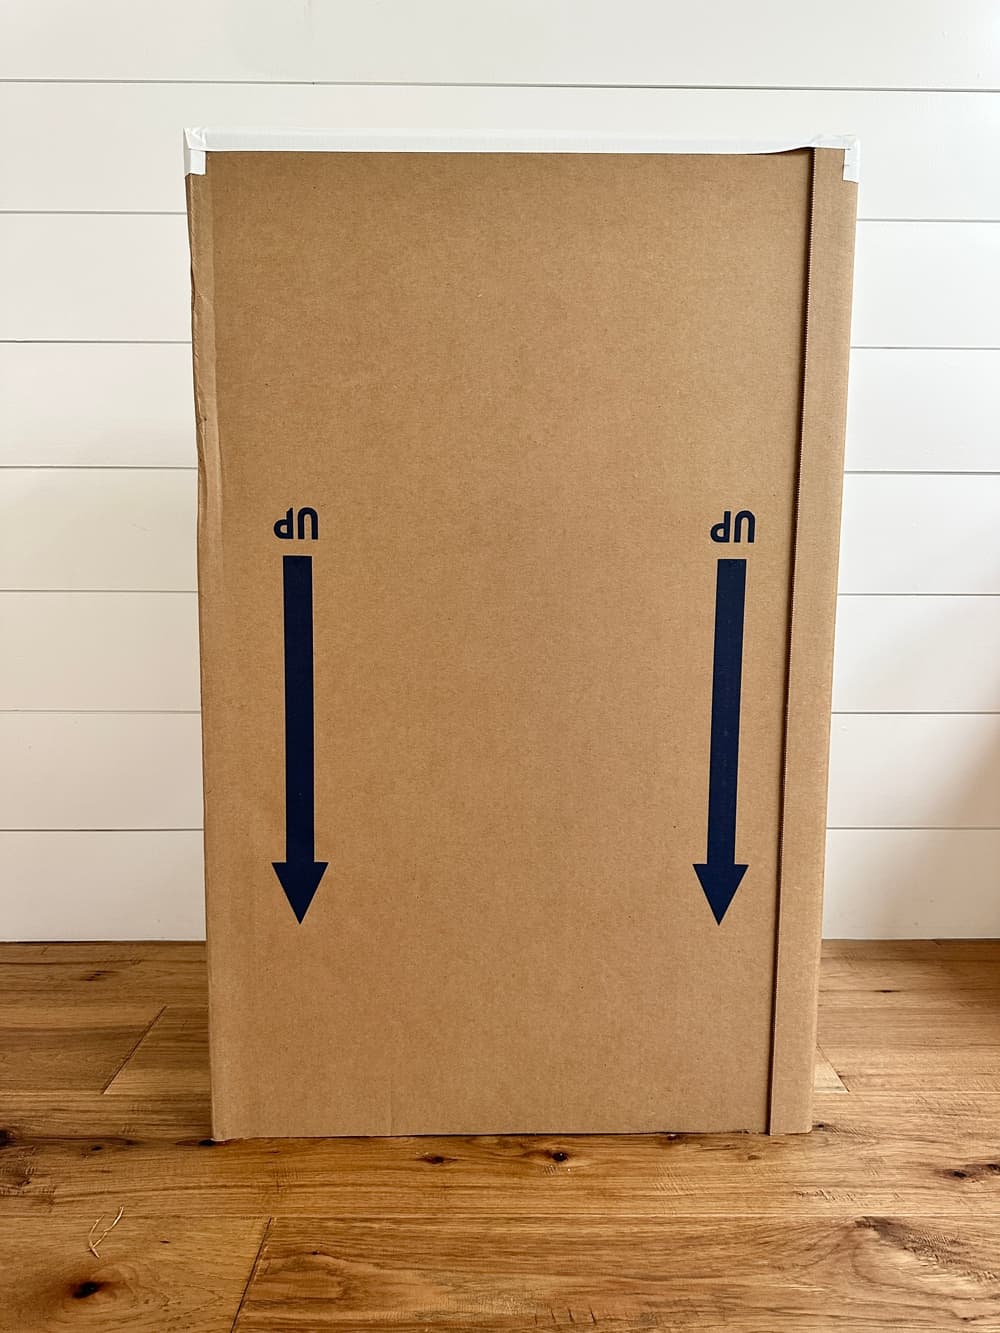
The box size we used is 22" x 8" x 40" and it is actually a "wardrobe" box. It fits my 5 year old inside perfectly but also my 12 year old! So this is a great size that can accommodate younger and older children. We got it on Uline.
Of course, it would be ideal if you had the perfect size box and recycled that instead. The unfortunate thing about Uline is that it requires you to buy 5 of the boxes, but you can pool your resources and ask around if other friends want to be Barbie and split the cost! I happen to make lots of DIYs from cardboard so I am not worried about reusing the cardboard for many other projects.

What backdrop did you use?'
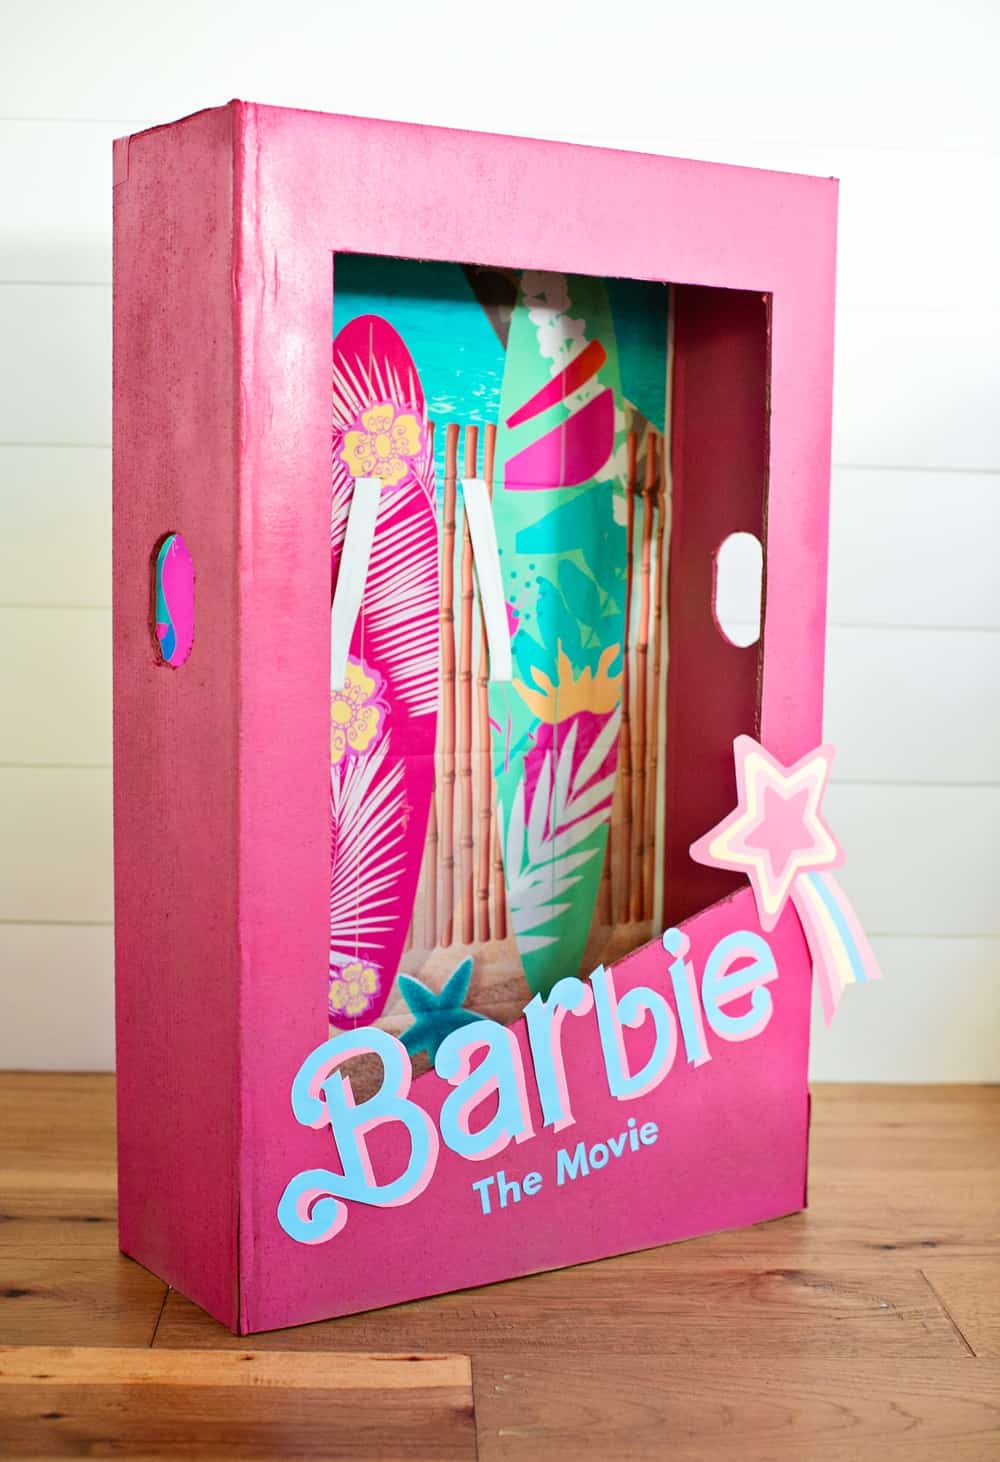
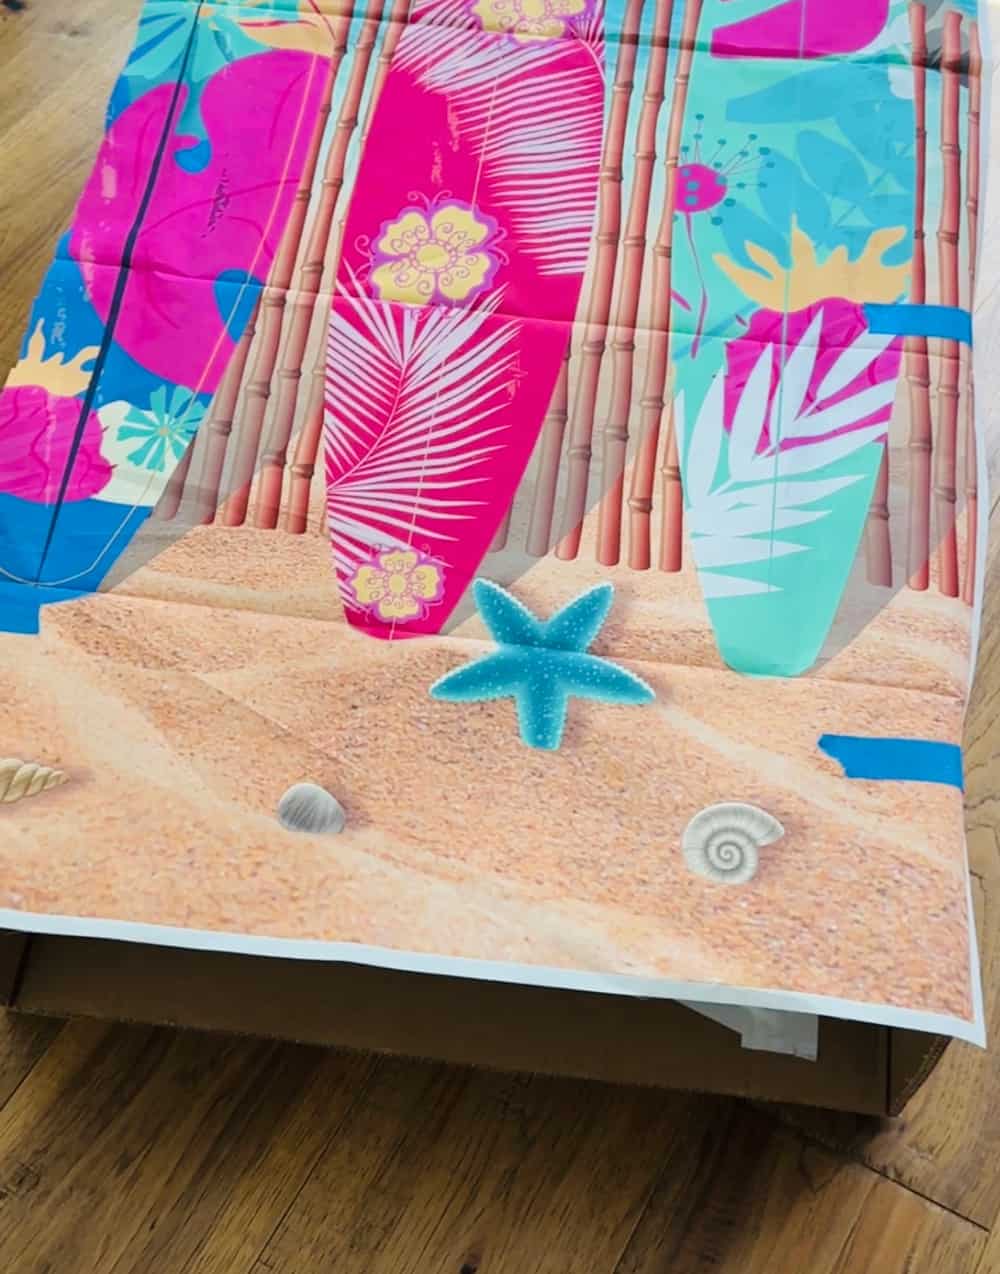
I was looking for a fun California backdrop with Malibu and beachy vibes. I could have tried to paint one but creating vivid beautiful landscapes is not in my talent scope! LOL and I think for many parents it would be difficult to achieve as well. I found this awesome beach photo vinyl backdrop for just $10 and it's got enough materials to make two Barbie costumes actually so it's quite a steal. All I did was cut and hot glue it to the back of the box.
Of course, you can opt out of using a similar backdrop and paint the back pink instead. You can then paint colorful palm trees and surfboards as an alternative.
DIY Barbie Costume - Materials
- Large rectangle cardboard box that fits your child (the box size we used is 22" x 8" x 40")
- Hot pink spray paint (we used about 1 ½ cans)
- Craft knife or box cutter
- Photo backdrop
- Paint drop cloth
- Elastic straps 1.5" wide
- Barbie clothes (for our Ken we used this shirt, these pants and these shoes)
- Hot glue gun
- Scissors
- Barbie letters and shooting star. You can write find similar fonts and clip art to create your own using a tool like Canva.

INSTRUCTIONS:
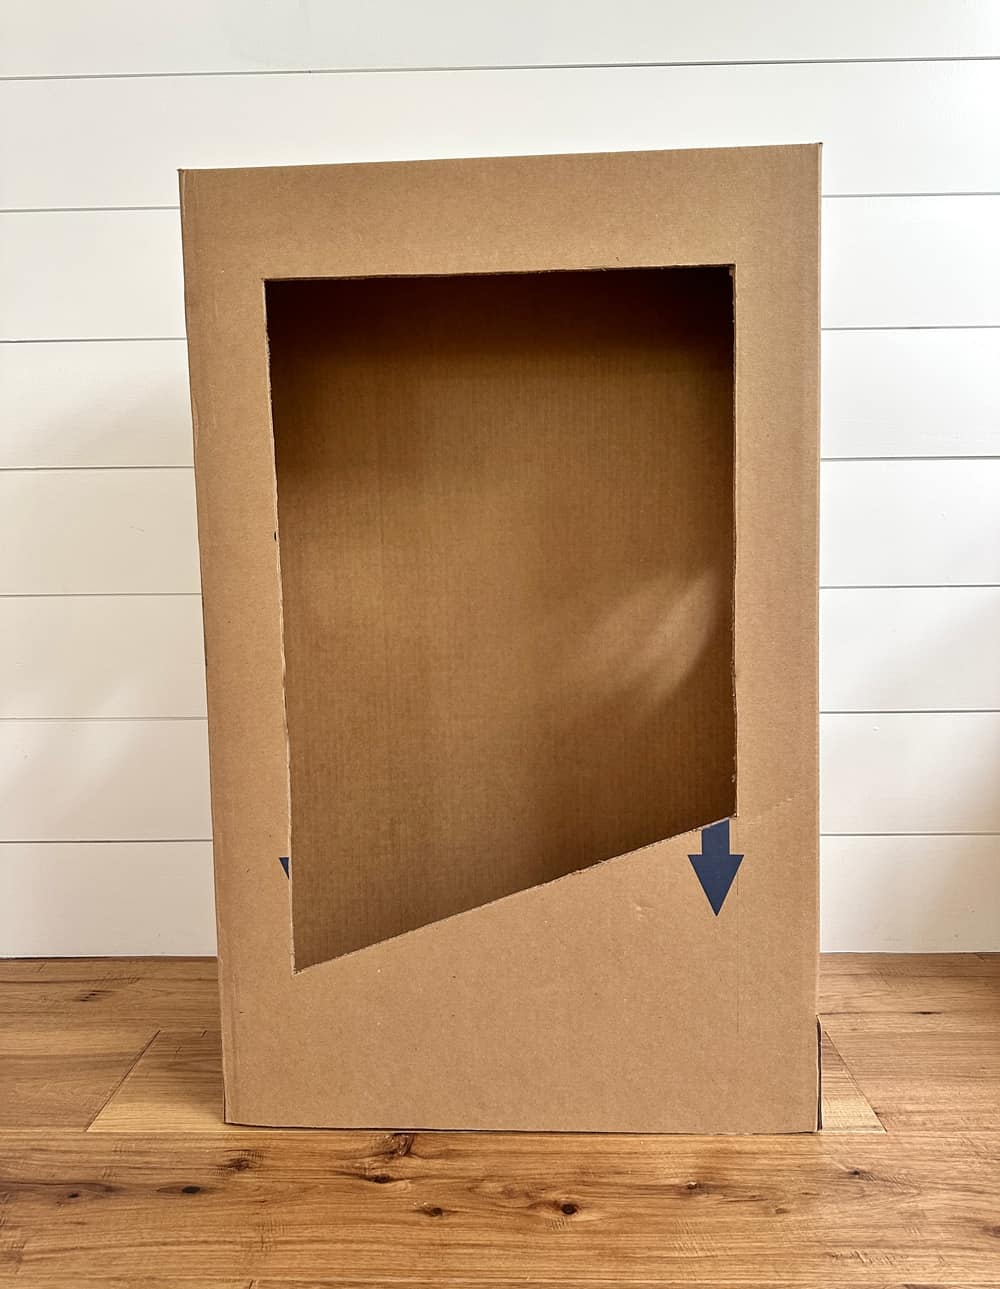
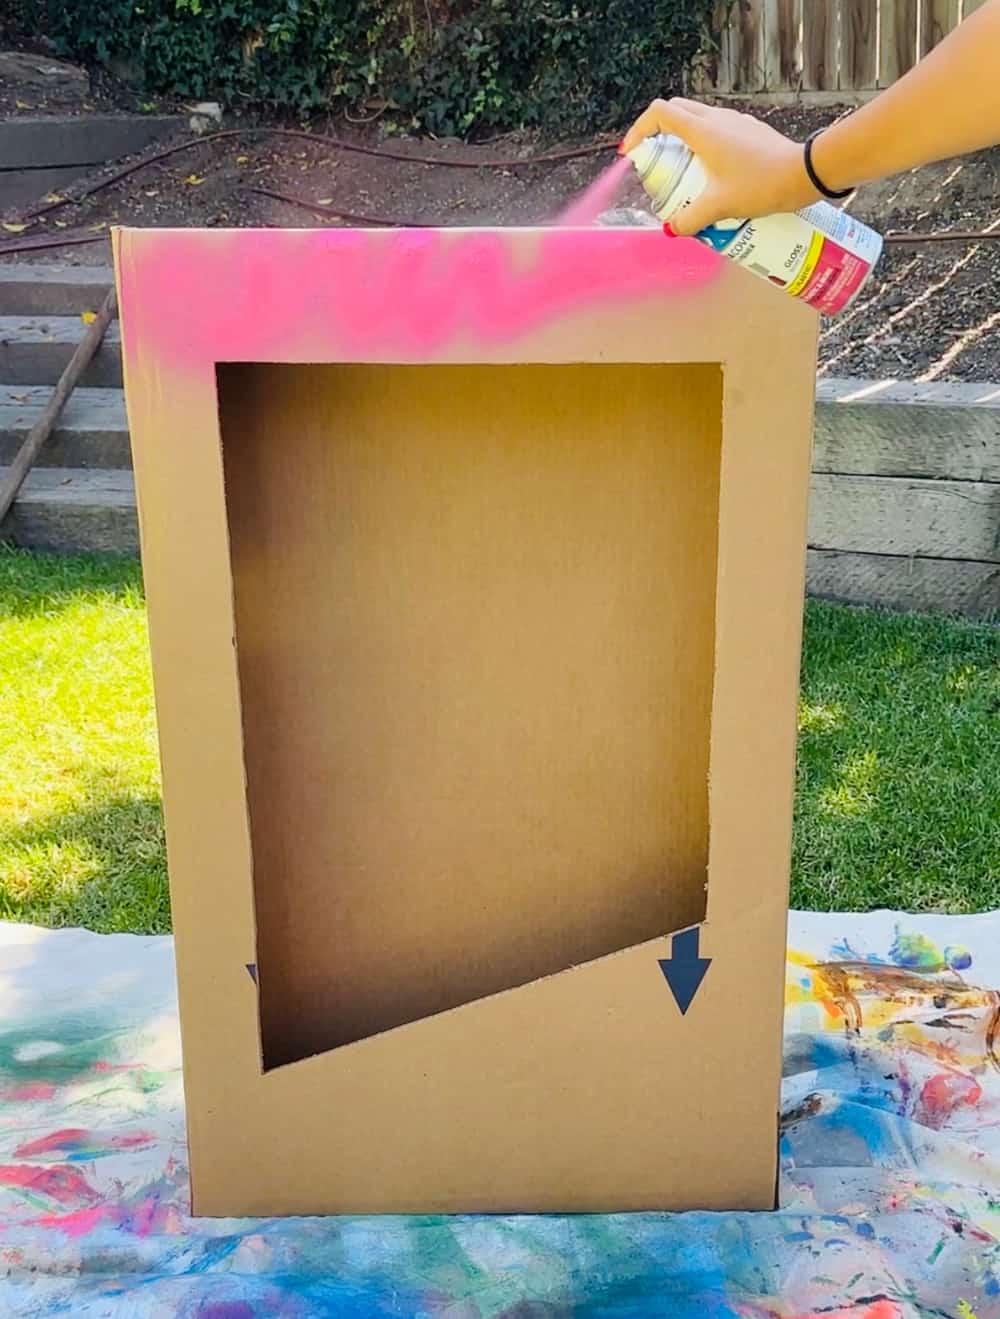
- Box Prep: Take your cardboard box and tape or hot glue the top side shut. Using a pencil, outline the front cut out of the box. It should be a rectangle shape with a diagonal bottom. It should be wide enough to showcase your child inside.
- Cutting the Window: Using your craft knife or box cutter, carefully cut out this window.
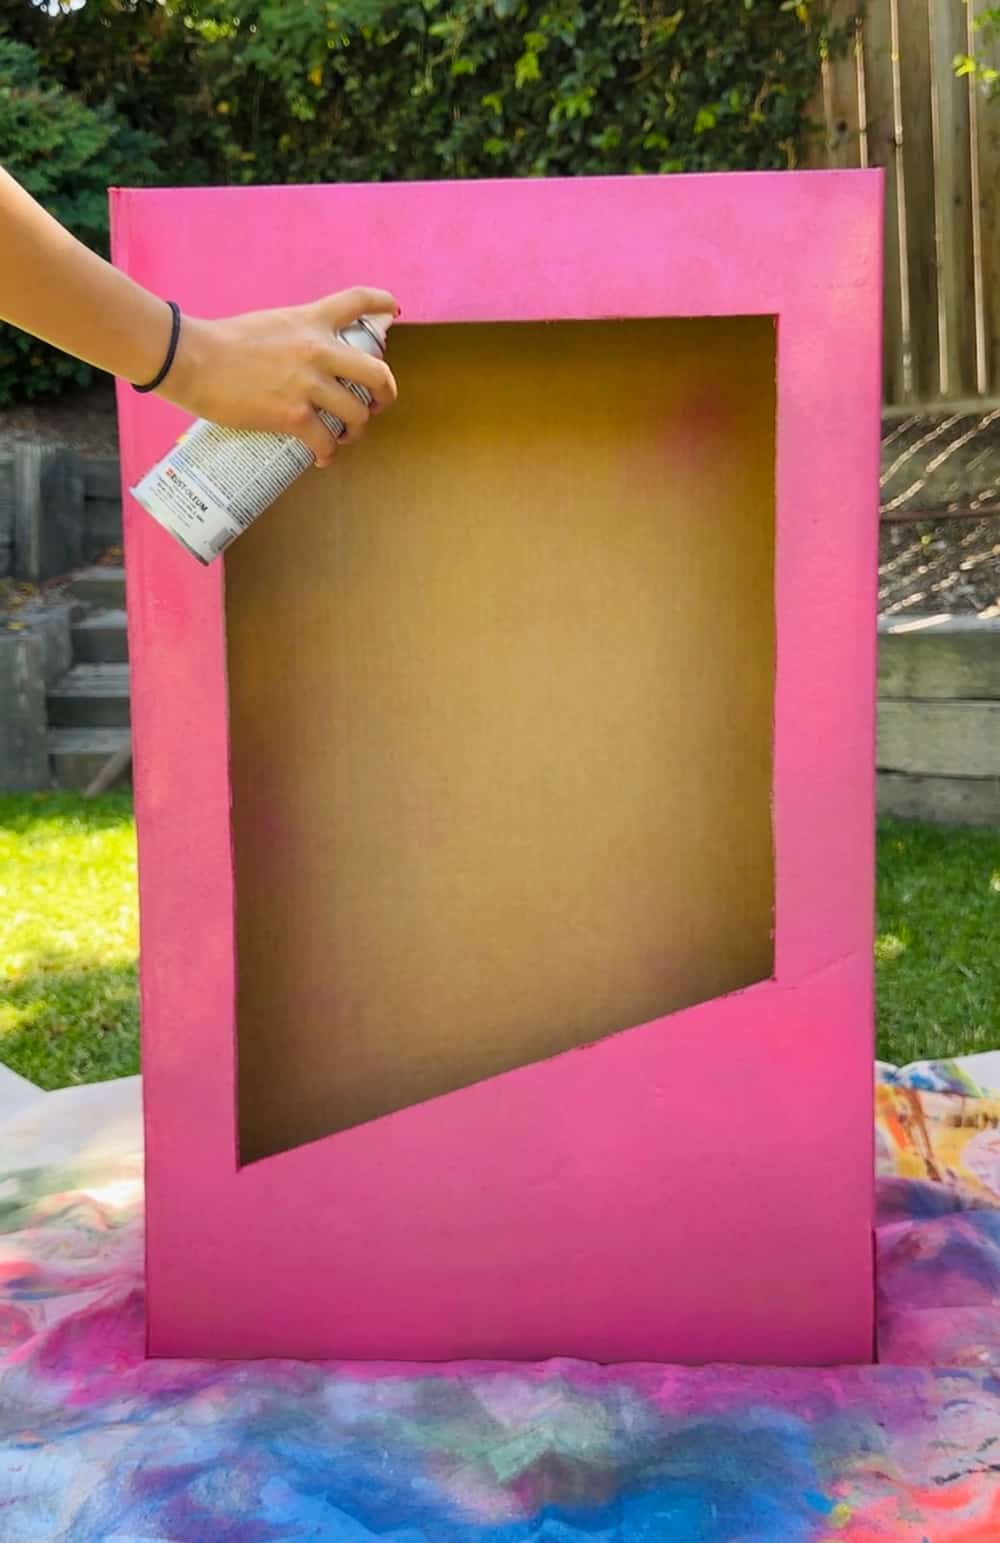
- Spray Painting: In a well-ventilated area outside, lay the cardboard box on top of your paint drop cloth and spray paint it hot pink. If you are using the photo backdrop you do not need to paint the inside. You might need a couple of coats to get an even, vibrant color. Allow it to dry thoroughly.
- Backdrop: Cut your photo backdrop to size the back of your box. Use hot glue to adhere.
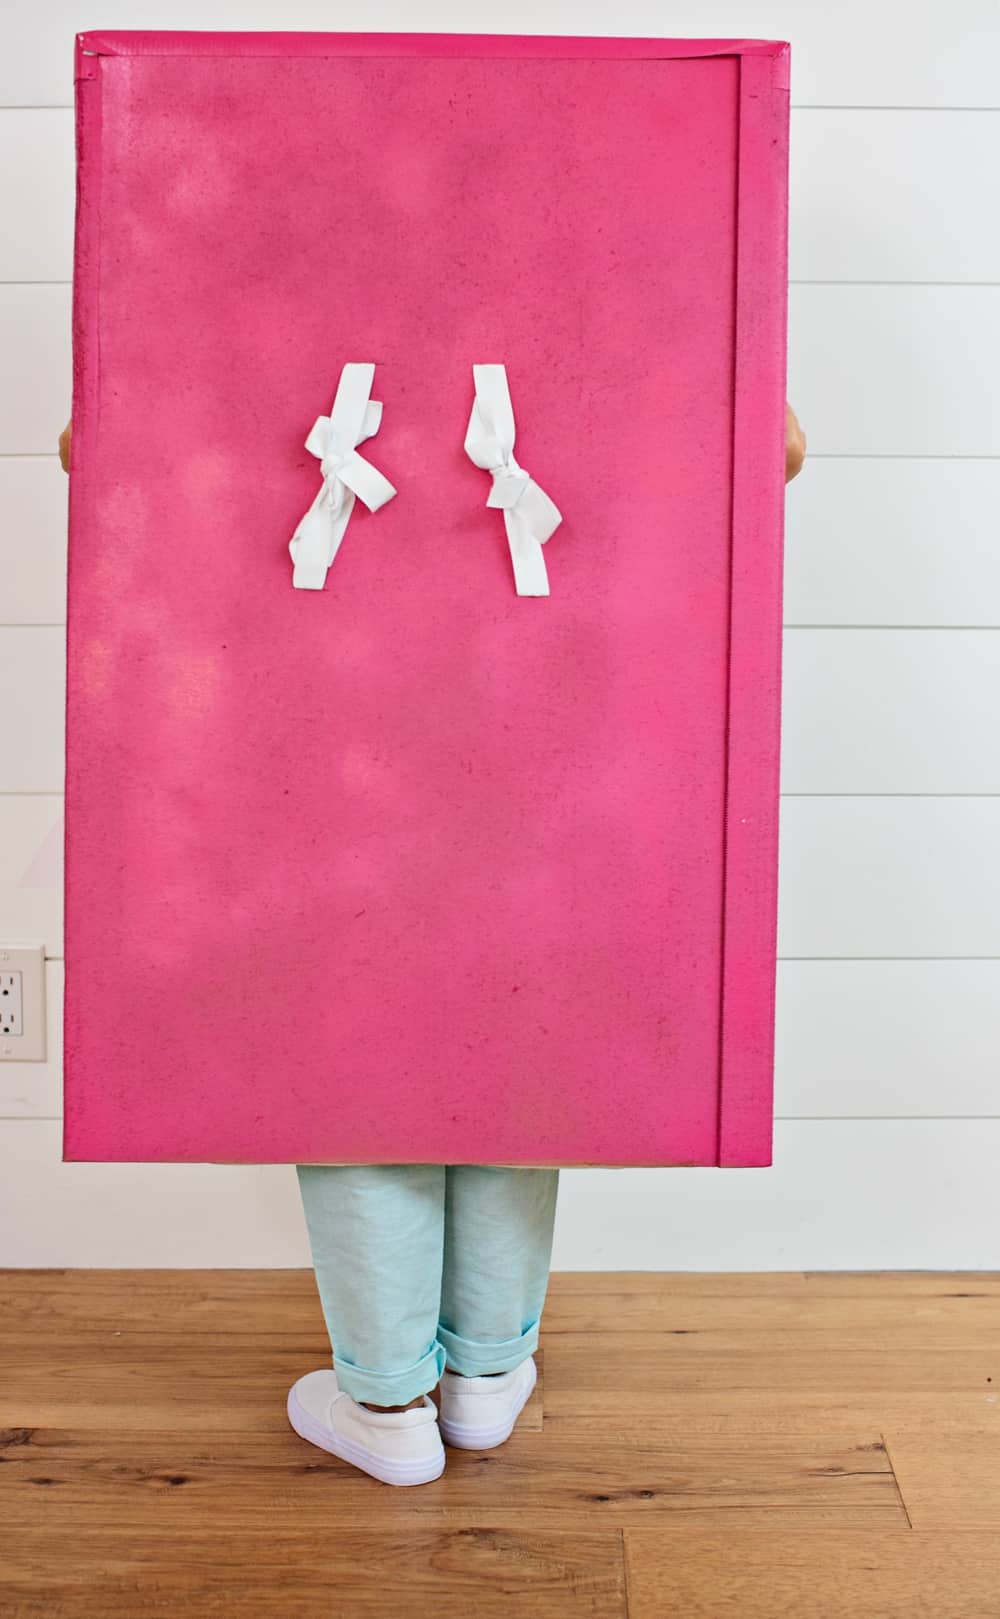
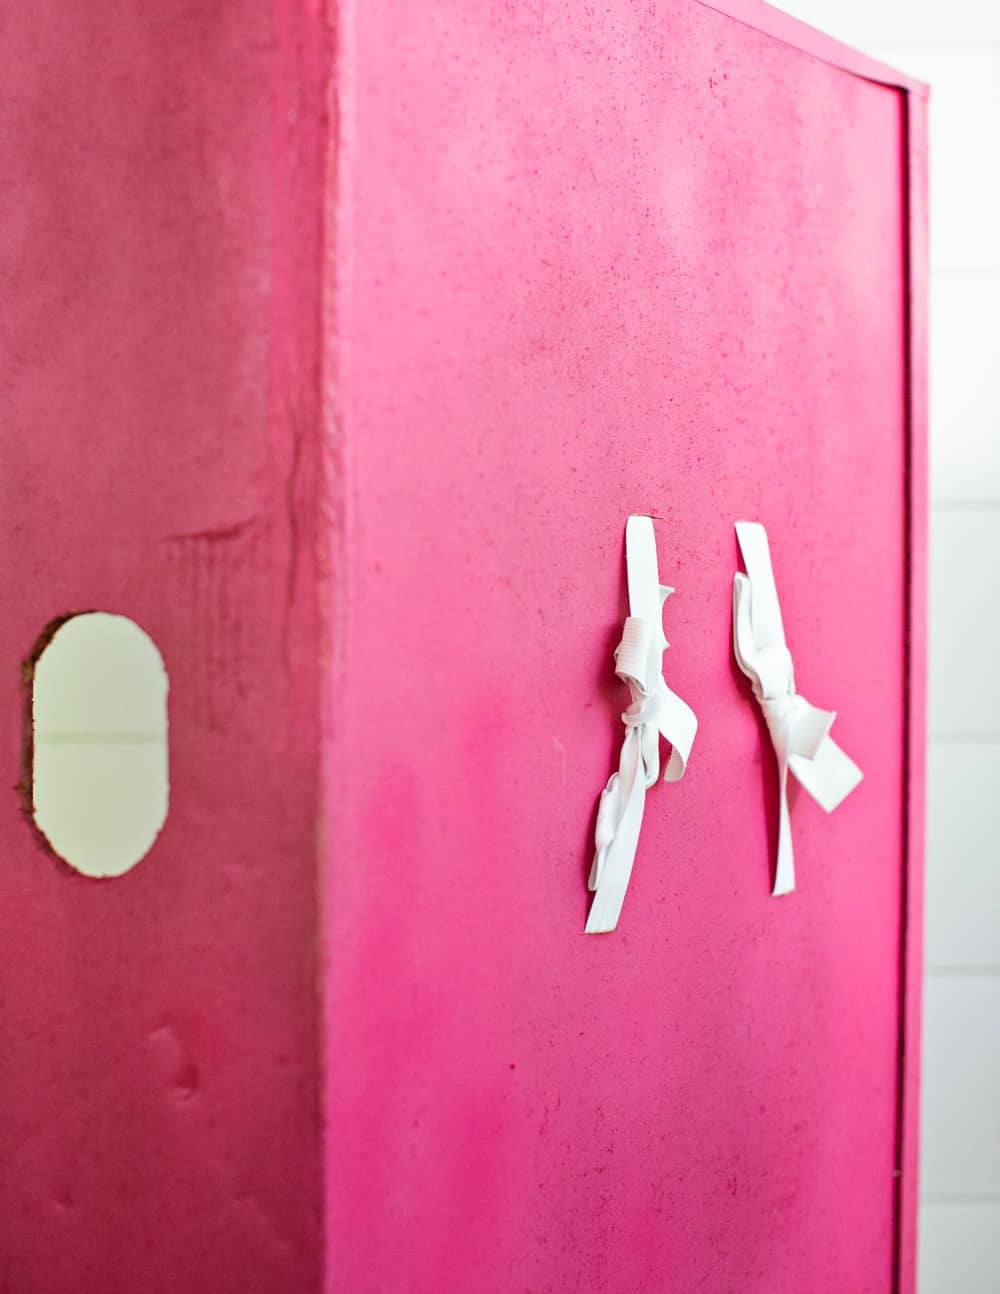
- Elastic Straps: Measure where your child's shoulders will be and using your box cutter cut two slits per strap. Roll your strap through and tie on the outside of the back of the box. Refer to photos in the post to see how we did it.
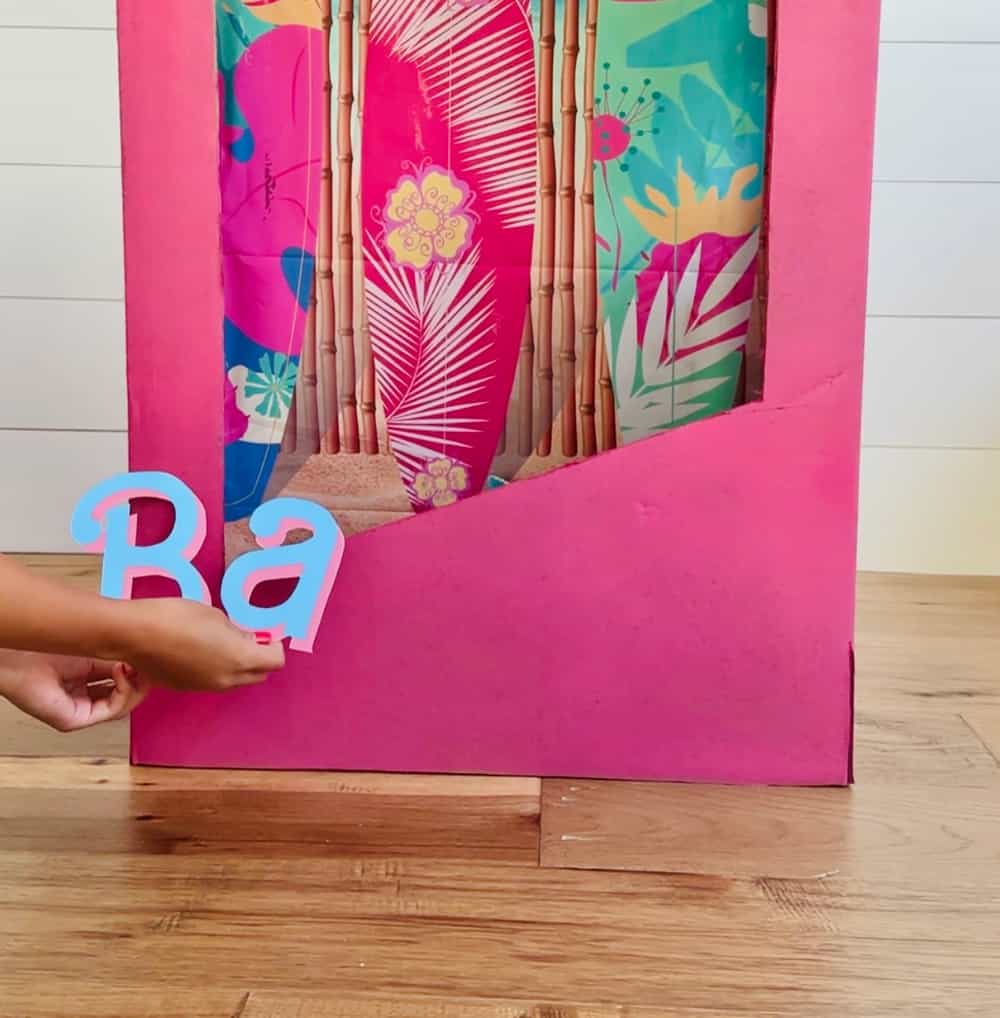
- Branding the Box: Place the Barbie letters and star and adhere them to the bottom of the box, below the window. You can use hot glue or stick glue.
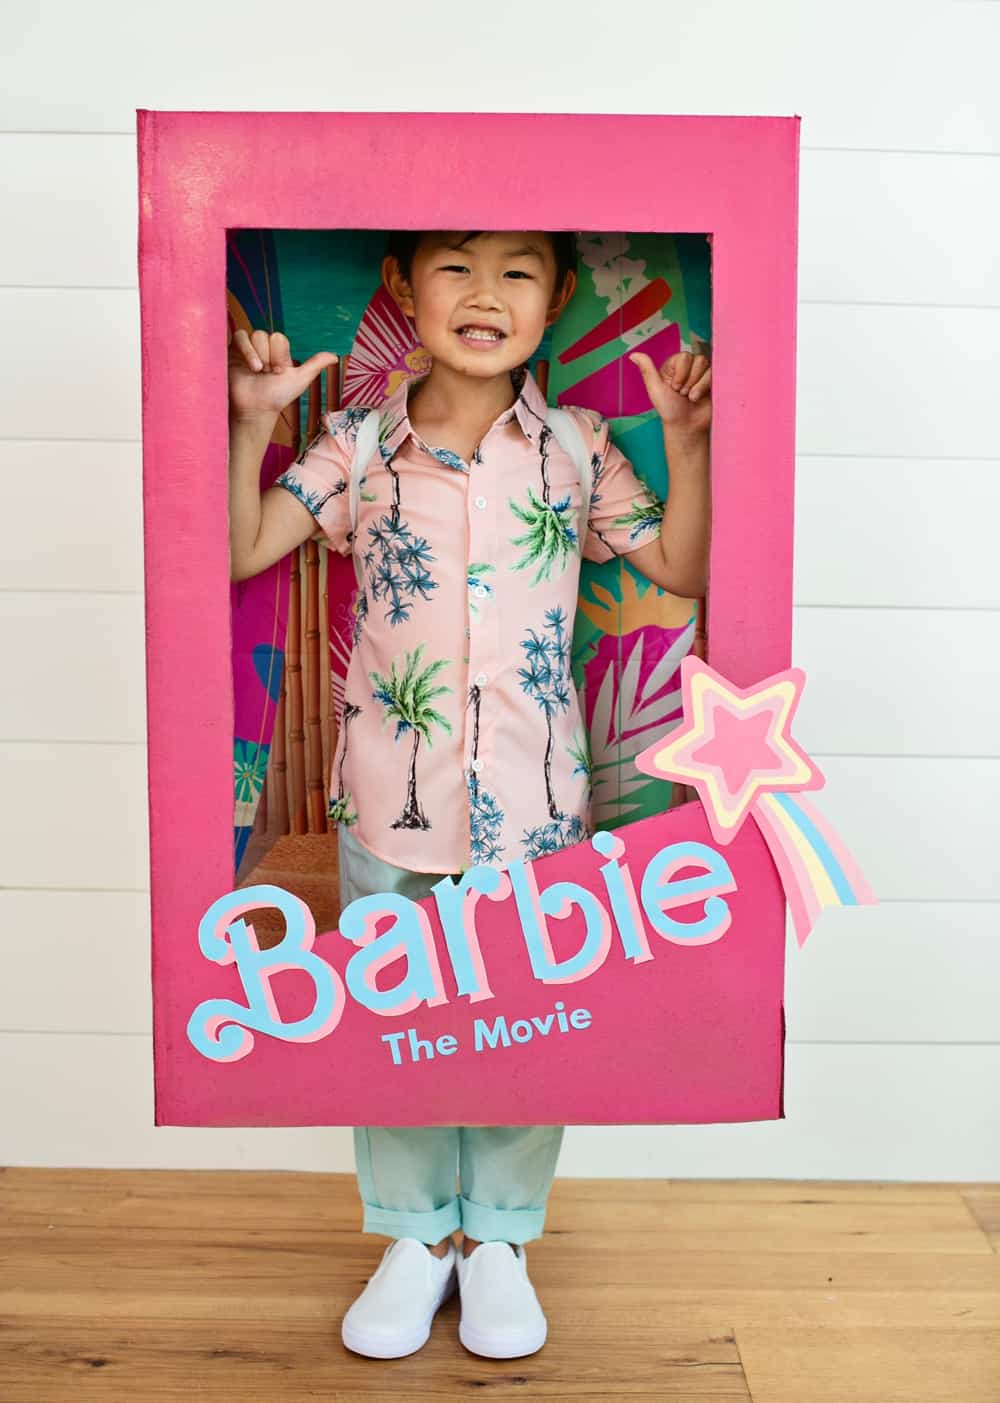
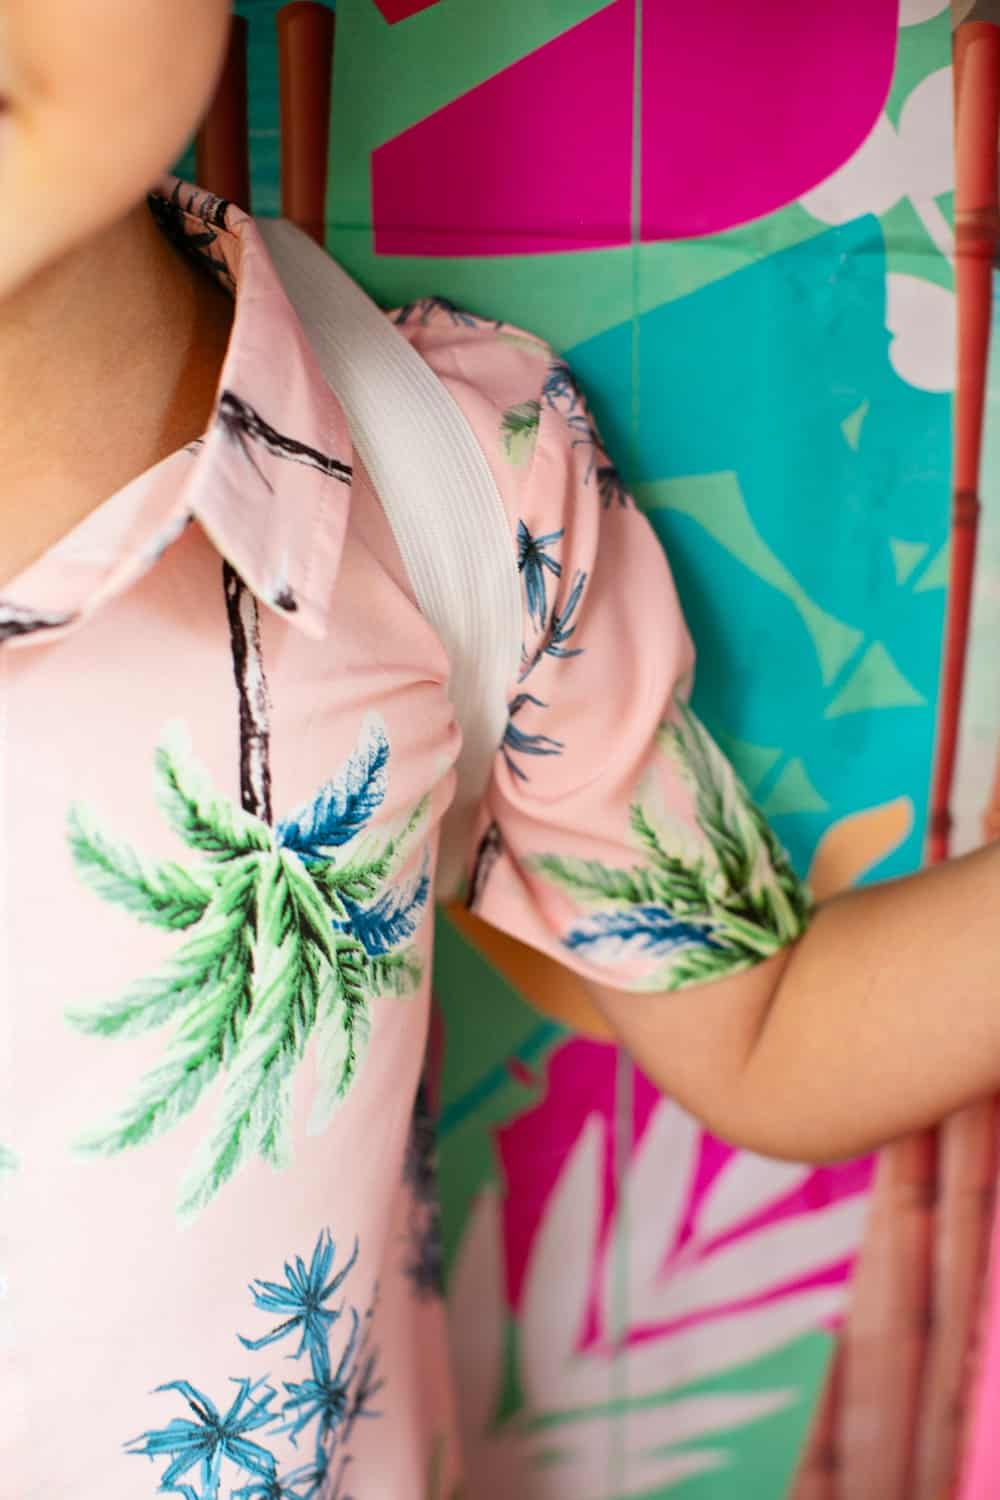
- Dressing up: Dress your child in Barbie or Ken style clothes. Since this is based off Barbie the Movie, think California beach vibes: floral shirts, shorts, flip-flops, sunglasses, and perhaps a surfboard accessory to complete the look.
- Placing the Child Inside: Help your child wear the box by first adding over their hand and gently down. Then add one arm in each strap, adjusting the straps as necessary. Their upper head and top body should be visible through the window, showcasing their fabulous Barbie/Ken outfit.
Tips:
- For added detail, consider gluing some Barbie accessories like tiny shoes, purses, or other doll items around the box.
- If you'd like to make the straps more comfortable you can cover the straps in a softer material or use non-elastic soft fabric that will hold your child's weight.
- Safety first! Ensure the box doesn't restrict your child's movement, vision, or breathing. Obviously, the window should provide ample space for their face, ensuring they can see and breathe easily.
Conclusion
Now, with Barbie (or Ken!) all boxed up and ready to go, hit those Halloween streets in style. Not only is this costume eye-catching, but it's also a fantastic nod to the 2023 Barbie Movie. Your child is sure to be the talk of the town! Happy crafting and trick-or-treating! 🎃👠📦
DIY Barbie Costume Using Cardboard
Materials
- Large rectangle cardboard box that fits your child (the box size we used is 22" x 8" x 40")
- Hot pink spray paint (we used about 1 ½ cans)
- Craft knife or box cutter
- Photo backdrop
- Paint drop cloth
- Elastic straps 1.5" wide
- Create your own Barbie letters and shooting star
- Barbie or Ken style clothes
- Hot glue gun
- Scissors
Instructions
- Box Prep: Take your cardboard box and tape or hot glue the top side shut. Using a pencil, outline the front cut out of the box. It should be a rectangle shape with a diagonal bottom. It should be wide enough to showcase your child inside.
- Cutting the Window: Using your craft knife or box cutter, carefully cut out this window.
- Spray Painting: In a well-ventilated area outside, lay the cardboard box on top of your paint drop cloth and spray paint it hot pink. If you are using the photo backdrop you do not need to paint the inside. You might need a couple of coats to get an even, vibrant color. Allow it to dry thoroughly.
- Backdrop: Cut your photo backdrop to size the back of your box. Use hot glue to adhere.
- Elastic Straps: Measure where your child's shoulders will be and using your box cutter cut two slits per strap. Roll your strap through and tie on the outside of the back of the box. Refer to photos in the post to see how we did it.
- Branding the Box: Make your own Barbie letters and shooting star, adhere them to the bottom of the box, below the window. You can use hot glue or stick glue.
- Dressing up: Dress your child in Barbie or Ken style clothes. Since this is based off Barbie the Movie, think California beach vibes: floral shirts, shorts, flip-flops, sunglasses, and perhaps a surfboard accessory to complete the look.
- Placing the Child Inside: Help your child wear the box by first adding over their hand and gently down. Then add one arm in each strap, adjusting the straps as necessary. Their upper head and top body should be visible through the window, showcasing their fabulous Barbie/Ken outfit.


