
By using this site, you agree to our Terms of Use. This post may contain affiliate links. Read our disclosure policy.
Check out my Plaeful Printables for kids play and learning!
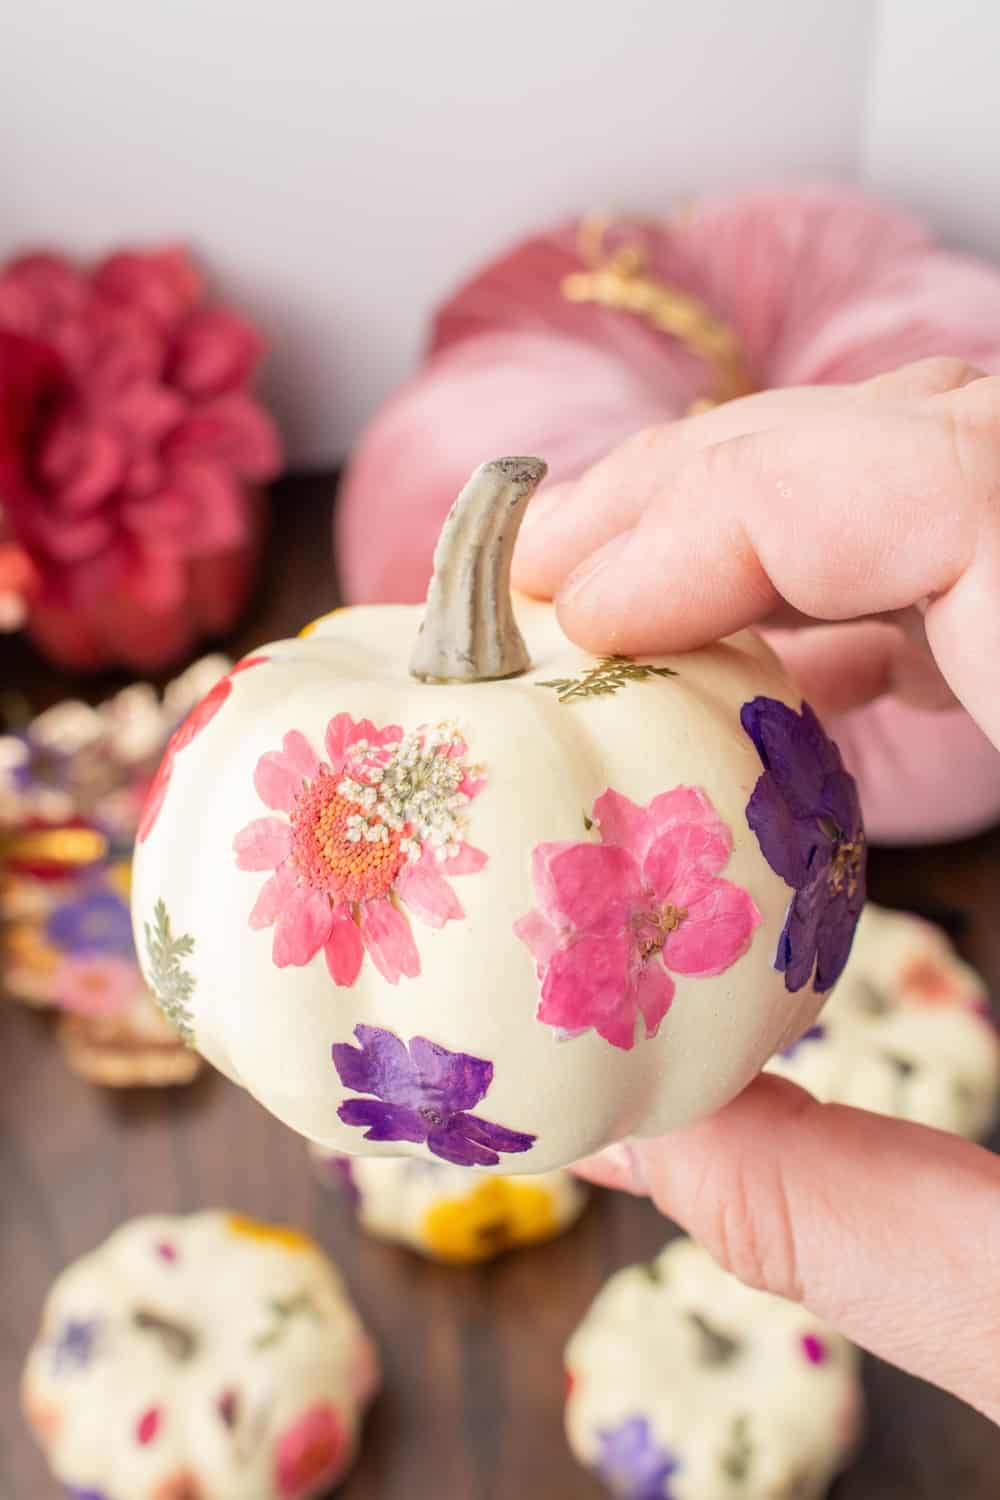
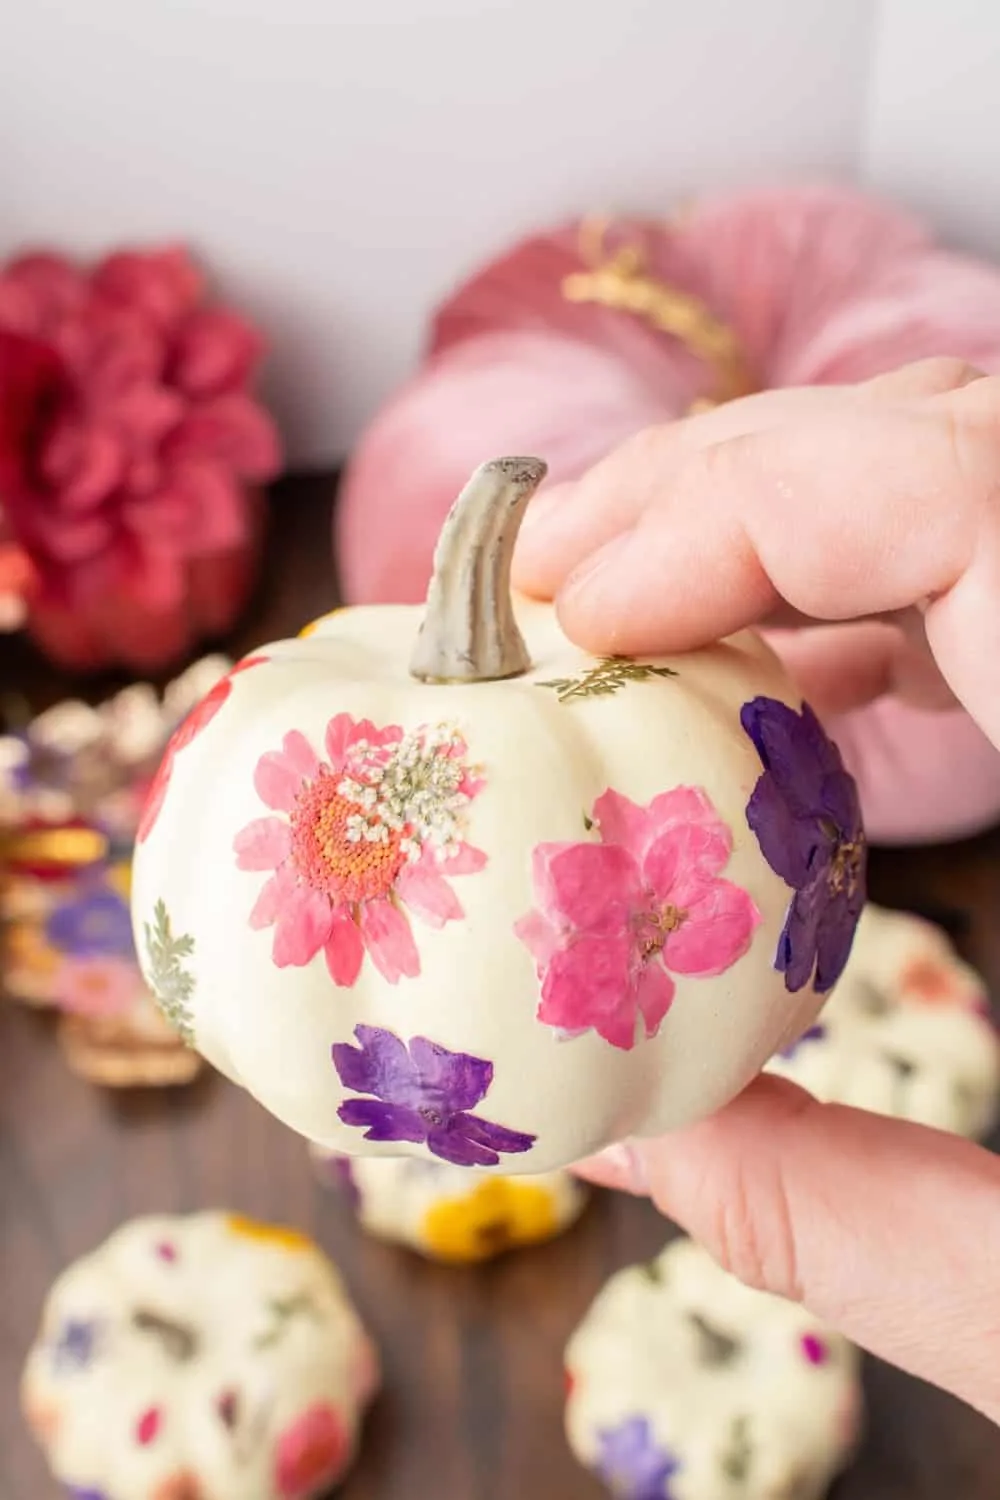
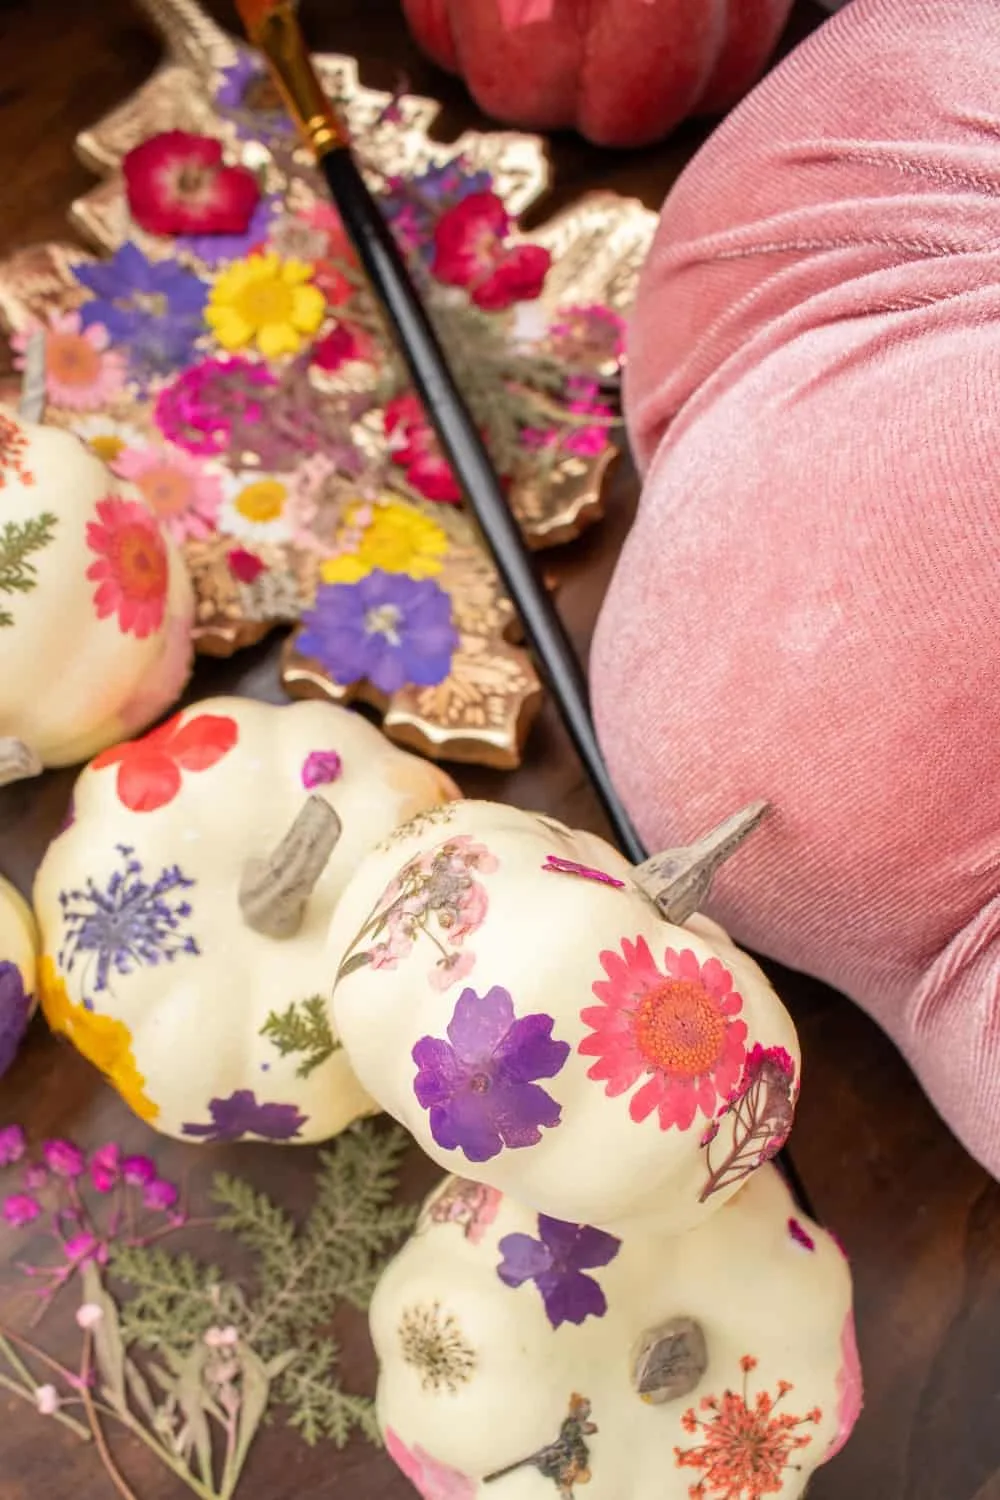
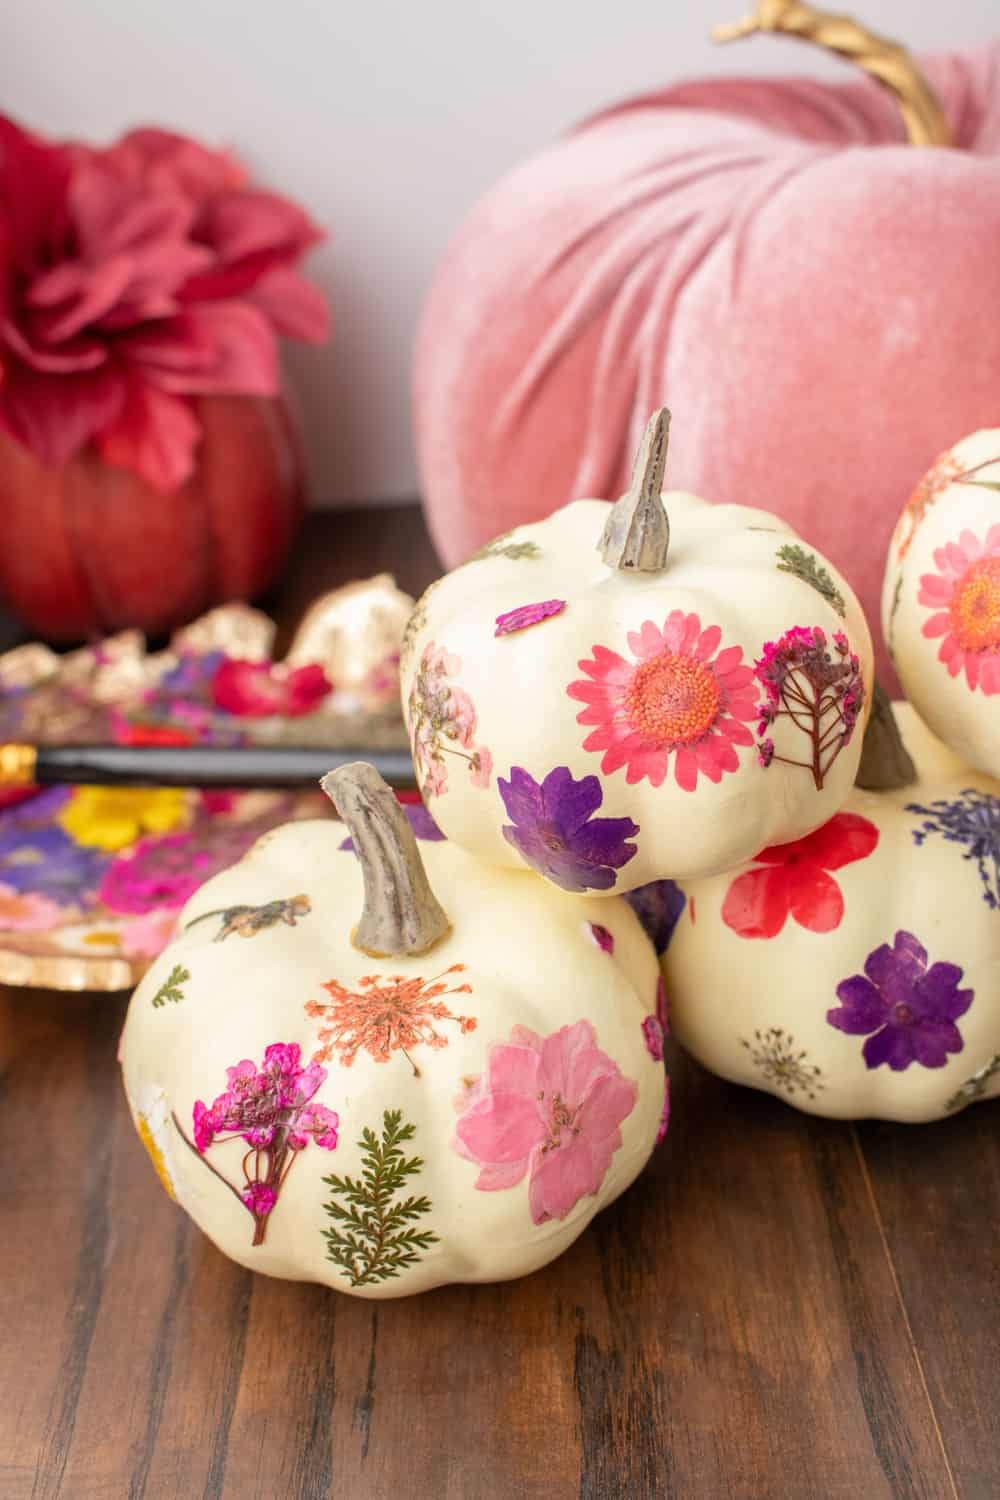
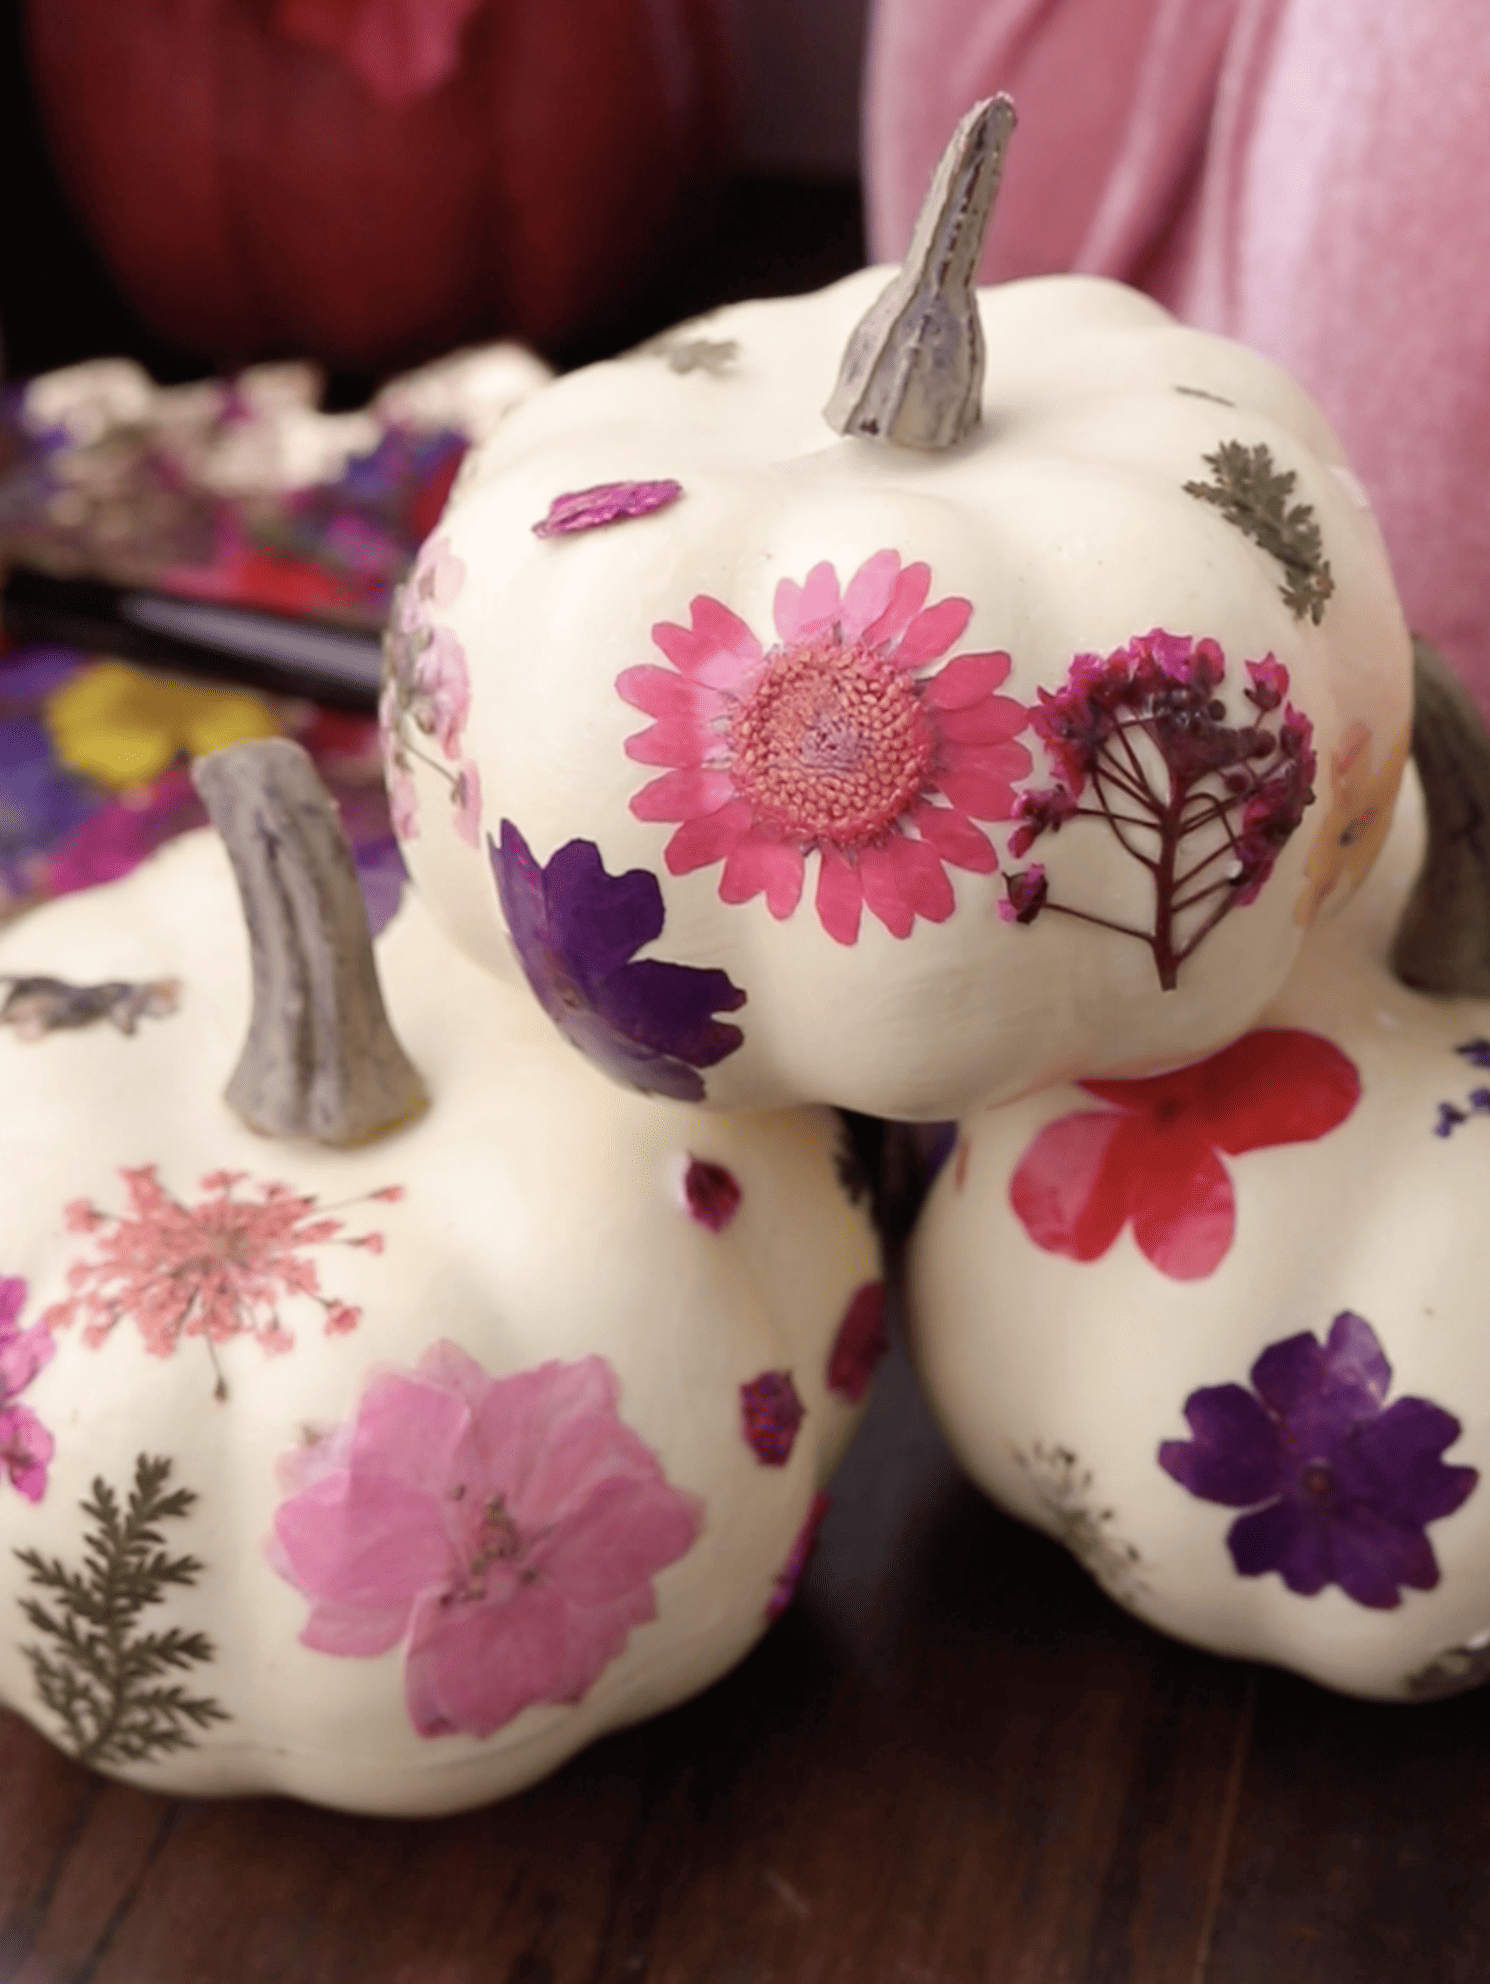
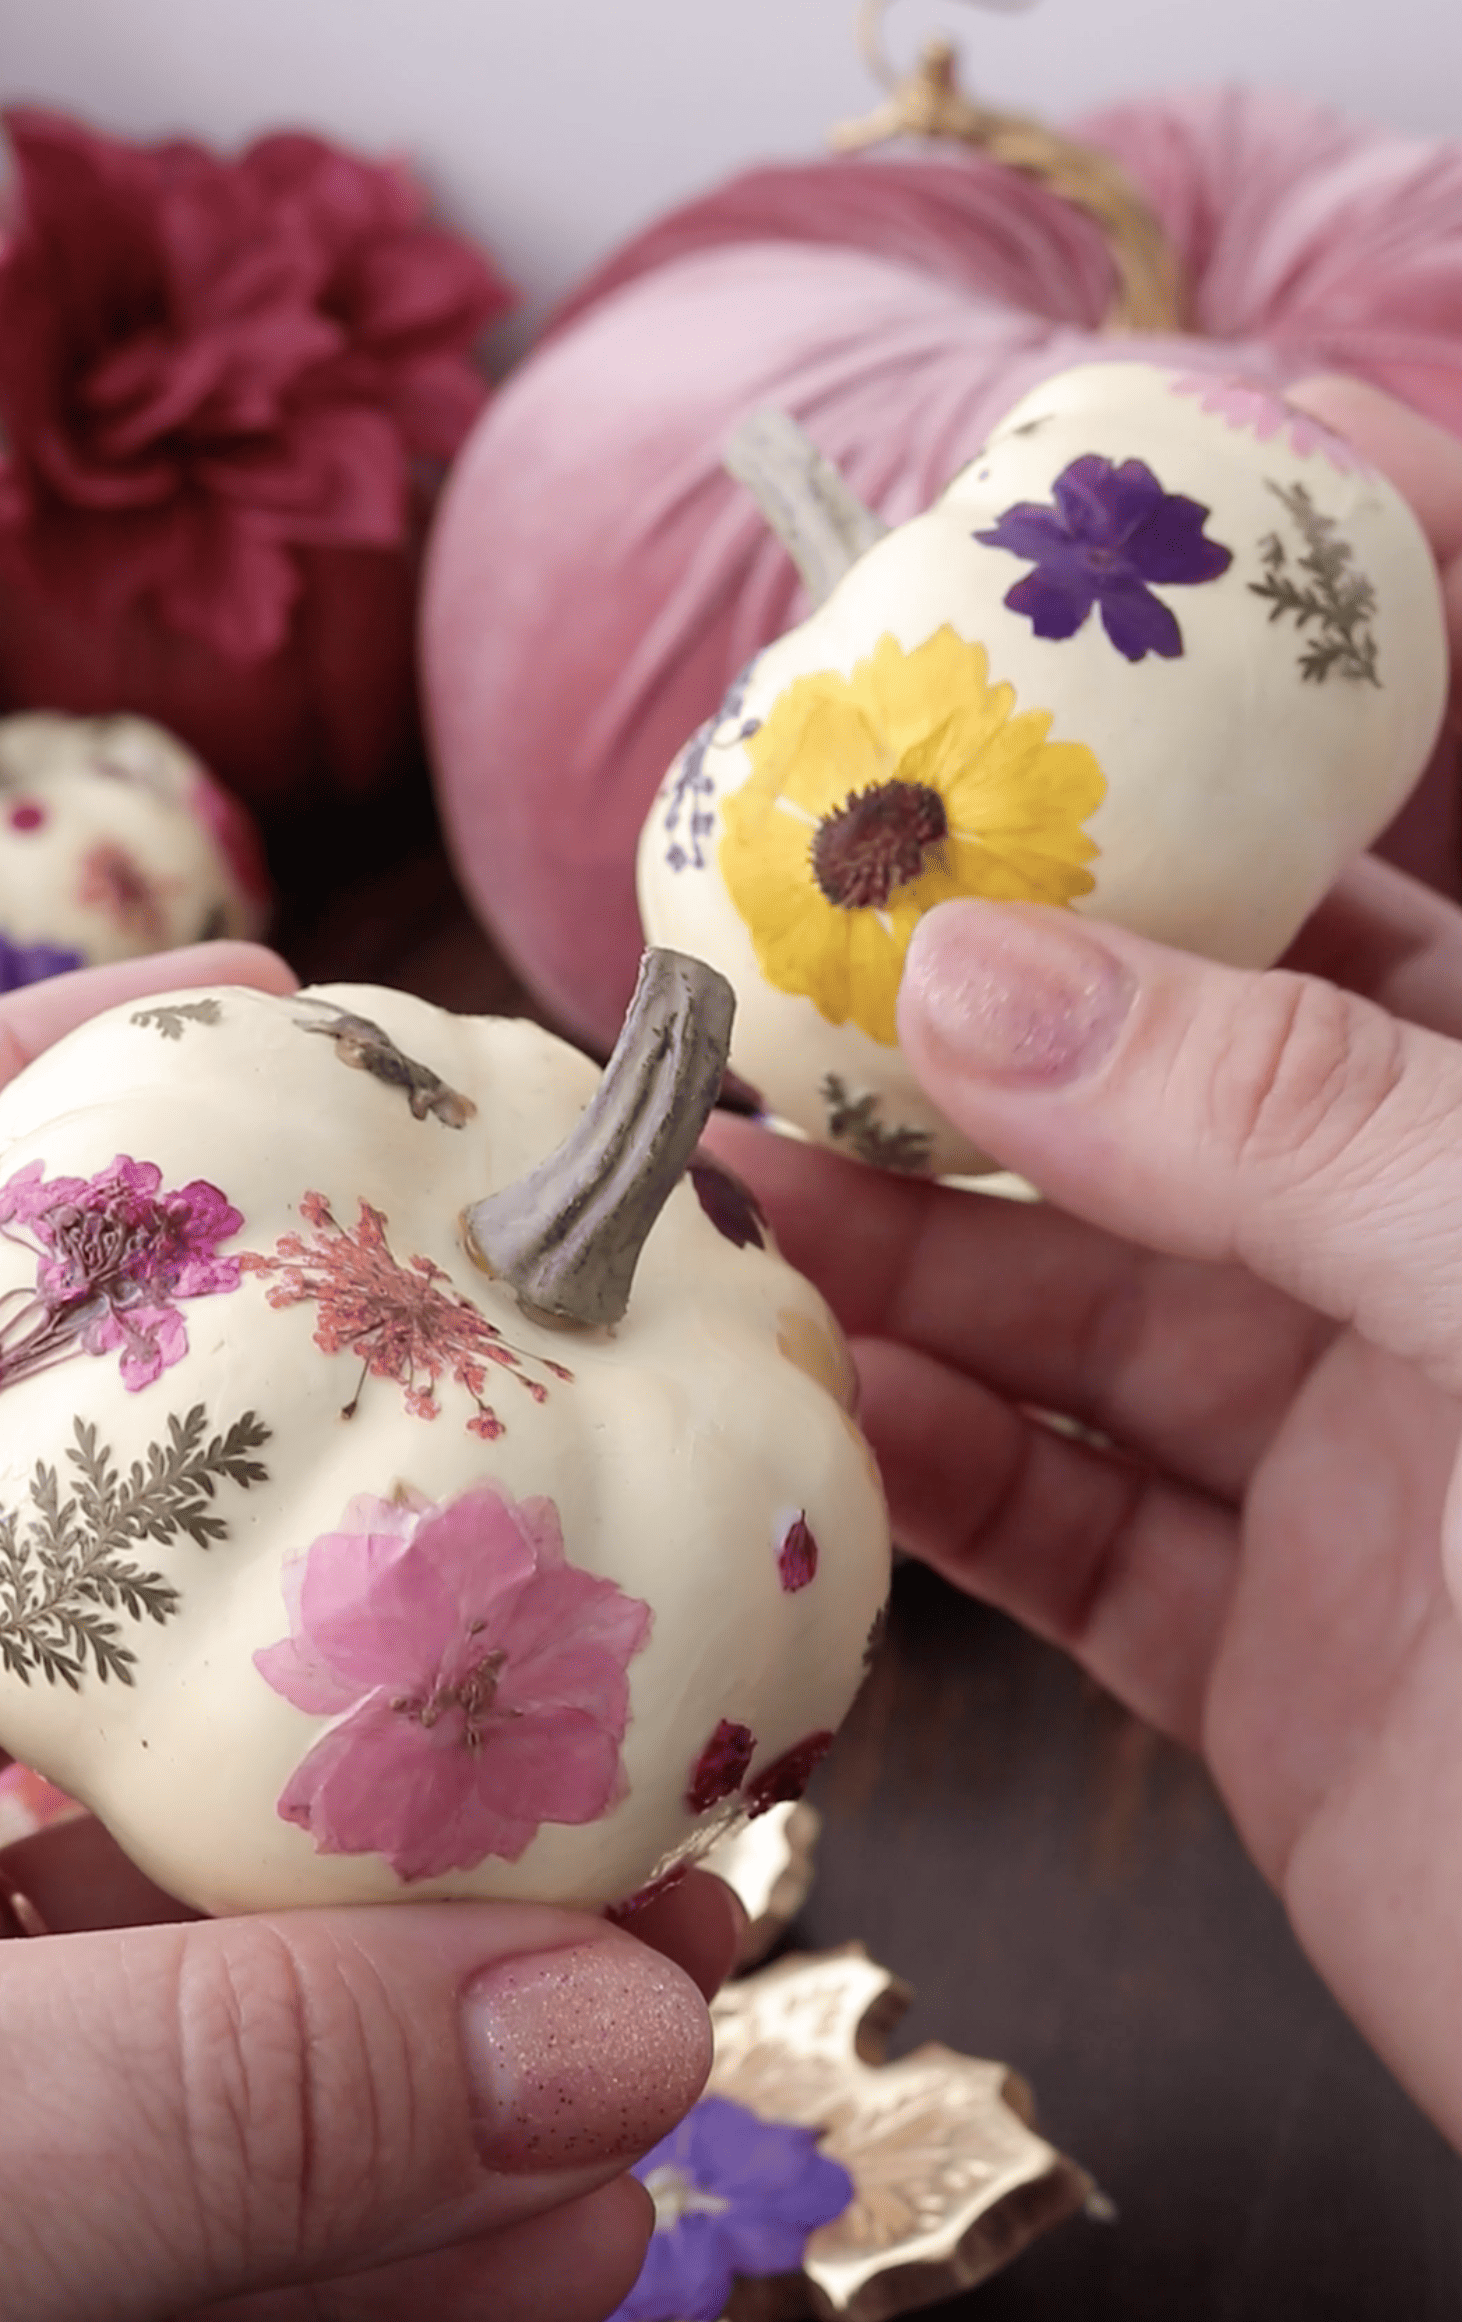
Make gorgeous no-carve pumpkins by transforming faux mini white pumpkins into elegant fall decor with pressed flowers and Mod Podge.
Autumn’s here with its hallmark pumpkins. Move over traditional jack-o-lanterns and explore a fresh decor twist: pressed flower pumpkins! We love making pressed flower jars. Pressed flowers make a beautiful medium for any canvas including pumpkins! Using faux mini white pumpkins, this fall DIY is simple, pretty and will last many fall seasons – an ideal craft for the weekend with the kids. Let’s get started!


Where do you get pressed flowers?
You can buy pressed flowers in many different color themes online or in craft stores. You can also make your own by using a flower press (faster production) or by hand (see more info below)
How do you make pressed flowers?
Here’s a basic guide on how to make pressed flowers. You’ll need fresh flowers (preferably ones that aren’t too thick), absorbent paper like newspaper or parchment paper, heavy books. Optional tools are tweezers and a flat brush.
Steps:
- Choose Your Flowers: Almost any flower can be pressed, but those with flatter blooms are easiest. Examples include pansies, violets, and daisies. Flowers with thicker blooms like roses can be pressed, but they may need more time and might not retain their shape as well.
- Lay Out Your Flowers: Open your book and lay down a sheet of paper. Place your flowers face down on the paper, making sure they don’t overlap.
- Cover: Place another sheet of paper over the flowers.
- Press: If you’re using a book, simply close the book. To apply more pressure, you can stack additional books or heavy objects on top.
- Wait: Leave the flowers to press for about 2-3 weeks. Try not to peek too much as that can disturb the flowers.
- Remove and Store: After waiting a couple of weeks, gently open the book or press and carefully remove the flowers. They should be dry and flat. Use tweezers or a flat brush to lift delicate flowers. Store pressed flowers between sheets of paper in a cool, dark place until you’re ready to use them.
Tips:
- The drying time can vary depending on the type and thickness of the flowers.
- To prevent mold, ensure flowers are completely dry before pressing.


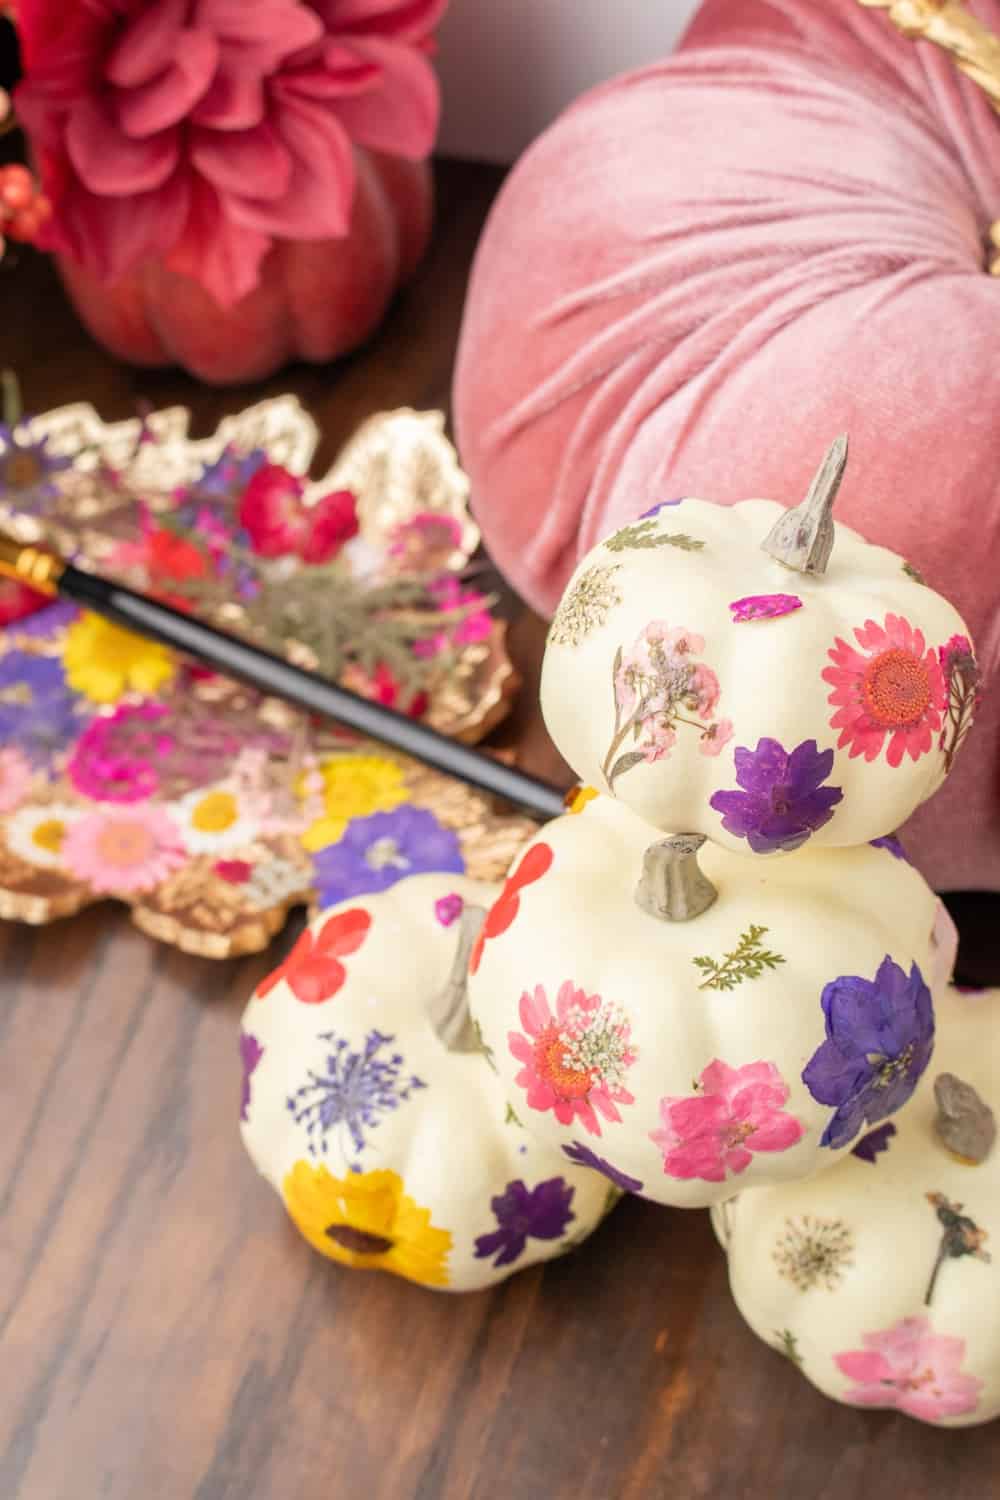
Pressed Flower Pumpkins – Materials:
- Faux mini white pumpkins (available at most craft stores or online)
- Pressed flowers (you can either buy pressed flowers or make your own).
- Mod Podge (or another clear drying glue).
- A paintbrush.
- Clear acrylic sealer spray (optional but will help preserve your pumpkins)


INSTRUCTIONS
- Preparation: Begin by making sure your faux pumpkins are clean and dry. This will ensure the Mod Podge and flowers adhere properly.
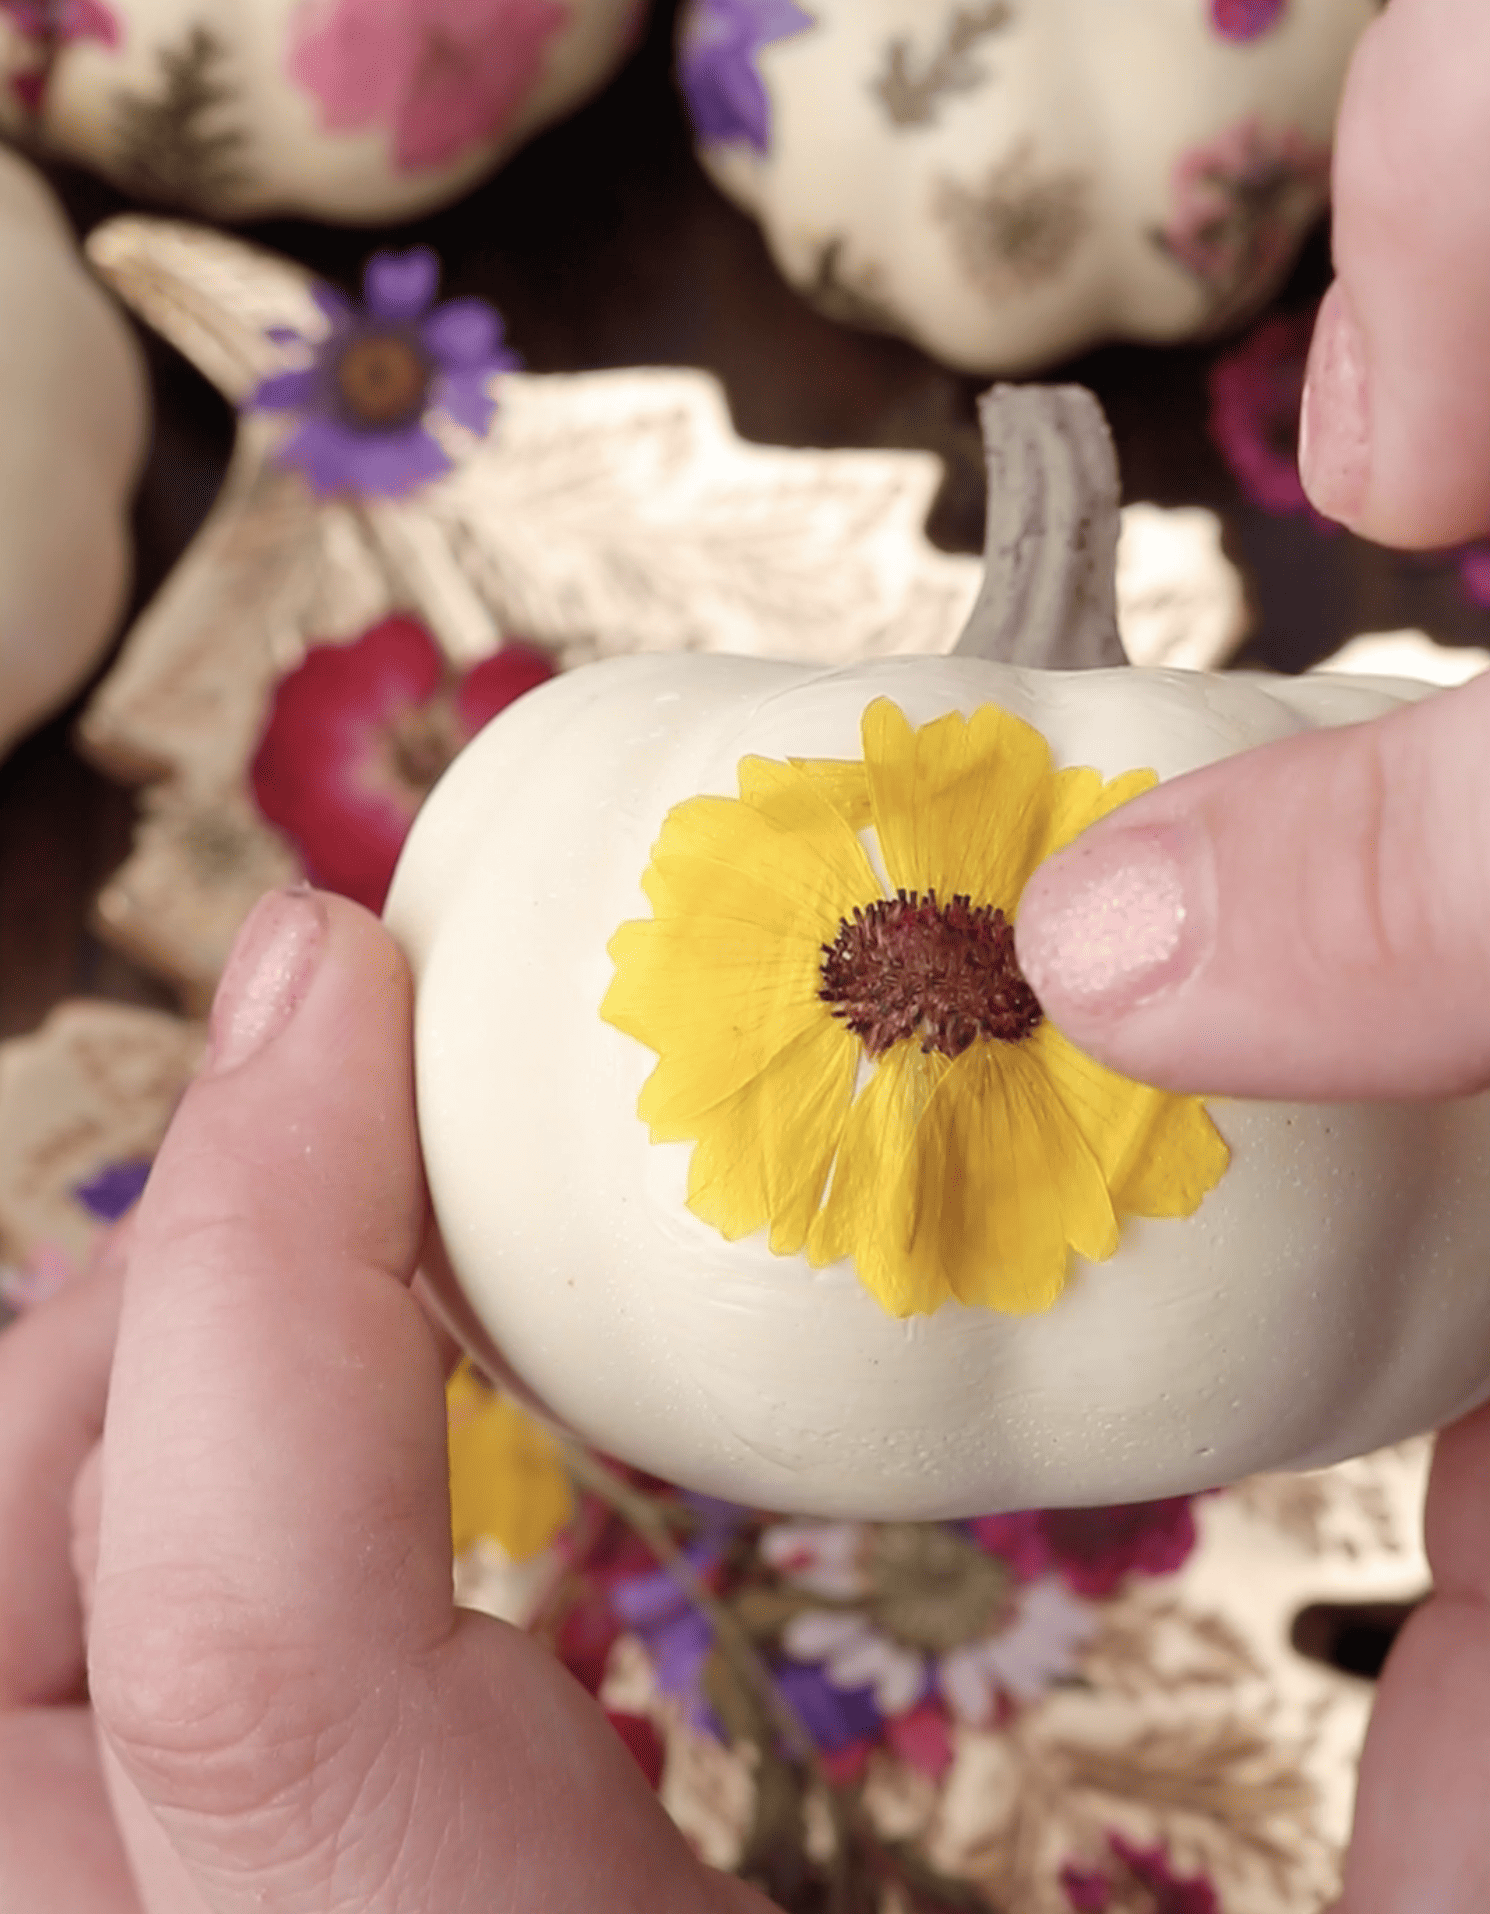
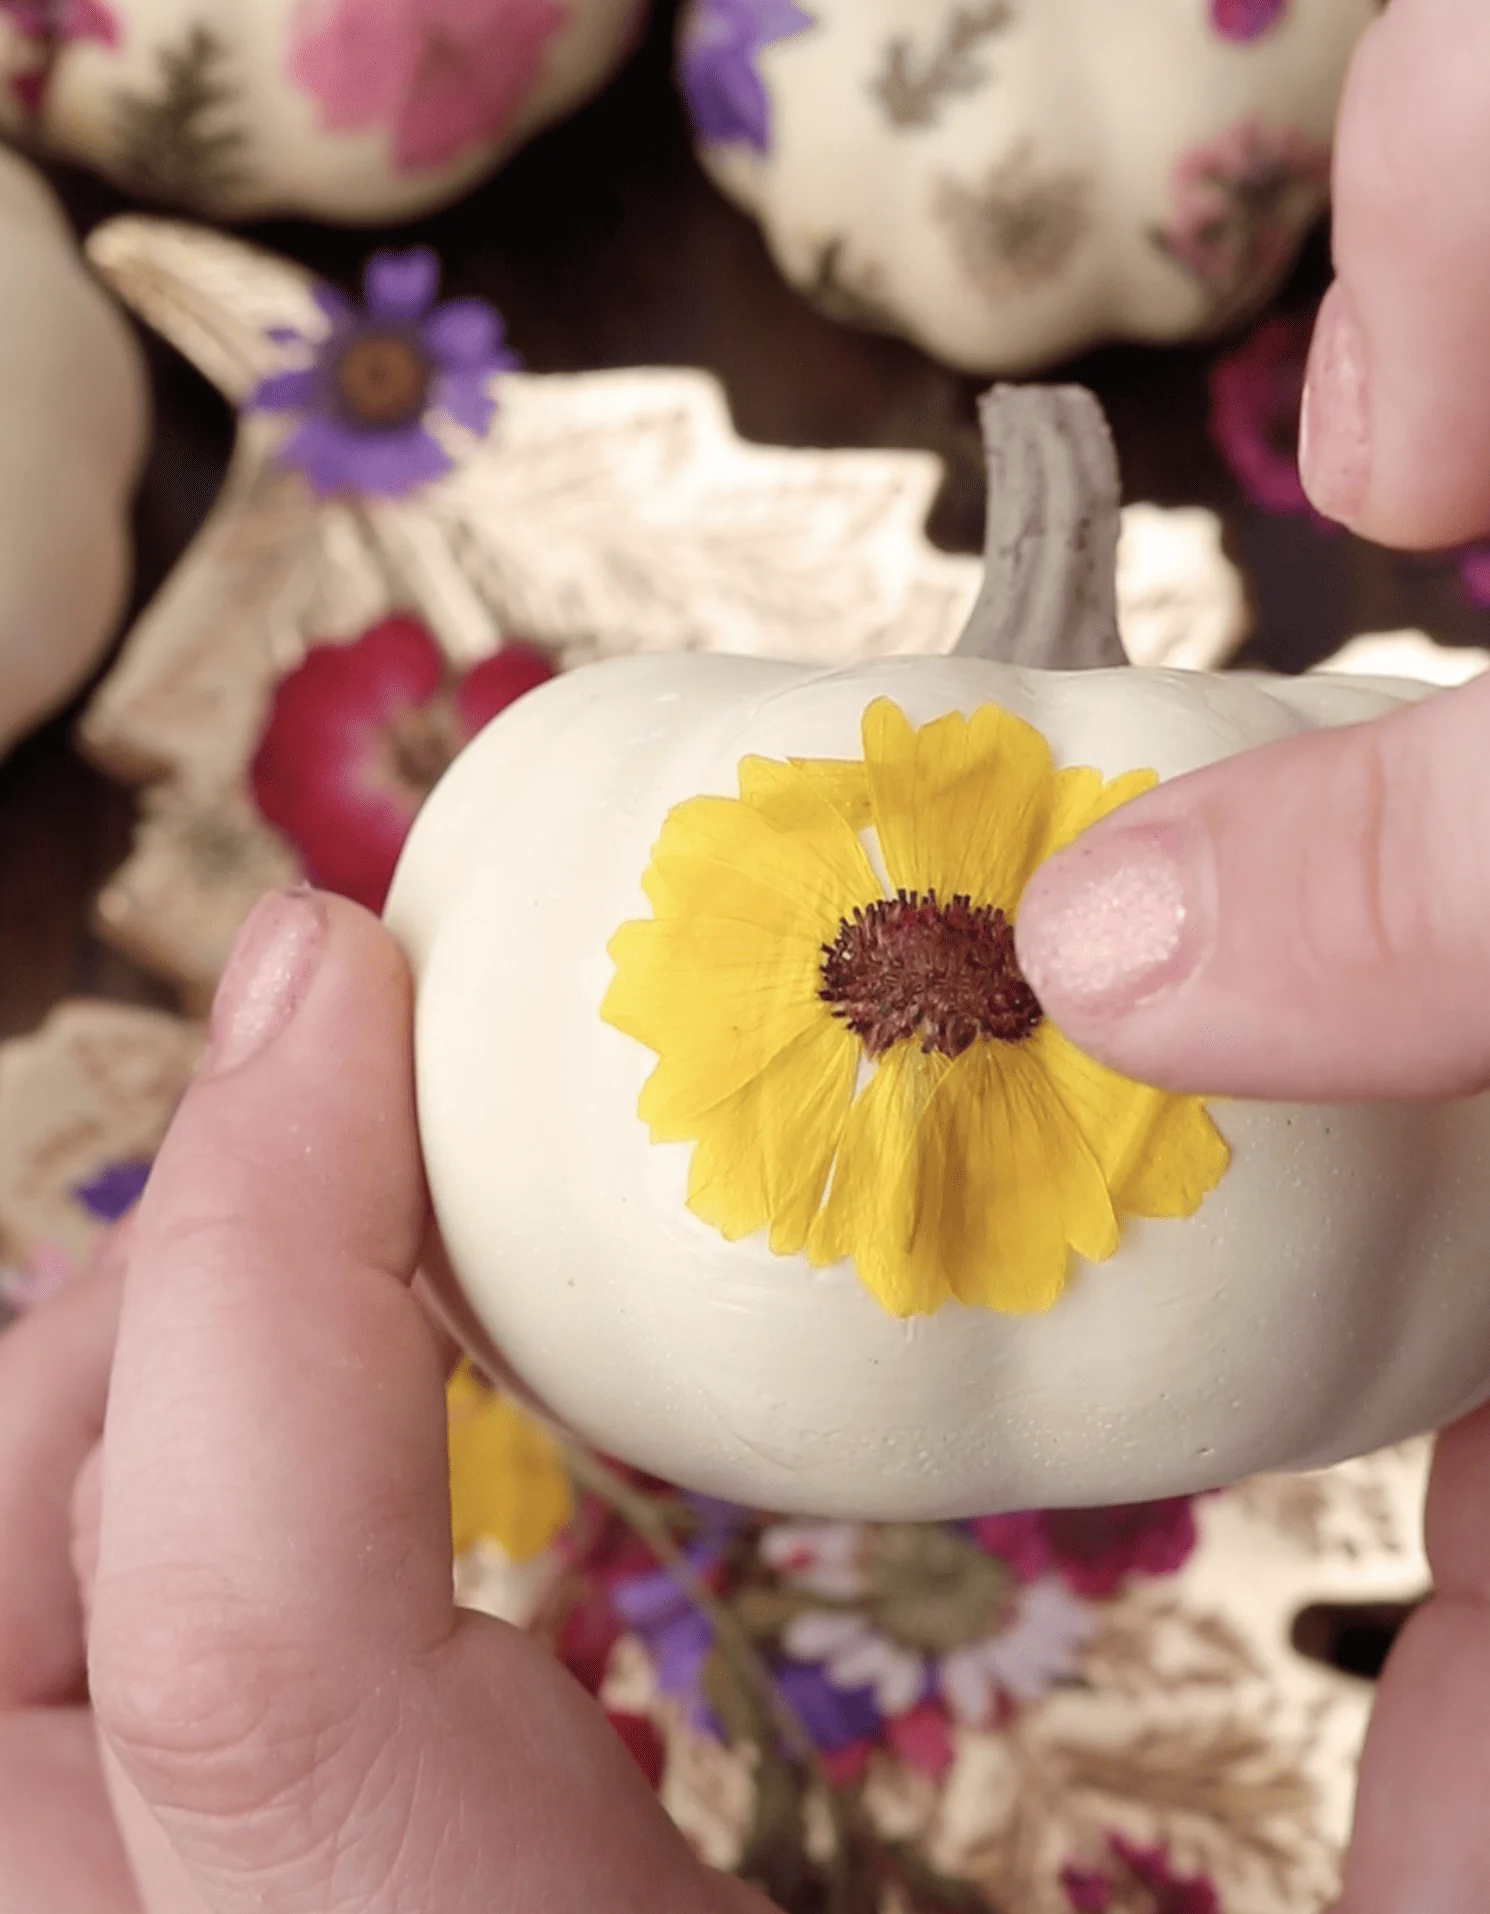
- Arrange Your Design: Before gluing anything down, arrange your pressed flowers on the pumpkin to figure out the design you like best. This gives you a chance to play around and see what looks best before making it permanent.
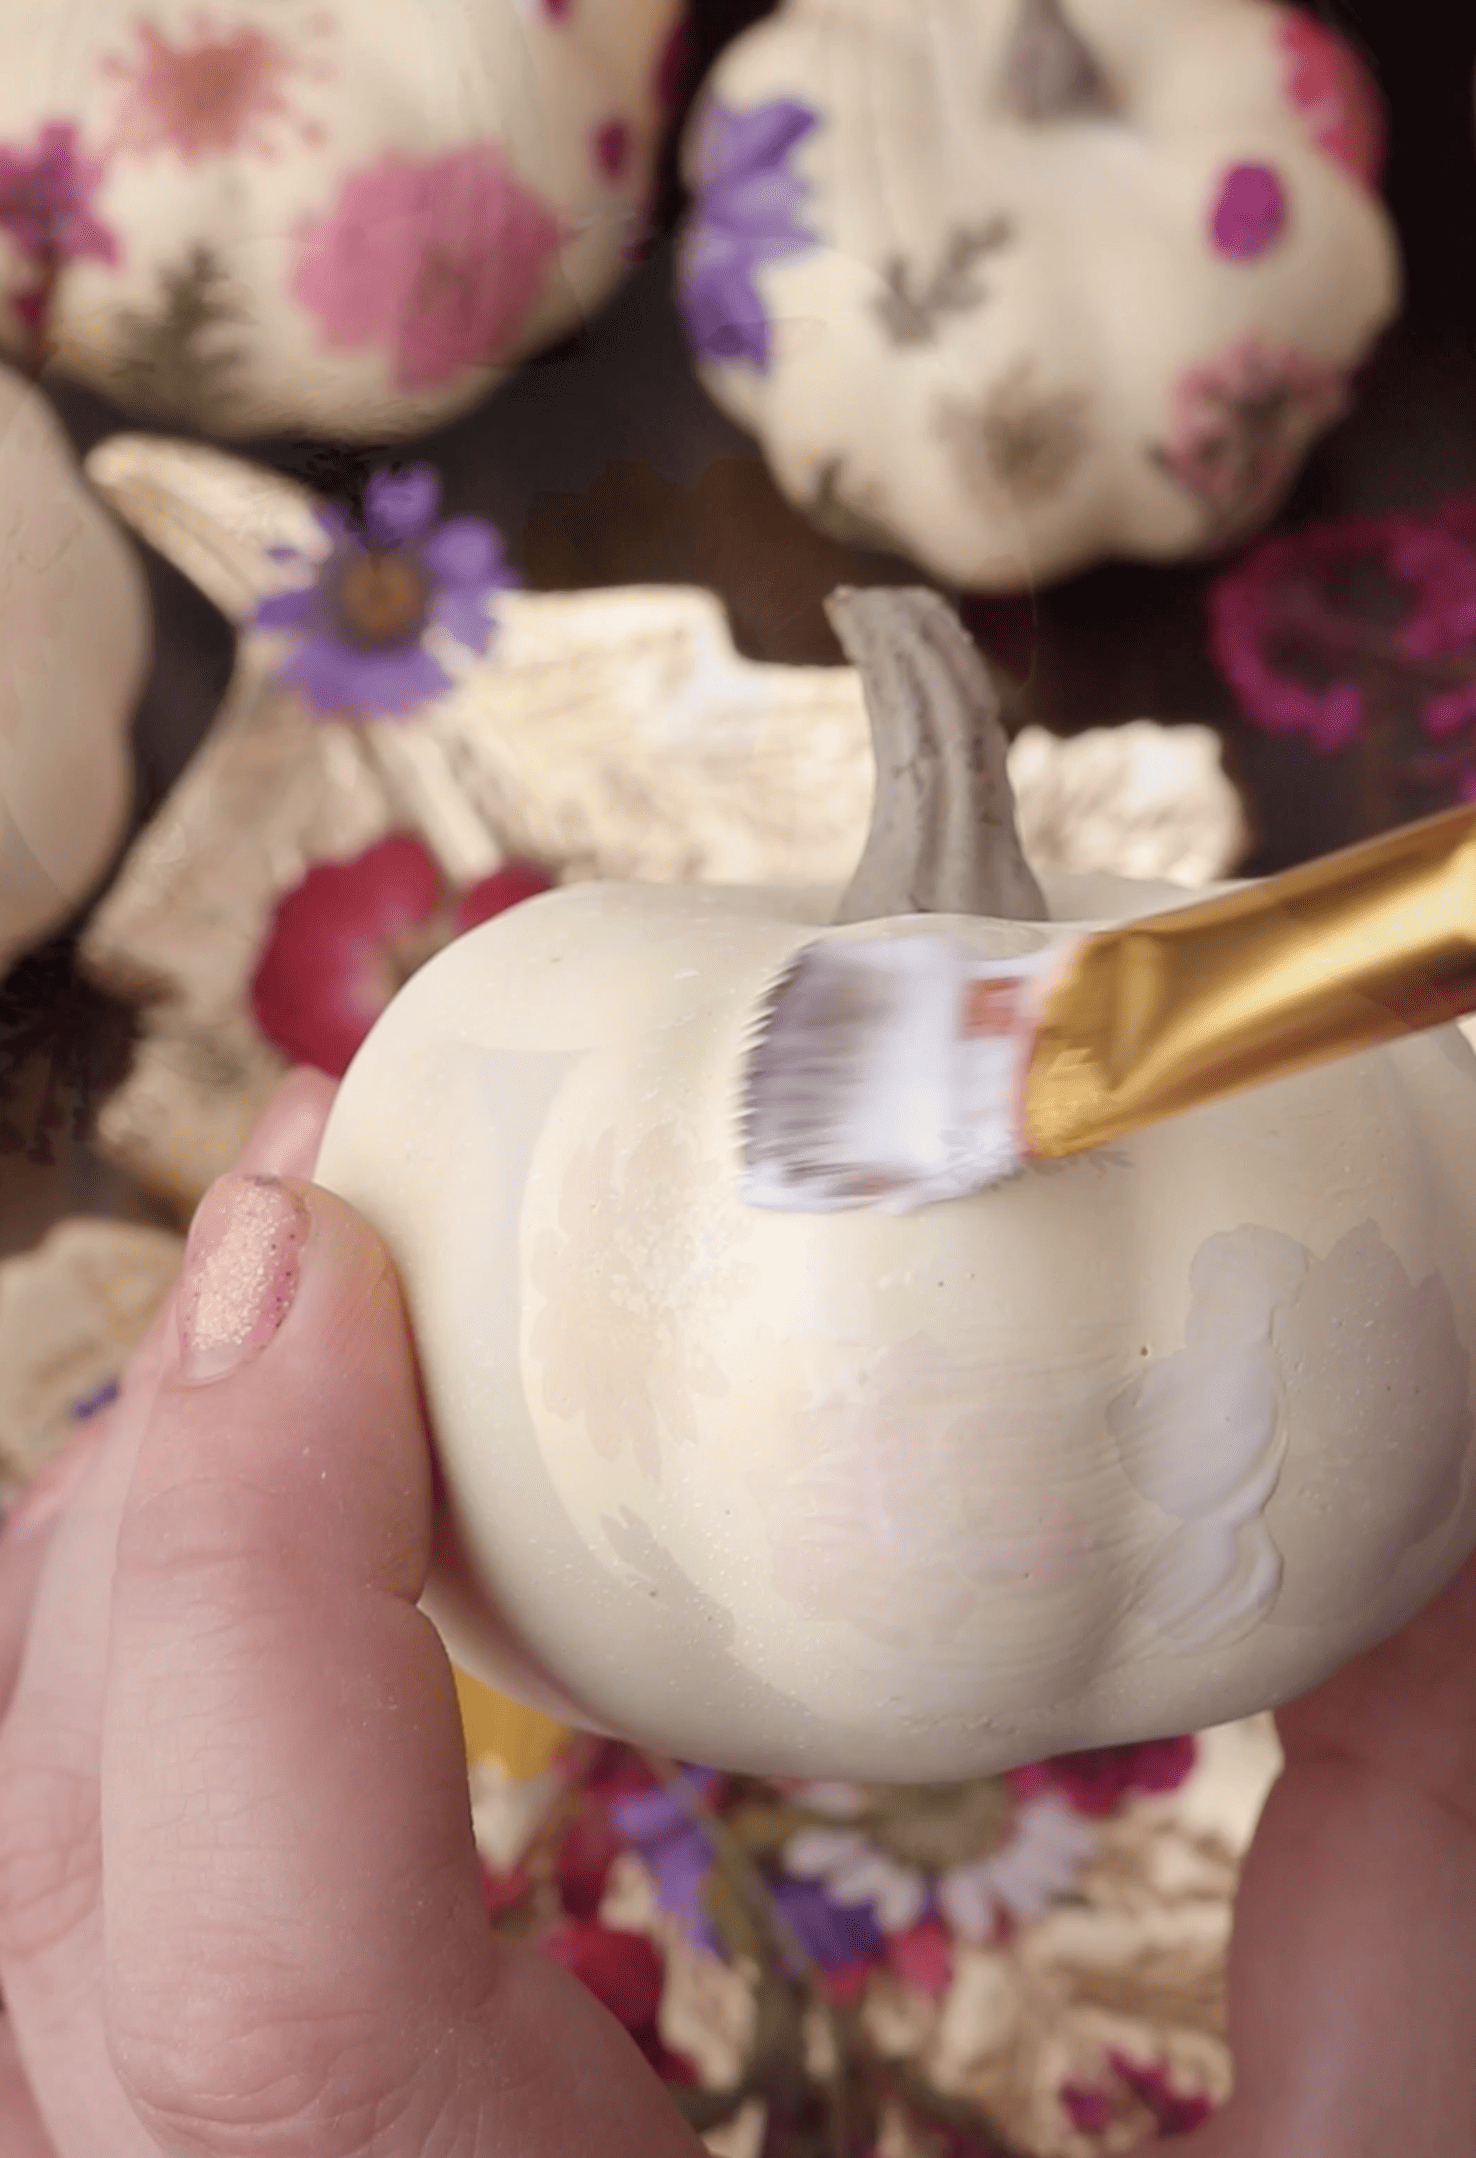
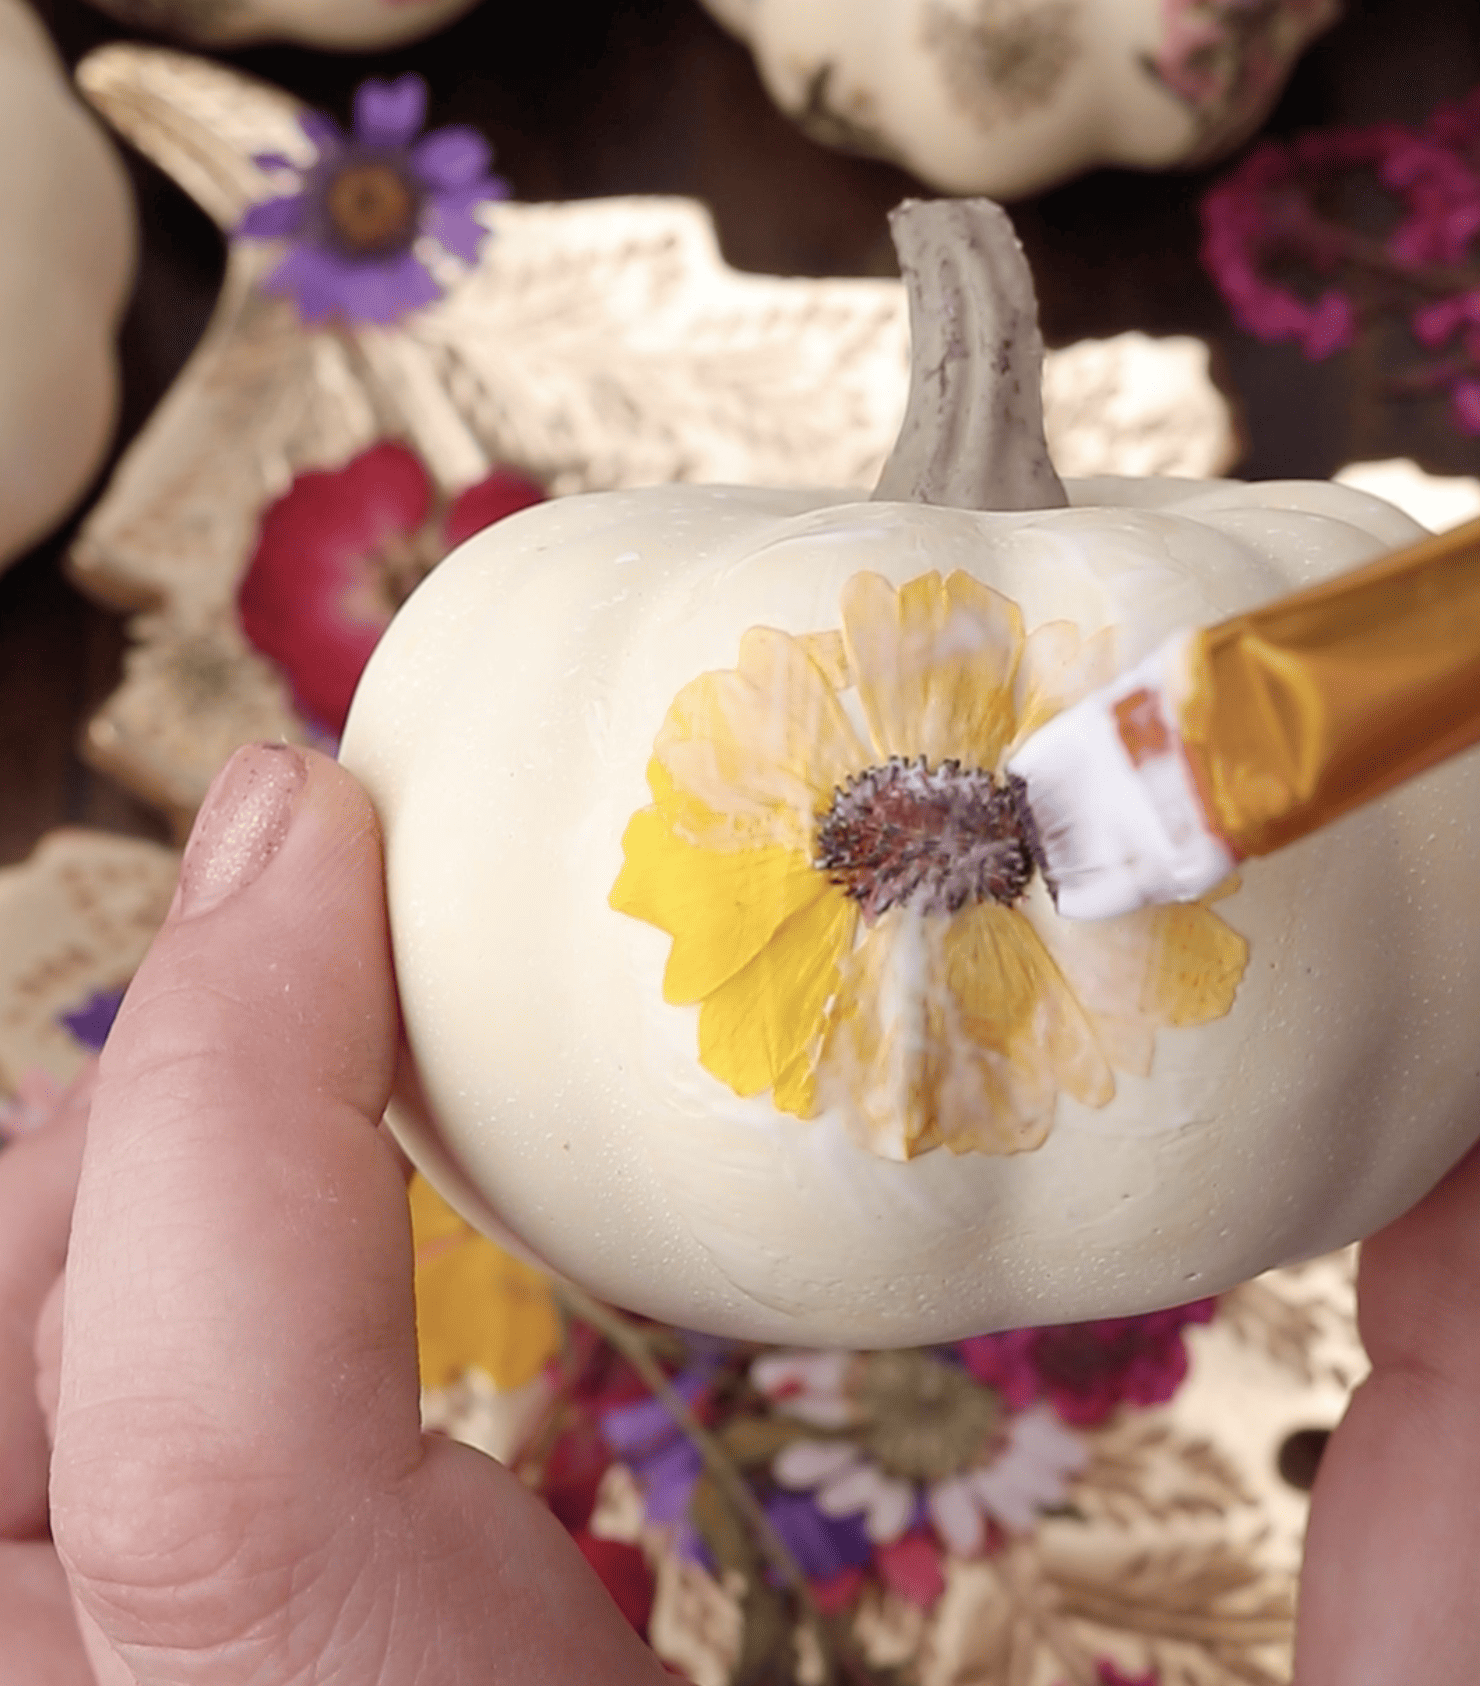
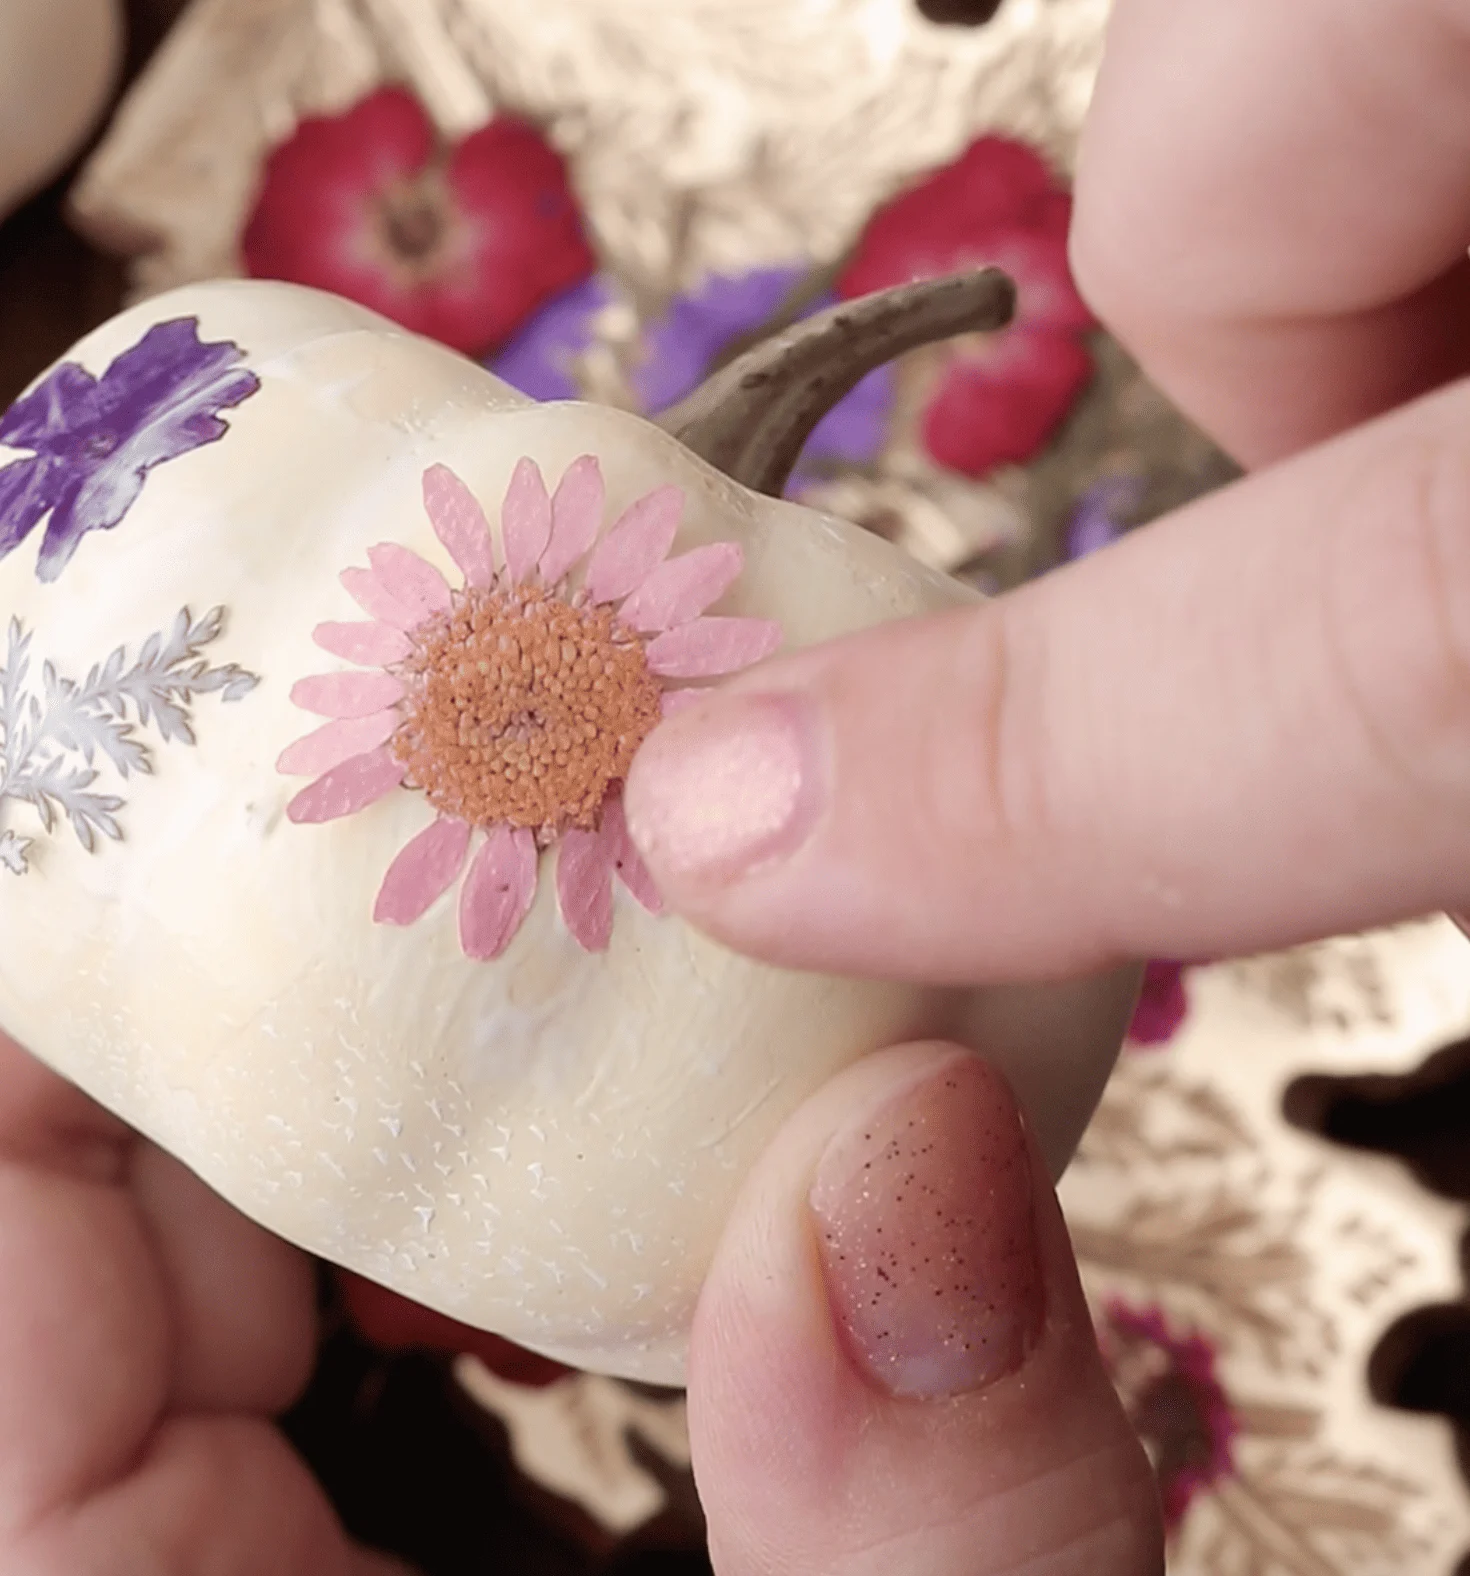
- Glue Down the Flowers: Dip your paintbrush into the Mod Podge and apply a thin layer where you plan to place your flower. Gently lay the flower on top, then paint another thin layer of Mod Podge over the flower to seal it. Make sure to smooth out any bubbles or wrinkles as you go.
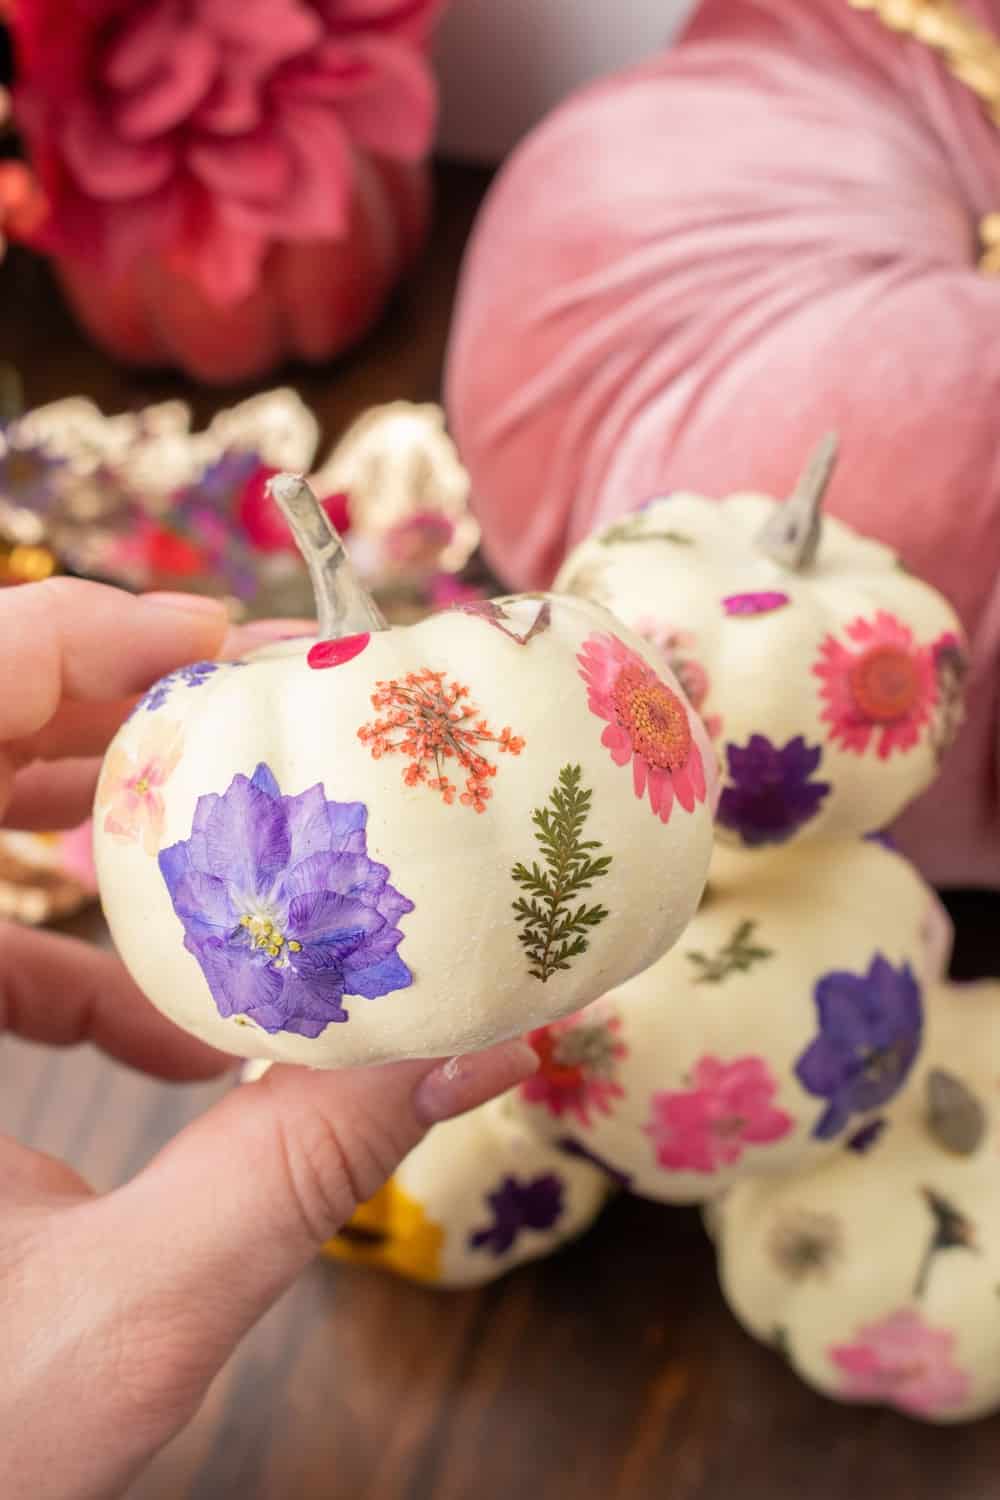
- Continue the Process: Repeat step 3 until your pumpkin is covered in the floral design of your choosing.
- Let It Dry: Once all your flowers are glued down, let the pumpkin sit for a few hours to ensure it’s completely dry.
- Seal (Optional): For extra protection, you can spray a clear acrylic sealer over the pumpkin. This step is especially recommended if you plan on displaying your pumpkins outside.


Final thoughts
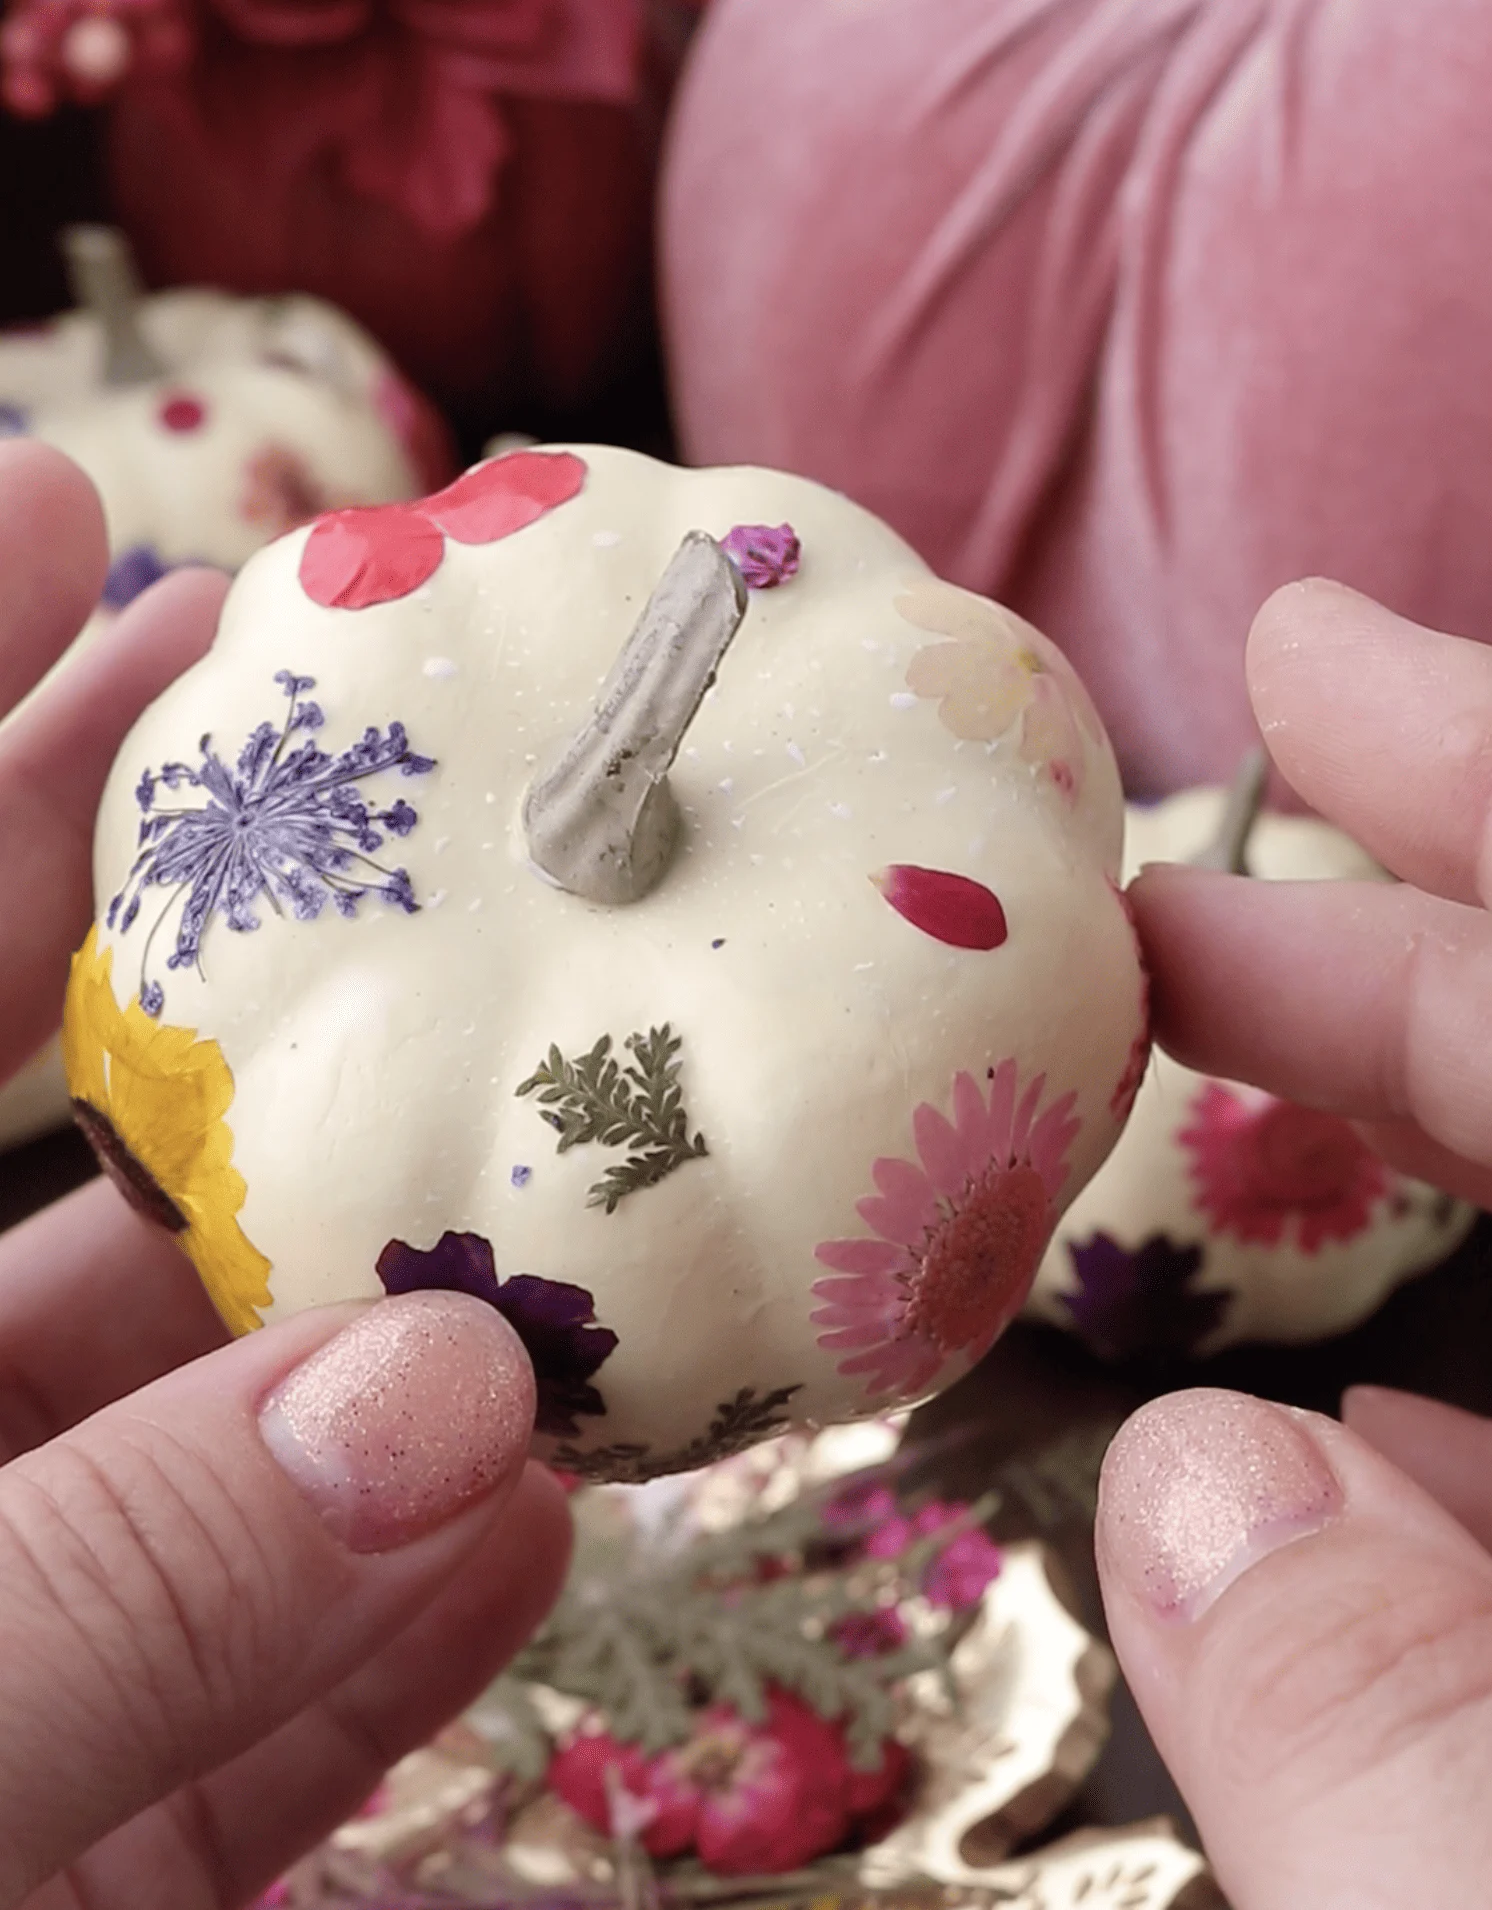
Pressed flower pumpkins are a beautiful, no-carve fall decor that adds elegant and rustic charm. They’re not only eye-catching but also a delightful way to bring nature indoors during the cooler months. I love using these on my Thanksgiving table and the kids love how easy they are to make!
Pressed Flower Pumpkins Make Pretty No-Carve Pumpkin Decor


Materials
- Faux mini white pumpkins (available at most craft stores or online)
- Pressed flowers (you can either buy pressed flowers or make your own).
- Mod Podge (or another clear drying glue).
- A paintbrush.
- Clear acrylic sealer spray (optional but will help preserve your pumpkins)
Instructions
- Preparation: Begin by making sure your faux pumpkins are clean and dry. This will ensure the Mod Podge and flowers adhere properly.
- Arrange Your Design: Before gluing anything down, arrange your pressed flowers on the pumpkin to figure out the design you like best. This gives you a chance to play around and see what looks best before making it permanent.
- Glue Down the Flowers: Dip your paintbrush into the Mod Podge and apply a thin layer where you plan to place your flower. Gently lay the flower on top, then paint another thin layer of Mod Podge over the flower to seal it. Make sure to smooth out any bubbles or wrinkles as you go.
- Continue the Process: Repeat step 3 until your pumpkin is covered in the floral design of your choosing.
- Let It Dry: Once all your flowers are glued down, let the pumpkin sit for a few hours to ensure it's completely dry.
- Seal (Optional): For extra protection, you can spray a clear acrylic sealer over the pumpkin. This step is especially recommended if you plan on displaying your pumpkins outside.


Agnes Hsu is a mom of three and has been inspiring parents and kids to get creative with easy activities and family friendly recipes for over 10 years. She shares her love for creative play and kids food to her 2MM+ followers online. Agnes' commitment to playful learning and kindness has not only raised funds for charity but also earned features in prestigious nationwide publications.