HOW TO MAKE MELTED CRAYON ART
Follow us on Instagram for more fun ideas for kids!
Watch the video below to see this fun Melted Crayon Art in action. Make sure to subscribe to our YouTube channel for more fun videos!
This melted crayon art is a creative arts and crafts activity for kids and great way to use up old crayons.
Crayons don't have to be a conundrum. In our house, we find a lot of different ways to use crayons.
Besides coloring, this is one of our favorite creative activities to do. We've even tried melting crayons on pumpkins!
It's such a simple way to create an art masterpiece that we can proudly showcase and share.
This Melted Crayon Art not only shows children the possibilities of repurposing crayons, but it also opens up their creative minds to see that art really can be made from a wide variety of items.
This indoor activity is perfect for rainy day or indoor fun, and is a great way to make a homemade gift that everyone is certain to love.
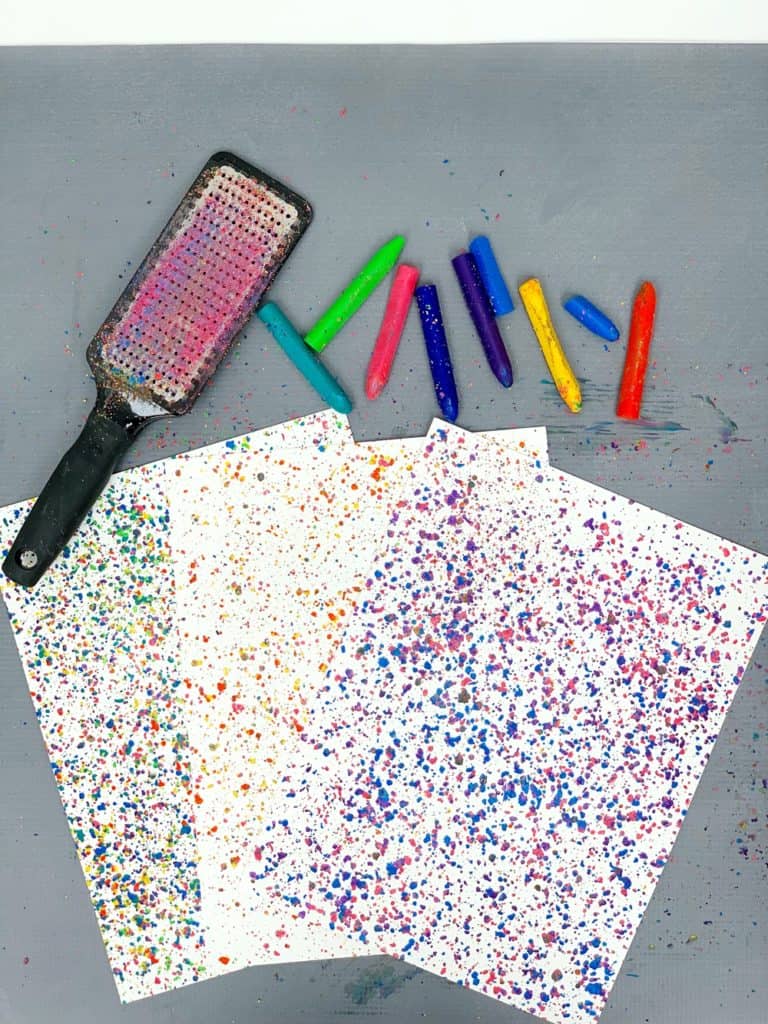
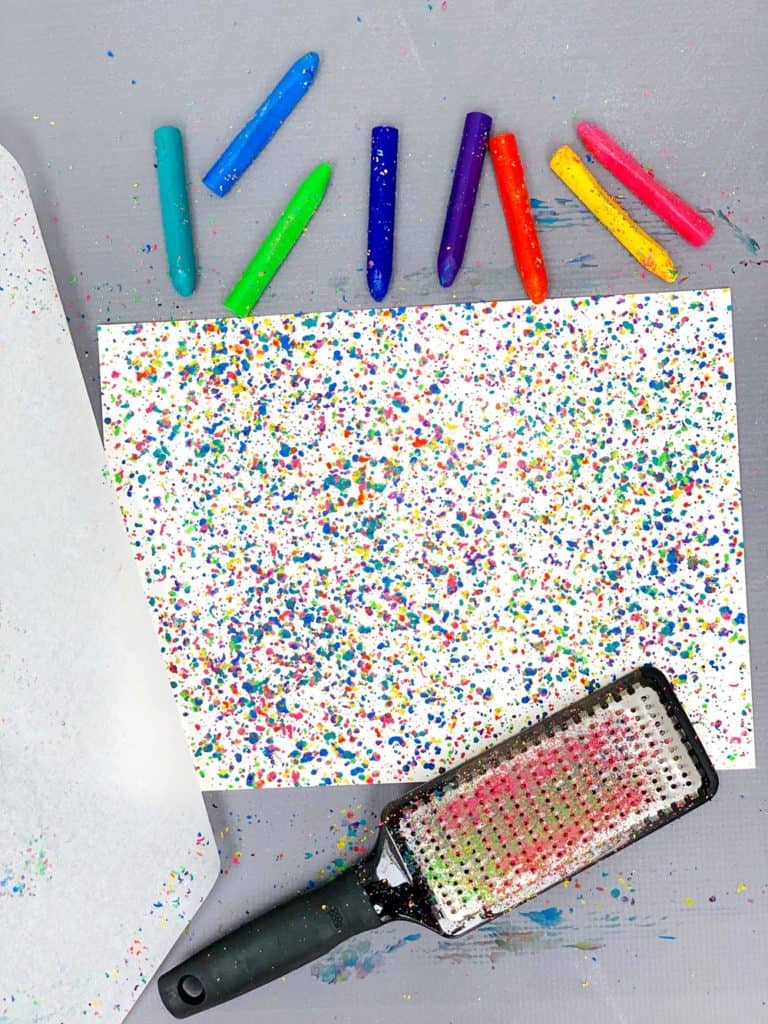
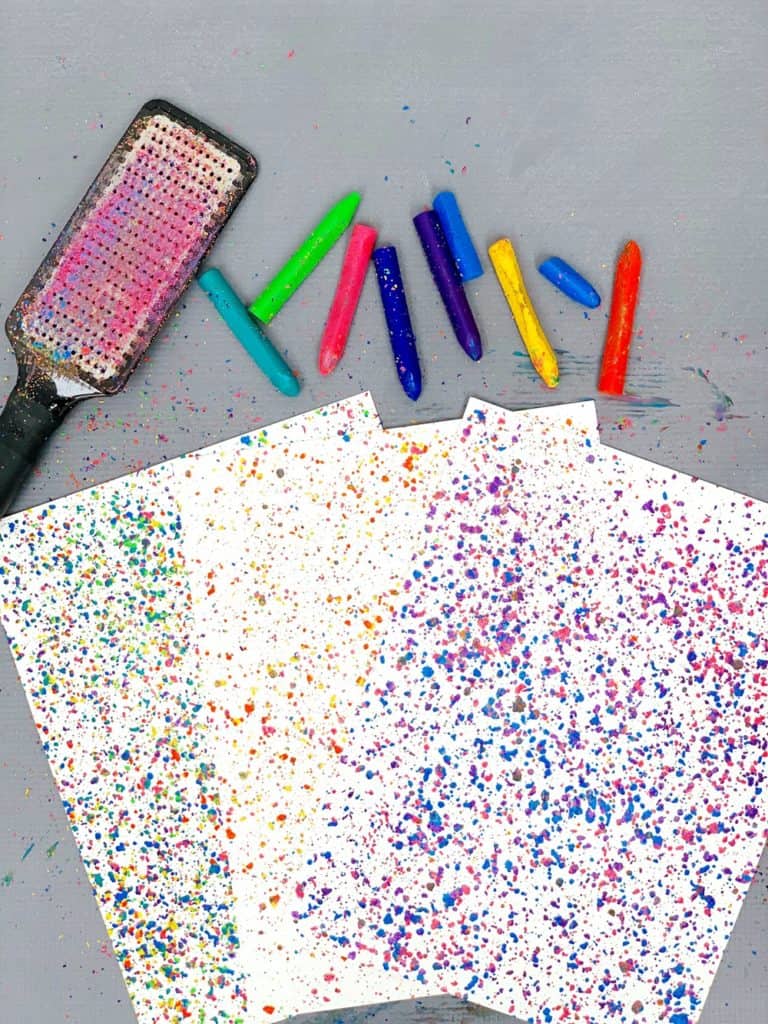
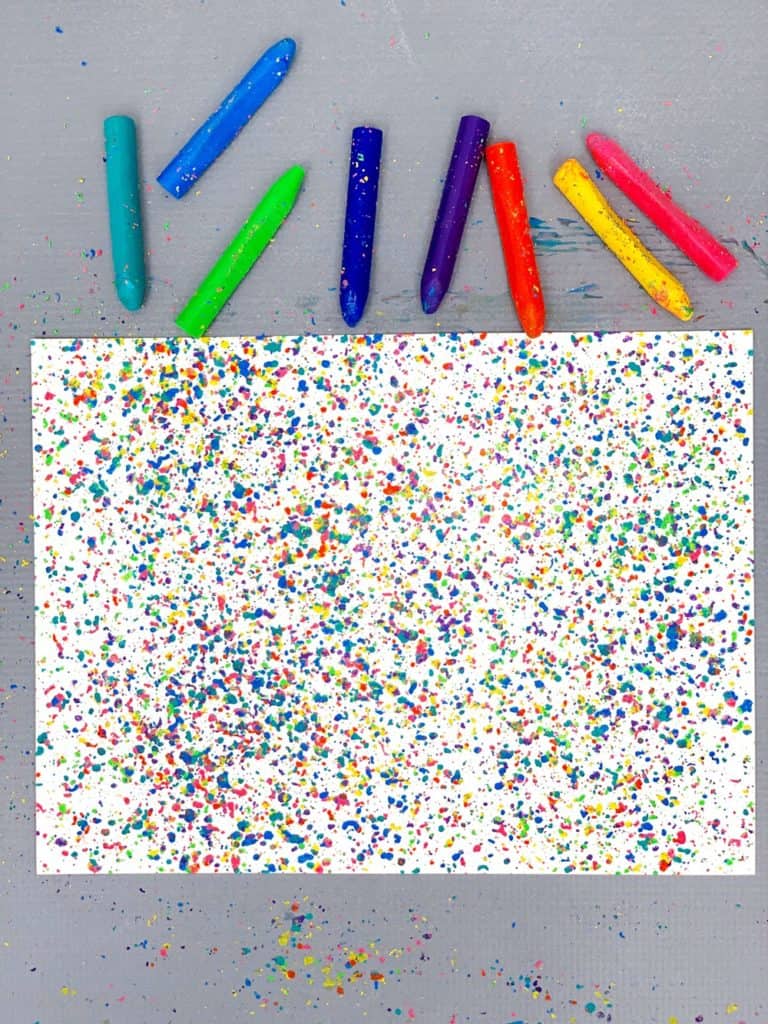
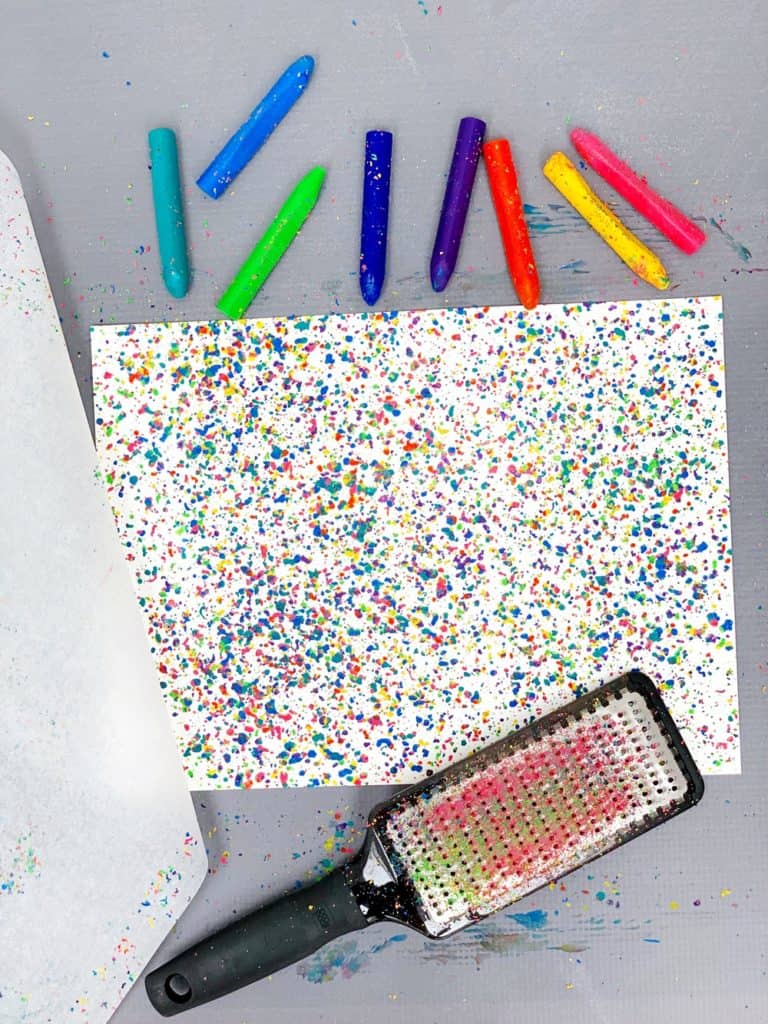
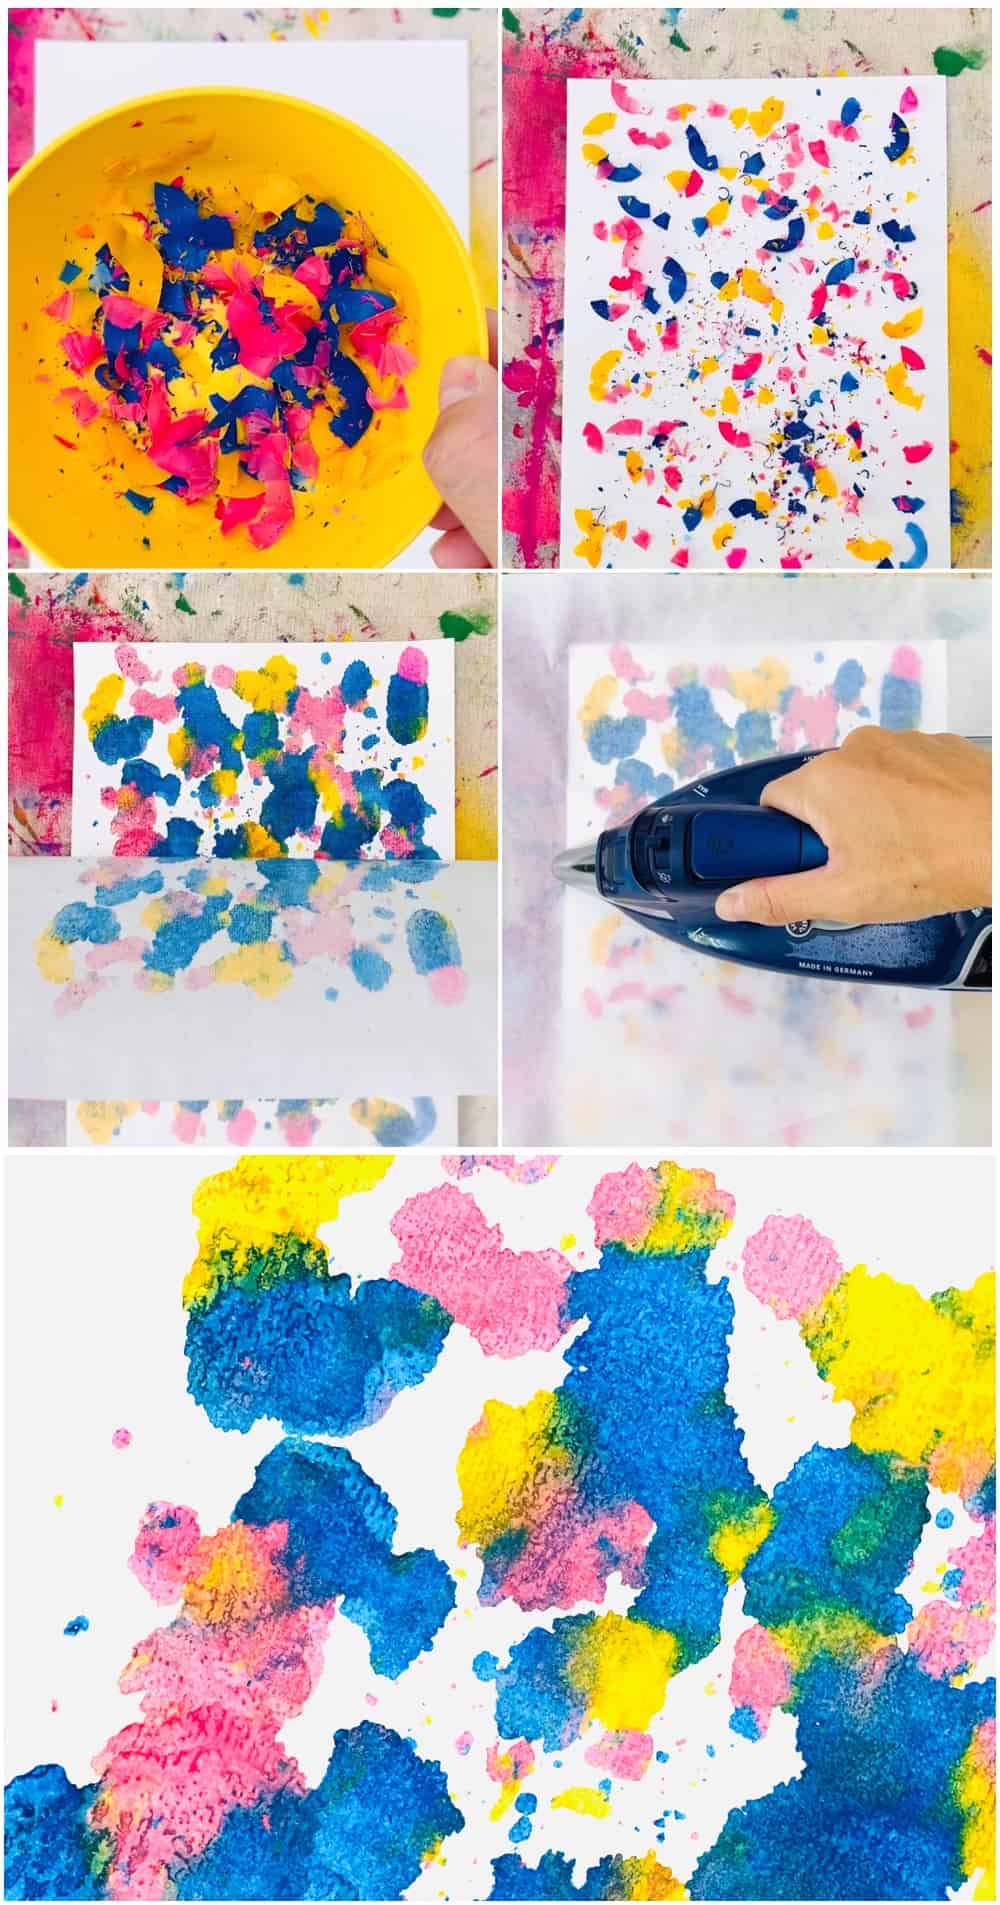
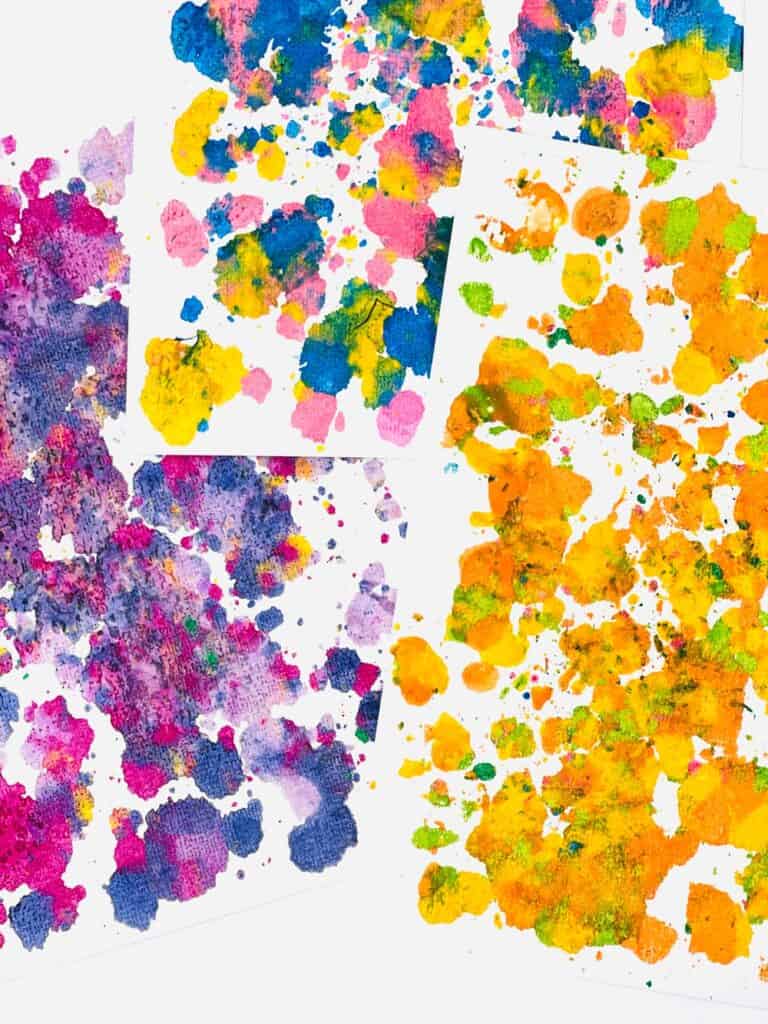
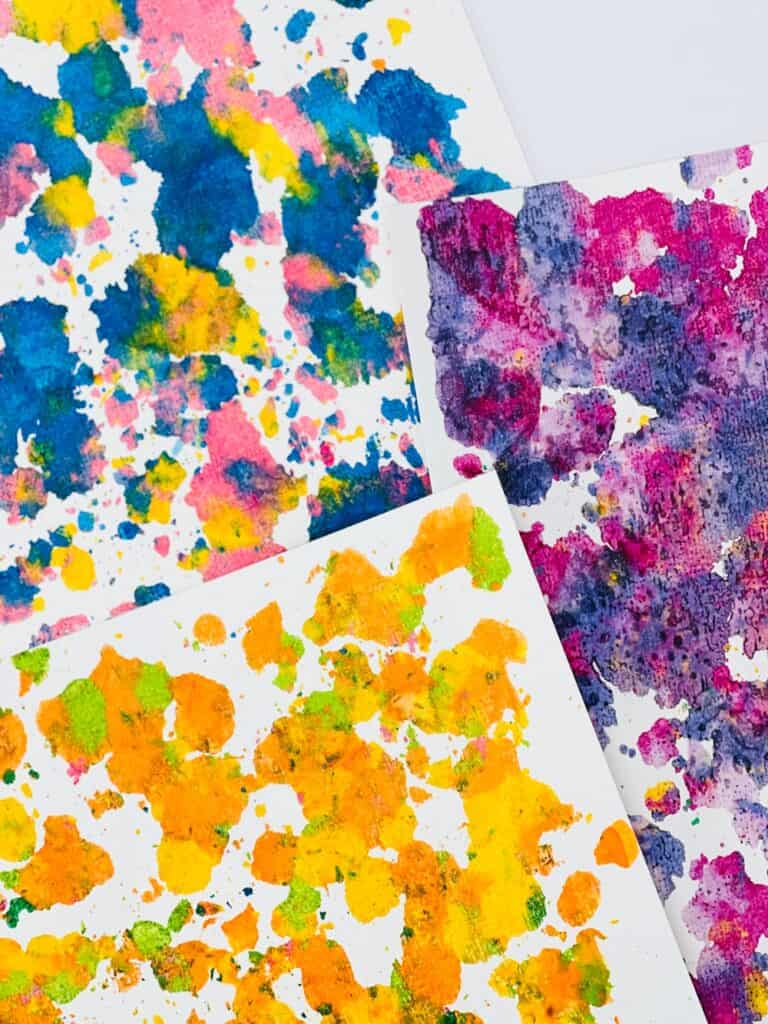
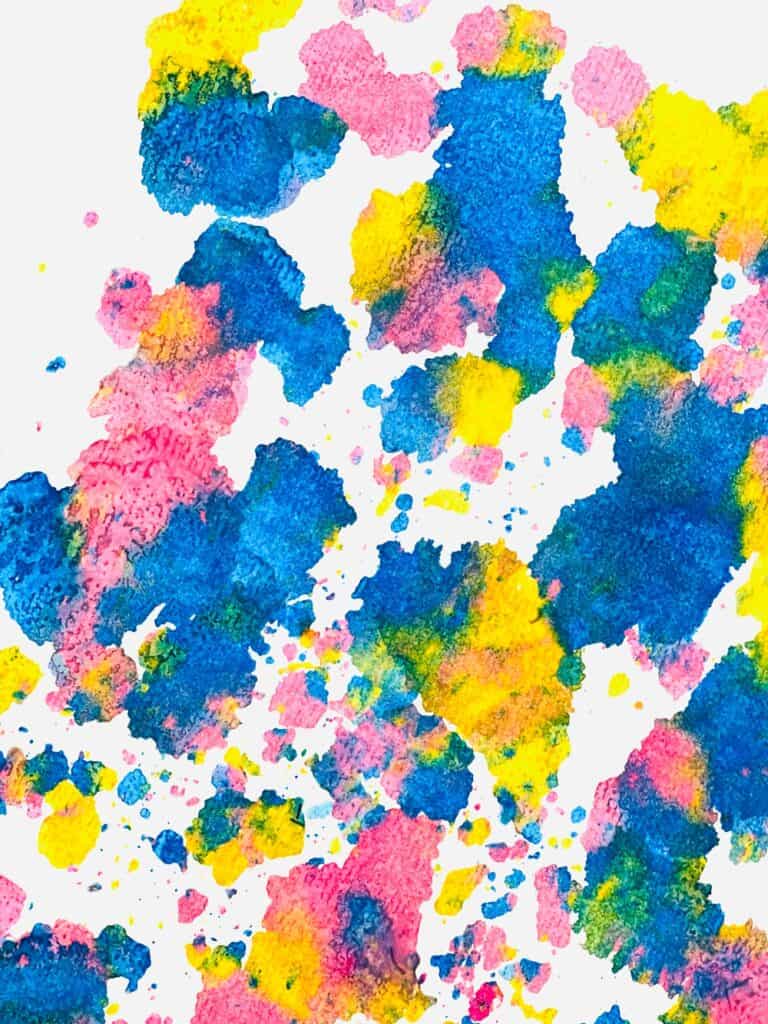
The little bits of crayon shavings make the prettiest confetti dots. We like to think we're making sprinkle paper!
You can then cut these into cute note cards or gift tags, hang as handmade garlands, or just frame as is!
I hope that this creative art activity shows your kiddo that creativity and art truly are a magical pair!
How long does this melted crayon art take to make?
Honestly, just minutes. If you have about 10 minutes of time, you have the ability to create this melted crayon art.
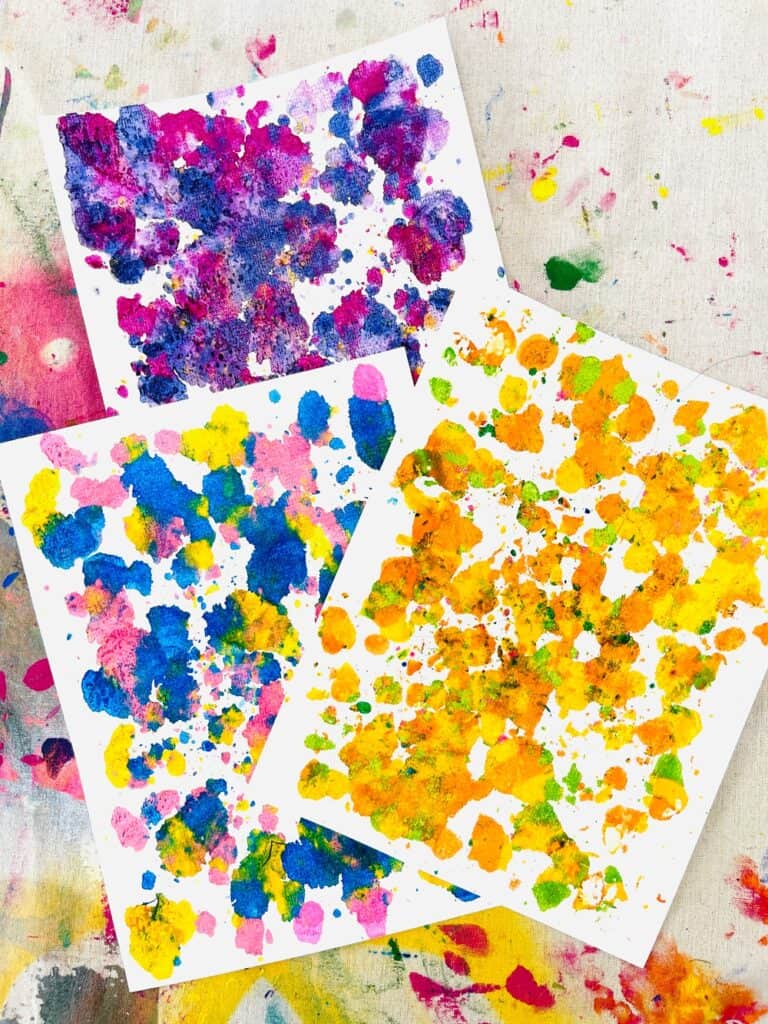
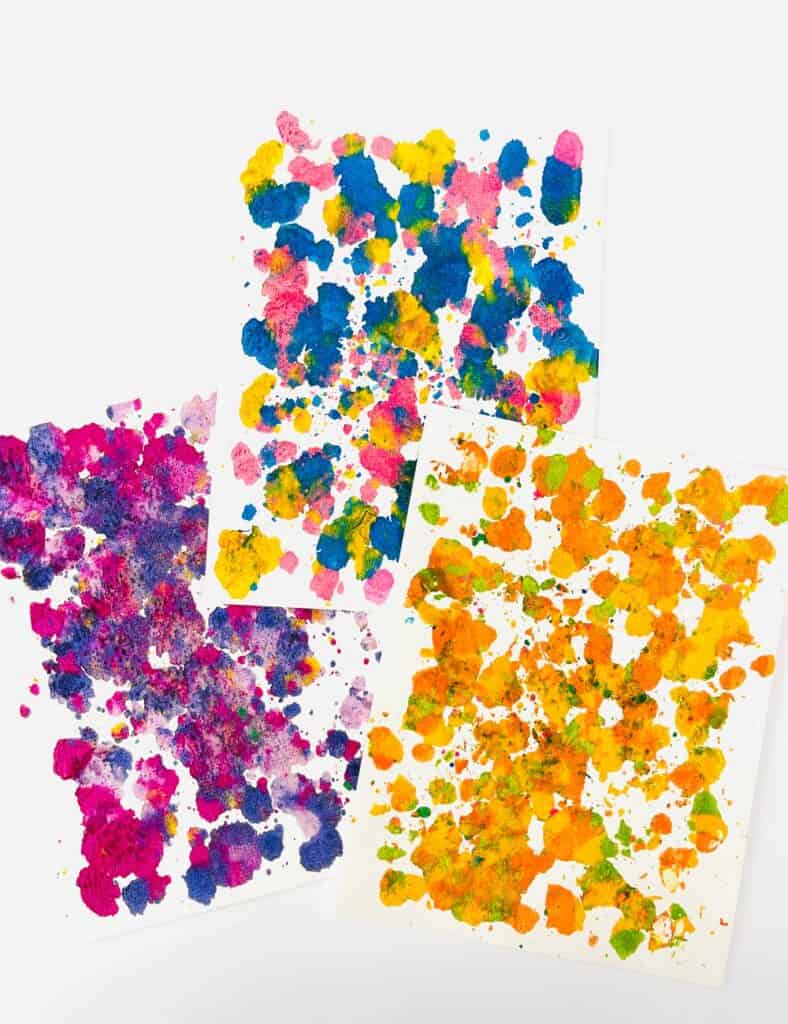
Once you and your child make this once, they're going to want to do it over and over again! The fun part is deciding what color combinations to make!
What is the best way to melt crayons?
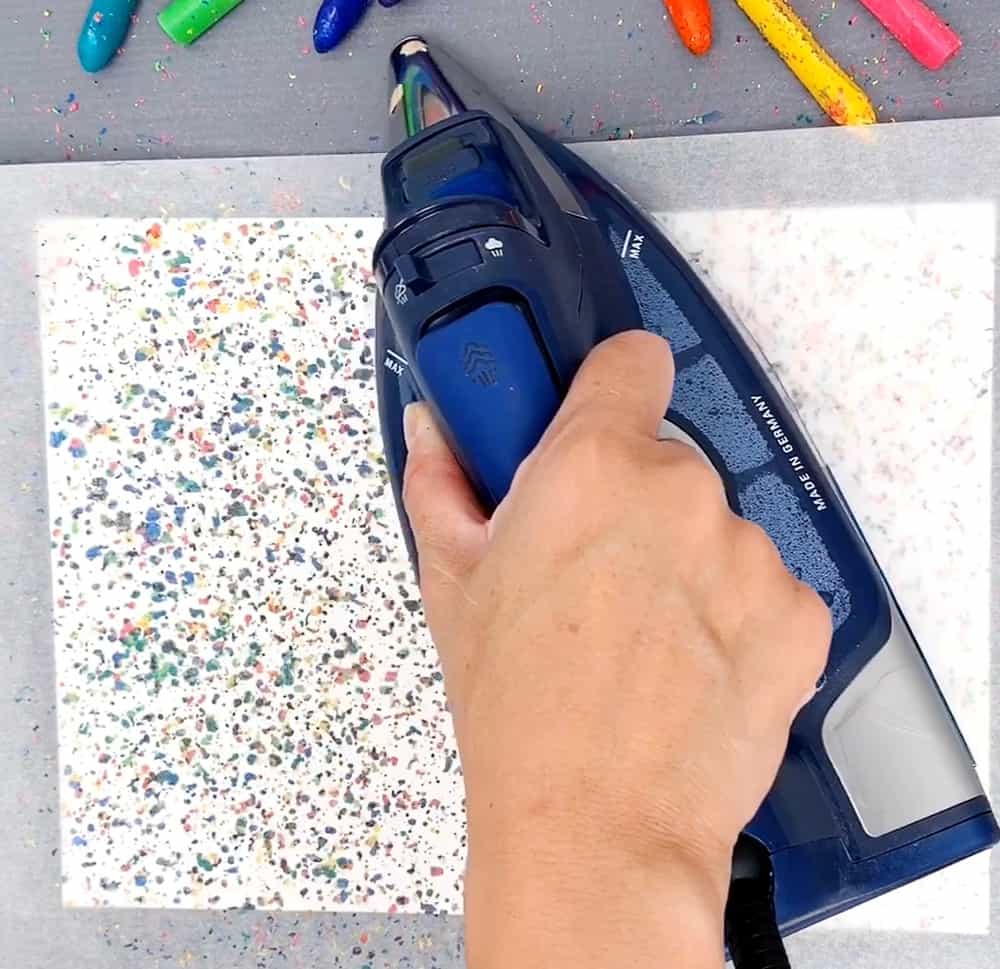
You can melt crayons in several different ways. Here we used an iron on low-medium heat. The heat from the iron is the key to melting the bits of crayon pieces. You can also use flat iron press (place the paper with the crayon shavings in between). Some people have used a hair dryer or hair blower to melt crayons. But for this particular crayon art, the hairdryer will just blow all those tiny bits of crayon shavings! Save yourself the time and use the iron as the video shows. So easy and take seconds to melt!
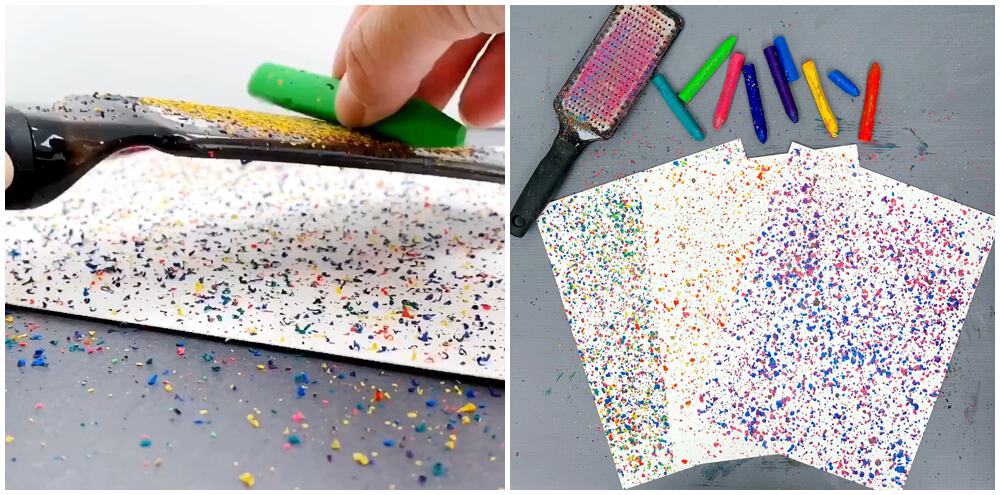
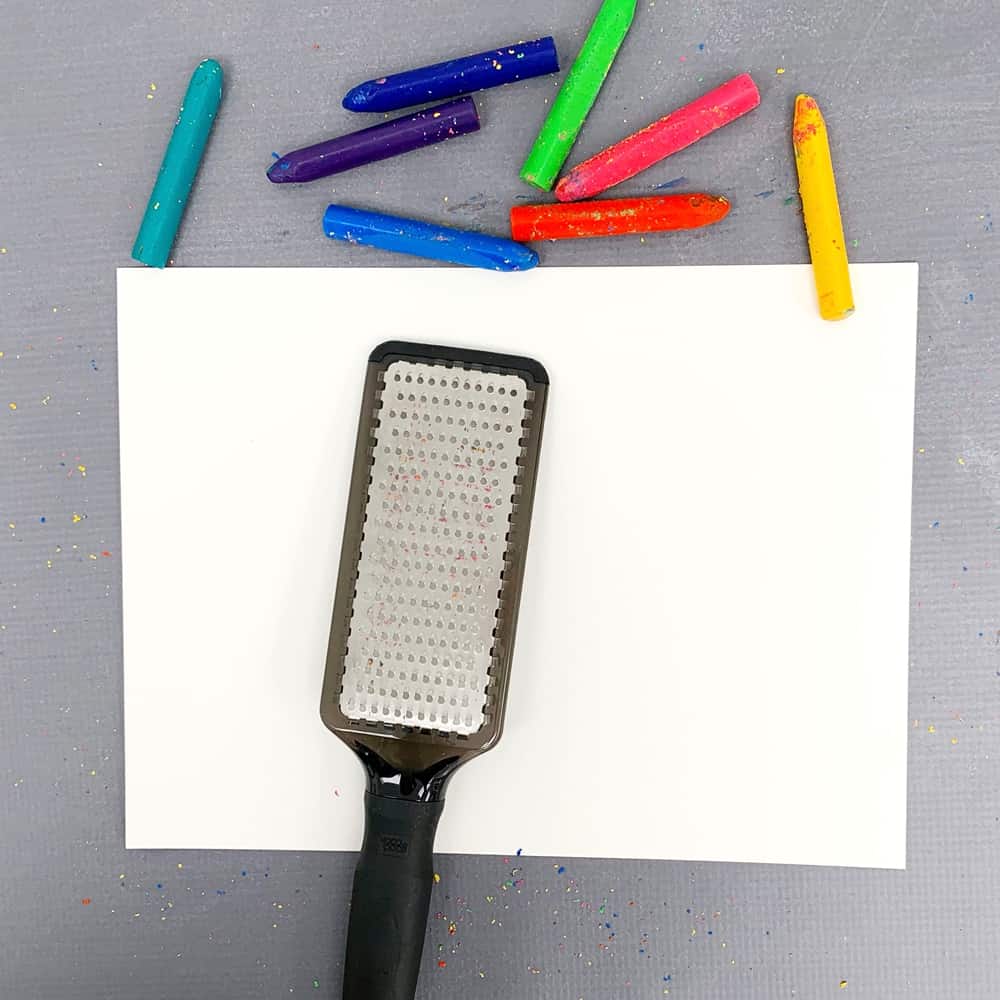
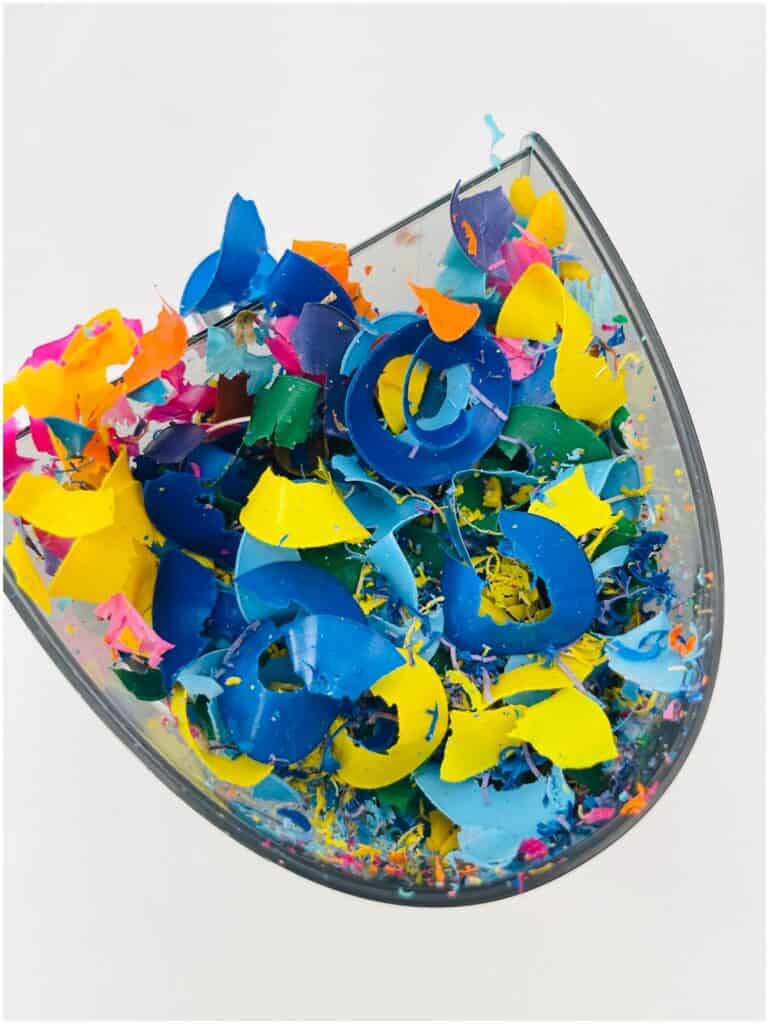
How do you create crayon shavings?
We used a dedicated cheese grater for this tutorial (we don't recommend cleaning it for future food use as it will be nearly impossible to get all the tiny bits of wax out). But you can also use a manual large pencil or crayon sharpener or this really cool electric crayon sharpener which gets great reviews! People who've used it say the key is to freeze the crayons.
Is this melted crayon activity messy?
While it might look like it might be, that doesn't mean that it has to be! When you or your child are grating the crayons, just take your time and keep it over the paper. You can put newspaper or a piece of cardboard under your paper if you wish.
Once you lay the parchment paper over the crayon shreds, it will seal them in and melt them immediately. And what that means for you is that there isn't a worry for any type of mess after that! Yes, we did use parchment paper and not wax! After all you can use parchment paper in the oven as a liner up to at least 400 degrees and for much longer than the seconds the iron is glazing over the the parchment.
Parchment paper is what we had on hand, although we've seen melted crayon art with wax paper before. We've also seen people use a towel as a barrier between the iron and paper, but we didn't find that necessary! The tiny shavings of crayon melt immediately.
Make sure to only have adults do the ironing part.
You don't want to take any chances of your child burning themselves in the process. What's fun for them anyways is to grate crayons and choose what colors they want!
How to set up this Melted Crayon Art
This crayon art is actually super simple. With minimal supplies and hardly any time needed, you can rest easy knowing that you and your child can accomplish this activity with ease. Let your child join in on the fun by having them find all the broken crayons that they're wanting to use.
The other great aspect of this craft is that your child can work on their hand-eye coordination and fine motor skills when they're using the grater on the crayons.
Melted Crayon Art – Materials:
- Crayons (large broken pieces or whole)
- Parchment paper (with iron on low heat it's fine to use) You can also use wax paper
- Watercolor paper (we find this is best for the crayons to stick well to paper)
- Iron
- Cheese grater
**Always supervise children when hot iron is in use
How should I display or ideas for what to do with my melted crayon art?
You can do several fun things with your melted crayon art!
- Display it in a shadow box or frame
- Cut up the paper and make greeting cards
- Do this on butcher paper and make super fun wrapping paper
- Cut shapes like butterflies or flowers for art or note cards
HOW TO MAKE MELTED CRAYON ART

Materials
Instructions
1. Decide what crayons you will combine and grate.
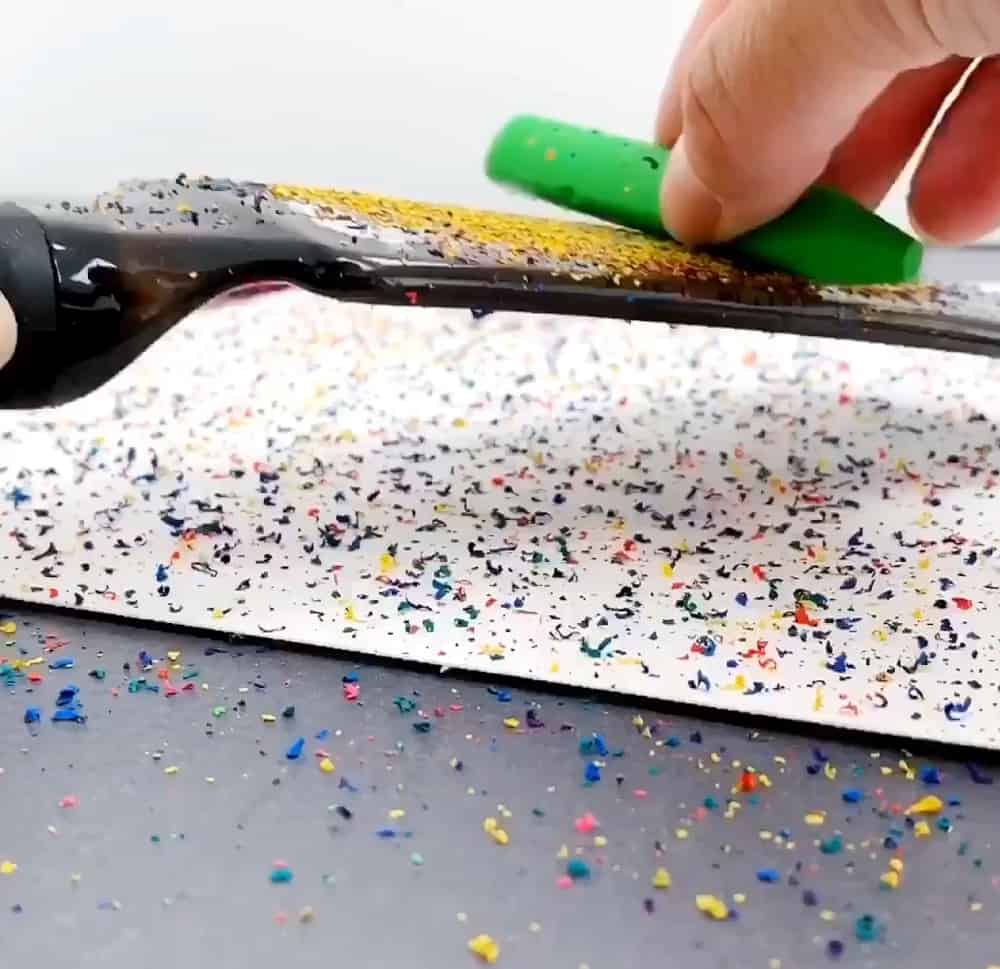
2. Place your grater over your paper and in a continuous even motion, grate over the entire paper. Make sure to do this as evenly as possible! If not you will create a big blob of crayon in one area.
3. Repeat with all the crayon colors you choose.
4. Lay one sheet of parchment or wax paper over the watercolor paper carefully as to not make the crayon bits fly everywhere.
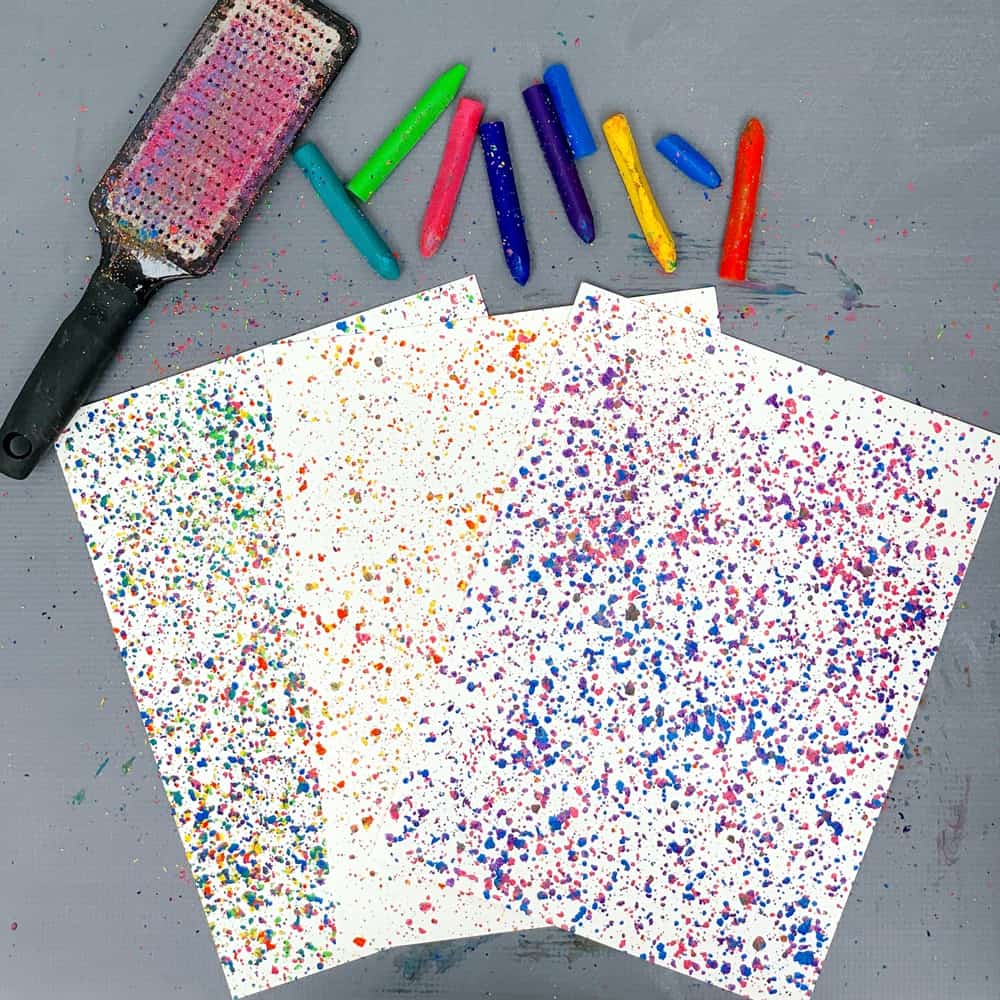
5. Add your preheated iron on low heat over the parchment paper and press firmly in one continuous motion. We had our iron on a low setting.
6. Remove the parchment paper and admire your melted crayon art!
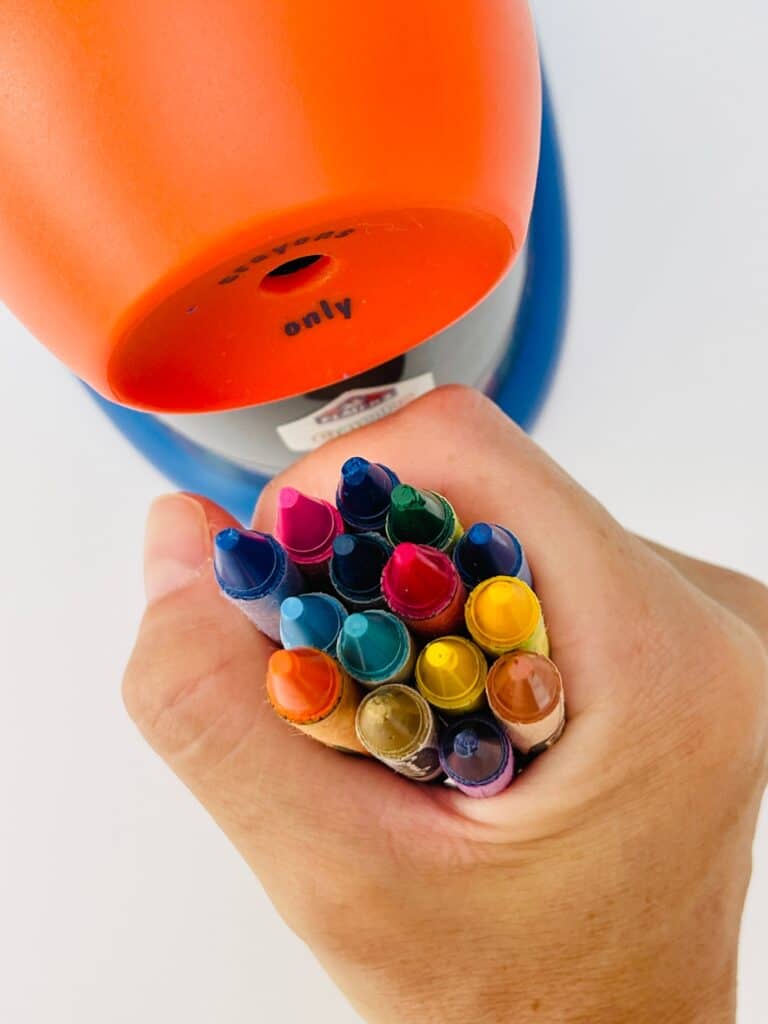
Update 8/26/21 - we made more melted crayon art except with larger crayon shavings!
If you have a crayon sharpener like this one it's perfect for collecting beautiful larger pieces of crayon shavings! Make sure to save those for this lovely melted crayon art project as well! Check out our Instagram Reels to watch this video.
The process is the same (as above) after you lay the shavings down on paper. A tip is to use a paintbrush to scatter the shavings evenly across your paper.
If you love this fun melted crayon art activity, make certain to check out this other fun art project as well:
How to Recycle Markers Into Watercolors
______________________________________________________________________________________________________
Disclosure: Some of the links in the post above are “affiliate links.” This means if you click on the link and purchase the item, we will receive a small affiliate commission. Regardless, we give our promise that we only recommend products or services we would use personally and believe will add values to our readers.