

By using this site, you agree to our Terms of Use. This post may contain affiliate links. Read our disclosure policy.
Follow us on Instagram for more fun ideas for kids!
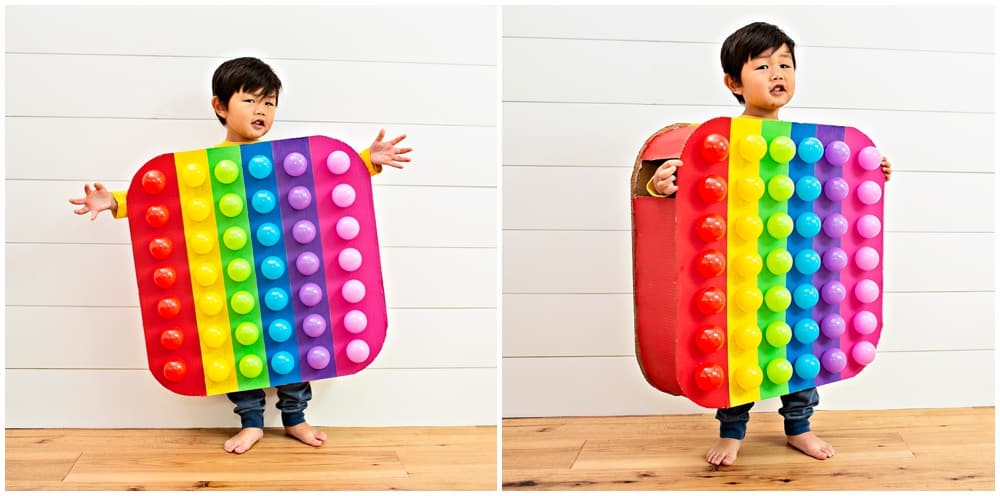
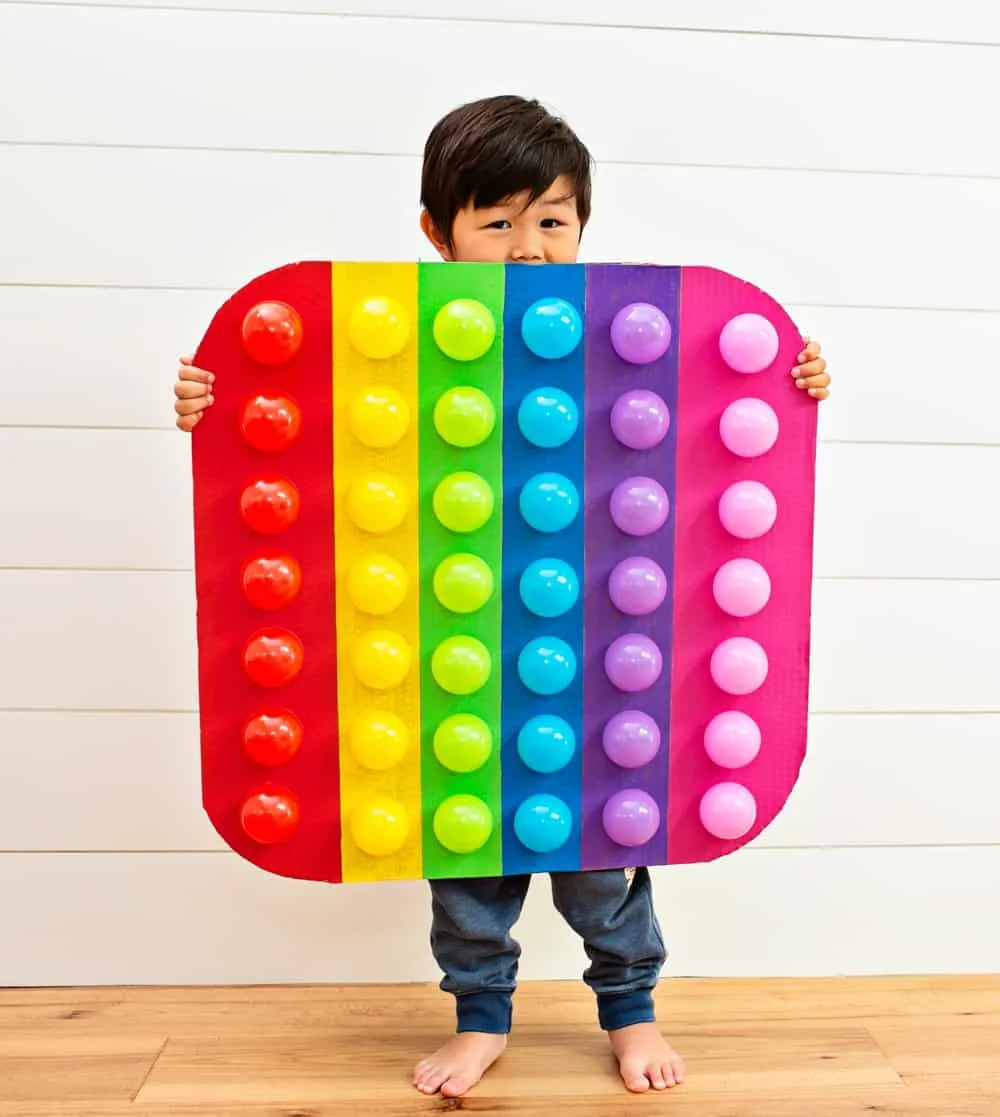
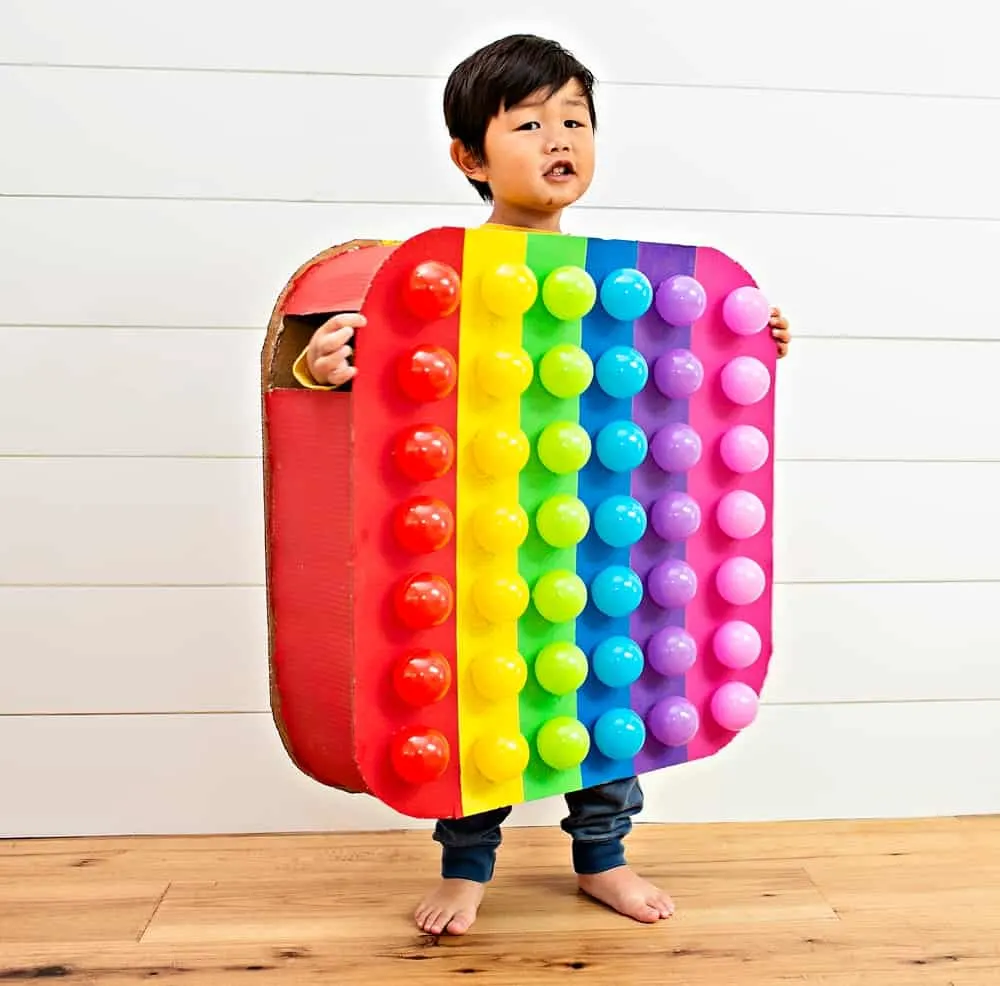
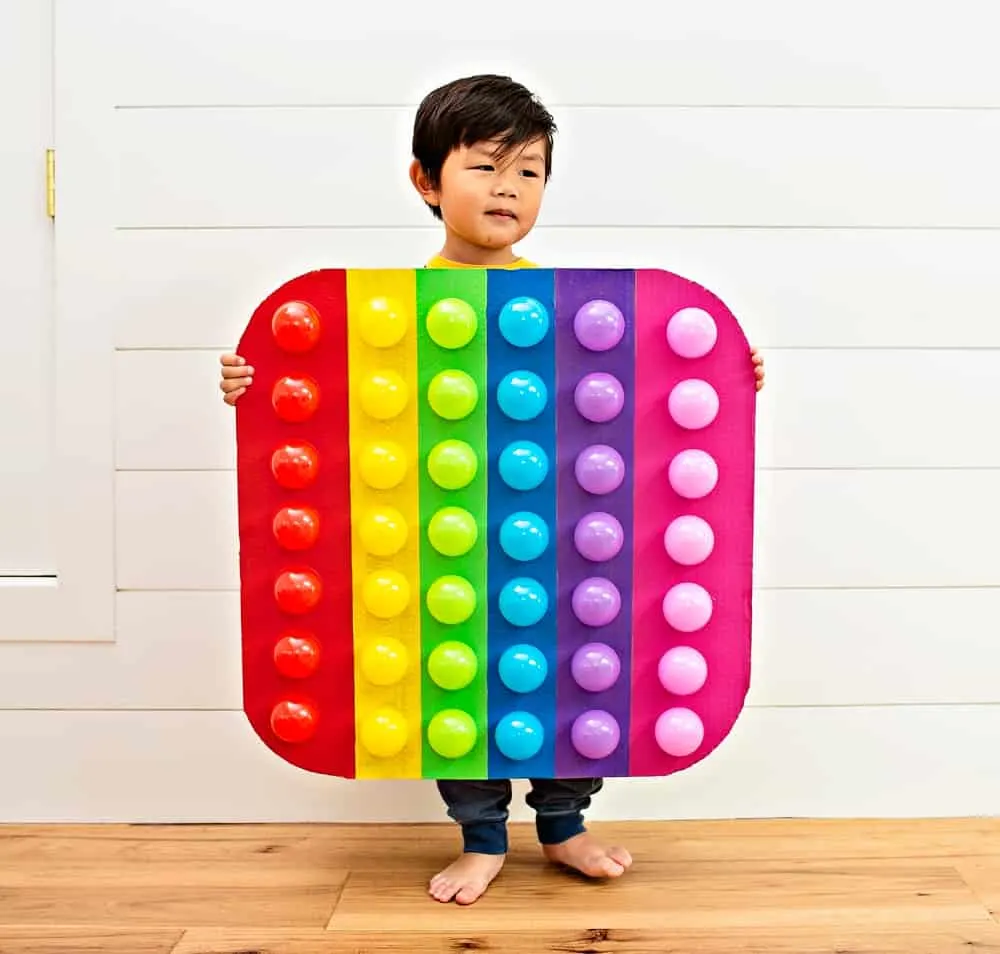
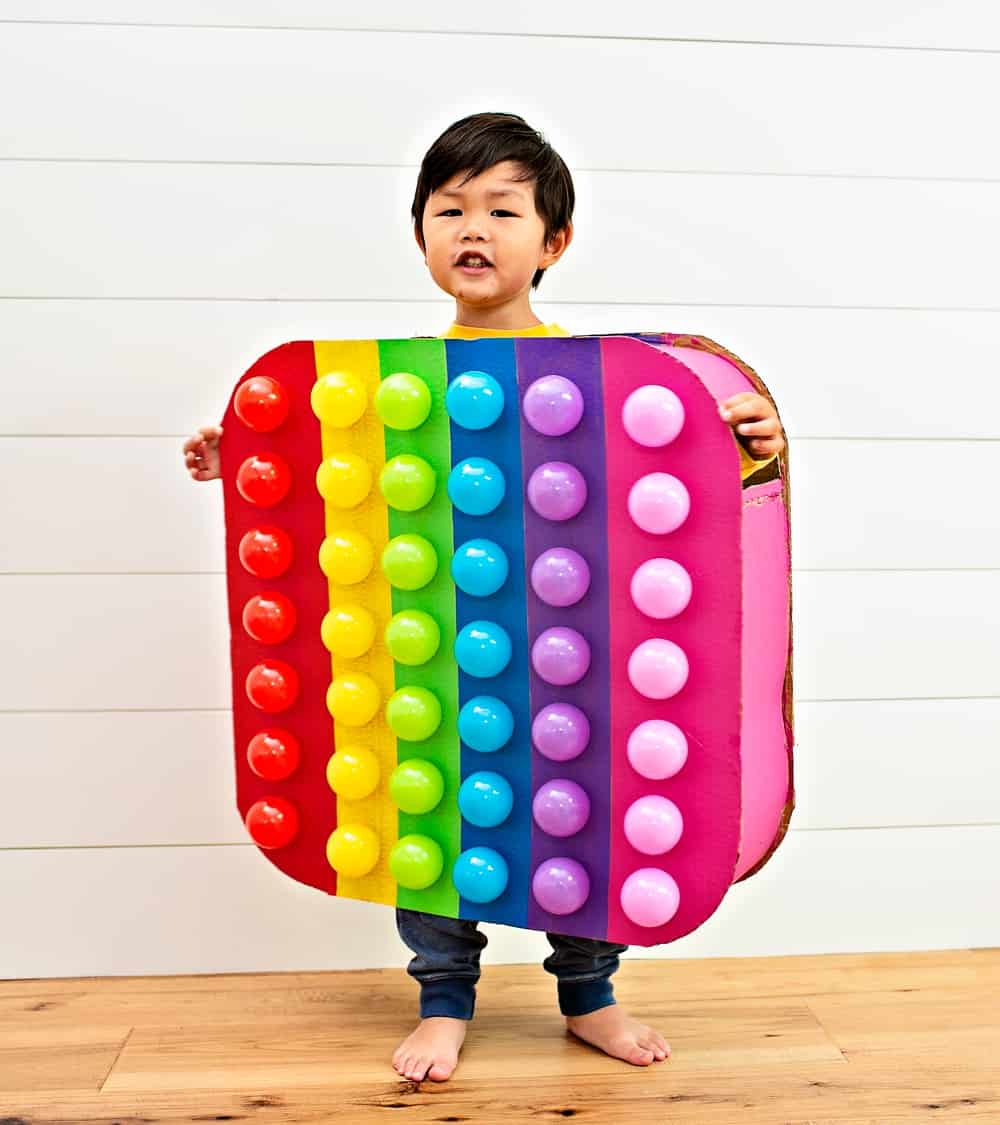
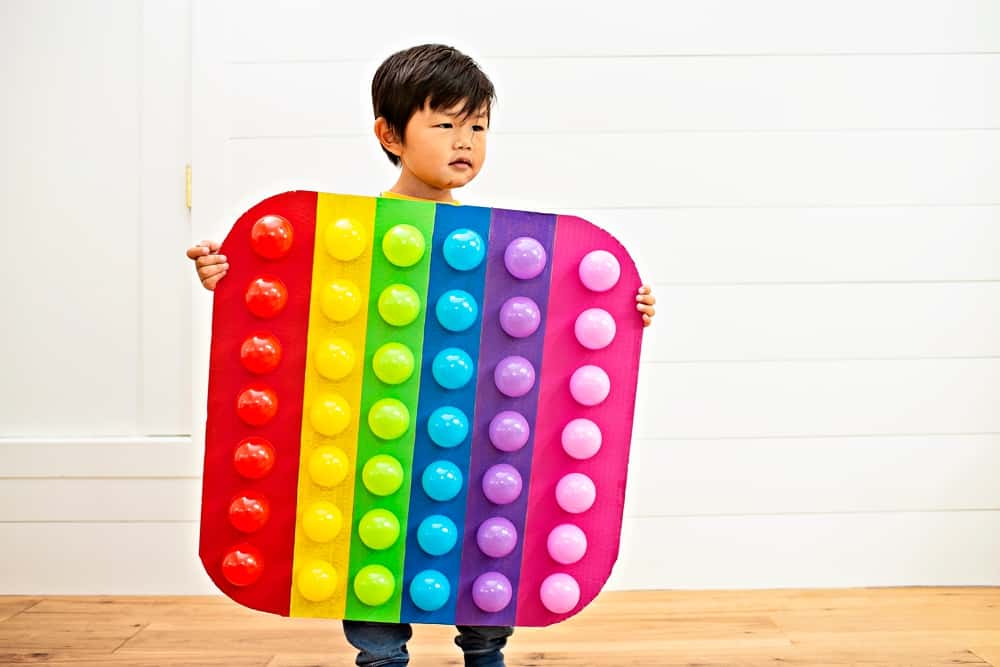
Pop It fidget sensory toys are all the rage and this year’s viral sensation kids are crazy about. If you’re looking for a Halloween costume that will turn heads, look no further than this DIY Pop It Costume!
My kids like most kids this past year are crazy about sensory toys and Pop Its in general! We have this creative Pop It Game and have even made Pop It Chocolate! To celebrate and continue our love for Pop It sensory toys, we came up with this super fun DIY Pop It costume.
If you’ve been following us for a while, you’ll know that DIY Halloween costumes are a BIG deal around here! We like to keep them simple, low cost and often make cardboard costumes as a result.
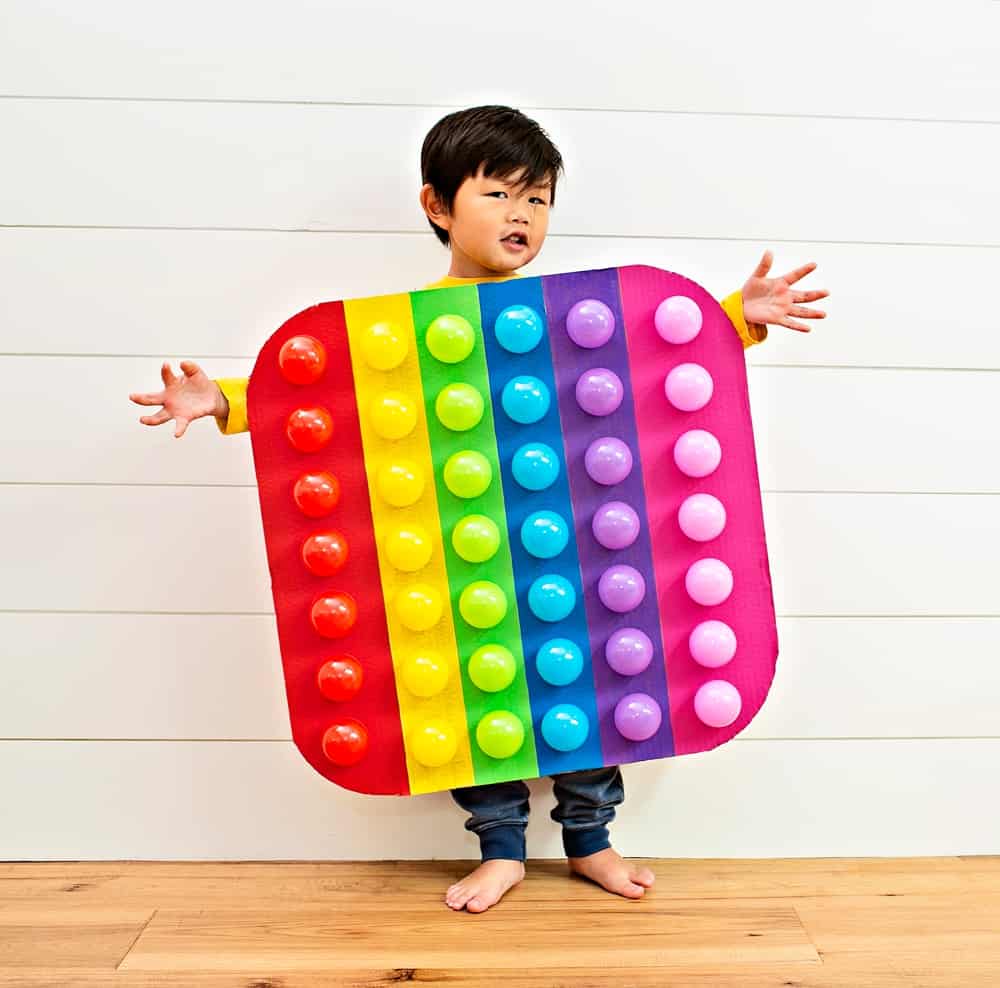
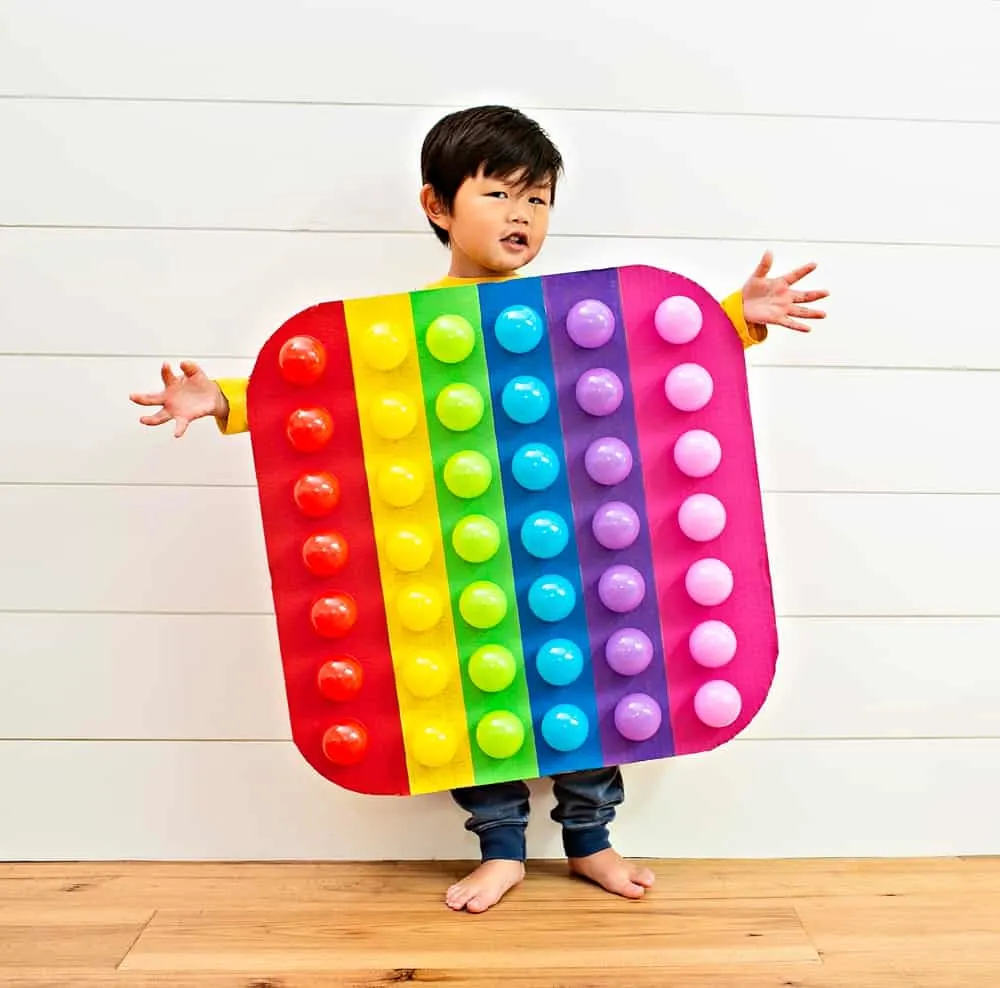
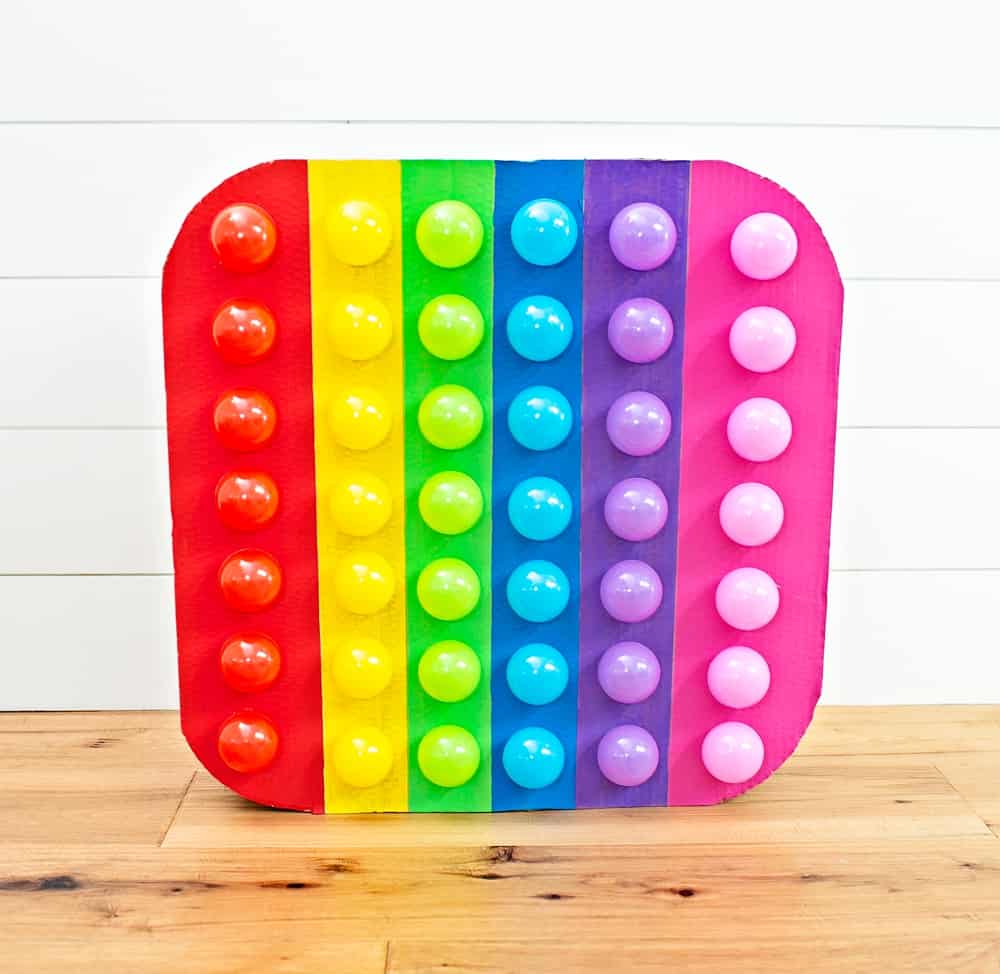
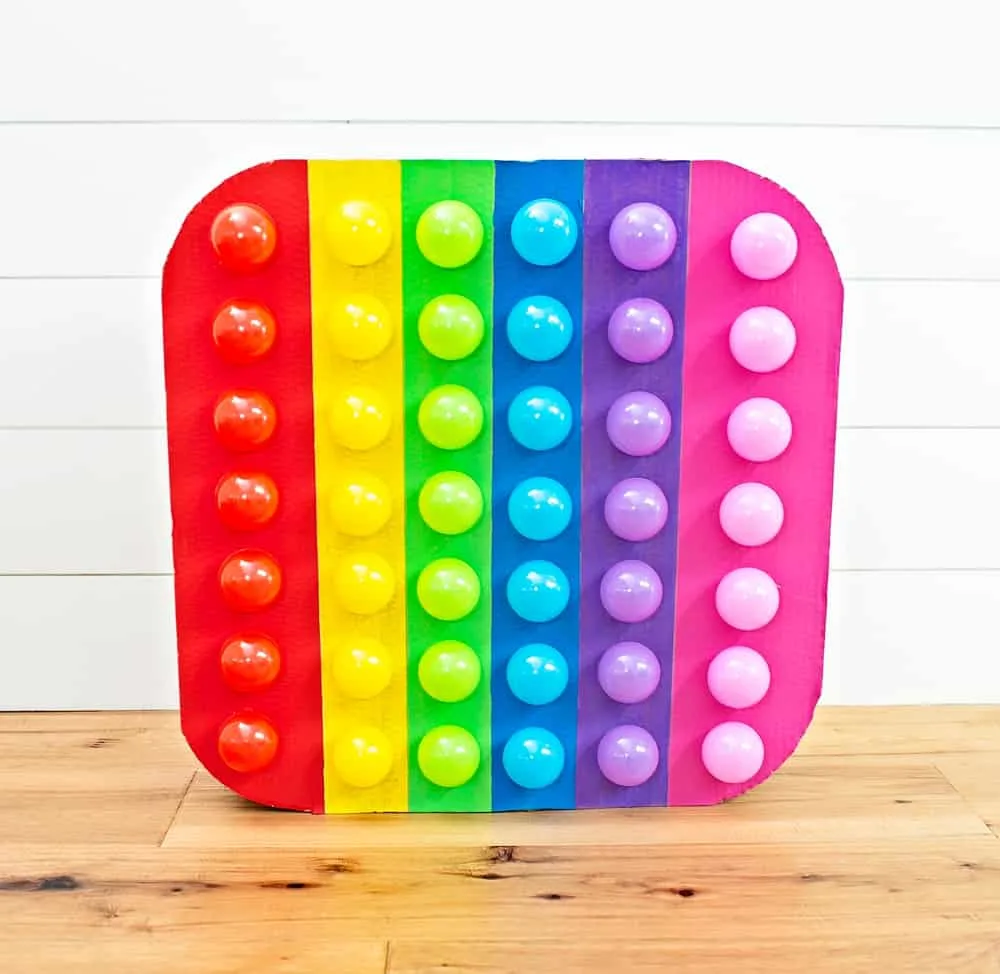
For this Pop It costume, we continued the cardboard tradition and added our signature rainbow pops of colors! You’ll be surprised to see how simple this Pop It costume is to assemble. It’s basically cardboard, glue and paint! Read more below to get all the details and make sure to check out the DIY video in this post for more details.


How to Make a Pop It Costume
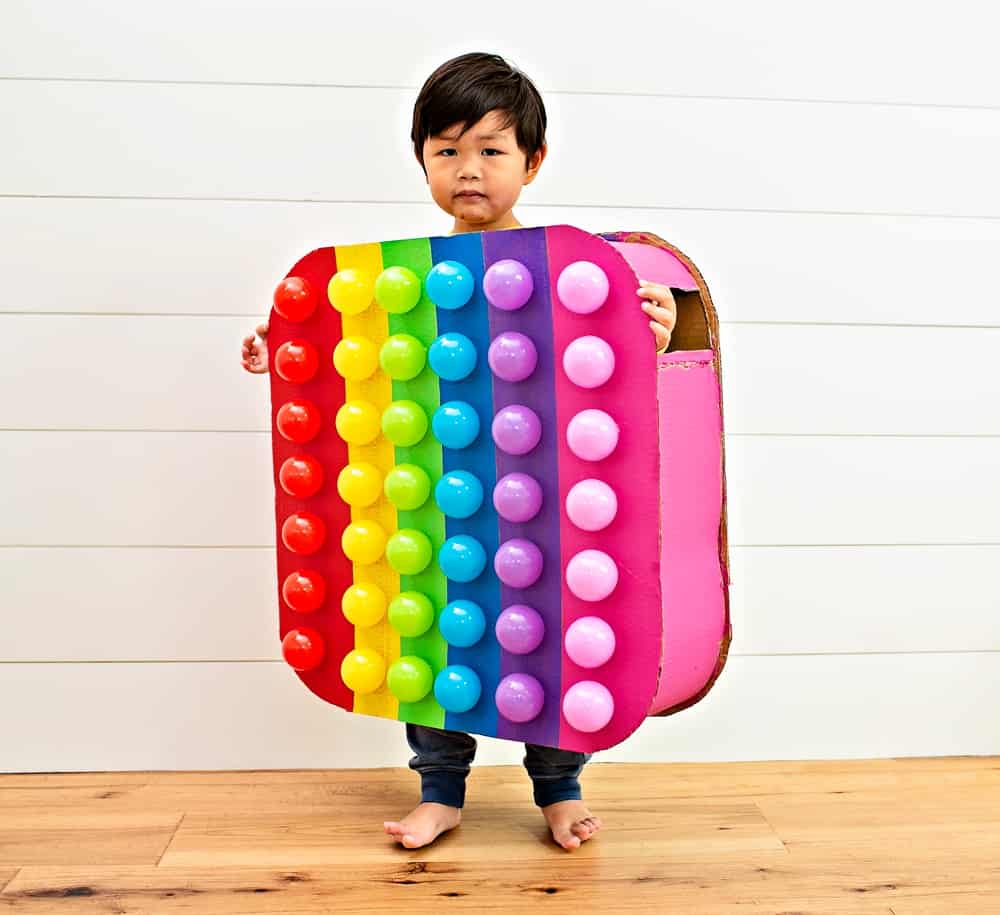
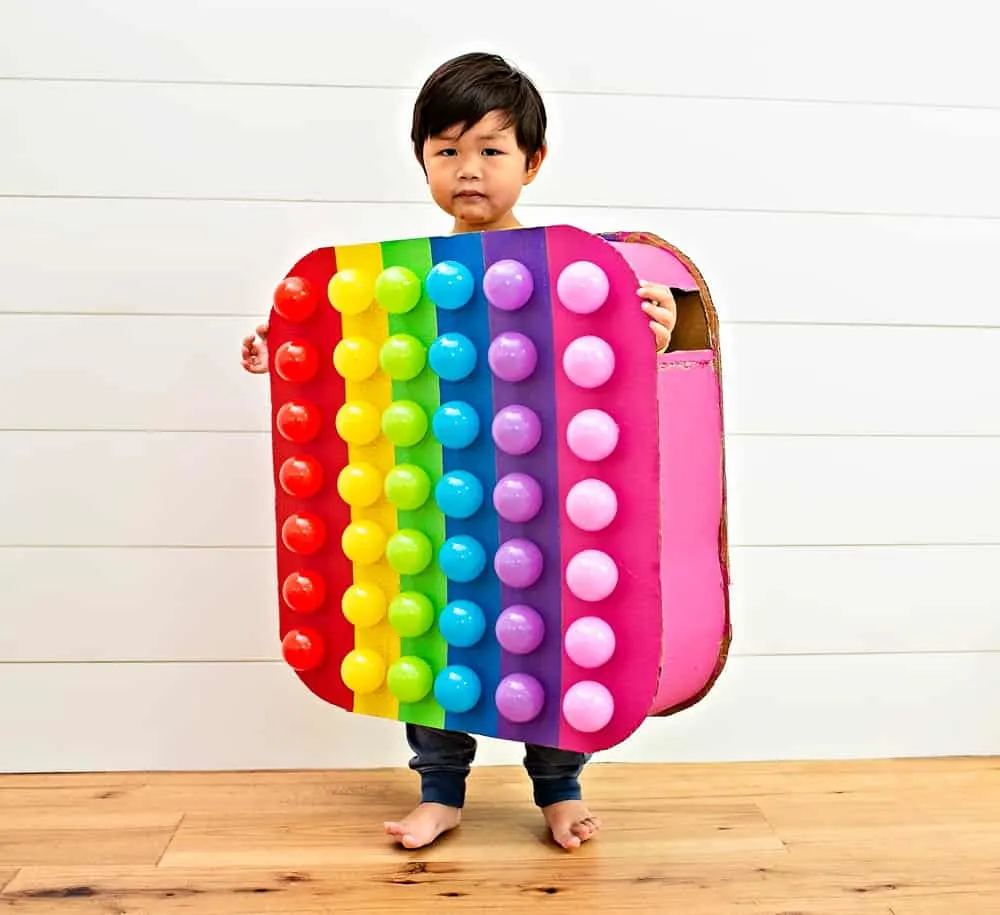
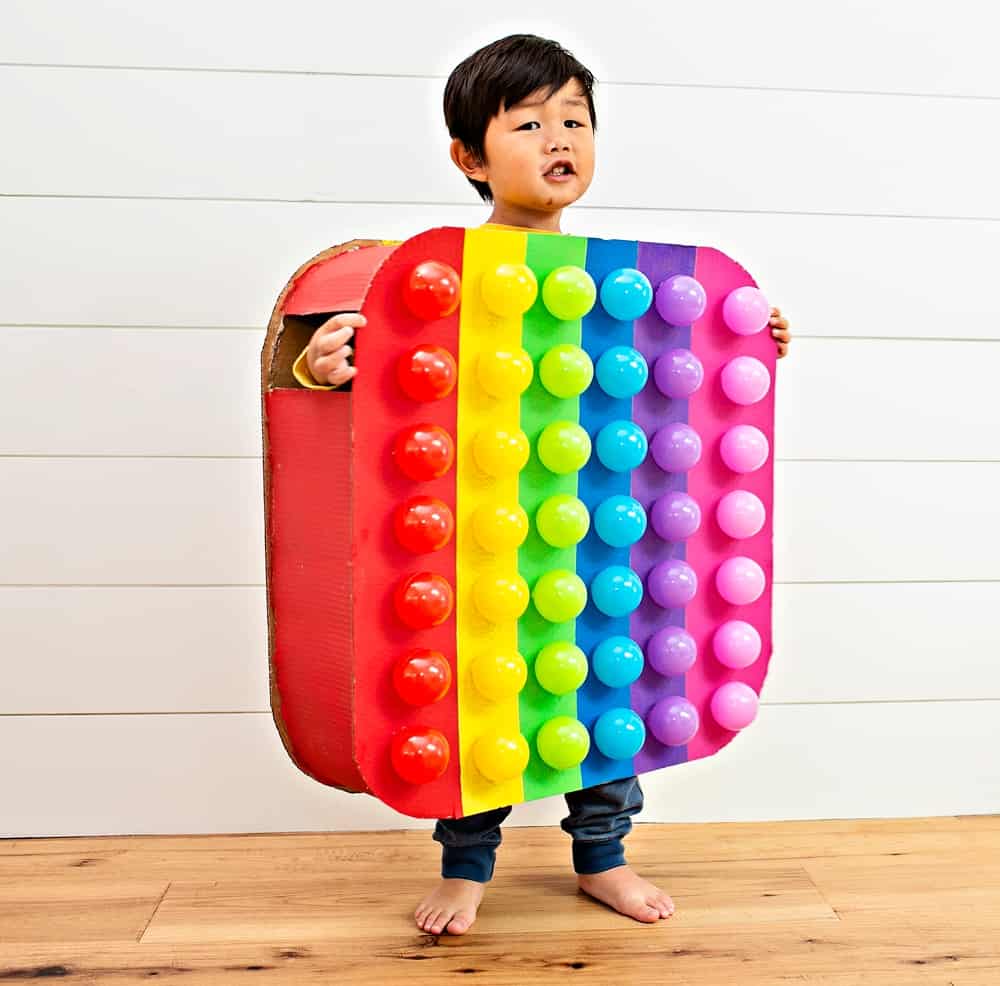
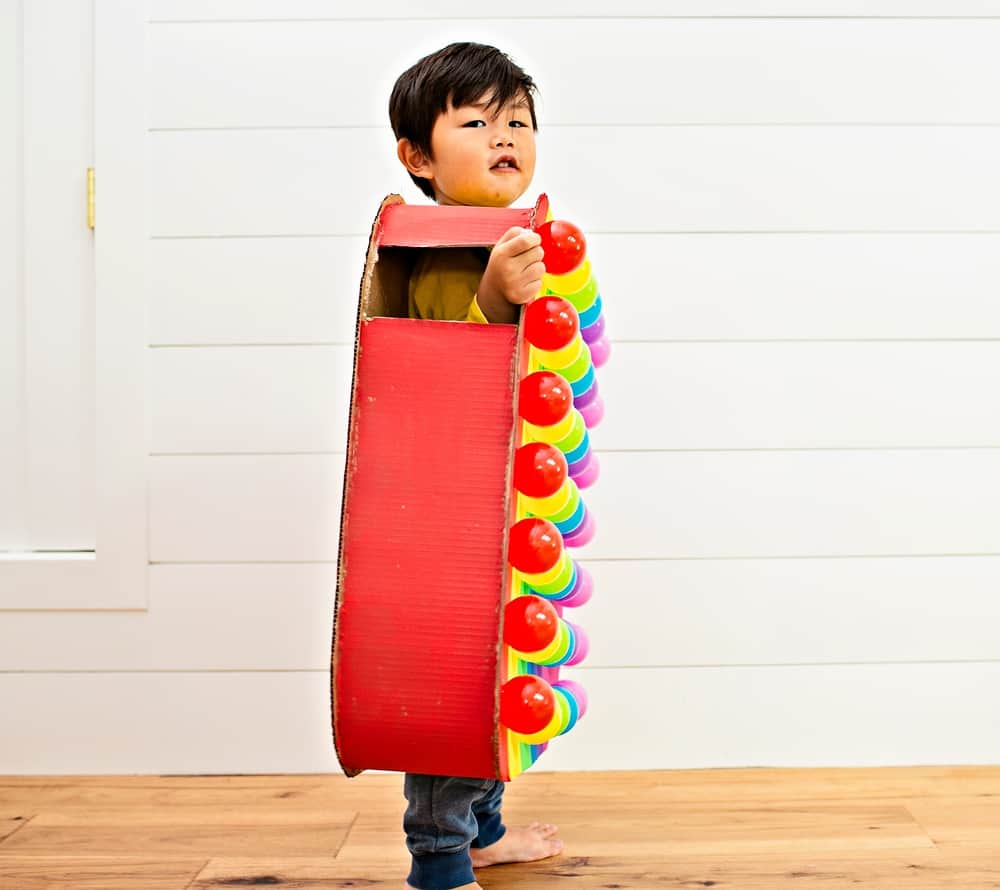
You’ll need two sheets of cardboard. We sized them based on my 3 year old’s body, so keep in mind you will need larger square of cardboard if your kid is older. We used two pieces of 24 inches cardboard flats. Note you can cut these into smaller squares. Also note the costume we made was a bit large on my 3 year old, so this size can likely accommodate ages 3-6 easily. You will need to adjust the width though so the body can fit inside. More on that below.
The second thing you’ll need is corrugated cardboard rolls. The one we got was 6″ in width. If your child is older and needs a wider width (to fit inside), one option is to securely Ductape two rolls side by side to make the width you want (the widest would be around 12″) or overlap them let’s say if you want to make 10″ in width. You would need to hot glue AND Duct tape to make sure they stay together as one strip.
To complete your costume you will need a hot glue gun, lots of hot glue sticks, paint, and plastic pit balls. We found this ball pit size to be perfect for our costume.
We originally thought of using small balloons since we’ve made cute balloon costumes in the past. But felt pit balls would make a sturdier option. However, how fun would it have been to actually be able to “pop” the bubbles? Too bad they wouldn’t bounce back!


Pop It Costume Materials:
- Two flat pieces of cardboard (we used 24″ squares but size according to your child)
- Corrugated cardboard roll (ours is 6″ in width, double up side by side and hot glue + Duct tape to make your costume wider)
- Hot glue gun and hot glue sticks
- Acrylic paints in rainbow colors
- Foam brushes
- Masking tape
- Pit Balls
- Exacto knife and scissors
- Ruler, pencil

Instructions
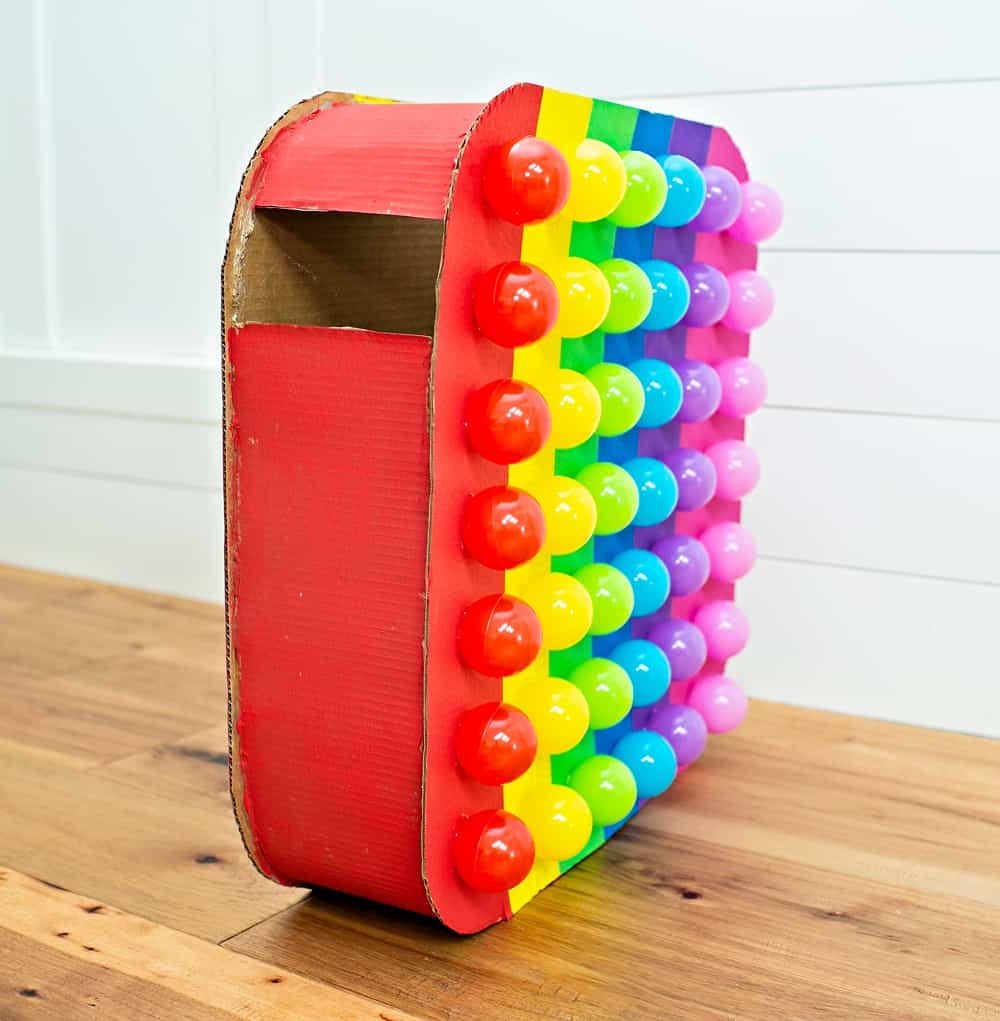
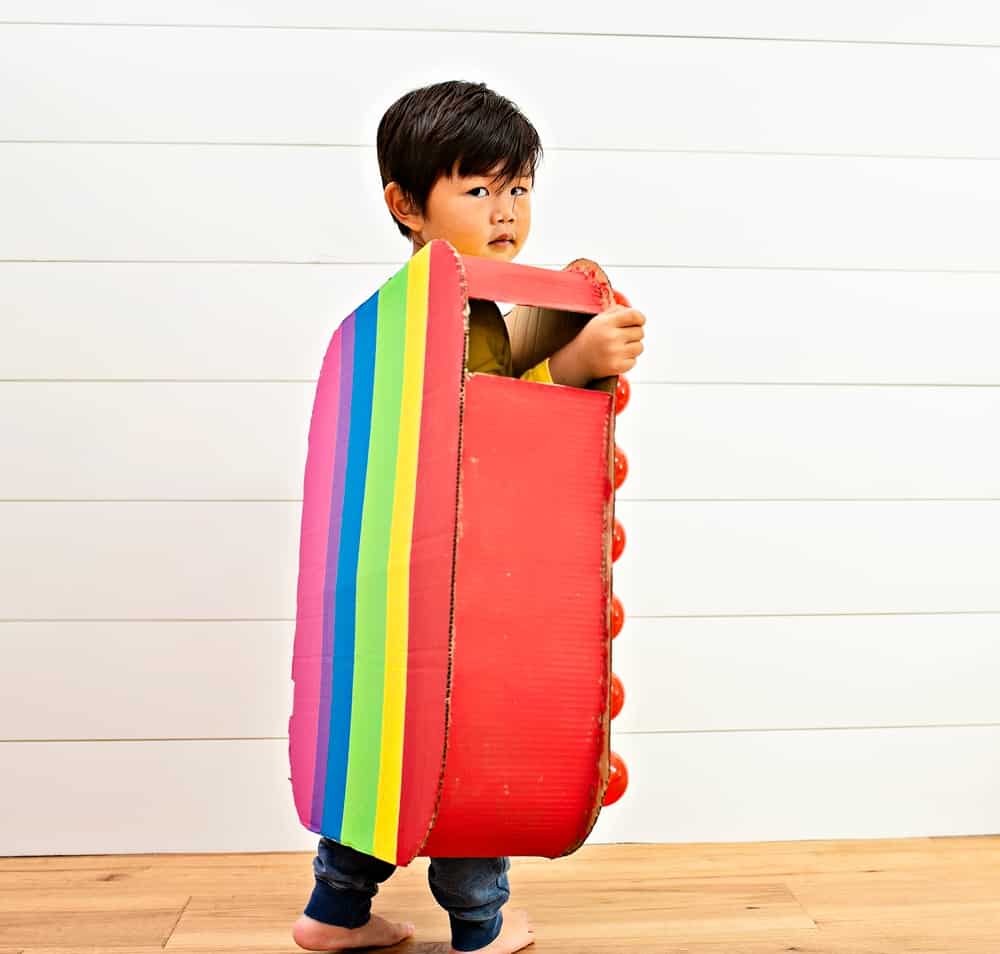
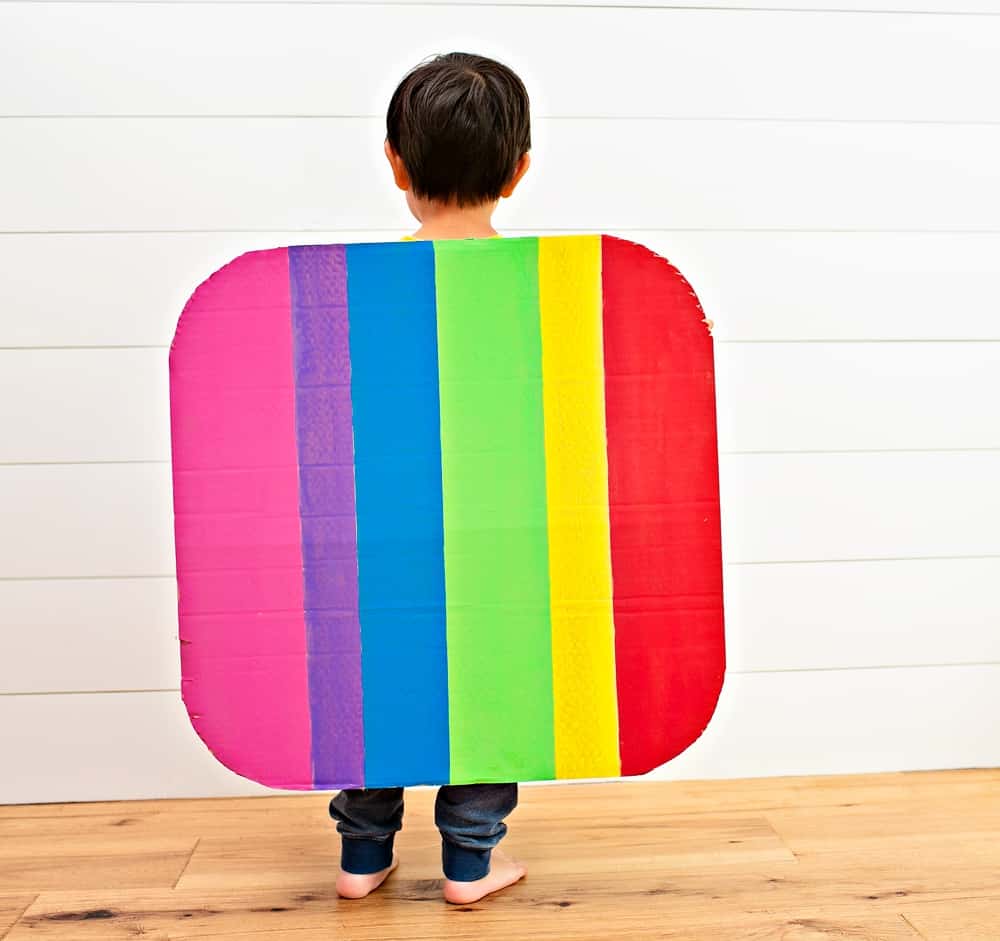
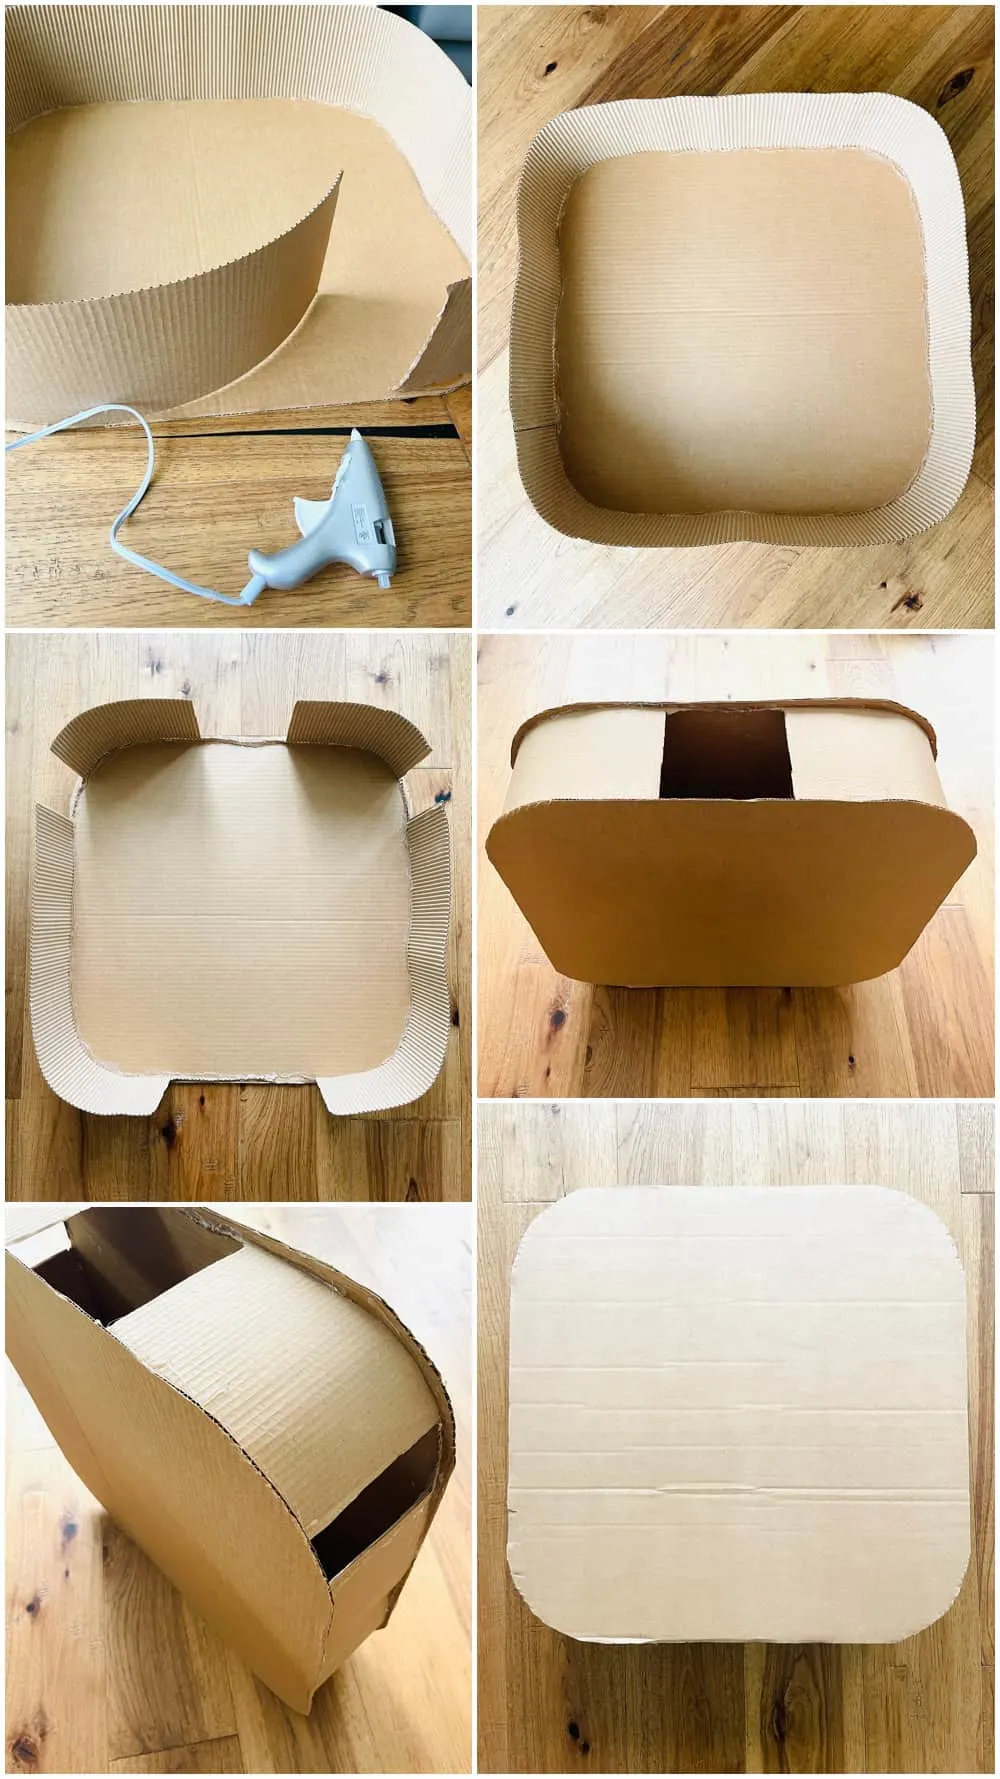
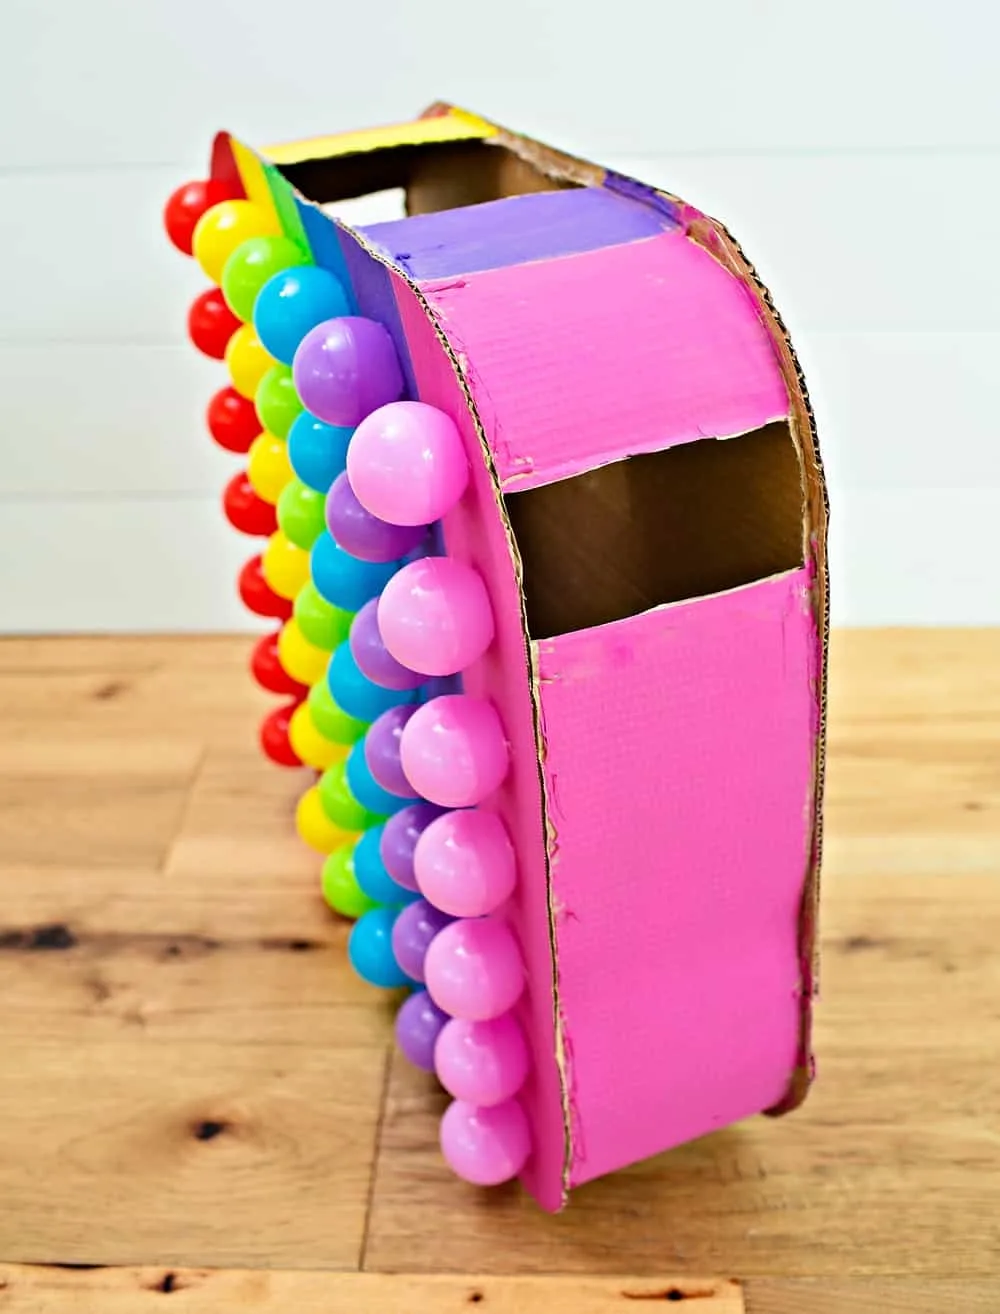
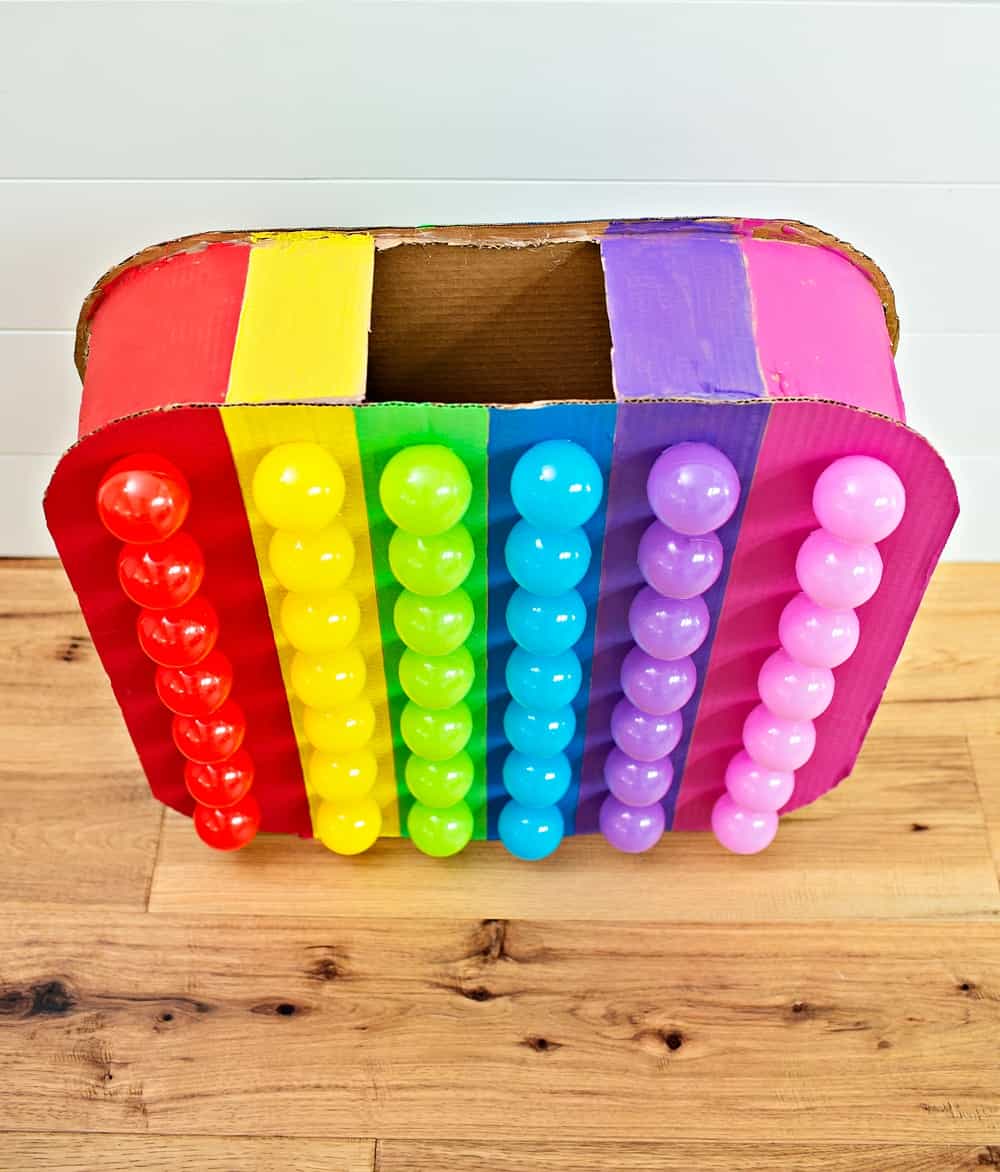
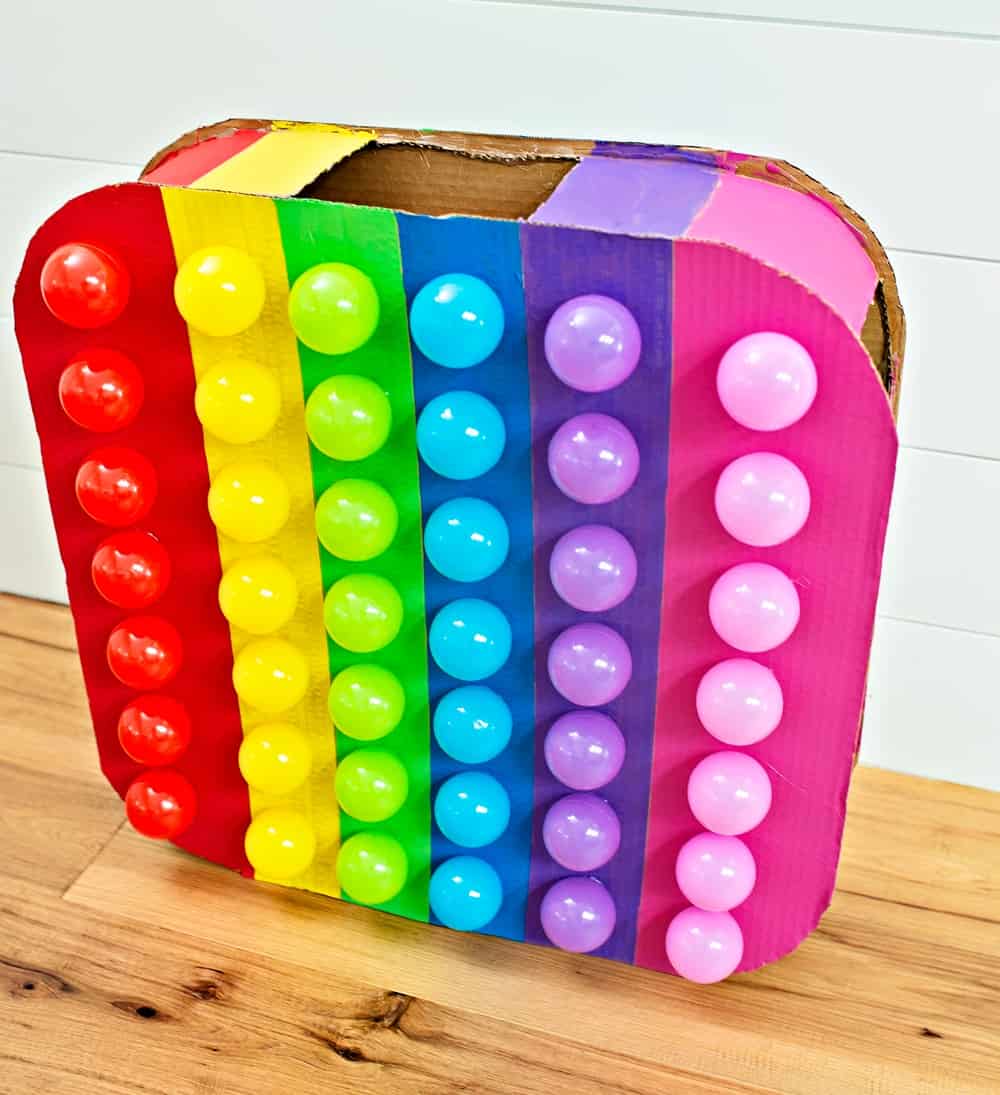
Step 1: Round out the corners of your square cardboard evenly so you should end up with two rounded square panels. You can place a bowl on the corners, trace with pencil and cut out the edges to make them look rounded.
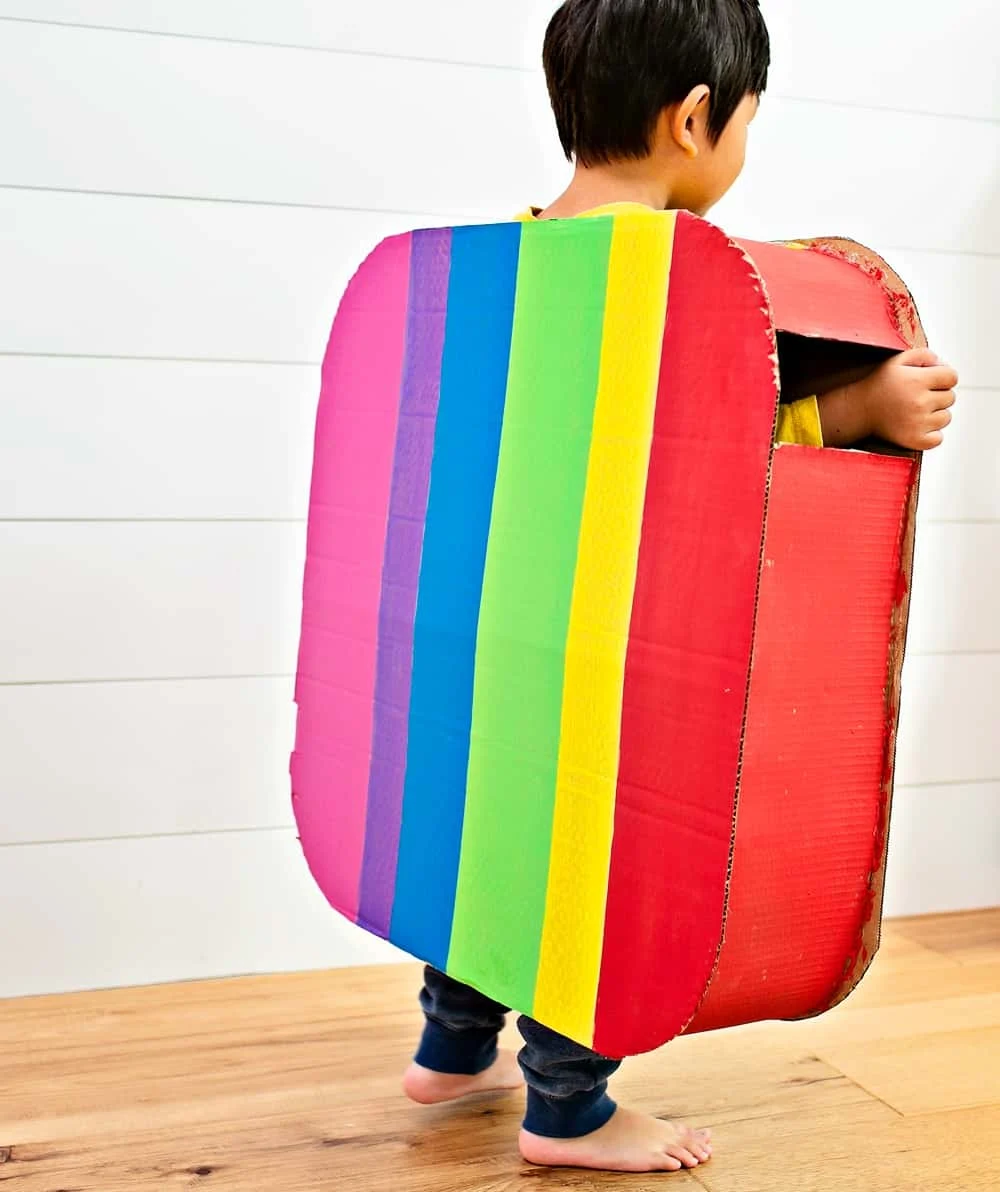
Step 2. Hot glue your corrugated roll around one square panel. Make sure to use lots of hot glue and glue both sides. Remember hot glue is your friend here!! You don’t want the costume to tear or rip easily.
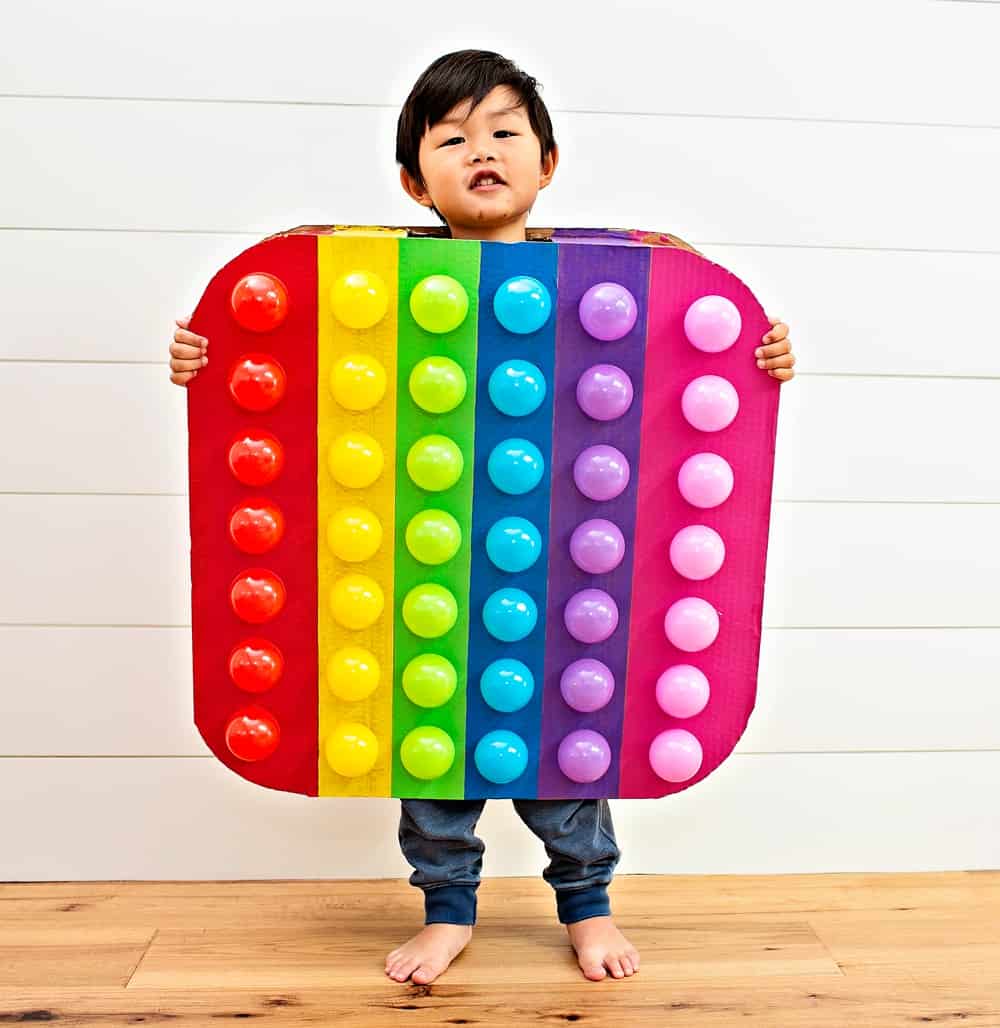
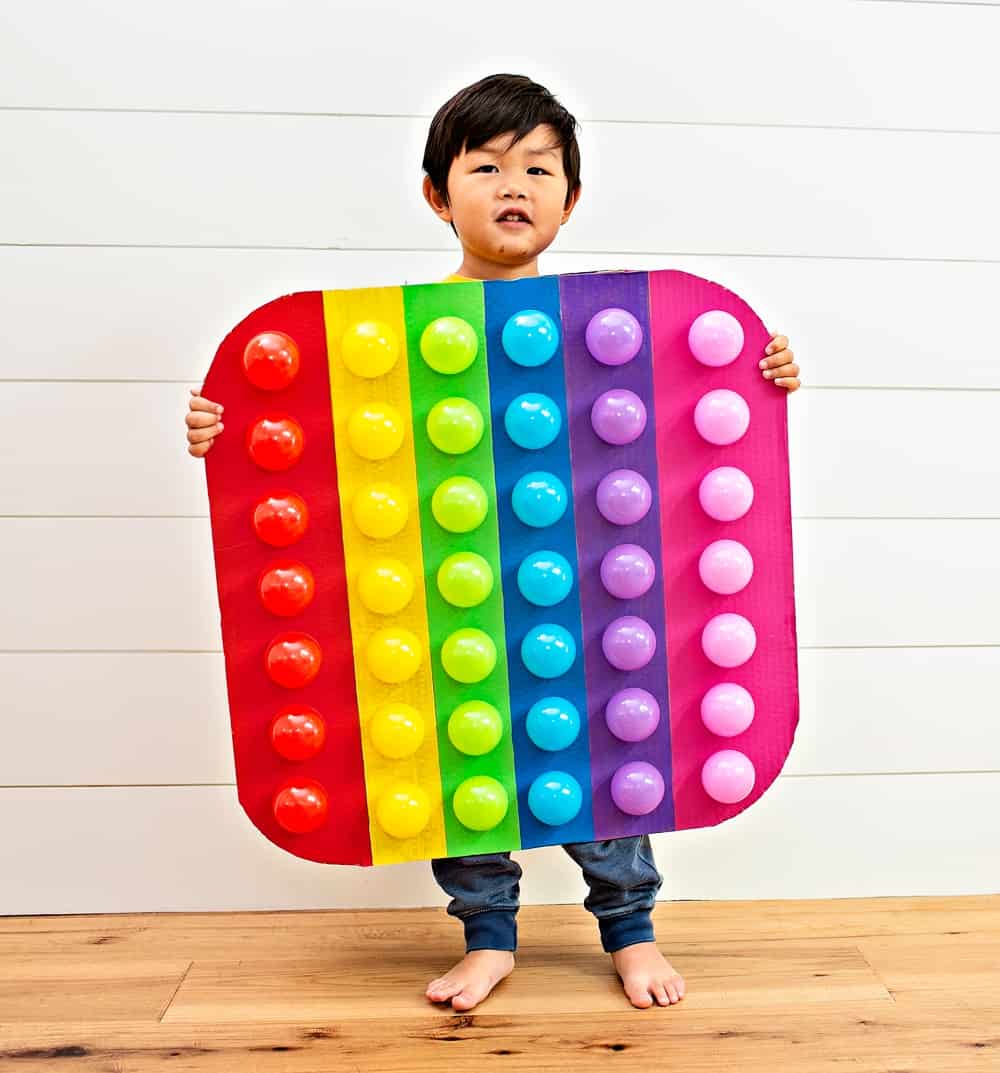
Step 3. Cut out holes for your child’s head, legs, and arms. (see photo above).
Step 4. Hot glue the second piece of square panel over the corrugated parts. Again be liberal with the hot glue! Glue along all the seams and once dried, over again.
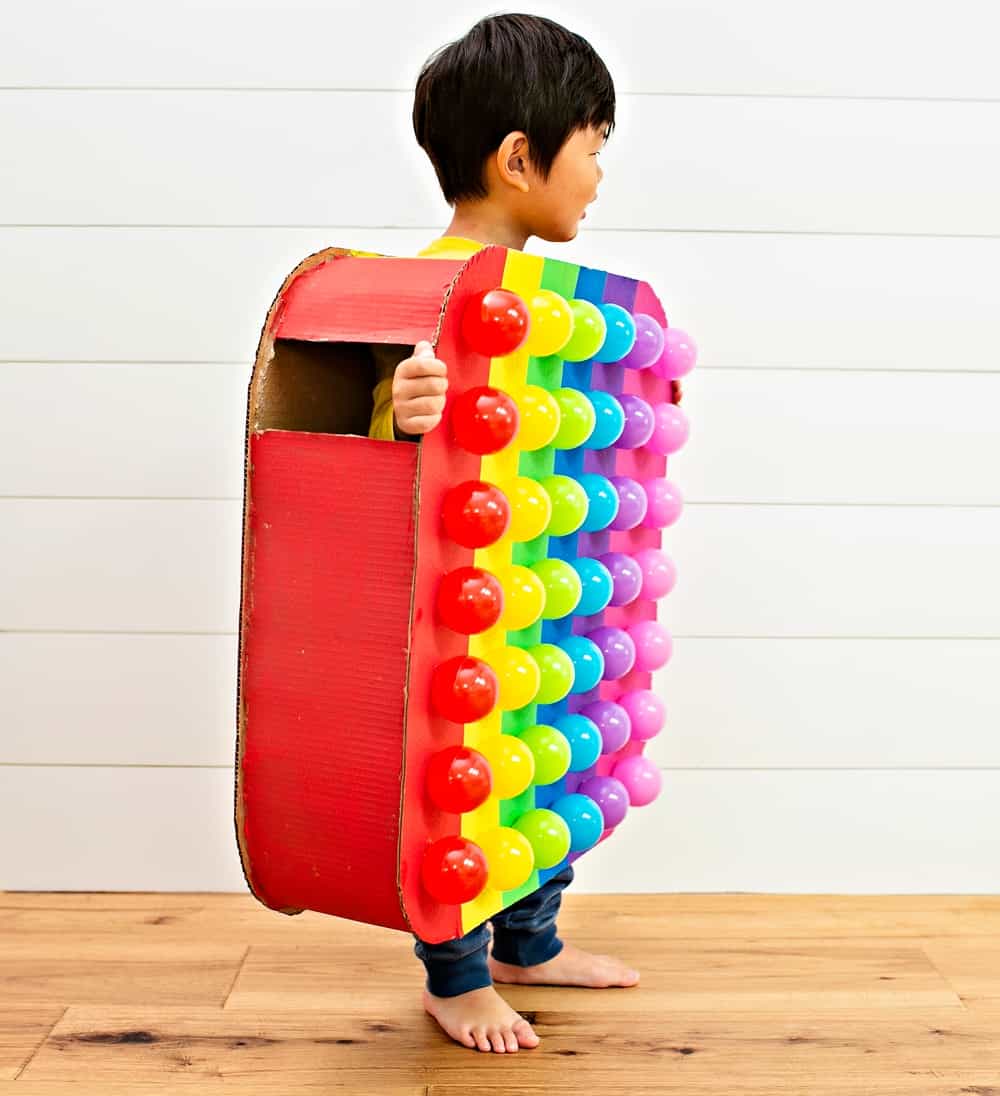
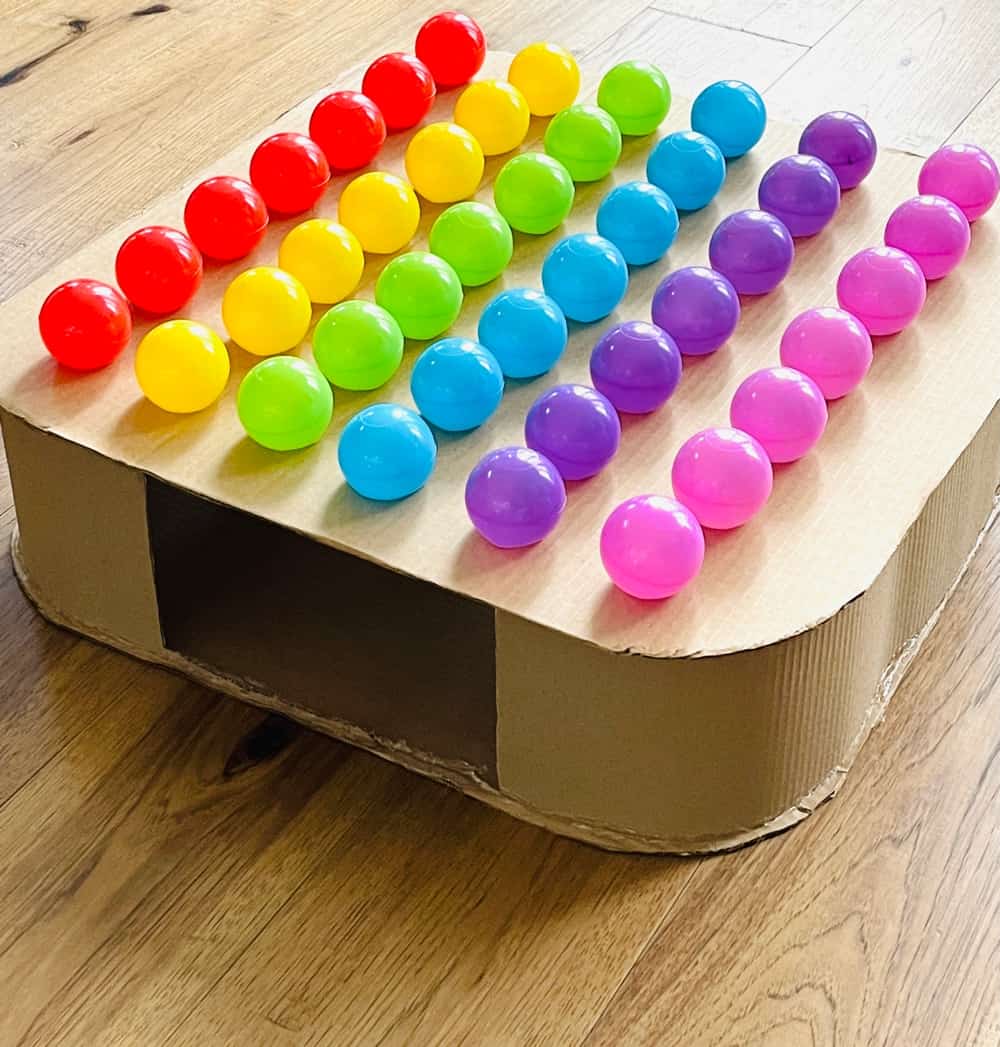
Step 5. When the cardboard frame is done, line up your balls to make sure they will be straight and use a pencil to make lines so you know where to paint.
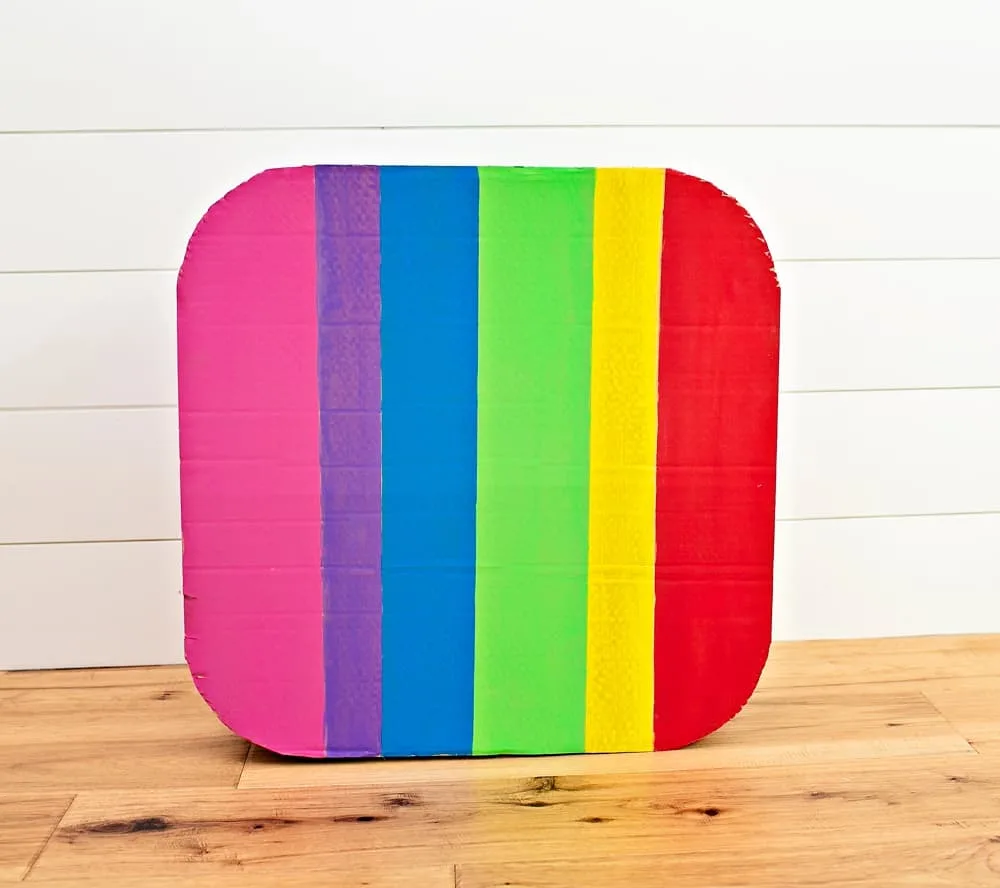
Step 6. Remove the balls and paint the strips you penciled one by one. We used painter’s masking tape to make clean lines against the pencil. Note you will need to wait in between the paint drying before adding more tape on the other panels. We chose to make a rainbow Pop It, so had to paint a lot of lines, but if you make one color this process is much easier.
Step 7. Repeat the painting on the back side.
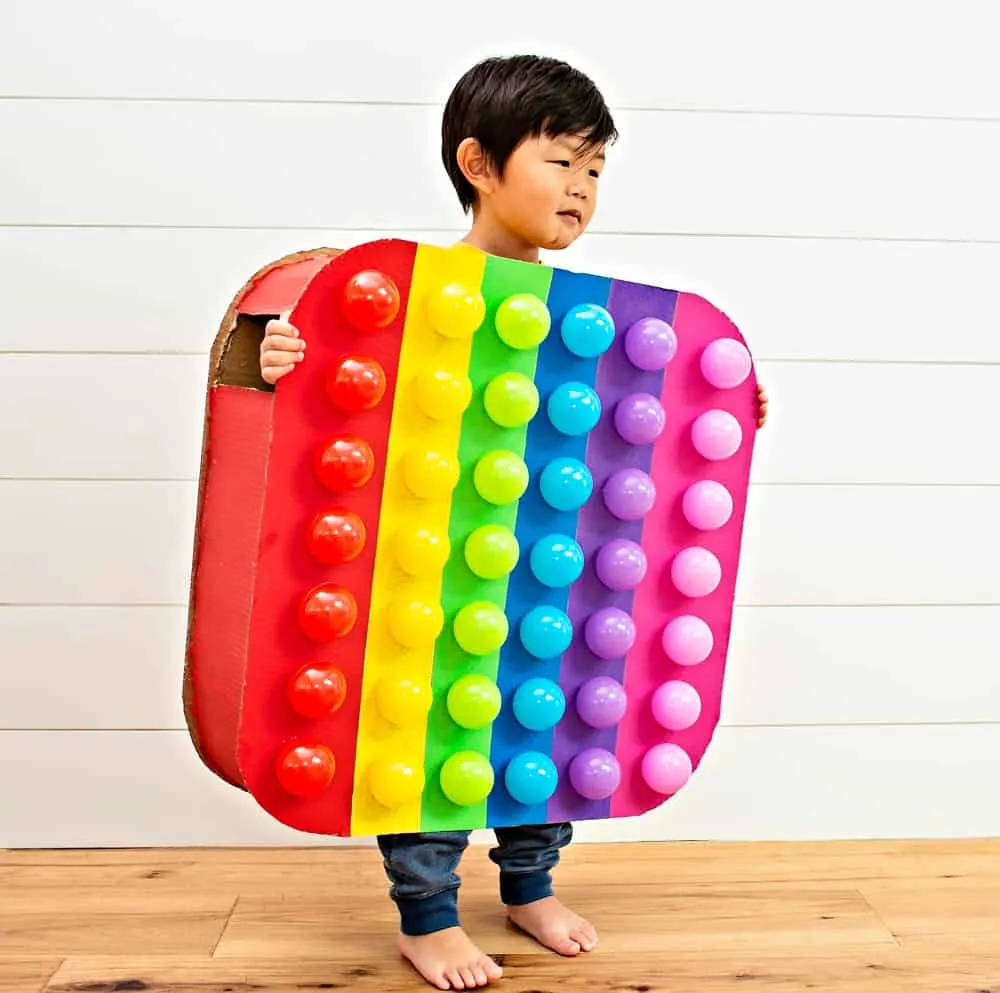
Step 8. After your paint is fully dried front and back, line up your balls and hot glue them one by one.
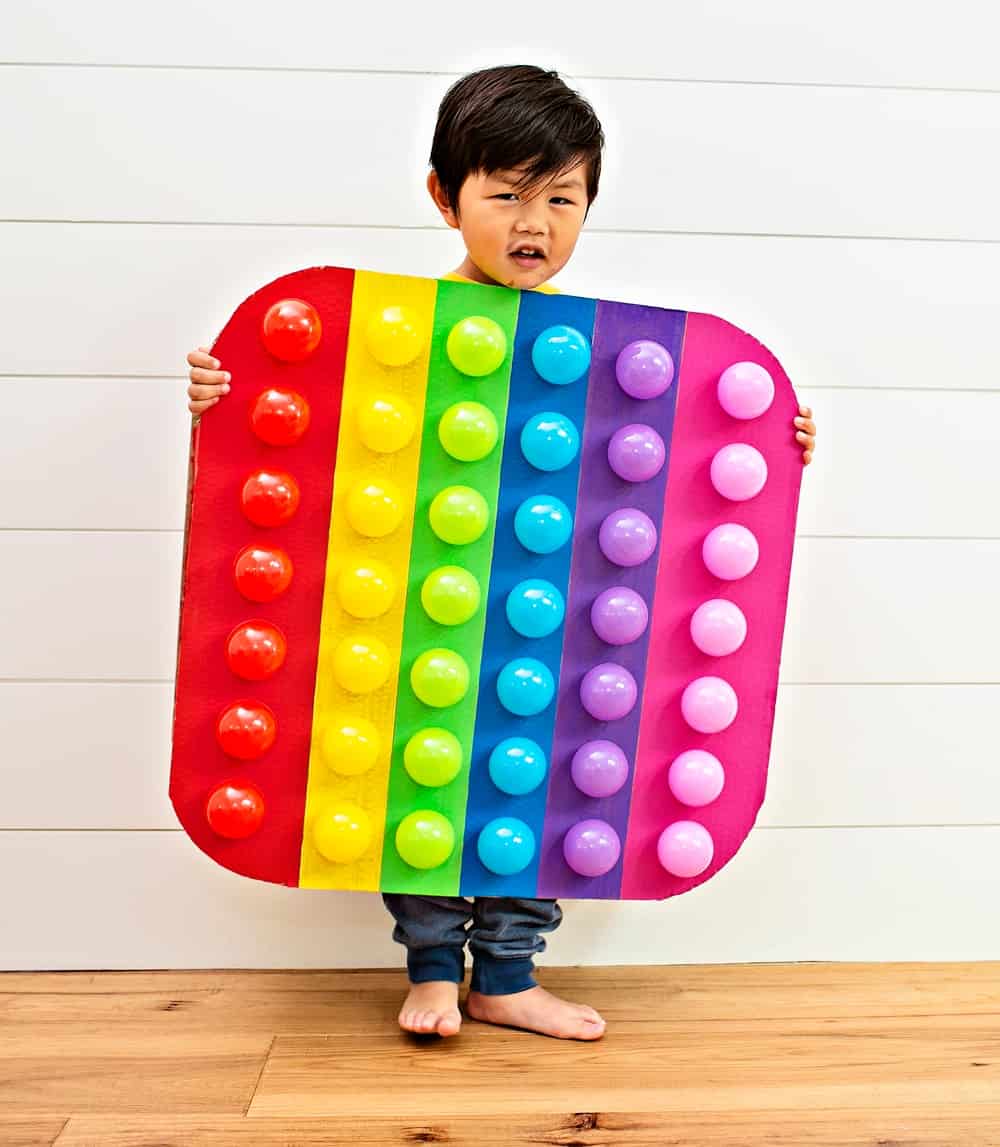
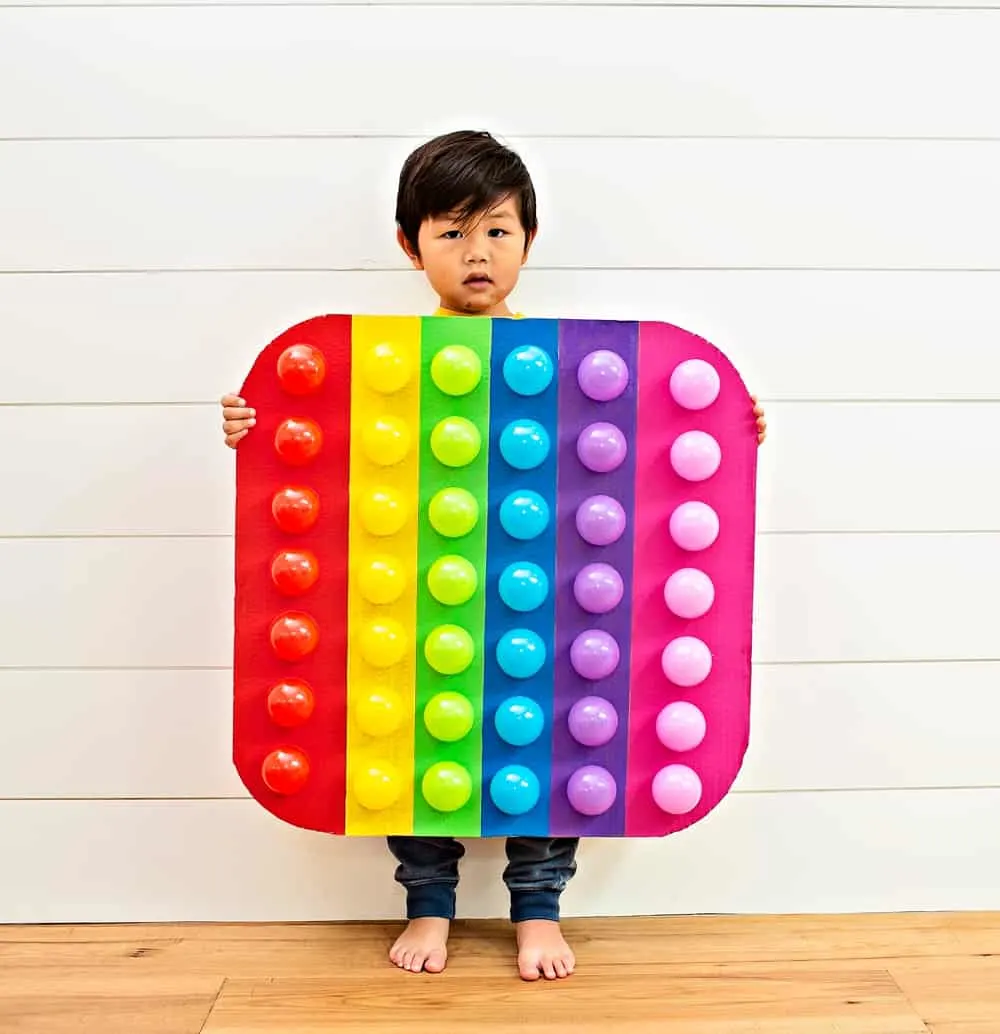
To put on the costume, have your child lay their arms down straight and place it over their head then help them place their arms over each arm hole one at a time.


Step 1: Round out the corners of your square cardboard evenly so you should end up with two rounded square panels Step 2. Hot glue your corrugated roll around one square panel. Make sure to use lots of hot glue and glue both sides. Remember hot glue is your friend here!! You don't want the costume to tear or rip easily. Step 3. Cut out holes for your child's head, legs, and arms. (see photo above). Step 4. Hot glue the second piece of square panel over the corrugated parts. Again be liberal with the hot glue! Glue along all the seams and once dried, over again. Step 5. When the cardboard frame is done, line up your balls to make sure they will be straight and use a pencil to make lines so you know where to paint. Step 6. Remove the balls and paint the strips you penciled one by one. We used painter's masking tape to make clean lines against the pencil. Note you will need to wait in between the paint drying before adding more tape on the other panels. We chose to make a rainbow Pop It, so had to paint a lot of lines, but if you make one color this process is much easier. Step 7. Repeat the painting on the back side. Step 8. After your paint is fully dried front and back, line up your balls and hot glue them one by one. To put on the costume, have your child lay their arms down straight and place it over their head then help them place their arms over each arm hole one at a time. DIY POP IT COSTUME


Materials
Instructions
DIY Cardboard Dinosaur Costume
10 Playful No Sew Costumes For Kids


Agnes Hsu is a mom of three and has been inspiring parents and kids to get creative with easy activities and family friendly recipes for over 10 years. She shares her love for creative play and kids food to her 2MM+ followers online. Agnes' commitment to playful learning and kindness has not only raised funds for charity but also earned features in prestigious nationwide publications.