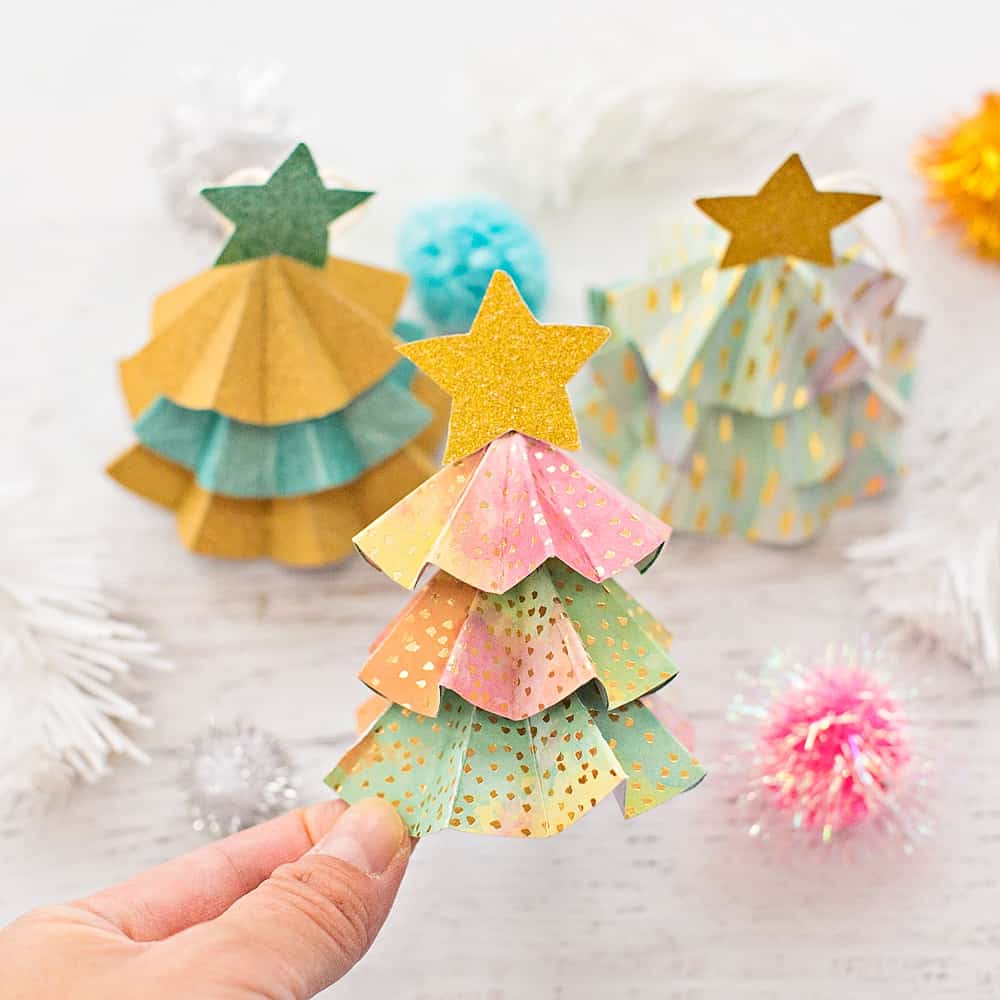
DIY PAPER TREE ORNAMENTS WITH TEMPLATE
Follow us on Instagram for more fun ideas for kids!
Scroll all the way down to watch the video below for the step-by-step video in how to make these pretty DIY Paper Tree Ornaments with Template. Make sure to subscribe to our YouTube channel for more fun videos!
While the holiday season whizzes by, we’ve been busy adding to our ever-growing collection of handmade ornaments!
We’ve especially love featuring DIY Photo Ornaments which make lovely keepsakes from the kids.
Imaginative mermaid and dinos, popsicle stick trees, and whipped glue unicorn ornaments are just a few of the festive kid-made crafts we’ve hung on our tree this year.
DIY ornaments are a fun holiday activity, but also a great way to use up simple supplies you probably already have around the house.
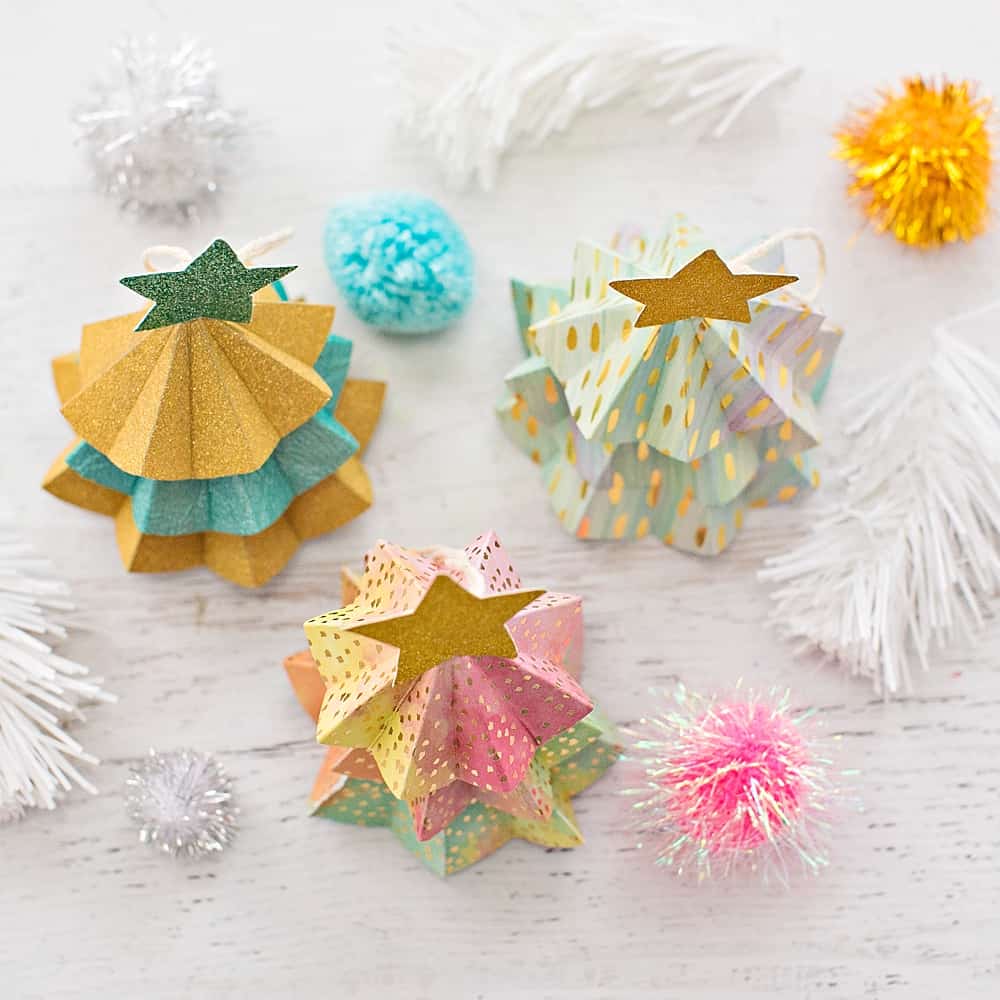
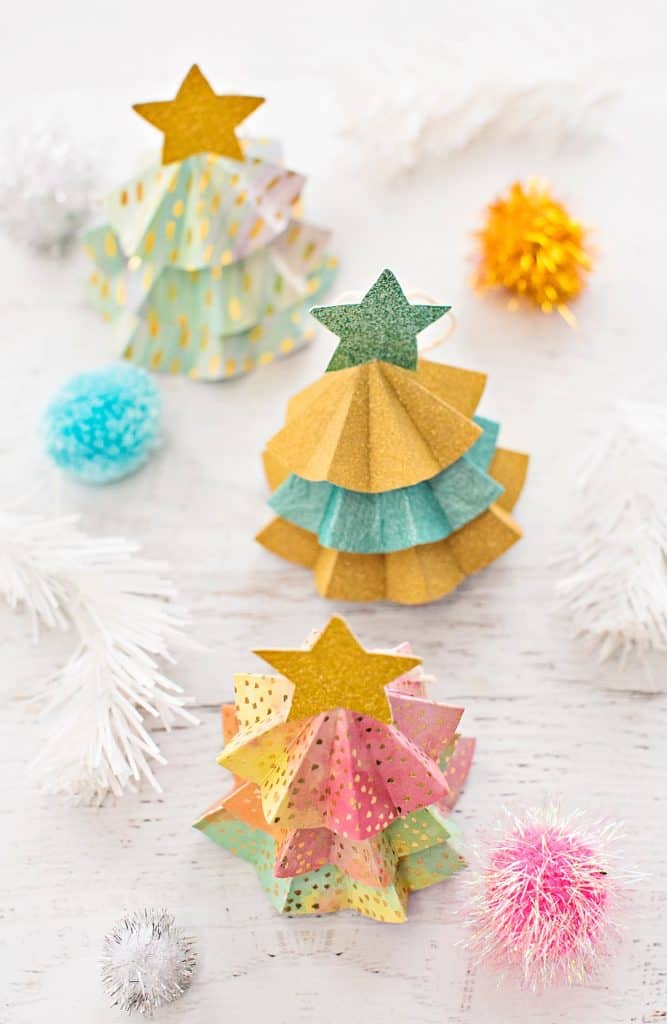
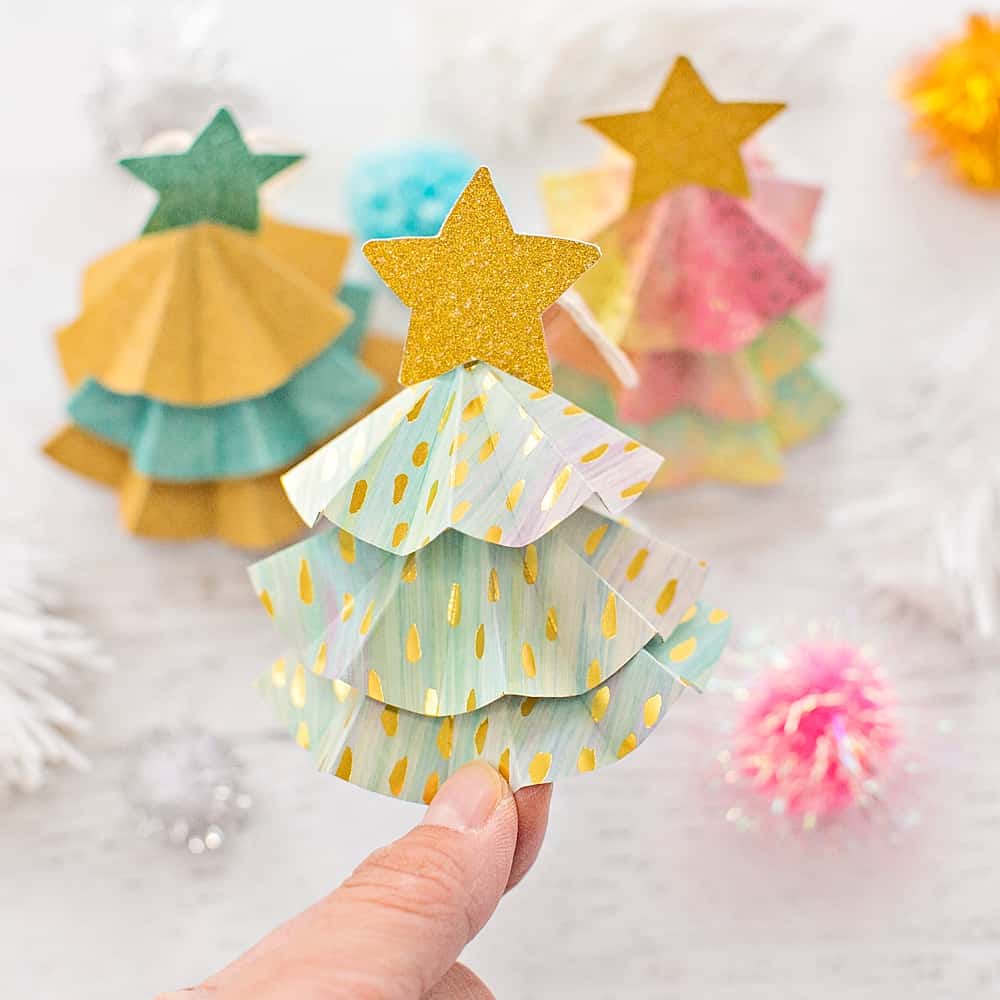
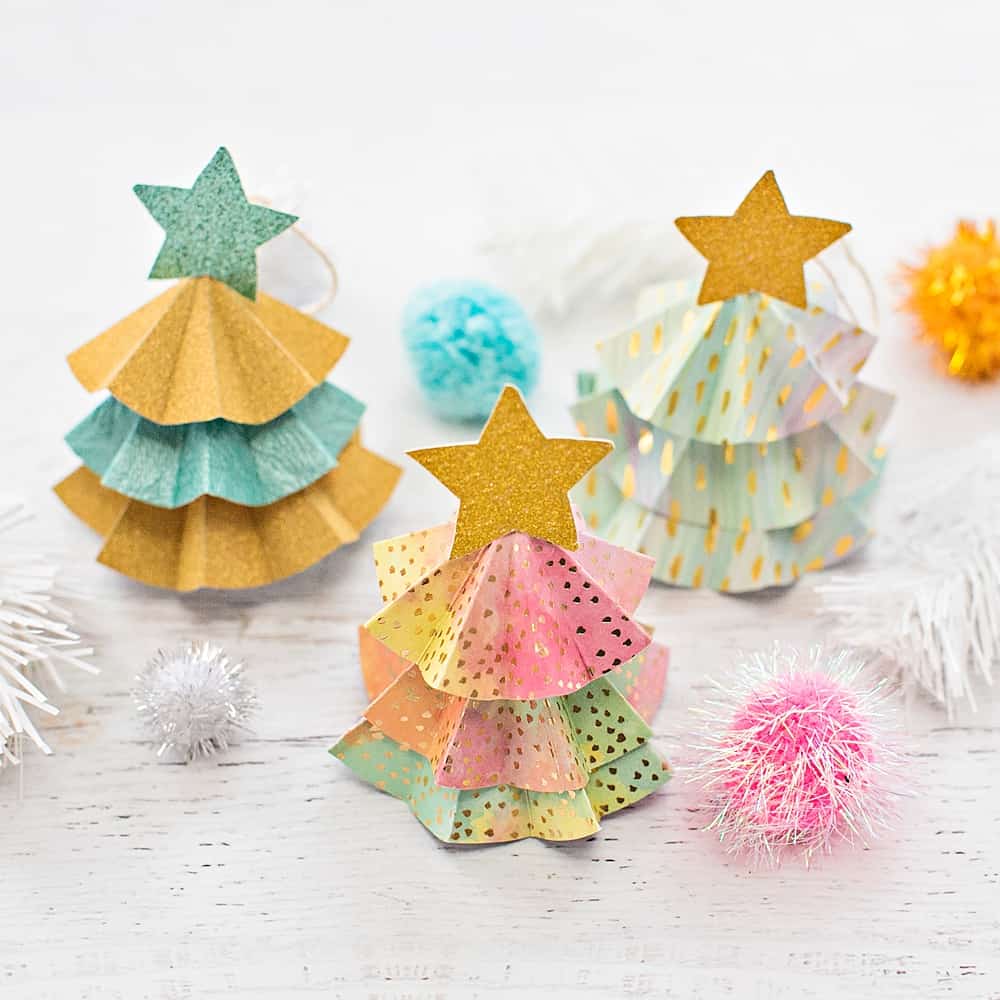
I had piles of decorative paper and leftover gift wrap scraps, so these darling little paper tree ornaments seemed like the perfect way to recycle some of it while keeping my little elves busy!
DIY PAPER TREE ORNAMENT – MATERIALS:
- Colorful cardstock or patterned papers, leftover gift wrapping paper works too!
- Large needle or something to poke through the center of the trees
- String
- Straw (optional)
- Glue
- Scissors
- Free Printable tree template and star (download right below)
Click Here to Get Your Free Printable
INSTRUCTIONS:
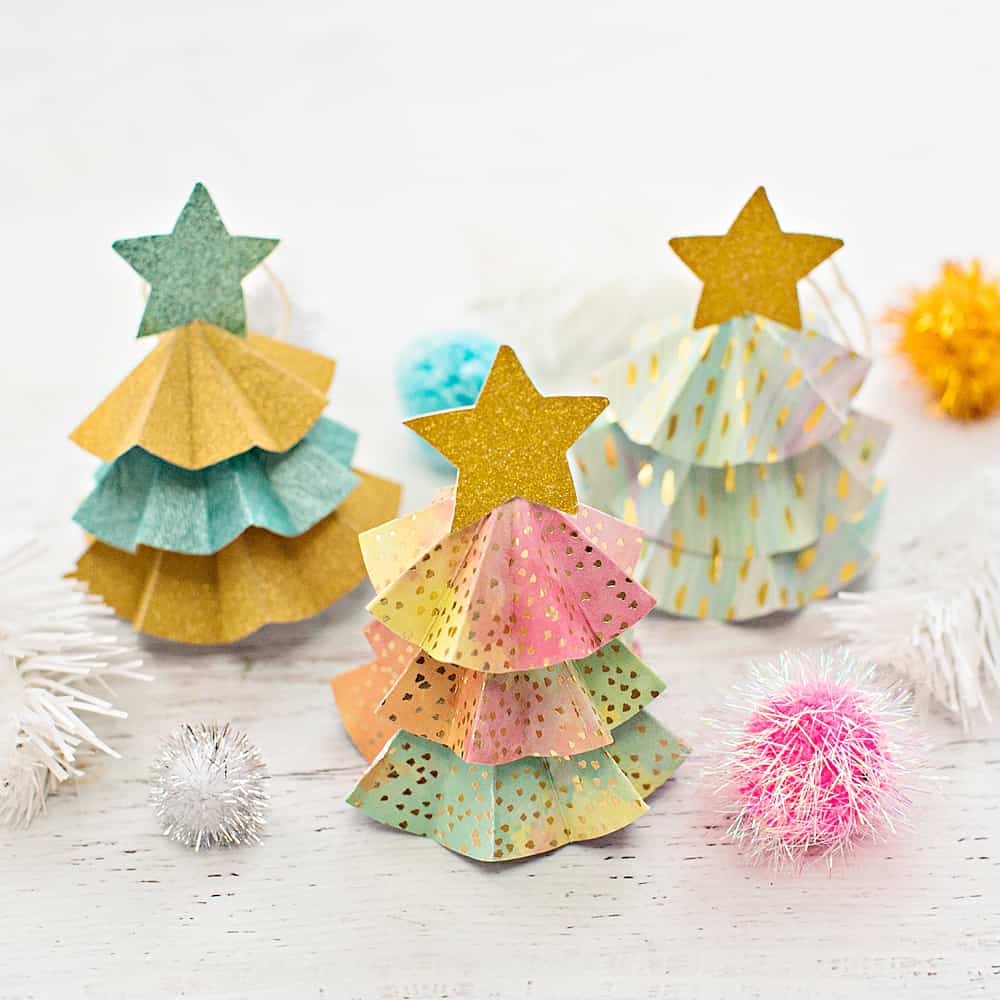
Step 1. Print out and cut out the free printable template. There are 3 sizes for the circle and a star for the top of the tree.
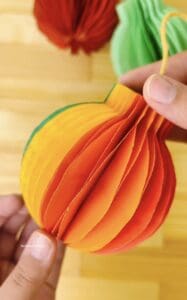
Step 2. Start folding the circle in half and then keep going in half over and over again. The lines are to show you there are 16 lines. This is a good step to watch the video so make sure to scroll down below!
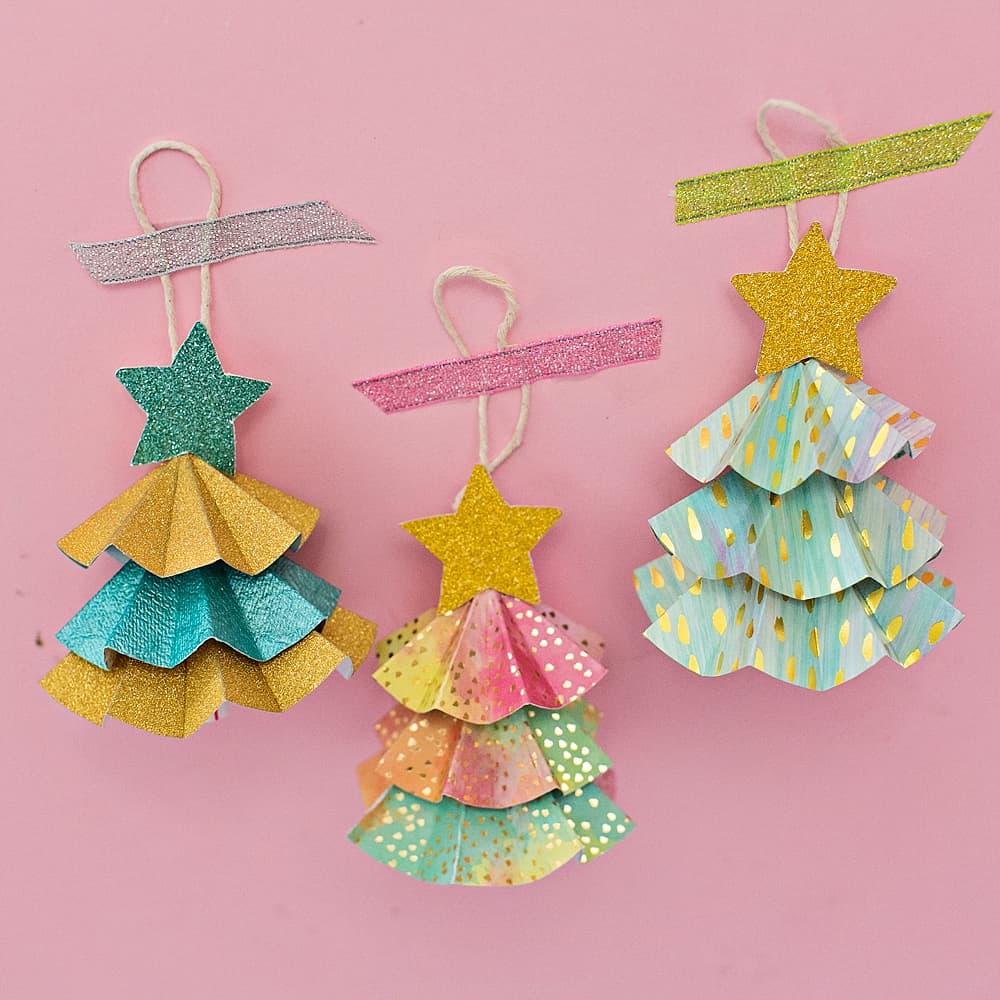
Step 3. Once you have folded all 3 size circles, poke a hole on top with your needle and thread a string to make the ornament loop. Tie it off at the bottom.
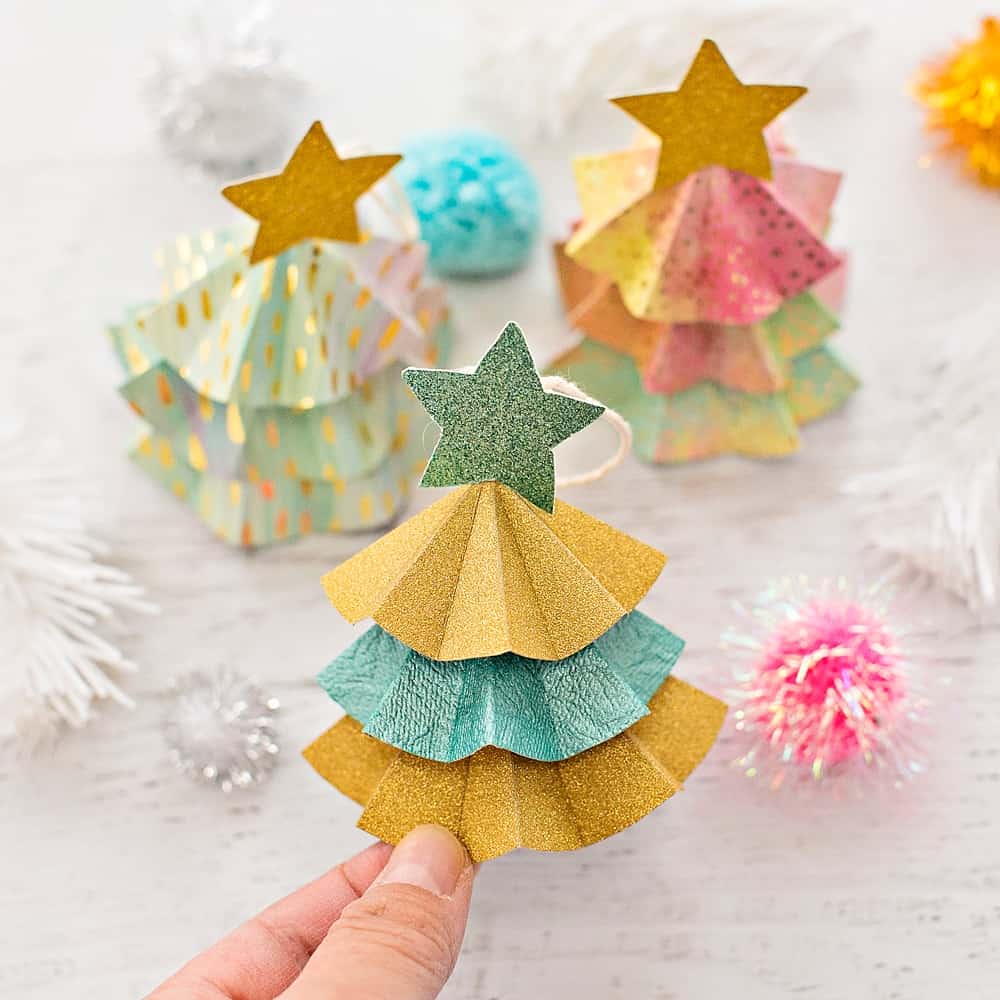
Step 4. Glue your star on top and hang on the tree!
Optional: if you want your tree to stand up instead of making an ornament, you can cut a straw and make the center holes bigger and insert straw underneath the accordion circle!


Watch the video below for the step by step:
Do you love a festive tree as much as I do? Add to your crafted Christmas tree collection with these easy DIY felt tree ornaments or try something a little more life-sized with these gorgeous colorful cardboard Christmas trees!
DIY PAPER TREE ORNAMENTS WITH TEMPLATE

These simple paper tree ornaments are a perfect way to recycle some wrapping scraps or old cards while keeping little elves busy!
Materials
Instructions
Step 1. Print out and cut out the free printable template. There are 3 sizes for the circle and a star for the top of the tree.
Step 2. Start folding the circle in half and then keep going in half over and over again. The lines are to show you there are 16 lines. This is a good step to watch the video so make sure to scroll down below!
Step 3. Once you have folded all 3 size circles, poke a hole on top with your needle and thread a string to make the ornament loop. Tie it off at the bottom.
Step 4. Glue your star on top and hang on the tree!
Optional: if you want your tree to stand up instead of making an ornament, you can cut a straw and make the center holes bigger and insert straw underneath the accordion circle!
Disclosure: Some of the links in the post above are “affiliate links.” This means if you click on the link and purchase the item, we will receive a small affiliate commission. Regardless, we give our promise that we only recommend products or services we would use personally and believe will add values to our readers.