
Follow us on Instagram for more fun ideas for kids!
Scroll all the way down to watch the video below for the step-by-step video in how to create these magical Whipped Glue Decoden Unicorn Ornaments. Make sure to subscribe to our YouTube channel for more fun videos!
Check out more Cute Unicorn Crafts for Kids.
If you haven’t heard of the term “whipped glue” or “Decoden whip” let me introduce you to the most fun art material we’ve played with in a long time!
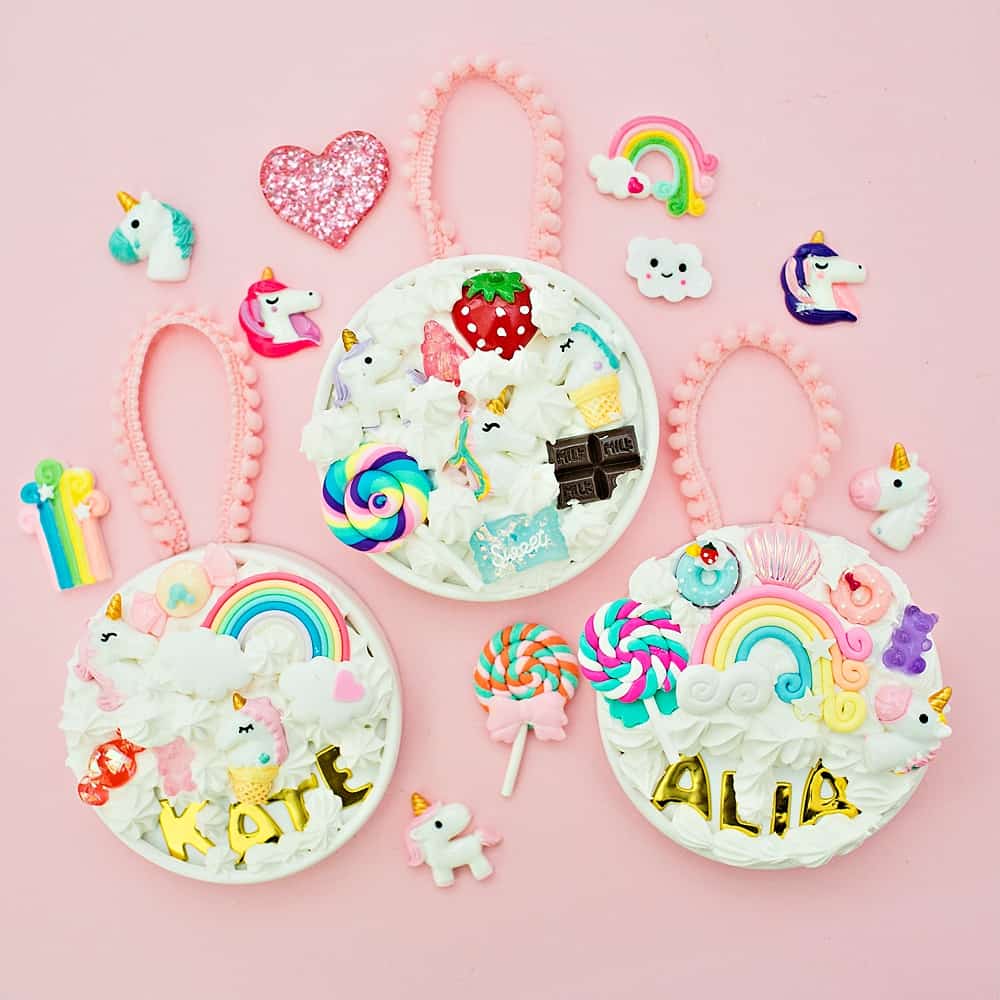
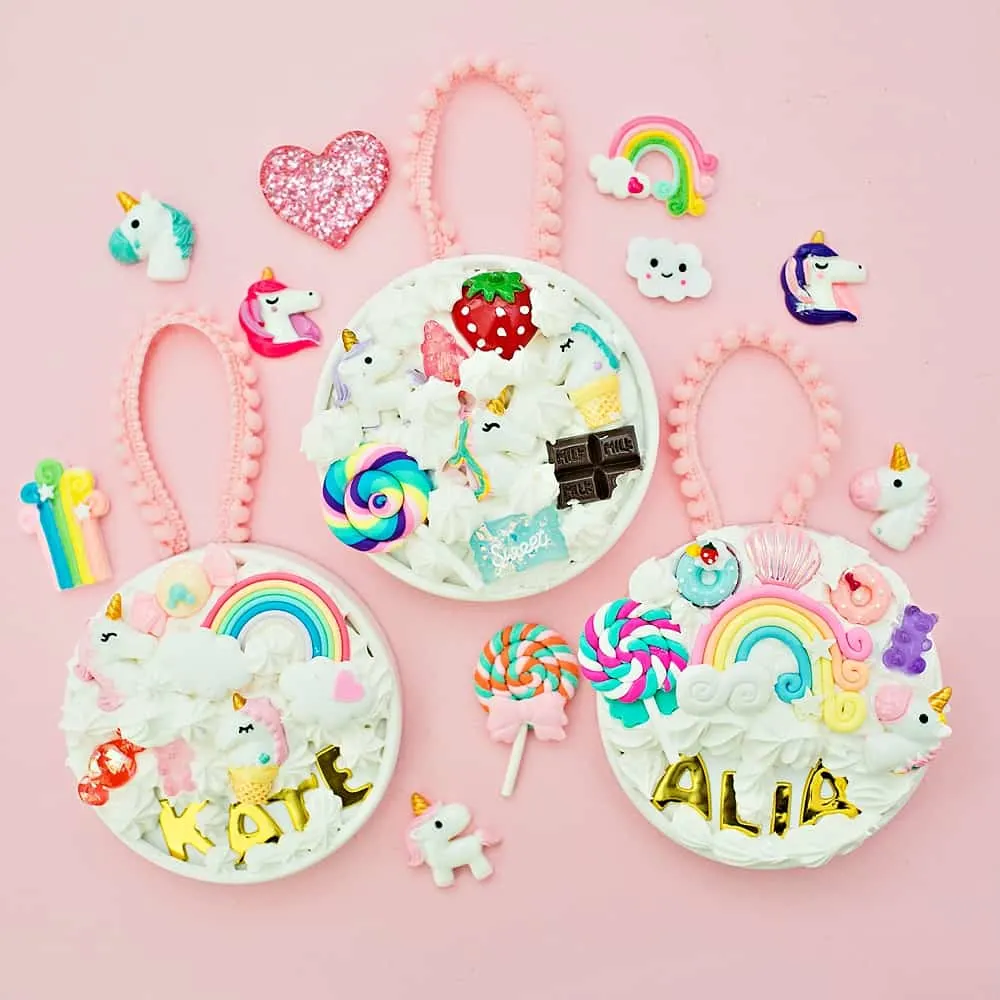
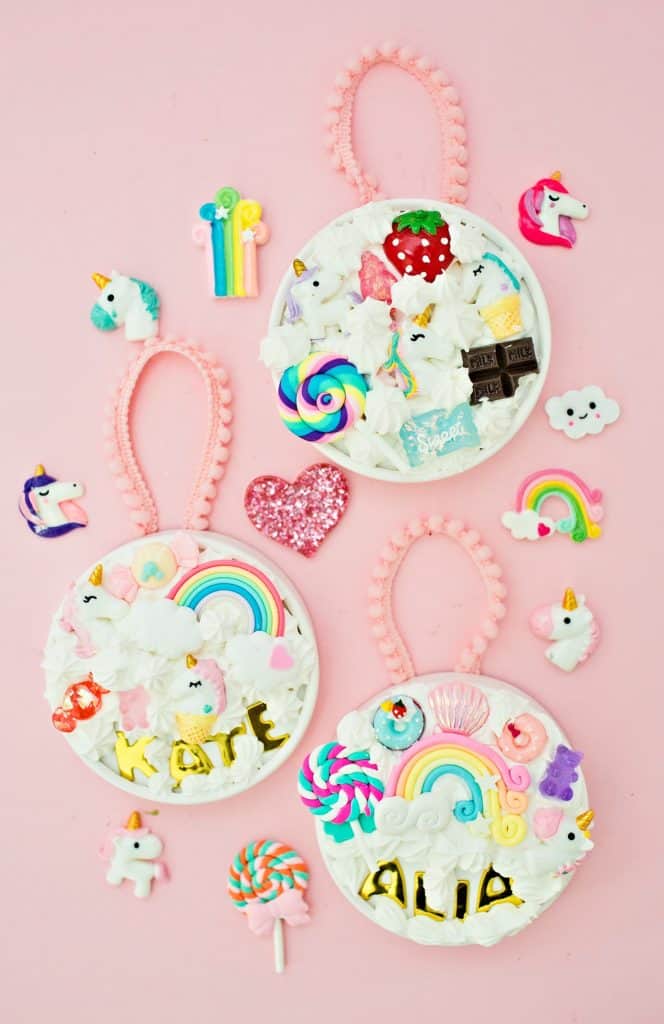
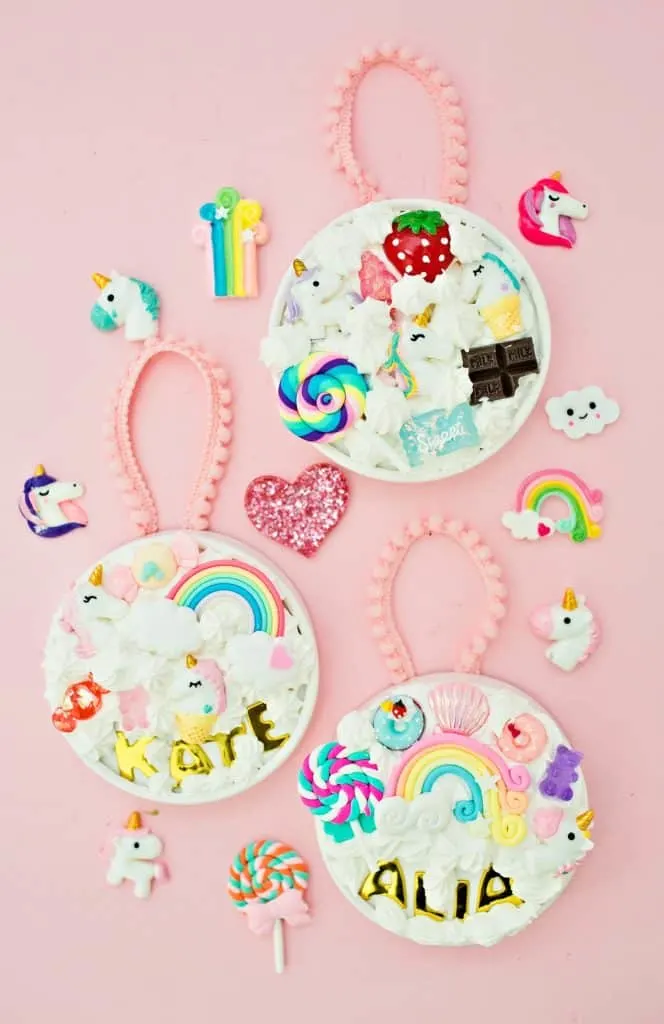
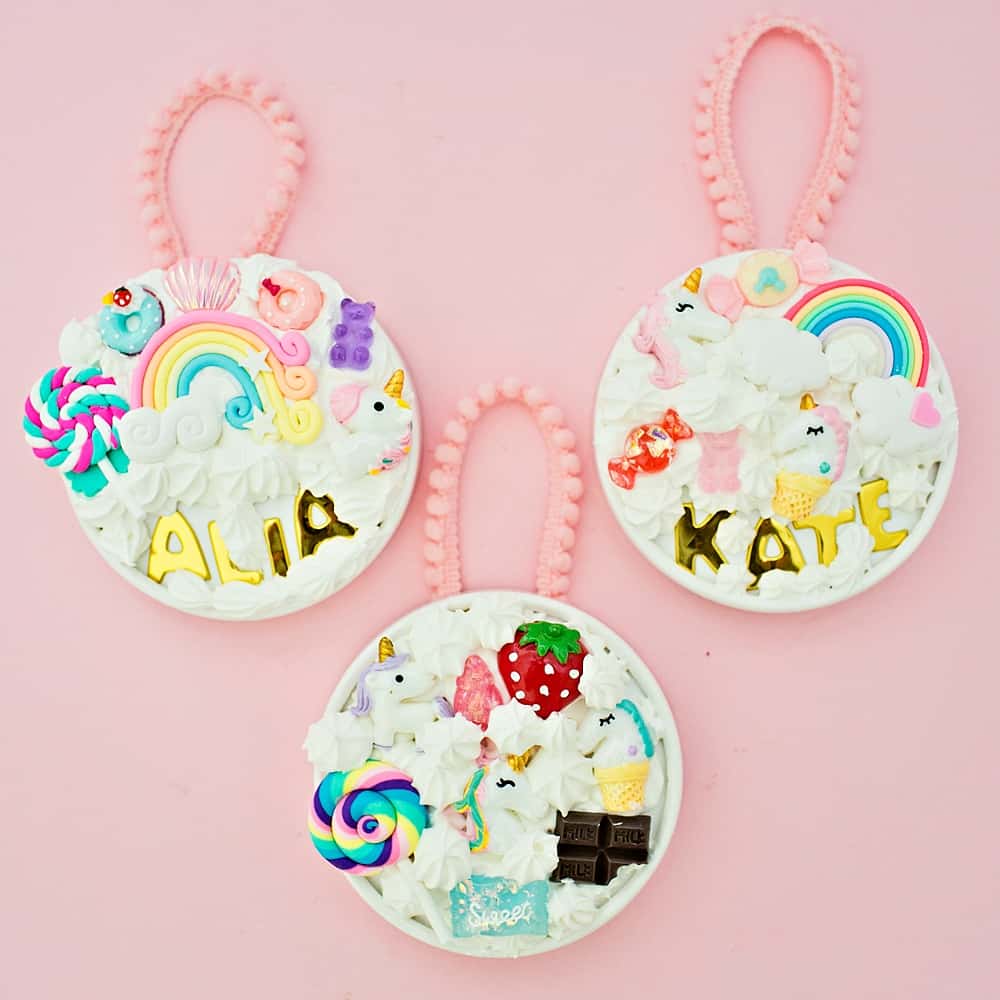
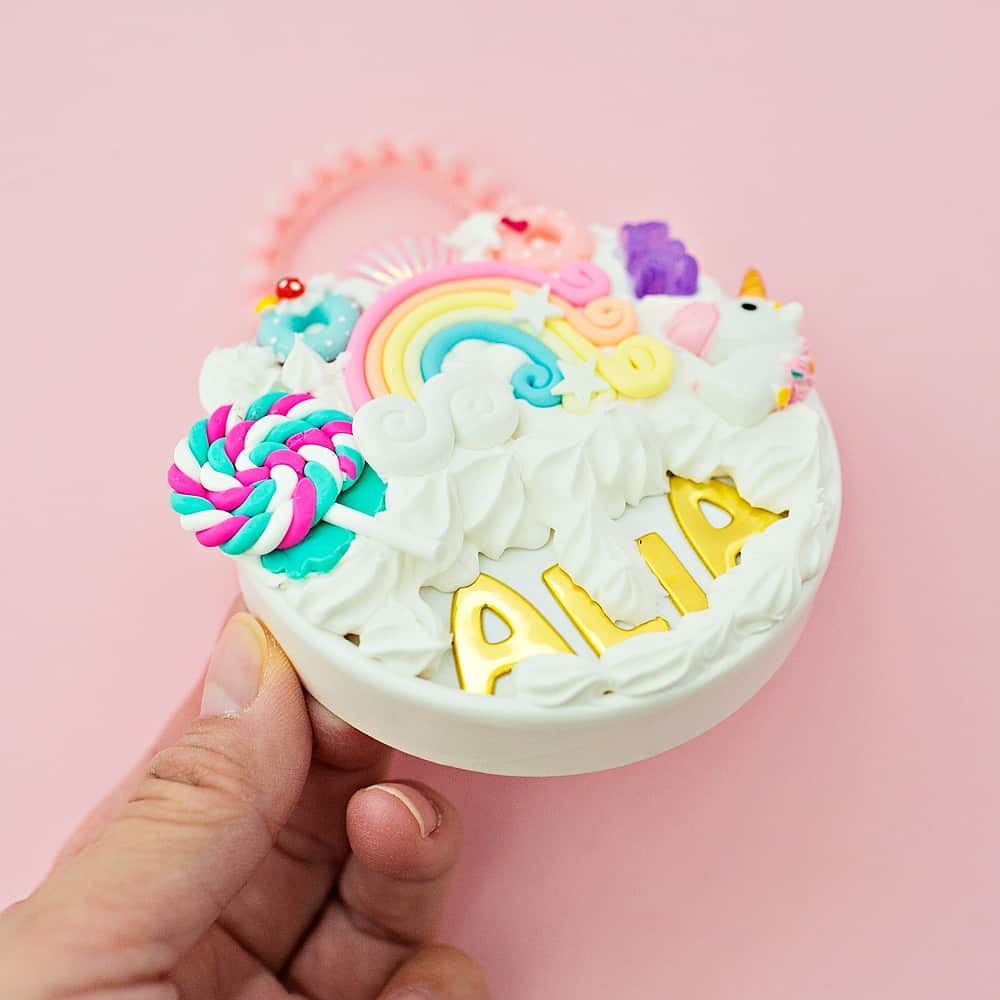
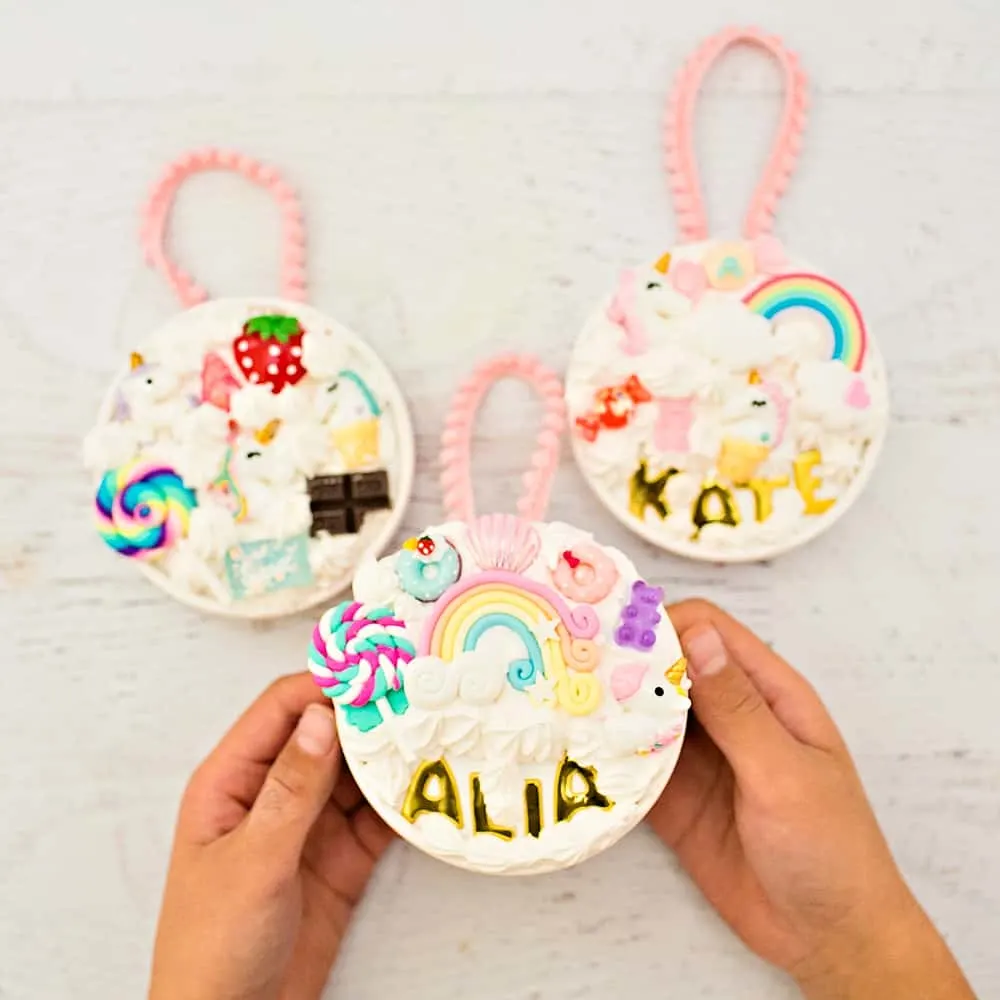
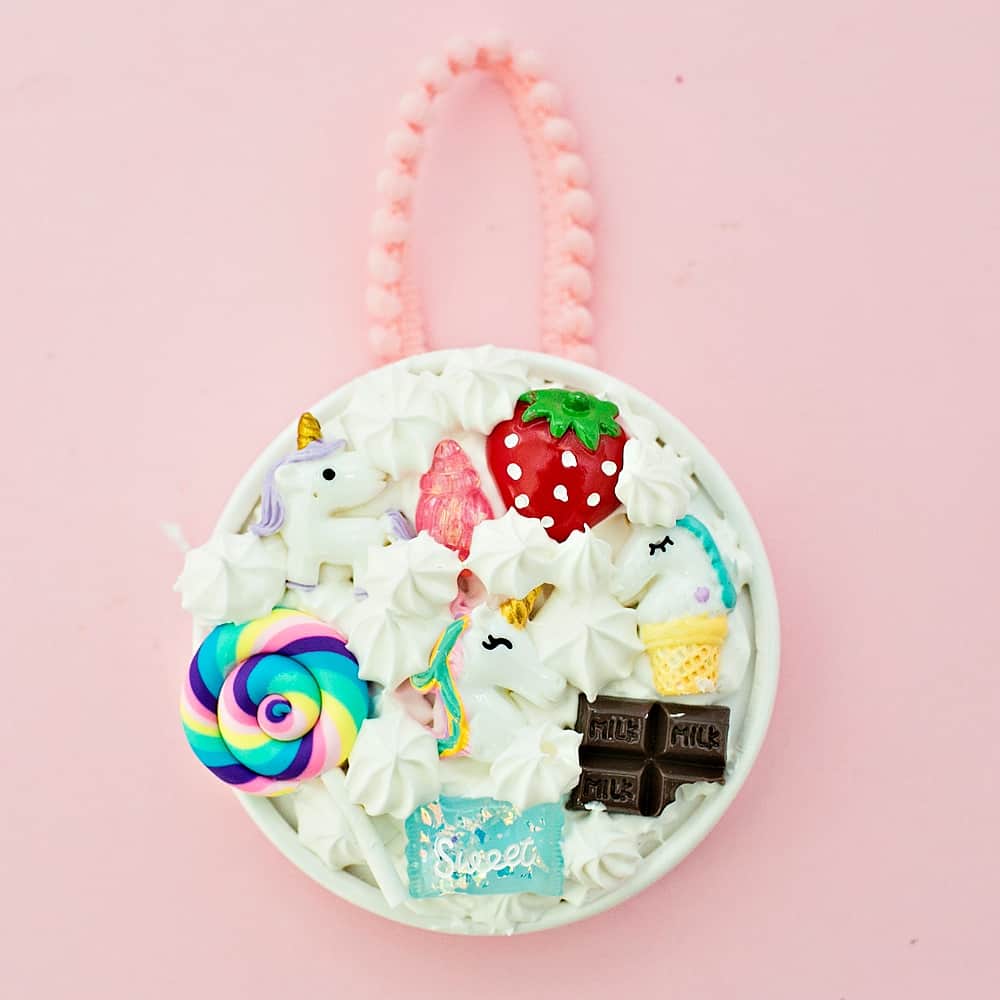
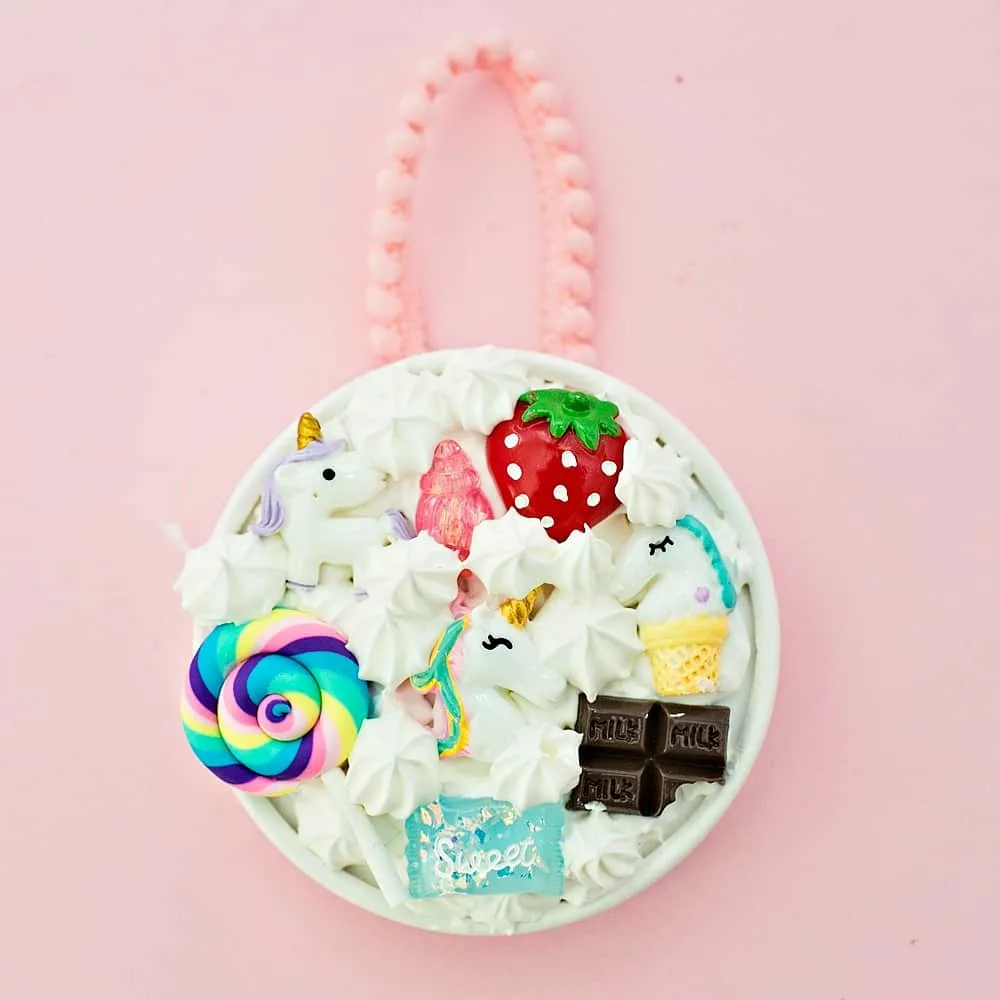
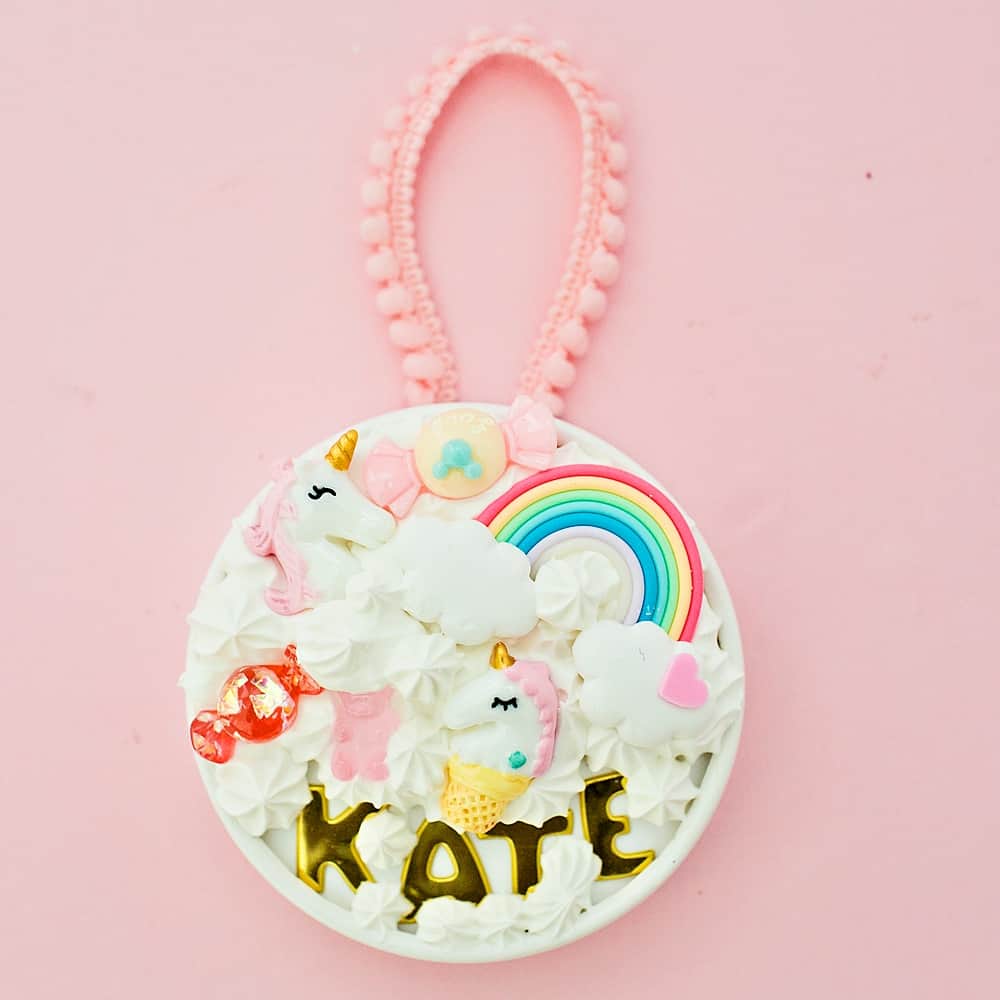
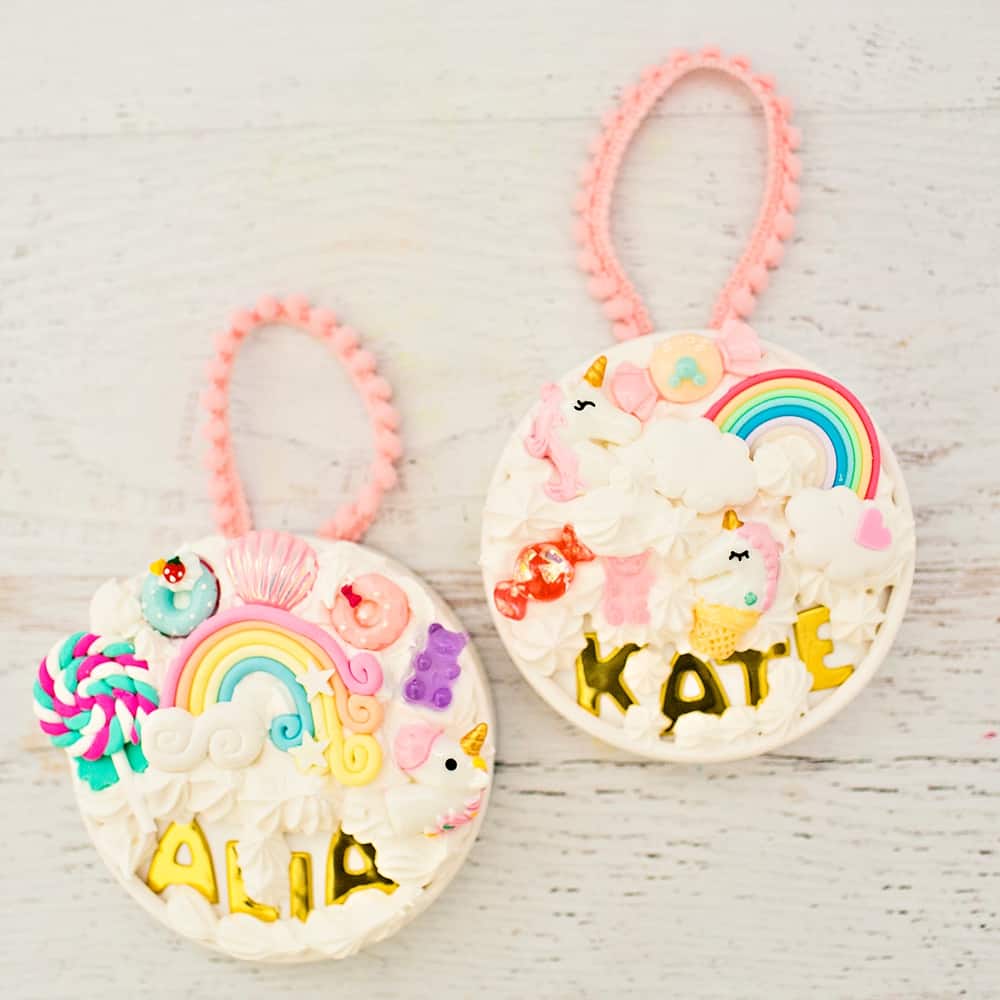
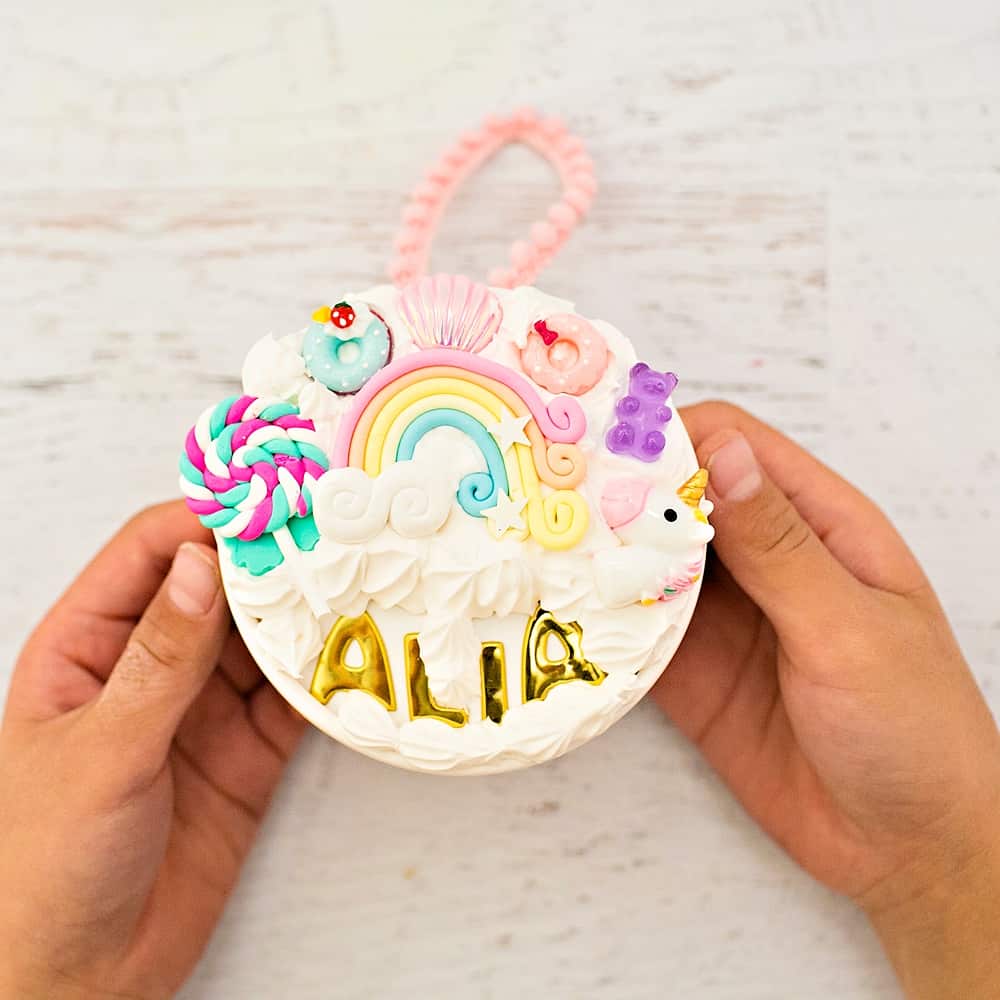
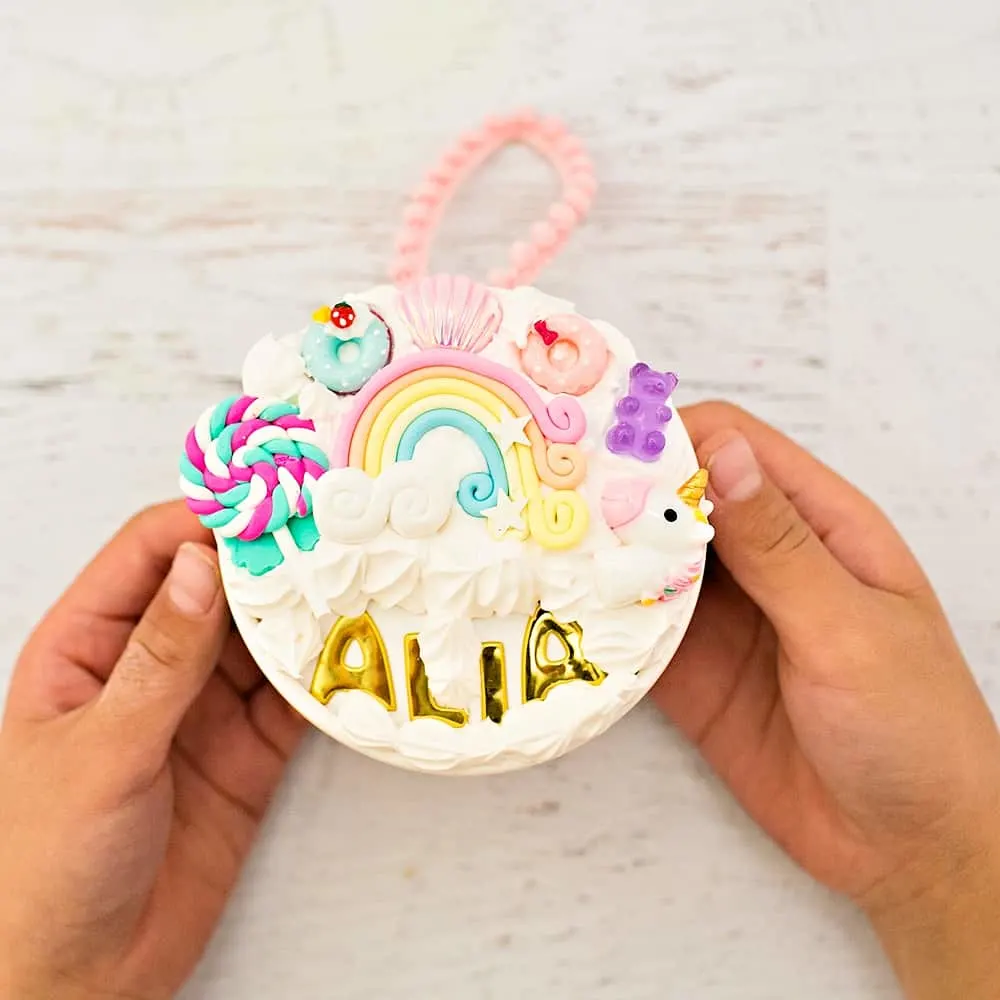
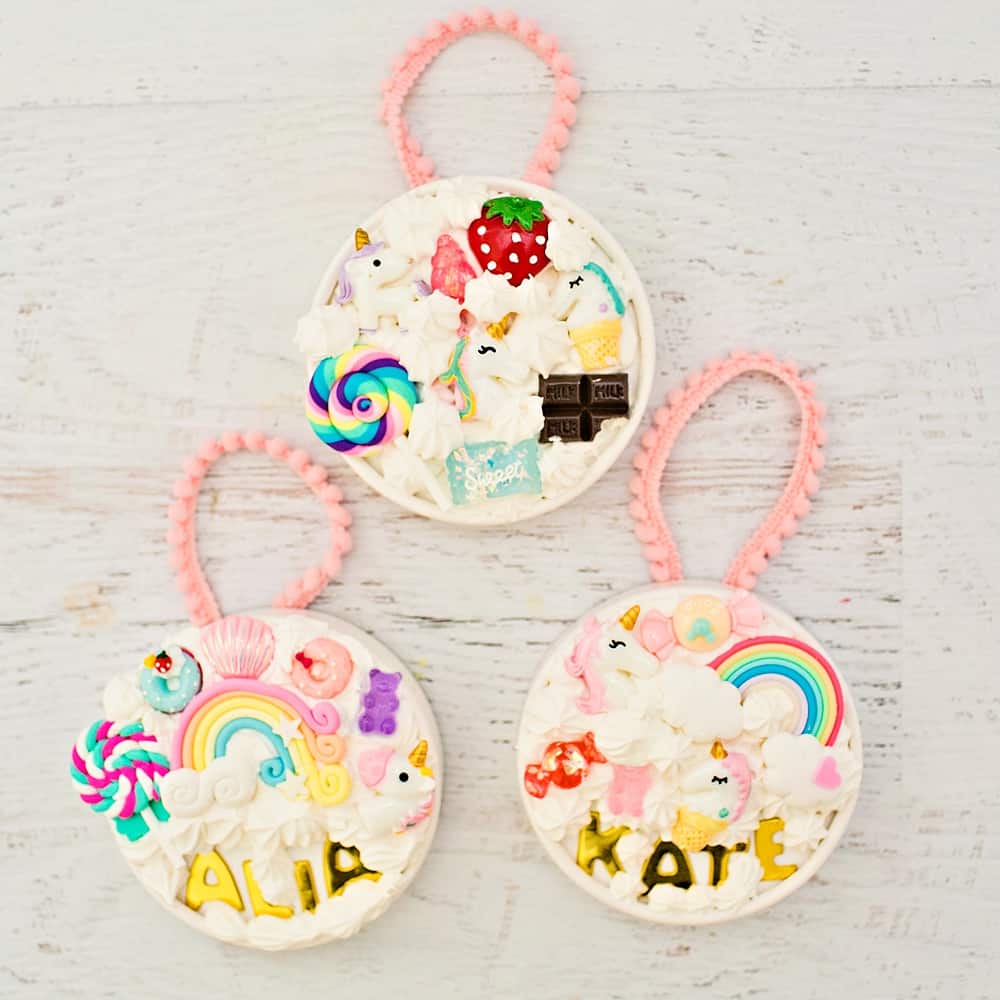
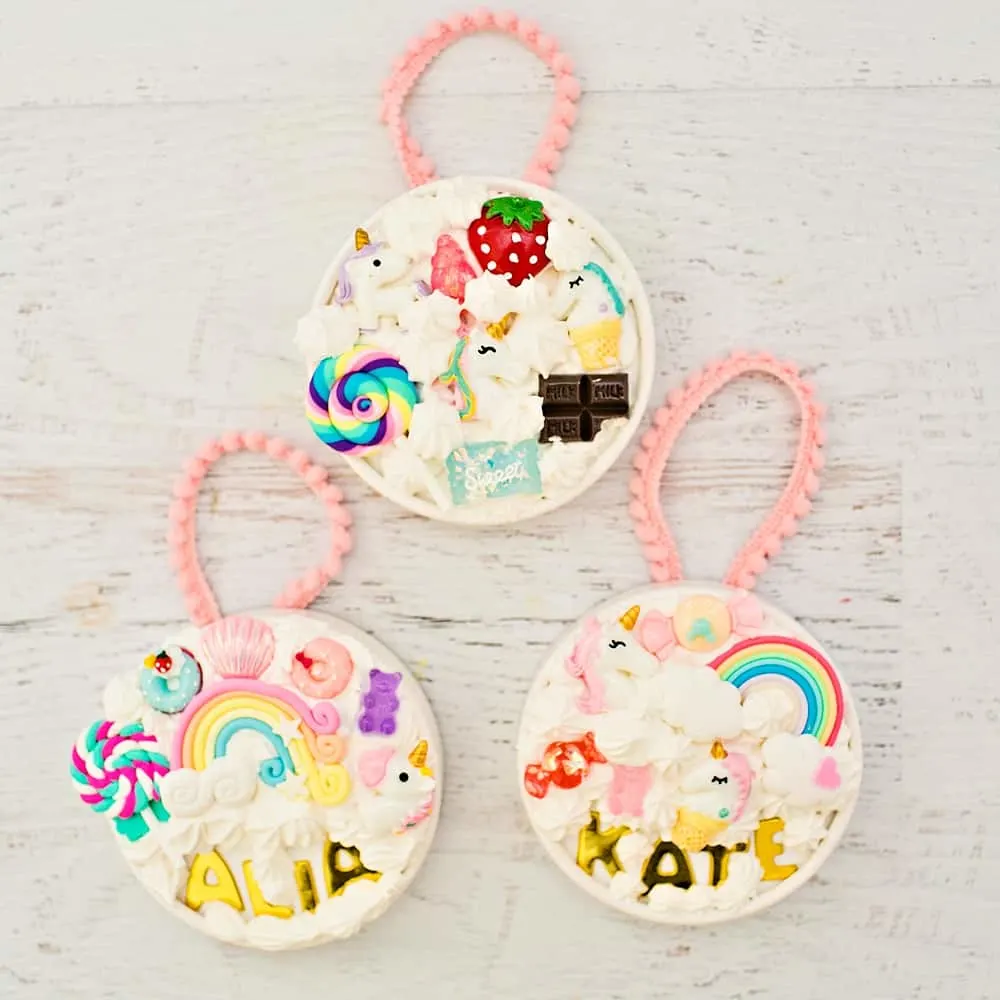
These Whipped Glue Decoden Unicorn Ornaments are so sweet to make and look like real piped on frosting! The best part is that the glue dries hard so the finished product makes a beautiful ornament that’s mess-free.


I first fell down the rabbit hole of Decoden whipped glue when I first saw these irresistibly cute Kawaii Decoden phone case ornaments. Here’s a close up example of one where you can see the whipped glue and cute charms up close.
I had to find out what that fun whipped topping was! Was it clay, glue or a mixture of both? It turns out “Decoden” is a Japanese decorating trend that’s a 3D collage style of decorating using whipped glue and placing cute Kawaii plastic charms or cabochons on top. The trend became really popular with clear phone cases.
We’re all about promoting non-screen time play and creativity here so my mind started whirling on how we could apply this adorable whipped glue decorating trend to other creative projects.

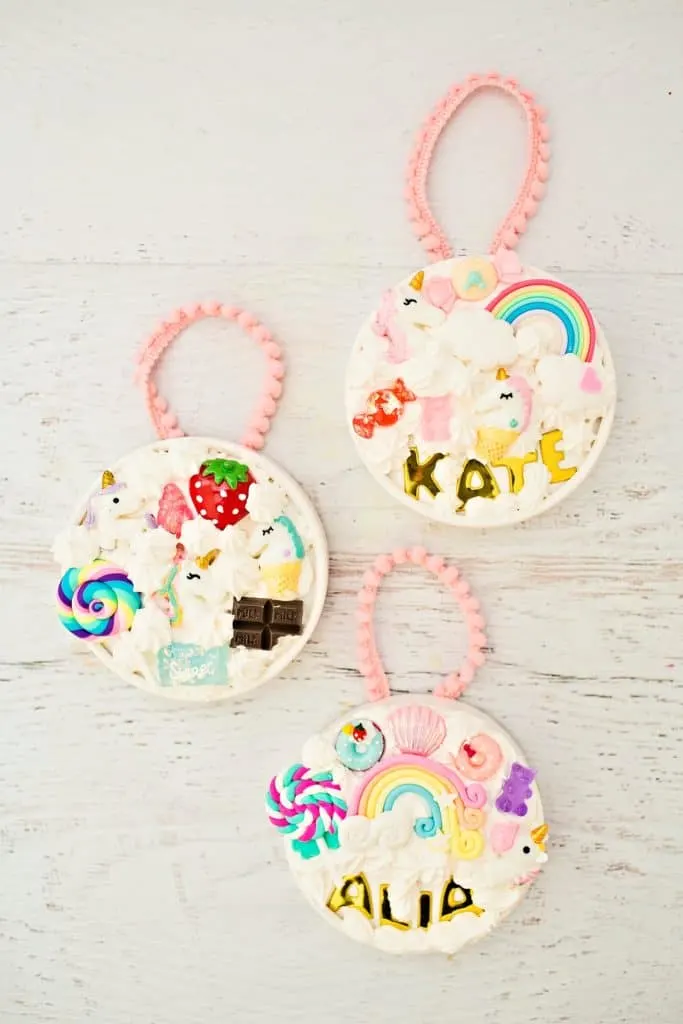
With the holidays coming up, it seemed a perfect time to make magical Unicorn Whipped Decoden Ornaments!
After all, we had leftover food lids from our Rudolph Photo Ornaments and lots of scrap ribbon.
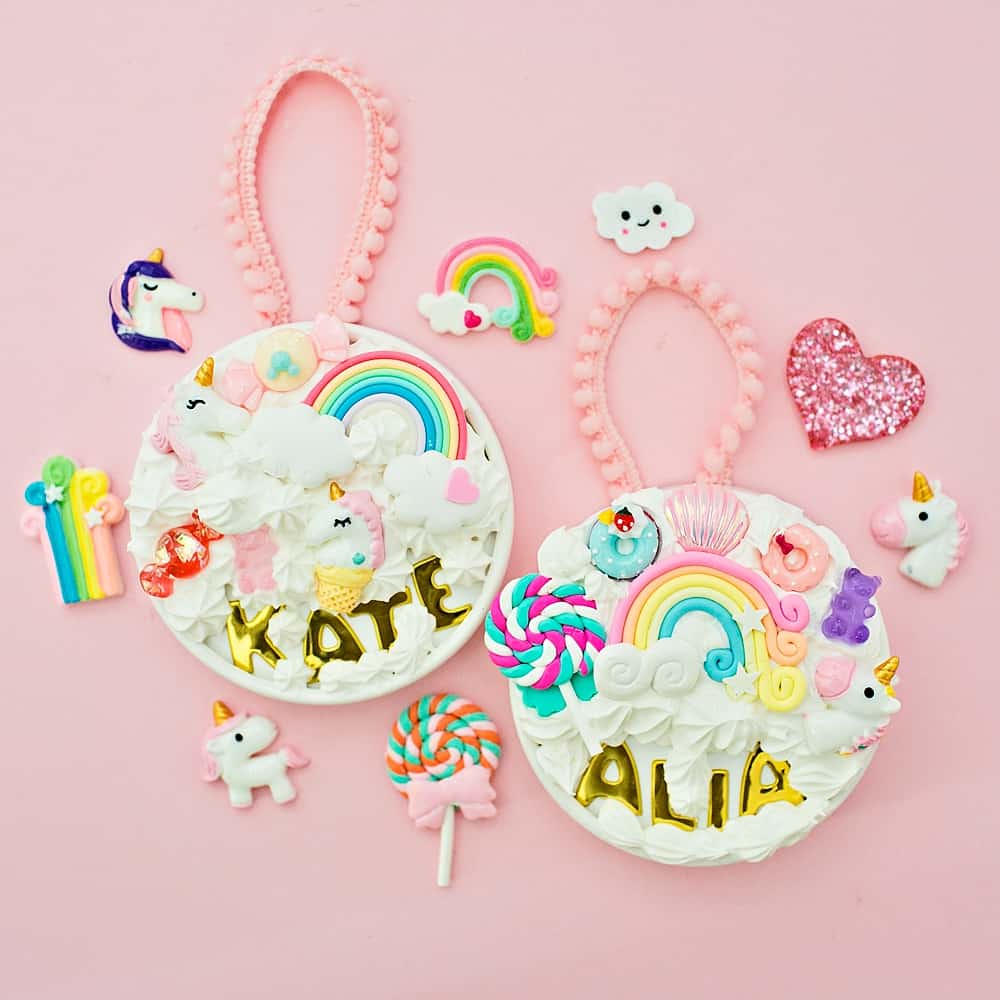
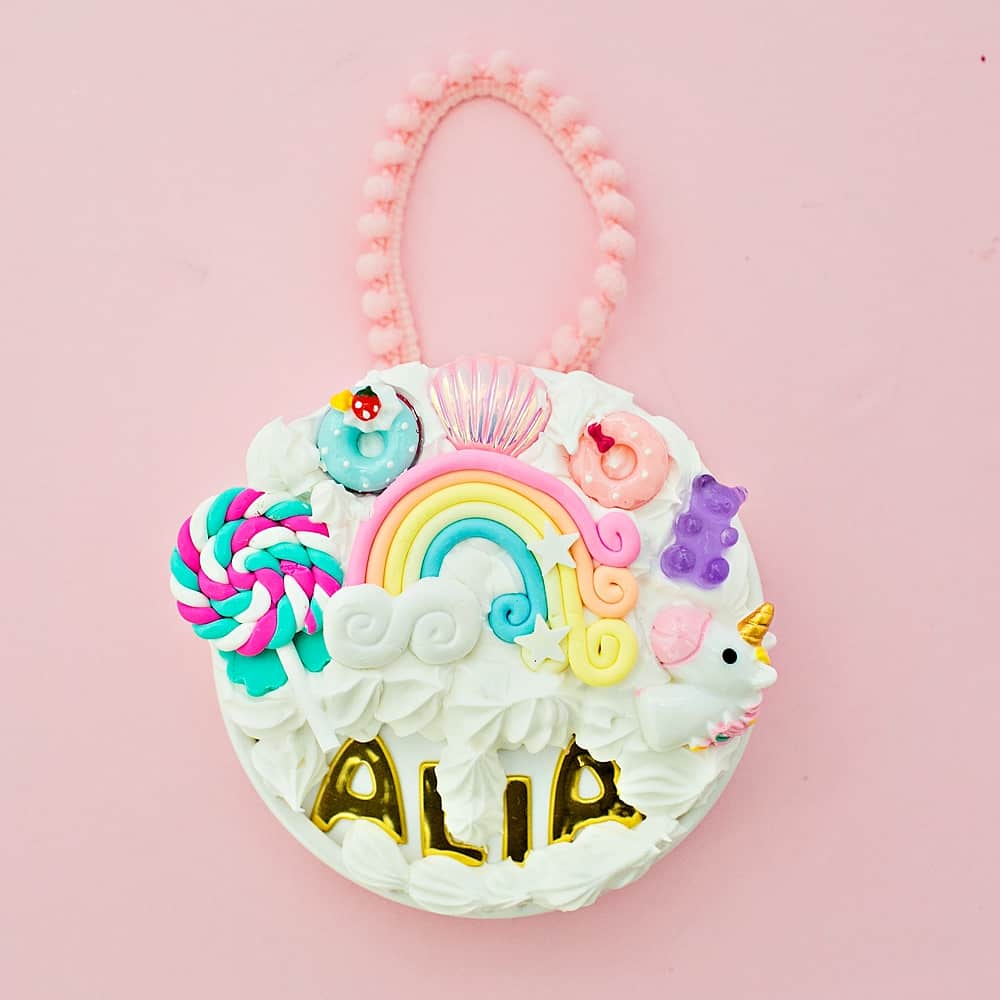
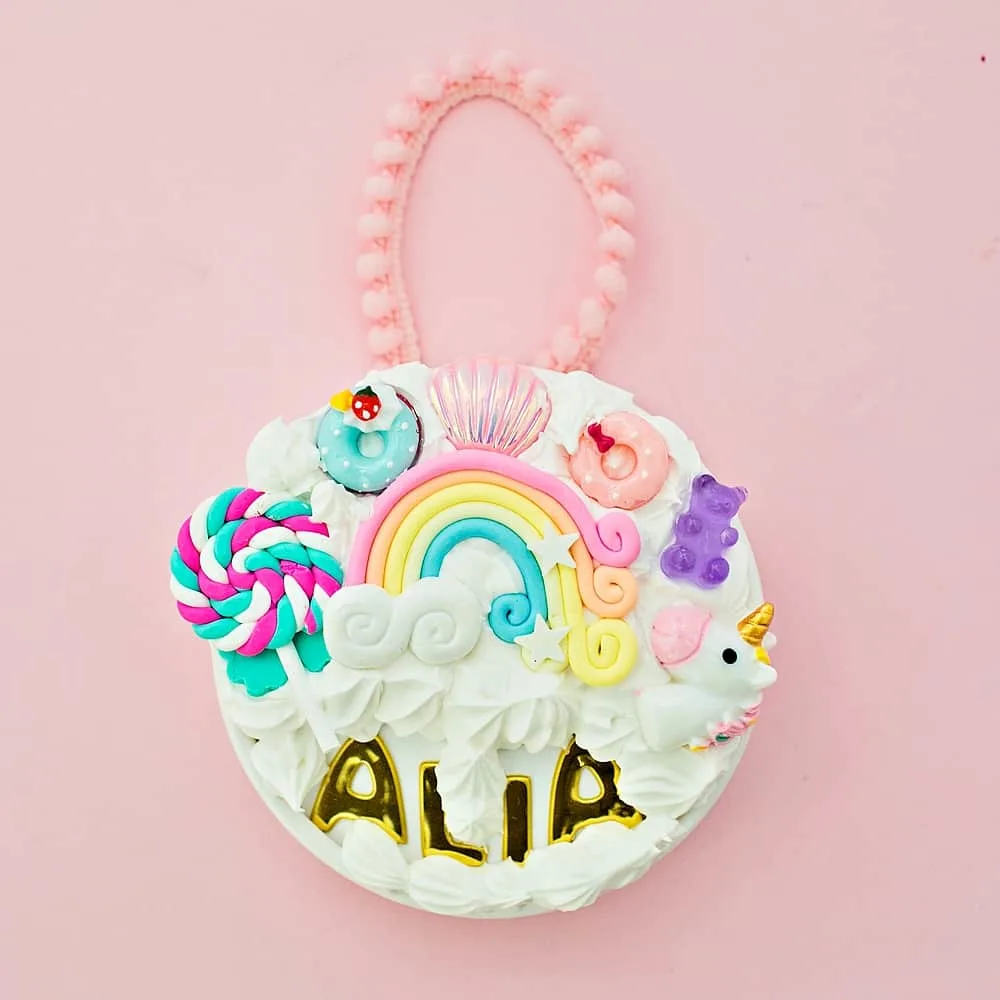
The only thing we’d need is whipped glue and cute charms. We decided to add a personalized touch by adding sticker letters but you can also opt to just decorate without! We show both options below.
WHIPPED GLUE DECODEN UNICORN ORNAMENTS – MATERIALS:
- Whipped Glue
- Food lids (like these) or you can use cardboard cut out circles
- Sticker letters
- Cute Unicorn Charms and Kawaii Charms
- Ribbon
- Strong clear tape (we used packing tape)


INSTRUCTONS:
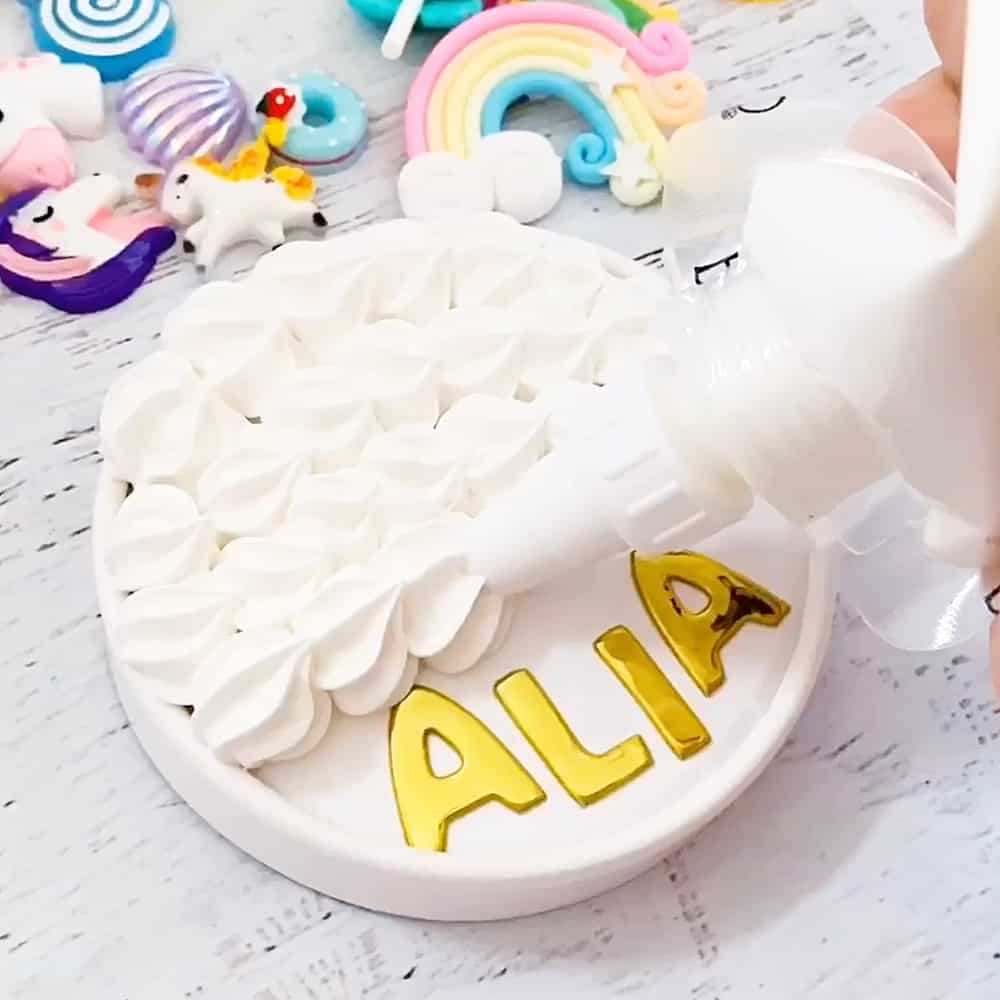
Step 1. Add your sticker letters to your lid if personalizing (you can also do this step on top of the whipped glue too instead of before).
Step 2. Start piping the glue on the lid. The glue we got came with 3 decorating tips! We used the star tip shown here. The glue glides out easily and is easy to handle, doesn’t clump, and isn’t hard to push out.
Step 3. Once your piped glue is on, decorate with charms! Press lightly on top of the glue. Tip: you want to do this right after piping before the glue set. So you can design your lid before frosting, take a photo on your phone and refer to the design when the glue is piped on.
Step 4. Once your charms are on, pipe around to finish the decorating as some of the nicely piped glue will have squished down from the charms.
Step 5. Allow to dry completely, a few hours or until the frosting is hard to the touch.
Step 6. Add your ribbon to the back, we simply used a bit of strong clear packing tape. That’s it!


Check out the step by step video right below:
These cute unicorn ornaments are a great tween or teen project!
We loved trying out this new type of whipped glue and are already dreaming up more fun Decoden projects to share with you all soon!
More Cute Unicorn Crafts for Kids.
Check out more Unicorn Ornaments HERE and HERE.
Lots more Holiday Ideas for Kids.
Disclosure: Some of the links in the post above are “affiliate links.” This means if you click on the link and purchase the item, we will receive a small affiliate commission. Regardless, we give our promise that we only recommend products or services we would use personally and believe will add values to our readers.


Agnes Hsu is a mom of three and has been inspiring parents and kids to get creative with easy activities and family friendly recipes for over 10 years. She shares her love for creative play and kids food to her 2MM+ followers online. Agnes' commitment to playful learning and kindness has not only raised funds for charity but also earned features in prestigious nationwide publications.