
The Most Colorful Rainbow Toilet Paper Roll Butterfly
By using this site, you agree to our Terms of Use. This post may contain affiliate links. Read our disclosure policy.
Follow us on Instagram for more fun ideas for kids!
This Rainbow Toilet Paper Roll Butterfly is the perfect craft for spring! Show kids that art can be created using simple supplies!
Spring is almost here and we love a good butterfly craft to go along with it! This Rainbow Toilet Paper Roll butterfly is the perfect colorful butterfly craft to make.
Who knew that there were so many uses for toilet paper roll? It’s a great crafting supply that people always tend to overlook. We’ve used them for Toilet Paper Roll Christmas Trees, and more, and the kids absolutely have a blast!
Over the past few years indoors staying at home, we gathered up quite a few rolls of toilet paper that we were able to stockpile in the house to use for later.
I love using toilet paper rolls because they’re round, easy to paint, and can be changed to make just about anything. From animals to bugs, you can change it up each time.
Can I use something other than an empty toilet paper roll?
The key to making this butterfly craft is that you need a round empty roll for the body and base. You could also use a paper towel roll that is empty, but you would need to cut it in half to be able to use it.
If you don’t have either option, rolling a piece of cardstock and stapling it or gluing it shut is an option as well. As long as you can make a round cylinder, it can be used.
Rainbow Toilet Paper Roll Butterfly Supplies
- Empty toilet paper roll
- Black paper and white paper for the eyes and antennae
- Colored paper (in the various colors of the rainbow)
- Scissors
- Marker
- Hot glue gun and hot glue
- Free printable template for the wings (download below in our craft instruction card)

Tips for Making Butterflies from TP Rolls
The fun thing about this butterfly craft is that the kids can change the colors and look. This is just a template and a suggestion, but don’t forget to let the kids have creative freedom.
They’ll love being able to create their own butterflies in a way that is inspiring to them!
Don’t forget that you can teach the order of the rainbow colors with a simple saying. ROYGBIV. This is the order of the colors of the rain! Red, orange, yellow, green, blue, indigo, voilet!
How long does it take the glue to dry?
If you use hot glue, instantly. If you’re using a craft glue like Elmer’s It’s really important to let the glue dry so that the butterfly craft doesn’t fall apart. Once you add the hot glue, talk to the kids about being patient and letting it dry before moving it.
I would give this craft about 30 minutes or so to be dried completely if not using hot glue.
Variations
Add glitter – If you are a household that crafts with glitter, use some on this craft. You can have the kids paint it on, spray it all over, or just add some glue and dab it as well.
Change the colors – As I mentioned earlier, the kids can change the colors that they want to use for this craft. They just need to pick the colors that they want to use and then use them.
Use something else for antlers – If you don’t have black paper, you could easily substitute black pipe cleaners!
What is the best way to display this craft?
Display them however the kids want! These are also super cute to play with as well. What I love about crafting is that whatever is made can be used for decoration or just as a great activity for the kids.
Once the butterflies are made, have the kids showcase them and then figure out what they want to do with them. They may want to have them in their room or have them out in the common areas of the house for everyone to see!
You can use removable poster tape and make a bunch to display on the wall for a cute spring wall decor!
Sometimes my kids even like to gift the crafts to others as well to spread happiness and cheers.
Open those lines of communication with the kids and see what they want to do. If they want to give one away and make another one at home, that sounds like a super awesome idea as well.
Crafting time is a great way to get more family time!

How to make a Butterfly out of a Toilet Paper Roll
This craft is fun and easy to make – and perfect for spring! You can also use this craft to teach the kids about the colors of the rainbow.
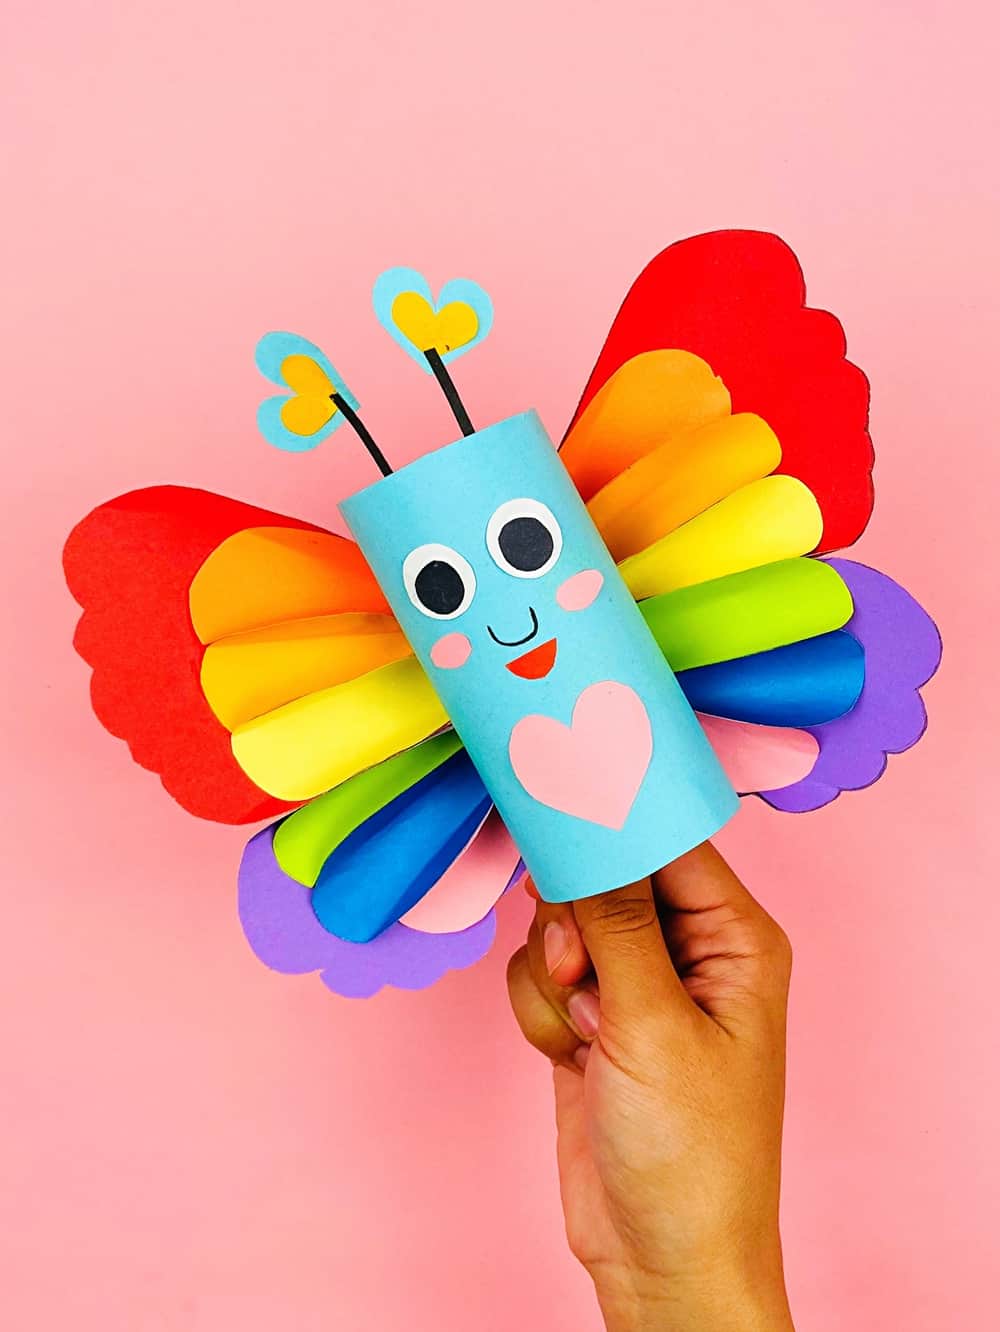
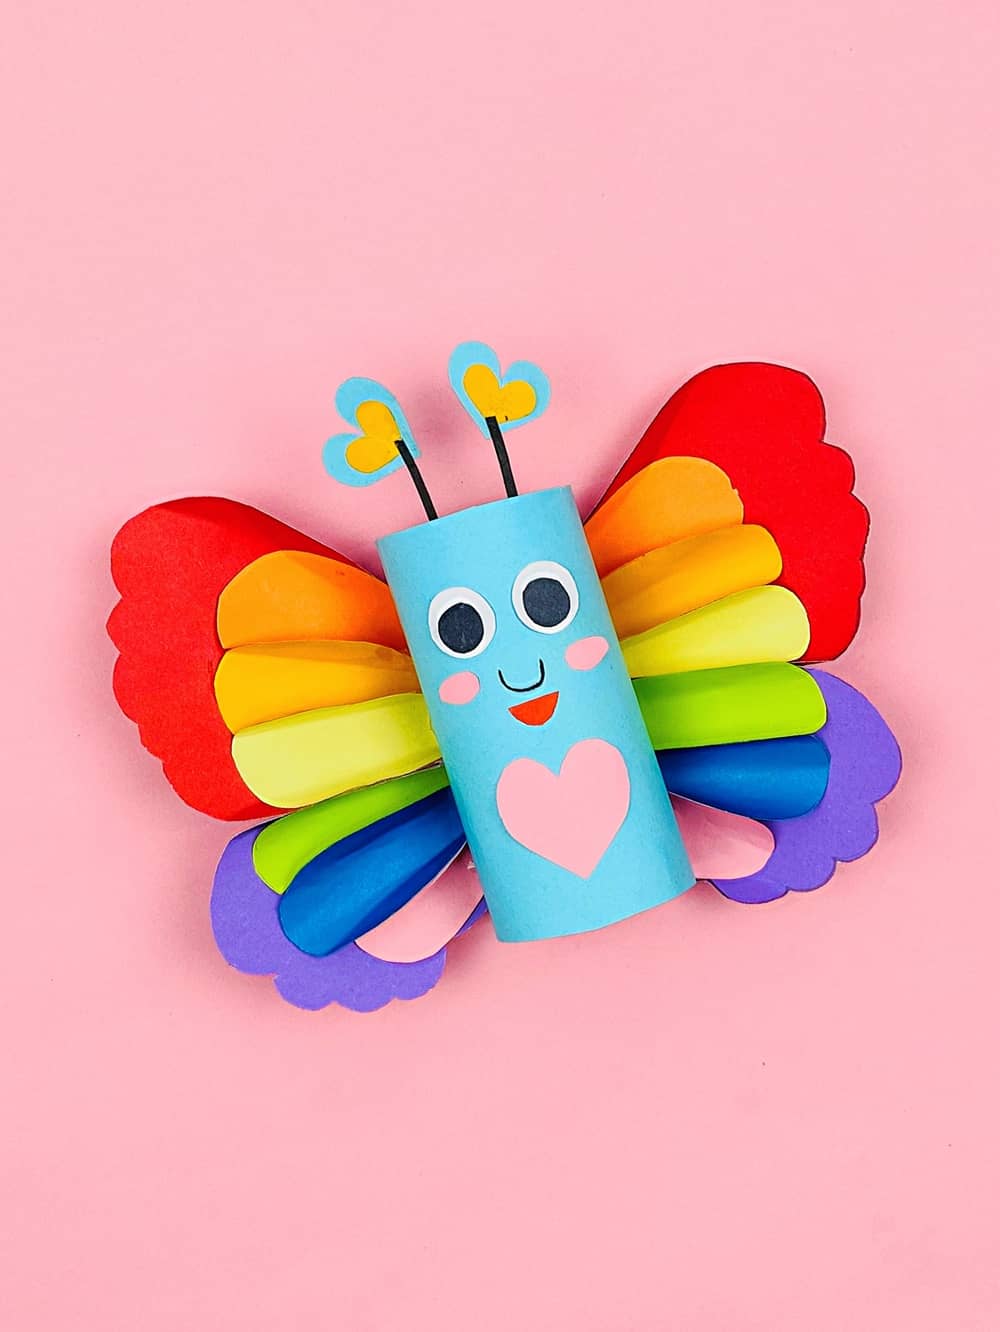
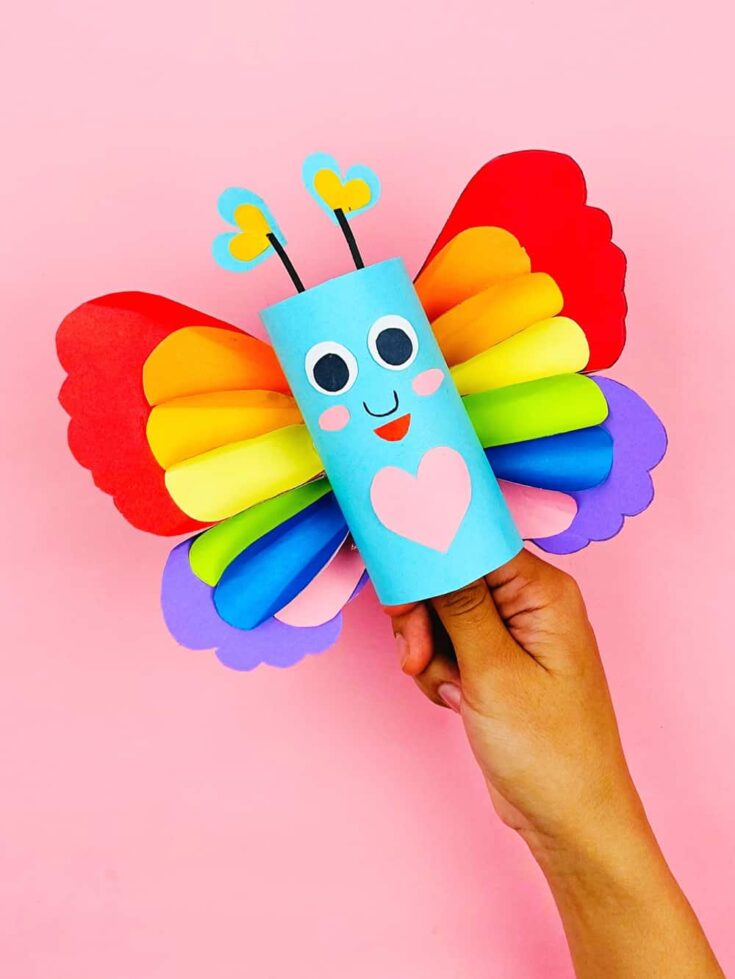
Grab the empty toilet paper roll and cover it with light blue paper. You can glue it on or tape it on, whatever works best.
Make the face! Use black and white paper for the eyes. Pink and red paper for the mouth and nose and draw on a nose. Use our butterfly face as a guide but make it any way you want! You can use googly eyes if that’s easier.
Cut out a pink heart and glue it on the body of the butterfly.
Cut two blue hearts out for the top of the antennas, and then cut two small yellow hearts and glue them in the middle of the blue hearts.
Add the hearts to the top of the black paper for the antennas and glue them in place.
Cut out the shape of the wings. (I used red for the top two wings and purple for the bottom two). If you need help with this step, print out our template in the craft instruction card below.
Then cut out the other rainbow colors and fold them on both ends. The template for that is also on the same page as the one for the wings below.
Glue them in the middle of the wings to give them a rainbow look!
More Fun Butterfly Activities
How To Make Beautiful Leaf Butterfly Art
Rainbow Toilet Paper Roll Butterfly
This Rainbow Toilet Paper Roll Butterfly is fun and easy to make! The kids will love it!
Materials
- Empty toilet paper roll
- Black paper and white paper for the eyes and antennae
- Colored paper (in the various colors of the rainbow)
- Scissors
- Black Marker
- Hot glue gun and hot glue
- Free printable template for the wings
Instructions
This craft is fun and easy to make - and perfect for spring! You can also use this craft to teach the kids about the colors of the rainbow.
Grab the empty toilet paper roll and cover it with light blue paper. You can glue it on or tape it on, whatever works best.
Make the face! Use black and white paper for the eyes. Pink and red paper for the mouth and nose and draw on a nose. Use our butterfly face as a guide but make it any way you want! You can use googly eyes if that's easier.
Cut out a pink heart and glue it on the body of the butterfly.
Cut two blue hearts out for the top of the antennas, and then cut two small yellow hearts and glue them in the middle of the blue hearts.
Add the hearts to the top of the black paper for the antennas and glue them in place.
Cut out the shape of the wings. (I used red for the top two wings and purple for the bottom two). If you need help with this step, print out our template under the materials list above.
Then cut out the other rainbow colors and fold them on both ends. The template for that is also on the same page as the one for the wings above.
Glue them in the middle of the wings to give them a rainbow look!


