

By using this site, you agree to our Terms of Use. This post may contain affiliate links. Read our disclosure policy.
Follow us on Instagram for more fun ideas for kids!
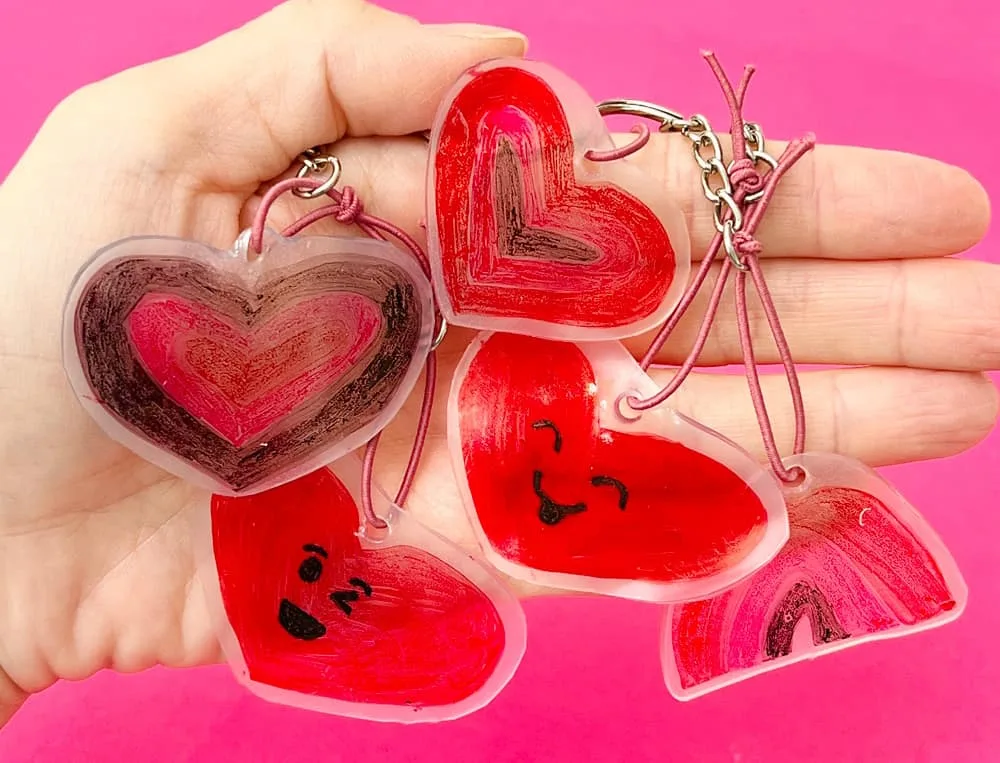
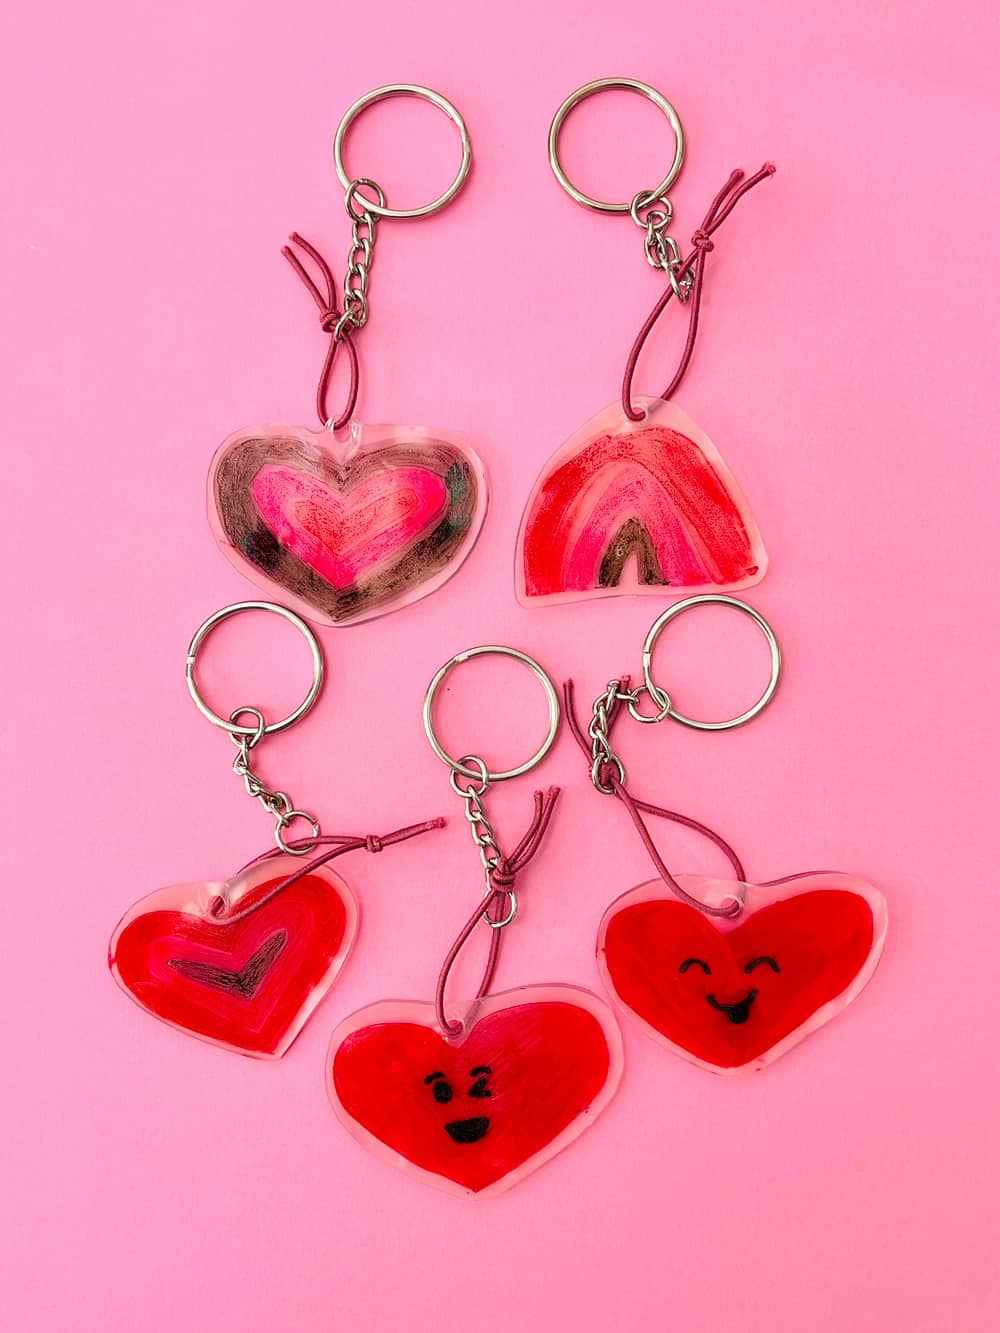
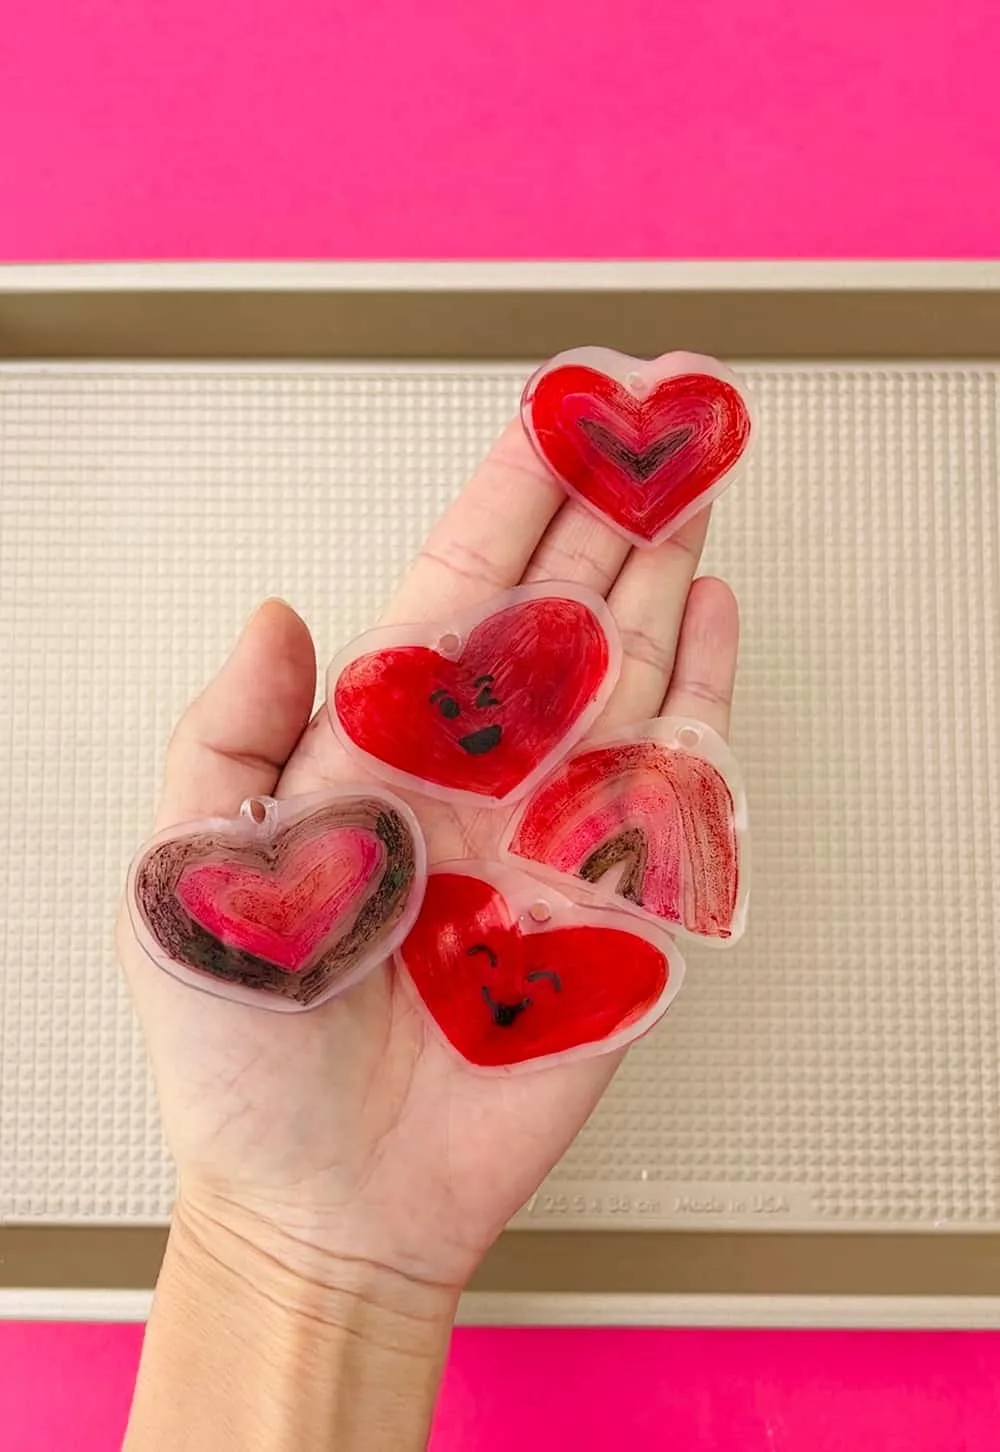
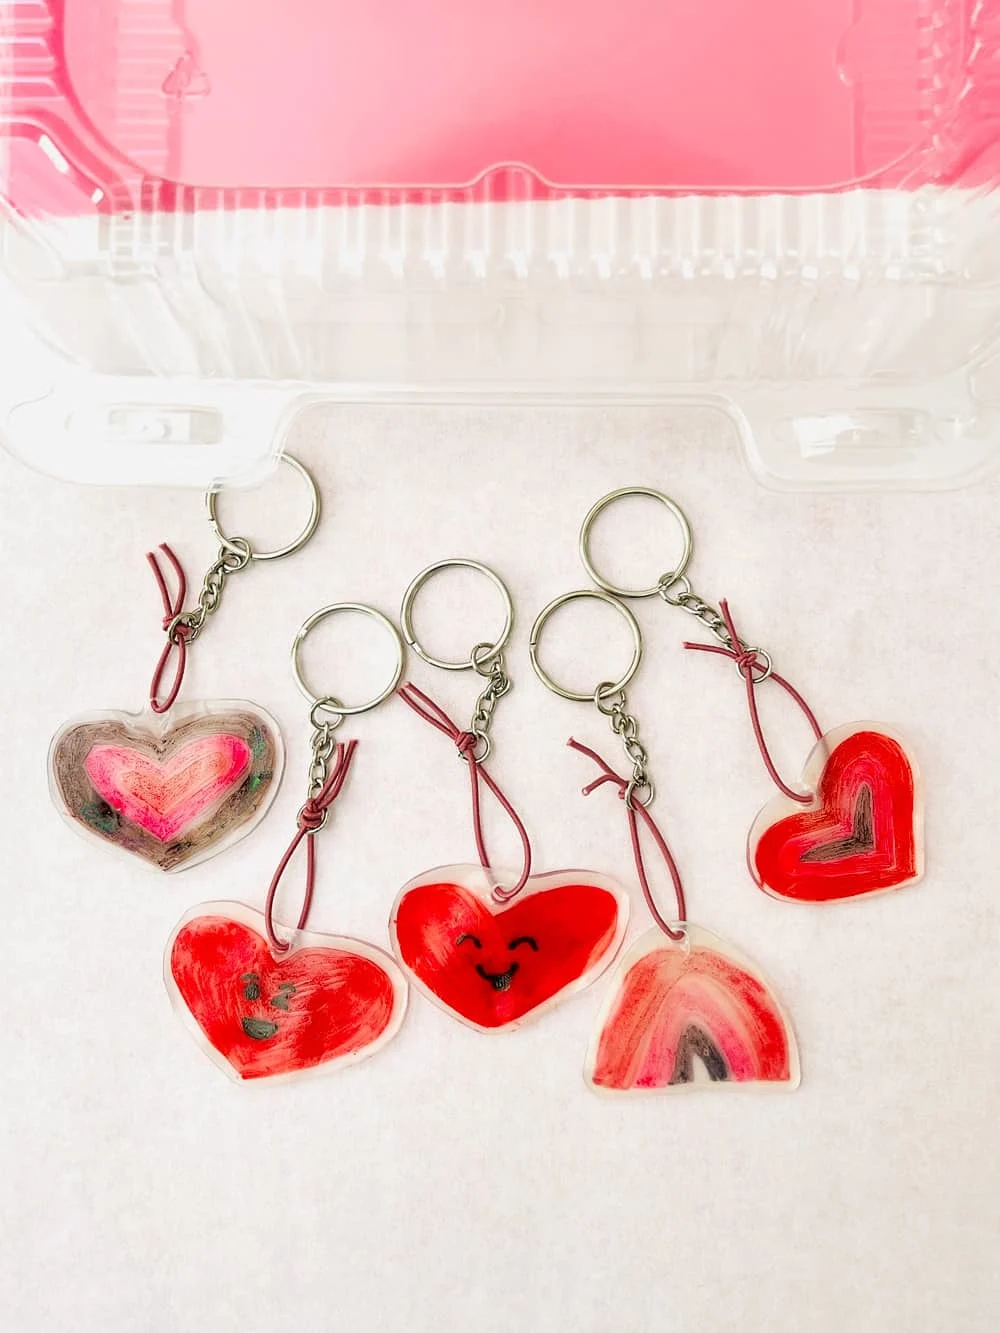
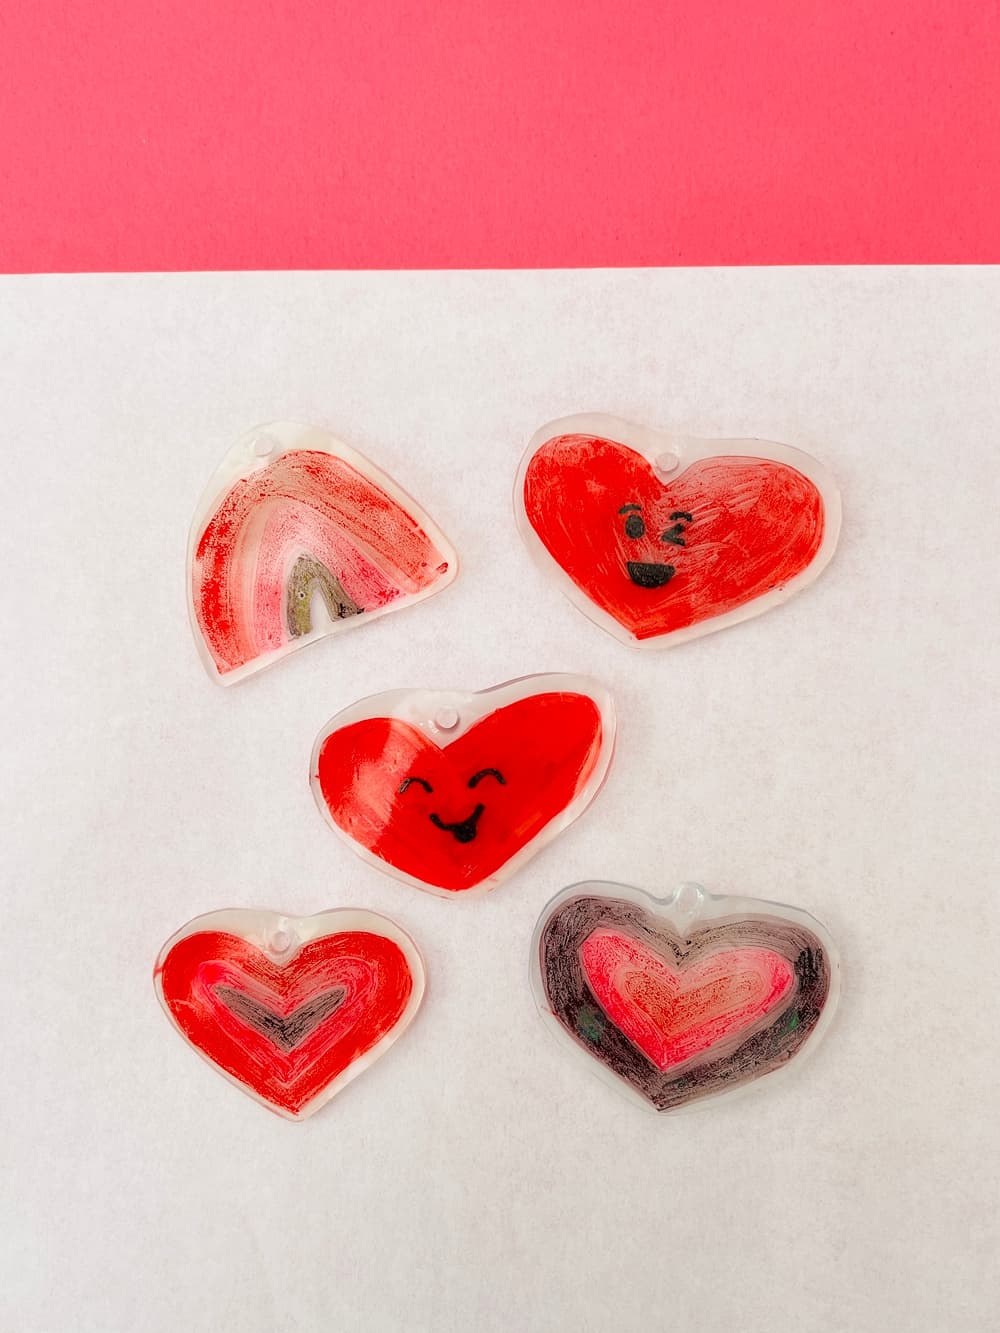
These DIY shrinky dinks keychains are so fun and easy to make with the trick of using a heat gun instead of oven! Watch them shrink instantly!
Are you a fan of shrinky dinks? The hard little plastic shapes and characters that are so fun to make as keychains or charms? We’re sharing these adorable DIY Shrinky Dinks Valentine keychains today with a super neat trick! Most Shrinky Dink projects we’ve seen use an oven but we found you can get the same magical shrinking results by using a heat gun! Read more below on all the details to make this adorable Valentine’s Day craft with kids!


What are shrinky dinks?
According to Wikipedia, “Shrinky Dinks were invented in 1973 by two housewives (Betty Morris and Kate Bloomberg). The base material consists of thin, polystyrene (#6) plastic sheets. Colored pens, markers or acrylic paint can be used to create designs right on to the plastic. When exposed to heat as in an oven, the shapes shrink and the thin plastic sheets become more rigid, making them great decor for crafts like making keychains, earrings, or charms.
What plastic is used for shrinky dinks?
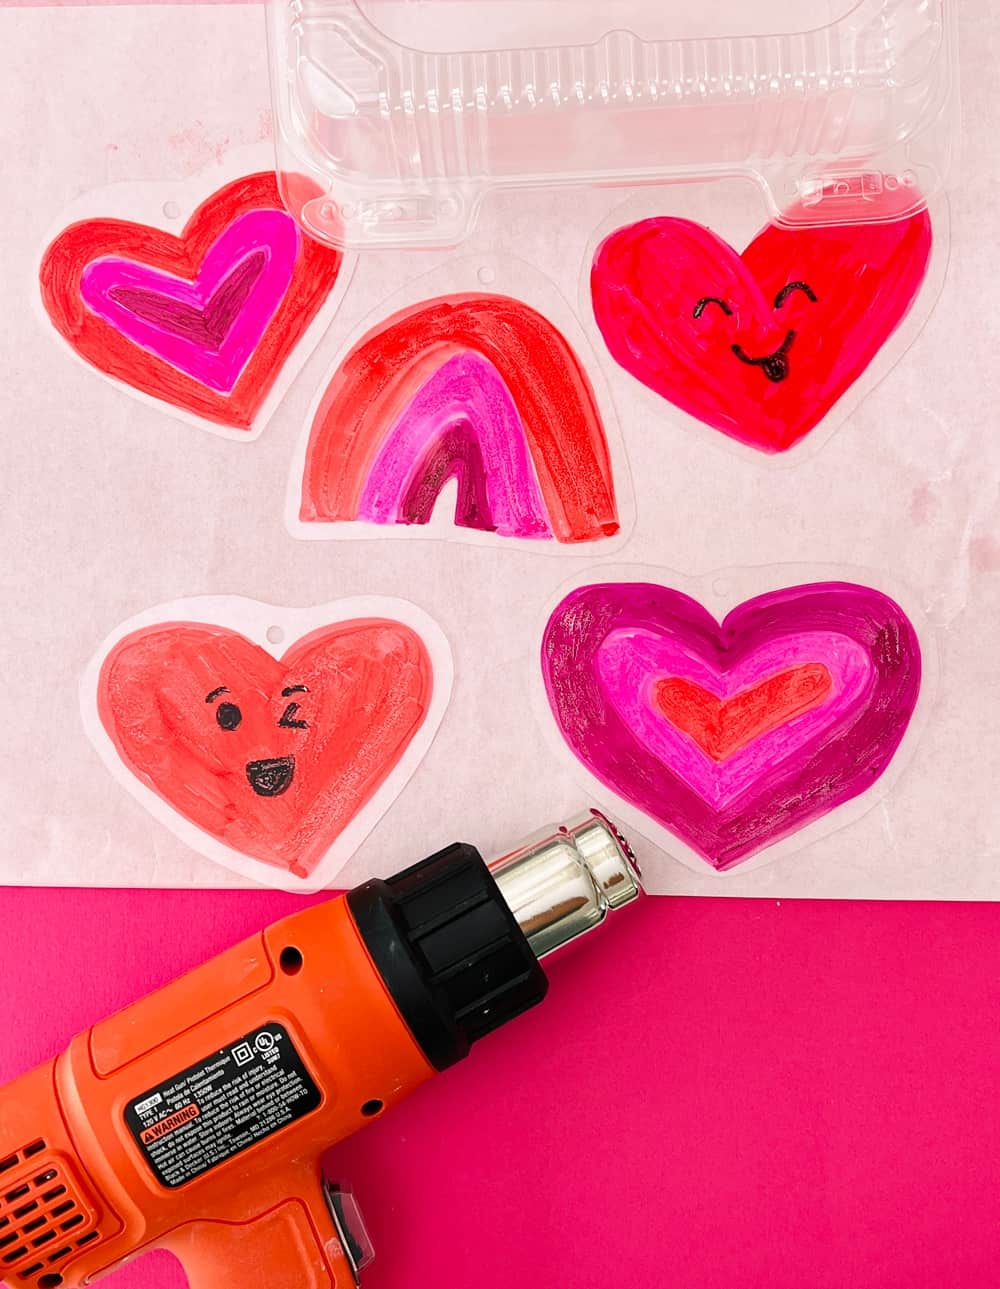
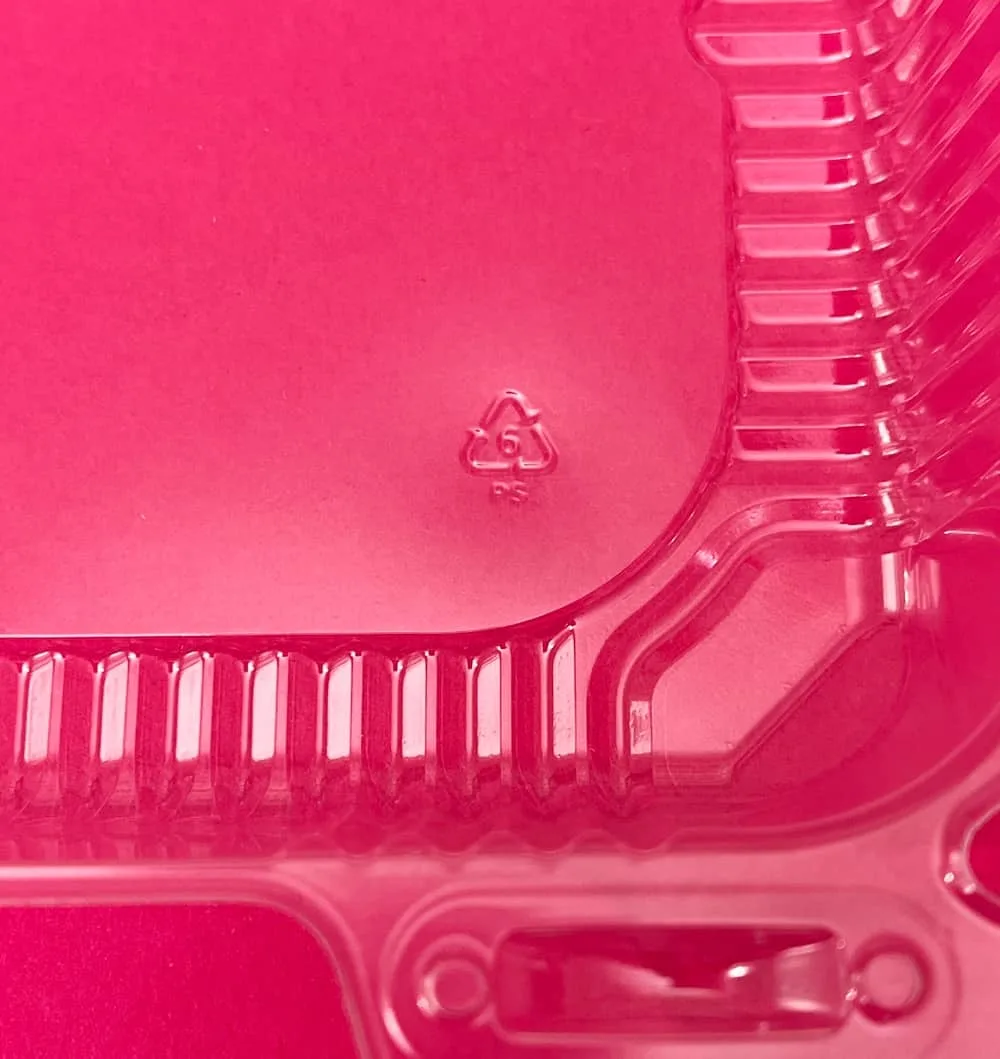
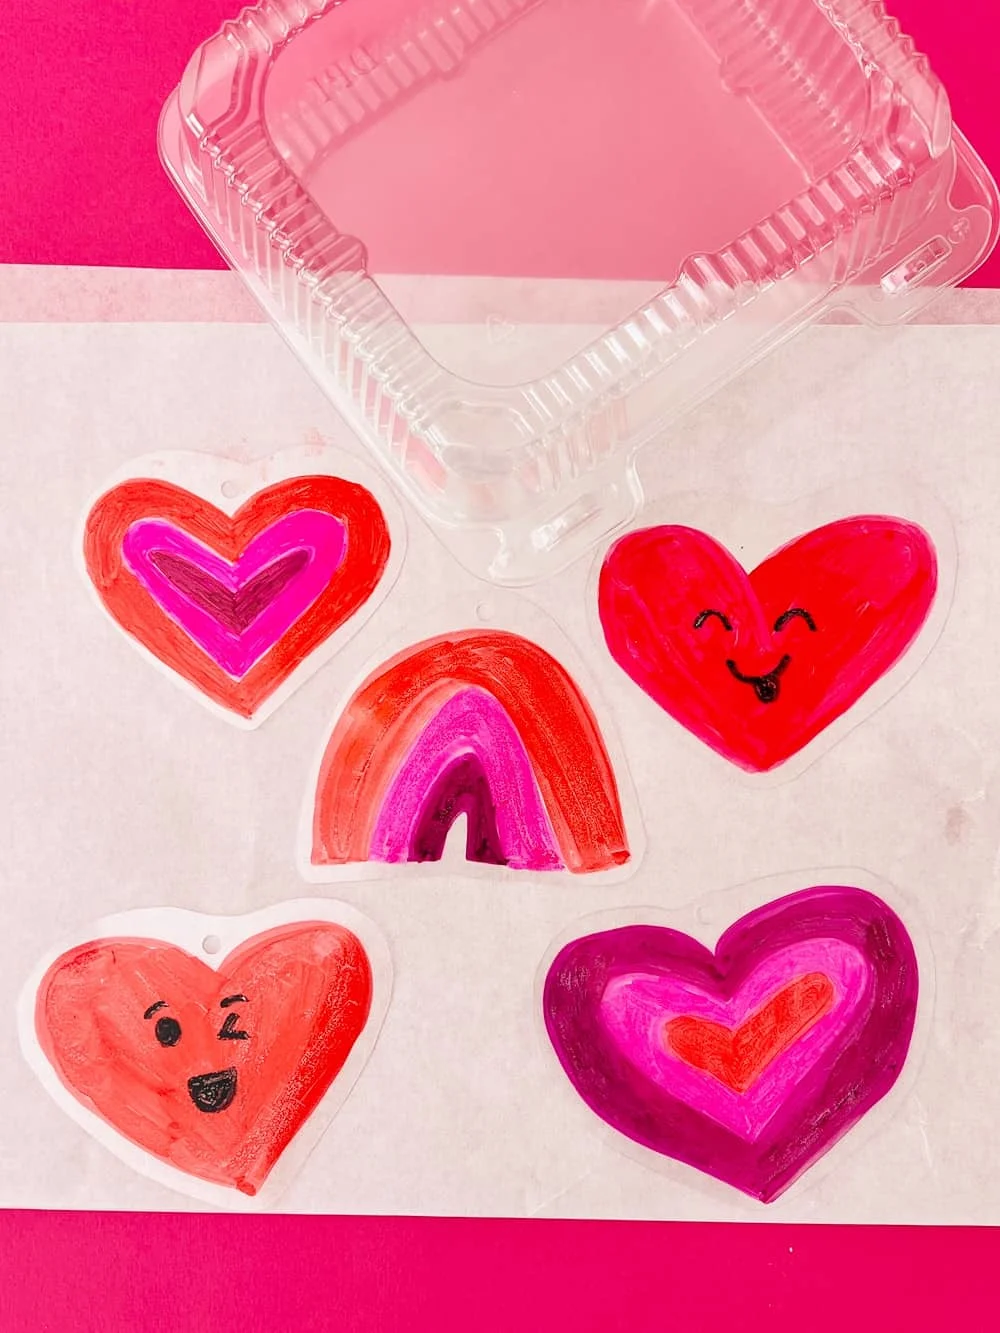
You can actually buy the thin plastic sheets online or in stores like these shrinky dink sheets. But what we like to do is recycle those food clamshell containers you can find in most grocery stores that hold bakery items. Just make sure they are wiped and cleaned of any oily or crumb residue before using. This makes this project a fun recycled craft for kids!
Also make sure the plastic you use is recycled #6. You will find the recycled icon with the number on the clamshell bottom usually.

How do you melt shrink dinks?
The more common method we have seen is in an oven or toaster oven. But what we have found to be much easier is using a heat gun! If you don’t have a heat gun, they are not very expensive, you can usually get one for around $20 and they are great for home use such as home improvement projects, loosening nuts, stripping paint, or thawing pipes. I actually use mine to help speed up the drying of my clay pottery pieces!
Why should you use a heat gun for melting shrinky dinks?
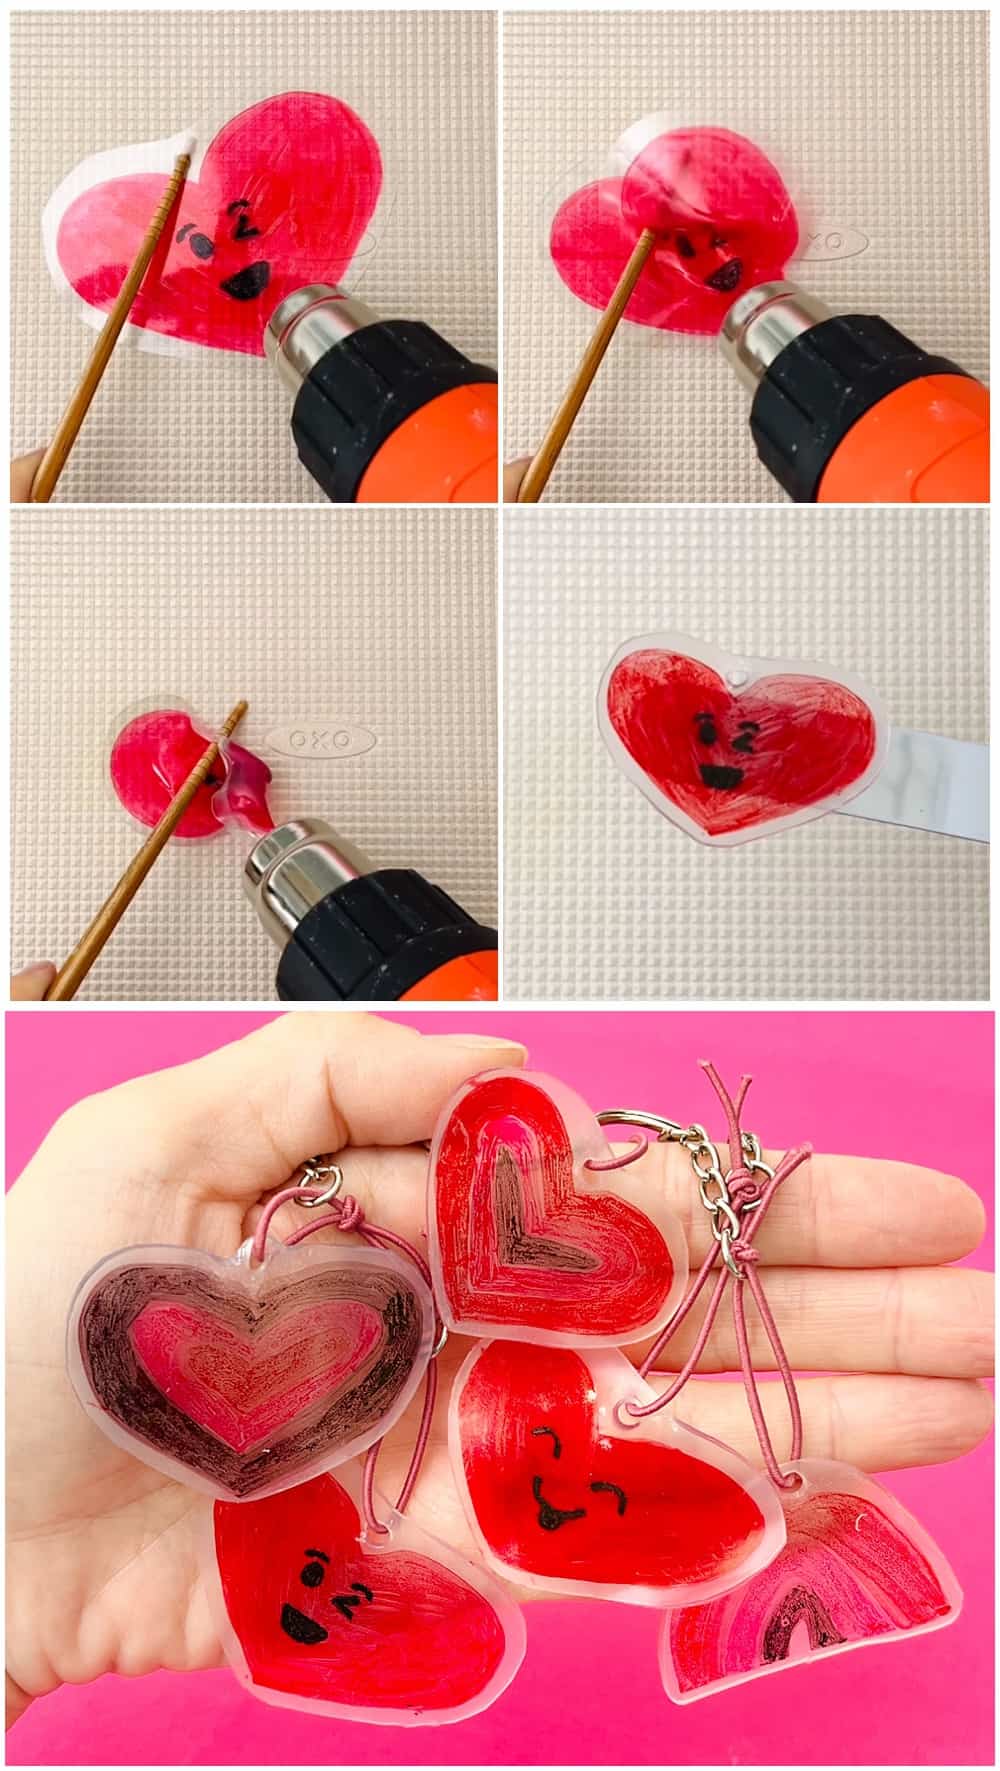
- Instantaneous visual of the plastic melting and shrinking right before your eyes. In an oven, it’s hard to get this close obviously since the oven door is closed. Watching the plastic melt, warm and turn into its final shape is mesmerizing for kids! Note: Always have an adult utilize the heat gun and do not let children use the heat gun alone and unsupervised!
- Not having to preheat the oven saves energy and time!
- Being able to do one shrinky dink art or multiple at once is a key benefit of using the heat gun. Of course you can do one piece in an oven too, but the process seems much more complicated for just one keychain.


How do you make shrinky dink keychains?
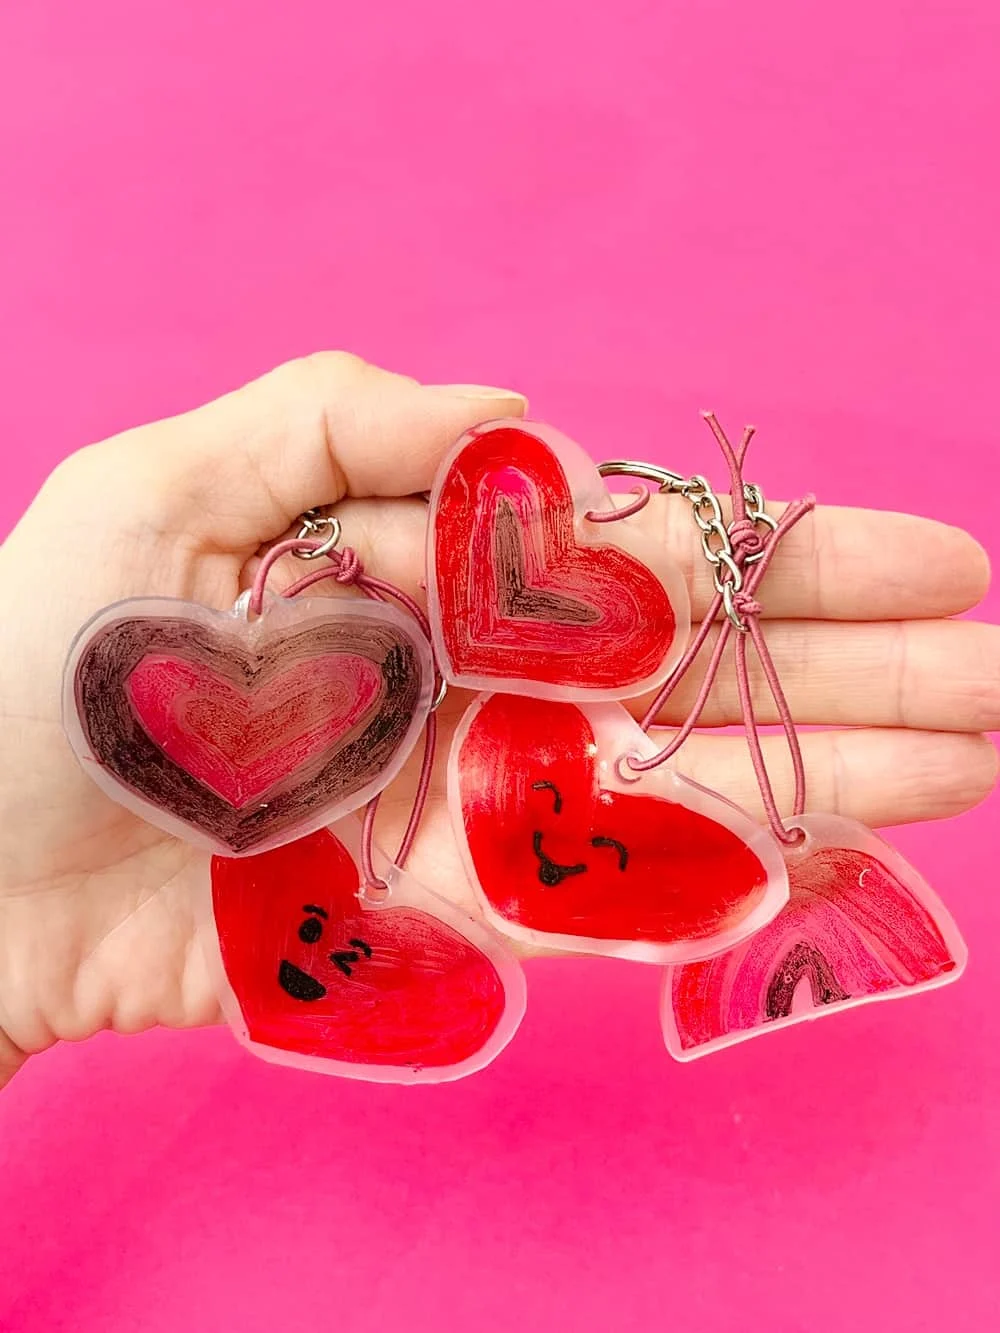
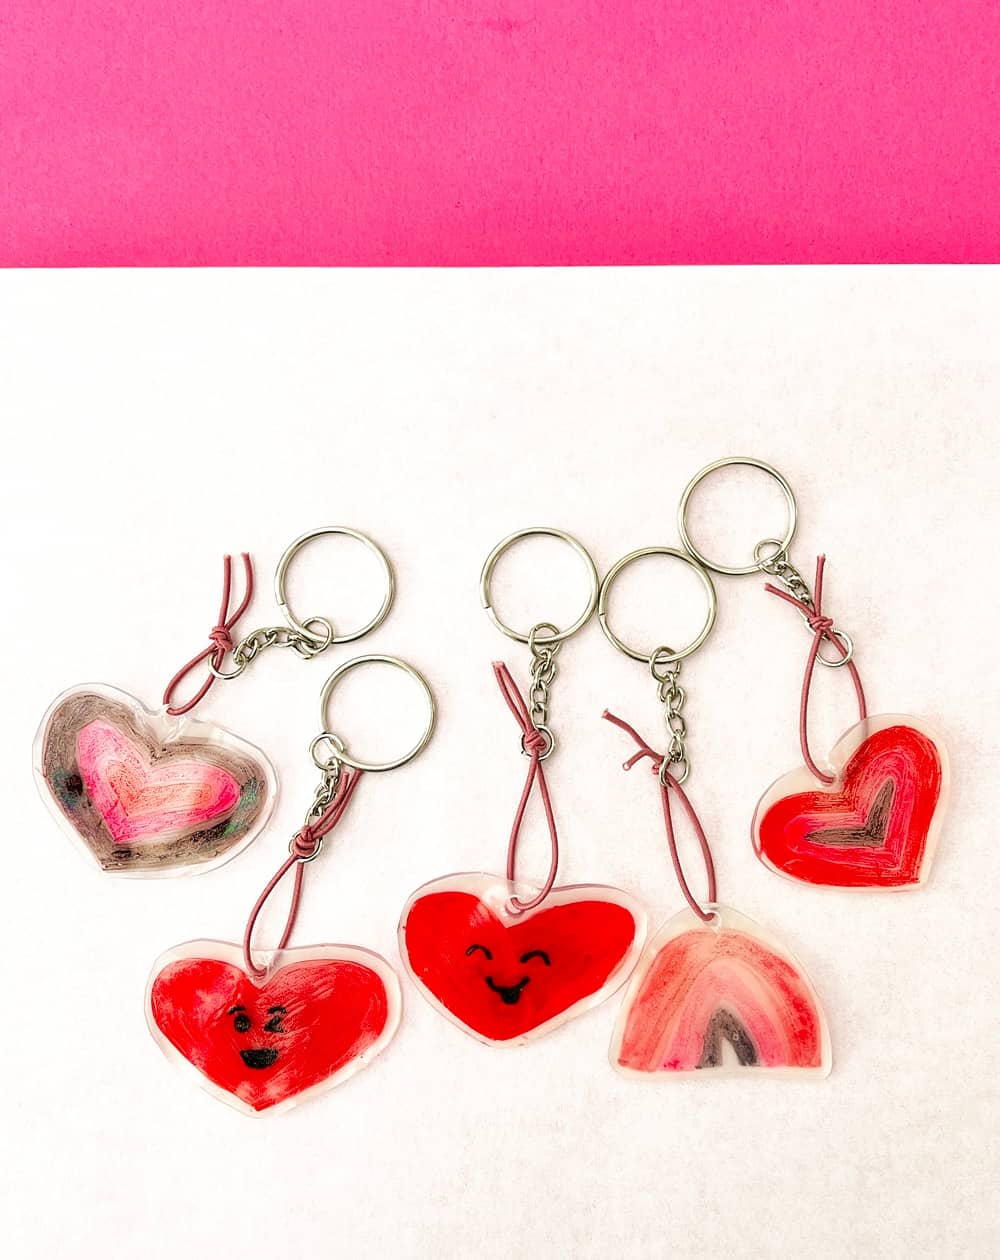
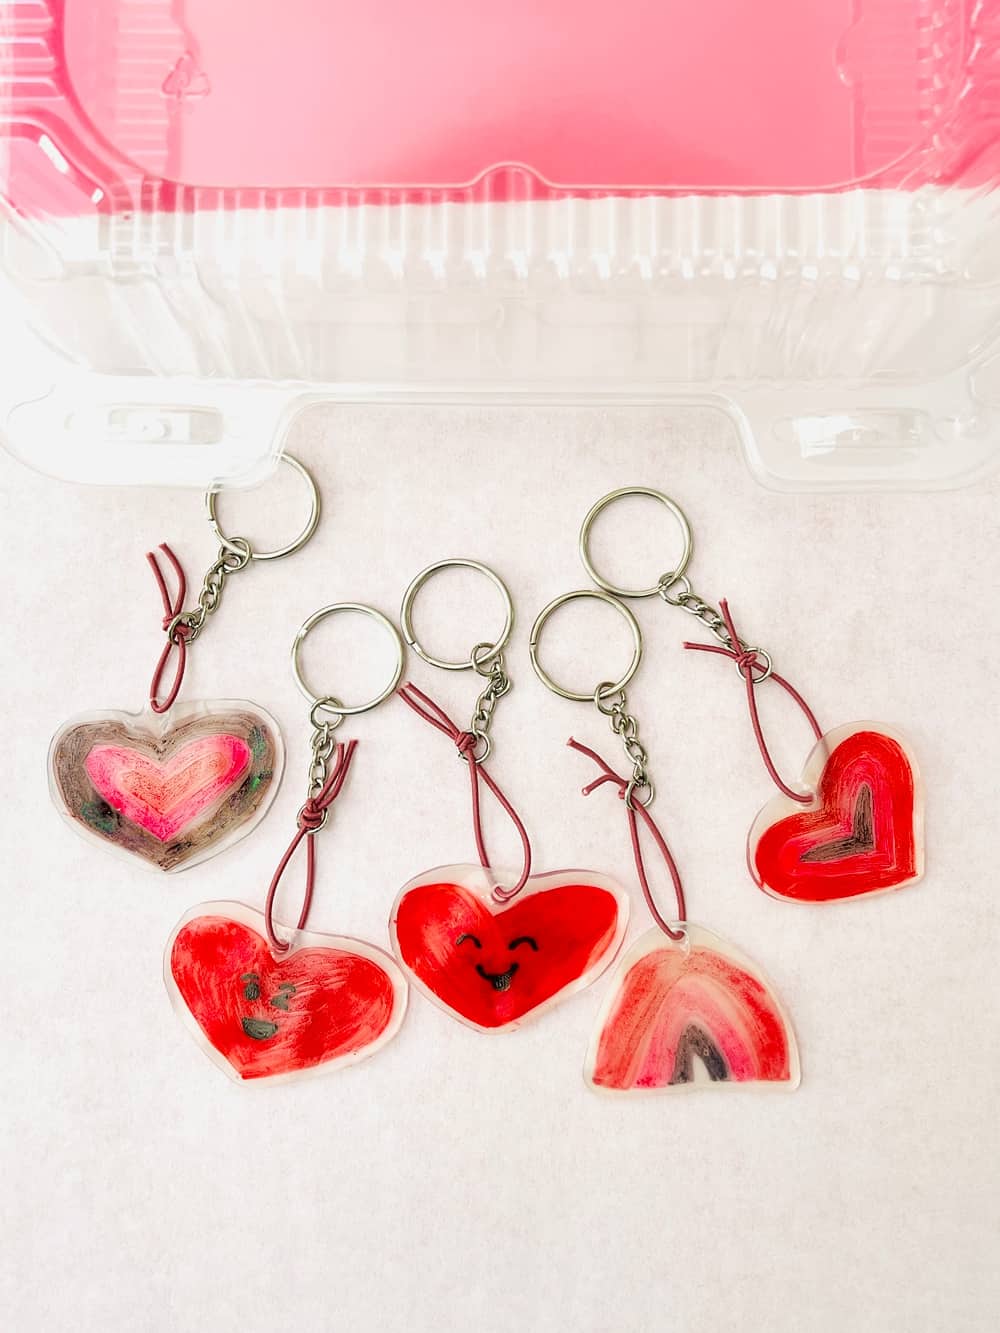
You will draw on the plastic as you would normally and then cut around it. The important note if making a keychain is using a hole puncher BEFORE the melting happens so you can then thread a string around a keychain ring. These make adorable Valentine’s Day favors or gifts!
What are the best markers for shrinky dinks?
The best results will be alcohol-based or acrylic markers like Sharpies or these from Arteza. You can also use paint markers or acrylic paint. Stay away from water based markers or waxy colored pencils or crayons that won’t hold the colors well after heating.
Having said that, we did notice some alcohol markers product more vibrant colors better than others so you will have to experiment with your set and see!
DIY Shrinky Dinks Valentine Keychains – Materials:
- Recycled #6 plastic (we used recycled food clamshell containers)
- Alcohol-based markers
- Heat gun
- Scissors
- Hole puncher
- String (optional)
- Keychain ring holders
- Baking Pan
- Thin stick like a chopstick

INSTRUCTIONS
Watch the video in this post to see how we made these keychains
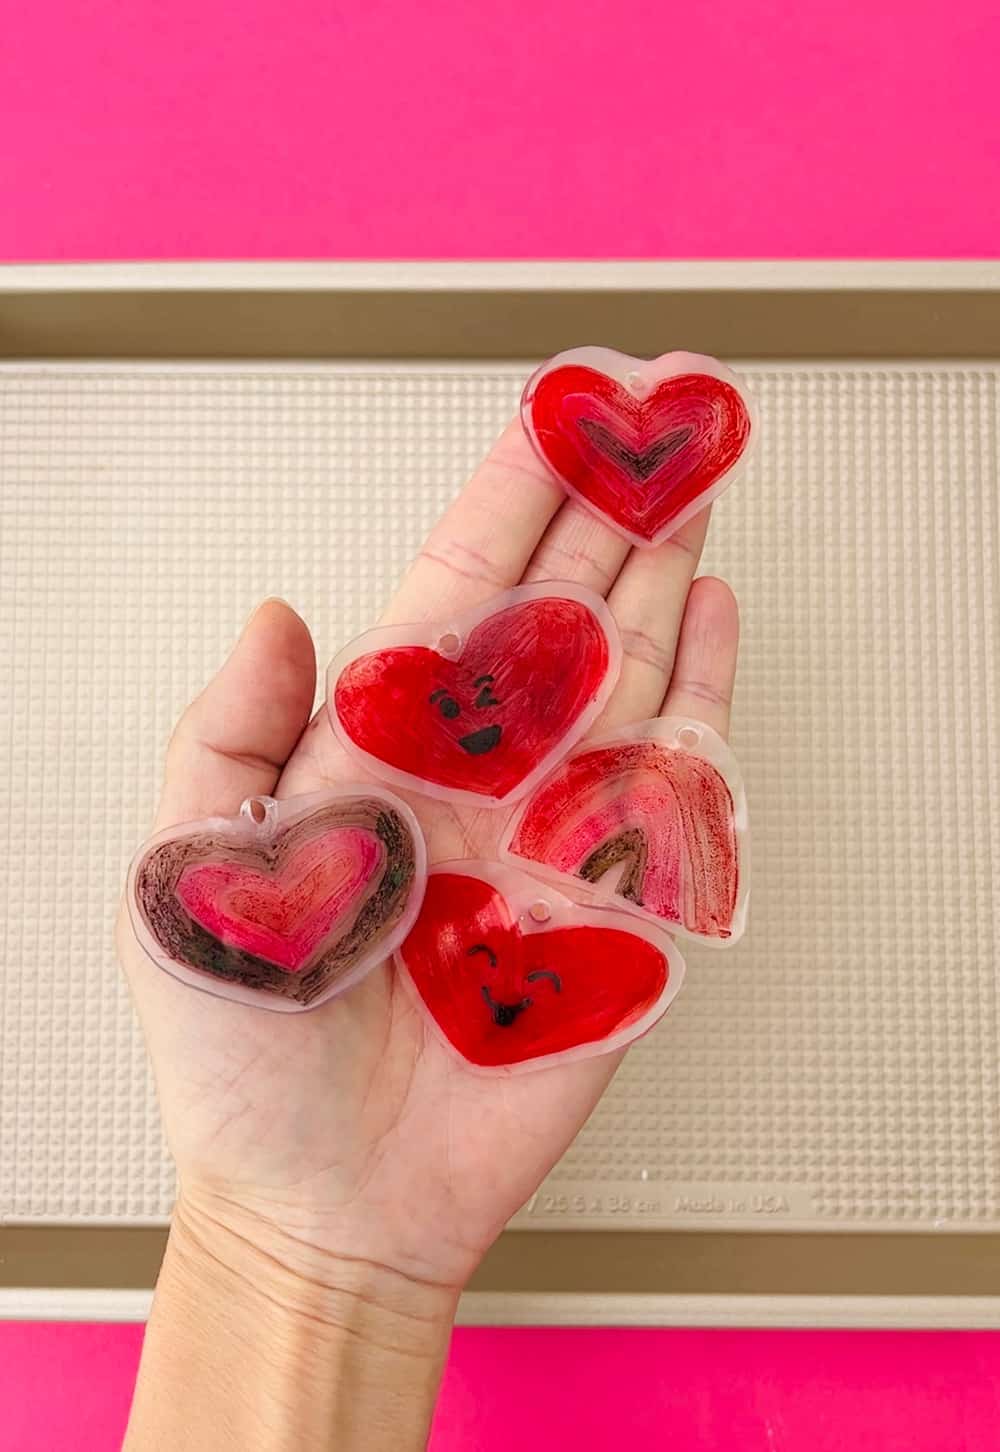
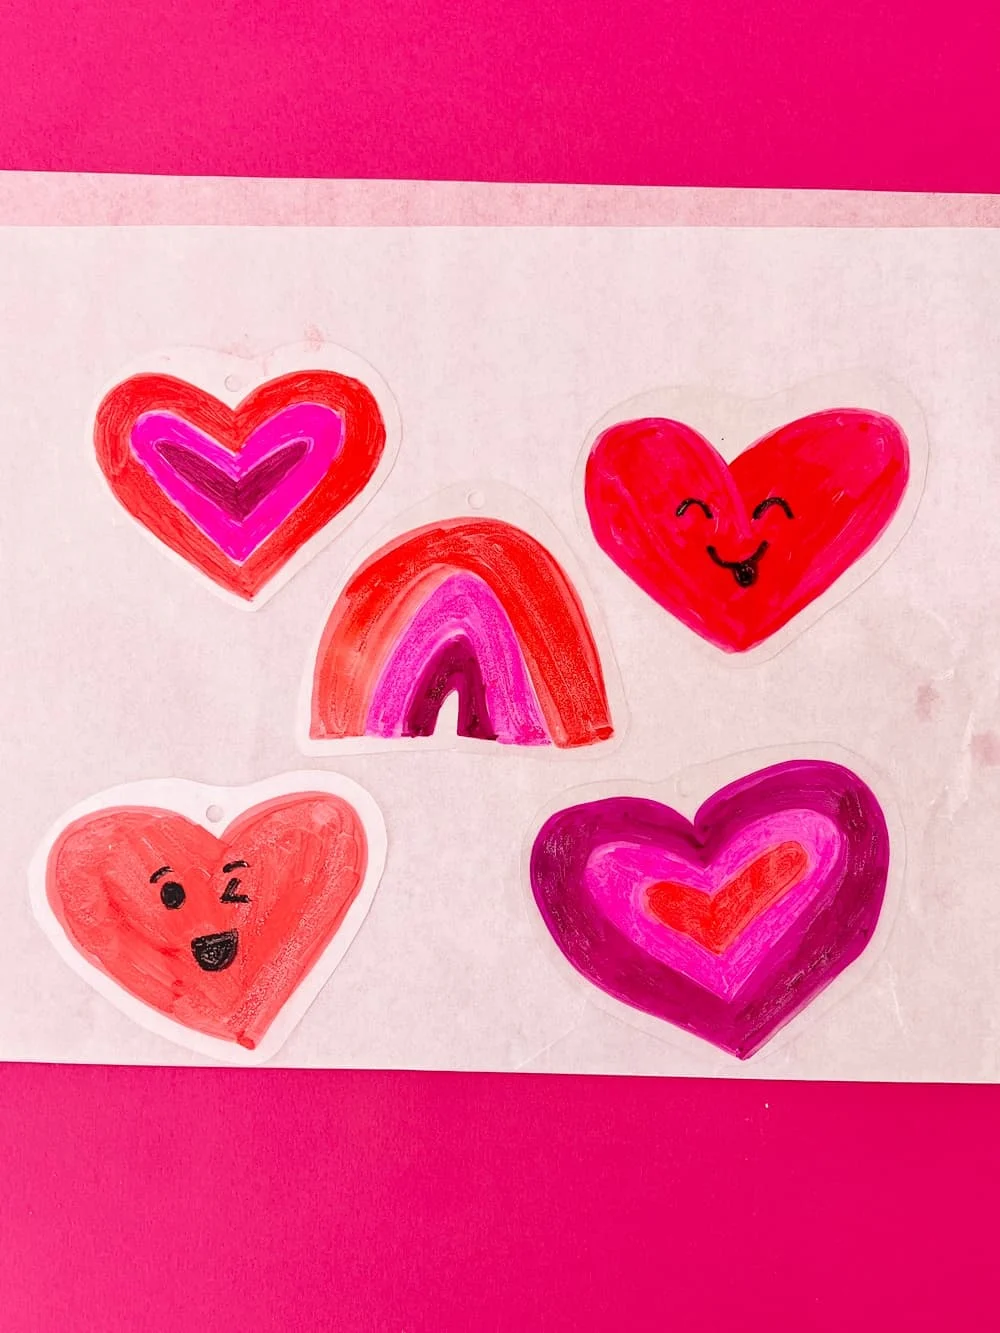
1. Cut out the flat part of your clamshell packaging and draw cute heart shapes on them. We went with a Valentine theme but you can really make any kind of art! 2. Cut around the shape leaving a small border of the plastic around as it will shrink and not be visible at all. Leave a larger border at the top where you will be hole punching to add your keychain ring later. Make sure you cut with rounded corners so the shrink dink art won't be sharp after melted. 3. Hole punch the top. 4. Lay your baking sheet on the table with your shrink art on top. Use a chopstick or skewer stick to hold the hole in place so the piece doesn't go flying when the heat gun is on. 5. Turn your heat gun on and in even rotations, go around your shrink dink art. It will first fold into itself and you may think it's getting warped but be patient and apply consistent even heat around. The piece will unshrink and unfold flat. The piece will be much smaller, about 1/3 the size and the plastic hard. If you are concerned about fumes note we did not notice this and the total shrinkage takes only 10 seconds. But please note if you are concerned please do this outside or in a ventilated area with a mask on. 6. Release the chopstick and if your piece at the top needs flattening, use a small spatial to flatten it. 7. Once your shrink art pieces are cooled you can tie a string around it like we did (pink string) and tie that around a keychain ring to make a cute Valentine's Day Keychain. These make cute Vday favors and gifts! WARNING: THE SHRINK ART WILL BE HOT TO THE TOUCH RIGHT AFTER USING THE HEAT GUN. LET IT COOL FOR A FEW MINUTES UNTIL YOU CAN PICK IT UP SAFELY OR USE A SPATULA TO REMOVE IT AND LAY IT ON ANOTHER BAKING SHEET TO COOL. DO NO LET KIDS USE THE HEAT GUN UNSUPERVISED OR TOUCH IT. ADULTS SHOULD BE USING THE HEAT GUN.DIY Shrinky Dinks Valentine Keychains - Check Out This Neat Trick!


Materials
Instructions
Notes
Paper Tube Valentine Bear Craft


Agnes Hsu is a mom of three and has been inspiring parents and kids to get creative with easy activities and family friendly recipes for over 10 years. She shares her love for creative play and kids food to her 2MM+ followers online. Agnes' commitment to playful learning and kindness has not only raised funds for charity but also earned features in prestigious nationwide publications.