Paper Plate Pumpkin Owl Craft With Printable Template
By using this site, you agree to our Terms of Use. This post may contain affiliate links. Read our disclosure policy.
Check out my Plaeful Printables for kids play and learning!
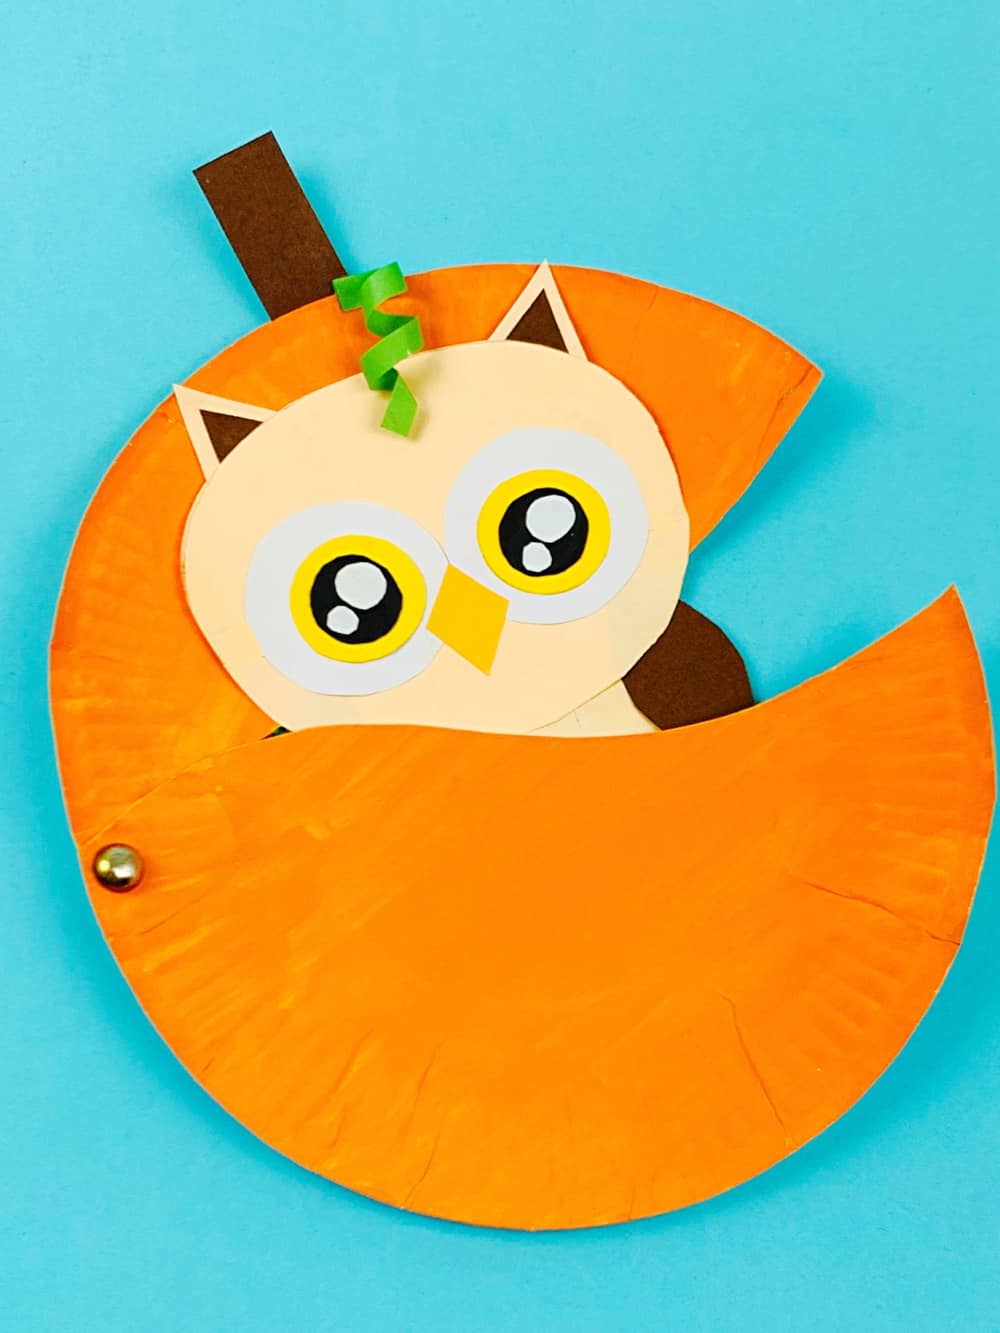
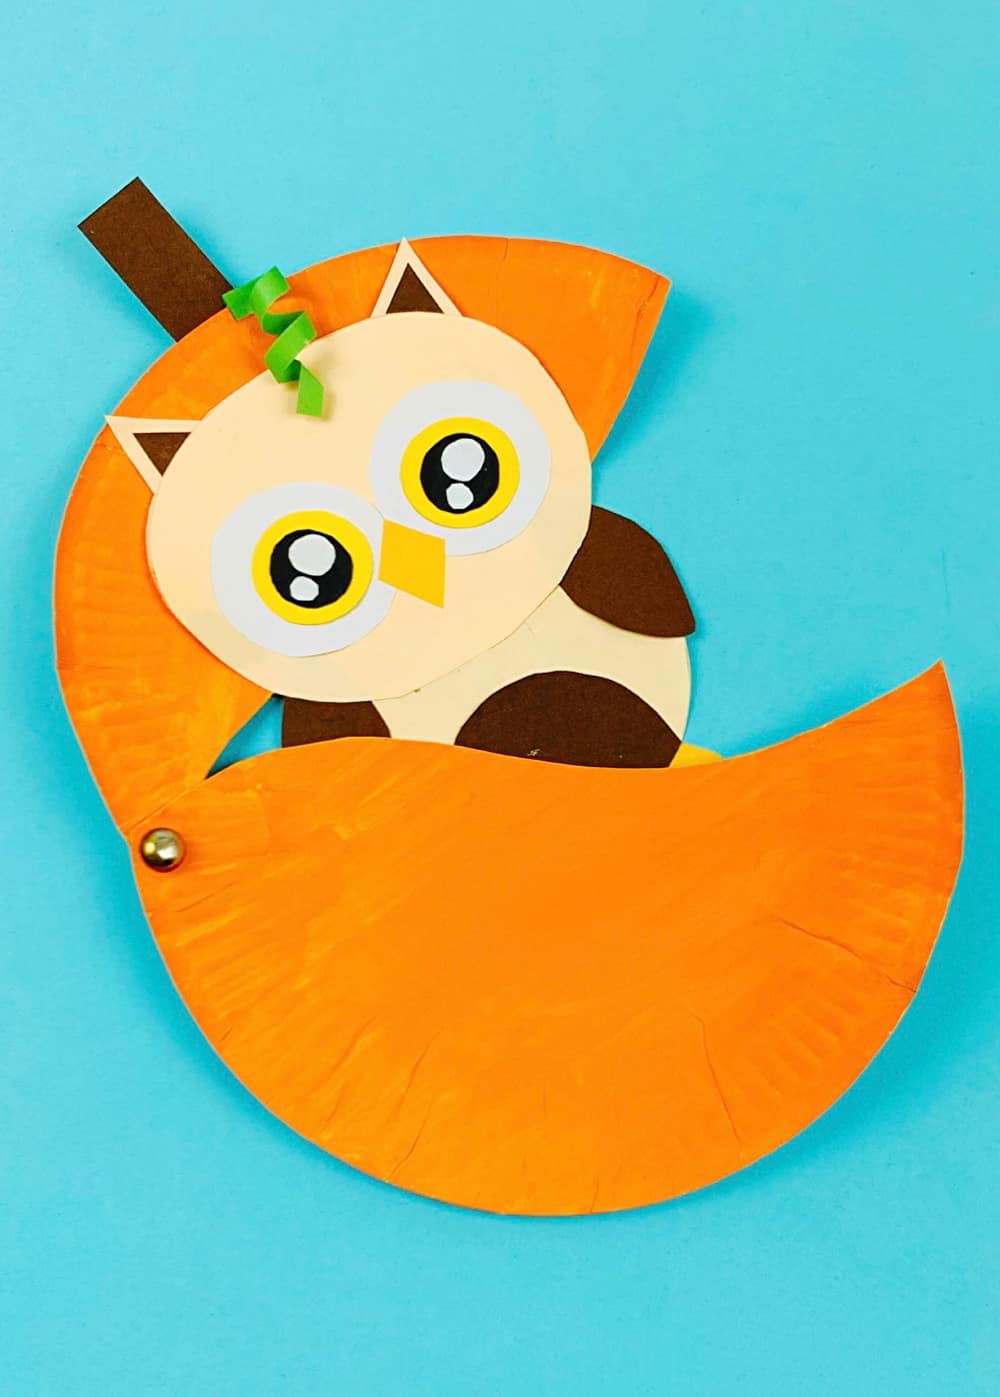
Have some fun fall crafting with this cute and easy paper plate Pumpkin Owl craft. Follow our easy-to-follow guide with printable template to combine the seasonal charm of pumpkins and the cuteness of owls!
Fall is almost here, and if you're like us, you're looking for fun, easy, and budget-friendly activities to keep the kids entertained. With the leaves changing and the weather cooling down, what could be better than getting some family crafting bonding time on? Today, we've got a super simple yet totally adorable owl craft that's perfect for little hands with a playful twist. Combining the charm of pumpkins with the cuteness of owls, we're making a paper plate Pumpkin Owl craft! This craft is perfect for a fall afternoon in, or even as a pumpkin themed activity for playdates or classroom projects. So gather your craft supplies and let’s dive into this fun and simple fall activity that's sure to put everyone into a festive autumn mood.
Paper Plate Pumpkin Owl Craft - Materials
- Paper plate
- Orange paint
- Green, cream, brown, yellow, black construction paper
- A brad fastener
- Our free printable owl template (link below in craft instruction card)
- Scissors
- Glue
- Paintbrush
Step-by-Step Instructions:
Preparing Your Pumpkin Plate:
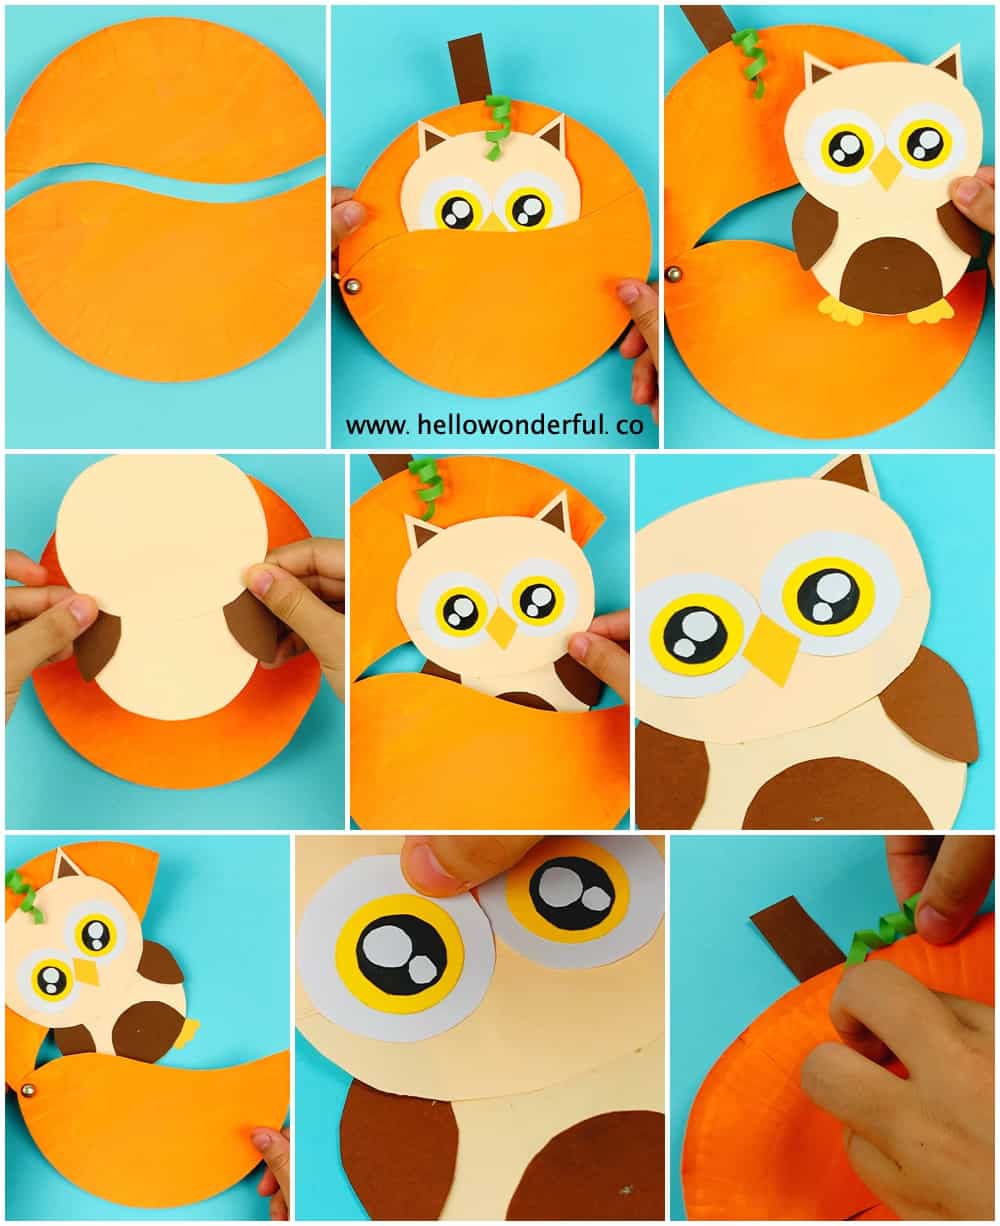
- Cut the Paper Plate: Take a standard paper plate and cut it in half in a wavy line. You'll use both halves, so keep them handy.
- Paint it Orange: Use your paintbrush to coat each half of the paper plate with orange paint. This will be the body of your pumpkin. Set them aside to dry.
- Attach the Halves: Once the paint has dried, overlap the two halves slightly and use a brad fastener through the sides to connect them. Make sure the brad is loose enough to allow movement; you'll be opening and closing your pumpkin.
Making the Stem:
- Cut and Attach: Cut a small rectangle out of brown paper for the stem. Cut skinny strip of green paper for the leaves and curl with a pencil. Glue the stem and leaves to the top of your pumpkin.
Creating Your Owl:
- Print and Cut: Download our free owl template and print it out. Use them as templates to make the owl. Use brown, cream yellow/orange papers for the details and body.
- Optional Customizations: If you wish, use markers or other decorations to add unique features to your owl. You can add large googly eyes for a whimsical touch or color in feathers to give it a textured appearance.
- Assemble the Owl: Use glue to assemble your owl together.
Bringing It All Together:
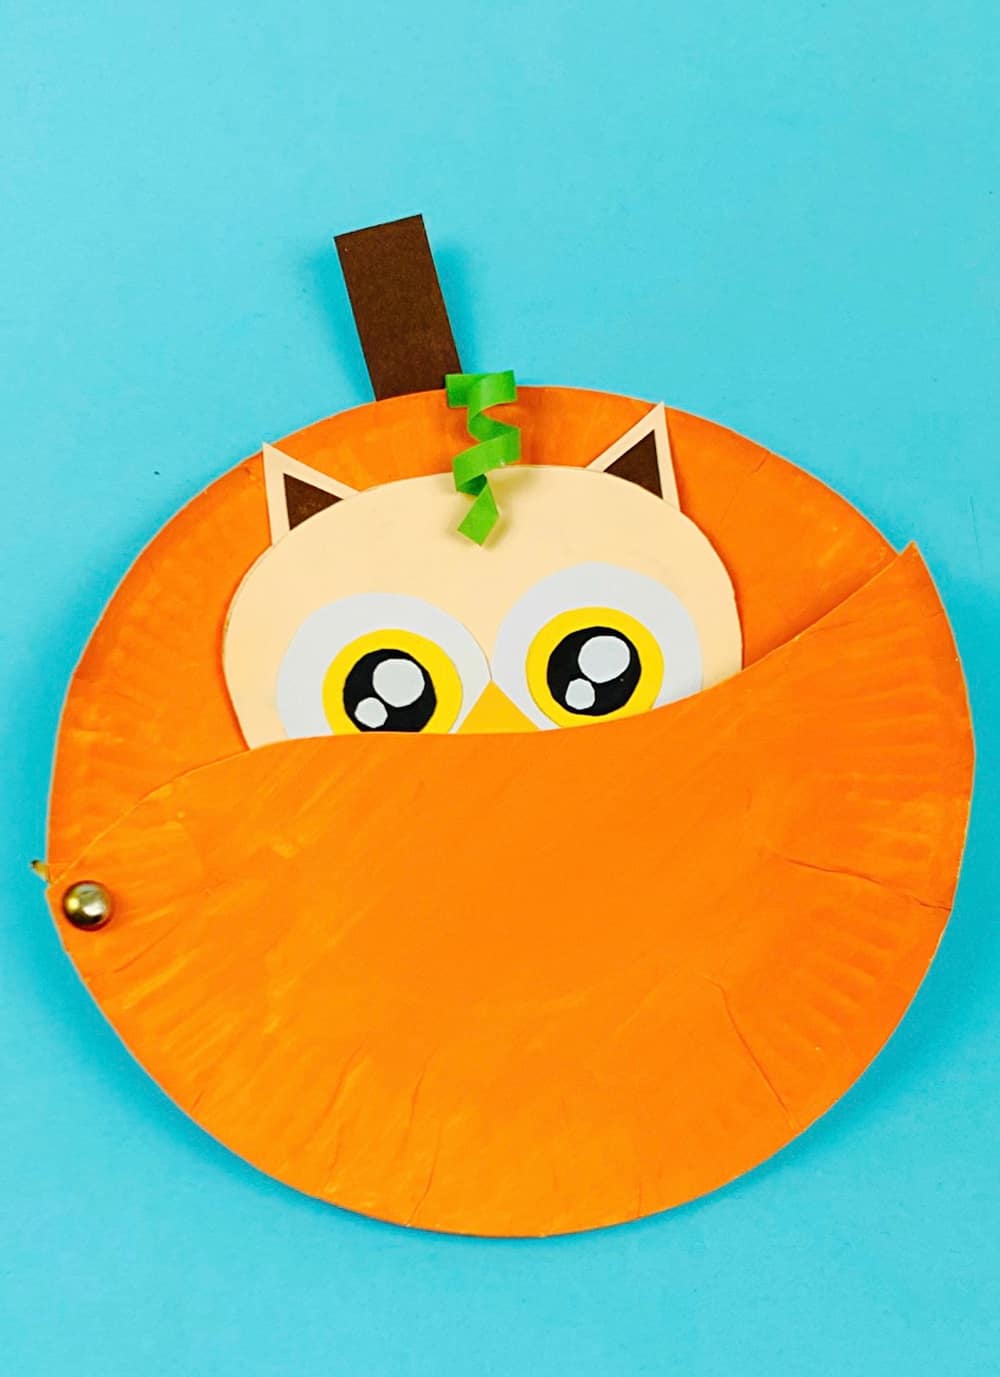
- Glue the Owl: Attach your completed owl to the top part of your pumpkin plate, right below the stem, using glue. Make sure it is securely in place.
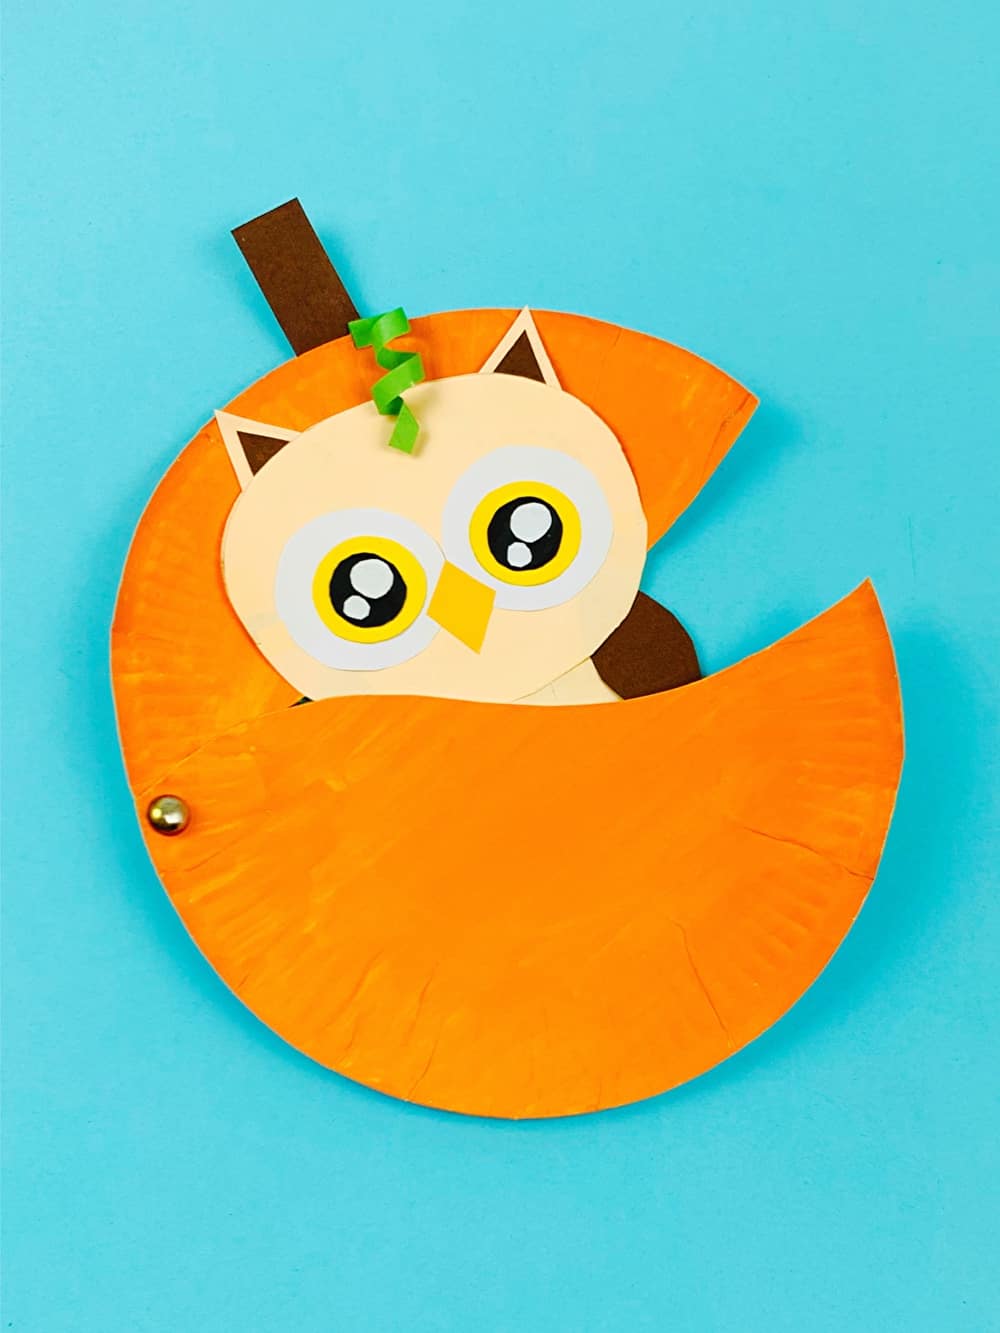
- Test the Movement: Once the glue has dried, you can gently open and close the pumpkin halves. The brad should allow you to move them up and down, making it look like your owl is popping out of a pumpkin!
Final Thoughts
And there you have it—a delightful Pumpkin Owl craft that's sure to be a hit this autumn season. Whether you're looking for a classroom project or a fun weekend activity to do with your kids, this craft ticks all the boxes. Happy fall crafting! 🎃🦉
Paper Plate Pumpkin Owl Craft With Printable Template

Materials
- Paper plate
- Orange paint
- Green, cream, brown, yellow, black construction paper
- A brad fastener
- Our free printable owl template
- Scissors
- Glue
- Paintbrush
Instructions
Preparing Your Pumpkin Plate:
- Cut the Paper Plate: Take a standard paper plate and cut it in half in a wavy line. You'll use both halves, so keep them handy.
- Paint it Orange: Use your paintbrush to coat each half of the paper plate with orange paint. This will be the body of your pumpkin. Set them aside to dry.
- Attach the Halves: Once the paint has dried, overlap the two halves slightly and use a brad fastener through the sides to connect them. Make sure the brad is loose enough to allow movement; you'll be opening and closing your pumpkin.
Making the Stem:
- Cut and Attach: Cut a small rectangle out of brown paper for the stem. Cut skinny strip of green paper for the leaves and curl with a pencil. Glue the stem and leaves to the top of your pumpkin.
Creating Your Owl:
- Print and Cut: Download our free owl template and print it out. Use them as templates to make the owl. Use brown, cream yellow/orange papers for the details and body.
- Optional Customizations: If you wish, use markers or other decorations to add unique features to your owl. You can add large googly eyes for a whimsical touch or color in feathers to give it a textured appearance.
- Assemble the Owl: Use glue to assemble your owl together.
Bringing It All Together:
- Glue the Owl: Attach your completed owl to the top part of your pumpkin plate, right below the stem, using glue. Make sure it is securely in place.
- Test the Movement: Once the glue has dried, you can gently open and close the pumpkin halves. The brad should allow you to move them up and down, making it look like your owl is popping out of a pumpkin!