

By using this site, you agree to our Terms of Use. This post may contain affiliate links. Read our disclosure policy.
Check out my Plaeful Printables for kids play and learning!
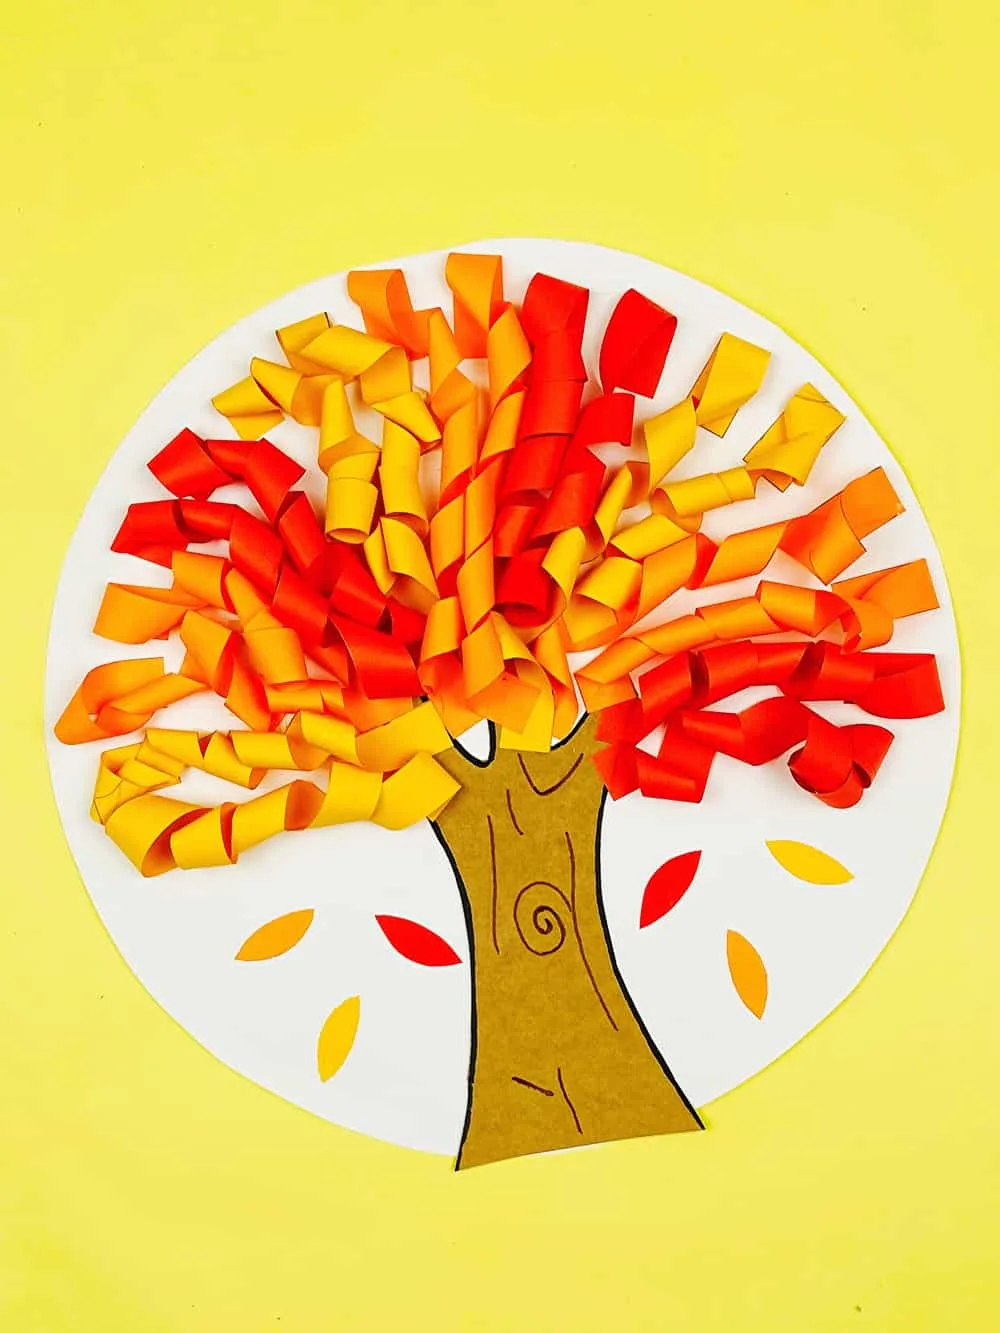
Discover how to make a colorful fall paper tree to celebrate autumn with our simple printable template. This easy and fun craft is fun for kids while bringing the magic of fall indoors!
Fall is the season when leaves change into bright colors like red, orange, and yellow. My kids are always excited for the pumpkin treats and changing seasons! As the leaves outside get colorful, why not make your own colorful fall paper tree inside? This fun autumn craft is great for kids. It lets them be creative and also enjoy the special things about fall. We’ll show you how to make this easy paper tree using a simple template that you can print out. It’s a perfect way for kids to have fun and celebrate the fall season.
Fall Paper Tree Materials:
- Printable fall tree and leaves template GET THE PRINTABLE
- Brown, red, orange, yellow paper
- Colored paper for the background
- Scissors
- Glue
- Brown marker (optional)
GET THE FALL TREE PRINTABLE


GET THE FALL TREE PRINTABLE
INSTRUCTIONS
1. Print out the templates and cut out them out.
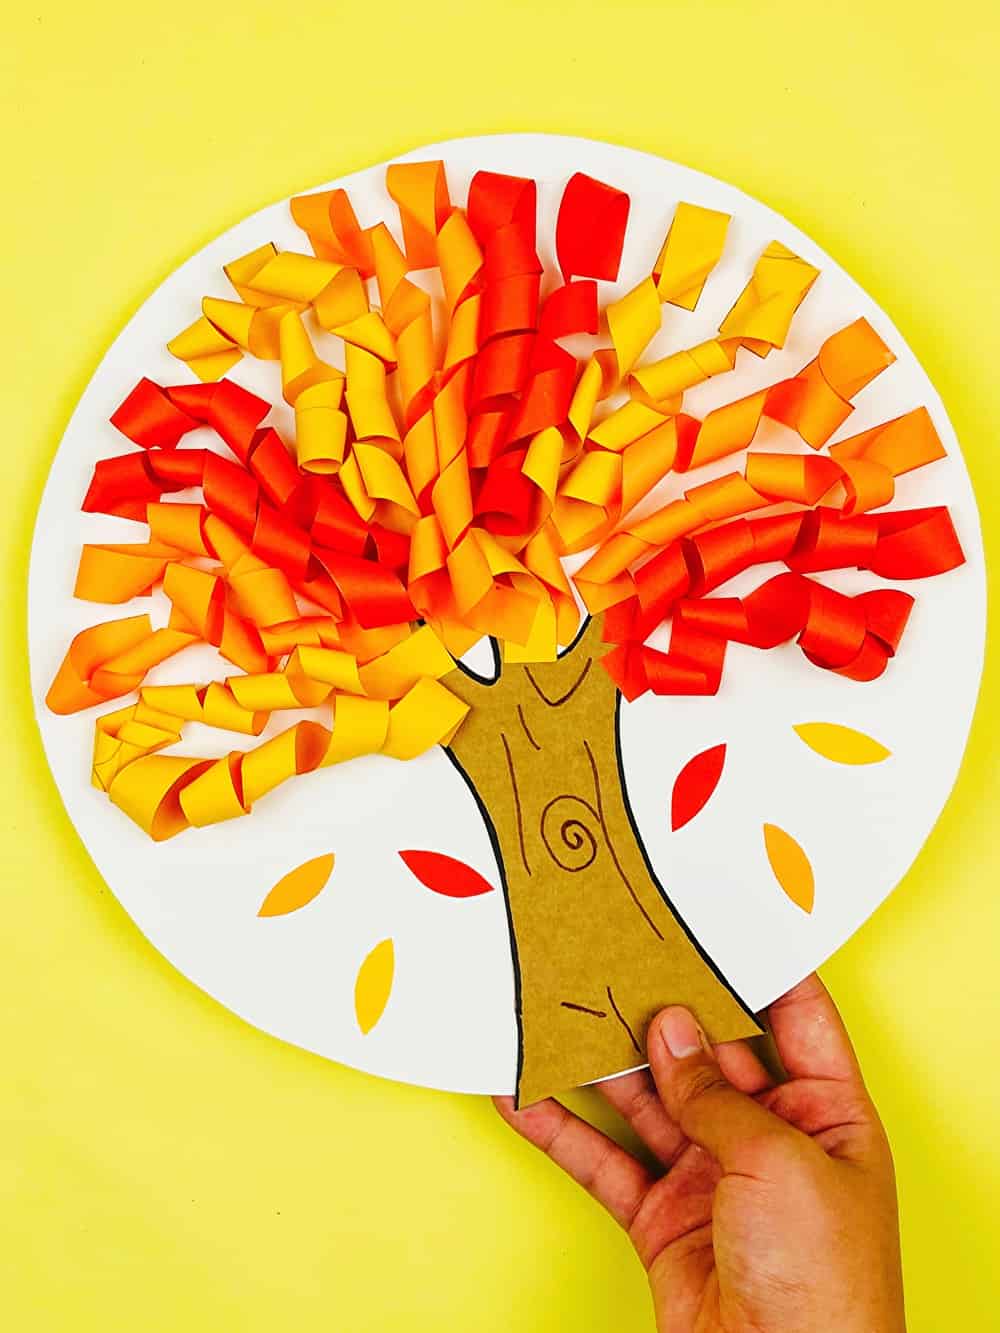
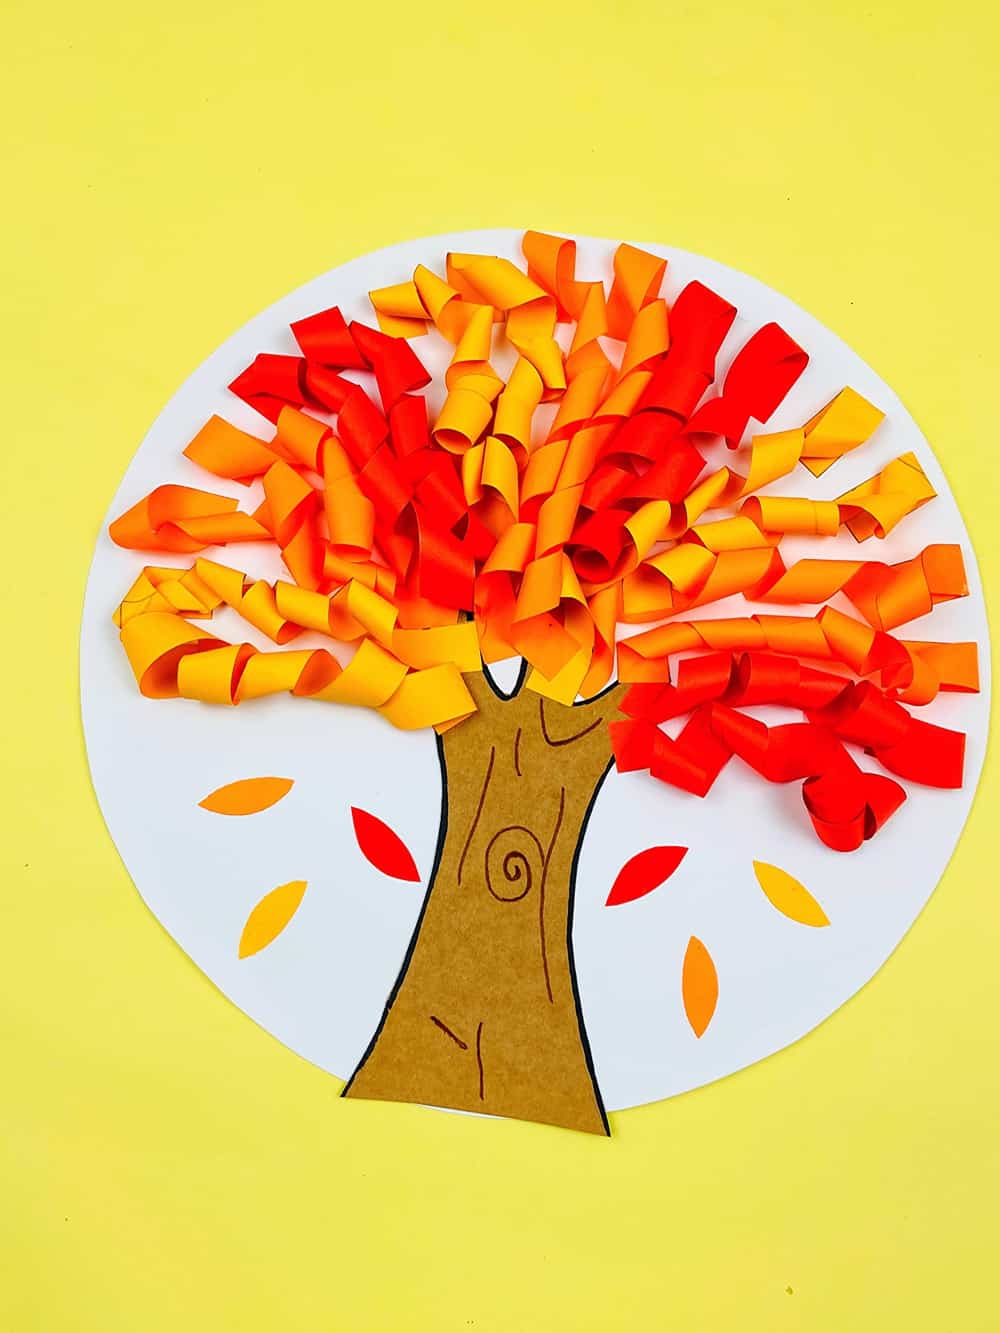
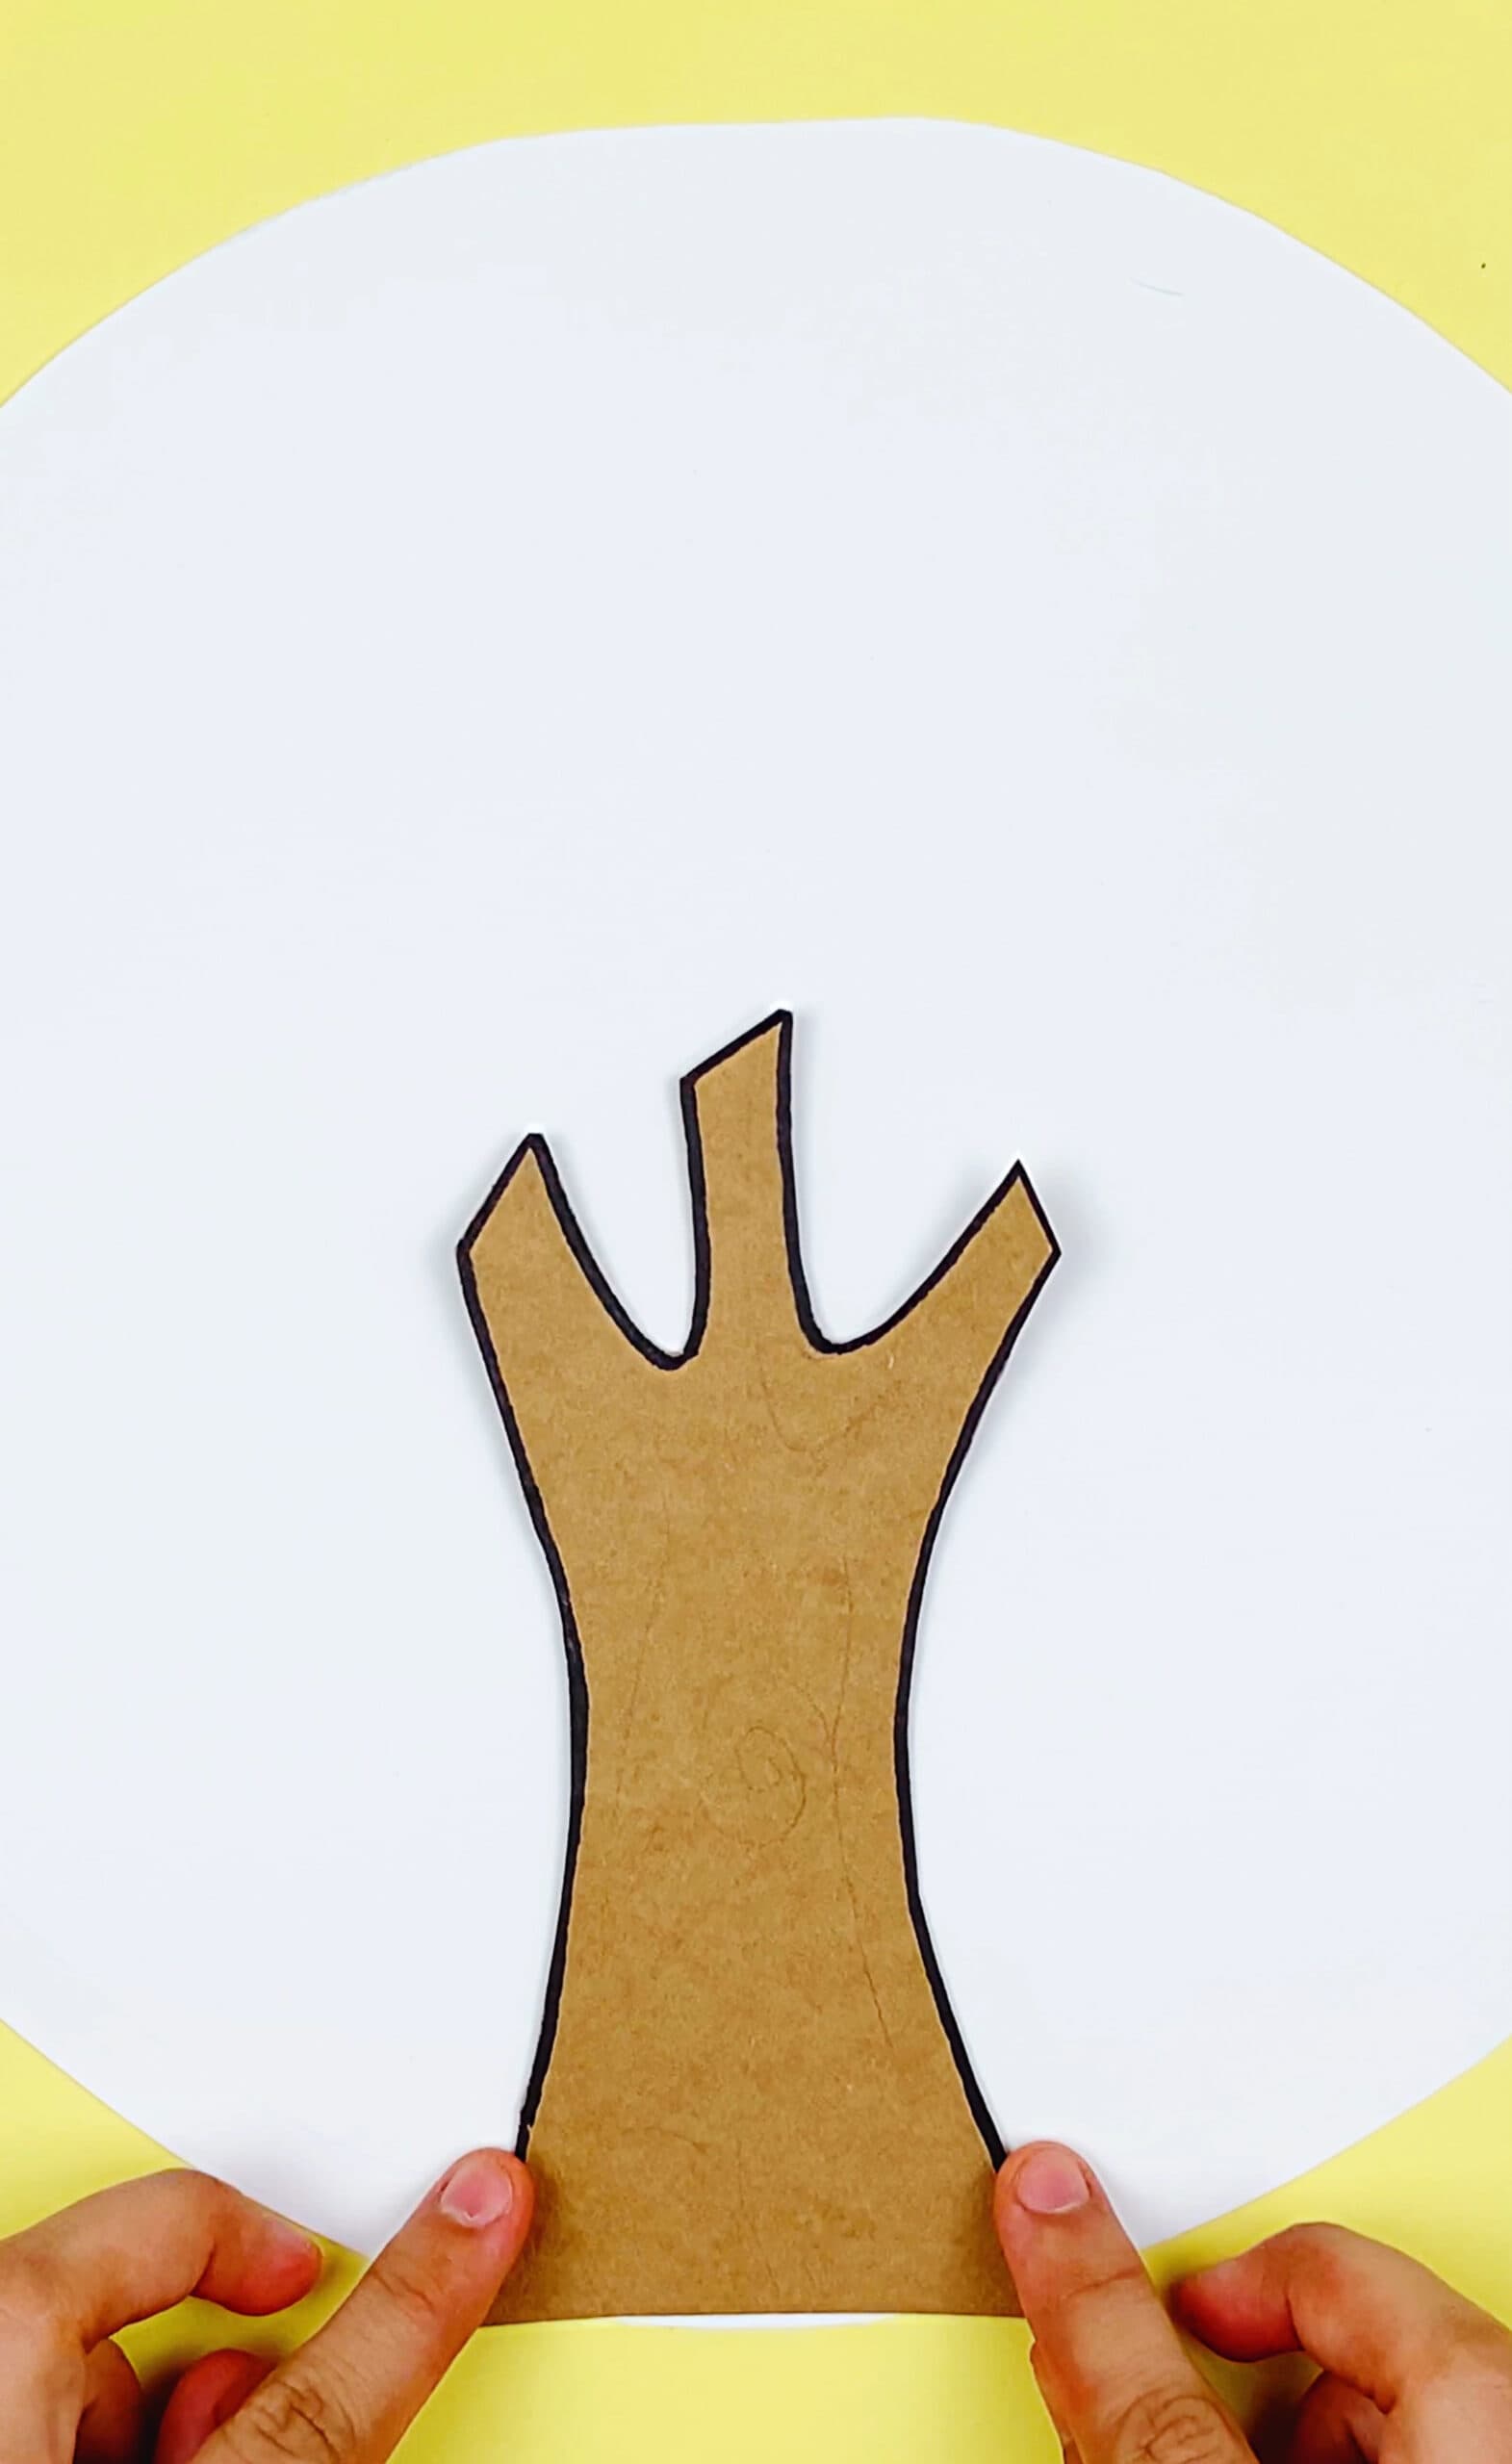
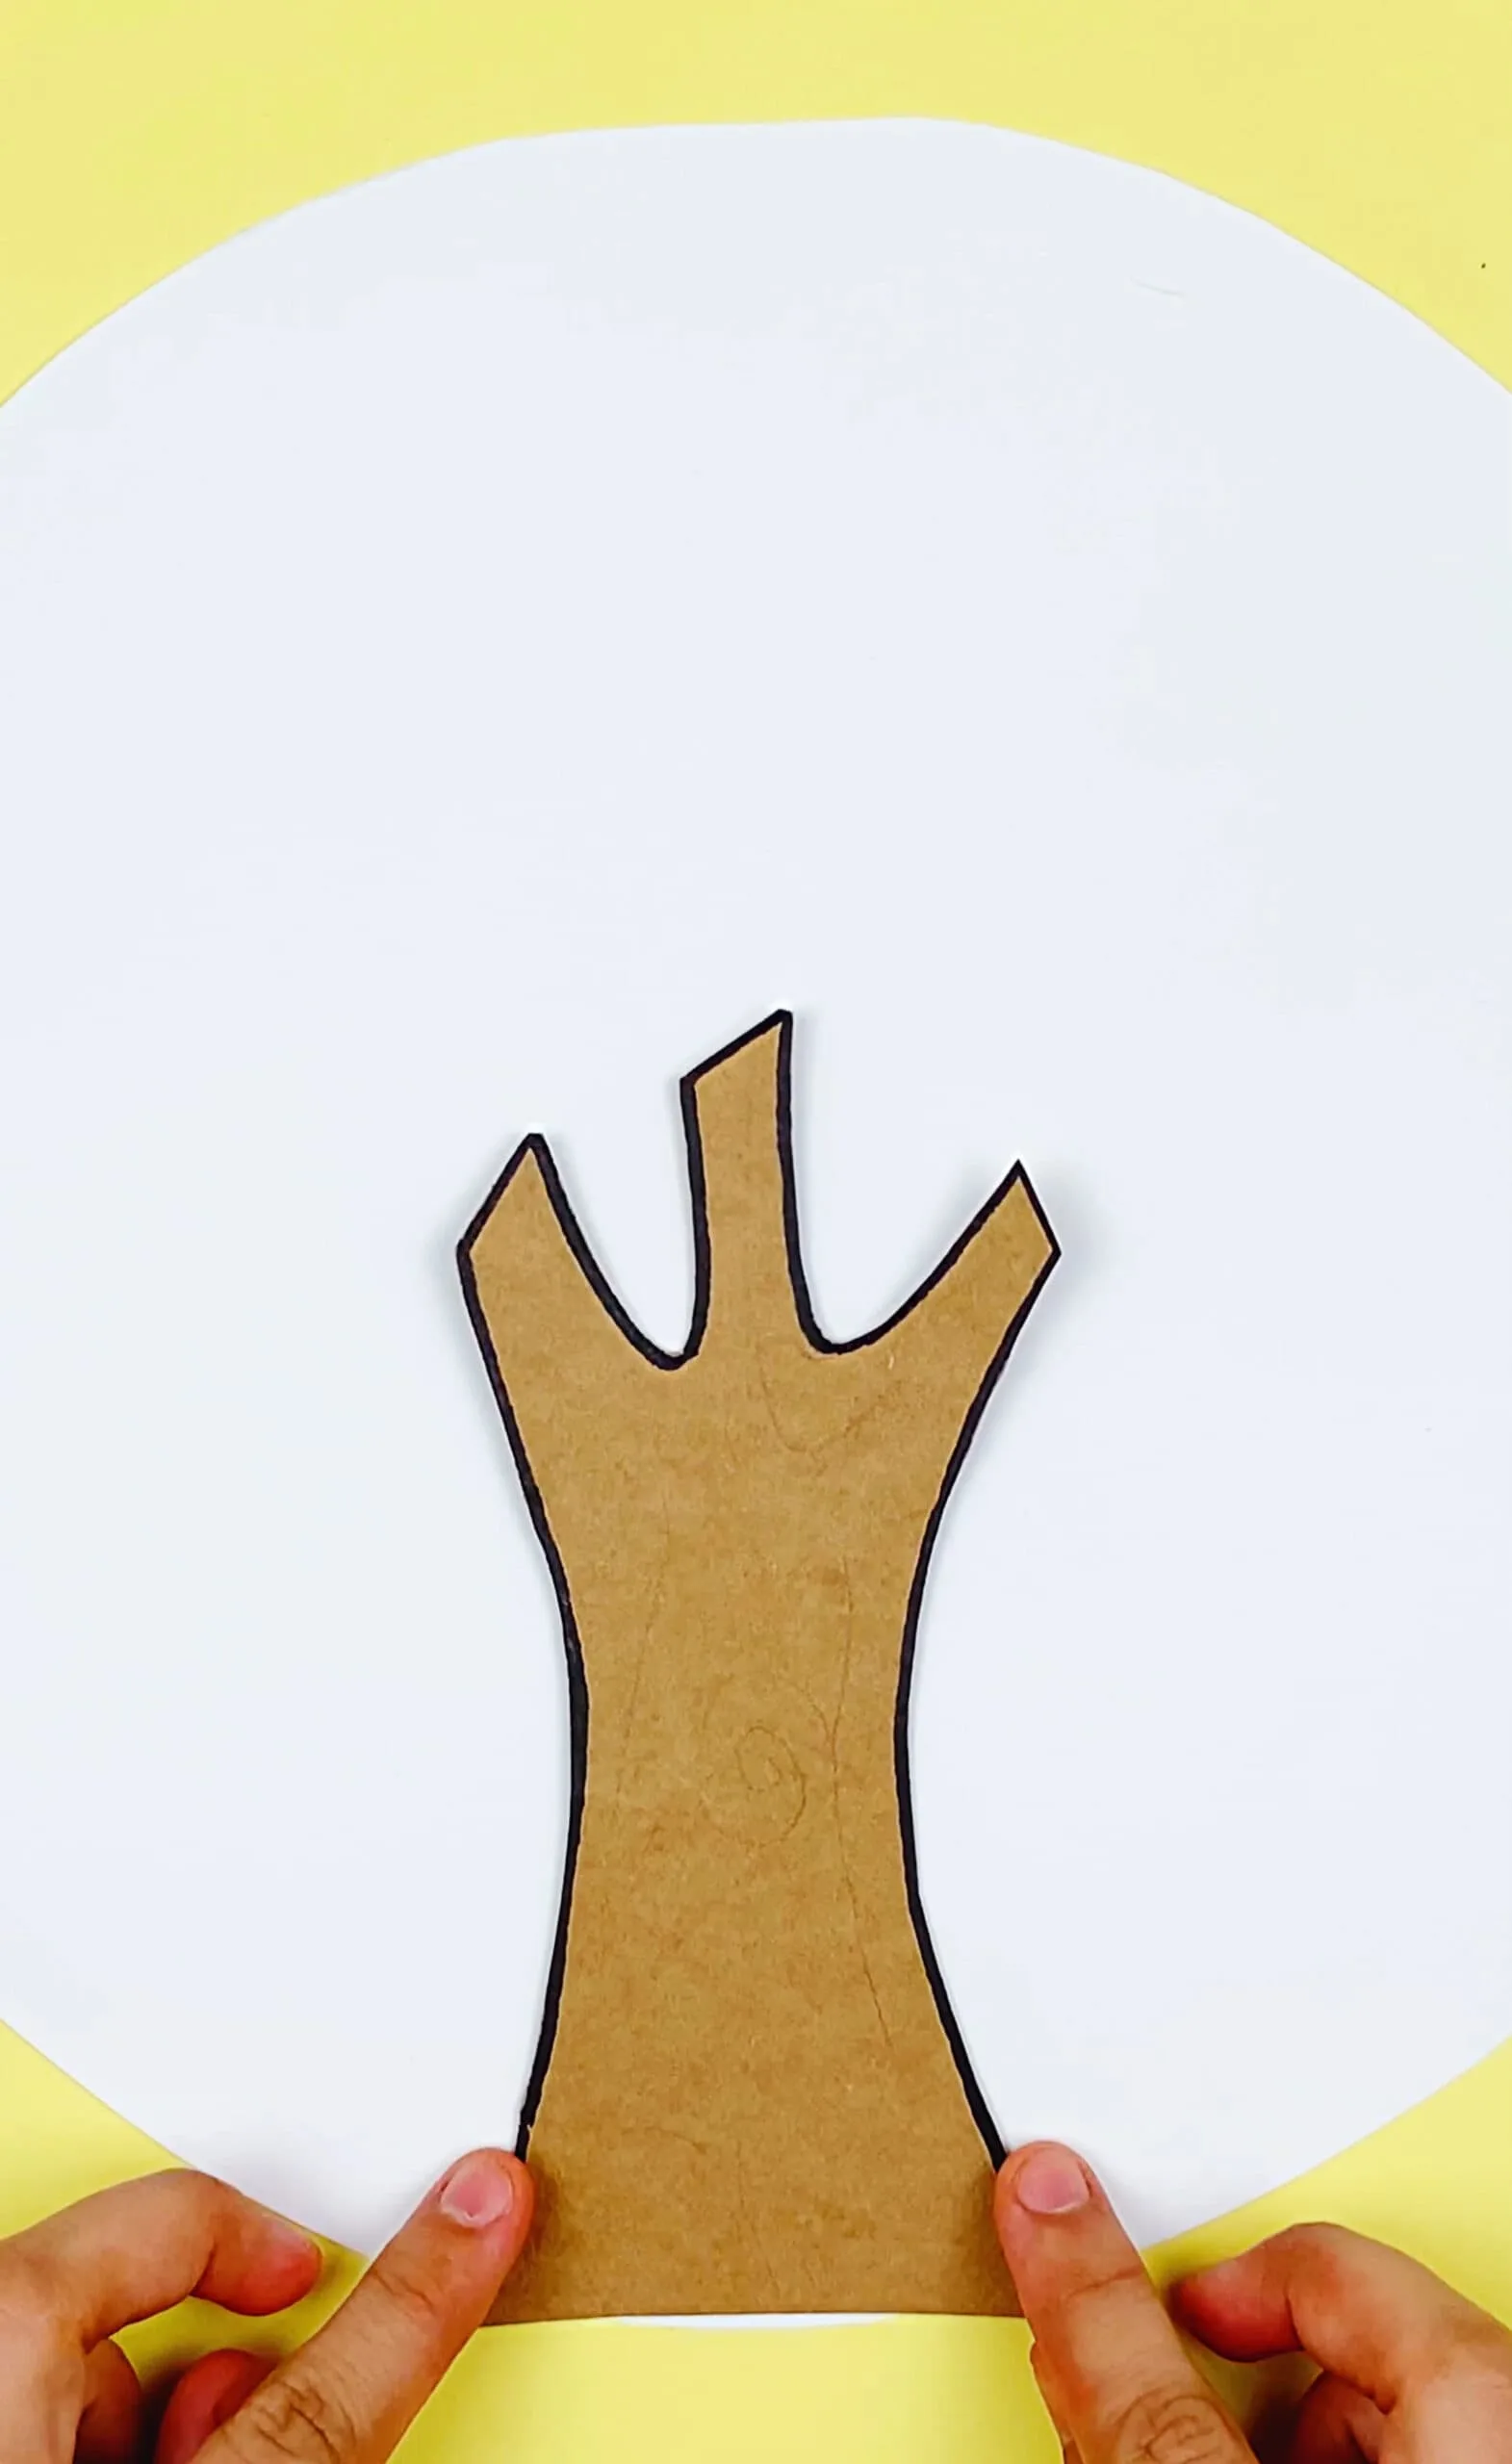
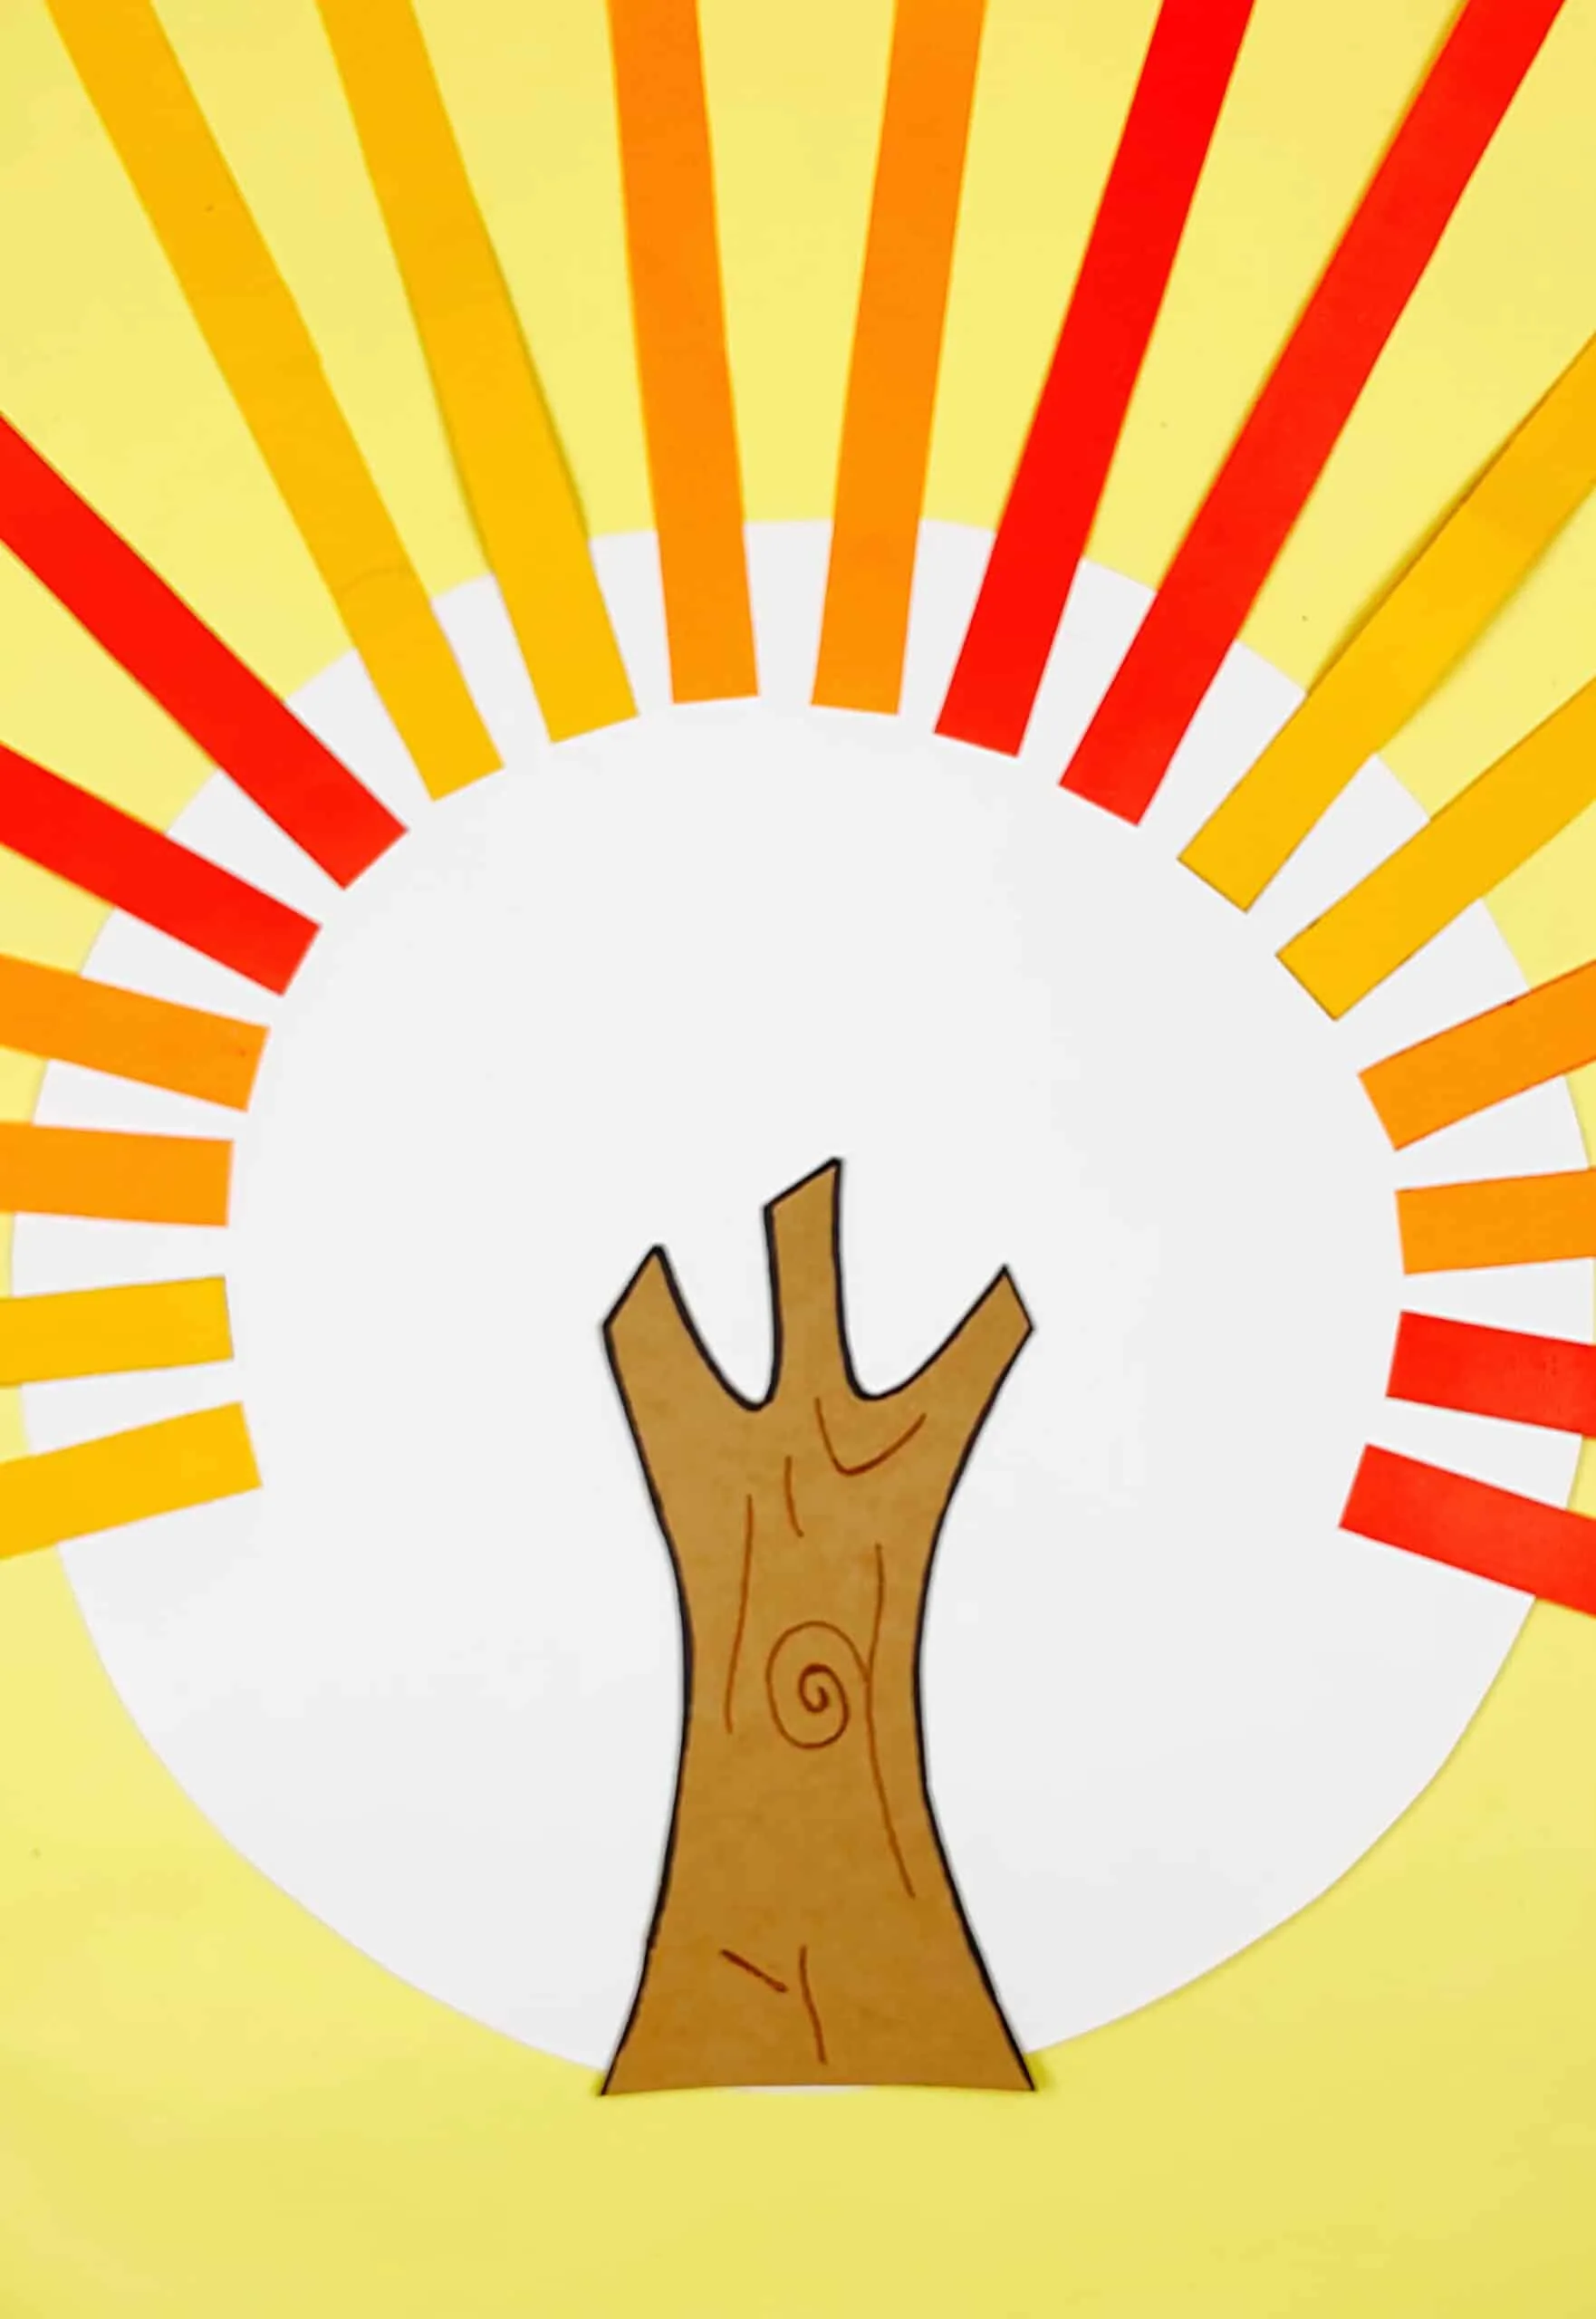
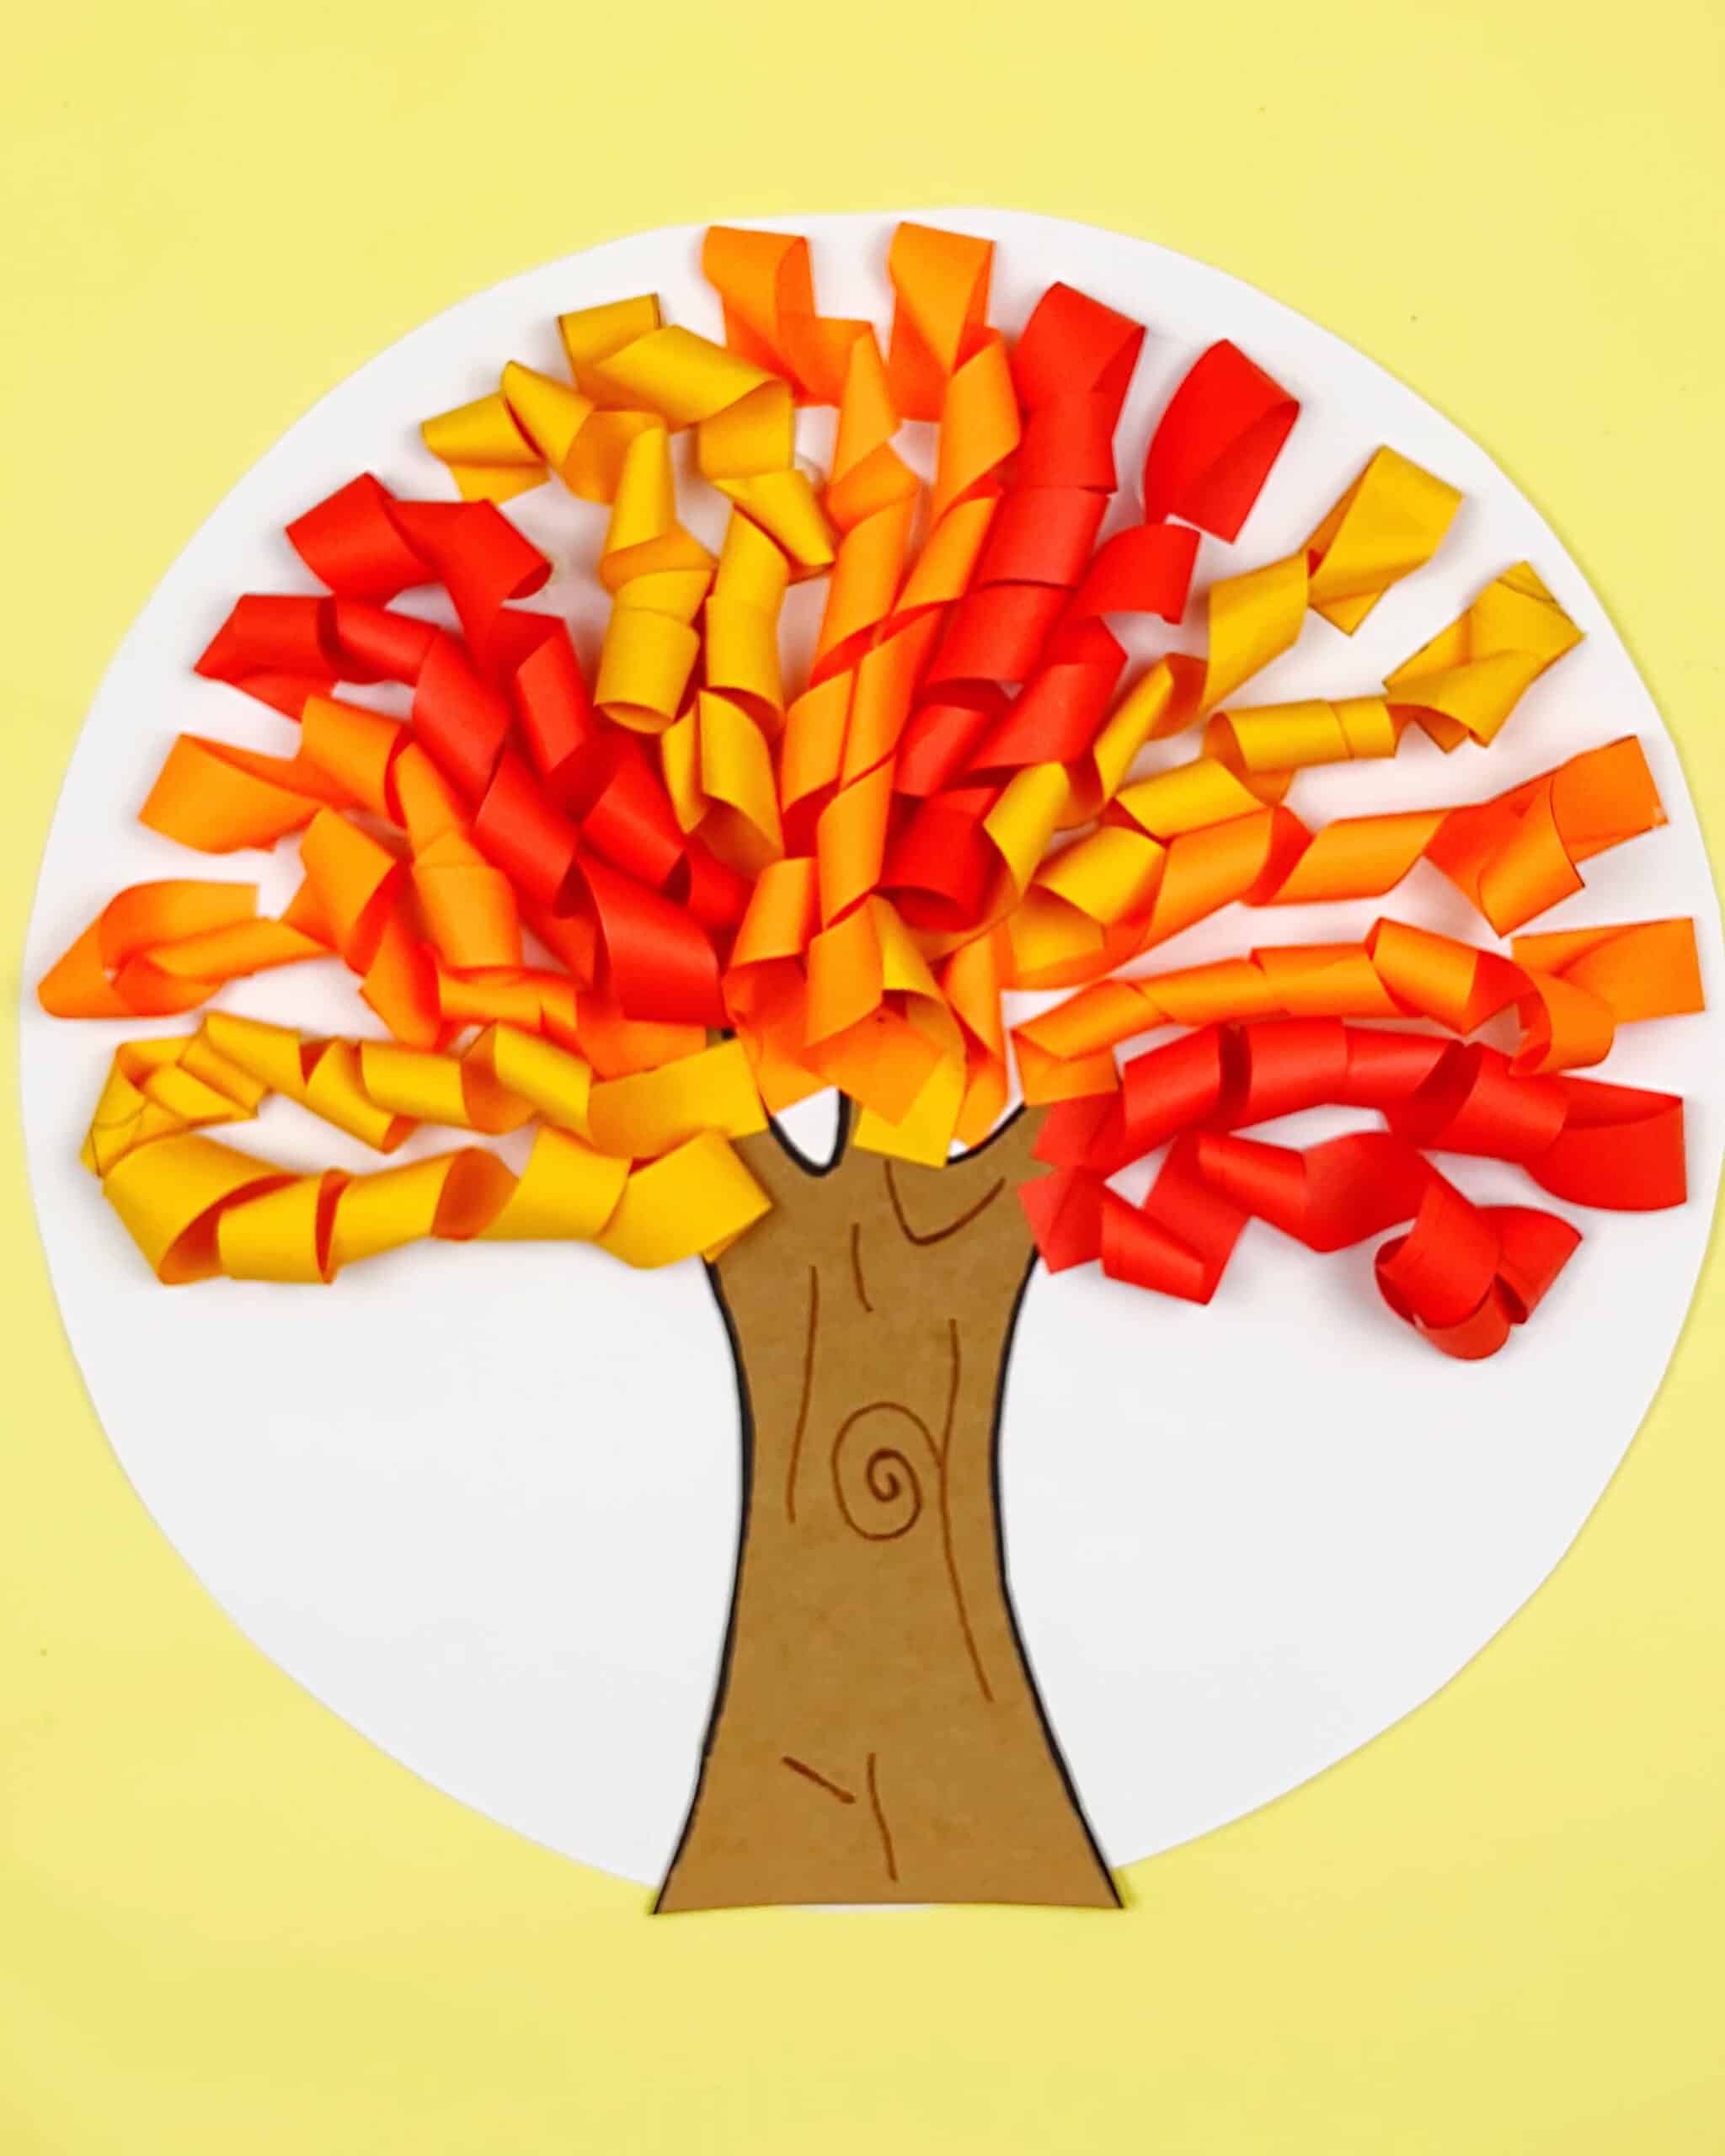
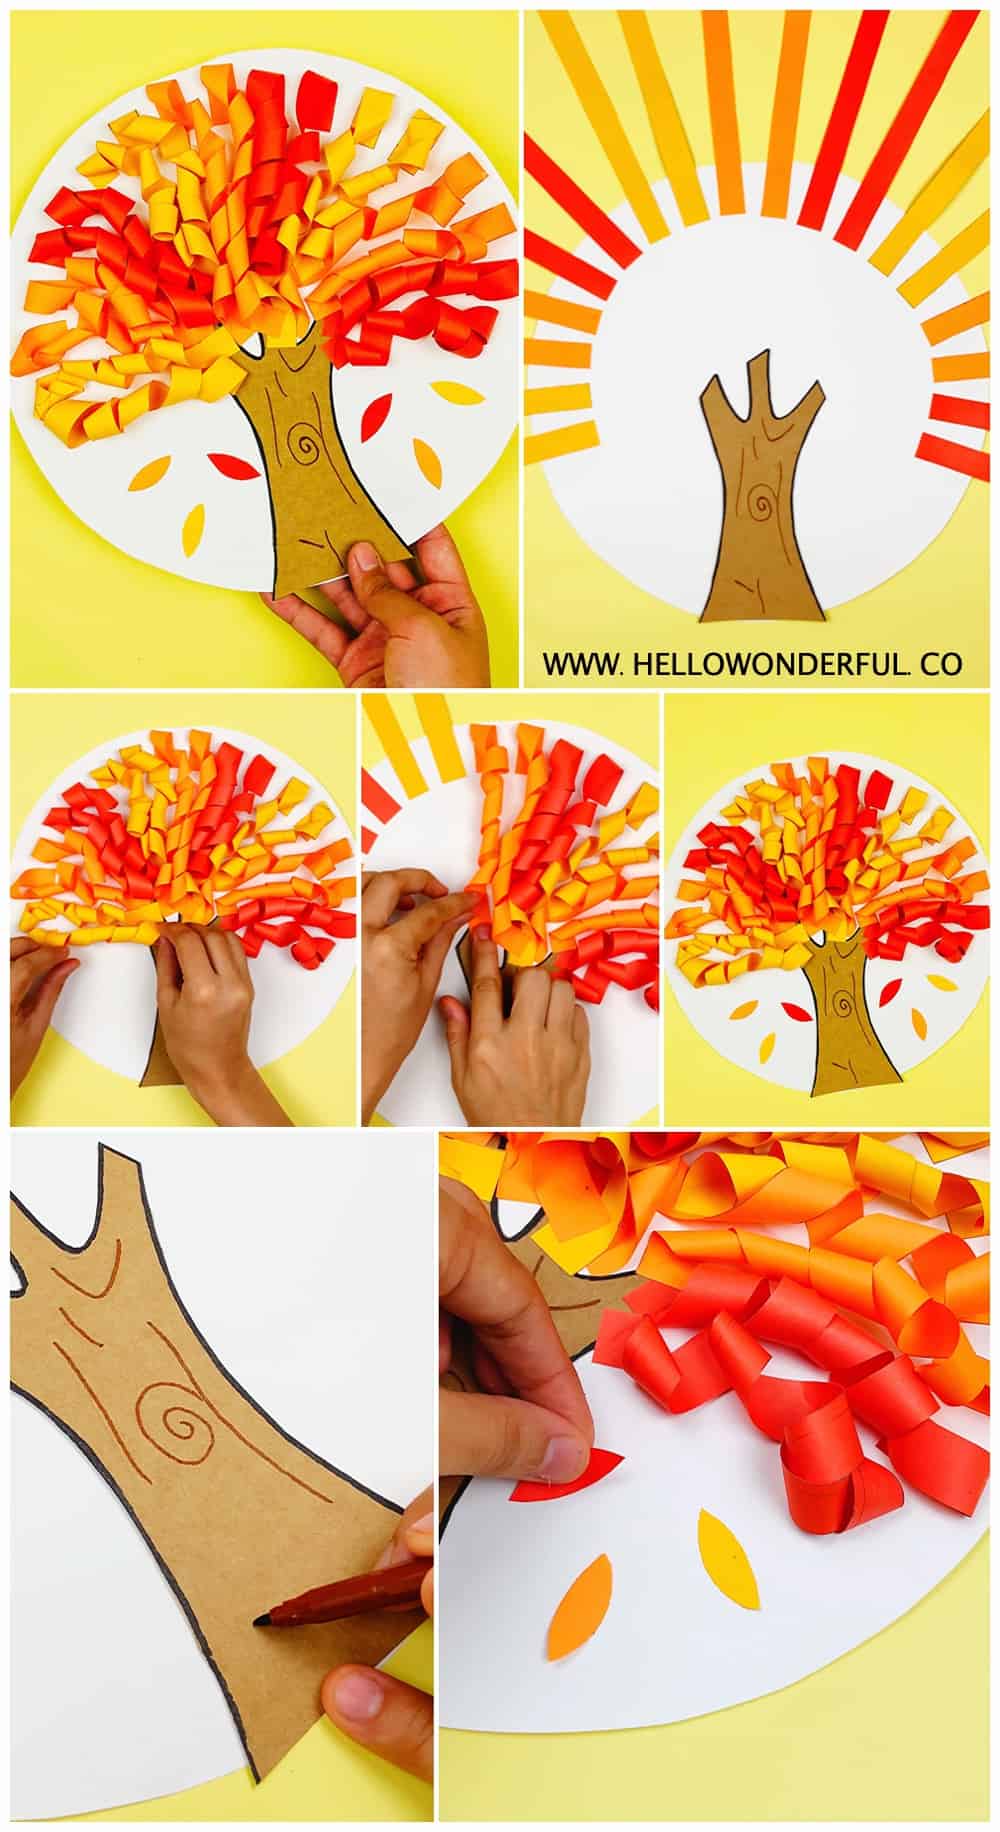
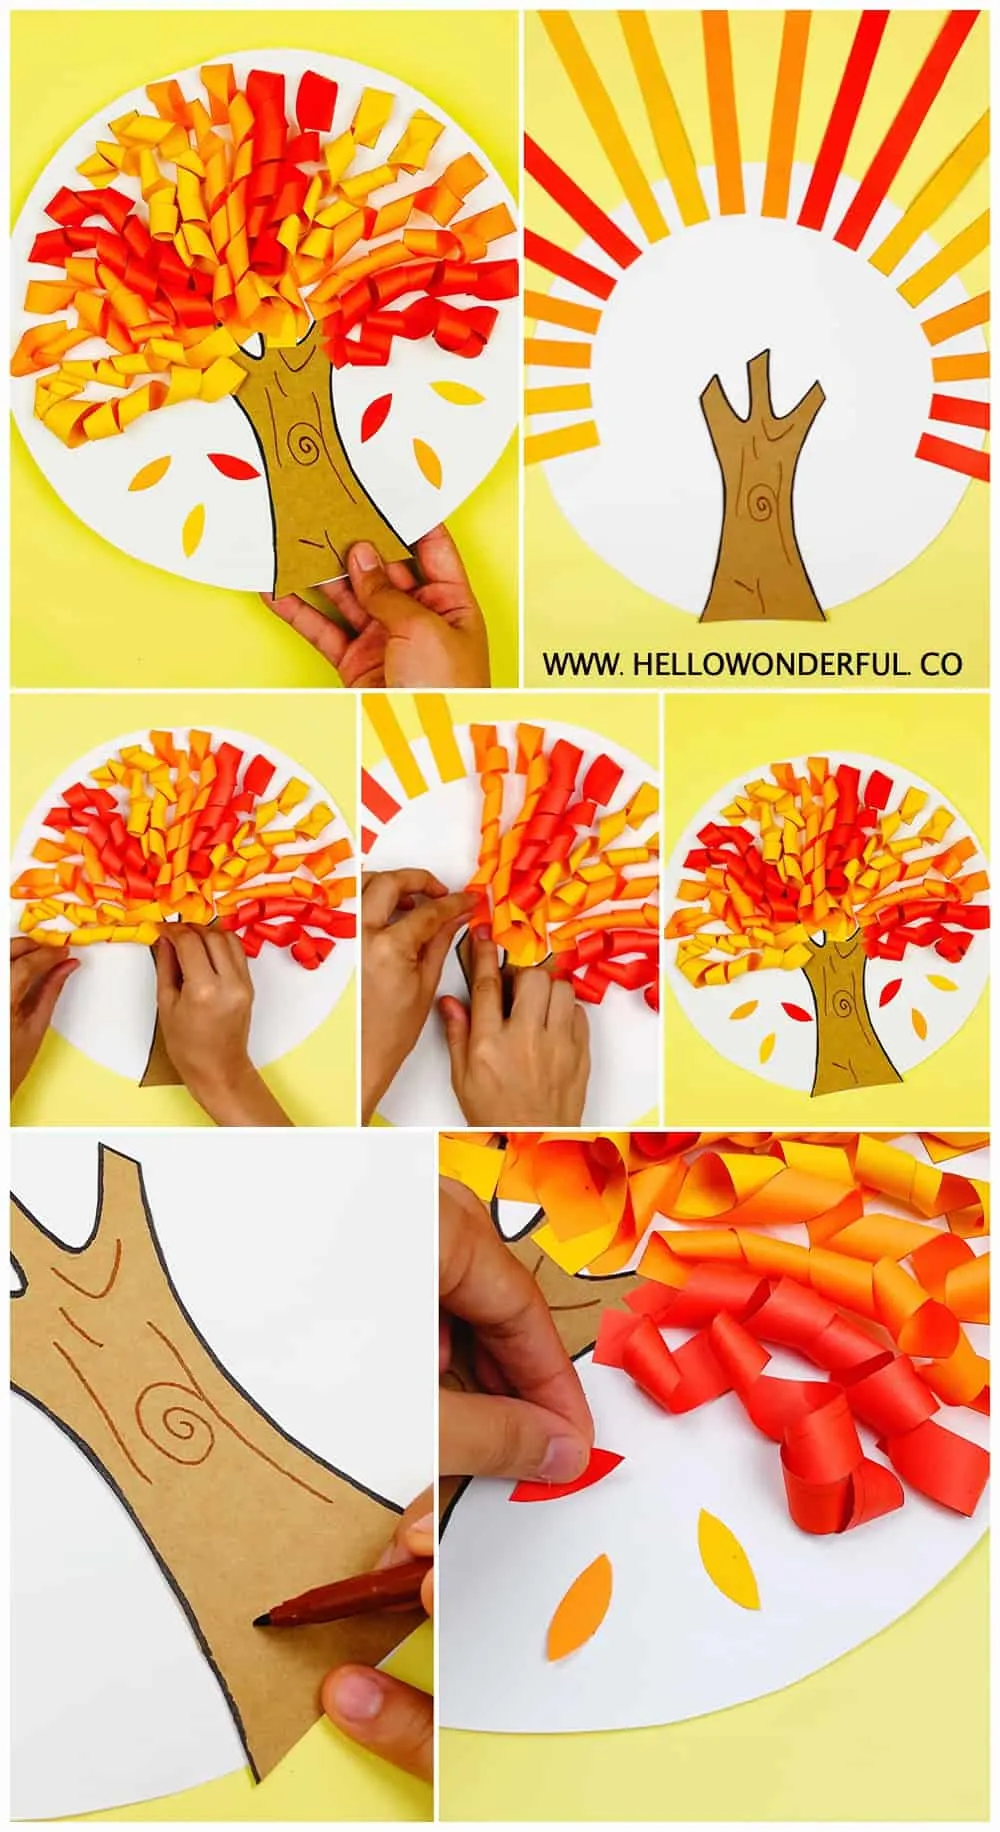
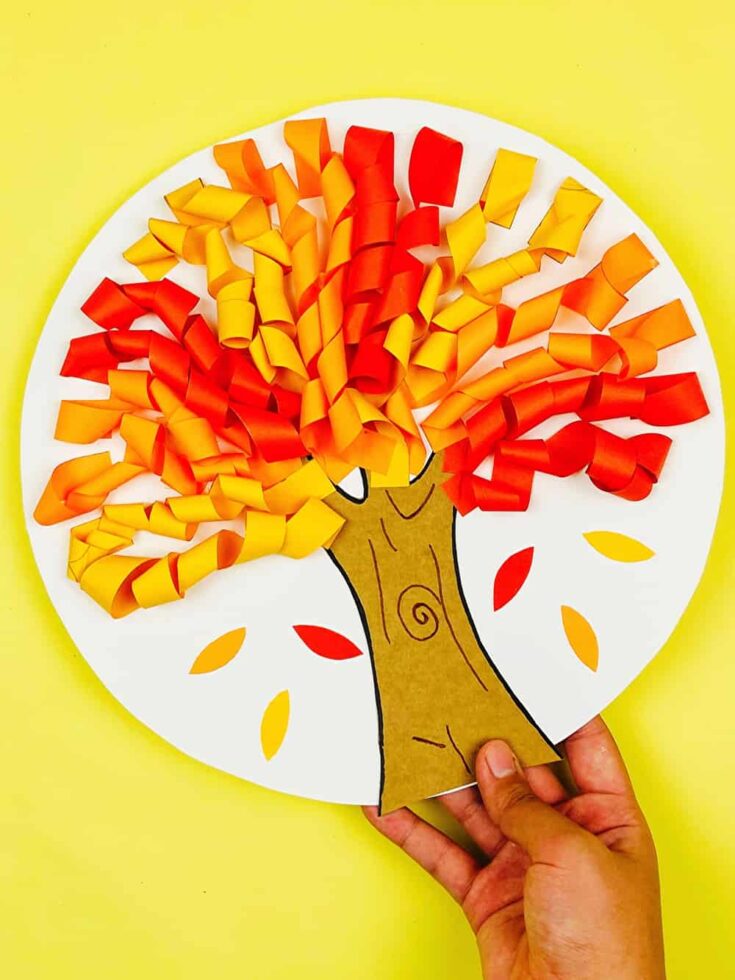
2. Use the cut out templates to trace onto colored paper of your choice. We chose brown for the tree and red, orange and yellow for the strips and leaves.
3. Glue your tree onto a paper base (we used a white circle over yellow paper) but you can use any colored paper.
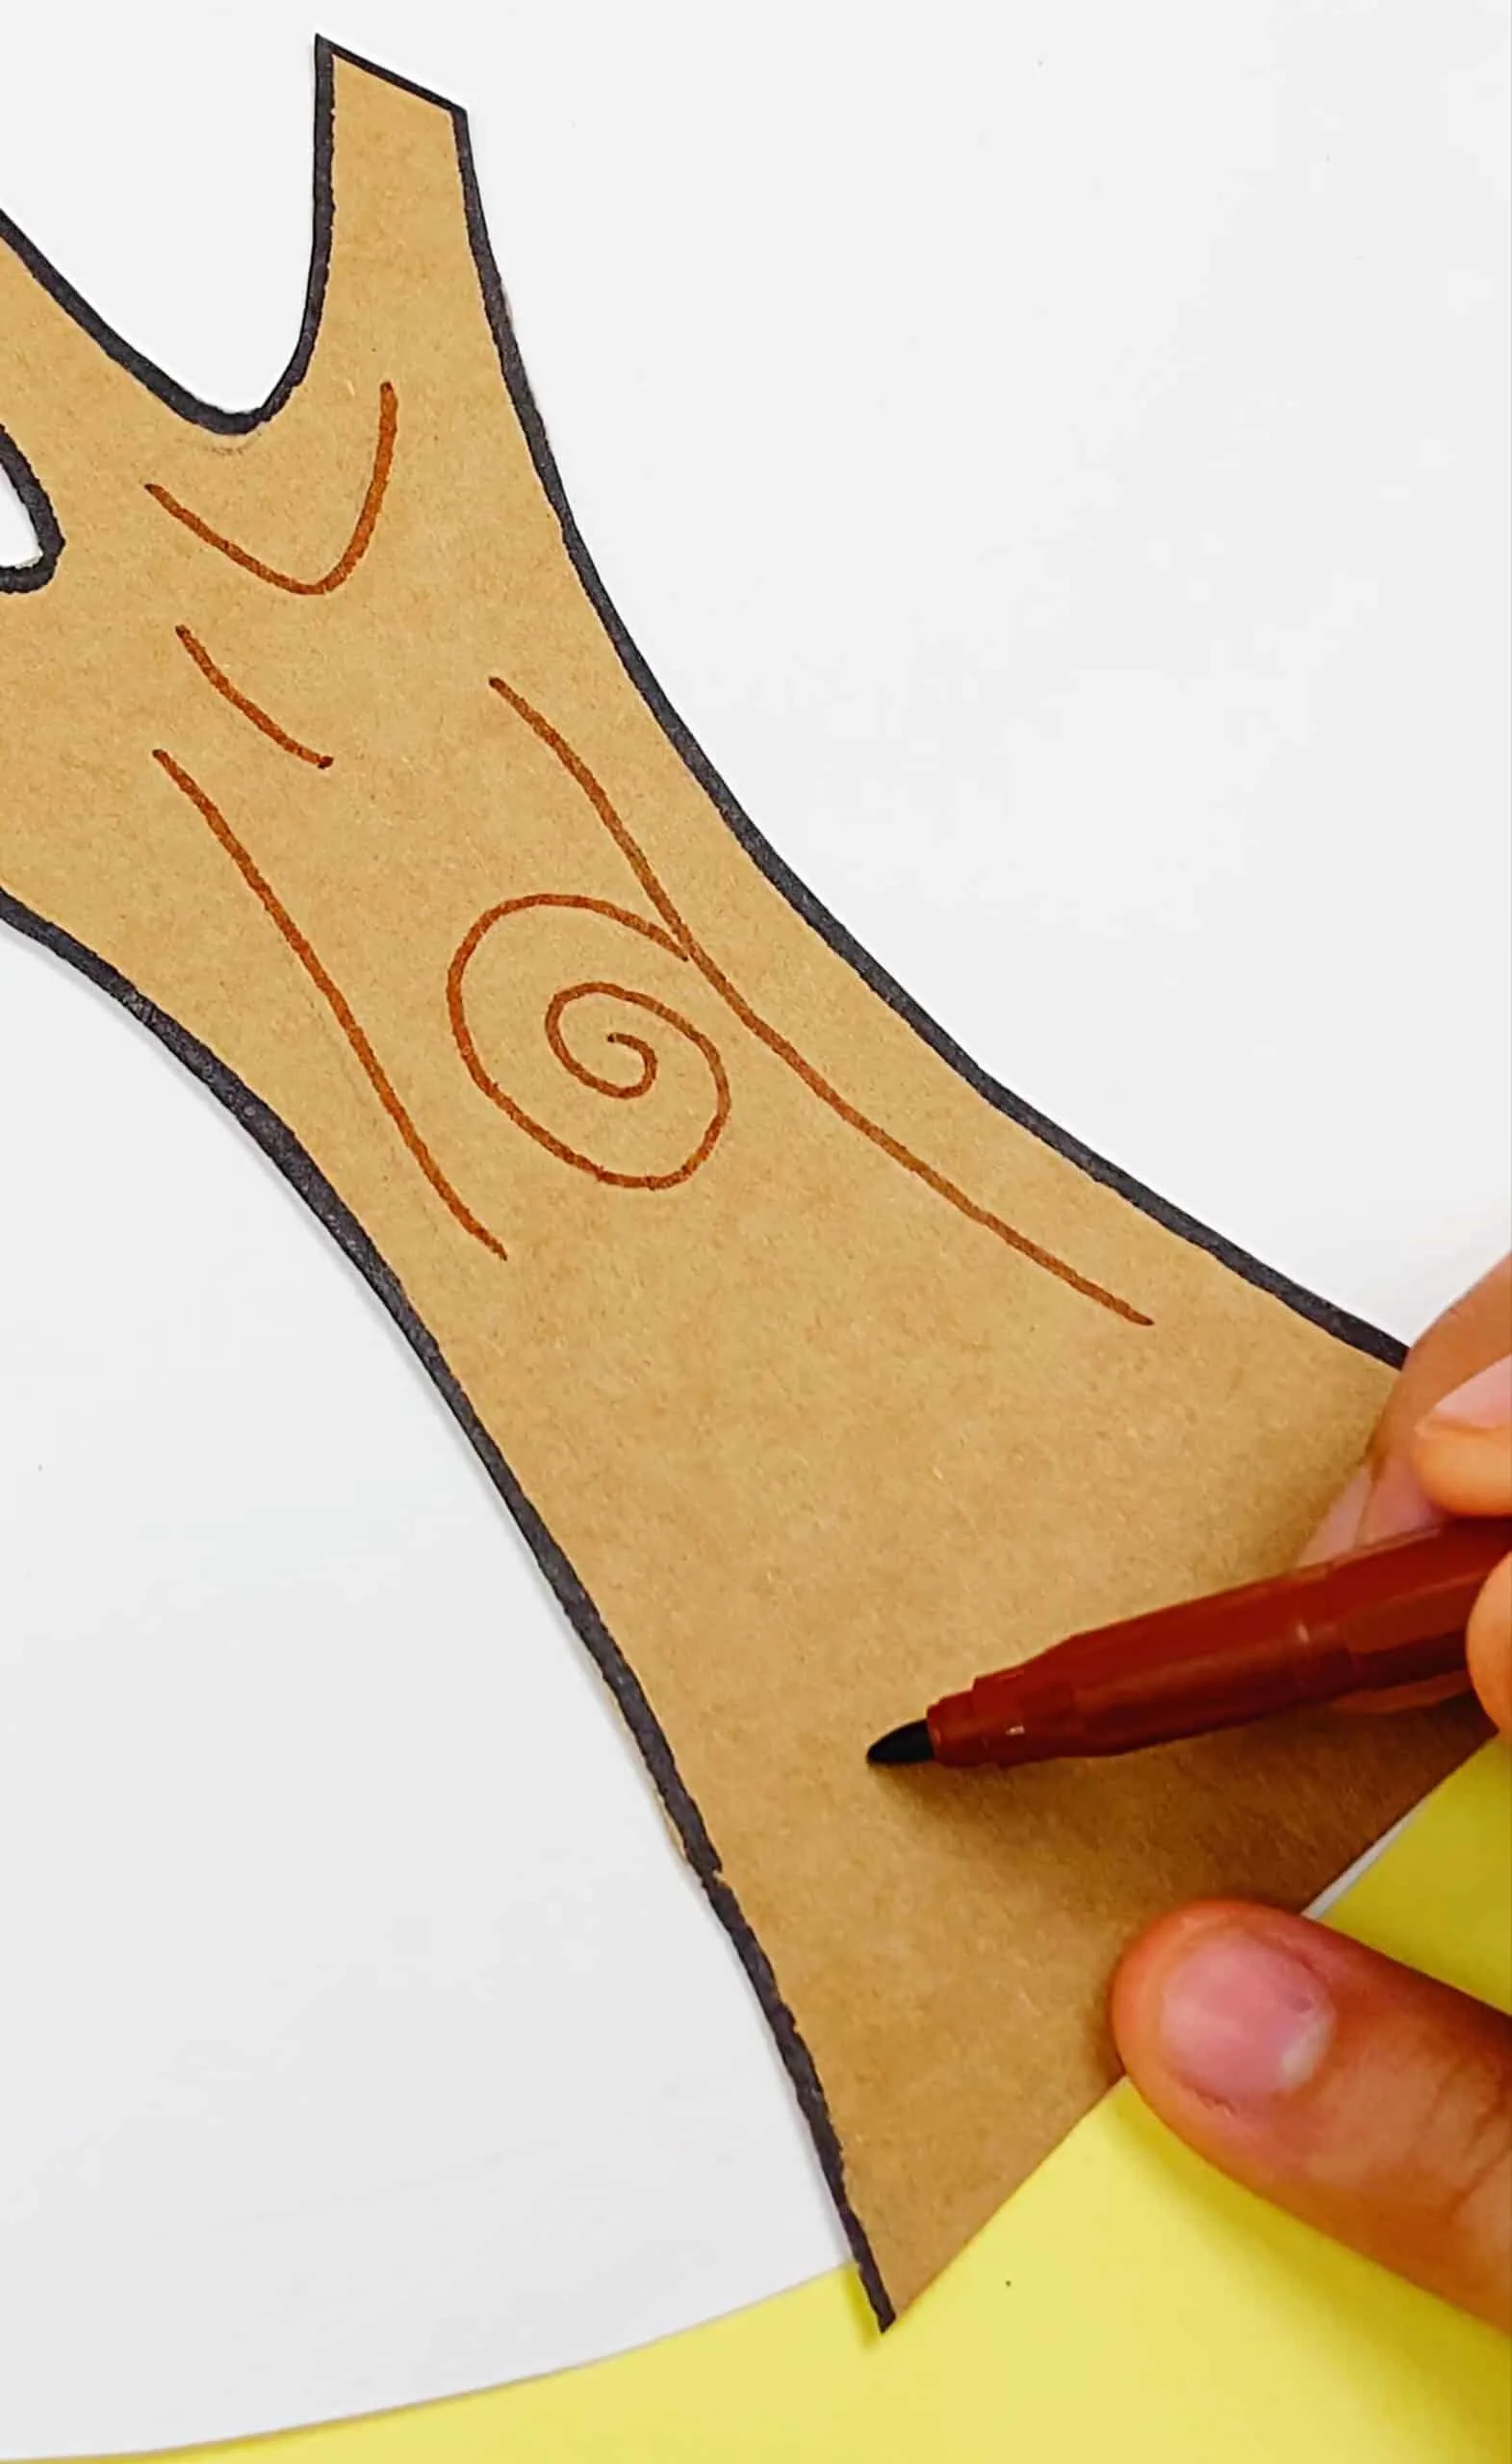
4. Draw tree details with a brown marker if you wish.
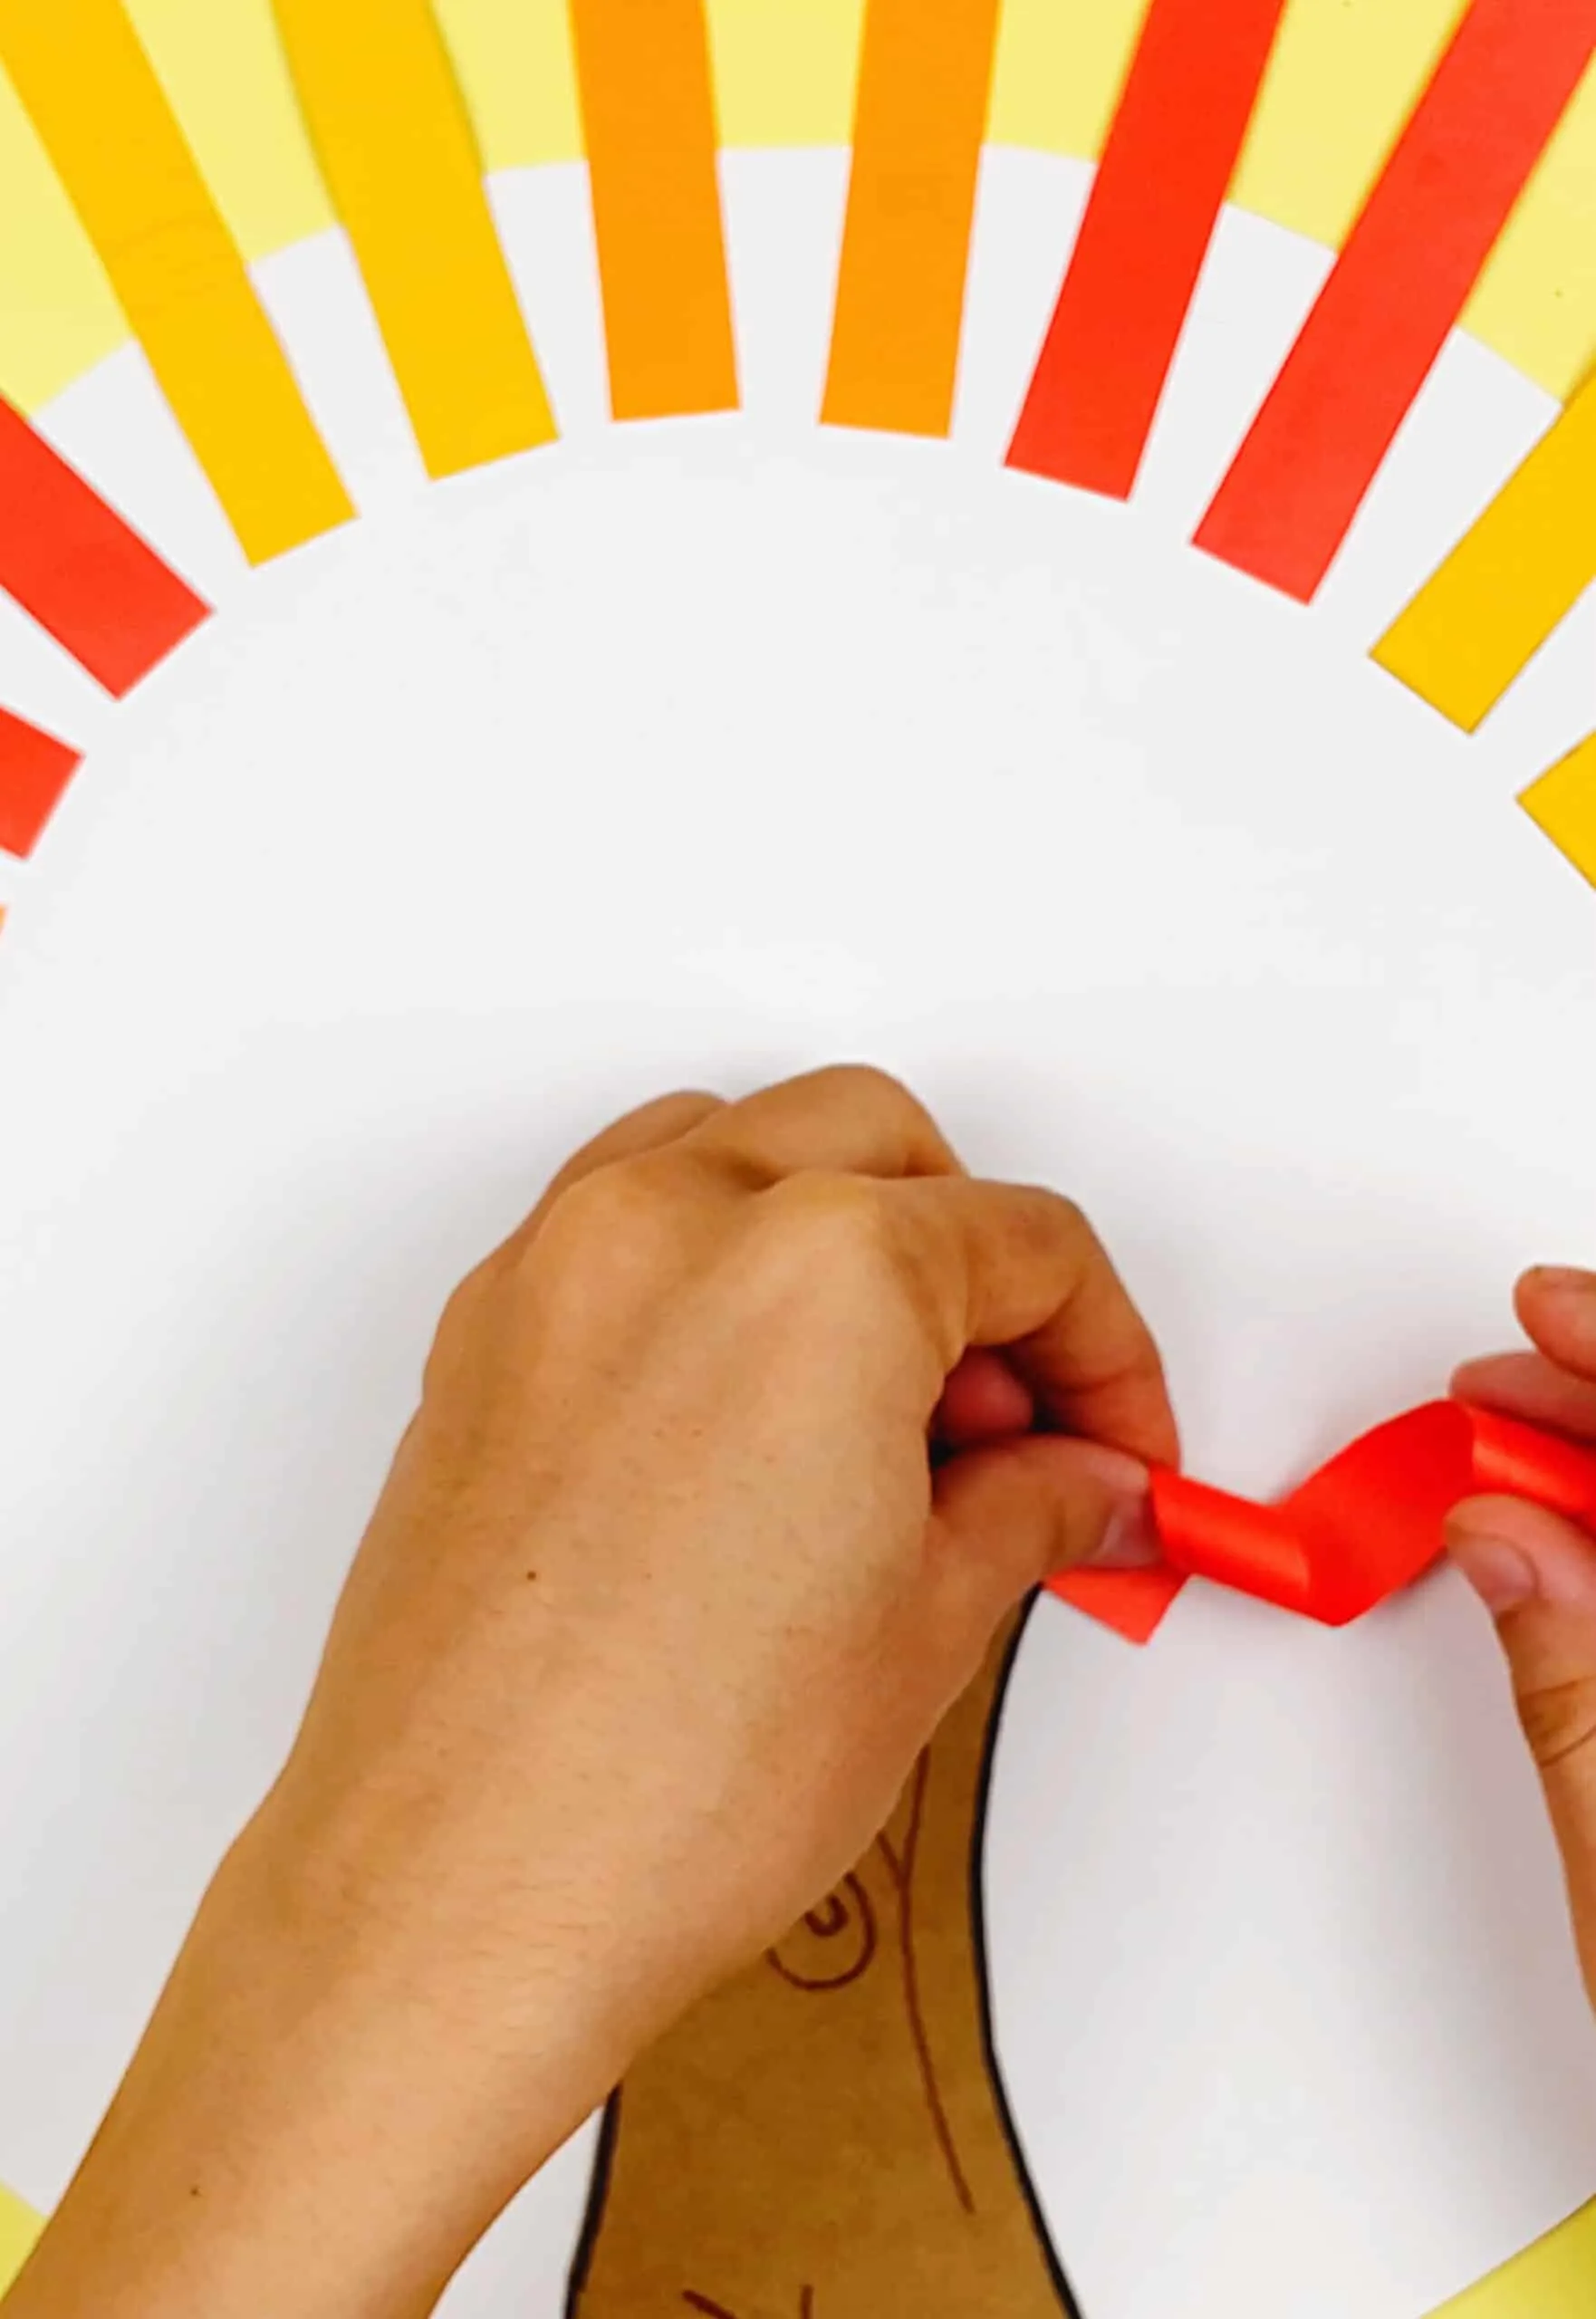
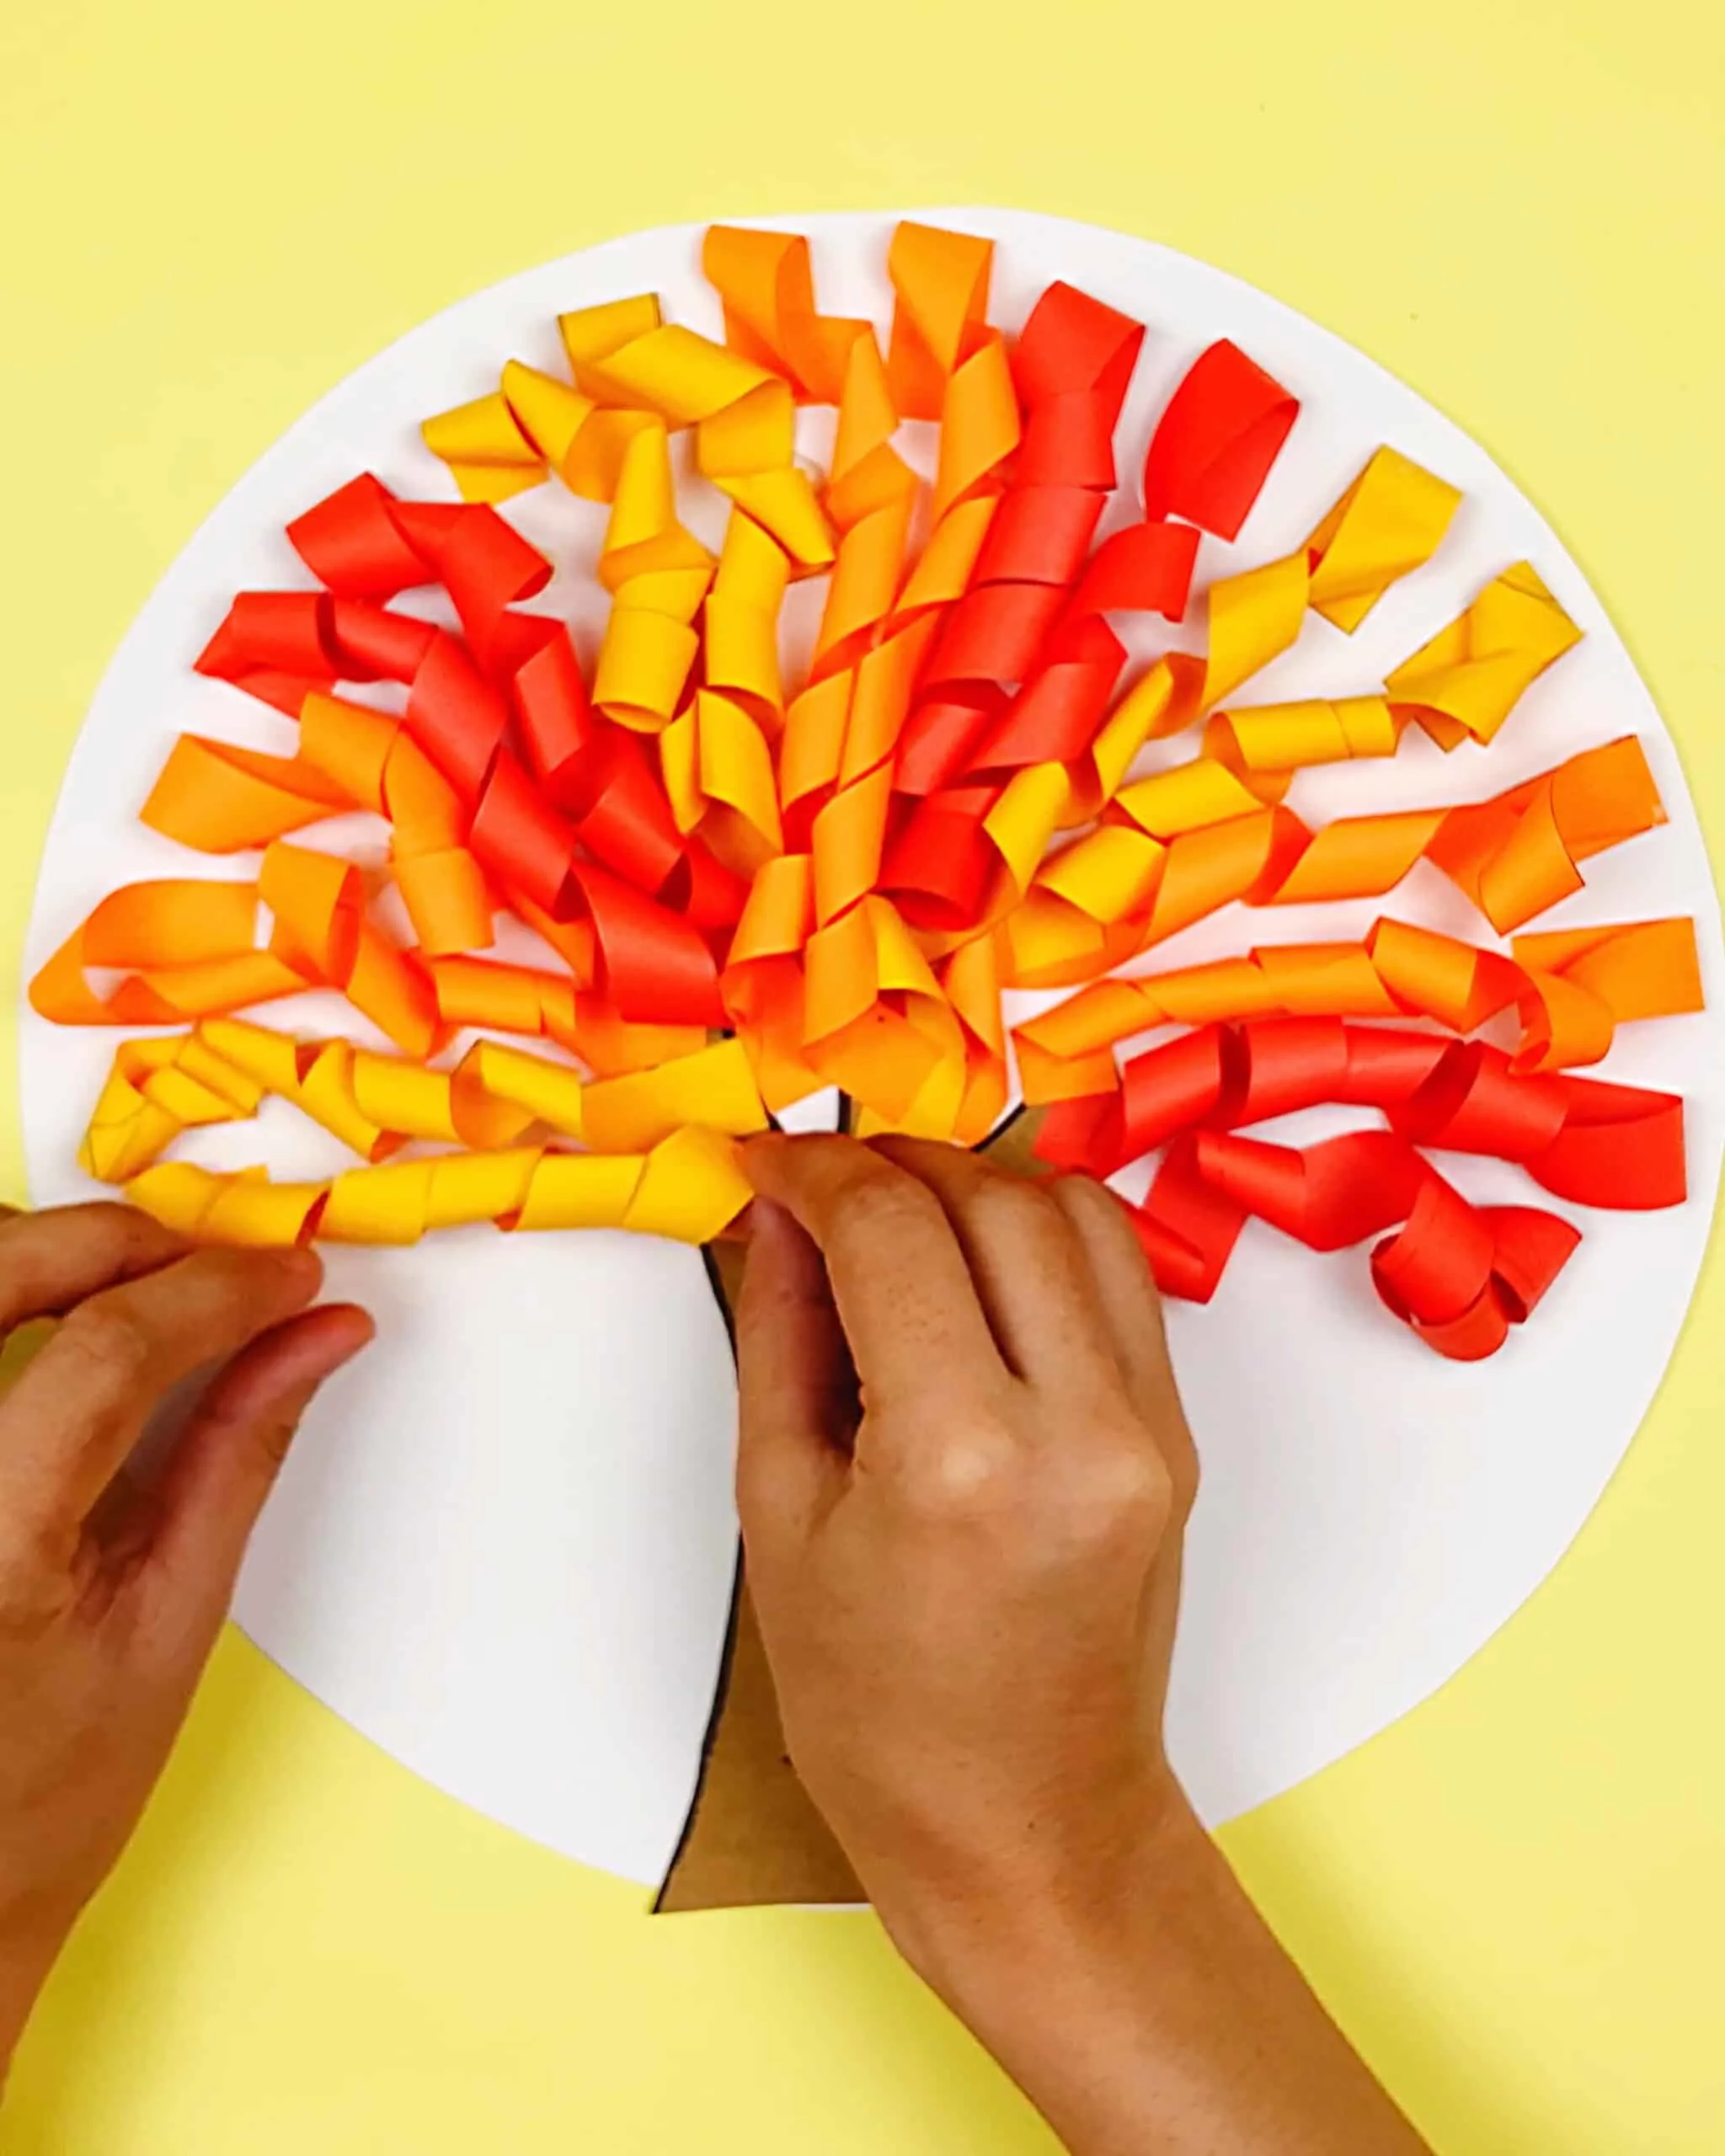
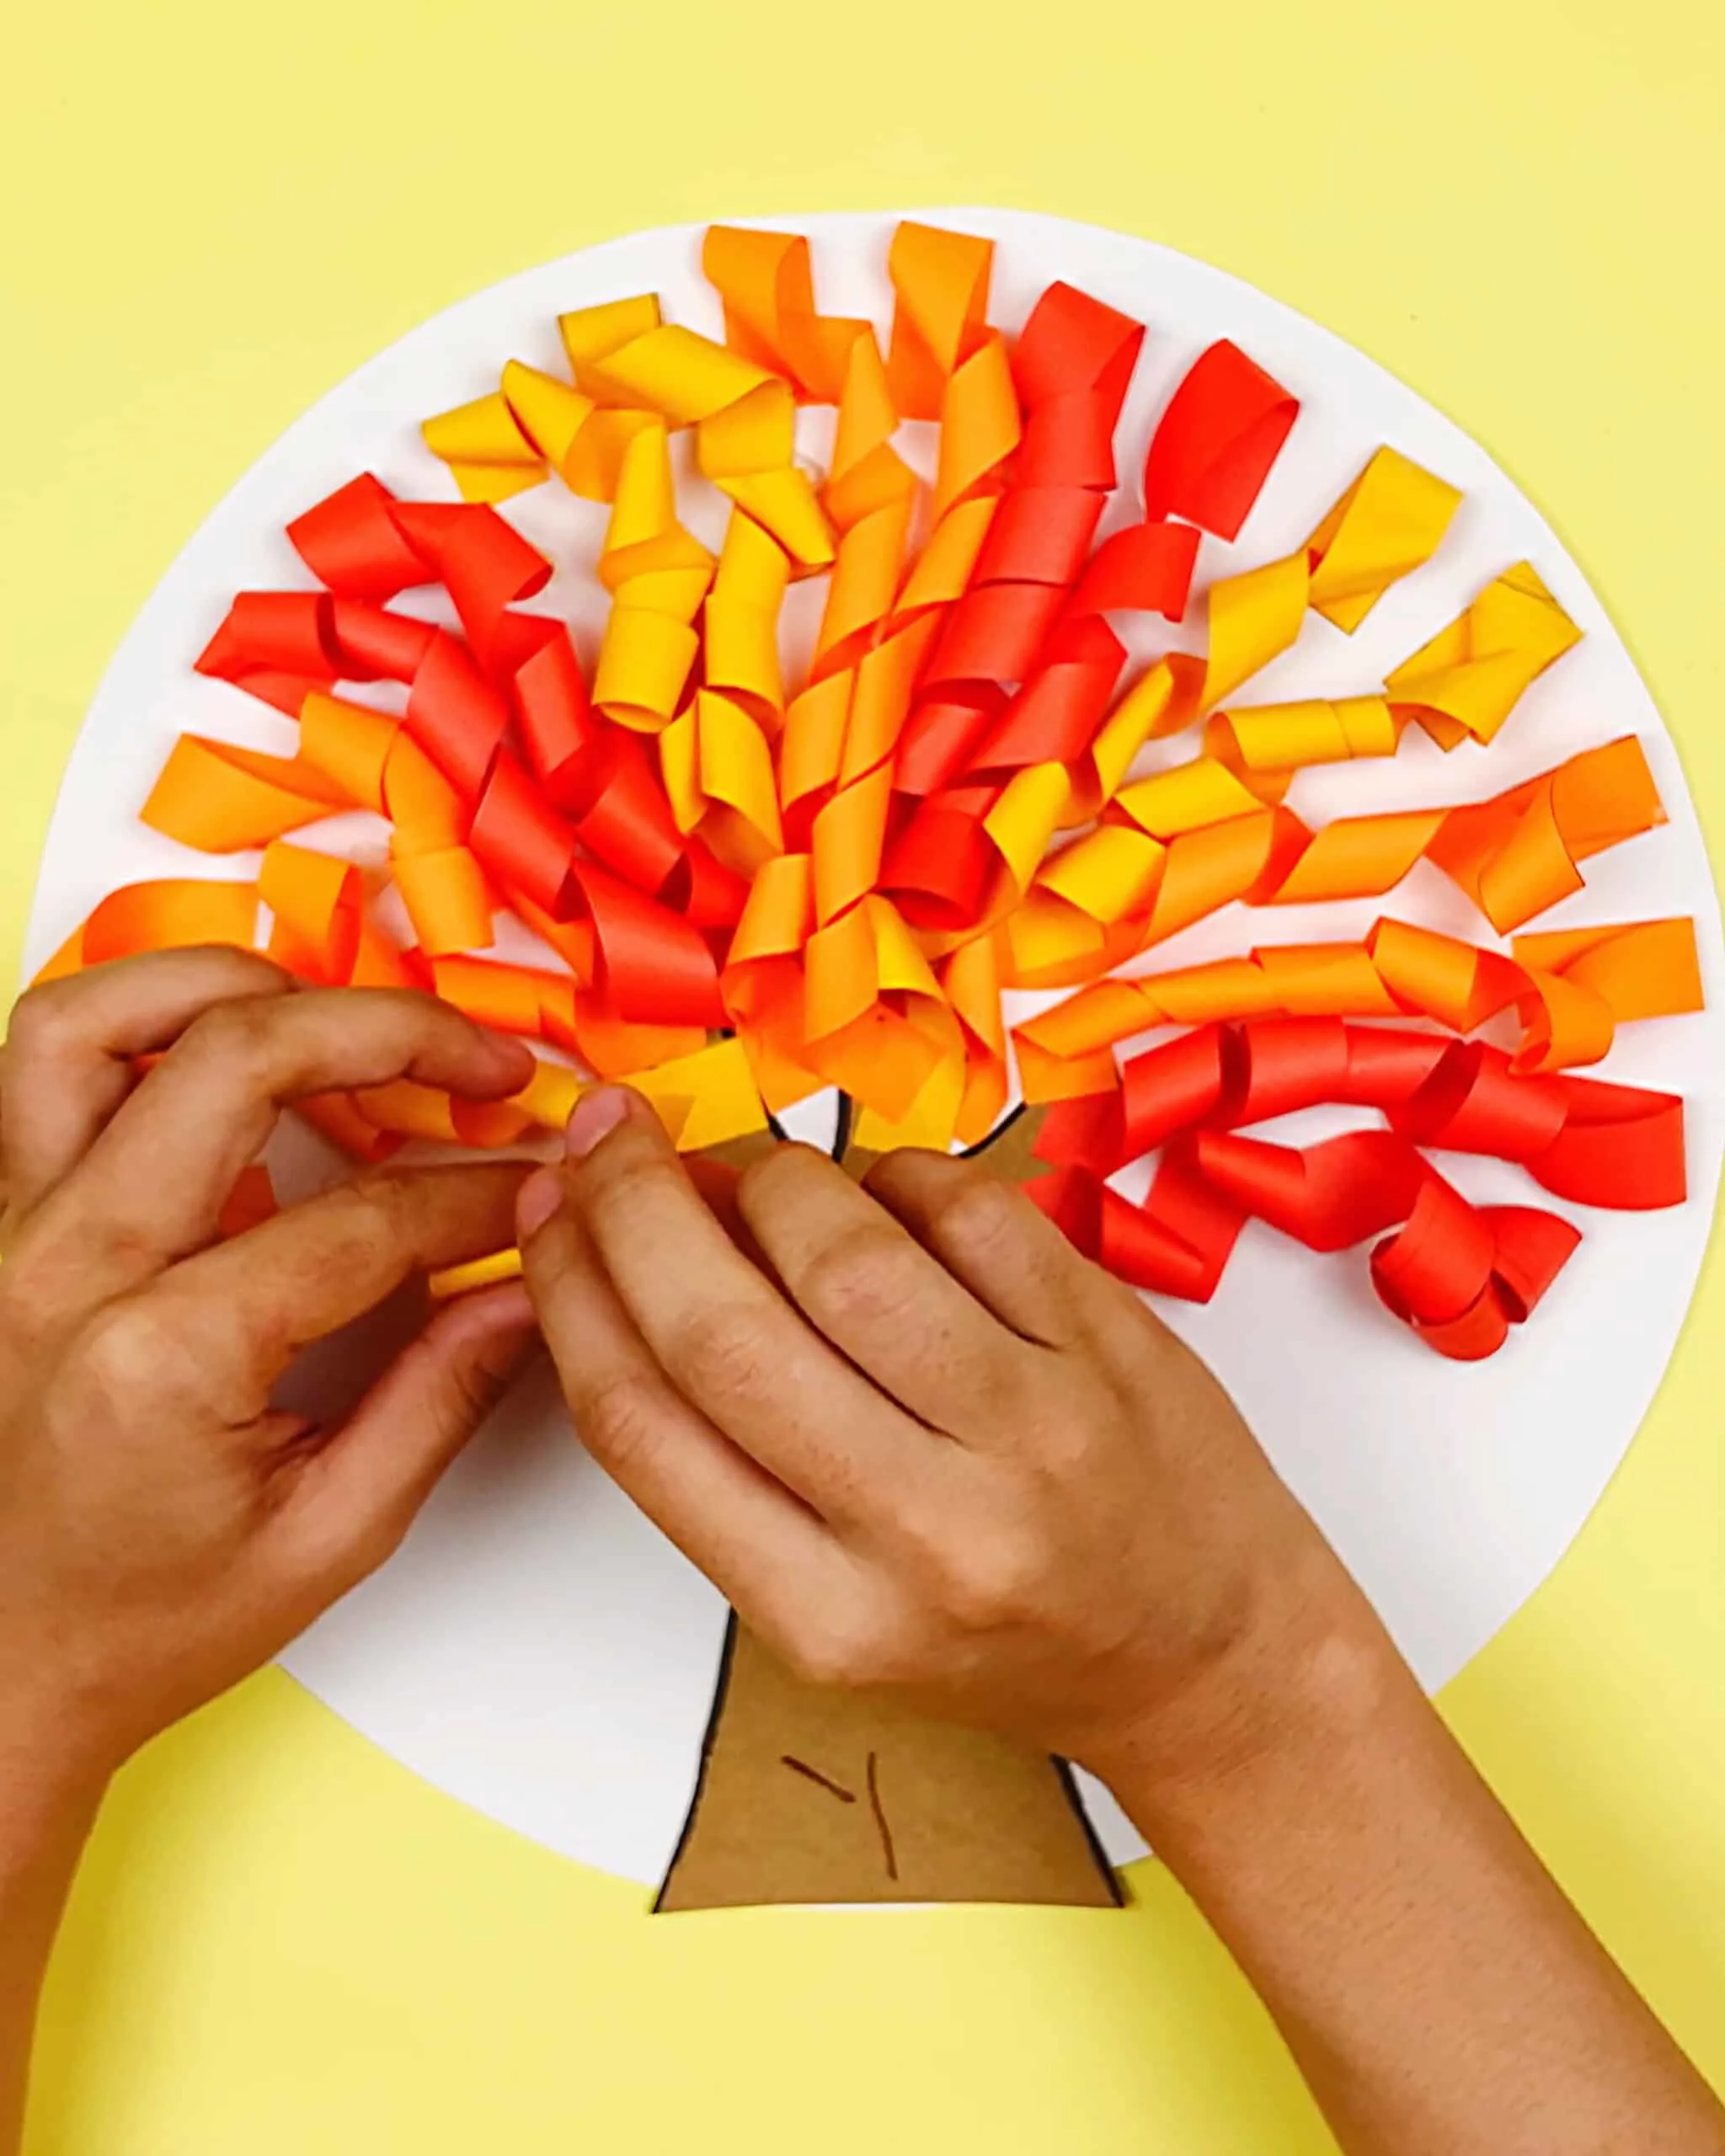
5. Cut out your strips and paste them around your tree as shown in the photos and video. Then twist each strip, starting from the unglued part. You will then paste the unglued end towards the tree.
6. Continue until all the strips are twisted. 7. Glue your leaves on either end of your tree to look like they are falling.
7. Glue your leaves on either end of your tree to look like they are falling.
GET THE FALL TREE PRINTABLE


How to decorate your fall tree
For added pizzazz, consider adding googly eyes to give your tree a little “personality.” Glitter can also be sprinkled on for extra sparkle. Buttons or beads make great embellishments too!
Learning Opportunities:
- Color Recognition: Children can learn to identify and differentiate between various fall colors.
- Fine Motor Skills: This craft involves cutting, pasting, and potentially coloring, which are excellent ways to develop fine motor skills.
- Creativity: Kids have the freedom to add their personal touch, encouraging creativity and self-expression.
Conclusion:
Creating a cute fall paper tree is not just a craft; it’s an experience that celebrates the beauty of the season while providing educational benefits for children. Download our printable template and get started today! Your kids will love this colorful fall craft, and you’ll appreciate the simplicity of this fall project!
GET THE FALL TREE PRINTABLE
Create a Cute Fall Paper Tree Craft With Printable Template

Materials
- Printable fall tree and leaves template
- Brown, red, orange, yellow paper
- Colored paper for the background
- Scissors
- Glue
- Brown marker (optional)
Instructions
- Print out the templates and cut out them out.
- Use the cut out templates to trace onto colored paper of your choice. We chose brown for the tree and red, orange and yellow for the strips and leaves.
- Glue your tree onto a paper base (we used a white circle over yellow paper) but you can use any colored paper.
- Draw tree details with a brown marker if you wish.
- Cut out your strips and paste them around your tree as shown in the photos and video. Then twist each strip, starting from the unglued part. You will then paste the unglued end towards the tree.
- Continue until all the strips are twisted. 7. Glue your leaves on either end of your tree to look like they are falling.
- Glue your leaves on either end of your tree to look like they are falling.


Agnes Hsu is a mom of three and has been inspiring parents and kids to get creative with easy activities and family friendly recipes for over 10 years. She shares her love for creative play and kids food to her 2MM+ followers online. Agnes' commitment to playful learning and kindness has not only raised funds for charity but also earned features in prestigious nationwide publications.