
How to Make a DIY Paper Plate Spider Craft
By using this site, you agree to our Terms of Use. This post may contain affiliate links. Read our disclosure policy.
Follow us on Instagram for more fun ideas for kids!
DIY crafts are all the rage these days, and for good reason. Not only are they budget-friendly, but they also allow you to create unique decorations that perfectly reflect your personal style.
This Halloween, ditch the store-bought decorations and make your own instead! This DIY paper plate spider craft is easy, fun, and perfect for getting into the spooky spirit.
Best of all, it’s a great activity to do with the kids. Kids will love creating their own paper plate spiders and adding their own personal touch to this classic Halloween spider craft.
This fun and easy craft are sure to be a hit with the whole family. You can even make a whole family of paper plate spiders!
Let’s get started and learn how to make your own spooktacular DIY paper plate spider.
You Will Need
- Black Paper
- 1 White Paper Plate
- Orange paint
- Stick Glue
- Hole Puncher
- Scissors
- White Yarn or String
- Popsicle Stick
- White and pink paper
- Black and white marker
How to Make a DIY Paper Plate Spider Craft
Step 1: Paint the Paper Plate
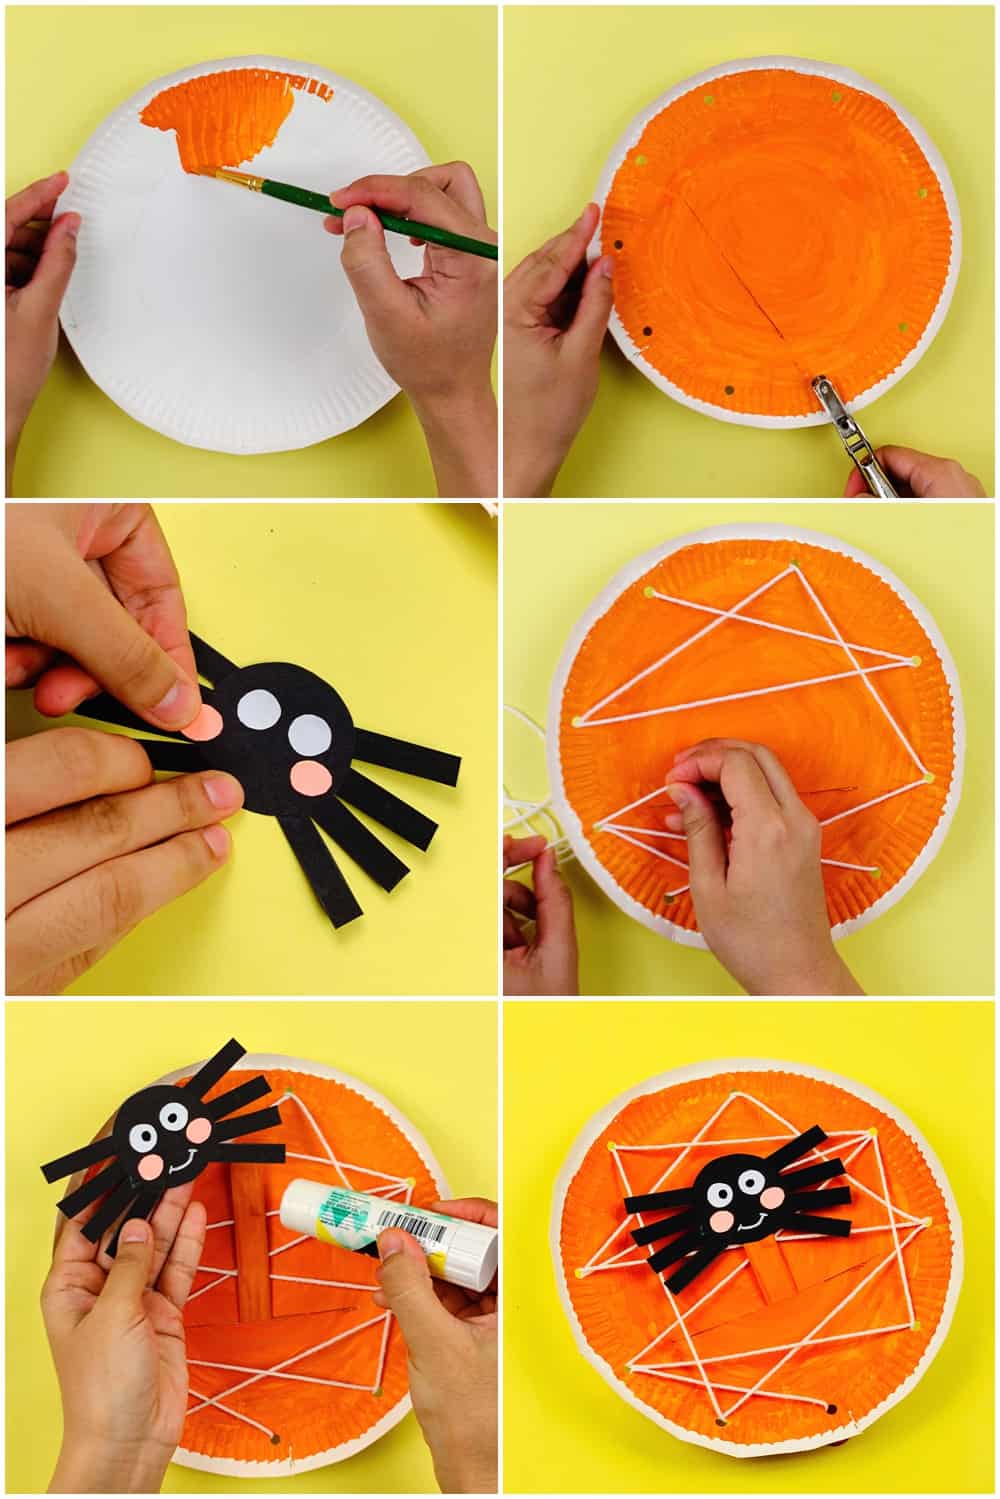
Start by painting a white paper plate with orange paint. Make sure to do this on the side you would normally place food on.
Also, try not to paint the outer edges of the paper plate. This will help give contrast and make the cobweb stand out more.
Use scissors to add a slit right below the center of the plate.
Step 2: Build the Cobweb
With a hole puncher, punch holes around the edges of the plate. Run white string or yarn around the edge of the orange plate through the holes, going across the middle of the plate.
The string should be elevated ever so slightly so the spider looks like it’s floating on its web. This is the most time-consuming step, but it’s worth it!
Any design will work, but we recommend making a traditional spider web. This will make your spiders web look more realistic.
Step 3: Place the Popsicle Stick
Take a popsicle stick and paint it orange so it matches the color of the plate and doesn’t stand out. Then, push it through a small slit from the bottom of the paper plate.
This will allow you to move the spider around by gluing the spider to the end of the stick after sticking it through the slit from the back side of the plate.
We recommend doing this because it makes the spider more fun to play with. You can also use a pencil instead of a popsicle stick. How you position the popsicle stick or pencil is up to you.
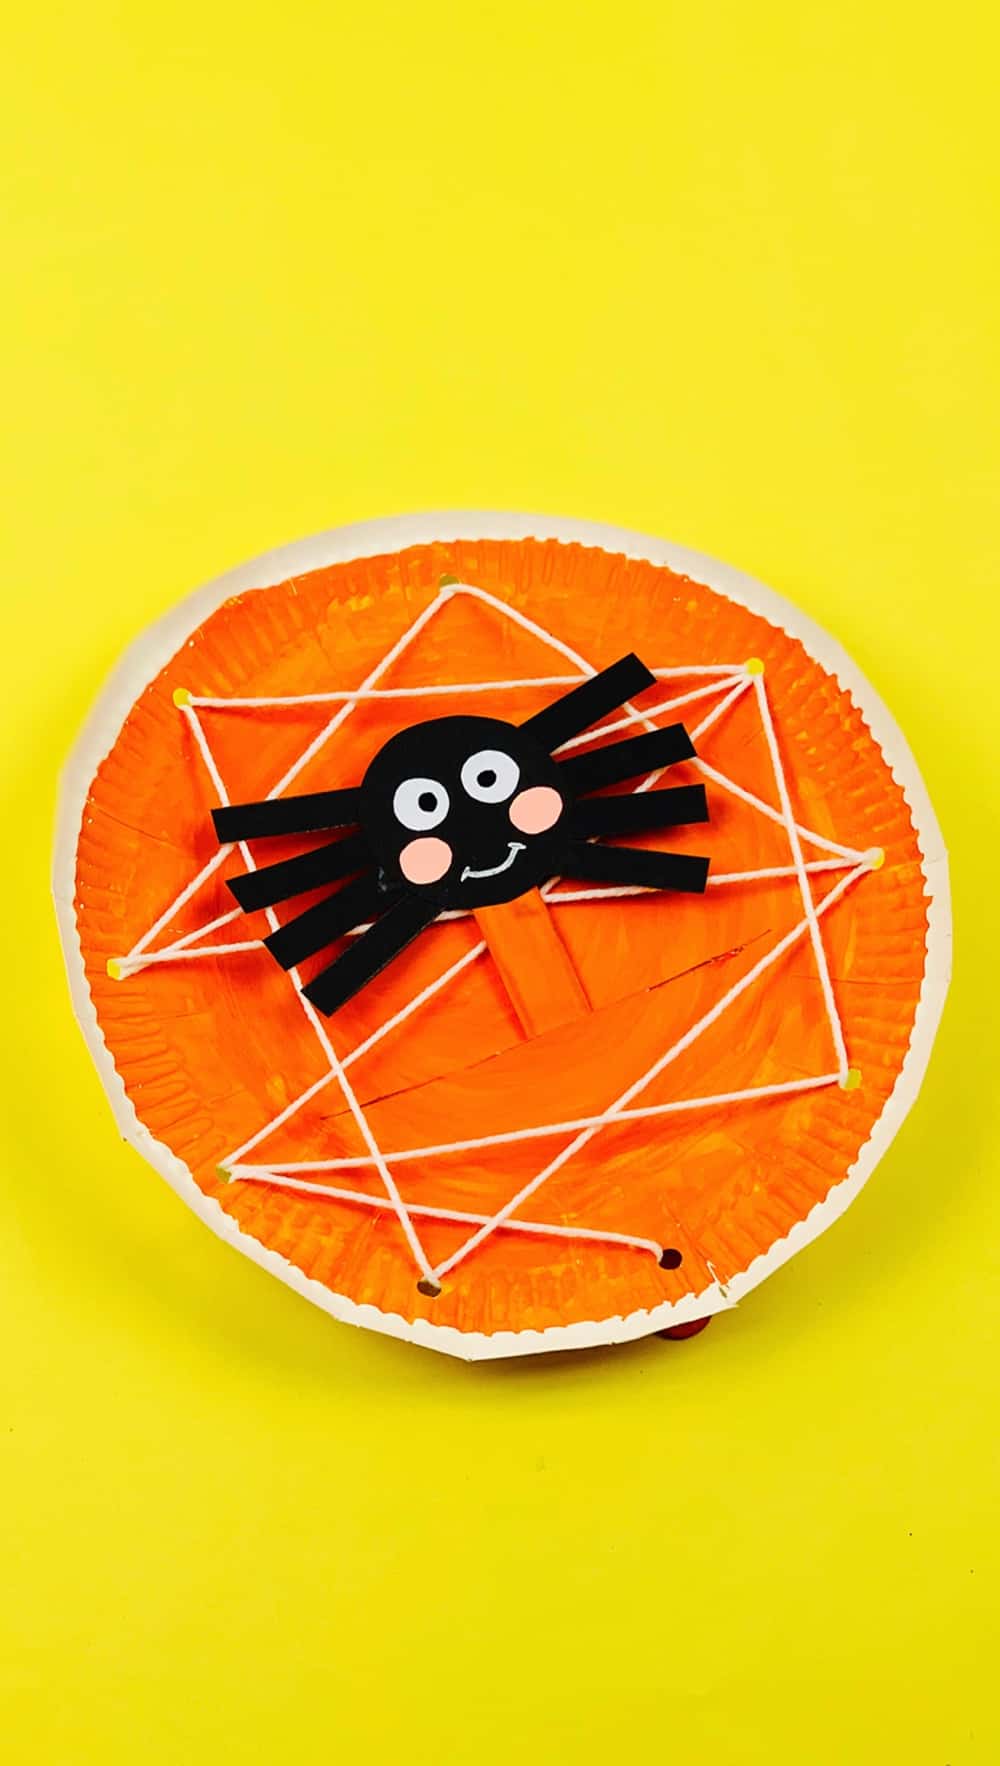
Step 4: Craft the Spider
Next, cut a shape of a spider from black paper or even felt will work. Give the spider eight legs. Glue two white paper eyes and add black pupils with a marker. Then add light pink paper as cheeks. Glue those on.
For the mouth, paint a smiley face or make it one step spookier and paint a pair of fangs onto the spider. If you want the spider to appear as if it’s moving, glue each leg in a different position.
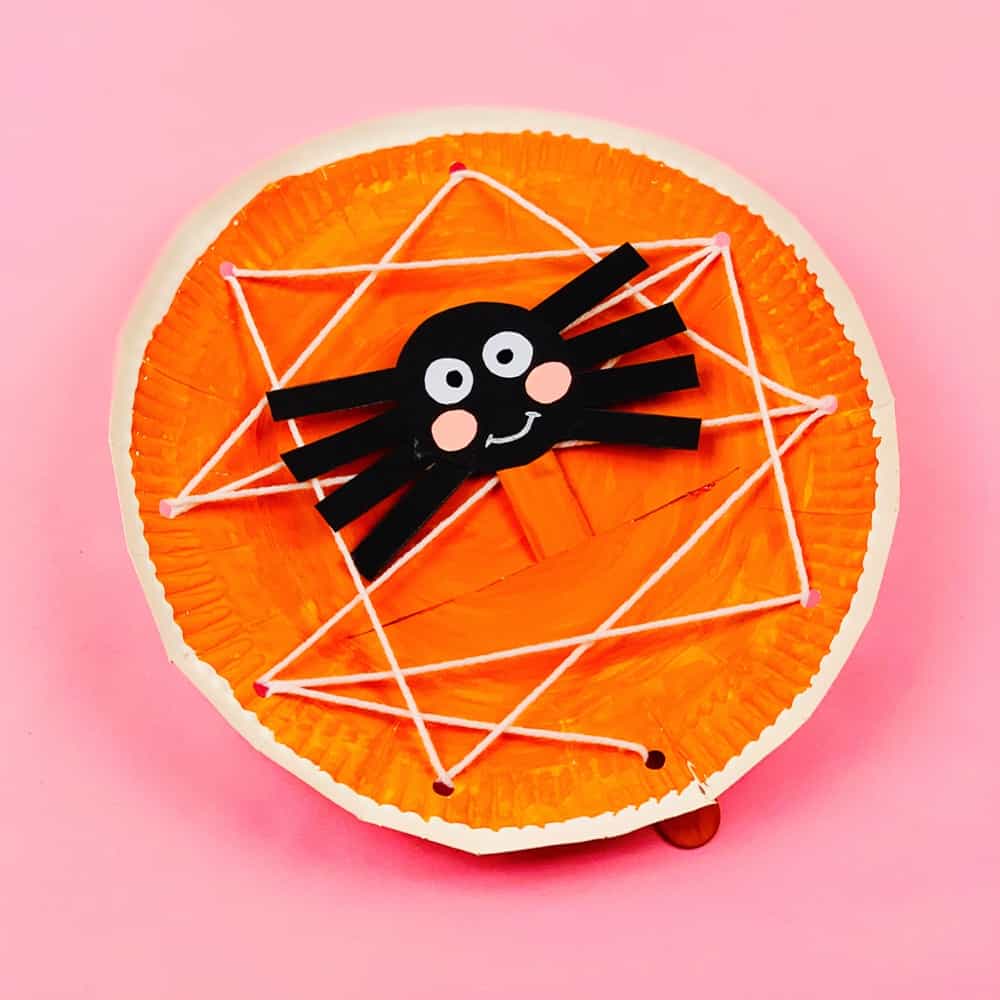
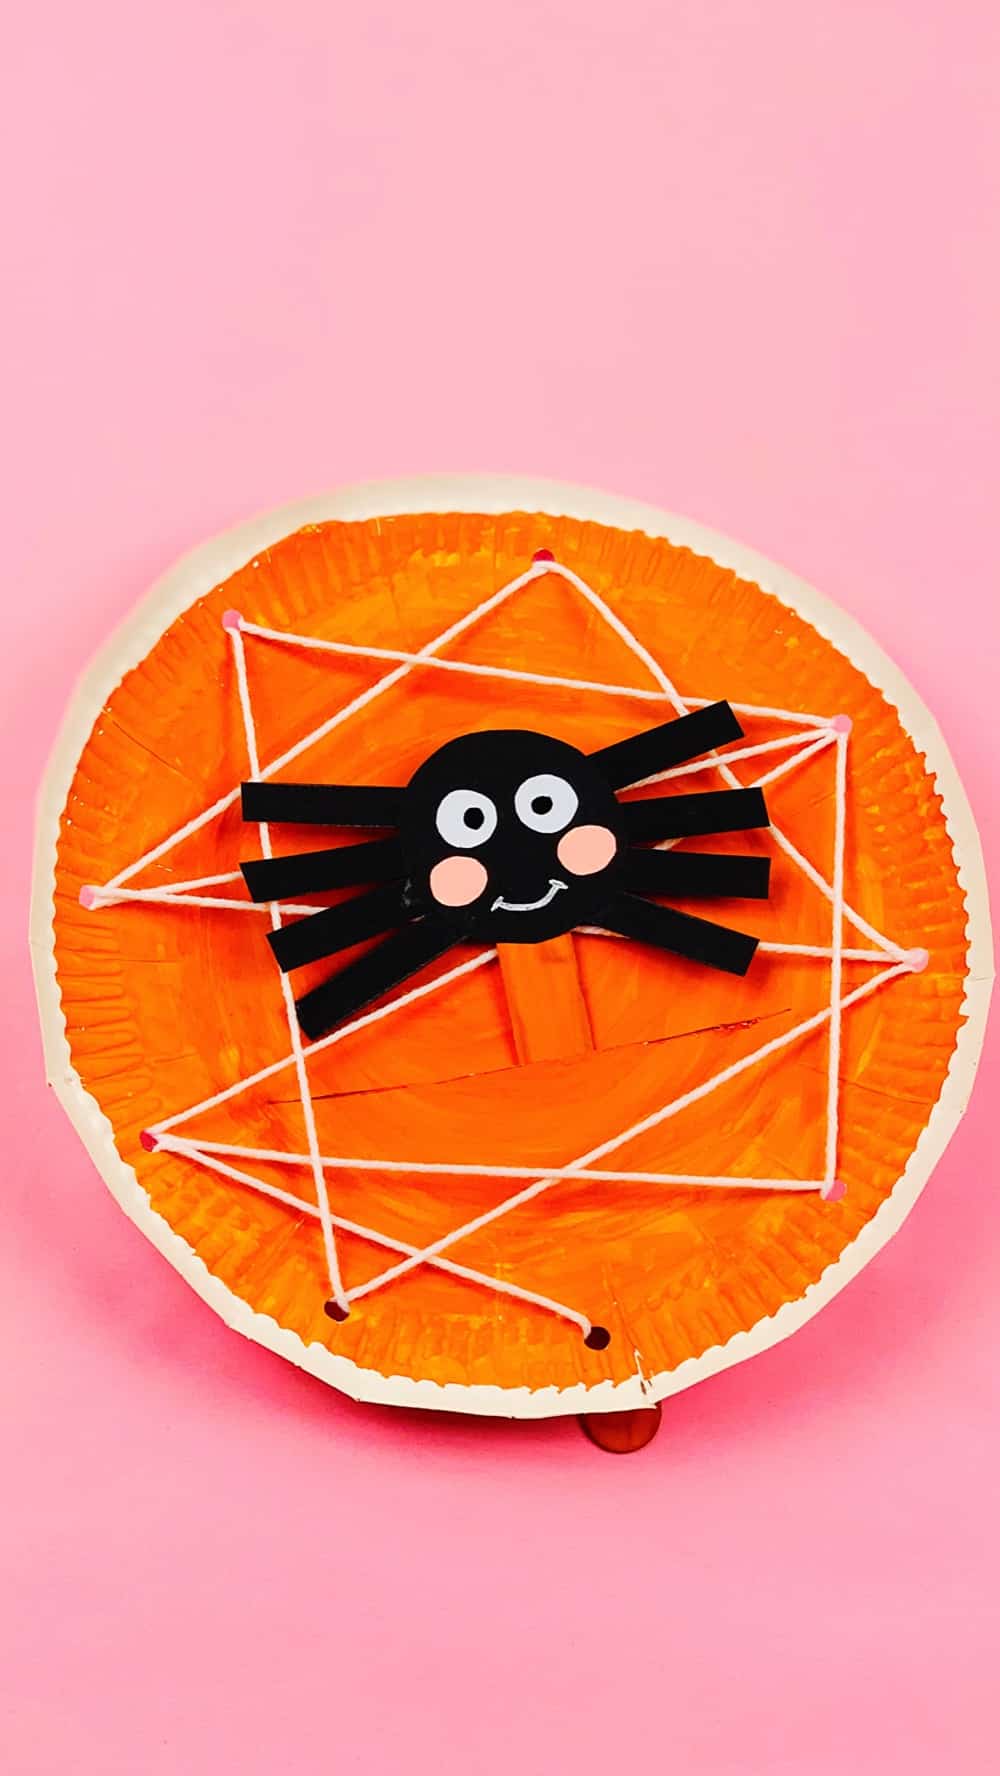
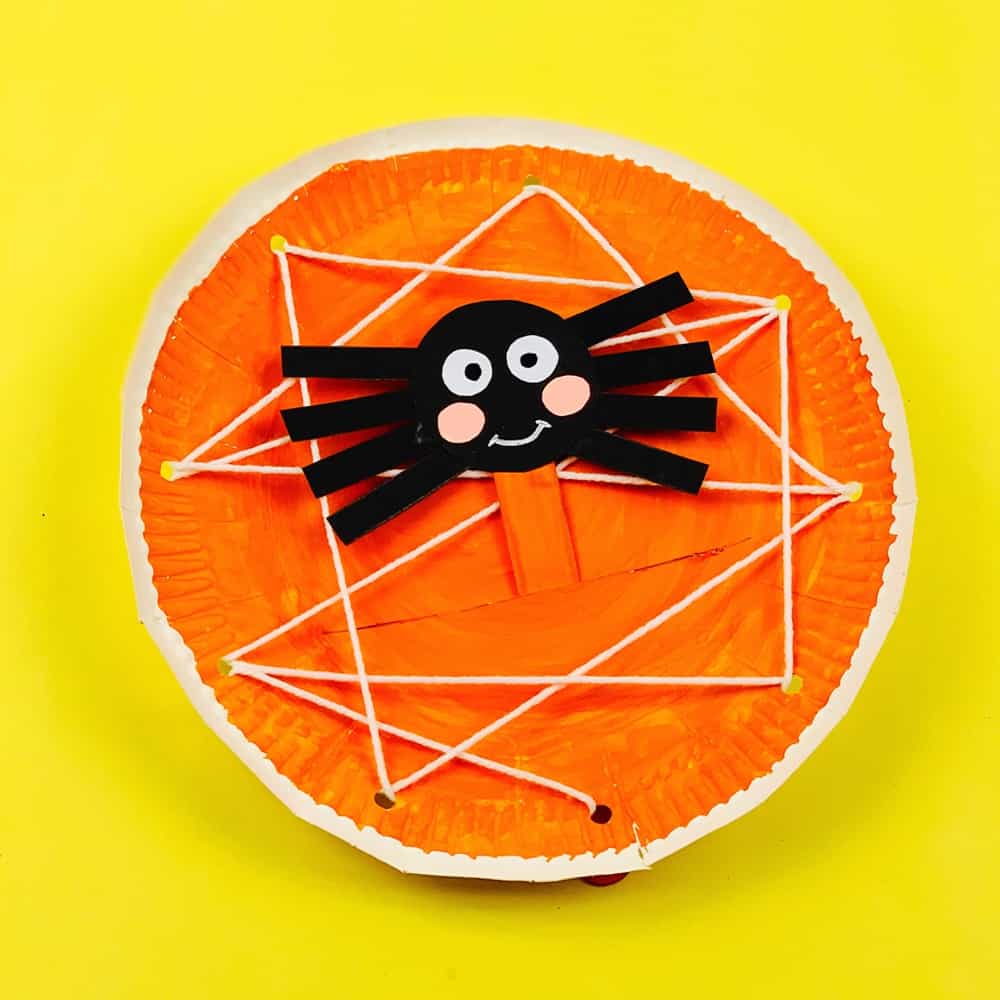
Situate the spider on top of the orange popsicle stick. Then insert the stick in the slit on the paper plate and move it around the web!
Hang Your Spider
Now that your paper plate spider is complete, it’s time to decide where to hang it up! A great place to start is your front door, as it’s sure to spook all of your guests when they come over.
If you want to get really creative, you could also try hanging it in a window or from the ceiling. Another great option is to hang it on your porch.
No matter where you decide to hang it, your spider is sure to be a hit at any Halloween party!
How to Make Your Spider Plate Even Spookier
Use LED Lights to Light Up Your Plate Craft
LED lights are great for lighting up any dark areas and adding an extra bit of spookiness to your Plate craft. You can find LED lights at most party stores or online as well.
Simply place them around the plate to light it up. This will make your spider look even more realistic and add an extra bit of spookiness to your décor.
Add Glowing Eyes to Your Paper Plate Spider
To make your paper plate spider craft even spookier, try adding some glowing eyes!
Simply place them where the eyes would be on your spider. Googly eyes that glow can be a good choice, but anything that glows that can be cut into the shape of eyes will work.
Add Some Dry Ice for a Smoky Effect
Dry ice is perfect for creating a spooky smoky effect. Simply place it on the plate and it will start to smoke! If it gets messy, try placing dry ice in a cotton ball and dousing the cotton very slightly.
Dry ice can be found at some grocery stores, or online. You don’t need much, though!
Use Glow-in-The-Dark Paint
Glow-in-the-dark paint is another way to add an extra bit of spookiness to your spider craft!
If you want your spider to really stand out, try painting the entire plate with glow-in-the-dark paint. This will make your spider look even more realistic and add an extra bit of spookiness.
Add Some Drops of Red Food Coloring
Another way to make your spider plate craft spookier is to add a few drops of red food coloring to the paint. This will give the paper plate and web a more sinister appearance.
For an even spookier effect, try adding a few drops of red food coloring near the fangs (if you add them).
Takeaway
Now you know how to make your own DIY paper plate spider. This easy, fun craft is perfect for Halloween and can be easily customized to your liking.
Kids will love making their own paper plate spiders and adding their own personal touch to this classic Halloween craft.
This is a great activity to do with the family and is sure to get everyone into the Halloween spirit! Plus, it’s a great way to save money on store-bought decorations.
How to Make a DIY Paper Plate Spider Craft

This Halloween, ditch the store-bought decorations and make your own instead! This DIY paper plate spider craft is easy, fun, and perfect for getting into the spooky spirit.
Materials
- Black Paper
- 1 White Paper Plate
- Orange paint
- Glue
- Hole Puncher
- Scissors
- White Yarn or String
- Popsicle Stick
- White and pink paper
- Black and white marker
Instructions
Step 1: Paint the Paper Plate
Start by painting a white paper plate with orange paint. Make sure to do this on the side you would normally place food on.
Also, try not to paint the outer edges of the paper plate. This will help give contrast and make the cobweb stand out more.
Use scissors to add a slit right below the center of the plate.
Step 2: Build the Cobweb
With a hole puncher, punch holes around the edges of the plate. Run white string or yarn around the edge of the orange plate through the holes, going across the middle of the plate.
The string should be elevated ever so slightly so the spider looks like it's floating on its web. This is the most time-consuming step, but it's worth it!
Any design will work, but we recommend making a traditional spider web. This will make your spiders web look more realistic.
Step 3: Place the Popsicle Stick
Take a popsicle stick and paint it orange so it matches the color of the plate and doesn’t stand out. Then, push it through a small slit from the bottom of the paper plate.
This will allow you to move the spider around by gluing the spider to the end of the stick after sticking it through the slit from the back side of the plate.
We recommend doing this because it makes the spider more fun to play with. You can also use a pencil instead of a popsicle stick. How you position the popsicle stick or pencil is up to you.
Step 4: Craft the Spider
Next, cut a shape of a spider from black paper or even felt will work. Give the spider eight legs. Glue two white paper eyes and add black pupils with a marker. Then add light pink paper as cheeks. Glue those on.
For the mouth, paint a smiley face or make it one step spookier and paint a pair of fangs onto the spider. If you want the spider to appear as if it’s moving, glue each leg in a different position.
Situate the spider on top of the orange popsicle stick. Then insert the stick in the slit on the paper plate and move it around the web!


