
Spooky Cute Halloween Mason Jar Craft
By using this site, you agree to our Terms of Use. This post may contain affiliate links. Read our disclosure policy.
Check out my Plaeful Printables for kids play and learning!
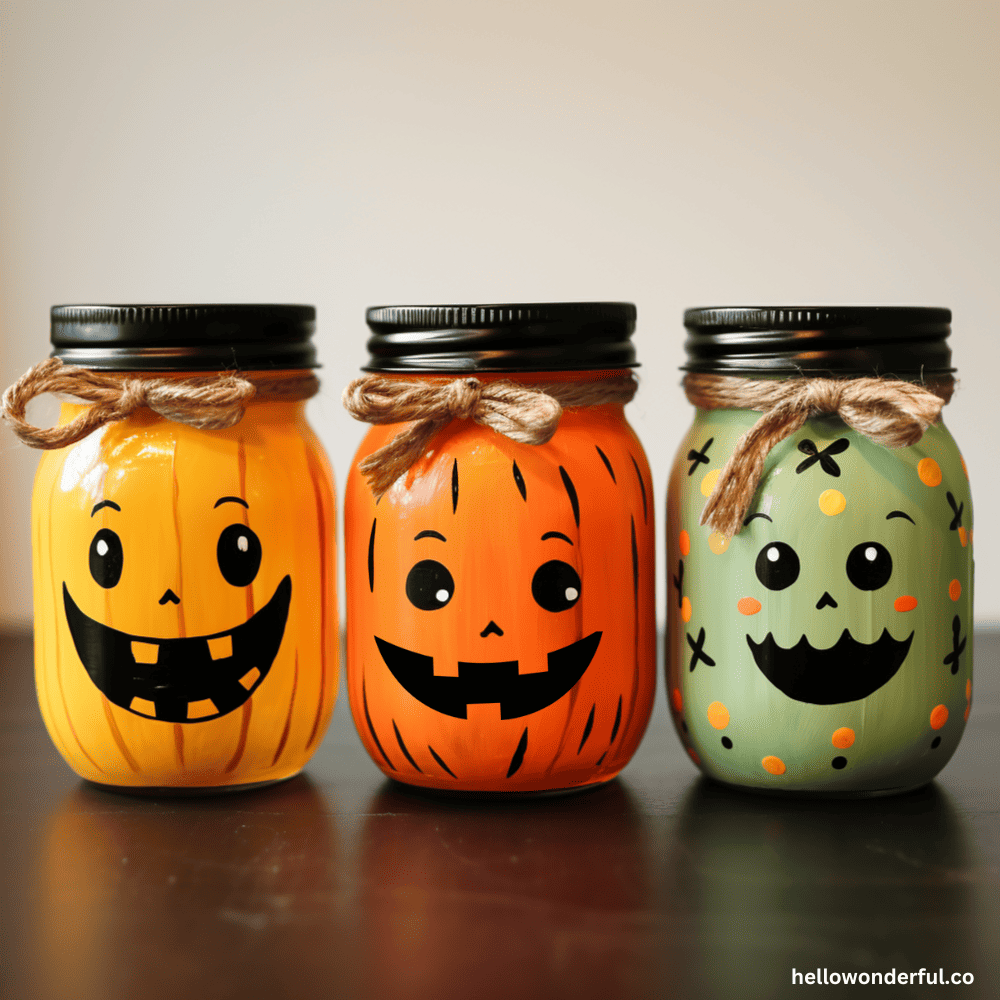
Recycle old Mason jars into cute Halloween jars! Perfect for storing spooky treats or to use as fun lanterns for trick or treating.
Halloween is around the corner, and it’s the perfect time for some spooky DIY decor. Instead of store-bought decorations, why not repurpose old Mason jars into festive Halloween crafts? With a touch of paint and a bit of imagination, you can quickly turn these jars into charming pumpkin and Frankenstein designs.
These jars are an eco-friendly recycled craft and a creative way to celebrate the ghoulish season. These are perfect for storing candy for trick or treating or to use as Halloween lanterns!
Halloween Jars – Materials
- Mason jars (clean and dry)
- Acrylic paint for glass or chalk paint (which adheres to jars very well). *You can also use spray paints. Make sure the paints you use can be used on glass.
- Paint brushes or foam brushes
- Primer (optional, but helps with paint adhere more)
- Paint markers (for face features)
- Sealer (like a spray sealer or Mod Podge)
How to Paint Mason Jars
1. Prepare the Jars
- Make sure your mason jars are clean. Wash them with soapy water, rinse, and allow them to dry completely. If there’s any residue or stickiness on the outside, you can use rubbing alcohol to clean it off. It also helps to to clean with alcohol on the outside to get rid of any greasy fingerprints or residue.
- (Optional) If you’re using a primer, apply a thin coat to the jar and allow it to dry completely.
2. Painting:
- Shake or stir your paint well.
- Dip your brush or foam brush into the paint, wiping off any excess.
- Apply the paint in thin, even layers.
- Let the first coat dry usually an hour or two.
- Apply a second coat if necessary and allow it to dry.
- Use shades of orange for the pumpkins and greens for Frankensteins.
- Optional: paint or spray paint your lids black or buy ready made jars with black lids
3. Adding faces
- You can use fine-tip paint brushes and paint to paint on faces, but we like to use paint markers because they are already fine-tipped and work well to add small details. If you want you can pencil in your face details and then paint over them.
- Add decorating touches last like lines around the jars or crosses or dot designs.
4. Sealing:
- To protect your painted jars, spray or brush on a clear sealer or Mod Podge. Let the sealer dry according to the product’s directions.
5. Decorating:
- Once your jars are painted and sealed, you can decorate them further with ribbons, twine, or add electric tea lights. These would be cute as jars to put out to line your home on Halloween night.
Conclusion:
Painting Halloween mason jars is a simple way to recycle old jars and add a spooky cute touch to your home! Kids can have fun decorating their faces and making adorable Halloween lanterns out of them too!
Spooky Cute Halloween Mason Jar Craft

Materials
- Mason jars (clean and dry)
- Acrylic paint for glass or chalk paint (which adheres to jars very well). *You can also use spray paints. Make sure the paints you use can be used on glass.
- Paint brushes or foam brushes
- Primer (optional, but helps with paint adhere more)
- Paint markers (for face features)
- Sealer (like a spray sealer or Mod Podge)
Instructions
1. Prepare the Jars
- Make sure your mason jars are clean. Wash them with soapy water, rinse, and allow them to dry completely. If there's any residue or stickiness on the outside, you can use rubbing alcohol to clean it off. It also helps to to clean with alcohol on the outside to get rid of any greasy fingerprints or residue.
- (Optional) If you're using a primer, apply a thin coat to the jar and allow it to dry completely.
2. Painting:
- Shake or stir your paint well.
- Dip your brush or foam brush into the paint, wiping off any excess.
- Apply the paint in thin, even layers.
- Let the first coat dry usually an hour or two.
- Apply a second coat if necessary and allow it to dry.
- Use shades of orange for the pumpkins and greens for Frankensteins.
- Optional: paint or spray paint your lids black or buy ready made jars with black lids
3. Adding faces
- You can use fine-tip paint brushes and paint to paint on faces, but we like to use paint markers because they are already fine-tipped and work well to add small details. If you want you can pencil in your face details and then paint over them.
- Add decorating touches last like lines around the jars or crosses or dot designs.
4. Sealing:
- To protect your painted jars, spray or brush on a clear sealer or Mod Podge. Let the sealer dry according to the product's directions.
5. Decorating:
- Once your jars are painted and sealed, you can decorate them further with ribbons, twine, or add electric tea lights. These would be cute as jars to put out to line your home on Halloween night.


