
EASY DIY SOCK BUNNY CRAFT
Easy DIY Sock Bunny Craft
Follow us on Instagram for more fun ideas for kids!
Scroll all the way down to watch the video below for the step-by-step video in how to make this Easy DIY Sock Bunny Craft. Make sure to subscribe to our YouTube channel for more fun videos!
It's been shown sewing with kids builds confidence, creativity and is a great way to practice those fine motor skills! Just ask sewing with kids enthusiast and expert Trixi from Coloured Buttons.
Trixi is the founder of Sew a Softie, a wonderful initiative to get kids sewing. This year, the mission has gone international with the Kids Global Sewing Party!

Trixi shares on her site:
"February, Sew a Softie partners with the Children’s Museum of the Arts, New York City as part of their CIVICKIDS campaign to host a Global Kids Sewing Party. Sew a Softie invites everyone, any where in the world with kids, grandkids, nieces or nephews, a school class, a sewing group or club to join in. The campaign’s theme for February is kindness and caring. The children participating will be joining in to sew a softie to give to someone in their community. The recipient may be a friend, a family member, an elderly neighbour, a local hospital, a nursing home, library, shelter or anyone whom they wish to reach out to."
So far there are over 20 countries committed to sewing a softie and we are one of the many participants!
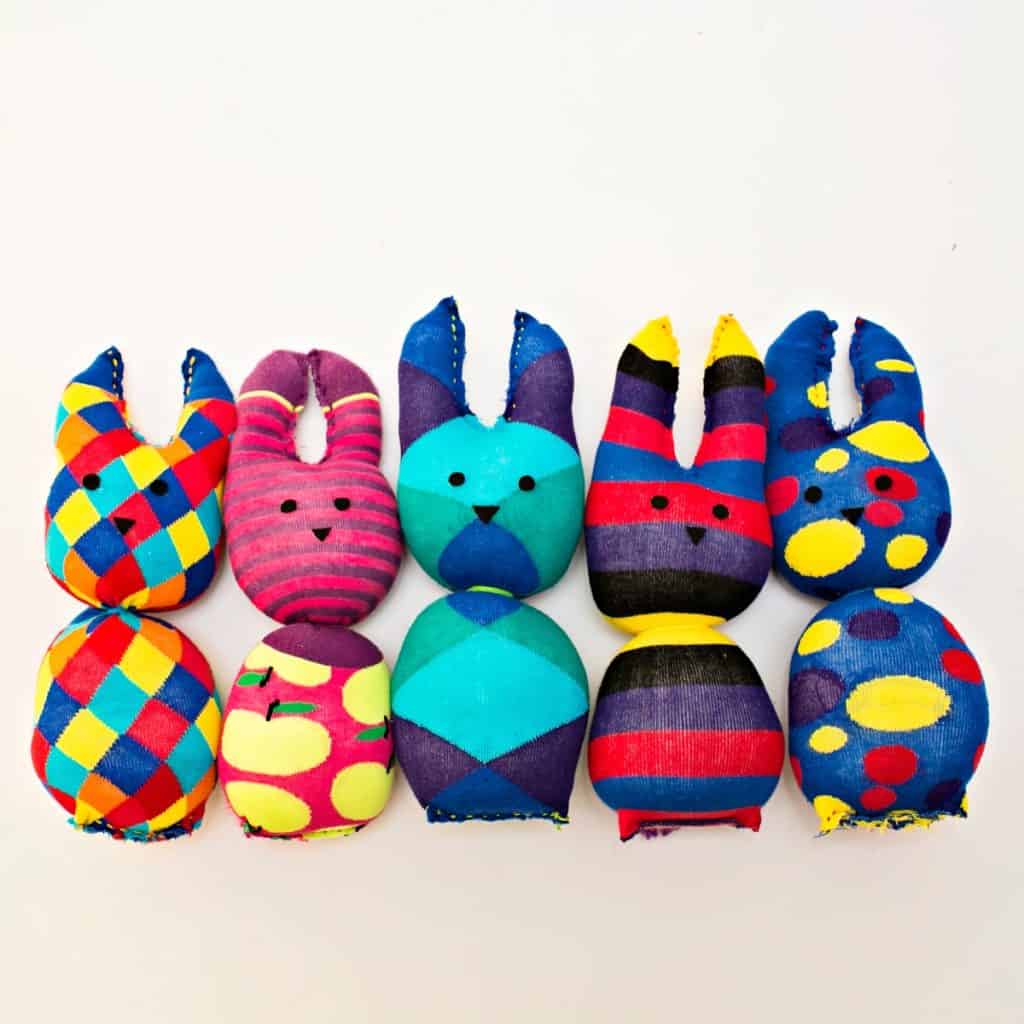
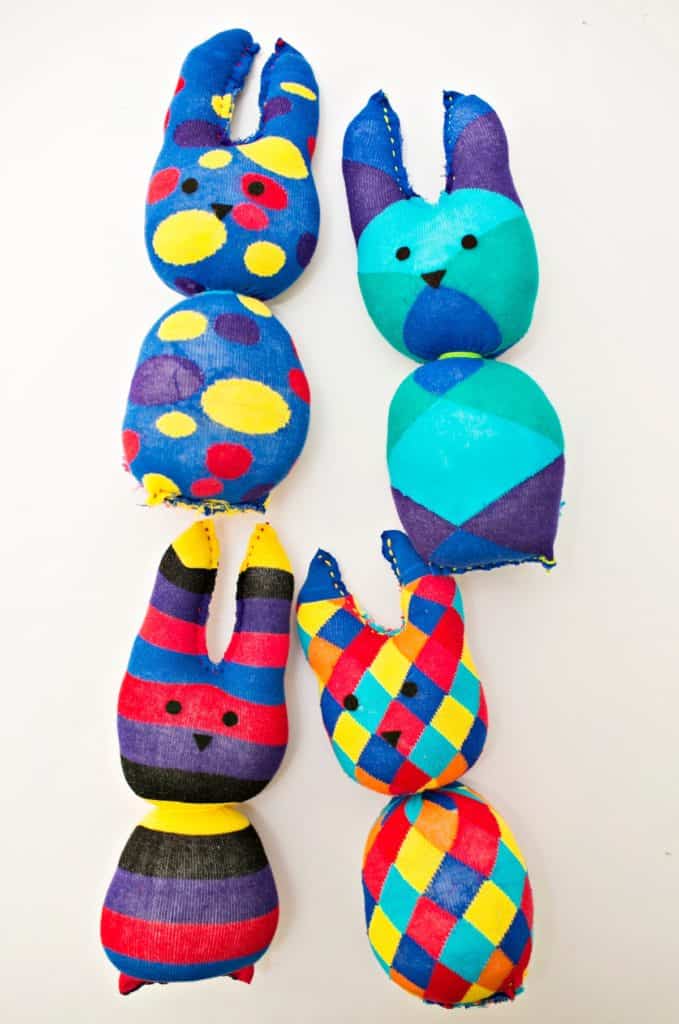
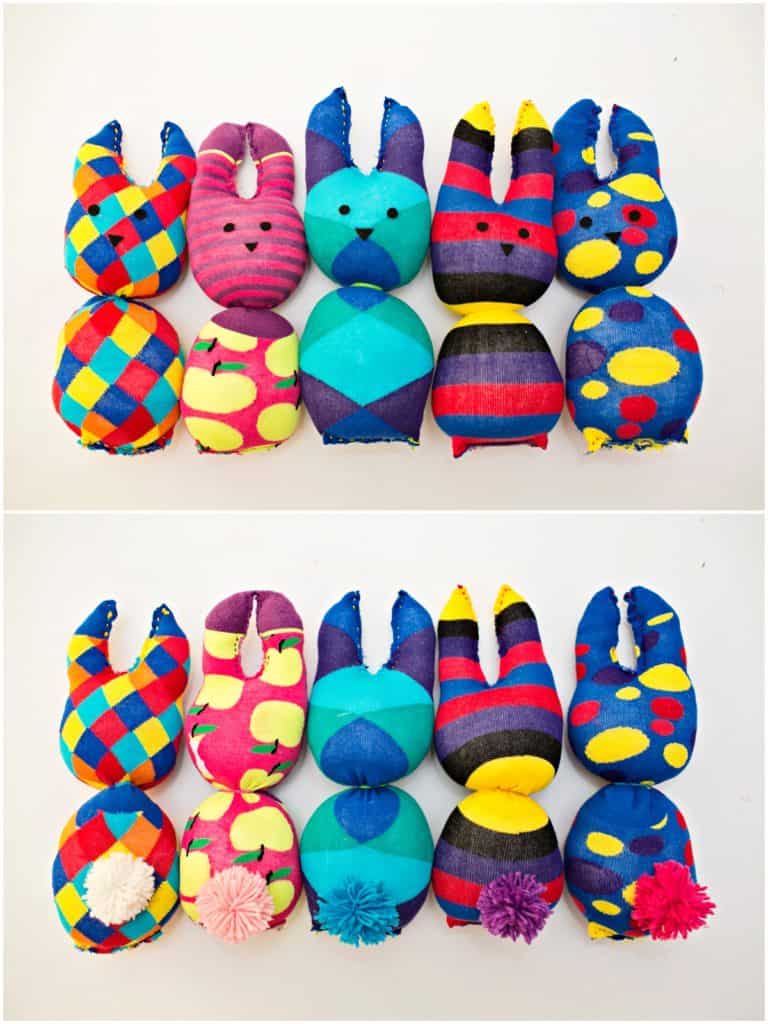
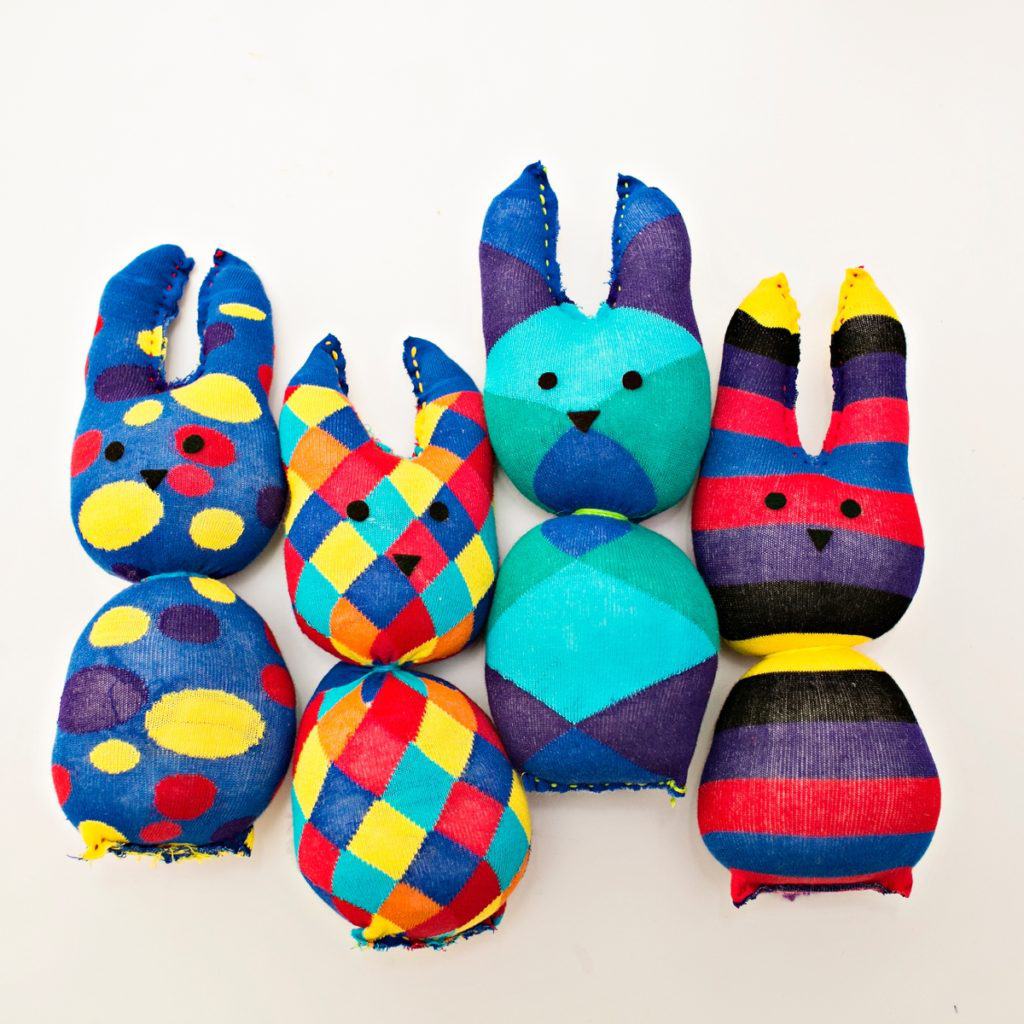
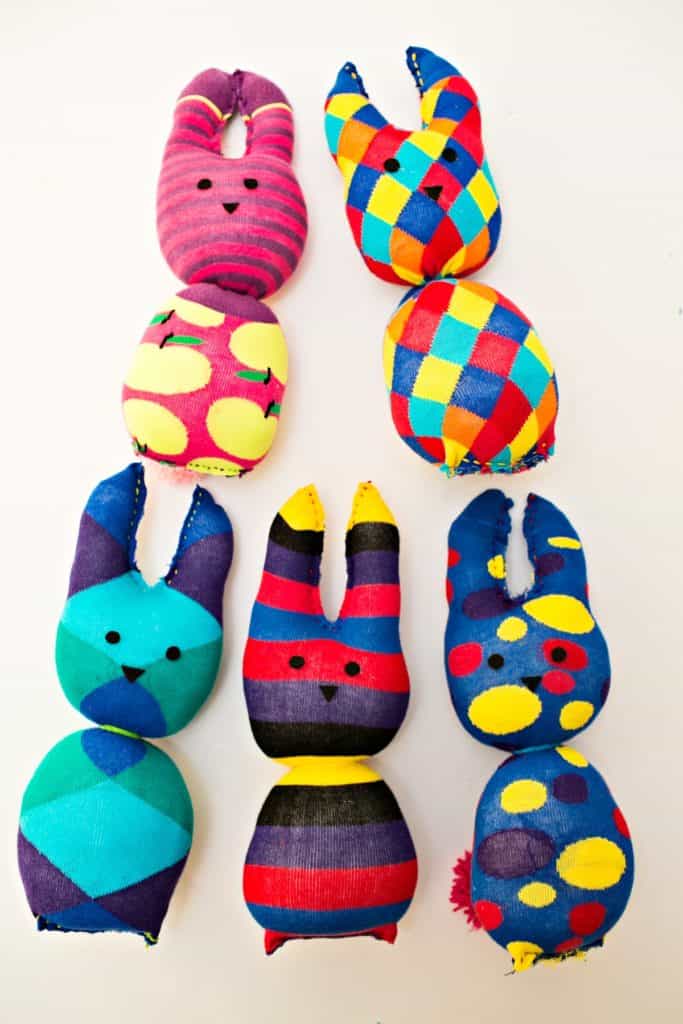
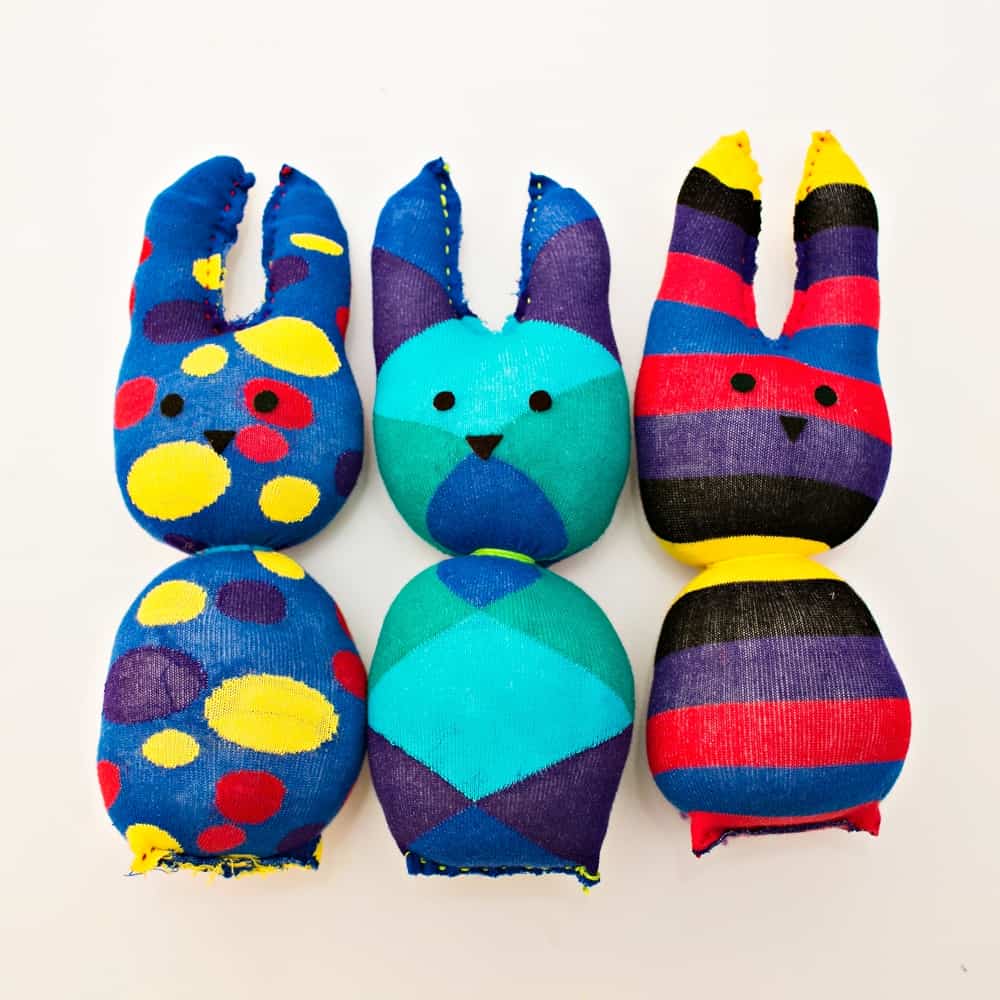
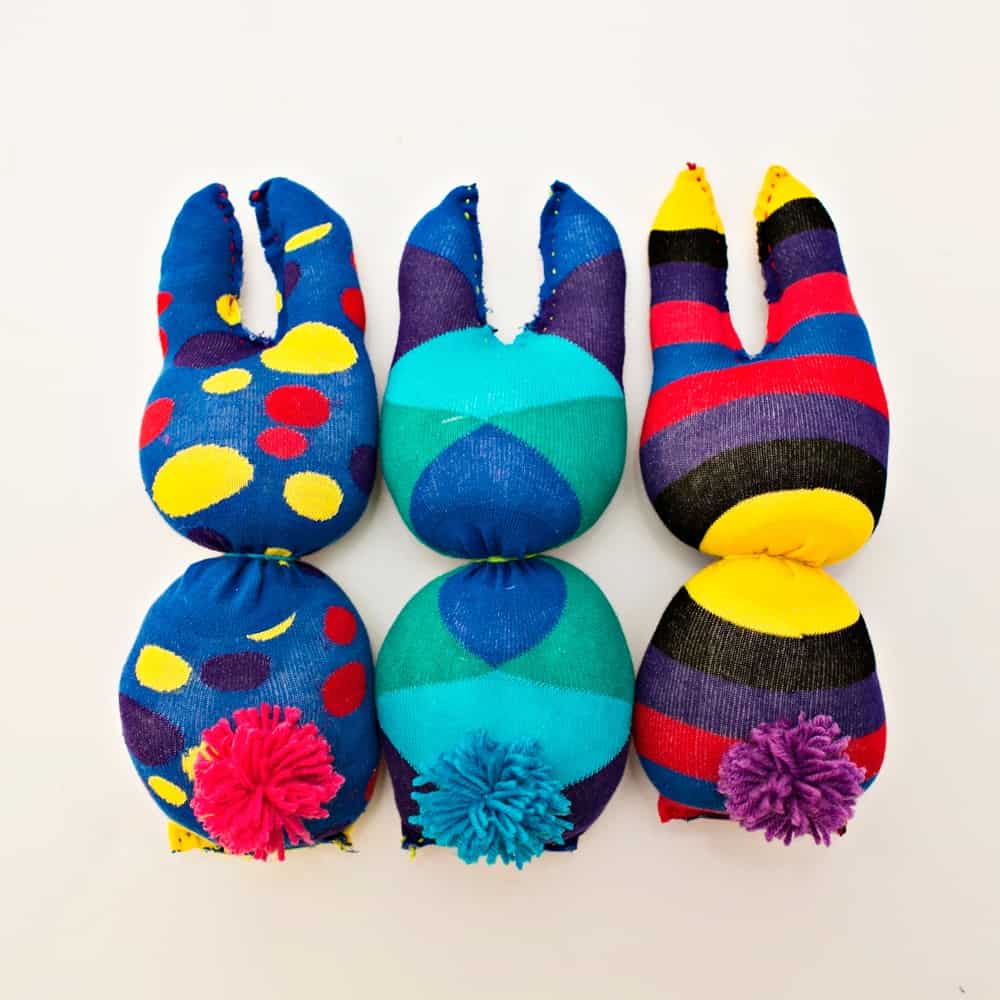
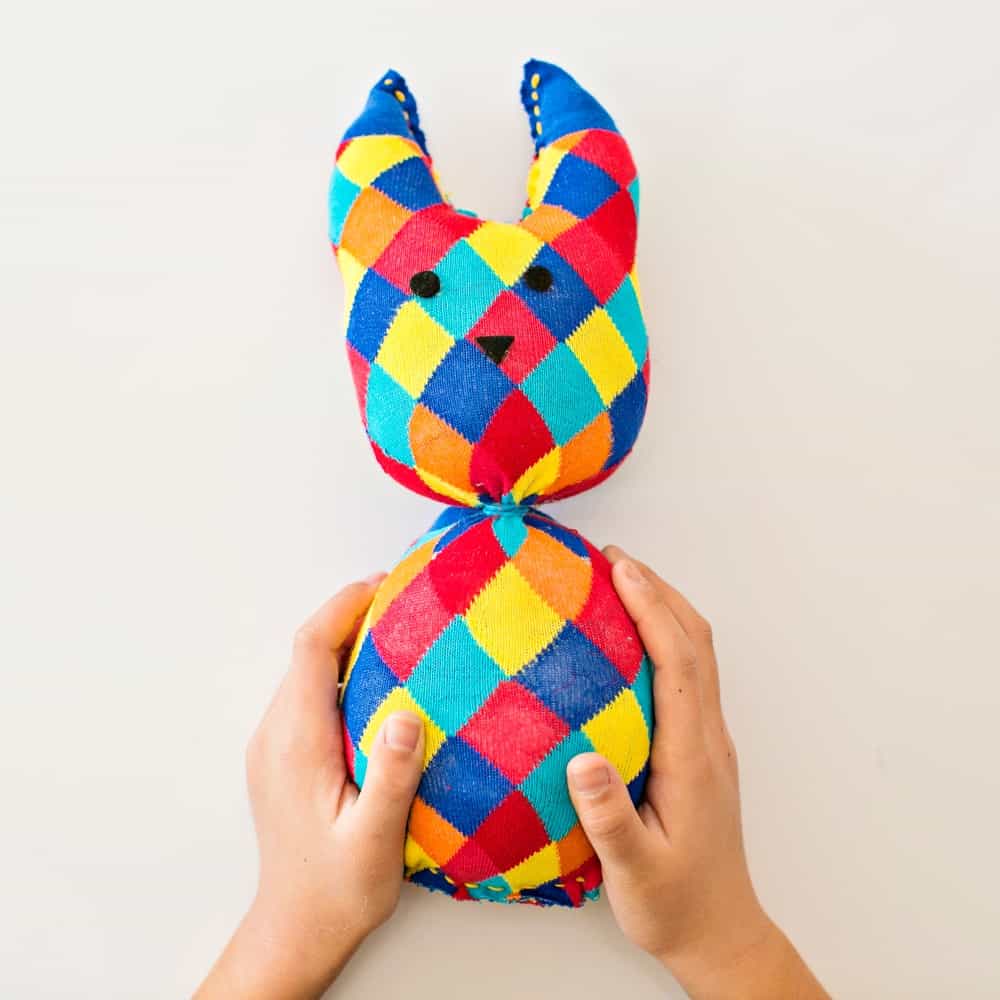
Given Easter is just around the corner, my daughter and I brainstormed a fun Easter bunny softie to make. Who doesn't love bunnies? Especially cute soft and cuddly ones.
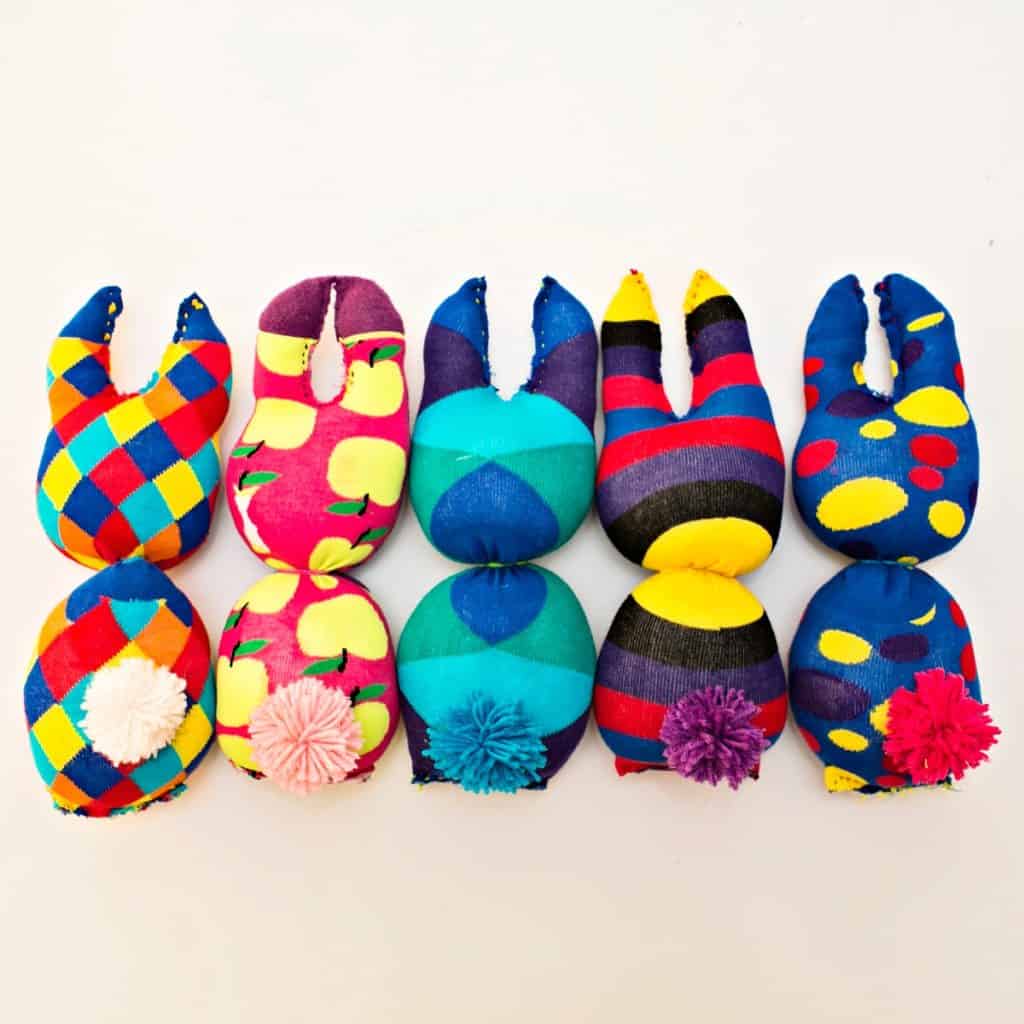
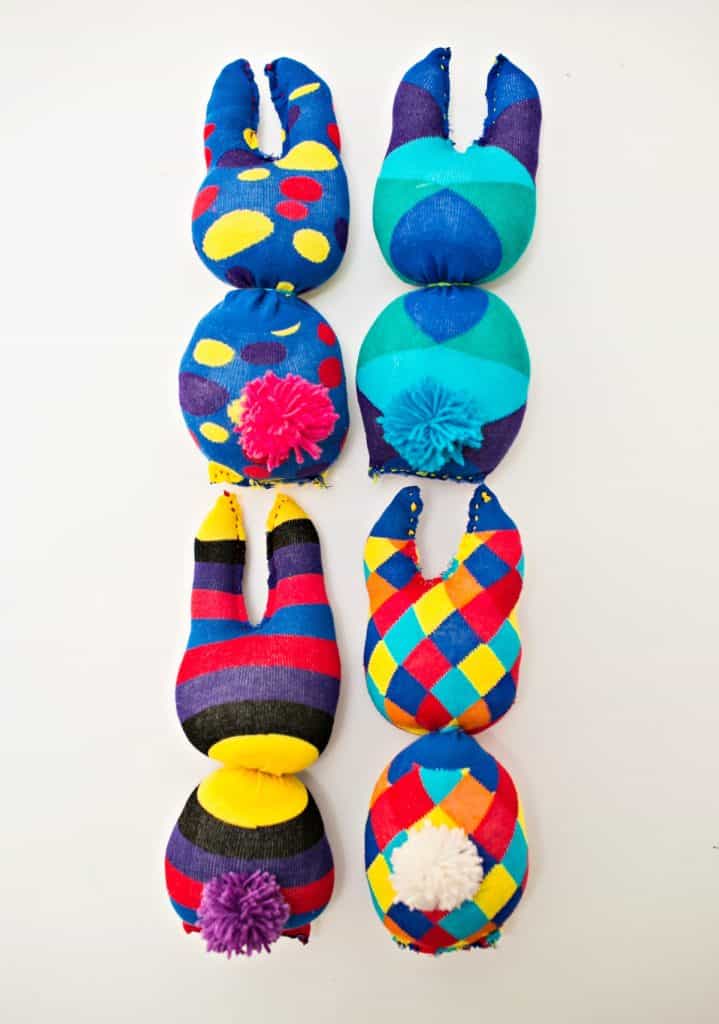
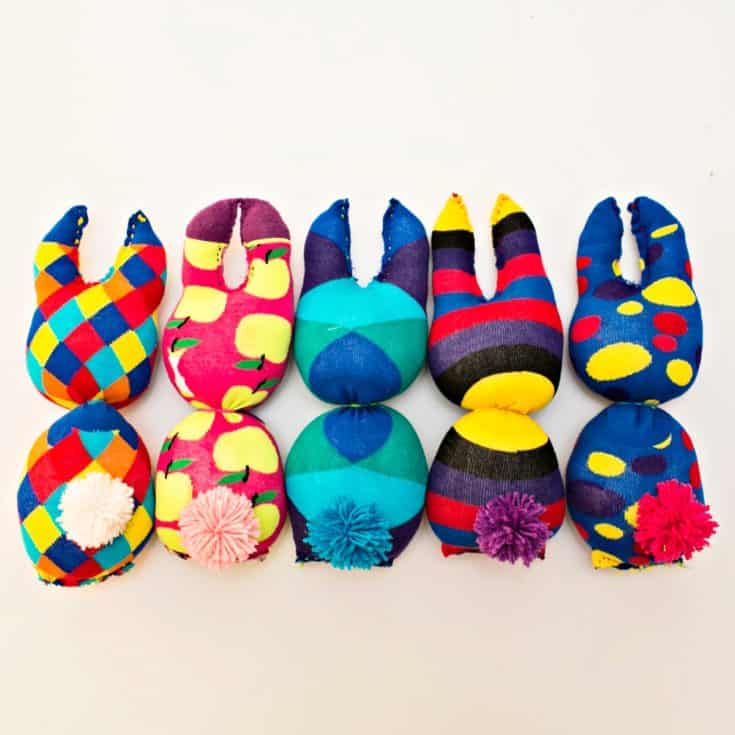
These irresistible DIY Sock bunnies are SO simple to make. Grab and old sock, some stuffing, thread and felt and you've got one lovable Easter friend.
On a personal note, we are moving cities in a few months so my daughter will miss her dear friends. These will be given to some of her besties to remember her by as a memento of their friendship.
Scroll all the way down below to watch the step by step video showing my daughter sewing by hand or follow the written instructions below:
DIY SOCK BUNNY - MATERIALS:
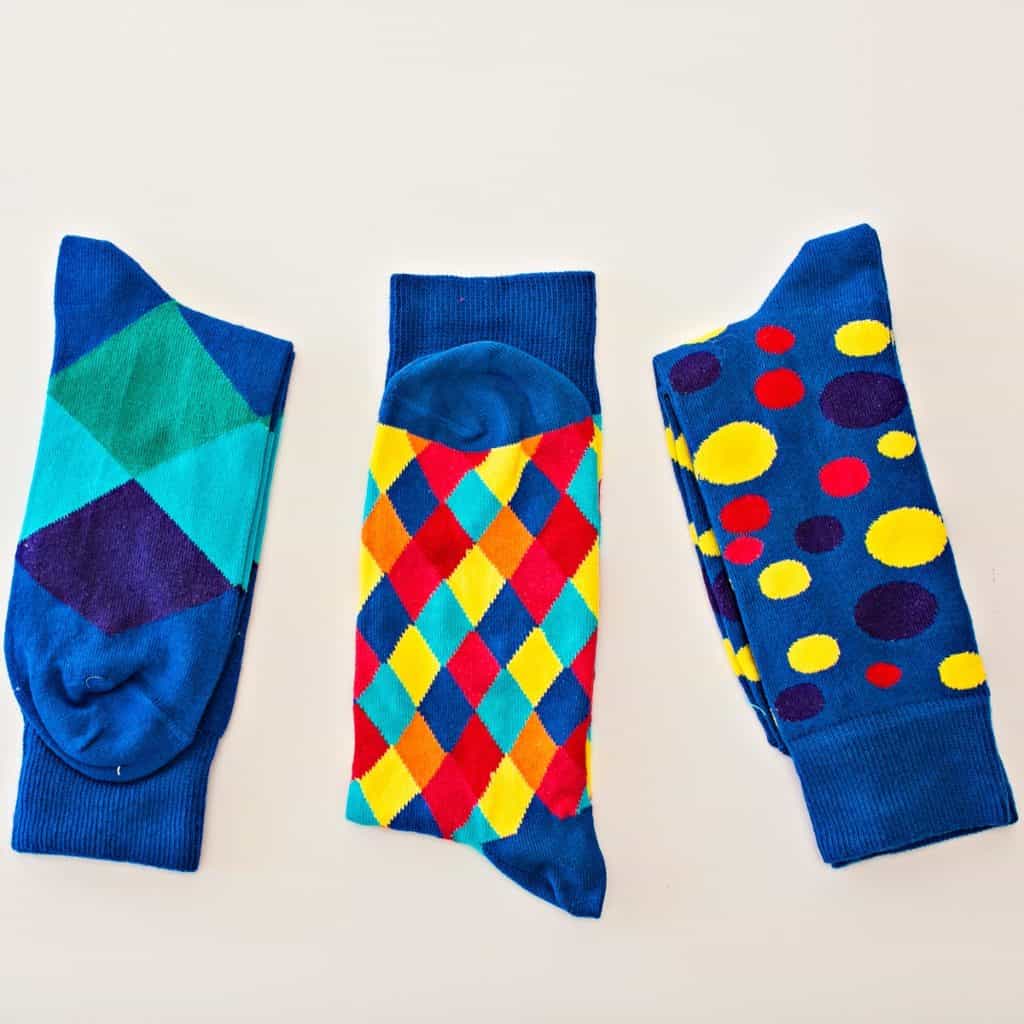
- Sock (a long one not ankle sock) we used these colorful socks
- Polyfill stuffing
- Thick Blunt Needle (for kids we like a safer thick needle)
- Embroidery thread
- Black felt scraps
- Yarn (to make your pom pom behind)
- Scissors
- Hot glue gun
- Rubber band
- Pins
INSTRUCTIONS:
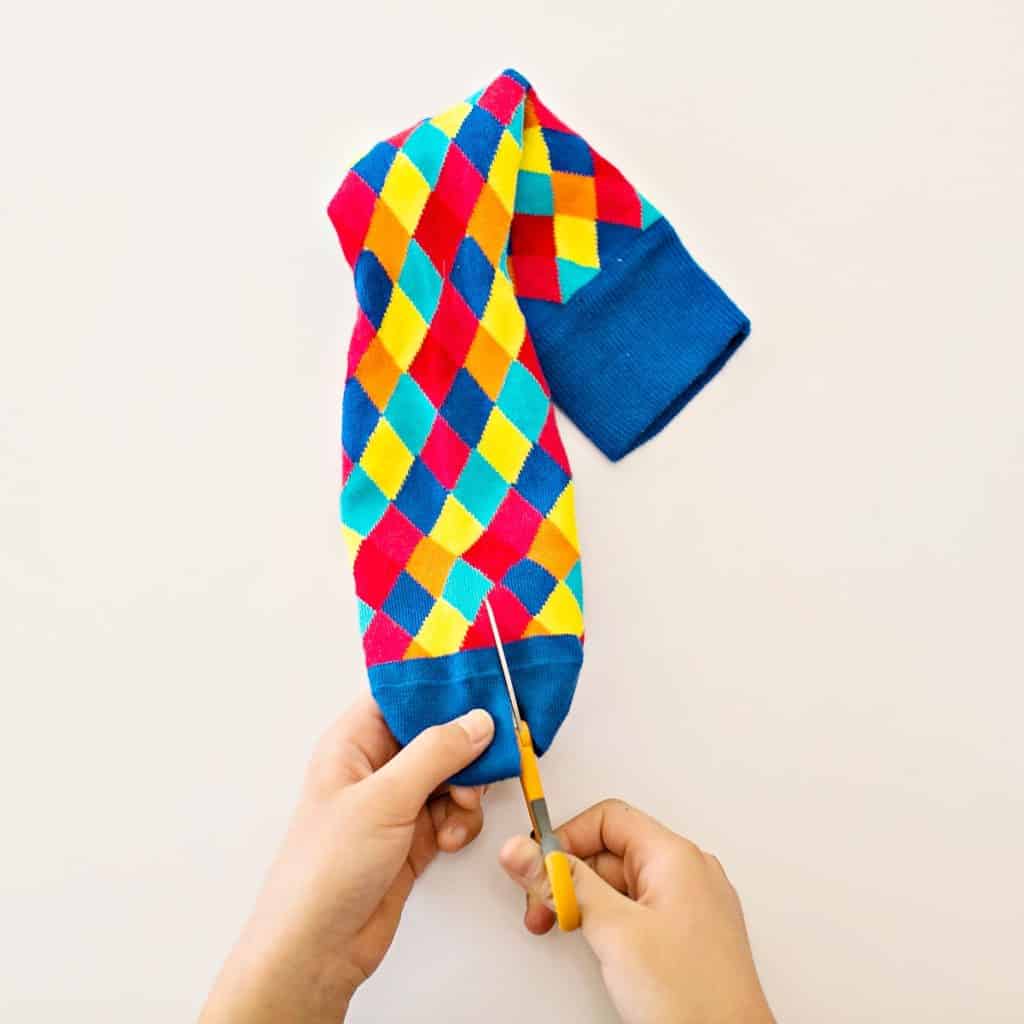
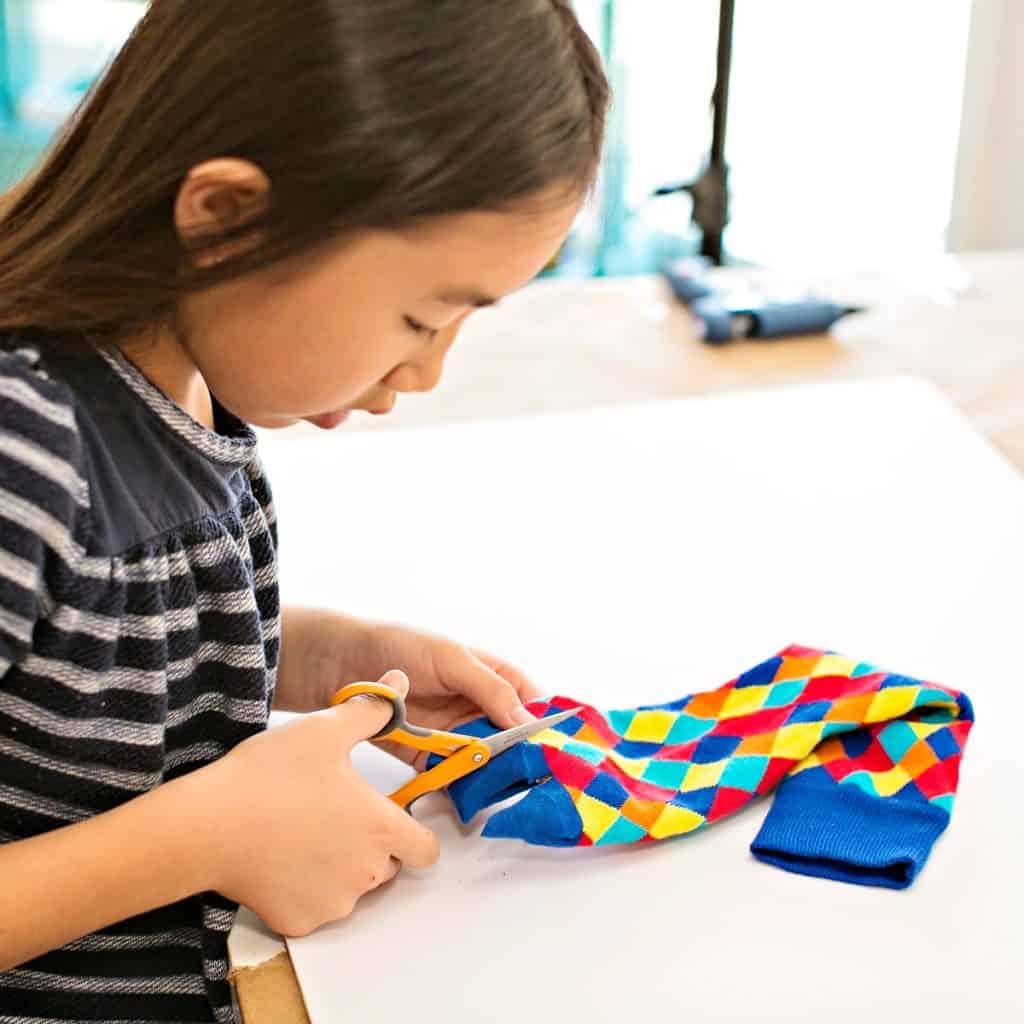
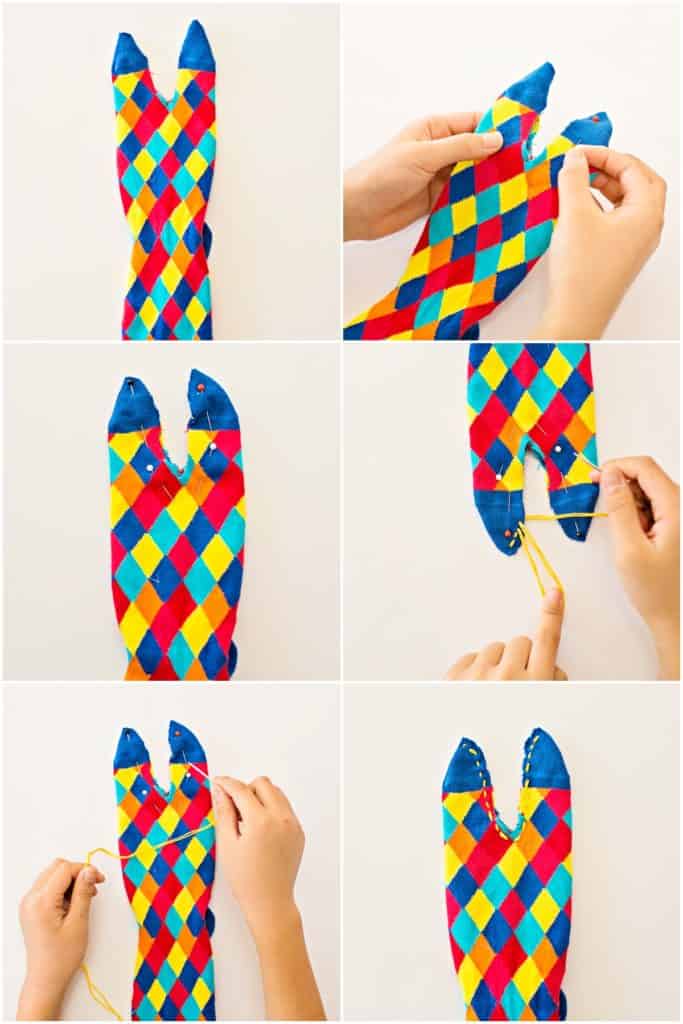
Step 1. Flatten your sock down so the heel is flat on the bottom. Cut a line down the top closed end, about how long you want your bunny years to be. In between the fold, cut around to make a slight curve.
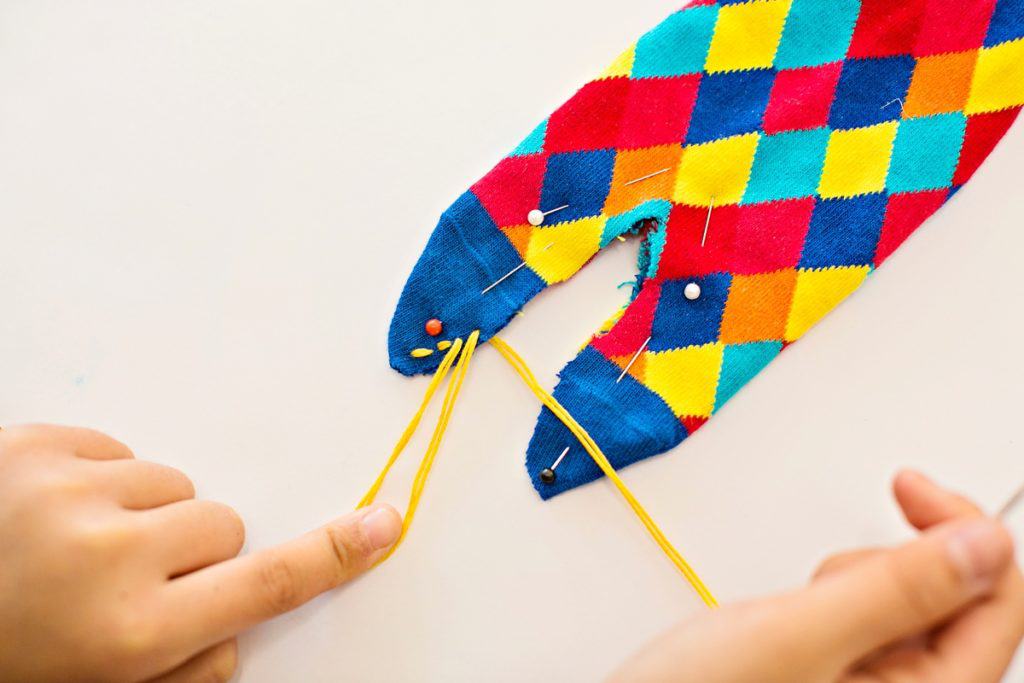
Step 2. Pin around the ears around ¼" seam from edge.
Step 3. Grab your embroidery thread, any color you want, thread a needle, double it up so it will be nice and strong. You don't need a very long piece as you'll just be stitching along the ears. Do just that, and stitch along your pinned ears.
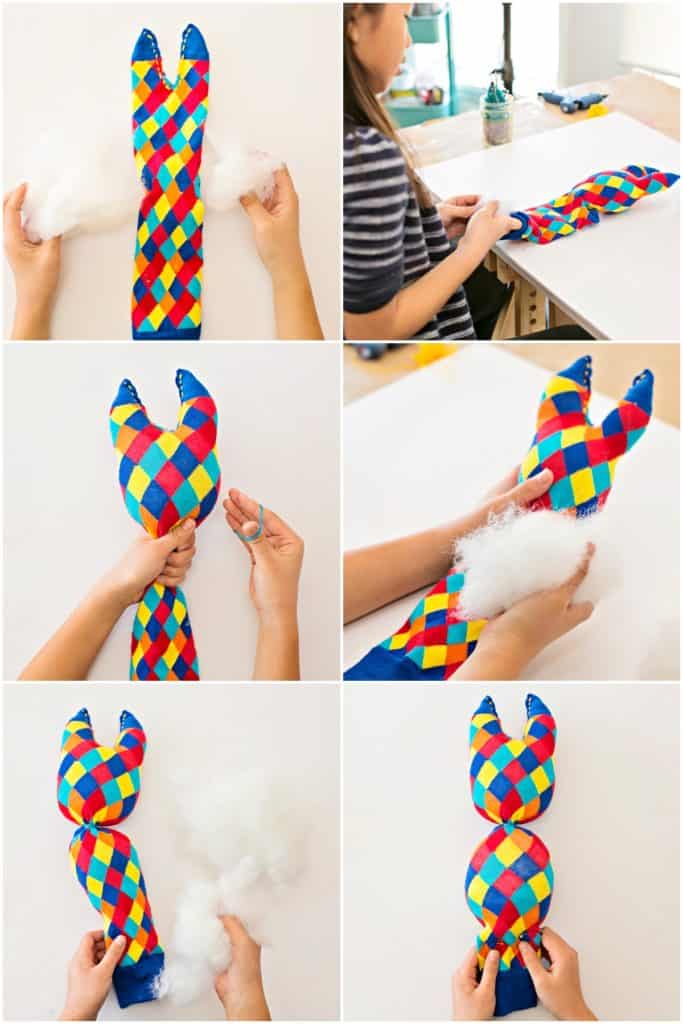
Step 4. Stuff the ears and face. Tie a rubber band right below the face to create the neck. We found after making multiple bunnies that two to three loops around is sufficient or you'll get a really skinny-necked bunny!
Step 5. Next add stuffing to the bottom of the sock which will be your body. Pin the end and sew shut. Cut off the excess sock.
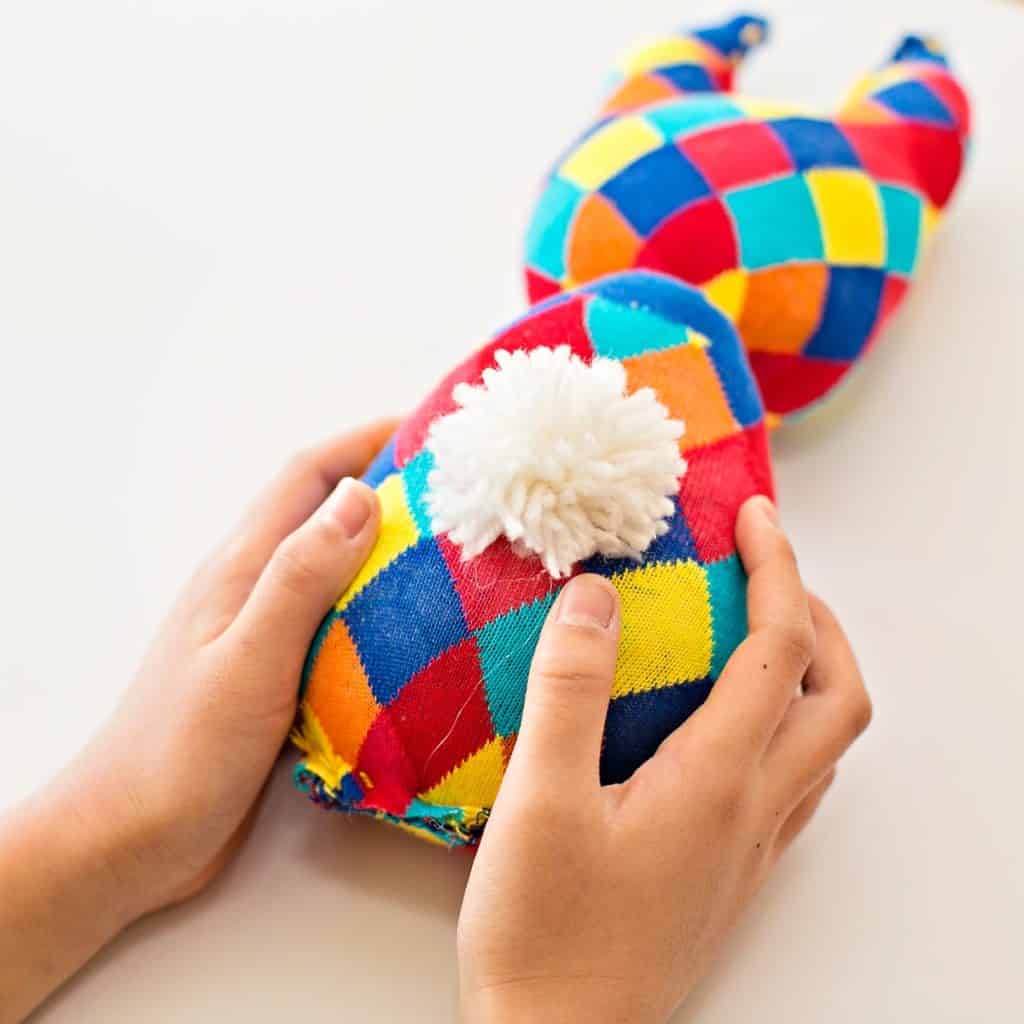
Step 6. Cut two small black circles for the eyes and small triangle from black felt. Hot glue to the bunny face. Of course you can sew these on too, it's just easier for kids to glue smaller parts.
Step 7. To make the yarn pom pom butt, use your favorite pom pom tool (we like this one) and hot glue on the back. You can choose to sew it on too.
Repeat and make more bunny friends!
**Remember if hot glueing any parts keep away from toddlers under 3 years old due to potential chocking hazards.**
Thank you for inviting to sew with you Trixi from Coloured Buttons! Check out all the amazing softies for the Global Kids Sewing Party over on Instagram! #GlobalKidsSewingParty.
Check out more cute Easter Crafts for Kids.
If your kids aren't quite ready to sew yet, check out our easy No Sew Tshirt Monster Softie!
Watch the step by step DIY Sock Bunny Craft below:
EASY DIY SOCK BUNNIES
These irresistible DIY Sock bunnies are SO simple to make. Grab and old sock, some stuffing, thread and felt and you’ve got one lovable Easter friend.
Materials
Instructions
Step 1. Flatten your sock down so the heel is flat on the bottom. Cut a line down the top closed end, about how long you want your bunny years to be. In between the fold, cut around to make a slight curve.
Step 2. Pin around the ears around ¼″ seam from edge.
Step 3. Grab your embroidery thread, any color you want, thread a needle, double it up so it will be nice and strong. You don’t need a very long piece as you’ll just be stitching along the ears. Do just that, and stitch along your pinned ears.
Step 4. Stuff the ears and face. Tie a rubber band right below the face to create the neck. We found after making multiple bunnies that two to three loops around is sufficient or you’ll get a really skinny-necked bunny!
Step 5. Next add stuffing to the bottom of the sock which will be your body. Pin the end and sew shut. Cut off the excess sock.
Step 6. Cut two small black circles for the eyes and small triangle from black felt. Hot glue to the bunny face. Of course you can sew these on too, it’s just easier for kids to glue smaller parts.
Step 7. To make the yarn pom pom butt, use your favorite pom pom tool (we like this one) and hot glue on the back. You can choose to sew it on too.
Repeat and make more bunny friends!
Disclosure: Some of the links in the post above are “affiliate links.” This means if you click on the link and purchase the item, we will receive a small affiliate commission. Regardless, we give our promise that we only recommend products or services we would use personally and believe will add values to our readers.


