BACK TO SCHOOL PHOTO PAPER PLATE CRAFT
Scroll down to watch and follow along this cute Photo Paper Plate tutorial, and be sure to subscribe to our channel for more fun crafts and ideas!
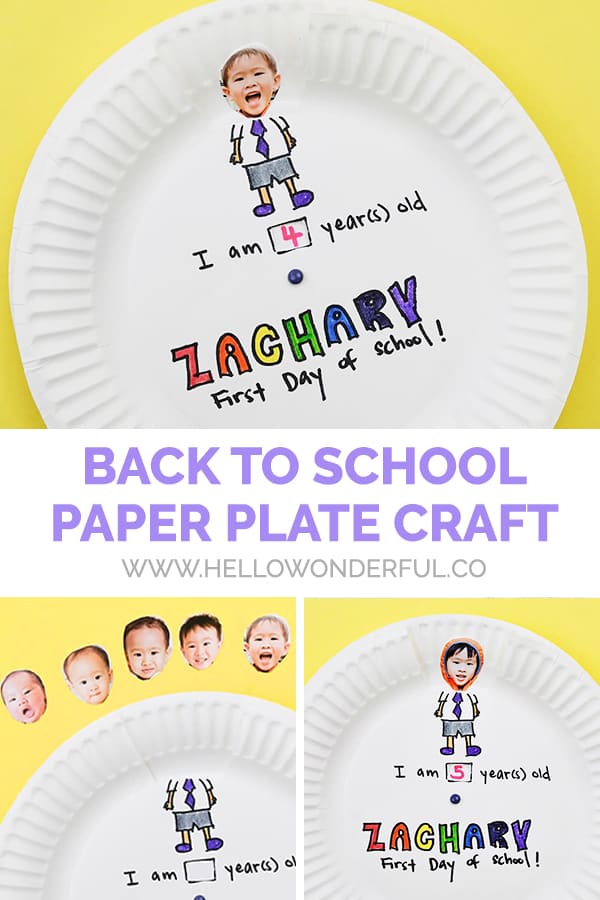
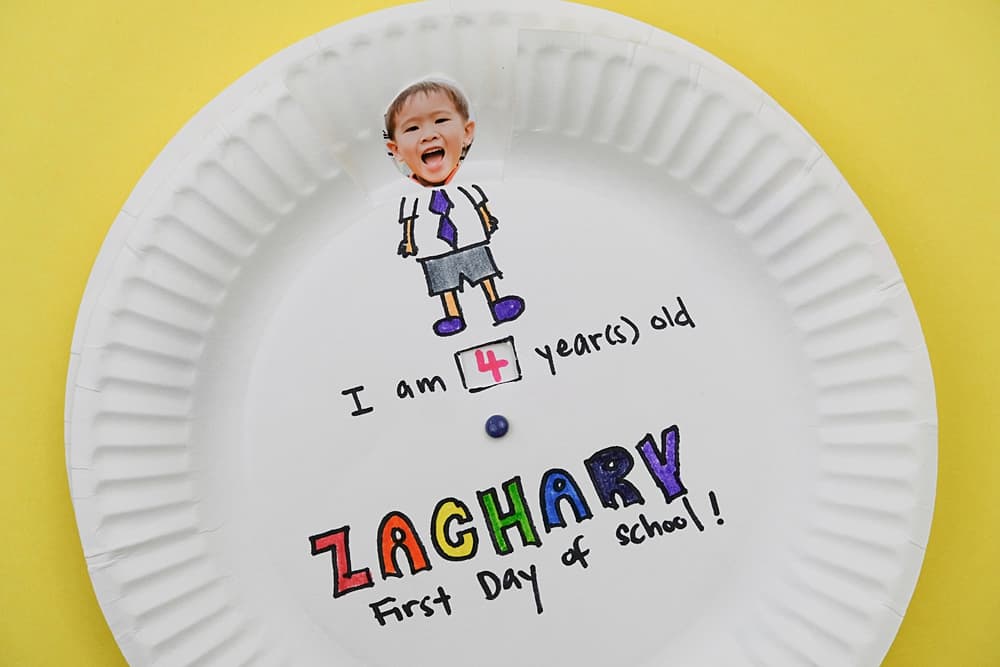
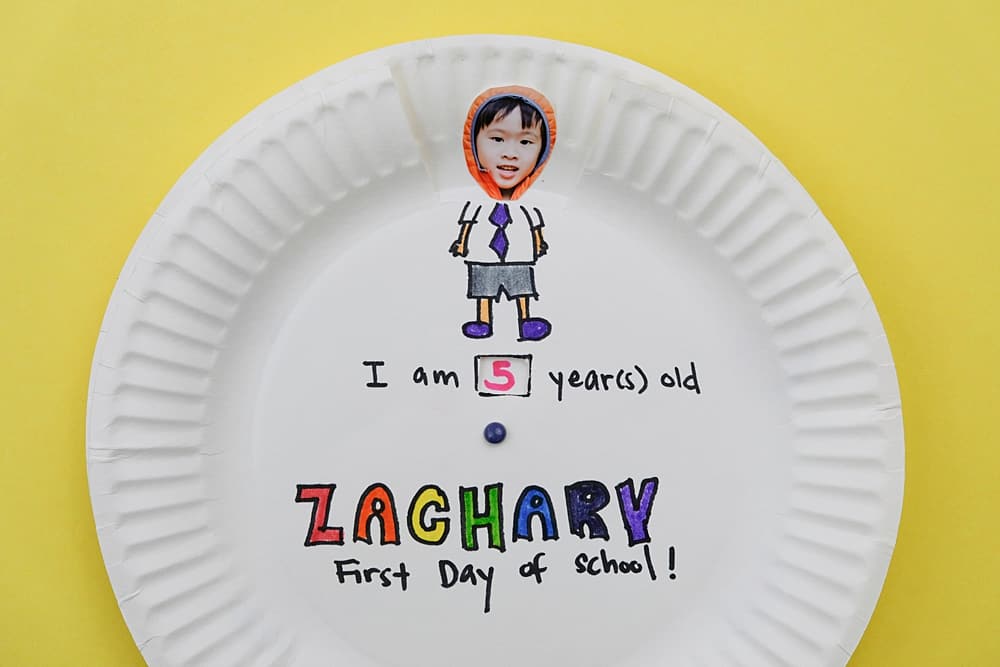
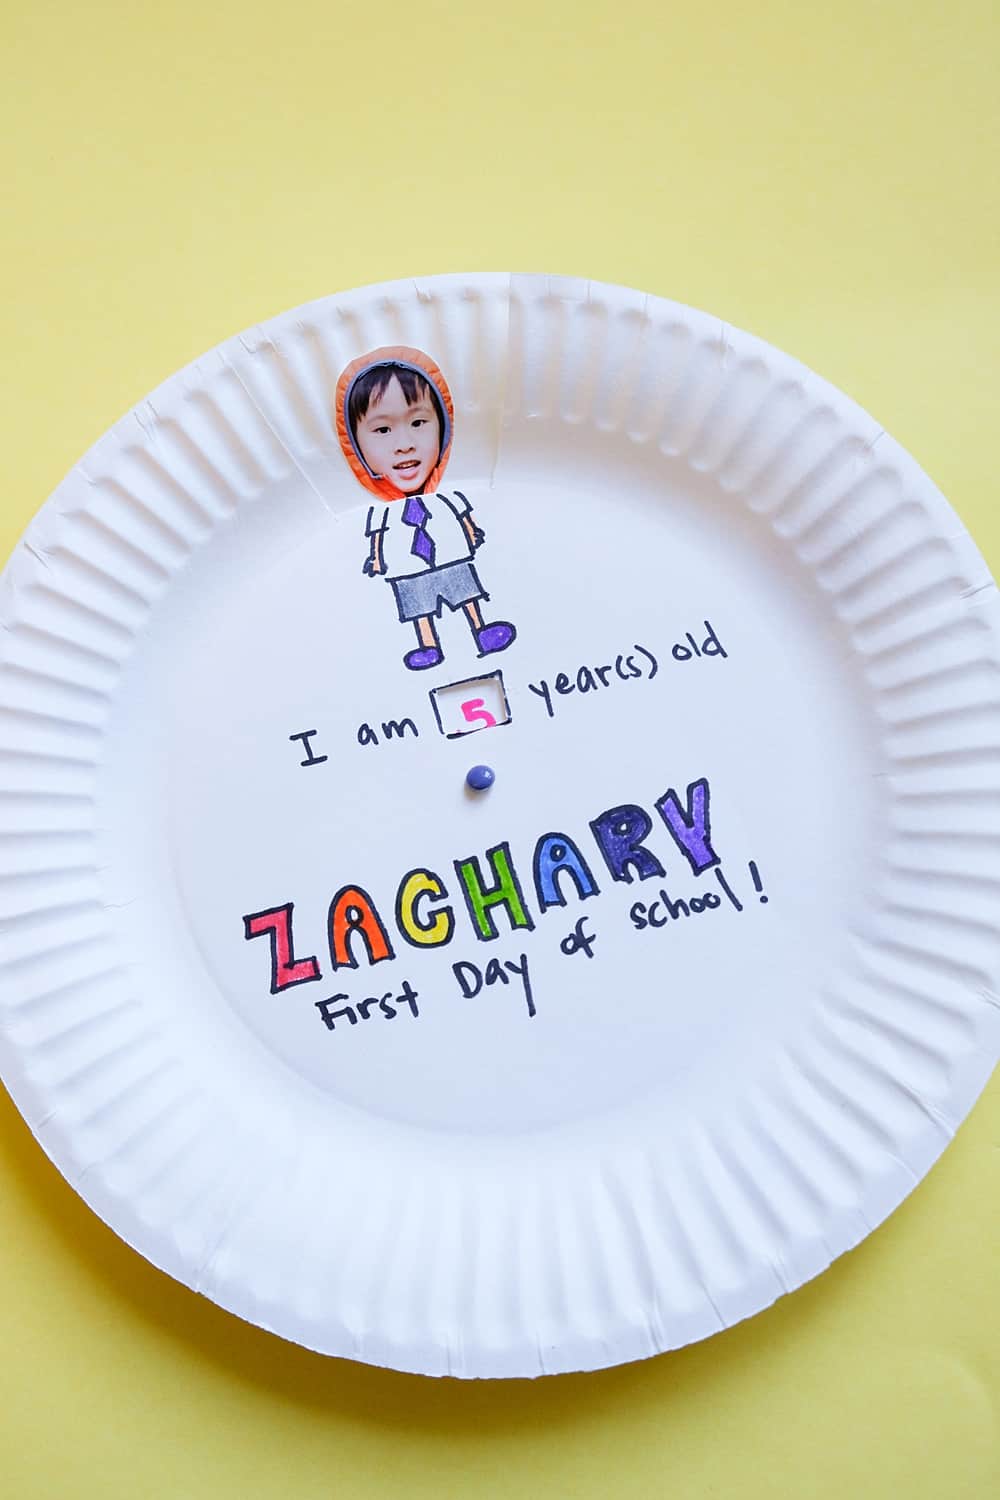
The first day of school is just around the corner. This Back to School Photo Paper Plate Craft is a special handmade gift for your little one to celebrate this milestone together. Turn the paper plate and see how much your child has grown through the school years!
This cute photo paper project would also work well to celebrate any milestones like birthdays! Simply change the text and wording to reflect a birthday celebration.
BACK TO SCHOOL PHOTO PAPER PLATE CRAFT – MATERIALS:
* 2 paper plates (9” each)
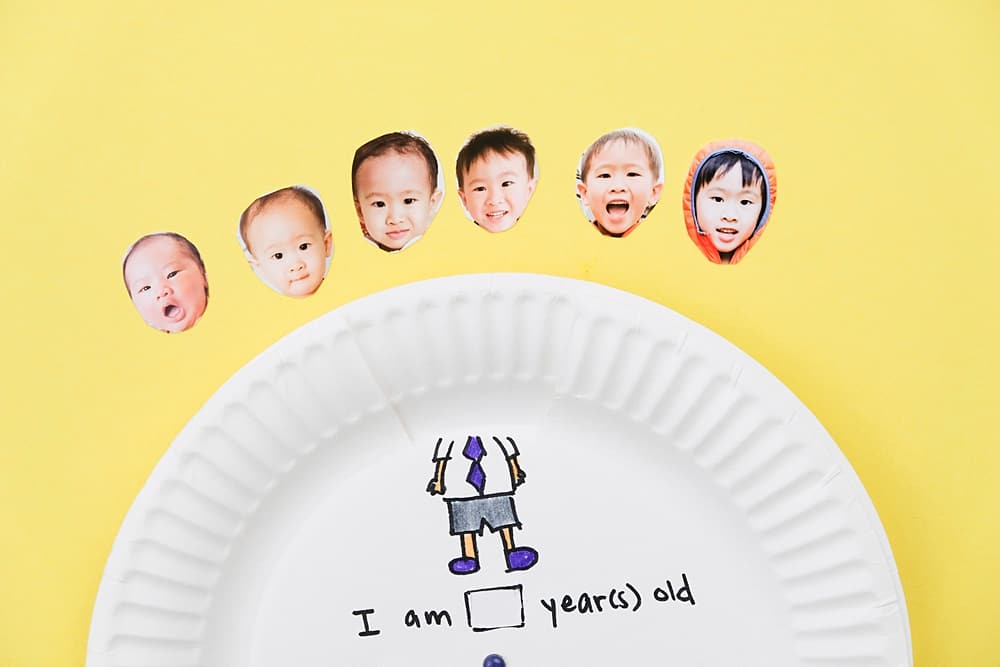
* Tiny yearly head shots of your child. I printed 6 photos in one 4×6” paper.
* A brad pin
* Markers for drawing and coloring
* Basic stationery like double sided tape/glue and a pair of scissors


Watch the video tutorial or follow the step by step instructions below.
BACK TO SCHOOL PHOTO PAPER PLATE CRAFT INSTRUCTIONS:
Step 1: Cut a small rectangle (around 2” by 1.5”) at the edge of the first paper plate.
Step 2: Draw a body (without the head) below the rectangle.
Step 3: Write ‘I am ___ year(s) old’ under the drawing of the body.
Step 4: Cut a small square at the blank in the sentence above.
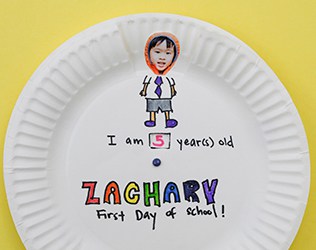
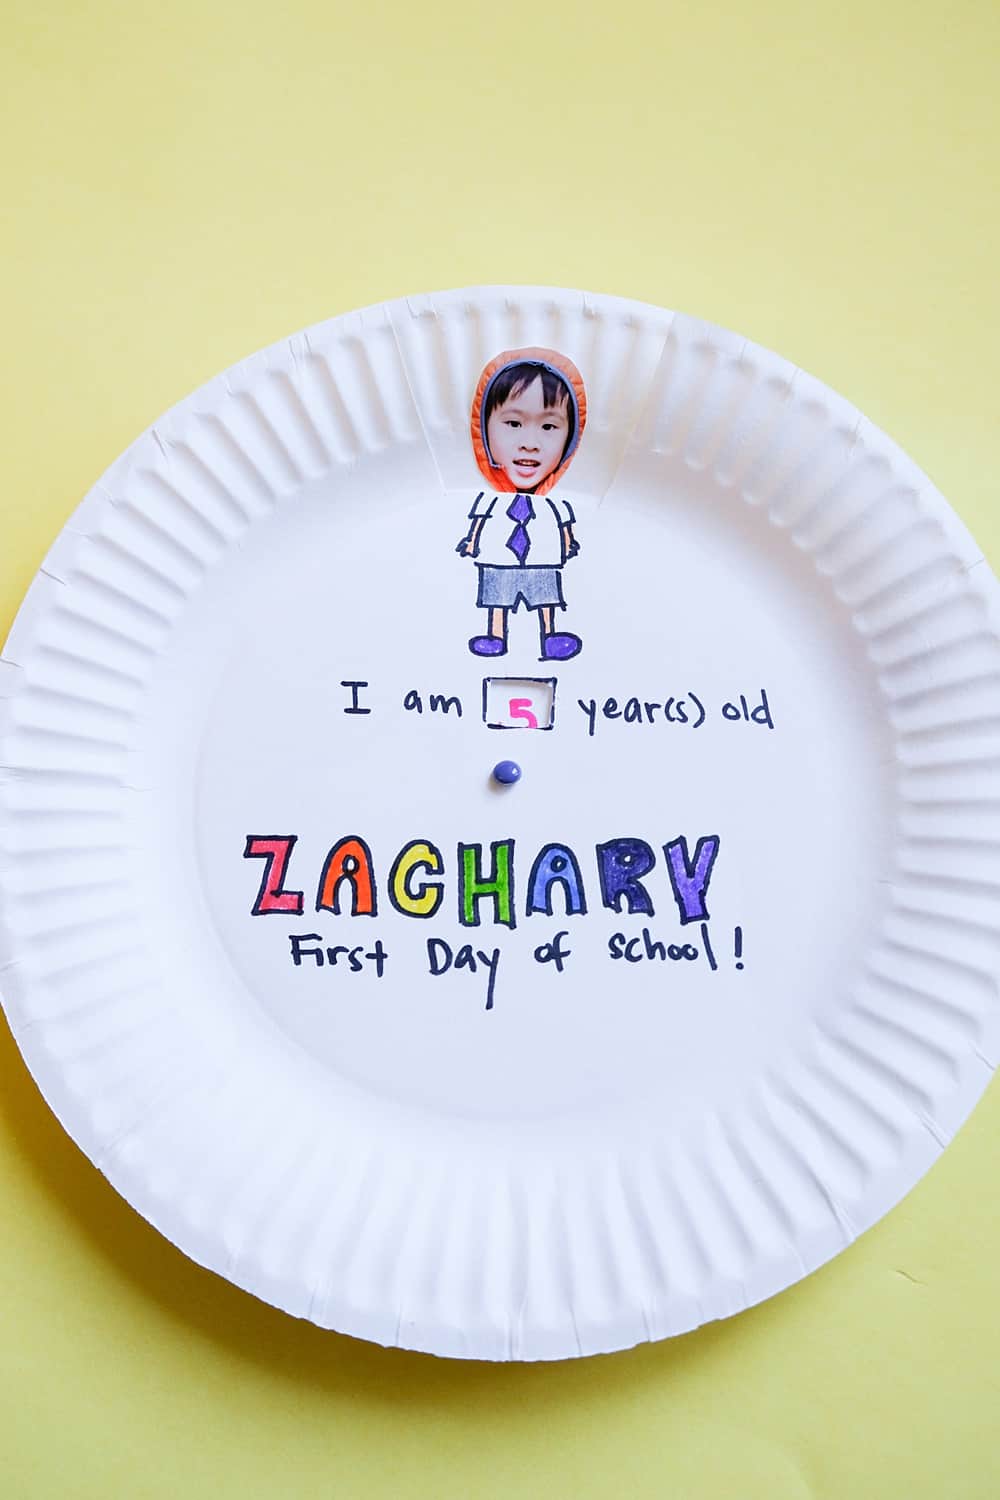
Step 5: Personalize the paper plate with your child’s name and/or a message.
Step 6: Color your drawings if you like to.
Step 7: Place the second paper plate behind and secure at the center with the brad pin.
Step 8: Cut out the headshots of your child. Stick the first headshot (at age 0) in the big rectangular space. The headshot should look connected to the drawing of the body.
Step 9: Rotate the first paper plate around 2” to the right and stick the second headshot (at age 1 year old) in the empty space. Repeat this step until all headshots are attached to the paper plate.
Step 10: Rotate to the age 0 headshot and fill in the number for the age in the small square space. Repeat for all the headshots.
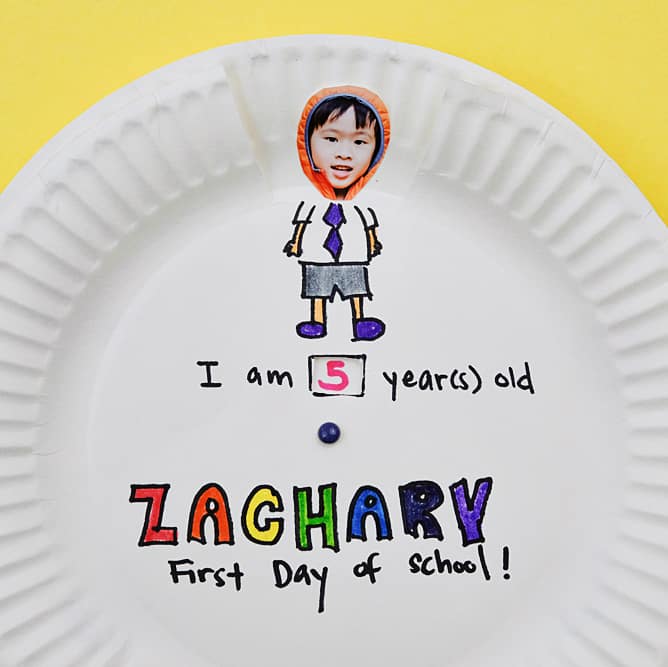
Keep this paper plate and add a new headshot each year! It’ll be so special to look back at these photos every first day of school!
This Back to School Photo Paper Plate Craft is a special handmade gift for your little one to celebrate this milestone together. Turn the paper plate and see how much your child has grown through the school years! Step 1. Cut a small rectangle (around 2” by 1.5”) at the edge of the first paper plate.BACK TO SCHOOL PHOTO PAPER PLATE CRAFT
Materials
Instructions
Step 2. Draw a body (without the head) below the rectangle.
Step 3. Write ‘I am ___ year(s) old’ under the drawing of the body.
Step 4. Cut a small square at the blank in the sentence above.
Step 5. Personalize the paper plate with your child’s name and/or a message.
Step 6. Color your drawings if you like to.
Step 7. Place the second paper plate behind and secure at the center with the brad pin.
Step 8. Cut out the headshots of your child. Stick the first headshot (at age 0) in the big rectangular space. The headshot should look connected to the drawing of the body.
Step 9. Rotate the first paper plate around 2” to the right and stick the second headshot (at age 1 year old) in the empty space. Repeat this step until all headshots are attached to the paper plate.
Step 10. Rotate to the age 0 headshot and fill in the number for the age in the small square space. Repeat for all the headshots.
How are you celebrating back to school?
Take a look right below at the DIY video to make your own Back to School Photo Paper Plate!

Fynn is a Singaporean mum currently living in California with her husband and two children. Trained a Chemical Engineer, she became a Science teacher and one day decided to dabble in the Arts and became a makeup artist. Her children came along and she switched painting faces for painting cardboard boxes with her children. Driven by new experiences, big dreams and cookie dough ice cream, she is always working on something new – learning new skills, exploring new places, creating new toys from trash and making new learning shelves at home. Follow Fynn on her blog Happy Tot Shelf, Instagram, Facebook, and Pinterest.
Disclosure: Some of the links in the post above are “affiliate links.” This means if you click on the link and purchase the item, we will receive a small affiliate commission. Regardless, we give our promise that we only recommend products or services we would use personally and believe will add values to our readers.