


By using this site, you agree to our Terms of Use. This post may contain affiliate links. Read our disclosure policy. As an Amazon Influencer, I earn from qualifying purchases.
Check out my Plaeful Printables for kids to play and learning!
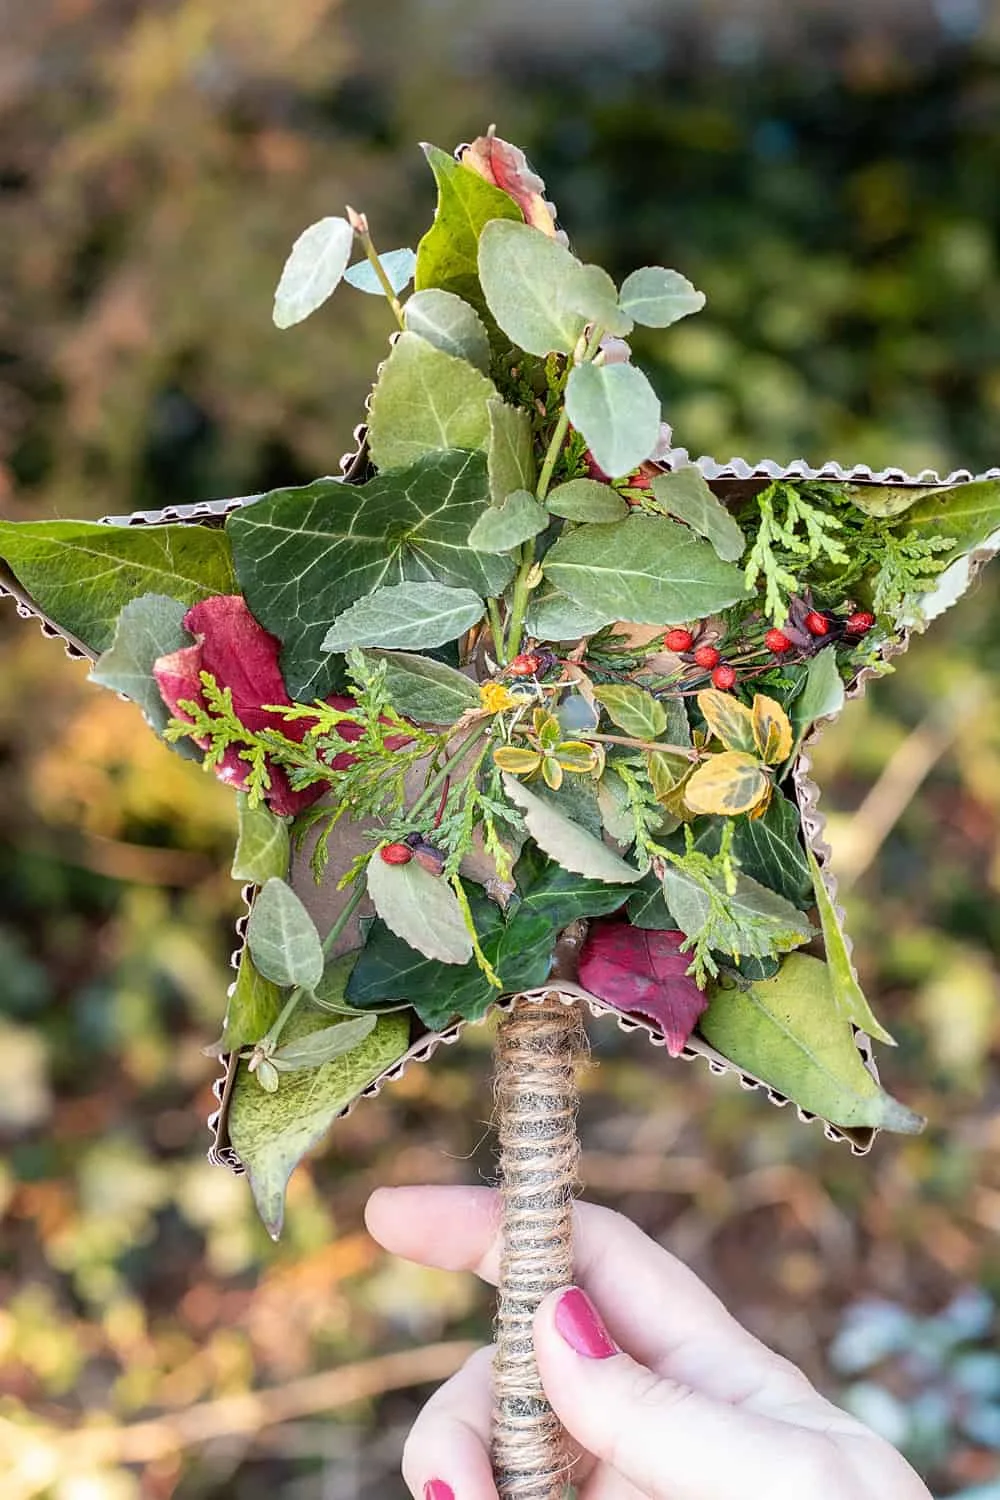
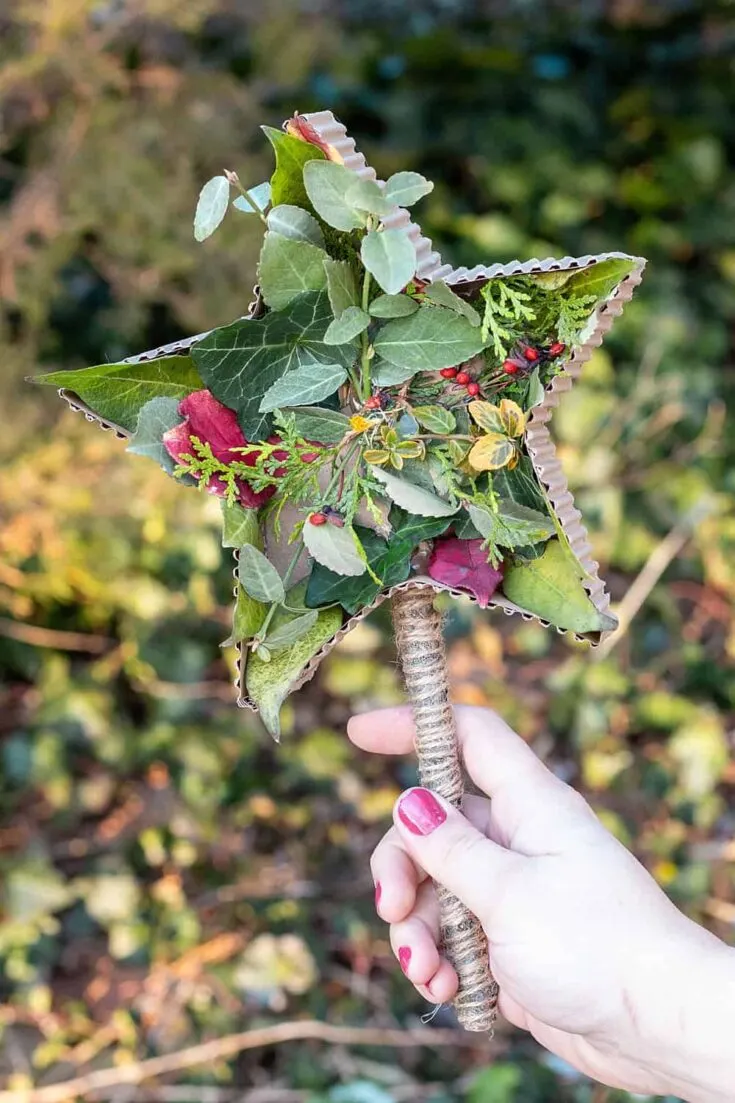
This nature star wand is the perfect new year craft for kids and encourages imaginative play to celebrate any occasion!


Nature Star Wand Craft

Materials
- Free star printable
- Cardboard
- Corrugated cardboard
- Natural materials (leaves, twigs, berries, flowers, etc.)
- A sturdy stick (for the wand handle)
- Twine
- Hot glue gun
- Scissors or a craft knife
Instructions
Step 1: Print and Cut Out Your Star Begin by printing out the star shape using our free printable. Trace the star onto a piece of cardboard and cut it out. This will be the base of your wand.
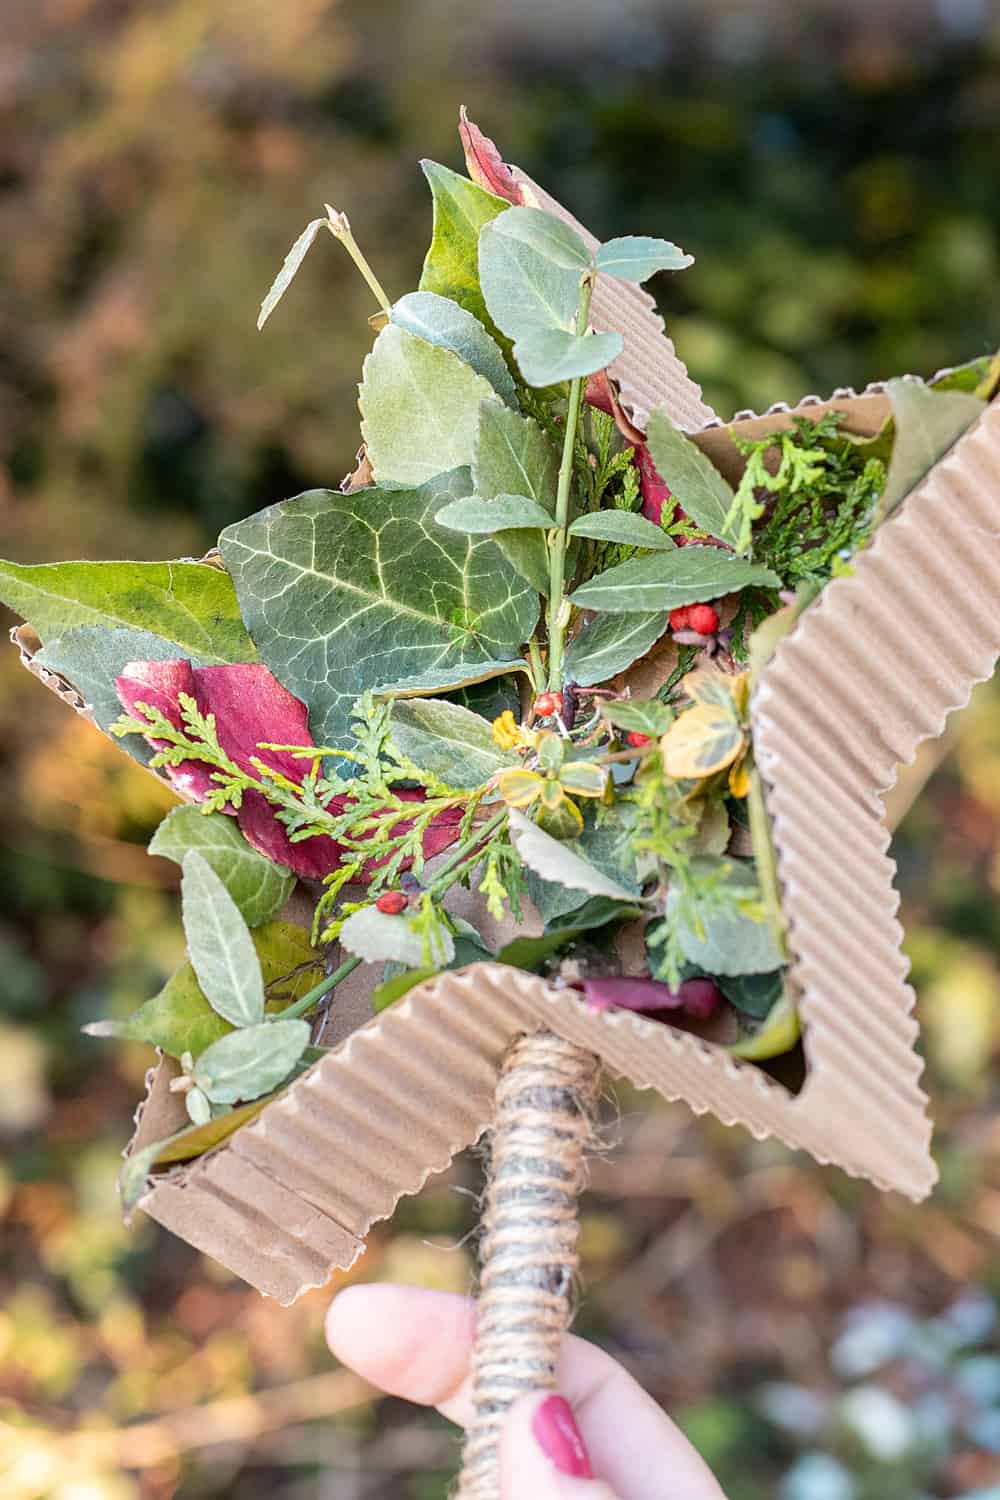
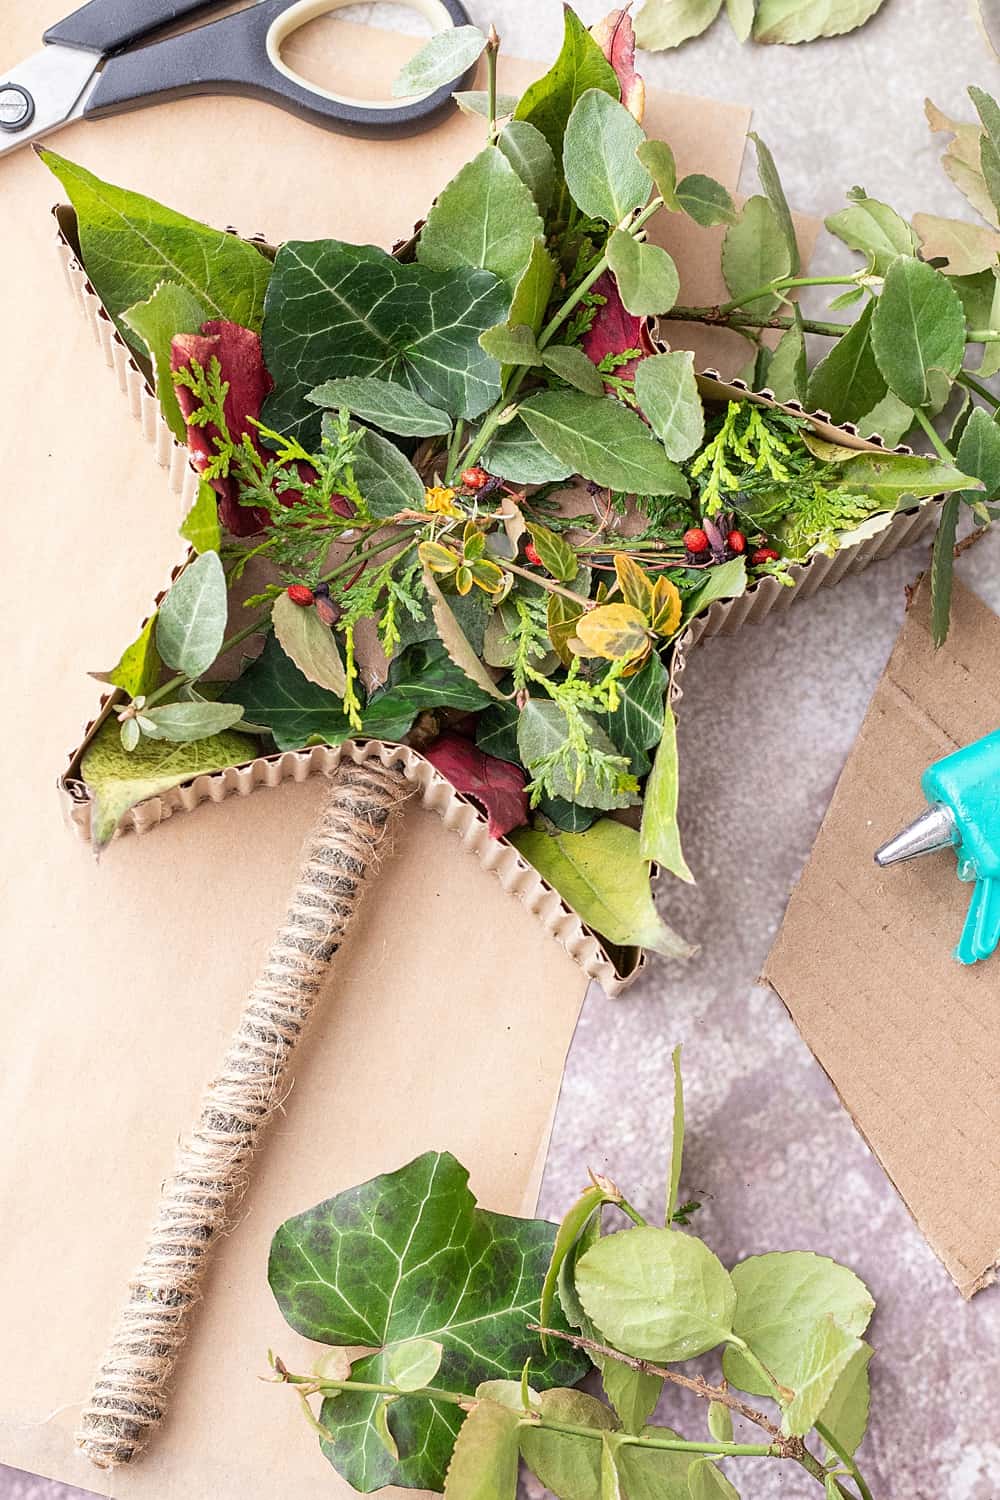
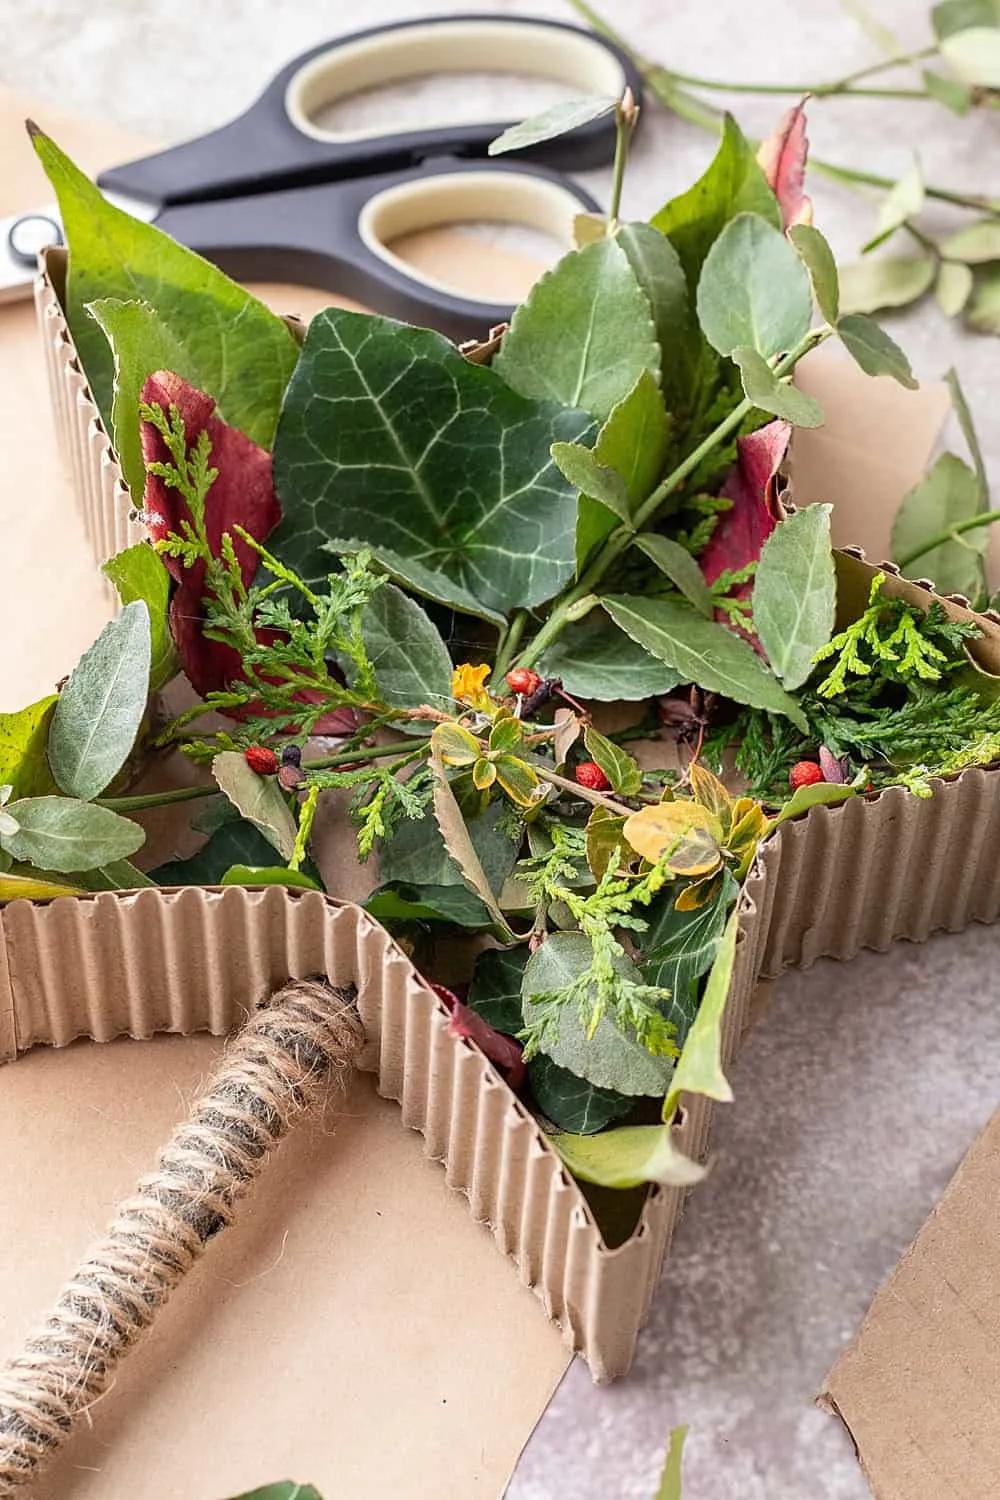
Step 2: Make it 3D To give your star a 3D effect, cut strips of corrugated cardboard and glue them around the edges of your star shape. This will create a nice boarder and outline to add nature bits inside!
Step 3: Gather Your Natural Materials Take a walk outside with the kids and collect various bits of nature. Look for small leaves, berries, delicate twigs, and anything else that captures your eye. Remember to choose items that will fit within the borders of your star, but you can also cut them down, too.
Step 4: Assemble the Star Once you have all your nature bits, start arranging them inside the star shape. When you’re happy with the design, glue each piece in place. A hot glue gun works best for this, but make sure an adult is handling the glue gun for safety if your child is too young.
Step 5: Prepare the Wand Handle Find a stick that is comfortable to hold is a good size for kids to hold. Wrap twine around one end of the stick to create a grip and add a rustic look. Secure the ends with hot glue.
Step 6: Attach the Star to the Wand Glue one end of the stick to the back of your star. Make sure it’s firmly attached and let it dry.


Agnes Hsu is a mom of three and has been inspiring parents and kids to get creative with easy activities and family friendly recipes for over 10 years. She shares her love for creative play and kids food to her 2MM+ followers online. Agnes' commitment to playful learning and kindness has not only raised funds for charity but also earned features in prestigious nationwide publications.