

By using this site, you agree to our Terms of Use. This post may contain affiliate links. Read our disclosure policy. As an Amazon Influencer, I earn from qualifying purchases.
Check out my Plaeful Printables for kids play and learning!
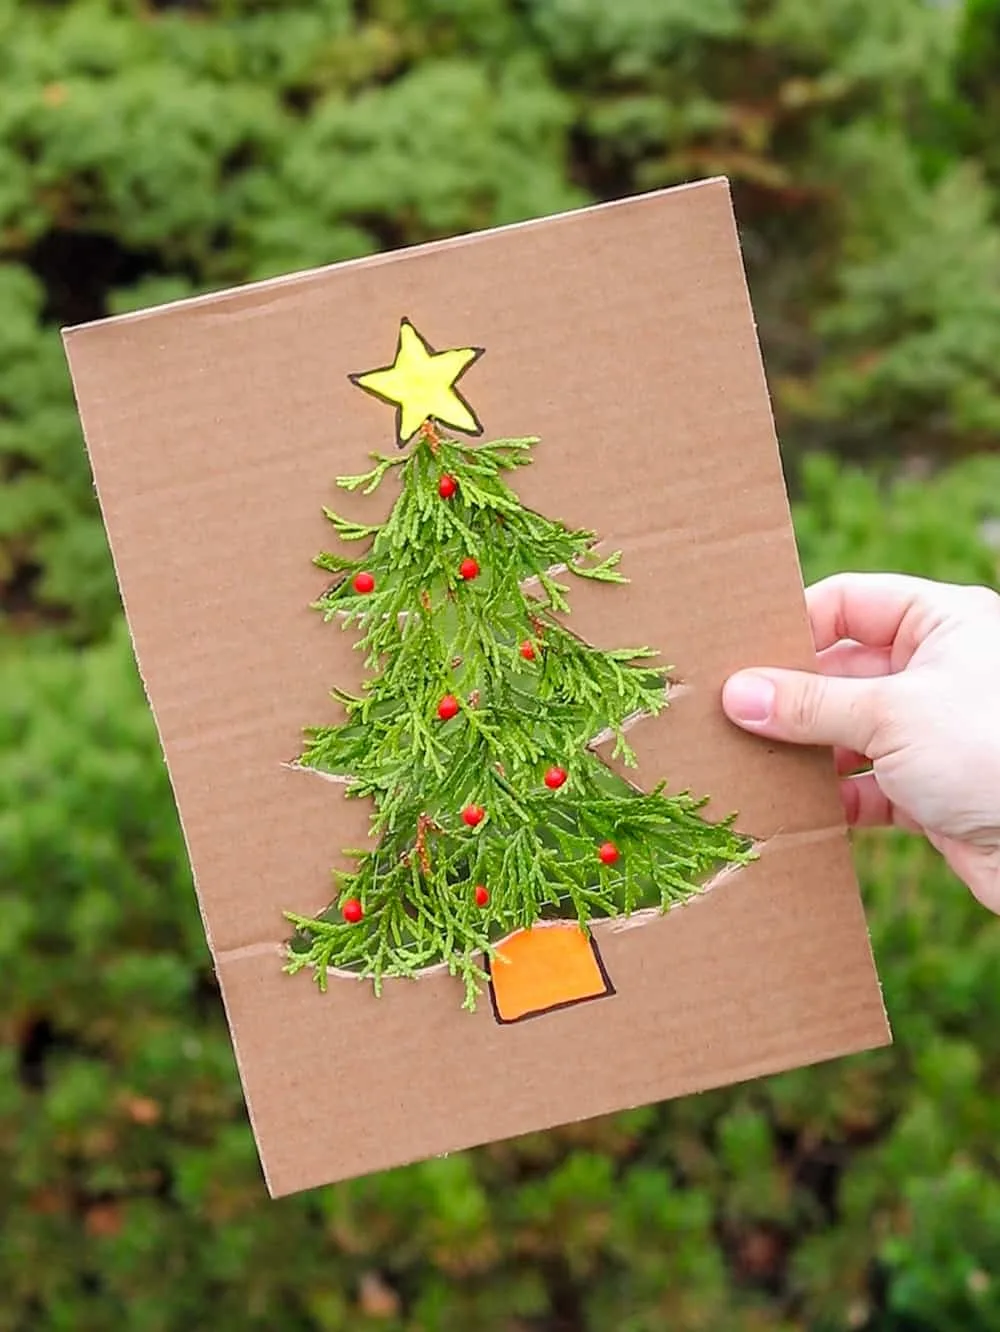
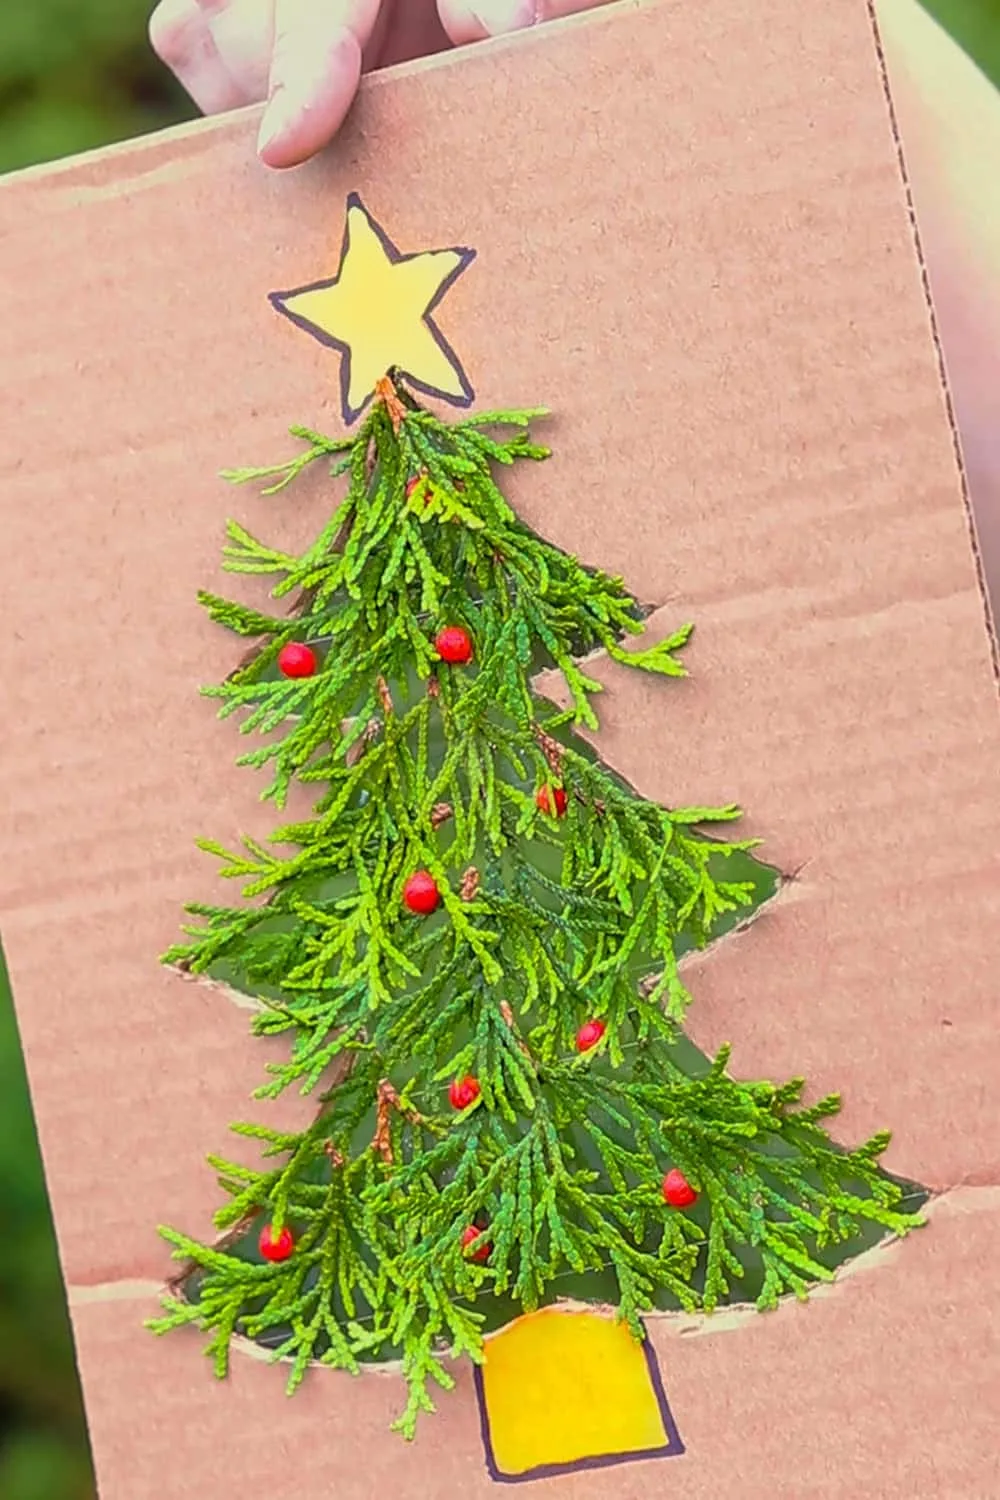
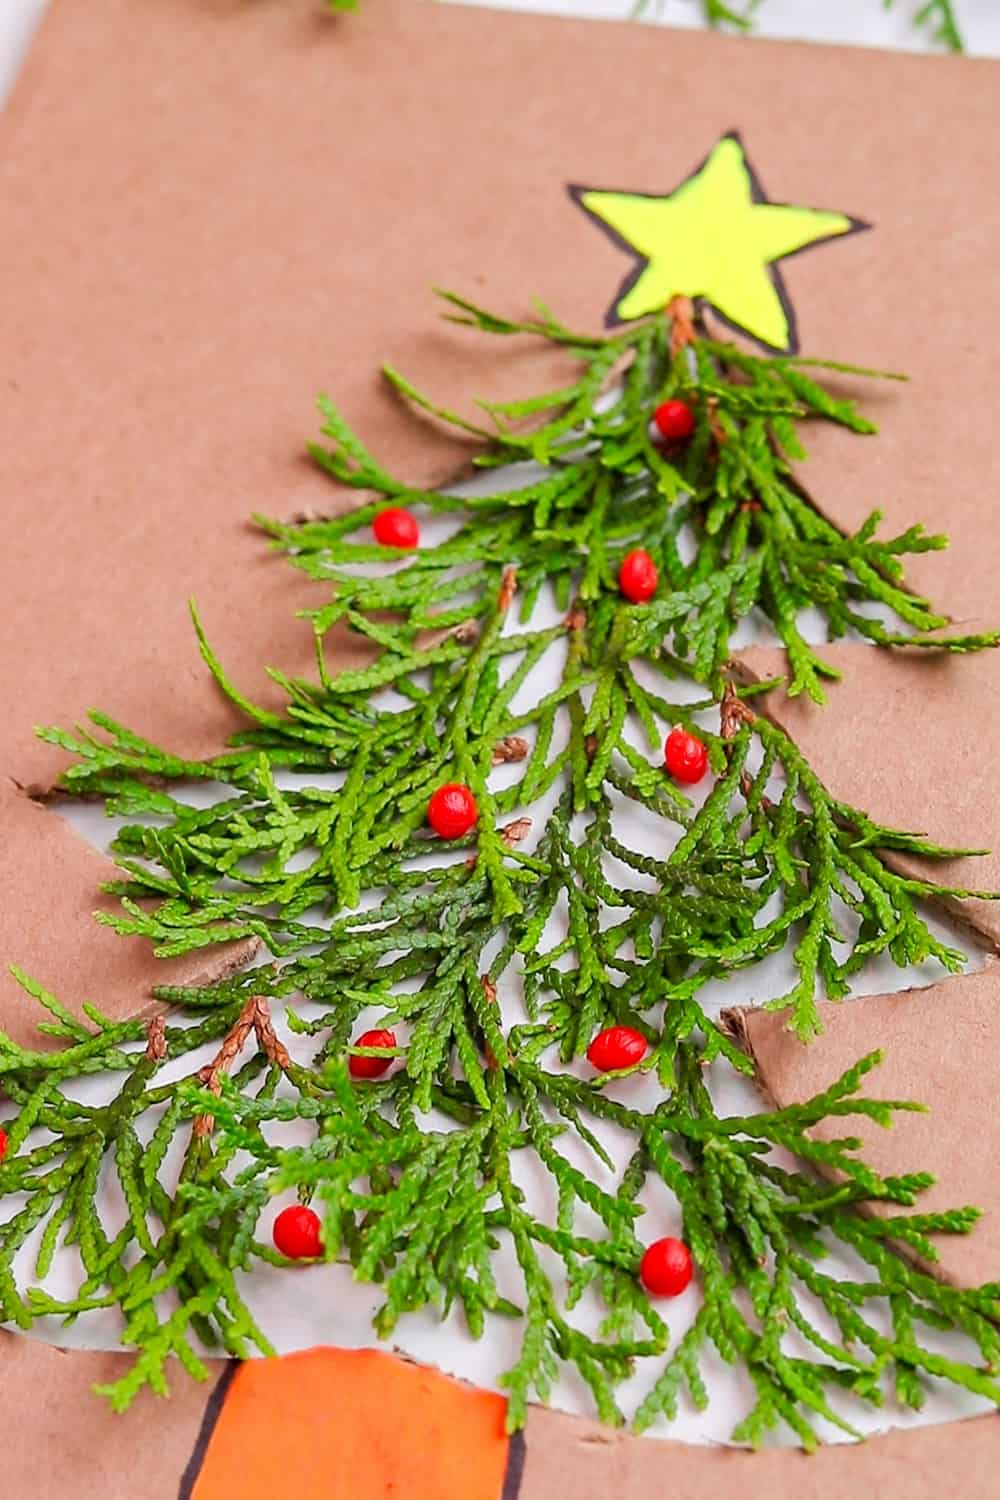
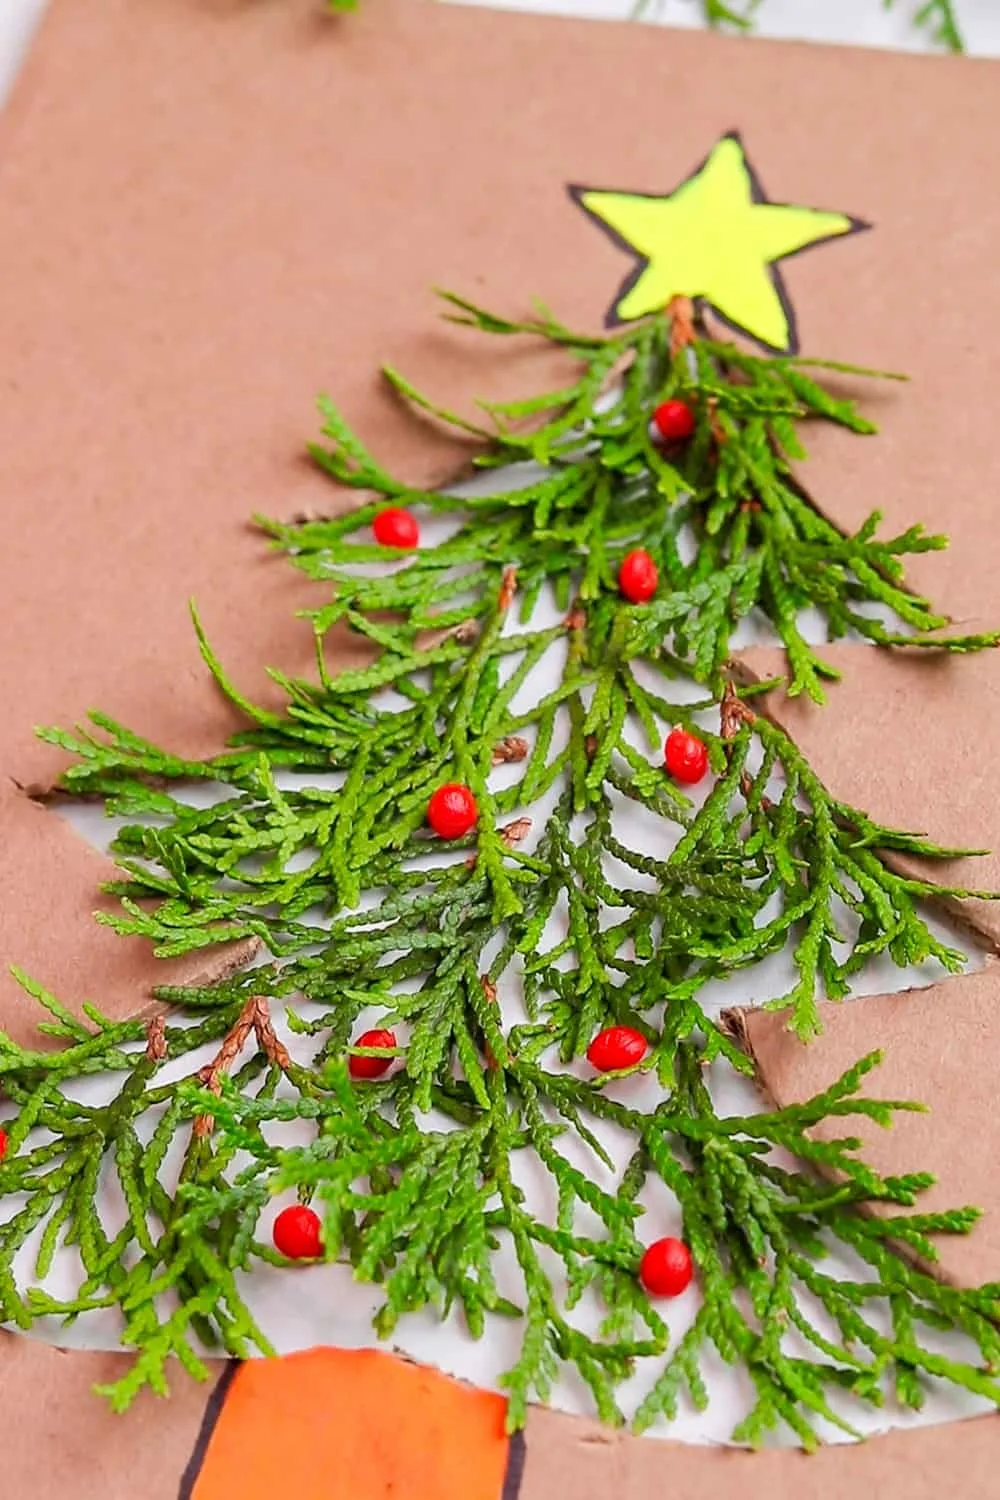
Make this charming Nature Christmas Tree Suncatcher with our easy tree printable. Gather greenery on a nature walk, then assemble this festive decoration for a fun Christmas craft with the kids.
The festive season is upon us and if you’ve been following us for a while, you’ll know Christmas crafting is one of our favorite things to do! We love combining nature crafts with recycled projects. This beautiful and easy Nature Christmas Tree Suncatcher is a wonderful activity for the kids. I love that it can be both a fun Christmas DIY and a lovely way to add cheer to your holiday decor. We provide a FREE printable tree template to make this a 5-minute craft, but of course, you can always hand-draw your own Christmas tree!

How do you make a nature Christmas Tree suncatcher?
Simply print our tree template and use that as a template to trace onto a piece of cardboard. You’ll use cut out the inside to create a blank tree center.
Use clear packing tape on the back, go on a nature walk and adhere greens, foliage and whatever nature treasures you find with your kids!


Christmas Tree Suncatcher – Materials Needed:
- Printable Christmas tree template (download in our instruction card below)
- Cardboard
- Clear packing tape
- Scissors
- Greenery, pine leaves, or other nature foliage
- Red berries (real or artificial)
- Markers or paint markers for coloring
- Pen or pencil

Instructions:
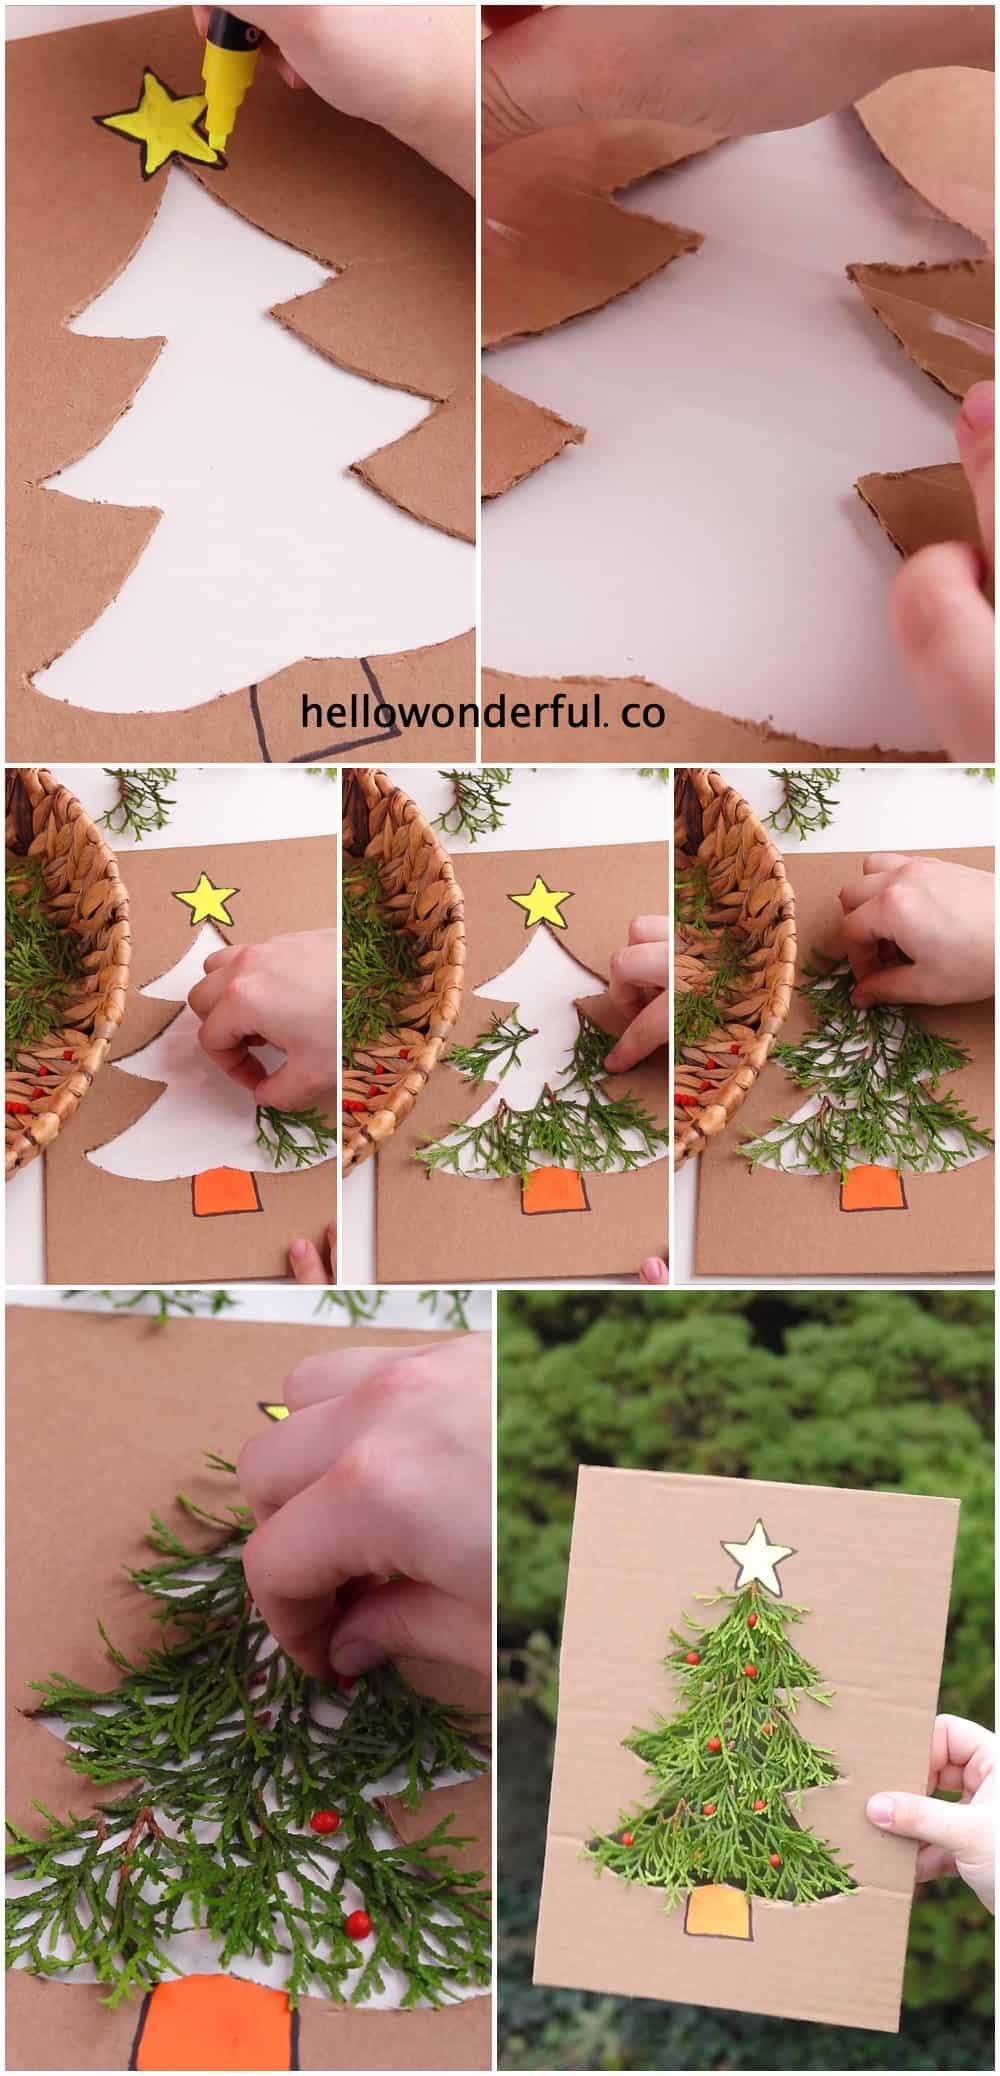
Step 1: Prepare the Tree Template
- Print out the Christmas tree template.
- Place the template over your piece of cardboard and trace around it with a pen or pencil.
- Carefully cut out the Christmas tree shape from the cardboard.
Step 2: Finalize the Tree
- Using markers or paint markers, draw and color a star for the top of your tree and a base at the bottom. You can also cut and paste colored paper instead.
Step 3: Add the Tape
- Stick clear packing tape onto the backside of the cardboard tree, ensuring the sticky side faces out through the cutout. This will create a transparent sticky surface for your nature bits to adhere to.
Step 4: Go on a Nature Walk
- Take a walk outside with the kids to collect your nature bits. Look for greenery, such as pine leaves, small twigs, and red berries (make sure they aren’t poisonous!)
- Engage with the kids by talking about the different types of plants you see and which ones would look best on your tree. You might love our leaf hunt and cloud hunt while going on a walk!
Step 5: Create Your Suncatcher
- Once you have collected your nature bits, start placing them onto the sticky side of the packing tape. You can create patterns or simply sprinkle them across randomly for a more organic look.
- Press down gently on the greenery and berries to make sure they stick well to the tape.
Display Your Suncatcher
Hold up your suncatcher to the sunlight or by a window. The light will shine through the greenery, casting a beautiful, natural glow.
Alternatively, you can hang it up where it will catch the light and be visible for all to enjoy.
Conclusion
Enjoy making this simple yet beautiful Nature Christmas Tree Suncatcher. It’s a great way to combine crafts with a nature lesson and can be a charming addition to your holiday decorations!
This Nature Christmas Tree Suncatcher: Beautiful Christmas Craft


Materials
- Printable Christmas tree template
- Cardboard
- Clear packing tape
- Scissors
- Greenery, pine leaves, or other nature foliage
- Red berries (real or artificial)
- Markers or paint markers for coloring
- Pen or pencil
Instructions
Step 1: Prepare the Tree Template
- Print out the Christmas tree template.
- Place the template over your piece of cardboard and trace around it with a pen or pencil.
- Carefully cut out the Christmas tree shape from the cardboard.
Step 2: Finalize the Tree
- Using markers or paint markers, draw and color a star for the top of your tree and a base at the bottom. You can also cut and paste colored paper instead.
Step 3: Add the Tape
- Stick clear packing tape onto the backside of the cardboard tree, ensuring the sticky side faces out through the cutout. This will create a transparent sticky surface for your nature bits to adhere to.
Step 4: Go on a Nature Walk
- Take a walk outside with the kids to collect your nature bits. Look for greenery, such as pine leaves, small twigs, and red berries (make sure they aren't poisonous!)
- Engage with the kids by talking about the different types of plants you see and which ones would look best on your tree. You might love our leaf hunt and cloud hunt while going on a walk!
Step 5: Create Your Suncatcher
- Once you have collected your nature bits, start placing them onto the sticky side of the packing tape. You can create patterns or simply sprinkle them across randomly for a more organic look.
- Press down gently on the greenery and berries to make sure they stick well to the tape.


Agnes Hsu is a mom of three and has been inspiring parents and kids to get creative with easy activities and family friendly recipes for over 10 years. She shares her love for creative play and kids food to her 2MM+ followers online. Agnes' commitment to playful learning and kindness has not only raised funds for charity but also earned features in prestigious nationwide publications.