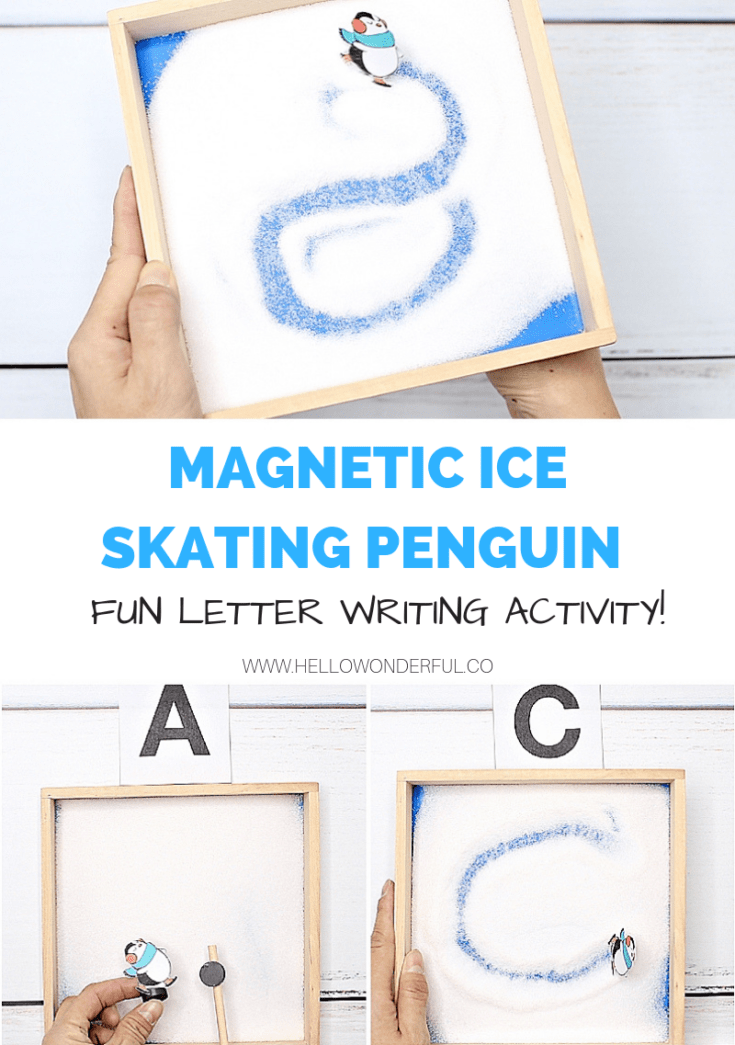
MAGNETIC ICE SKATING PENGUIN LETTER WRITING ACTIVITY
Follow us on Instagram for more fun ideas for kids!
Scroll all the way down to watch the video below for the step-by-step video in how to make this adorable winter Magnetic Ice Skating Penguin Letter Writing Activity. Make sure to subscribe to our YouTube channel for more fun videos!
Are you in full winter mode here? We start back to school from the holiday season next week and were able to squeeze in a fun Winter Activity to get right back in the learning mode!
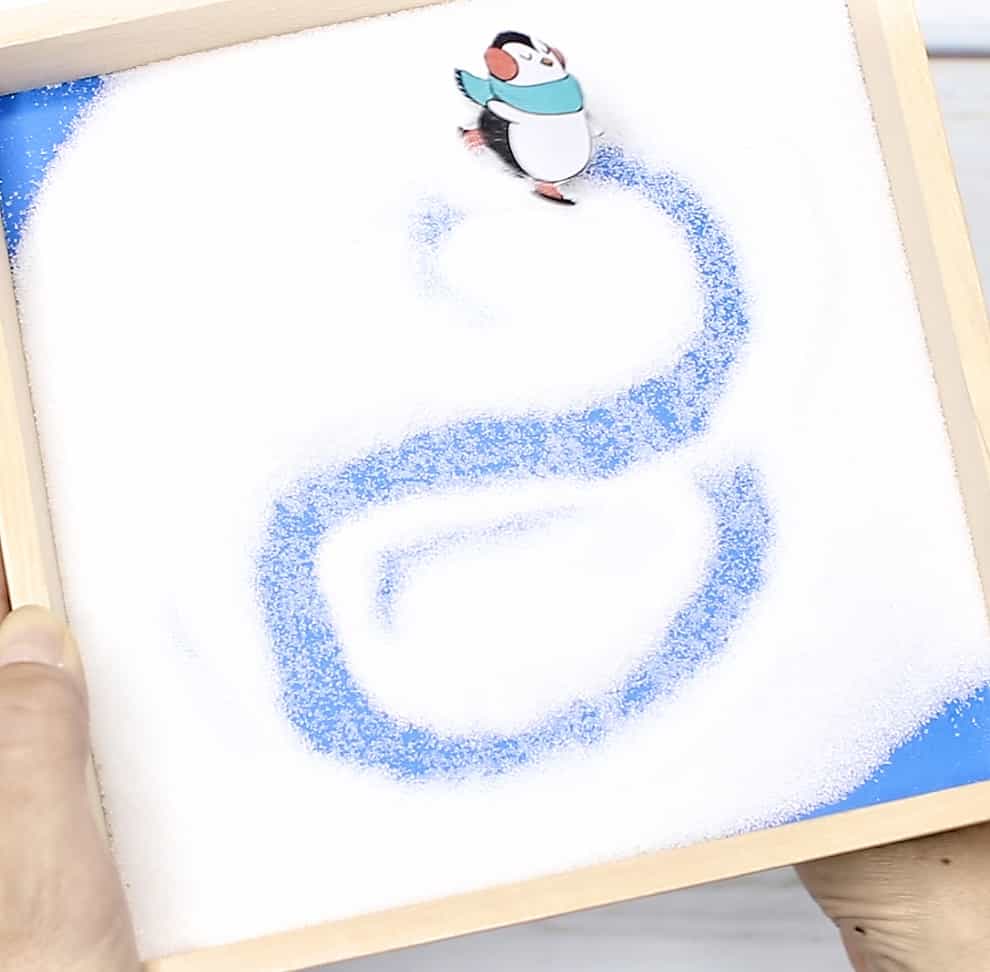
Not only does this magnetic penguin craft and skating activity provide lots of fun in having a cute penguin make figure eights on “snow” you can also double it up as a letter writing activity.
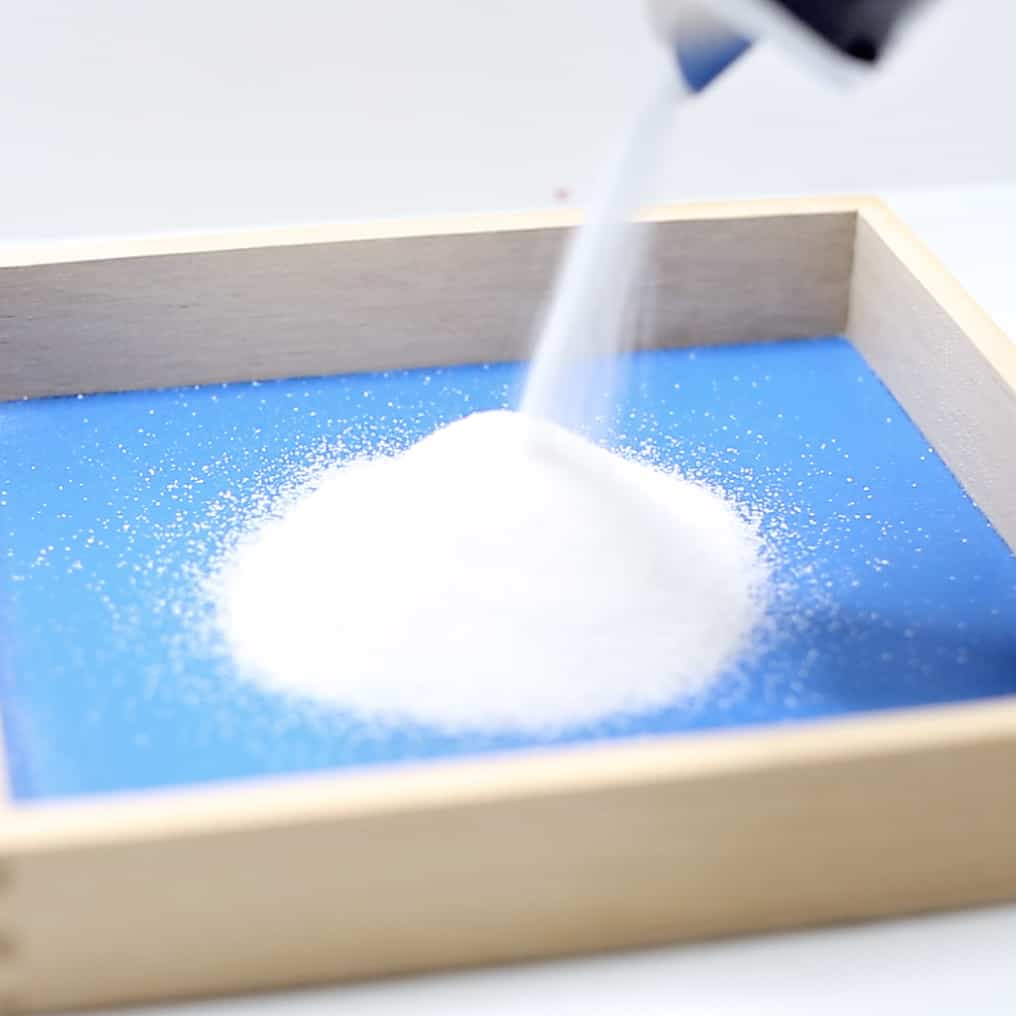
Sand writing trays are common for kids to practice “spelling” out letters. You can also used salt which is what we did here, because we wanted to simulate a more “snowy” ice skating scene.
If you don’t have a tray, you can just use a shallow cardboard box or any tray you have at home!
Print out the cute FREE printable penguin template and letters (download below) and your kids will be skating their way to letter recognition in no time.
This also makes a fun magnetic STEM project for the kids! Explain how magnets work to attract and repel each other.

This craft was inspired by our Magnetic Dancing Doily Peg Dolls, similar concept just with penguins 🙂
Read the instructions below to get started.
MAGNETIC ICE SKATING PENGUIN LETTER WRITING – MATERIALS:
- White cardstock
- Printer
- Small wooden dowel stick
- Two small round magnets
- Hot glue gun
- Scissors
- Letter writing tray or use any shallow (non-magnetic) tray and cardboard box
- FREE printable penguin template and letter download right below.
INSTRUCTIONS:
Step 1. Print out the free penguin and letter template (download above)
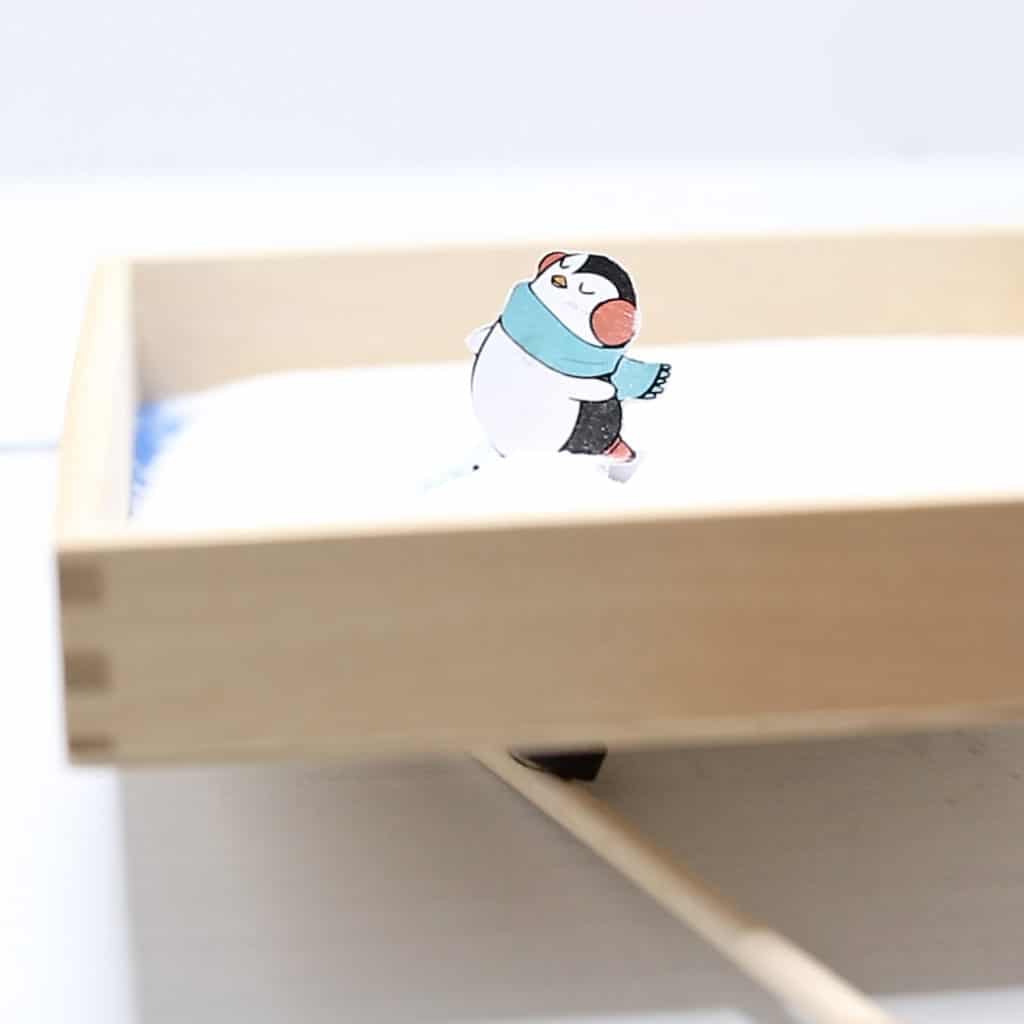
Step 2. Cut out the two penguins, they are just mirror images of each other so when the penguin skates, you can see both sides.
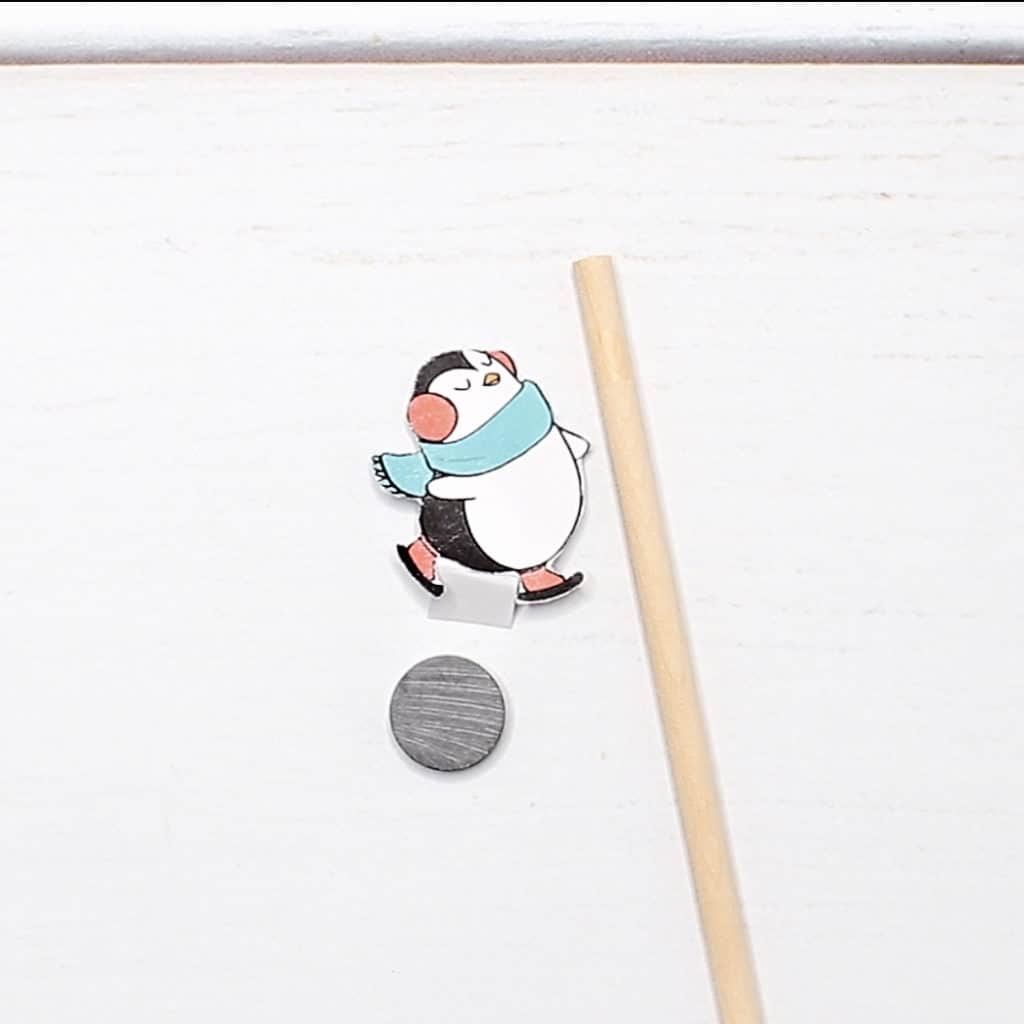
Step 3. Cut a small piece of rectangular cardstock about the size of the height of the penguin and give it a little fold about a third of the way down. Glue the part that is not folded to one side of the penguin and THEN glue the other penguin to the first penguin so they become one. The little fold will be sticking out and that is what you will glue to your first magnet.
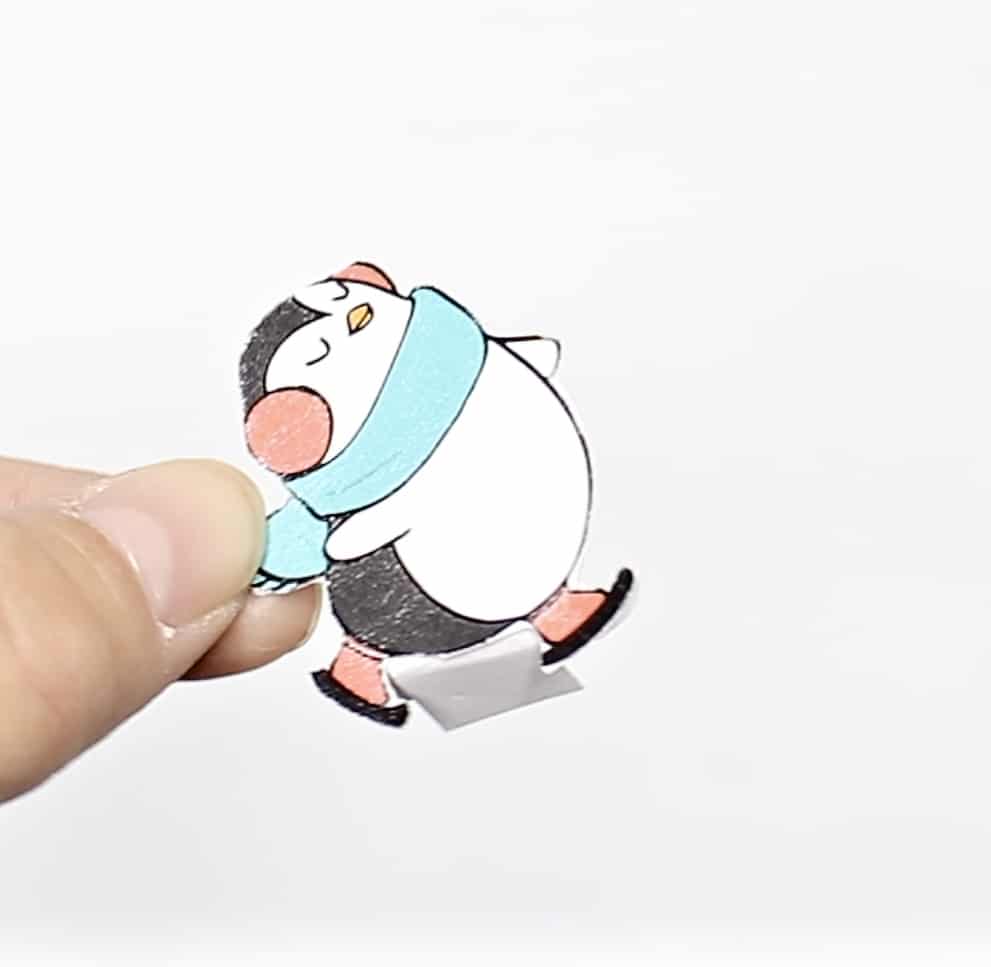
Step 4. Glue the flap to the first magnet.
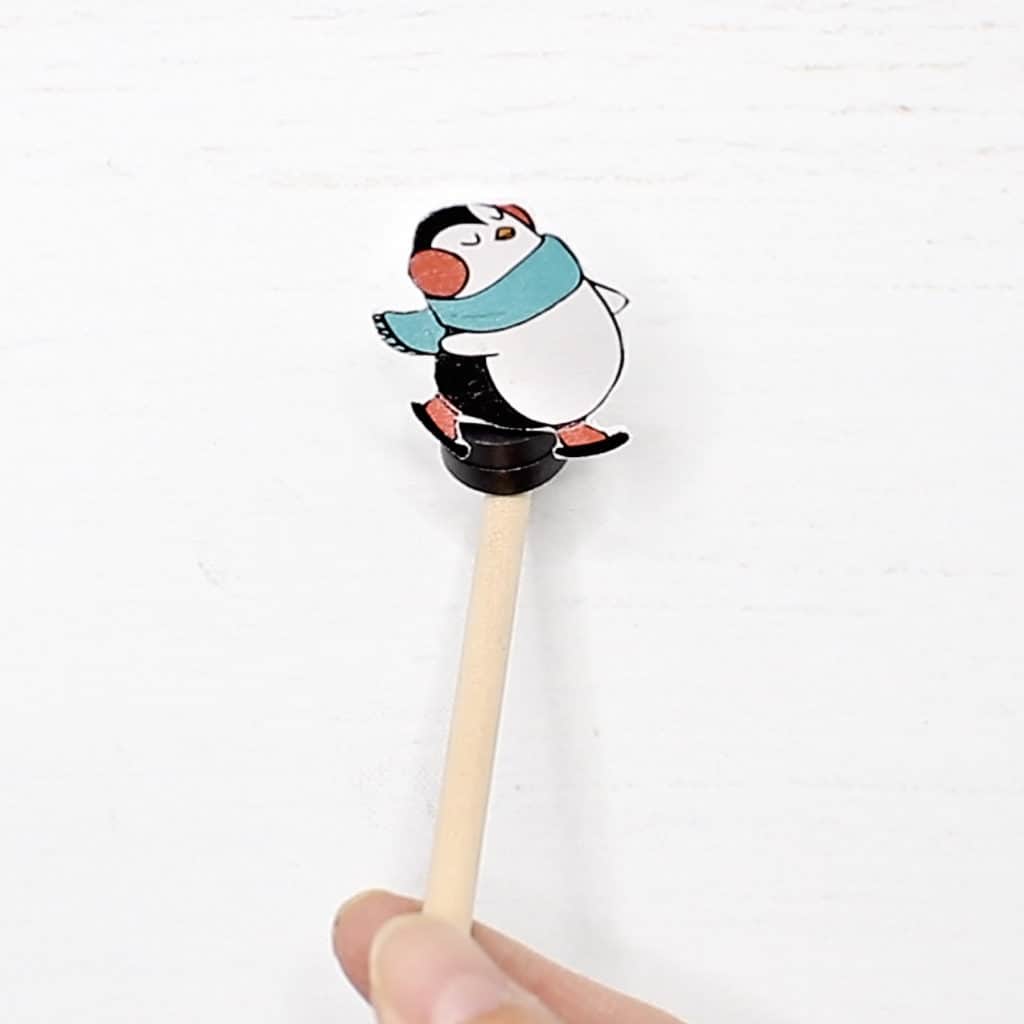
Step 5. Glue your dowel stick to the second magnet. Make sure you have the right magnetic ends for them to attract each other!
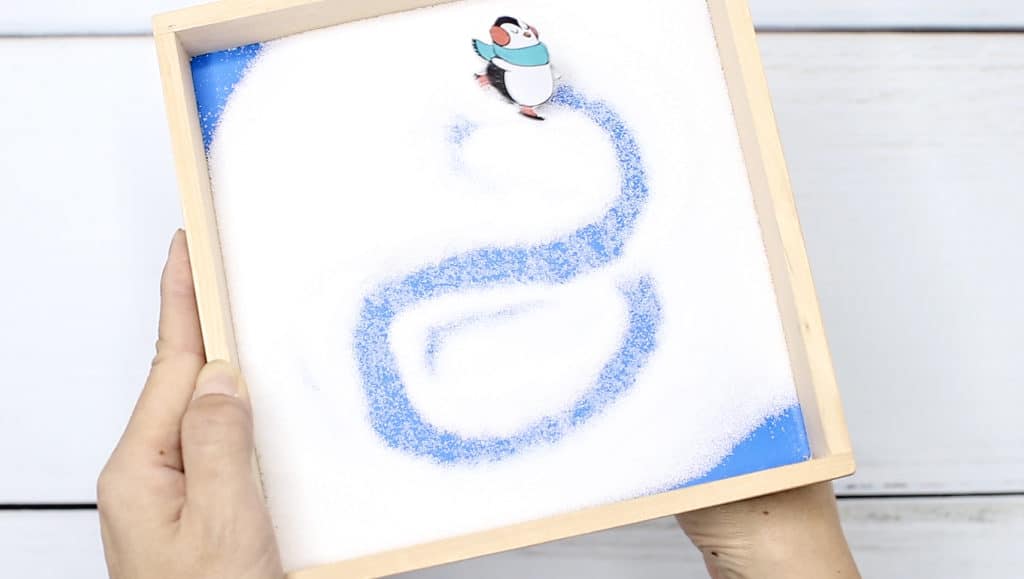
Step 6. Add salt until your writing tray is barely covered. You don’t need much. We had a wooden writing tray already but if you don’t you can use any small shallow tray or cardboard box.
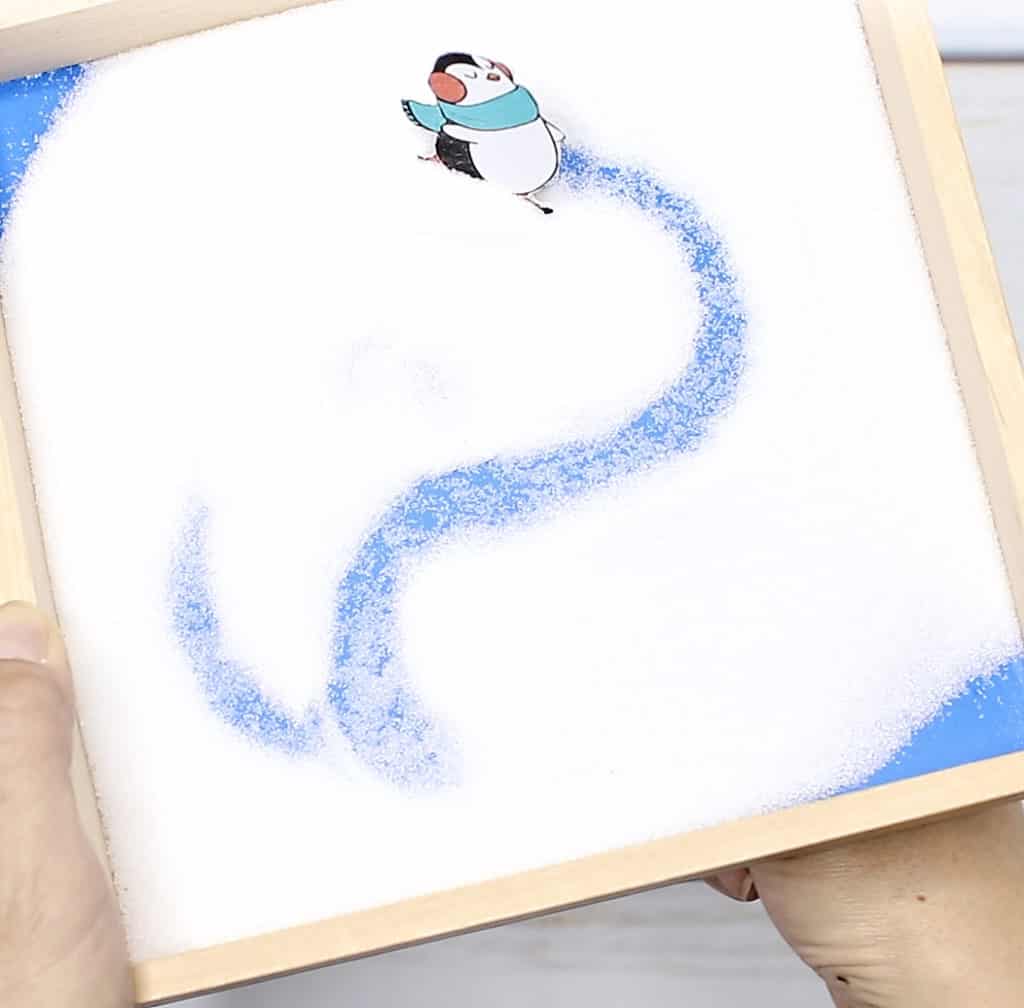
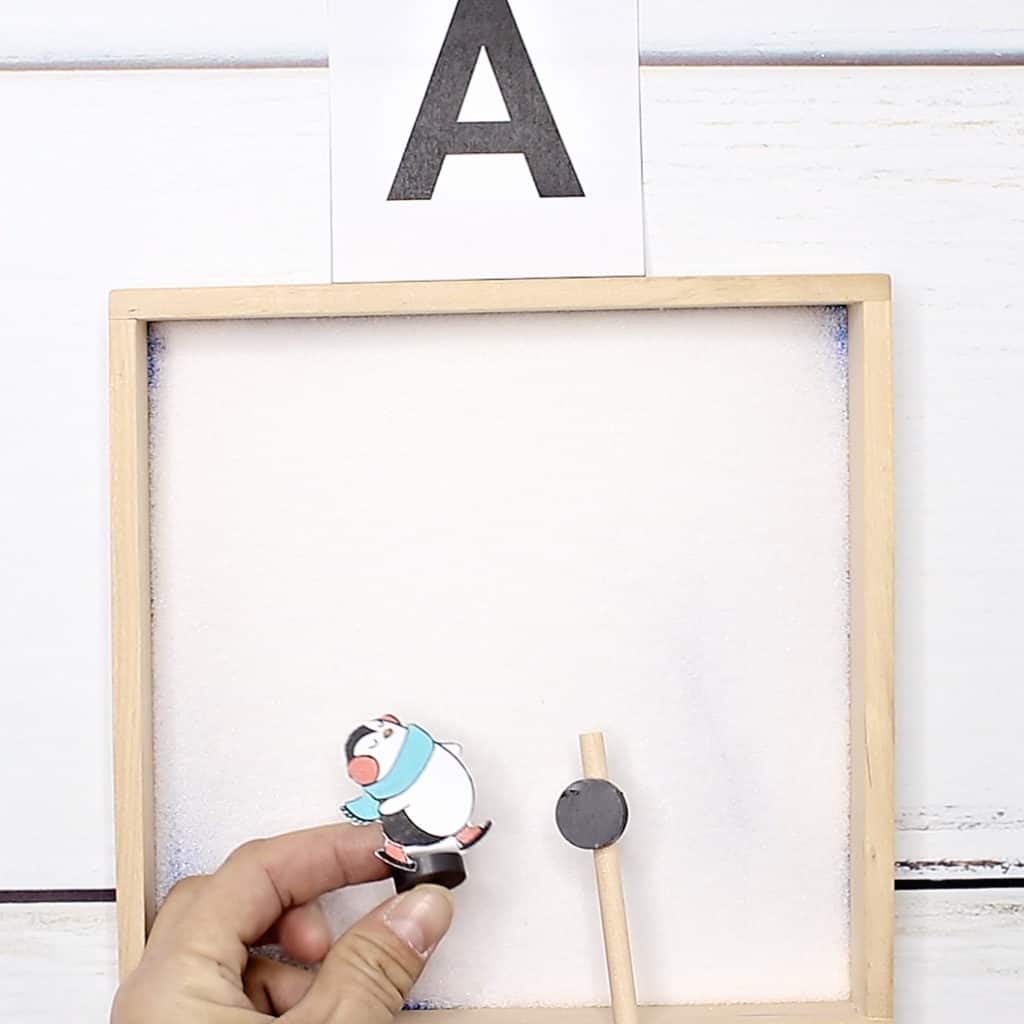
Step 7. Add your penguin on top of the “snow” and your dowel stick underneath the tray. Have kids first practice how to make the penguin skate. Make shapes, lines, figure eights! This is really fun to see the magnetic pull in action.
If you want to take learning further you can include a discussion on how magnetic force works.
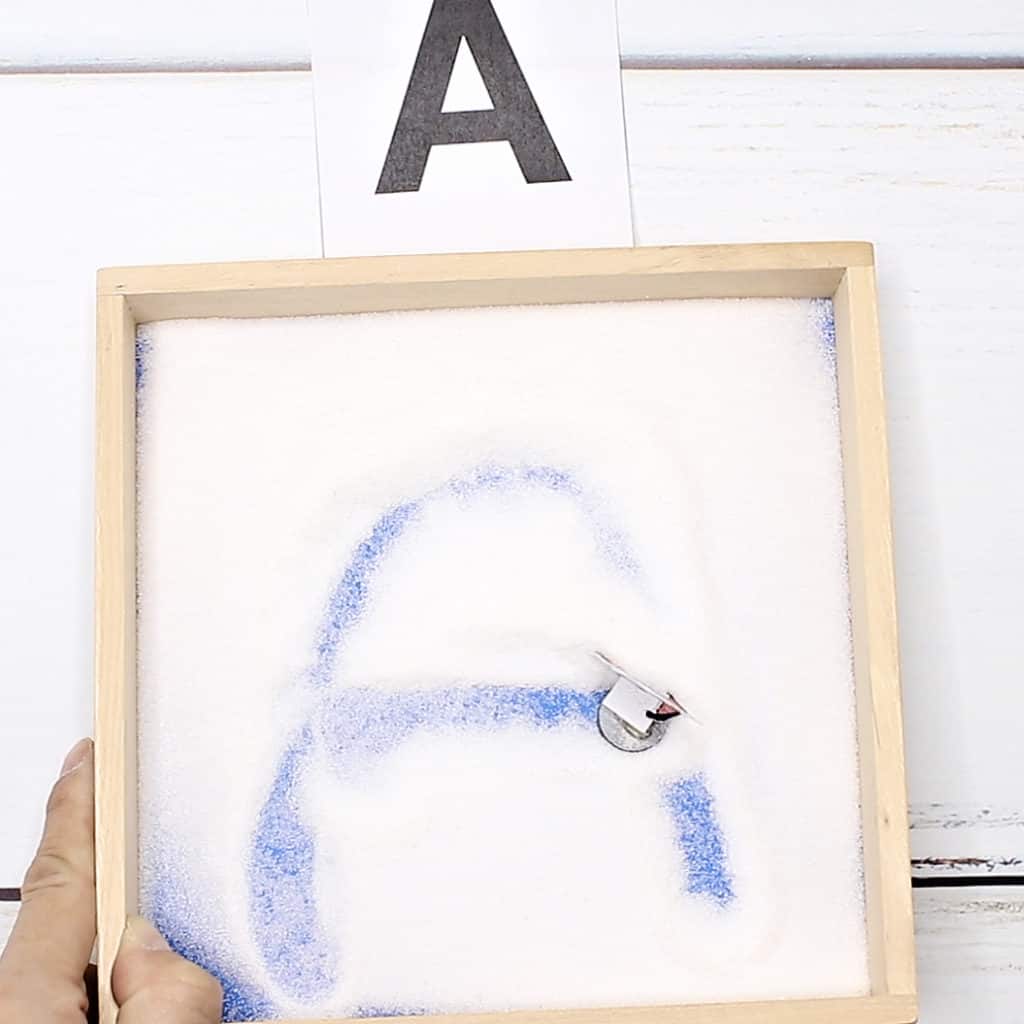
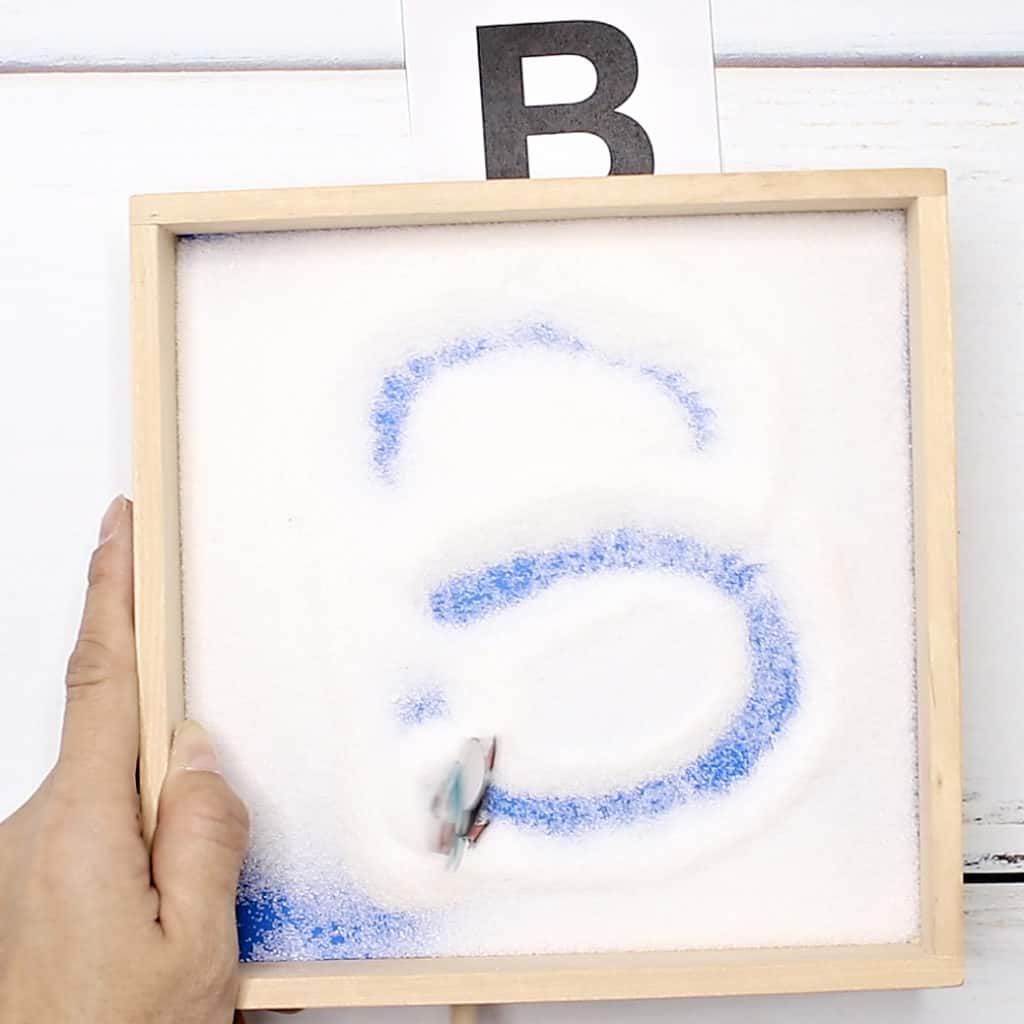
We decided to make it a fun letter writing activity.
Print out the free printable letters (comes in the same template file as the penguin), and cut. Show kids letters and have them skate each letter out!
What’s great about this activity is that you can shake the salt and start over! It’s like one handmade Etch-A-Sketch!
This is a great winter learning project for kids!

Check out more fun winter ideas, like these Winter Science Experiments.
If you like this activity, watch this fun ice skating craft from our friends over at The Craft Train!
Watch the step by step video to make this Magnetic Ice Skating Penguin Letter Writing Activity:
MAGNETIC ICE SKATING PENGUIN LETTER WRITING ACTIVITY
Grab the free printable template to make this fun Magnetic Ice Skating Penguin Letter Writing Activity.
Materials
- FREE printable penguin template and letters (download above in post)
- White cardstock
- Printer
- Small wooden dowel stick
- Two small round magnets
- Hot glue gun
- Scissors
- Letter writing tray or use any shallow (non-magnetic) tray and cardboard box
Instructions
Step 1. Print out the free penguin and letter template.
Step 2. Cut out the two penguins, they are just mirror images of each other so when the penguin skates, you can see both sides.
Step 3. Cut a small piece of rectangular cardstock about the size of the height of the penguin and give it a little fold about a third of the way down. Glue the part that is not folded to one side of the penguin and THEN glue the other penguin to the first penguin so they become one. The little fold will be sticking out and that is what you will glue to your first magnet.
Step 4. Glue the flap to the first magnet.
Step 5. Glue your dowel stick to the second magnet. Make sure you have the right magnetic ends for them to attract each other!
Step 6. Add salt until your writing tray is barely covered. You don't need much. We had a wooden writing tray already but if you don't you can use any small shallow tray or cardboard box.
Step 7. Add your penguin on top of the "snow" and your dowel stick underneath the tray. Have kids first practice how to make the penguin skate. Make shapes, lines, figure eights! This is really fun to see the magnetic pull in action.
If you want to take learning further you can include a discussion on how magnetic force works.
We decided to make it a fun letter writing activity.
Print out our free printable letters, and cut. Show kids letters and have them skate each letter out!
Disclosure: Some of the links in the post above are “affiliate links.” This means if you click on the link and purchase the item, we will receive a small affiliate commission. Regardless, we give our promise that we only recommend products or services we would use personally and believe will add values to our readers.