


By using this site, you agree to our Terms of Use. This post may contain affiliate links. Read our disclosure policy.
Follow us on Instagram for more fun ideas for kids!
Fall is the perfect time to get crafty and try out some new projects! One of our favorite things to do during this season is leaf crafts.
They’re easy, they’re fun, and they always turn out looking unique since there are no two leaves exactly the same! Today, we’re going to show you how to make a lion leaf craft.
This project is perfect for kids or adults, and it only takes a few minutes to complete.
Many of the materials you’ll need can be found right in your own backyard or on a nature walk. If you don’t have access to gorgeous leaves you can use craft leaves like we did with our leaf animals.
Whether you’re looking for a fun project to do with your kids or something to keep you occupied on a rainy day, this leaf craft is perfect for you! Let’s get started!
Leaf Lion Craft – Materials:
- Leaves
- Brown construction or butcher paper
- White paper, black paper
- Scissors
- Glue
- Black markers, or paint markers (or use black paint)
How to Make Your Very Own Lion Leaf Craft
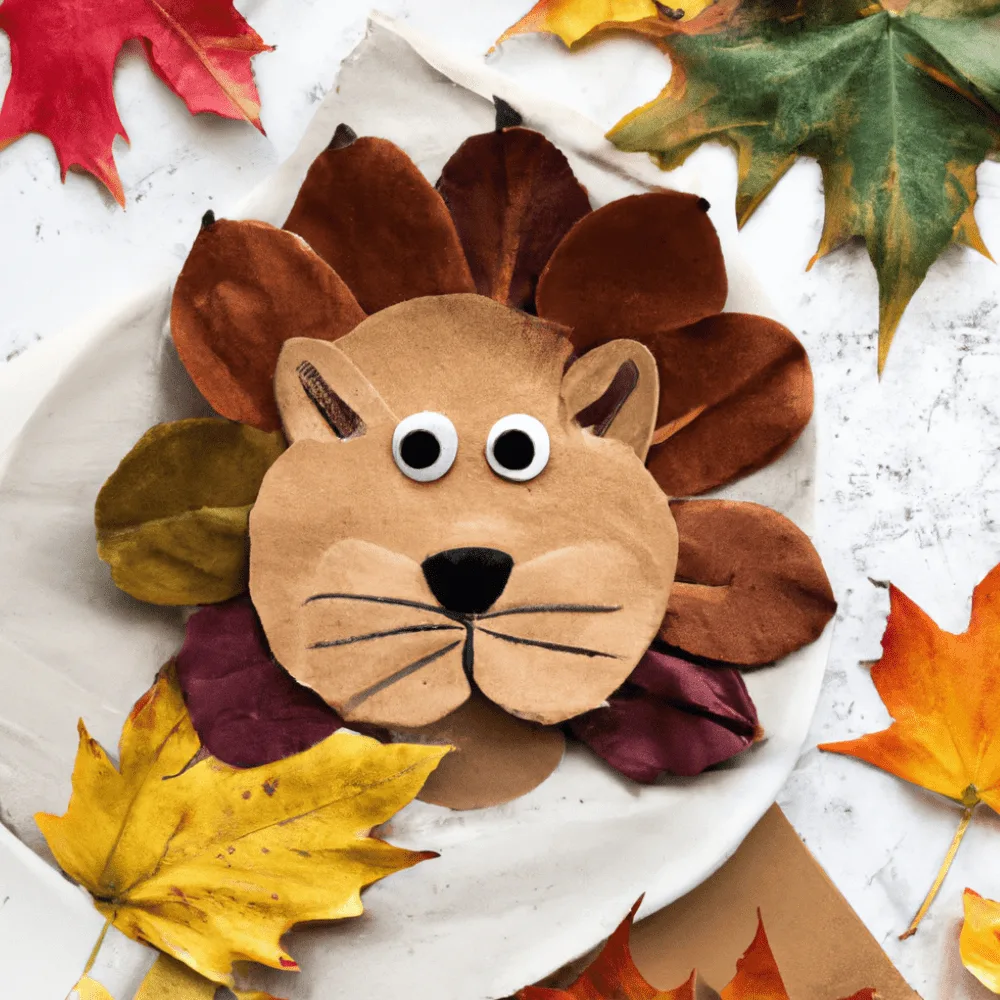
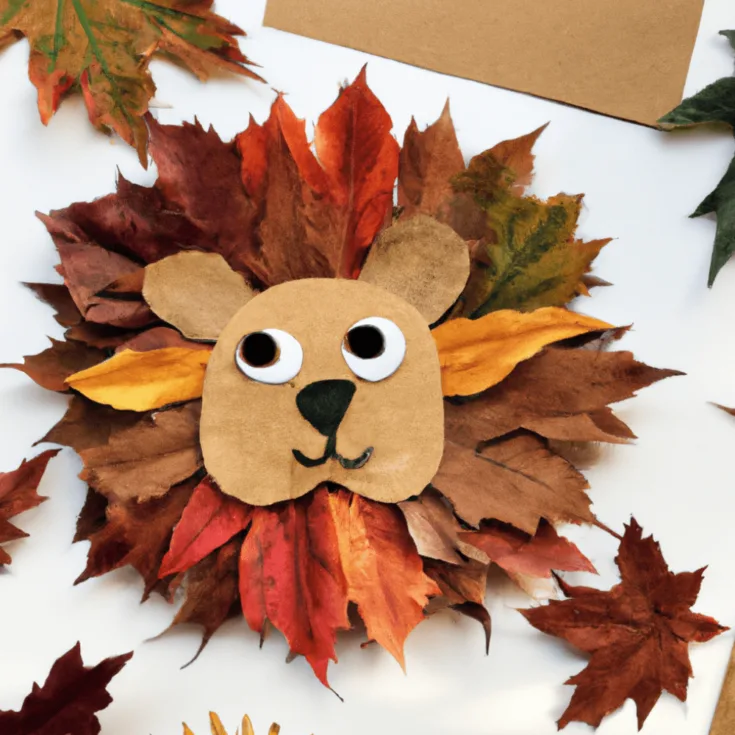
Step One: Create the Mane
The first step is to create the lion’s mane. To do this, simply gather a bunch of leaves and place them in the shape of a lion’s mane, with the leaf stems facing the neck.
You can use as many or as few leaves as you like. If you want a fuller mane, use more leaves.
Step Two: Cut Out the Head
Next, you will need to cut out the head of the lion from the brown piece of paper. You can freehand this or use templates for various rounded shapes.
Step Three: Create its Face
To start building the face, add the eyes. Its eyes can be made from white paper that is trimmed to look like lion eyes. Simply glue them to the lion’s head, then paint in the pupils. Use a black marker, charcoal pencil or paint to add the pupils.
Finally, add the nose and whiskers either with more paint, markers, or scrap pieces of black paper.

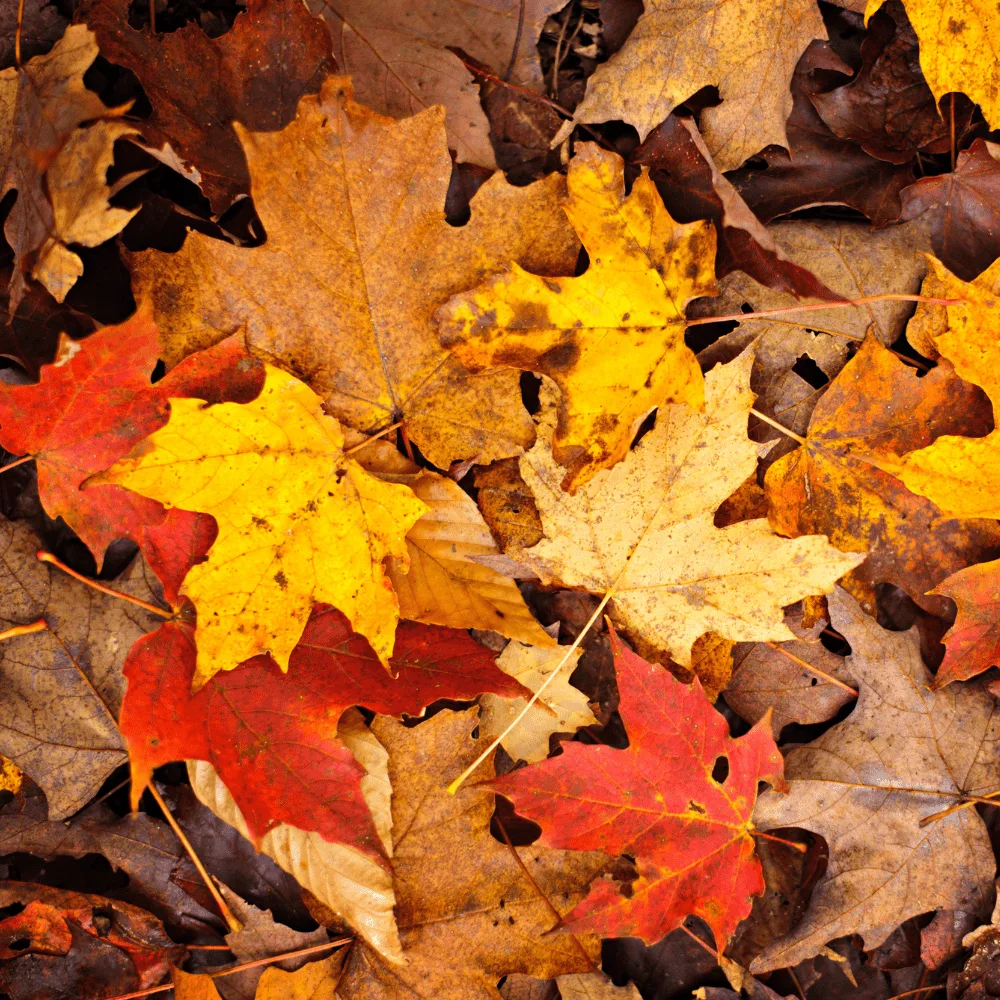
Photo credit: Canva
Variations of Lion Leaf Crafts
You can make some incredibly original works of art by constructing several variations. Here are a few suggestions to get you going!
For starters, you can construct a cardboard lion’s head and attach it to the leaves. Alternatively, you may use white paper for the face and yellow for the mane, adding realistic-looking whiskers.
If you’d like, you can also create a king or queen lion leaf craft. For example, you can add a crown to the queen to make her even more special.
How to Choose the Right Leaves for Your Lion Leaf Craft
Consider the Size of Your Leaf
One of the first things to consider when choosing leaves for your lion leaf craft is the size of the leaves. You want to choose leaves that are large enough to cover the surface of your project.
If you are working on a small project, you may need to use several smaller leaves. If you are working on a larger project, you may be able to get away with using fewer leaves.
Feel free to cut and glue as you wish. These are great fine motor skills for kids to practice while making art.
Choose a Variety of Colors
Another thing to consider when choosing leaves for your project is the variety of colors. You can find leaves in a wide range of colors, from deep orange to bright yellow.
Choosing a variety of colors will give your project a more realistic look. This is especially important if you are trying to create a realistic lion.
Consider the Texture of the Leaves
The texture of the leaves is also important to consider when choosing leaves for your project. You will want to choose leaves that have a smooth texture so that they are easy to work with.
Rough or bumpy leaves may be more difficult to work with and may not give you desired results.
Make Sure the Leaves Are Fresh
When choosing leaves for your project, it is important to make sure that they are fresh. Fresh leaves will be easier than dry and brittle ones that will break. .
Consider the Type of Leaf
There are many different types of leaves, from broadleaf to needle-like. You will want to choose a type of leaf that fits the type of lion leaf mane you want to create.
Broadleaf leaves are easier to work with than needle-like leaves, but both can be used for your project. Oak leaves have a distinct shape that can be used to create a unique lion.

Ideas for What to Do with Your Finished Lion Leaf Craft
Hang It on the Wall
One of the simplest things you can do with your finished lion leaf craft is to hang it on the wall. You can use a piece of string or ribbon to create a hanger, or you can simply tape it to the wall.
This is a great option if you want kids to be able to see their works of art every day.
Make a wreath
Another fun way to use your Lion Leaf craft is to make a wreath out of it. You can hang your wreath on your front door or on a wall in your home.
Imagine the kids bustling home from school and seeing their lion leaf on the door!
Put It in a shadow box
If you want to display your Lion Leaf craft but don’t want to hang it on the wall, you can put it in shadow box to keep the leaves from being crushed. This is a great way to protect your work of art and to keep it looking its best. We haven’t tried this yet but are wondering if spraying a protective adhesive would preserve your leaves longer.
Takeaway
Now that you know how to make a Lion Leaf craft, you can choose the right leaves for your project and get started. This is a great fall project but also one for any season. Kids love chasing and falling into leaves! Now they’ll have an excuse to bring home a bundle of them and make some fun leaf crafts!
How to Make a Cute Lion Leaf Craft

Leaf crafts are simple nature projects kids can make with minimal materials. Gather beautiful leaves to make this cute Lion Leaf craft!
Materials
- Leaves
- Brown construction or butcher paper
- White paper, black paper
- Scissors
- Glue
- Black markers, or paint markers (or use black paint)
Instructions
Step One: Create the Mane
The first step is to create the lion's mane. To do this, simply gather a bunch of leaves and place them in the shape of a lion's mane, with the leaf stems facing the neck.
You can use as many or as few leaves as you like. If you want a fuller mane, use more leaves.
Step Two: Cut Out the Head
Next, you will need to cut out the head of the lion from the brown piece of paper. You can freehand this or use templates for various rounded shapes.
Step Three: Create its Face
To start building the face, add the eyes. Its eyes can be made from white paper that is trimmed to look like lion eyes. Simply glue them to the lion's head, then paint in the pupils. Use a black marker, charcoal pencil or paint to add the pupils.
Finally, add the nose and whiskers either with more paint, markers, or scrap pieces of black paper.


Agnes Hsu is a mom of three and has been inspiring parents and kids to get creative with easy activities and family friendly recipes for over 10 years. She shares her love for creative play and kids food to her 2MM+ followers online. Agnes' commitment to playful learning and kindness has not only raised funds for charity but also earned features in prestigious nationwide publications.