
Fun Leaf Owl Craft for Kids to Make at Home
Kids will love getting their hands dirty as they tear and glue pieces of paper together, and you’ll love how easy it is to make these cute little creatures.
Unlike other owl crafts that use painted leaves, these leaf owls are made with real leaves.
These make cute leaf animal art and you can keep them as decorations in your home. Many of the leaves you’ll need can be found in your backyard or local park.
You will find plenty of leaves if you live in an area with many trees. If you don’t, parks often have beautiful trees that drop stunning leaves!
Just be sure to choose similar leaves in size and shape, so your owls look uniform. Once you’ve gathered your leaves, it’s time to start crafting! Let’s get started!
Why Leaf Owl Crafts Are So Good For Kids
Great way to encourage creativity in kids.
Leaf Owl crafts are a great way to encourage creativity in kids. Kids can create unique owls by using leaves and other natural materials.
And best of all, these crafts are easy to make and require no special skills or supplies. So gather a few leaves, sticks, and glue, and you’re ready to go.
Leaf Owl crafts are also a great way to teach kids about the different parts of an owl. As they assemble their owls, they’ll learn about the head, the wings, the tail, and the breast.
And as they experiment with different materials and techniques, they’ll develop their own creative style. Leaf Owl crafts are a fun and educational activity for kids of all ages.
It can be used to teach kids about nature.
Leaf Owl crafts are also a great way to teach kids about nature. By using leaves, sticks, and other natural materials, kids can learn about the different parts of an owl.
They’ll also learn how to identify different types of leaves and how to use them in their owls.
As they explore the different textures and colors of leaves, they’ll develop a greater appreciation for nature. And as they create their owls, they’ll be helping to preserve the environment.
Leaf Owl crafts are a fun and educational activity for kids of all ages. So next time you’re looking for a creative way to teach your kids about nature, consider making some Leaf Owls!
Teaches hand-eye coordination and fine motor skills.
Crafting is an excellent way for kids to develop fine motor skills and hand-eye coordination.
Leaf Owl crafts are well-suited for this because they require kids to use both hands to complete the project. In addition, leaf owl crafts are a great way for kids to express their creativity.
The process of cutting, gluing, and painting leaves can be very therapeutic, and it’s an excellent way for kids to unwind after a long day.
Plus, the finished product is always impressive, and it’s sure to get compliments!
What You’ll Need:
- Construction paper or cardstock (for the body and wings)
- Crayons, markers, or paints (optional)
- Leaves (preferably oak, maple, or birch)
- Sticks (for the legs)
- Household scissors
- Clear glue
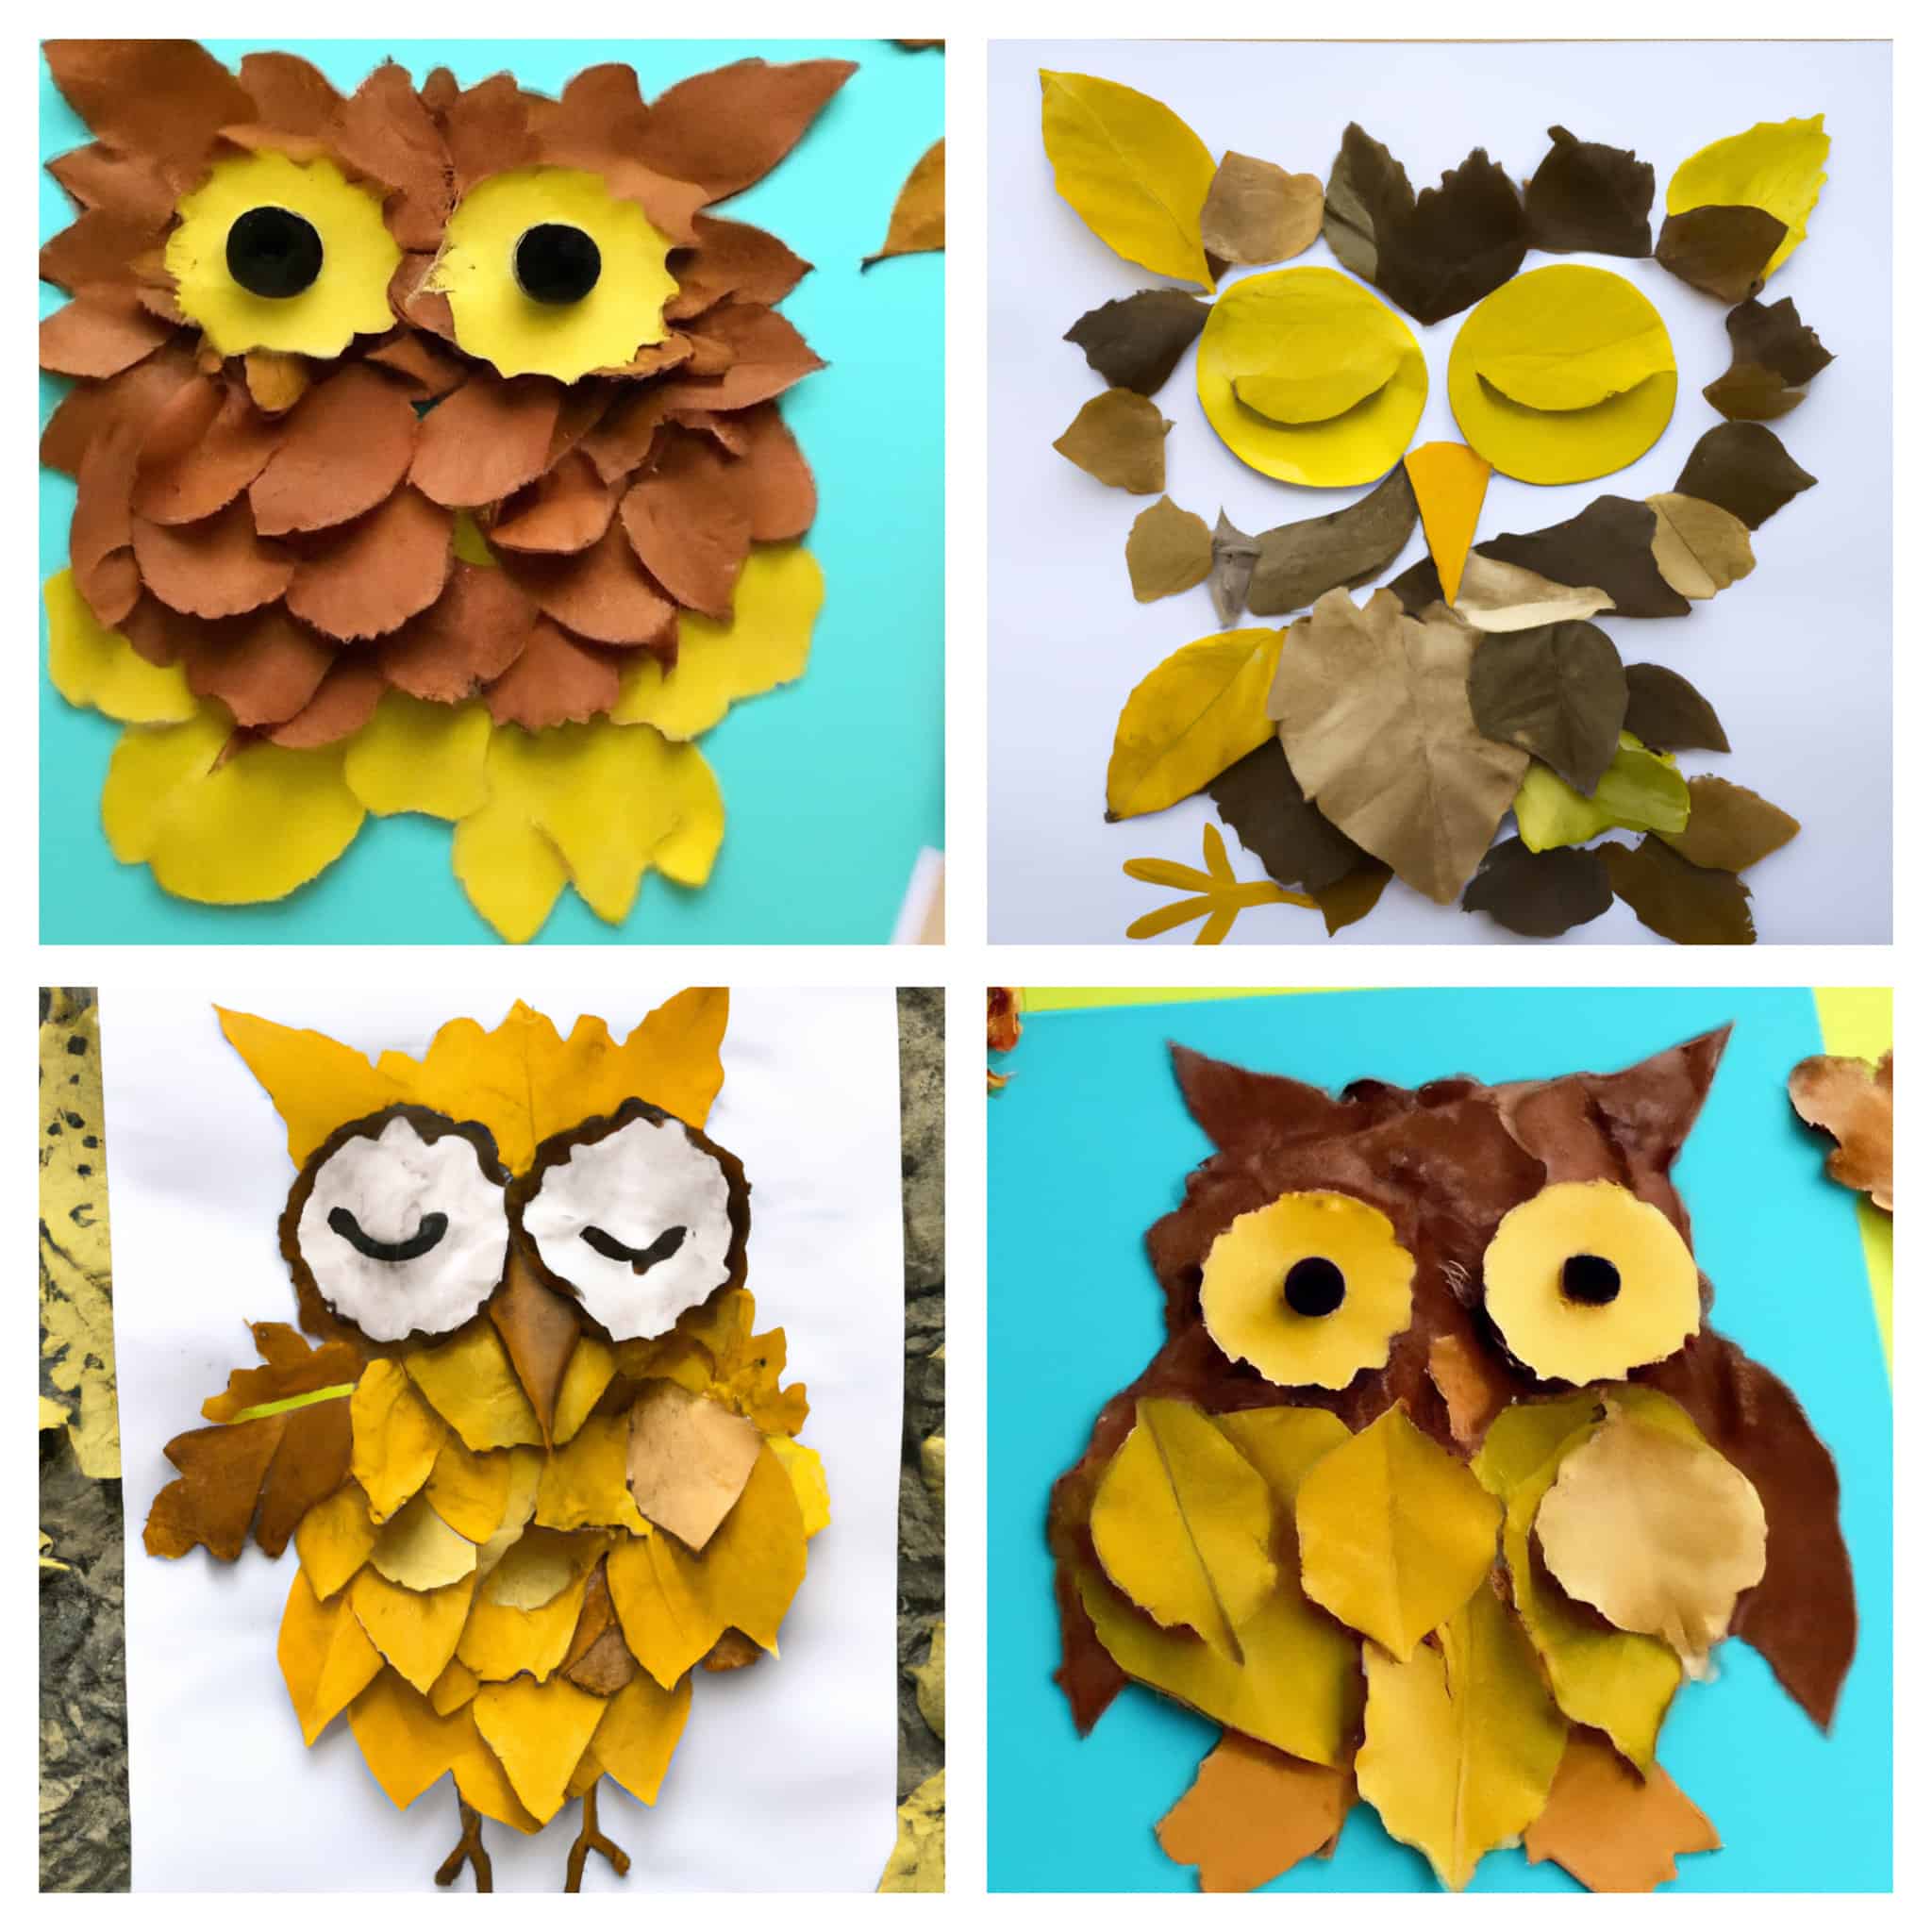
4 Amazing Leaf Owl Crafts and How to Make Them
1: Brown Googly Eyed owl

To start, collect a few brown leaves and a yellow leaf. If you don’t have any leaves, you can also use brown construction paper or cardstock.
Cut out two owl shapes from the brown paper – these will be the body and wings of your Owl. Next, cut out a small circle from the yellow paper – this will be the Owl’s head.
Glue the head in the center of one of the brown owl bodies.
For the eyes, you can either glue on a pair of googly eyes or cut out two small circles from white paper and glue them onto the yellow head.
For the pupils, use a berry or dark-colored rock. If you’re using berries, glue them on the white circles. If you’re using stones, glue them directly onto the yellow head.
Turn the Owl over for the feet and glue on four small pieces of yellow or construction paper. For the legs, you can either use sticks or leaves. Simply glue them onto the bottom of the Owl!
2: Simple Outlined Owl

This Owl involves finding darker-colored leaves to outline the Owl’s body. You can find some yellow-colored leaves for the eyes and a yellow leaf folded in half for the nose.
You can place the Owl on a white background, such as a white piece of paper. This will make the Owl’s features stand out more. Once you have all of your materials, it is time to start crafting!
Begin by outlining the Owl’s body with the darker-colored leaves. Then, add in the eyes, nose, and ears. Use the yellow leaves for these features.
For the eyes, you can glue two yellow leaves side by side. For the nose, take a yellow leaf and fold it in half. Then, glue it down in the center of the Owl’s face.
For the ears, cut out two small triangles from yellow leaves and glue them onto either side of the head. Lastly, add in the feet.
You can either glue down two whole leaves or cut out an outline of a foot from a leaf and glue that down. Once your Owl’s features are in place, allow it to dry completely!
3: Yellow Owl with Popping Eyes
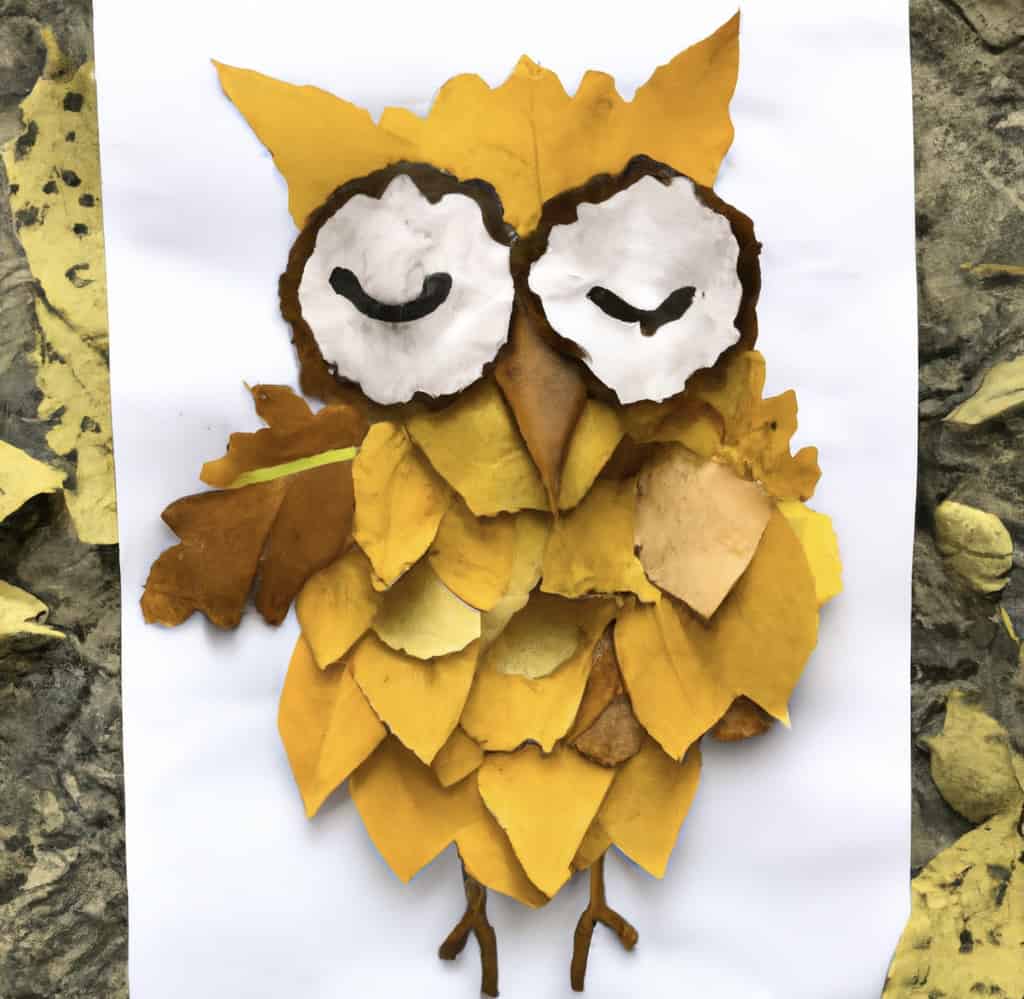
This owl craft primarily uses yellow leaves as the body. Make sure to make the body dense with leaves. The eyes can be made from a round piece of light-colored bark or light-colored leaf.
The pupils can be made from a small leaf or tree bark. For example, you Can outline the outer edges of the eye with tree bark and glue it to the edges. The feet should be made from twigs.
You can place the Owl on a white background, like white paper. Next, you must cut out two eyes and glue them onto the front of the head.
Then, cut out a small triangle for the nose and glue that on too. Next, take your light-colored bark or light-colored leaf and cut out two circles for the eyes.
Glue those in place on top of the smaller triangles. Next, cut out two small leaves or pieces of tree bark for the pupils and glue them on the larger circles.
Lastly, outline the outer edges of each eye with tree bark and glue it to the edges.
4: Yellow-Eyed “One Piece” Owl
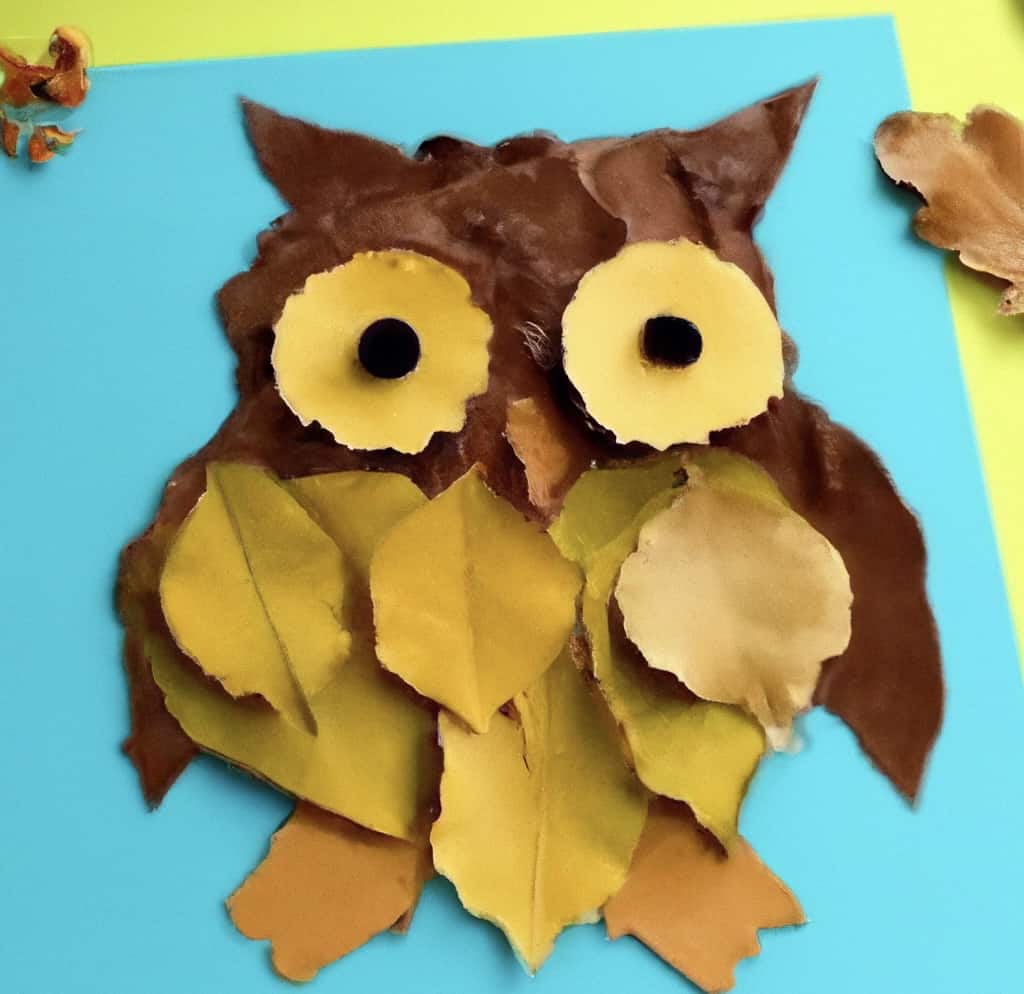
This owl craft is made by taking brown leaves and gluing them together to make them appear as one piece in the shape of an owl’s upper body, including its head, wings, and torso.
For the eyes, use small yellow flowers or yellow leaves and cut them in the shape of the eyes. First, glue two brown leaves together at the curved end to make the Owl’s head.
Next, take a third brown leaf and glue it to the first two, creating a triangle shape. Then, glue on two small yellow flowers or two large yellow leaves cut into circles.
For the wings, take two large brown leaves and glue them to the sides of the Owl’s body.
Finally, for the feet, take two small twigs or dark orange leaves and glue them to the bottom of the Owl’s body. This easy and fun DIY leaf owl craft is perfect for Fall!
Leaf Owls Tips & Tricks
Crafting with leaves is a great way to get outdoors and enjoy the Autumn weather while creating something beautiful. Here are a few tips and tricks to help you make the most of your leaf owls:
- Look for leaves of different sizes, shapes, and colors to add variety to your owls.
- Use a glue stick or clear drying glue to attach the leaves to each other.
- If you’re using twigs for the feet, cut them to size before gluing them.
- Allow your owls to dry completely before displaying them.
- Try painting or adding other embellishments to your owls for even more fun!
- Use leaves that are not too dry or too fresh, as they will be more likely to crumble.
- If you’re using twigs for the feet, cut them to size before gluing them.
With these tips, you’ll be able to create unique and beautiful leaf owls that are perfect for Fall!
Takeaway
Crafts are a great way to get outdoors and enjoy the Autumn weather while creating something beautiful. Leaf owls are a perfect example of this, as they are easy to make.
Many different materials can be used to create these owls, including leaves of various sizes, shapes, and colors. In addition, twigs, bark, flowers, and even paint can be used to add embellishments.
Be sure to allow your owls to dry completely before displaying them. Then, when you’re finished, you’ll have a cute and unique decoration perfect for Fall!


