HOW TO TIE DYE WITH MARKERS
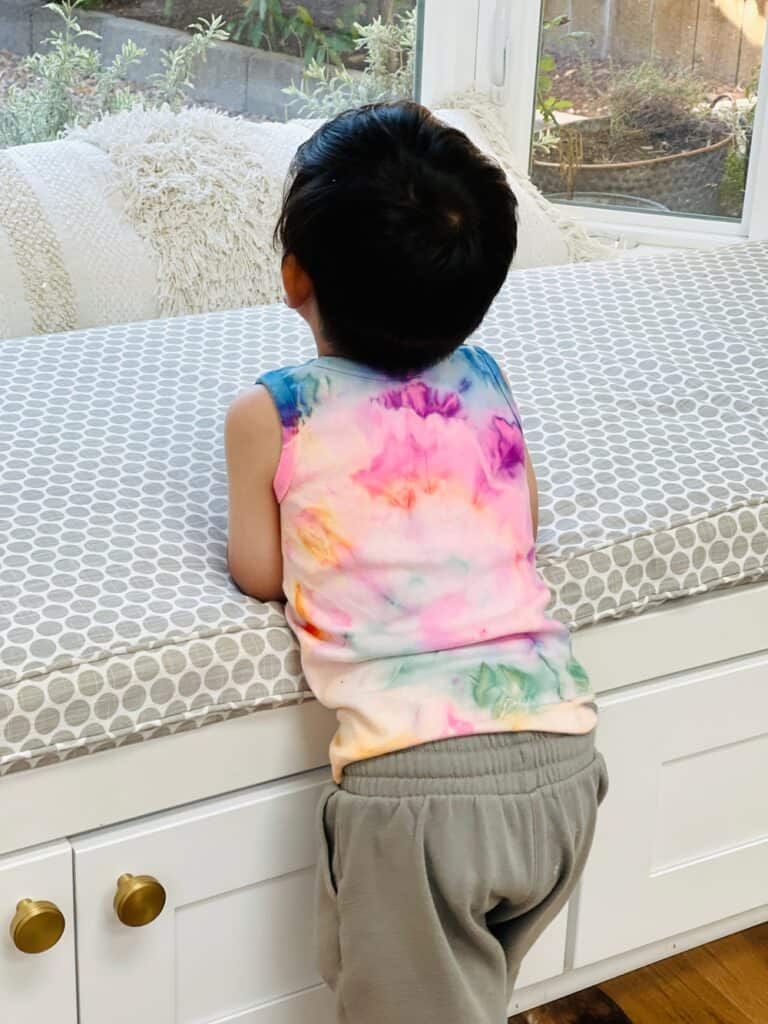
Learn how to tie dye your own shirts at home with just markers and alcohol! A simple art project kids will love wearing!
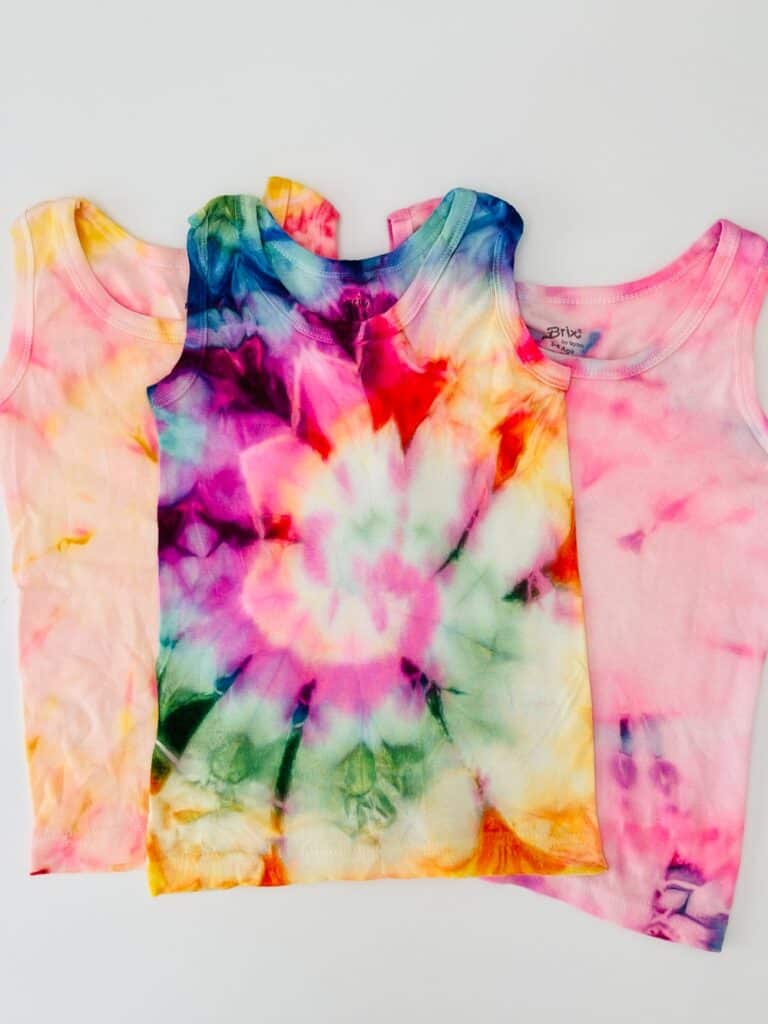
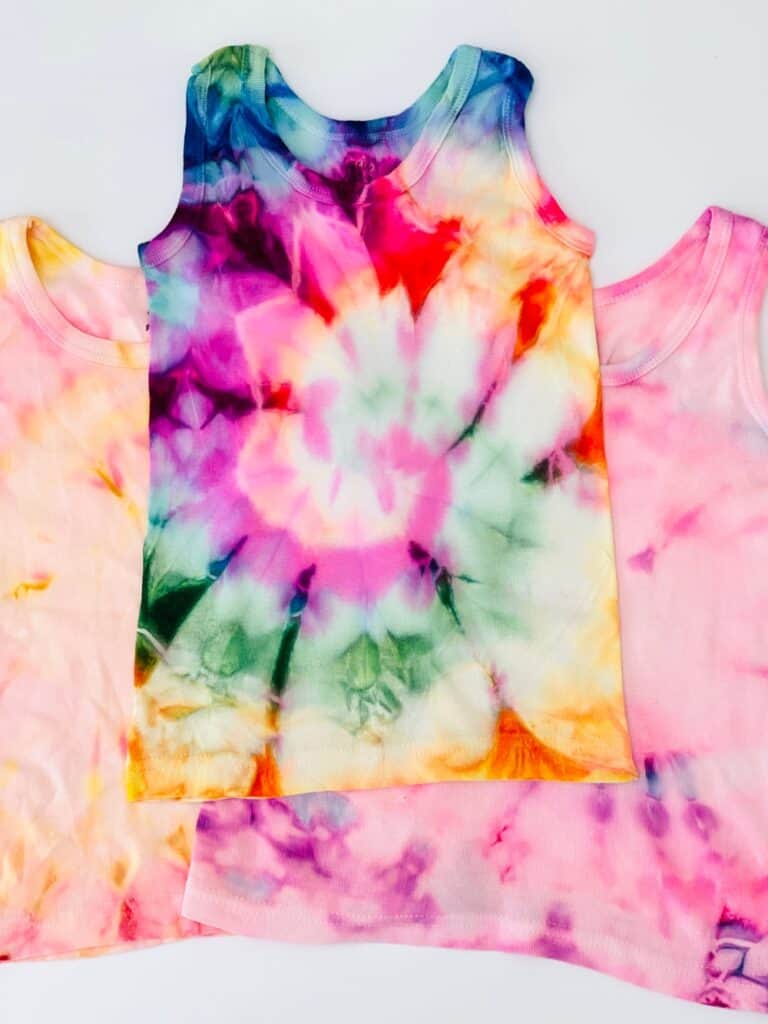
You've probably seen tie dye shirts at Target or Walmart, but what about making your own? You can use markers to create awesome designs on t-shirts! This is a fun project for kids and adults alike. It'll teach you the basics of how to make tie dye with markers and give you some great ideas to get started. Read more below for step-by-step instructions to make these crazy fun colorful shirts with two simple materials!
What kind of markers do you need to tie dye shirts?
You do need a certain type of markers and those are alcohol markers, like Sharpies or these Arteza markers which we happened to have at home and used for this project. Alcohol-based markers are a type of drawing and coloring tool that is made mostly from alcohol or acrylic. Unlike water-based markers which are suspended in water, alcohol markers are suspended in alcohol. They are often used for drawing. Sometimes pencils are used to outline the image and then filled with alcohol-based marker pens to color it in. In our case, they are perfect for tie-dying shirts because of their brilliant and sharp colors!
How do you tie dye with markers?
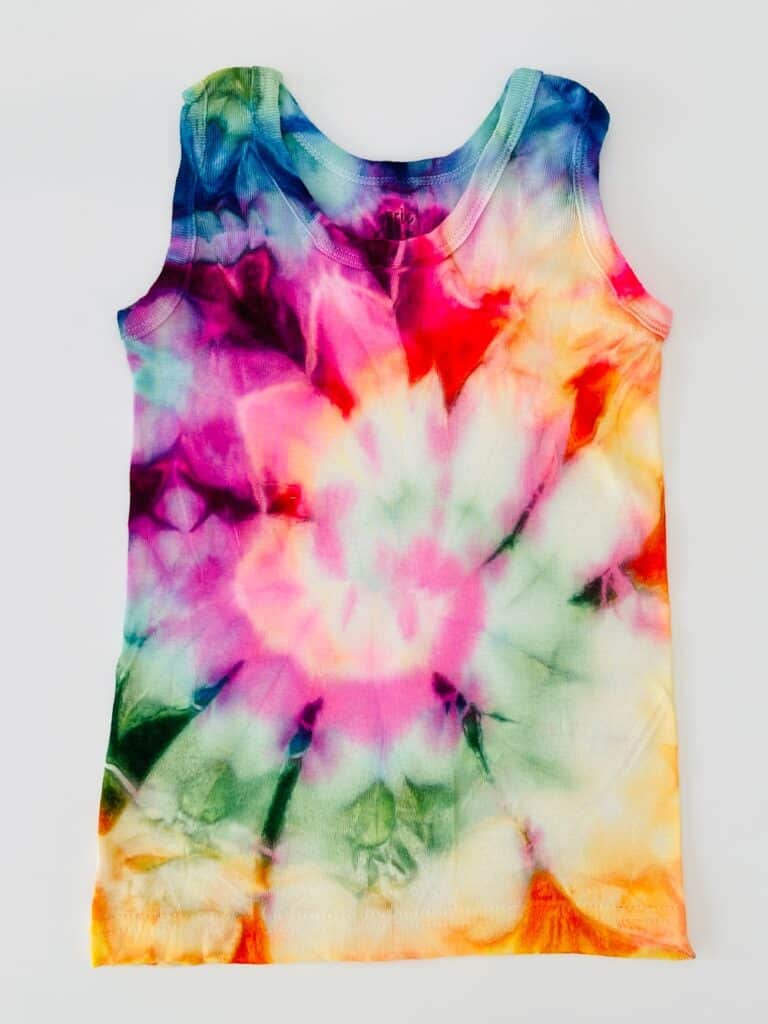
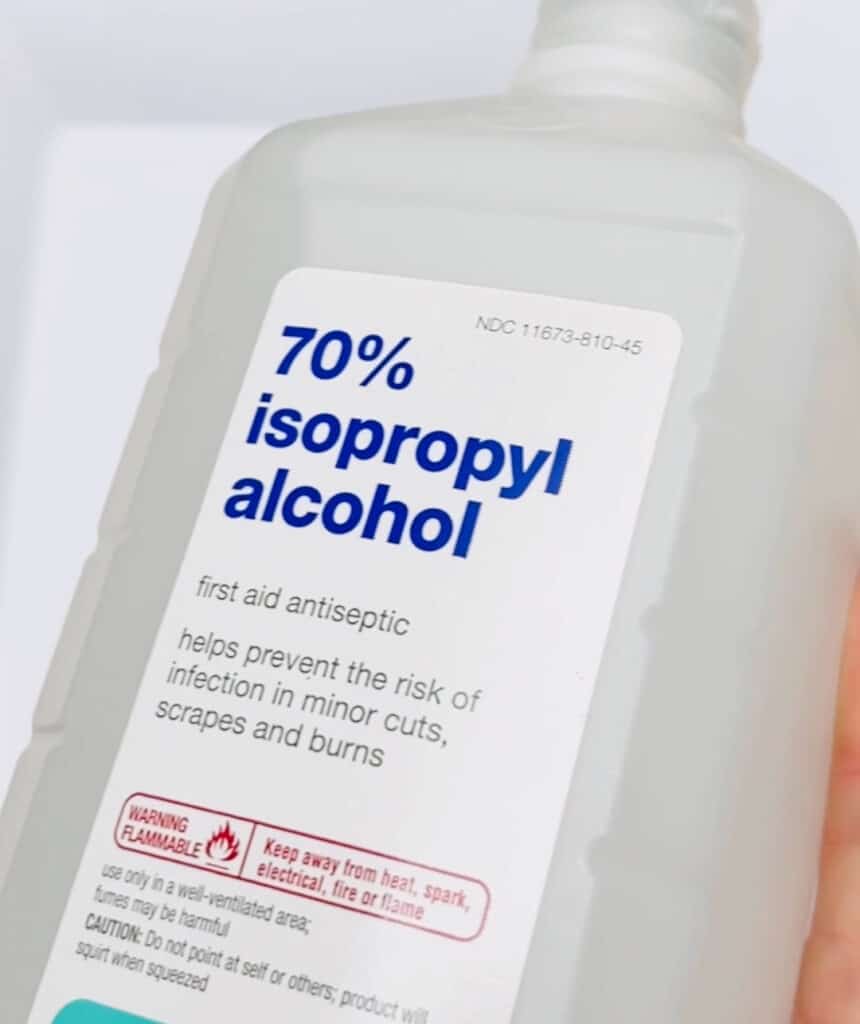
Okay we know we need to use alcohol markers because if we used water-based ones like washable markers, the colors would bleed straight out when washing or rinsing the shirts. The key to making this marker tie dye work is using rubbing alcohol (isopropyl alcohol). We used 71% which is what we had on hand. You should be fine using concentrations that are at least that or more. By adding rubbing alcohol over your markers, the colors will spread which will create that nice colorful tie dye effect. By wrapping the shirt around in circles and sectioning off with rubber bands, you are able to create concentric-like tie dye circles. Pretty simple, cool and easy!
You do need to make sure an adult handles the alcohol part or that adult supervision is there if you let the kids add the alcohol. Use a dropper instead of pouring straight over the shirt, as we did to keep it safer for kids. Also make sure to do add the alcohol in a well-ventilated area.
How long do I need to let my tie dye dry?
To make sure the colors spread and penetrated the shirts easily, we made sure there was an ample amount of alcohol on all ends, front, and back and sides of wrapped shirt. We let it dry outside fully until dry to the touch. This took around 48 hours. It could be more or less depending on your outdoor temperature. Just realize that the longer the colors have a chance to penetrate the more vibrant the shirt will come out.
What type of shirt is best for creating tie dye?
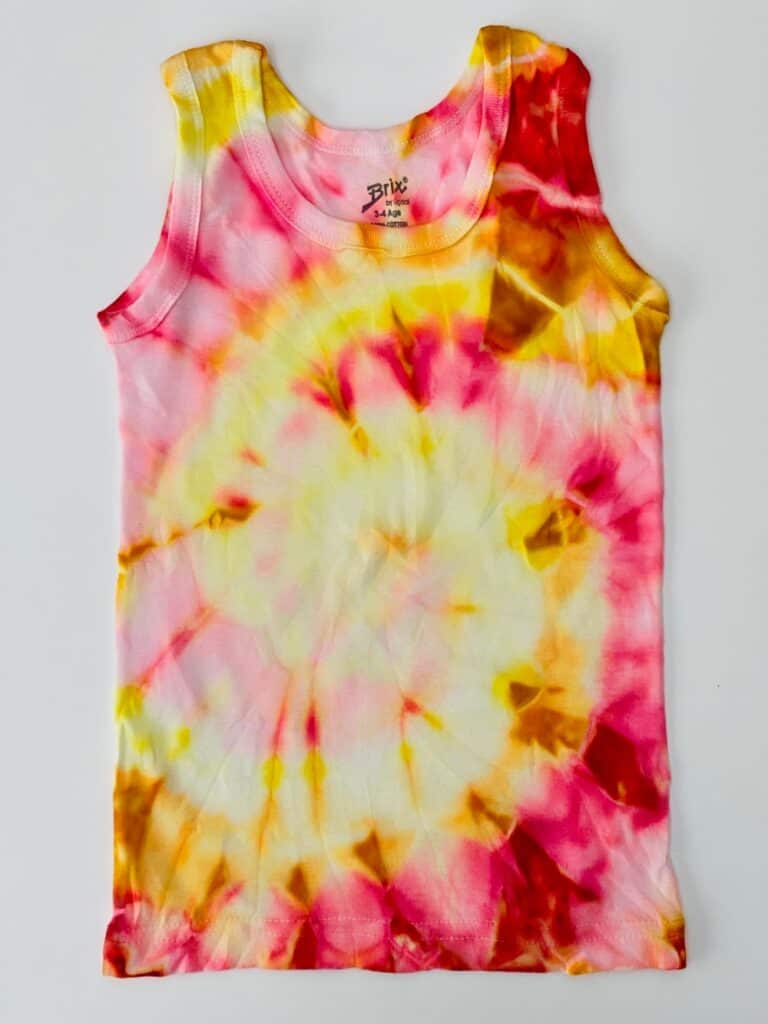
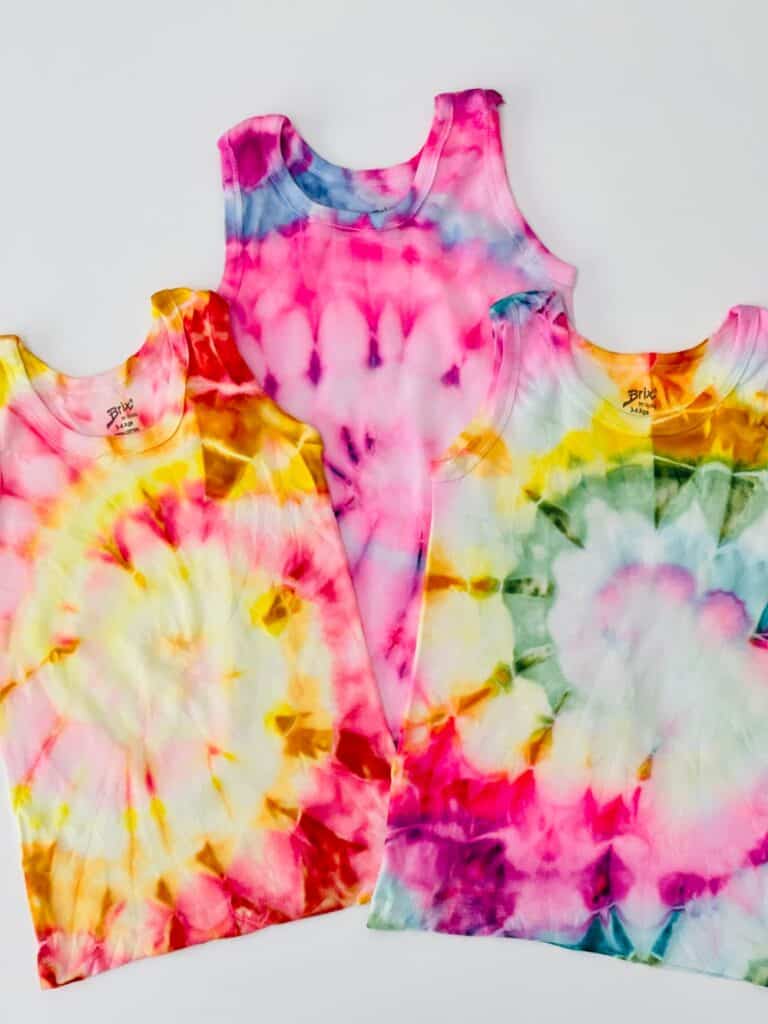
We made simple tank tops (but you could easily do t-shirts). We like soft, 100% cotton tees or tanks that are tagless so the tag doesn't absorb colors or get in the way. The tank tops we got were great quality, affordable, and came in a pack of 4!
How do you rinse and wash your tie dye shirts?
We followed this awesome guide for how to rinse and wash tie dye so we recommend reading that thoroughly. But in a nutshell this is what to do:
- Rinse your tie dye shirts one by one in warm water until the water runs clear
- Immediately wash in your washing machine or else the colors will bleed over the whites or other colors more than they would if not washed immediately. We also washed one item at a time to keep the colors mixing as best as possible.
- The guide suggests drying each item separately but we didn't want to waste energy and so hung up each tank to fully dry.
- Make sure to iron all the creases out when the shirt is fully dried.
- Note you may want to repeat the steps above a couple of more times after wear to make sure there is no bleeding onto other clothing items.
Will my tie dye look the same after washing?
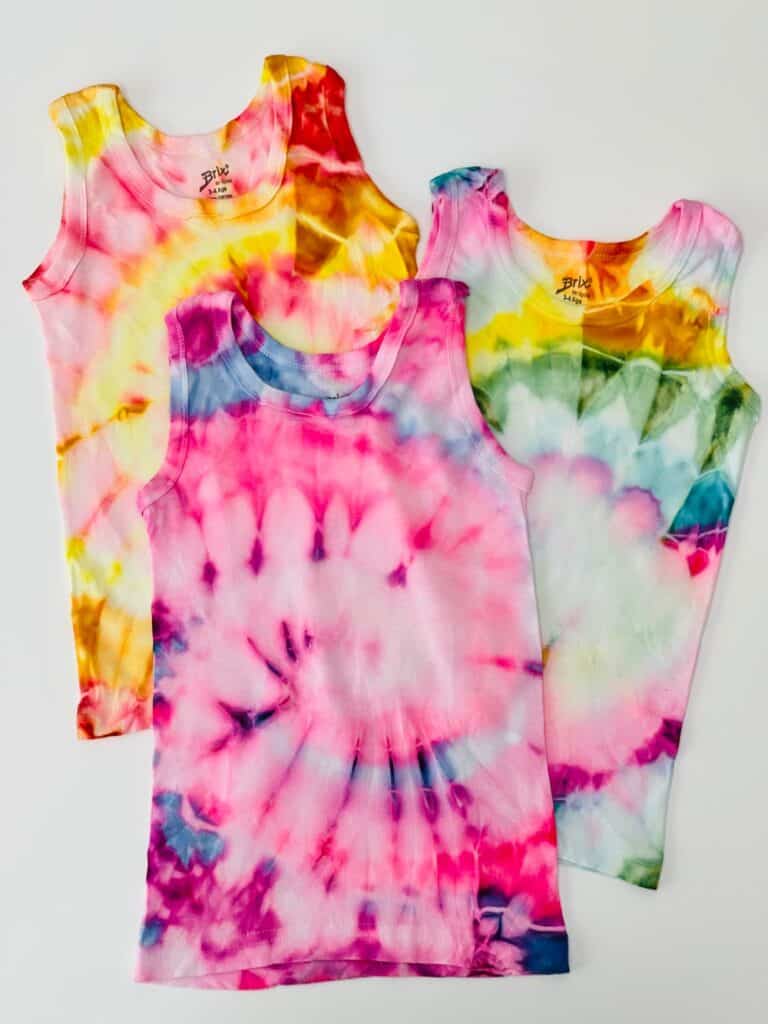
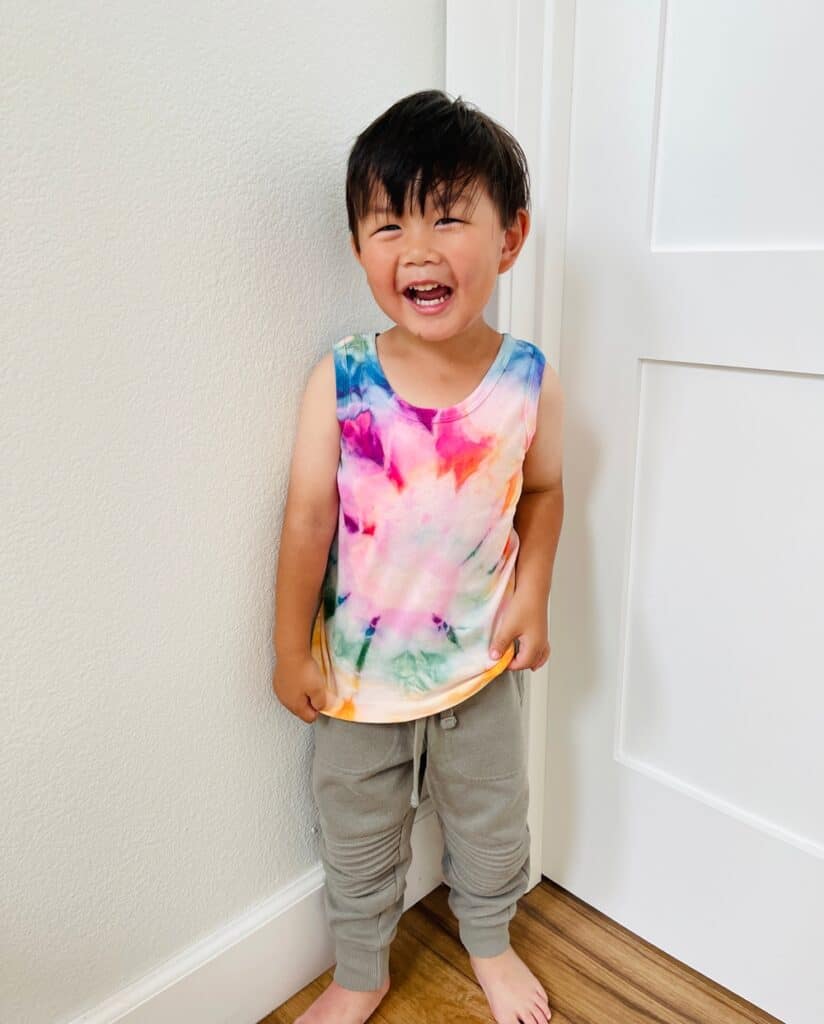
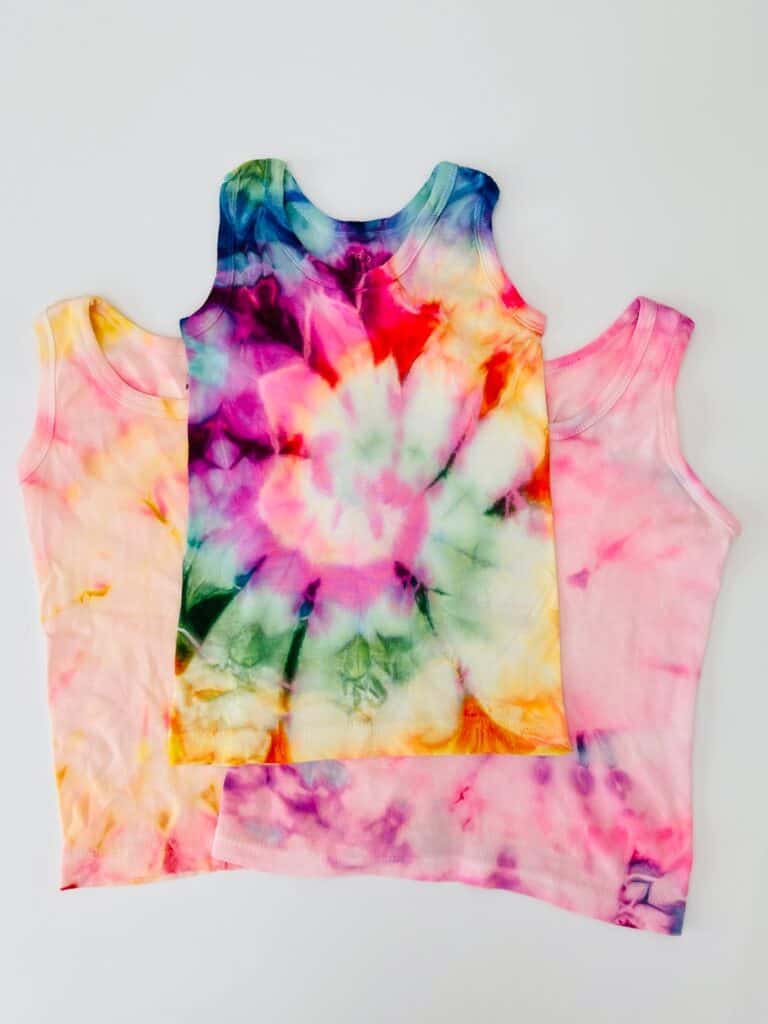
I will be honest, if you are dying at home, not really. The colors will be more muted because you're rinsing all the extra colors out and then washing the shirt immediately. After a rinse and wash, it is inevitable that some of the colors will bleed into the white parts of the shirts, but overall, our tank tops still remained very colorful and vibrant! And there is something super cool and rewarding about wearing a shirt that you made and designed yourself!
How to Tie Dye With Markers - Materials:
-
Alcohol-based markers
-
White cotton tanks or tees
-
Fork (optional or use your fingers to wound the shirt)
-
Rubber bands
-
A tray (line with plastic wrap if you don't want to stain it or use a covering like parchment paper)
-
Disposable gloves
INSTRUCTIONS: (WATCH THE VIDEO IN THIS POST TO SEE HOW WE MADE THESE!)
-
Line your tray with parchment paper or plastic wrap.
-
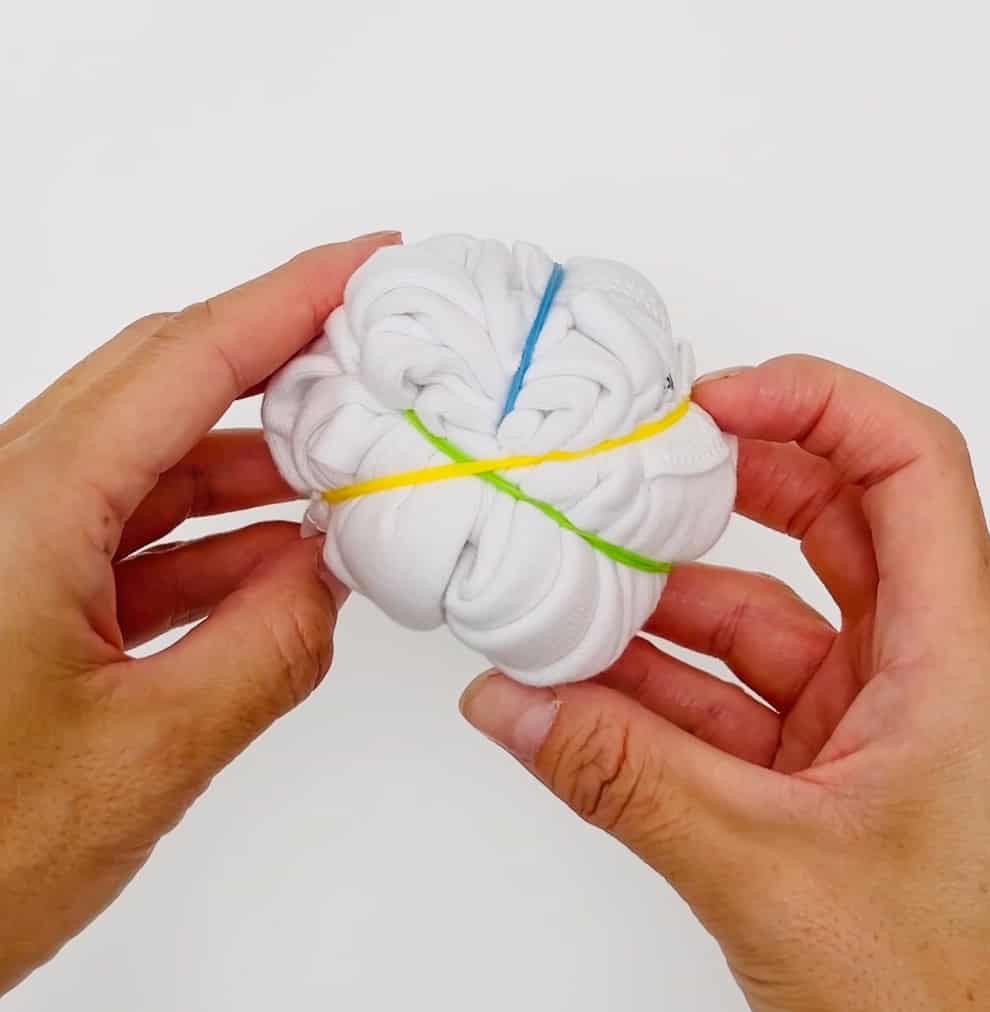
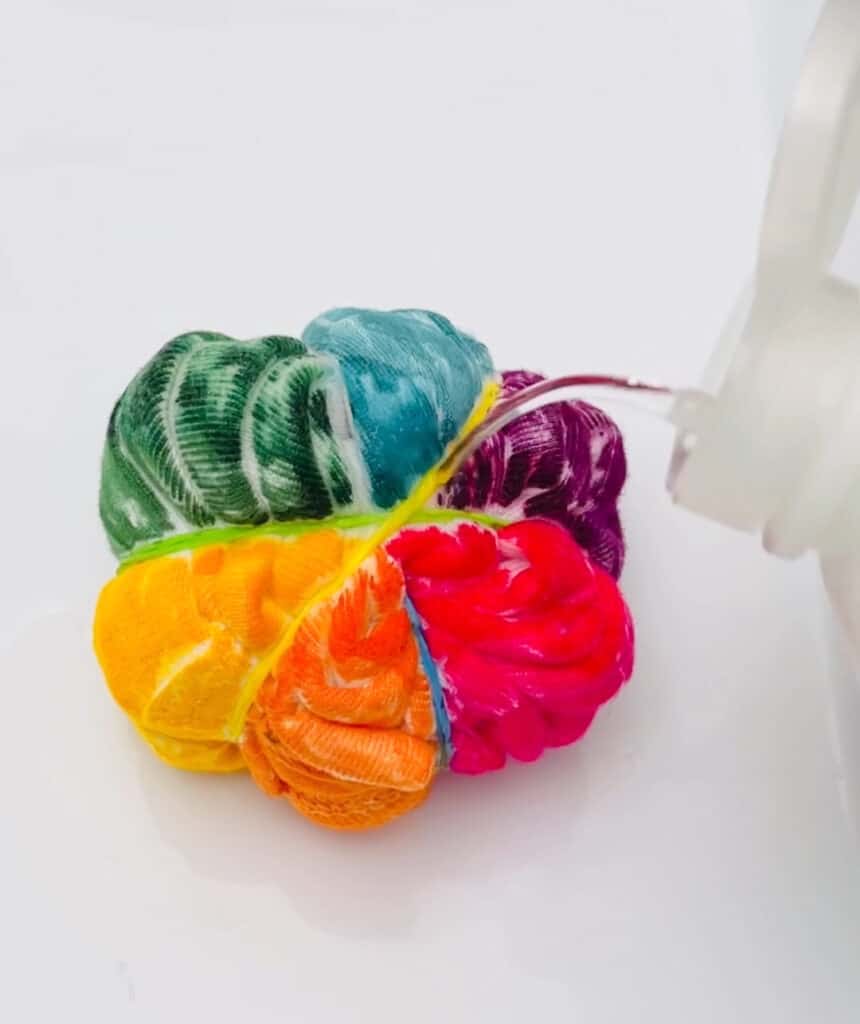
Use a fork or your fingers to wind the shirt in concentric circles (it will resemble a rose flower). Section off 6 sections with 3 rubber bands.
-
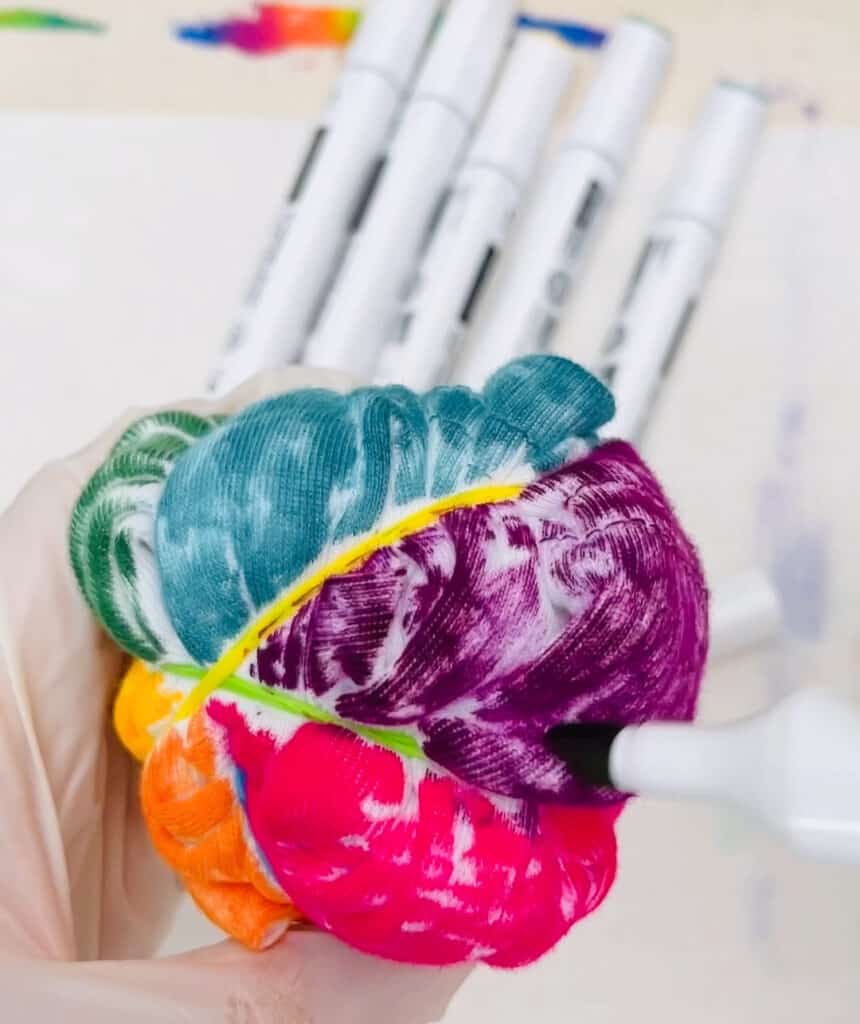
Put on some disposable gloves.
-
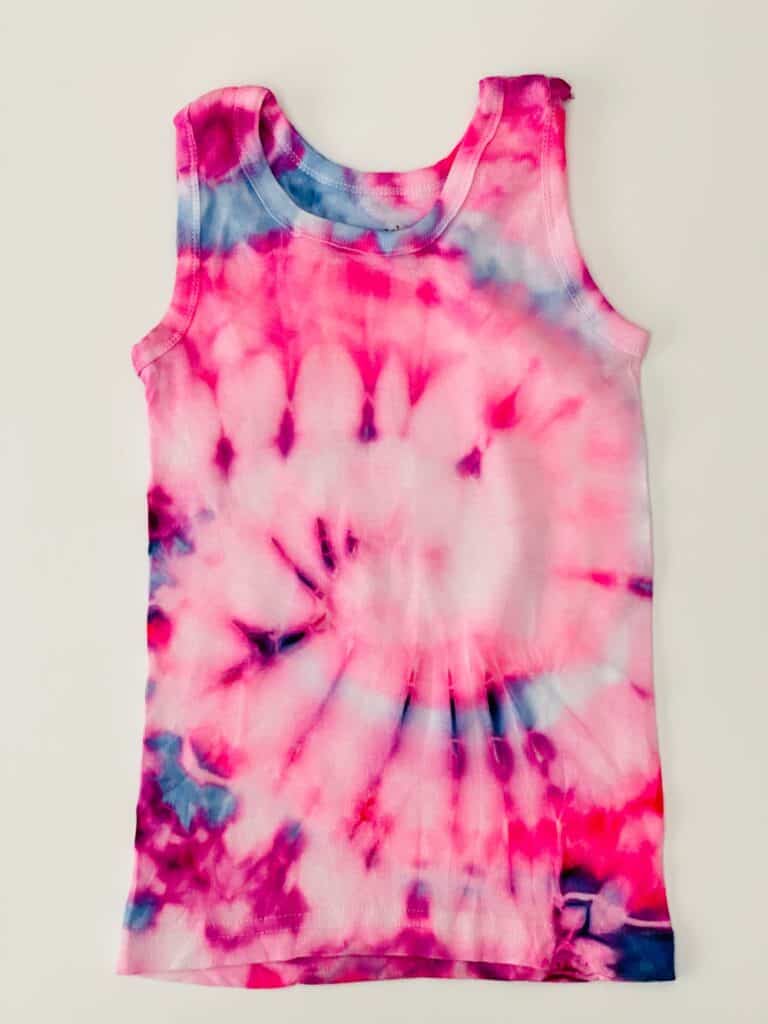
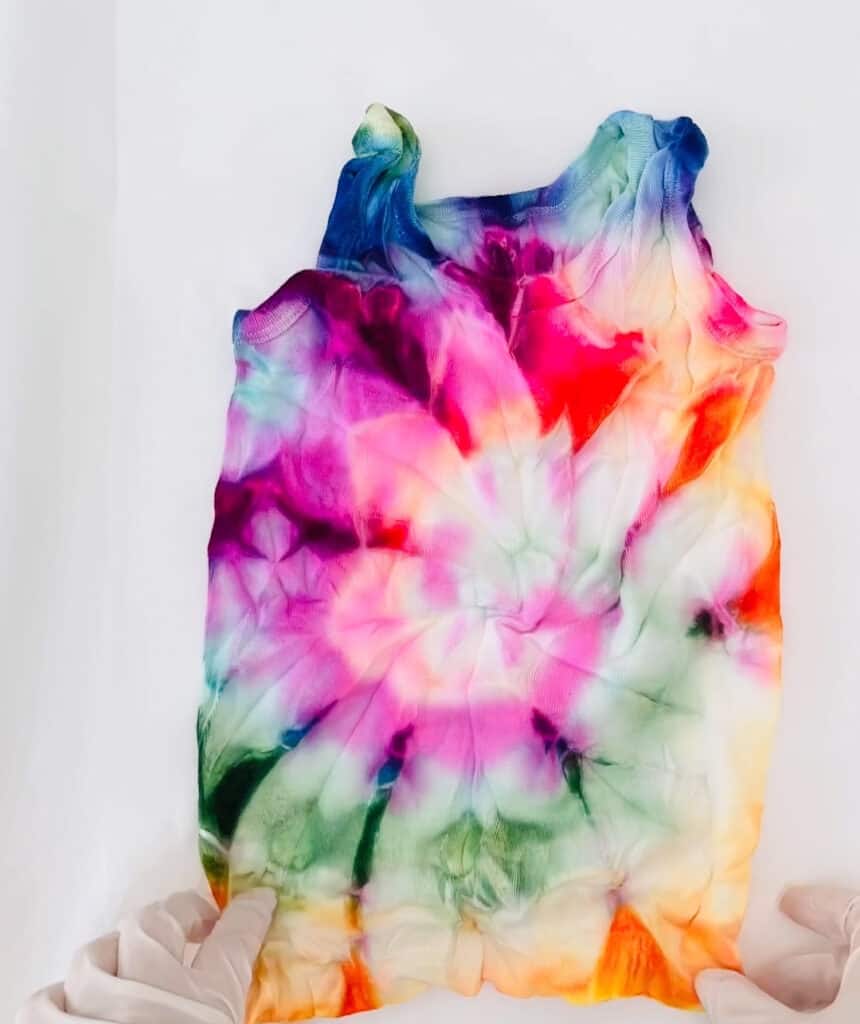
Color each section with your markers. Remember to color INSIDE THE FOLDS too, this is important or else you will have a few white spots. (Check out the photo of the rainbow tie dye above, we didn't fully color the inside folds and that is why you see white spots so wanted to share as an example. BUT we still think it looks cool so don't sweat it if you don't get it perfect the first time!)
-
Color both the front and back and sides fully.
-
Place on tray and liberally add rubbing alcohol on the front, back and sides. Do this in a well-ventilated space. Adults should do this step. If you wish to have the kids do this, we recommend using droppers and adding the alcohol safely this way, with adult supervision.
-
Take a fresh piece of plastic wrap and place your tie dye on it and allow it to dry. We let ours dry for 48 hours outside.
Learn how to tie dye your own shirts at home with just markers and alcohol! A simple art project kids will love wearing! Line your tray with parchment paper or plastic wrap. Use a fork or your fingers to wind the shirt in concentric circles (it will resemble a rose flower). Section off 6 sections with 3 rubber bands. Put on some disposable gloves. Color each section with your markers. Remember to color INSIDE THE FOLDS too, this is important or else you will have a few white spots. Color both the front and back and sides fully. Place on tray and liberally add rubbing alcohol on the front, back and sides. Do this in a well-ventilated space. Adults should do this step. If you wish to have the kids do this, we recommend using droppers and adding the alcohol safely this way, with adult supervision. Take a fresh piece of plastic wrap and place your tie dye on it and allow it to dry. We let ours dry for 48 hours outside. HOW TO TIE DYE WITH MARKERS

Materials
Instructions