

By using this site, you agree to our Terms of Use. This post may contain affiliate links. Read our disclosure policy. As an Amazon Influencer, I earn from qualifying purchases.
Check out my Plaeful Printables for kids to play and learning!
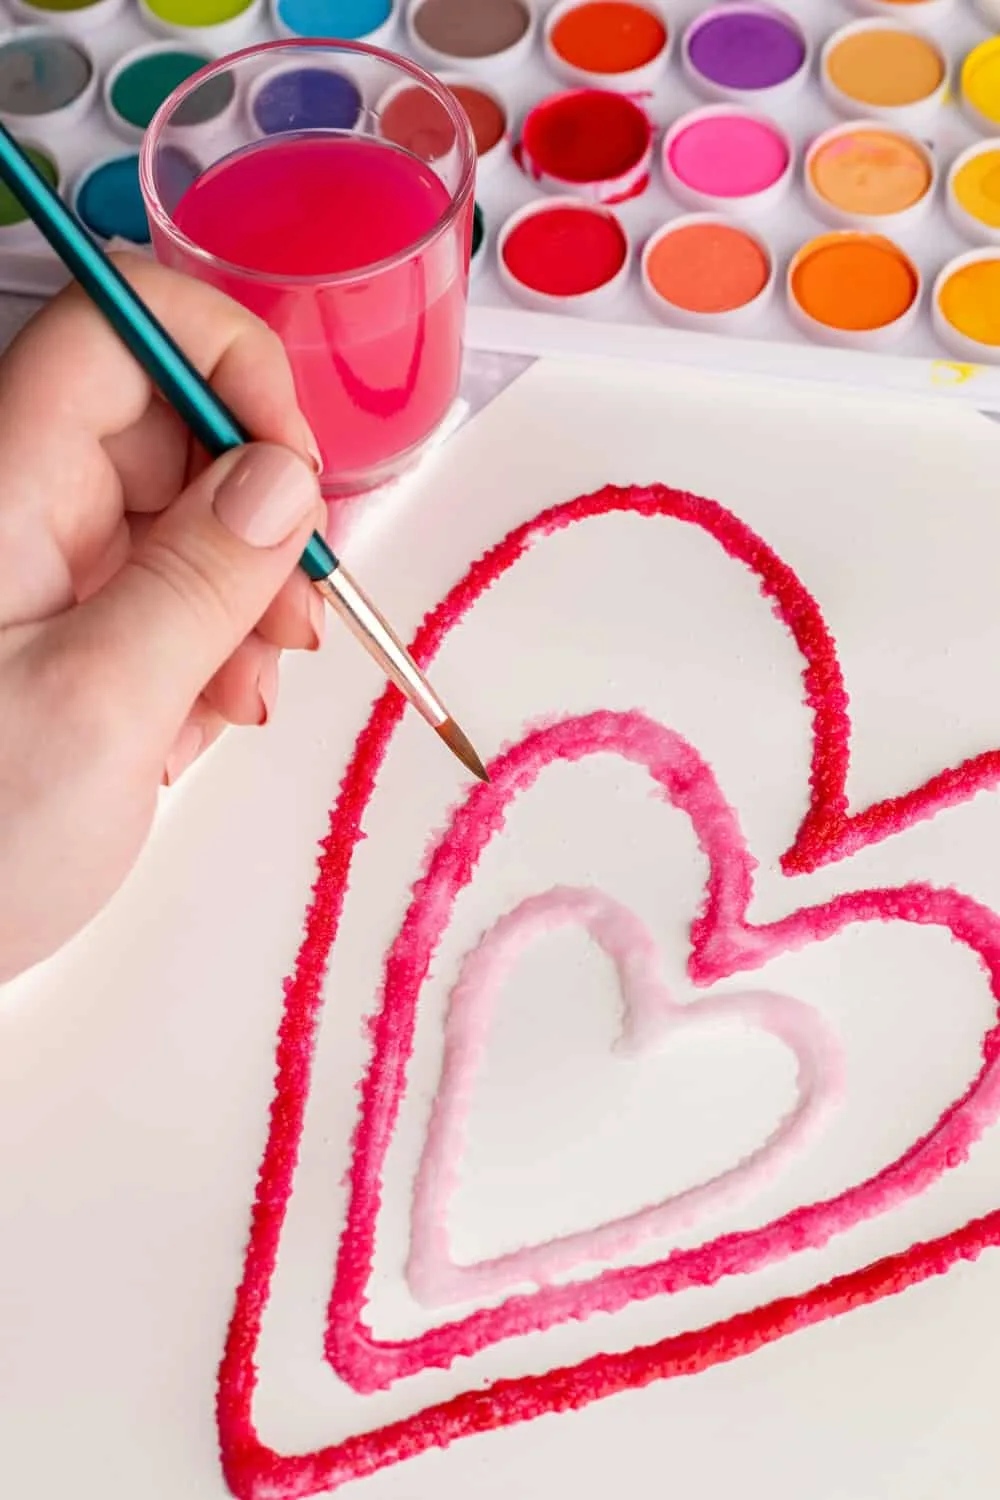
Use our free printable heart template to create this beautiful heart glue salt painting. A lovely and colorful Valentine craft!
We’ve been loving bringing out all the heart crafts for Valentine’s Day! Today we’re sharing a super simple Valentine art that’s also a great calming activity. Who doesn’t love a good salt-panting activity? This heart salt glue painting will keep your kids busy for an afternoon and produce adorable art you can frame or use as decor! This Valentine’s craft is simple, delightful, and the results are always magical. The best part is we provide a free printable heart template so all you need are some basic materials.


Heart Glue Salt Painting: Materials:
- White cardstock paper
- White school glue (like Elmers)
- Table salt
- Watercolor paints
- Paintbrush
- A tray or sheet to catch excess salt
- Our free printable heart template or draw your own hearts (scroll down to the craft instruction card to download)
How to make heart salt glue painting
- Prepare Your Workspace: It helps to have a tray and have your paper inside so excess salt can fall out and not get everywhere.
- Drawing the Heart: If you’re not using a heart template, draw a heart on your paper with a pencil. You can draw one large heart or several smaller ones, depending on your preference.
- Applying the Glue: Trace over the pencil lines with white glue. Ensure the glue is not too thin to prevent the salt from falling off.
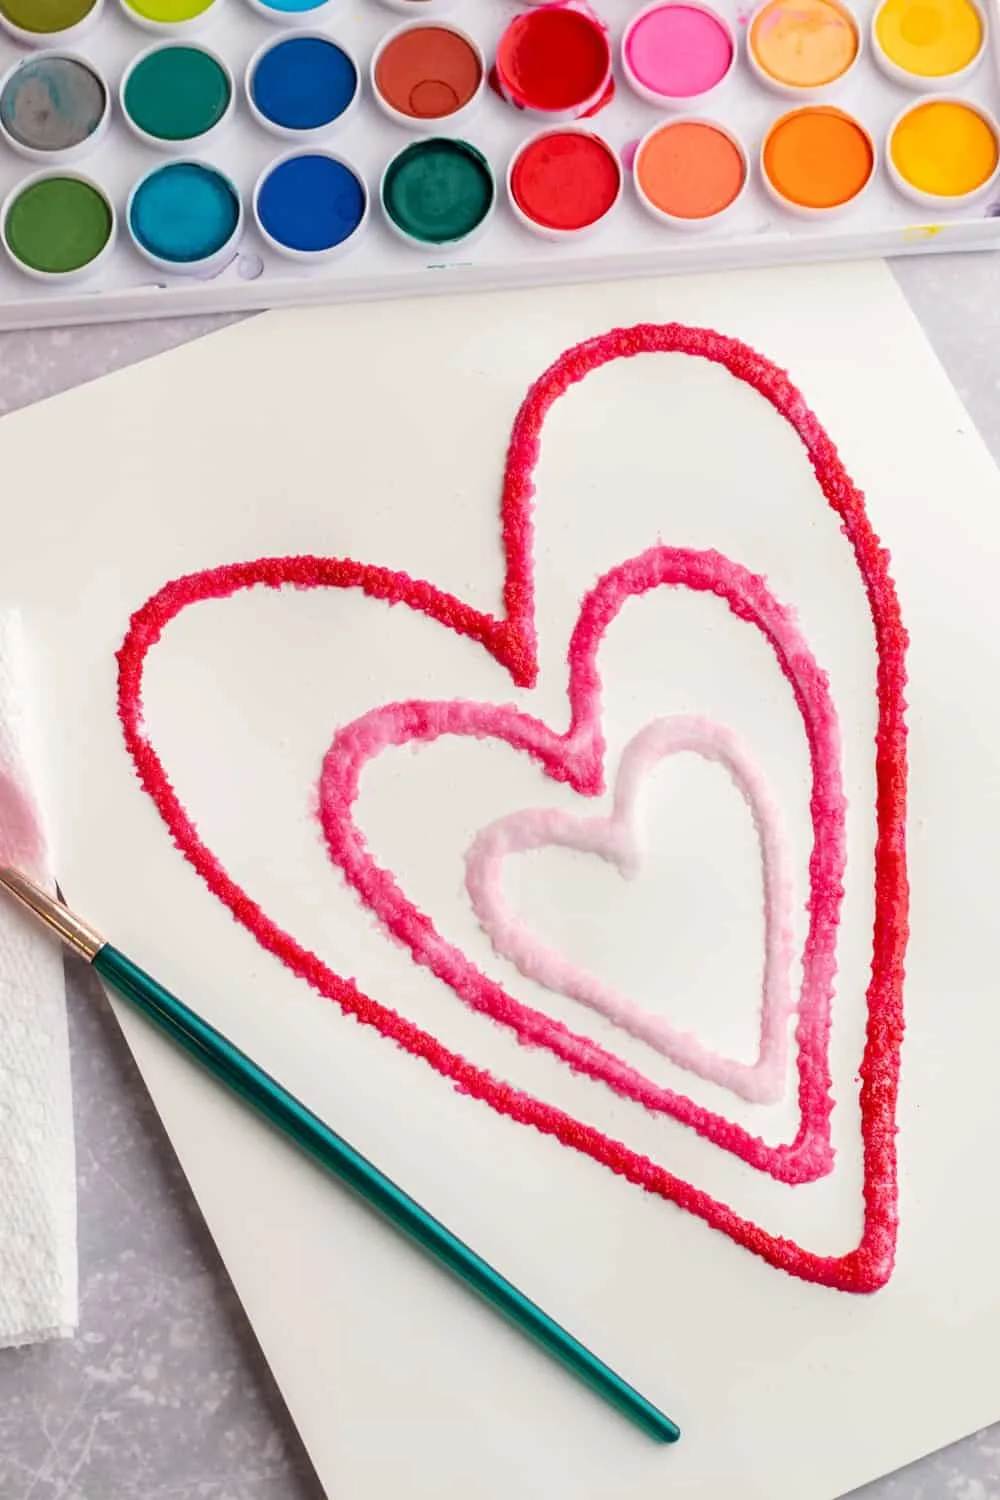
- Adding the Salt: While the glue is still wet, sprinkle a generous amount of salt over the glue lines. Make sure all the glue is covered. Then, tilt the paper to remove excess salt. Do this part over a tray to catch the salt that falls off.
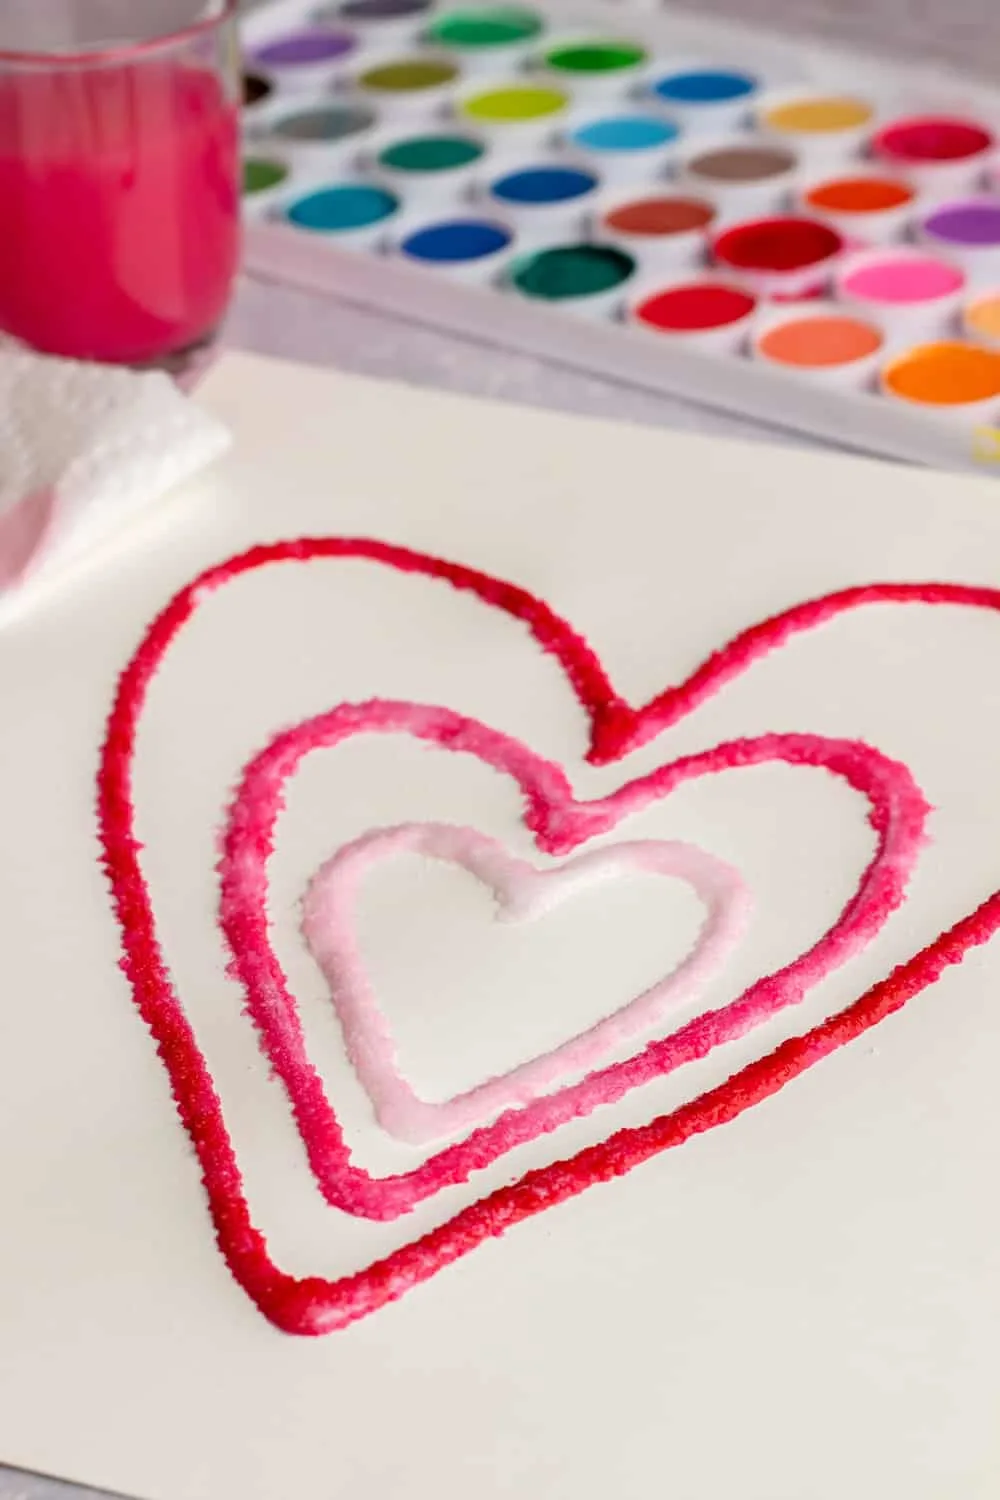
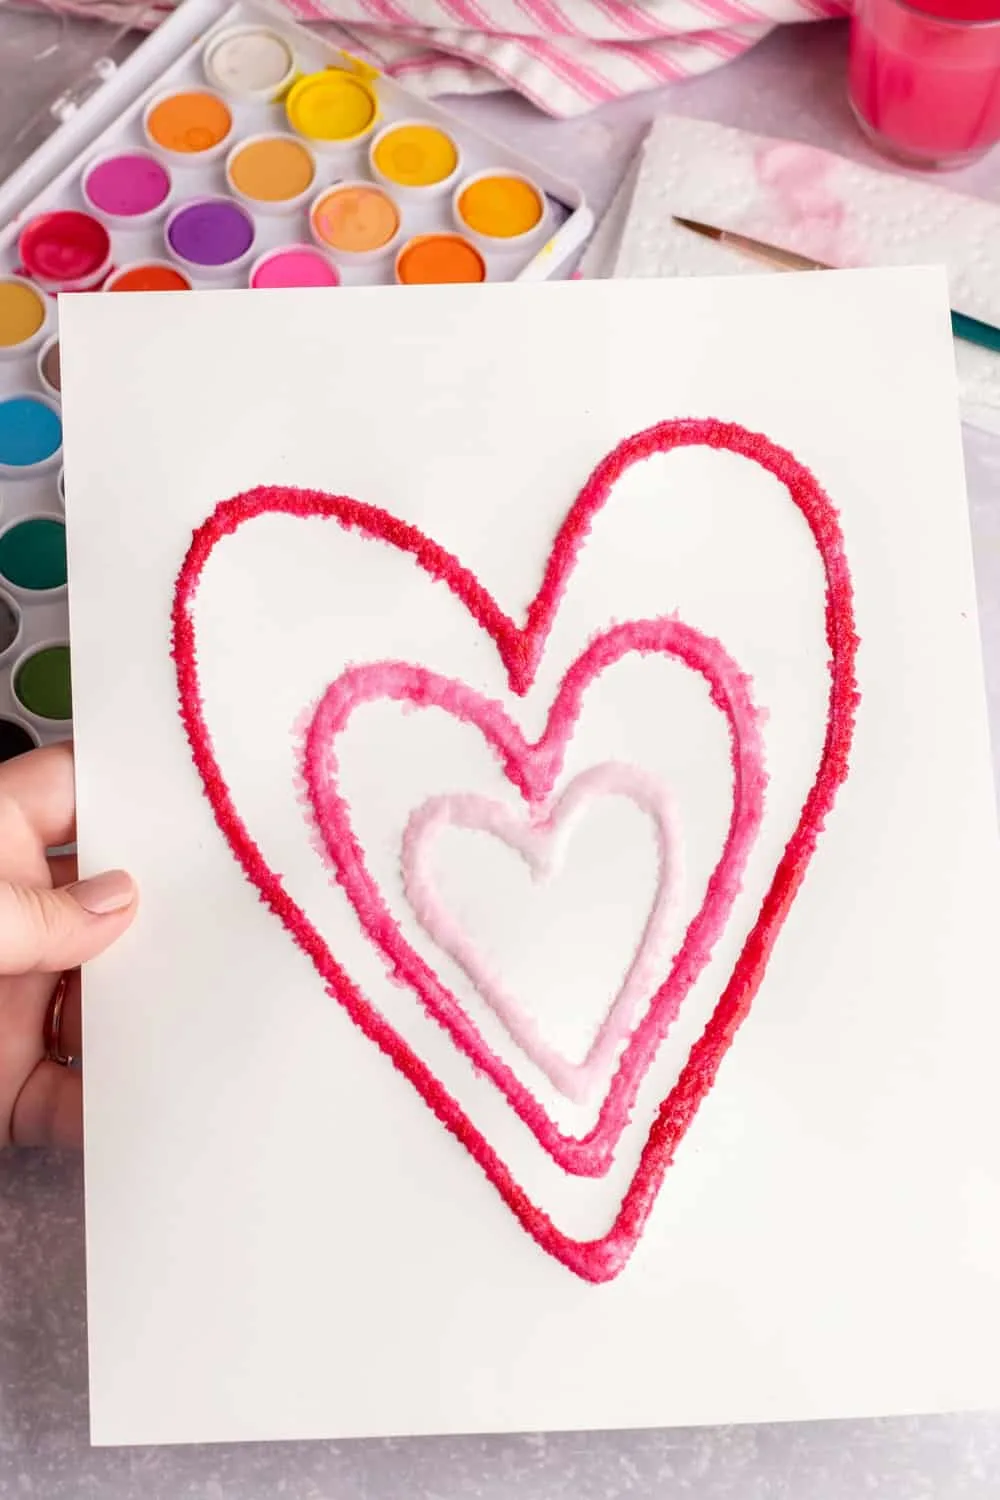
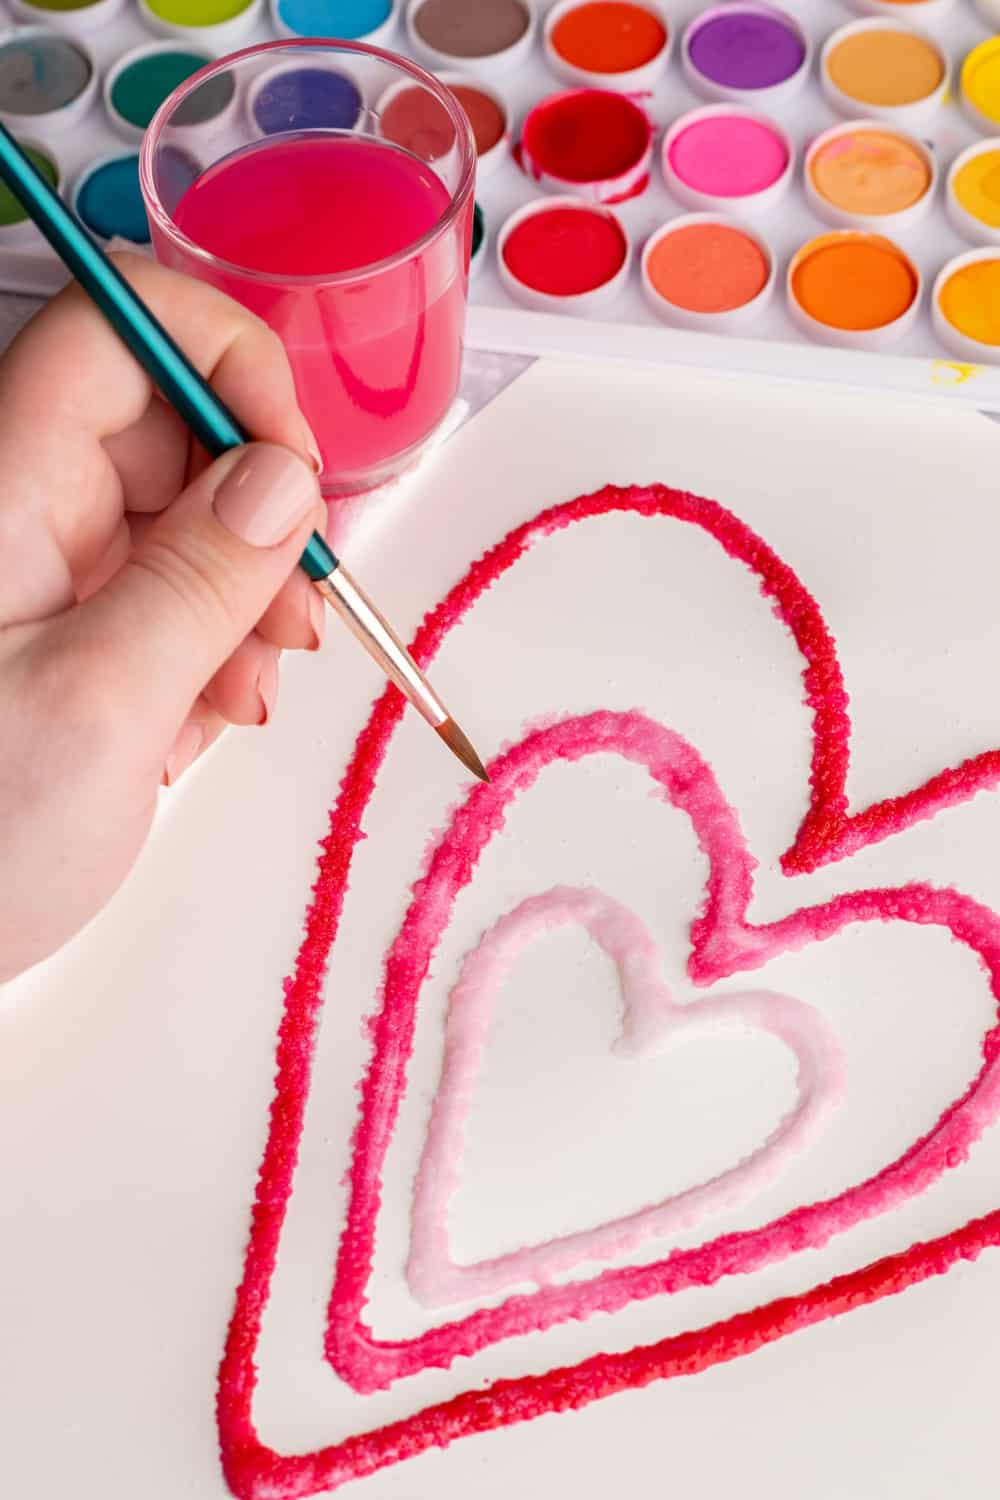
- Adding Color: Let the glue and salt dry for a moment. Then, dip your paintbrush in water and then in your watercolor paint. Gently tap the paintbrush over the salt-covered glue lines. You’ll see the color spread magically along the salt lines!
- Exploring Colors: We used red and pinks for a classic Valentine’s look, as you can see in the images. However, feel free to experiment with different colors.
- Drying: Once you’re satisfied with your painting, set it aside to dry completely, at least a day is a good idea before framing or displaying your art.
Tips
- Use a different paintbrush for each color to keep the colors vibrant and prevent them from mixing on the paper.
- For a more controlled application of the watercolor, squeeze the paintbrush to let just a few drops fall on the salt. This will help the color spread more slowly and evenly.
- If you’re doing this craft with very young children, squeeze the glue for them but let them sprinkle the salt and dab on the paint. It’s a great sensory experience!


Conclusion
This Valentine art is not only fun but also a fantastic way to introduce the concept of absorption to children. They will be amazed at how the salt absorbs the paint and spreads the color along the glue lines. It’s a magical blend of art, science, and play!
Heart Glue Salt Painting


Materials
- White cardstock paper
- White school glue (like Elmers)
- Table salt
- Watercolor paints
- Paintbrush
- A tray or sheet to catch excess salt
- Our free printable heart template or draw your own hearts
Instructions
- Prepare Your Workspace: It helps to have a tray and have your paper inside so excess salt can fall out and not get everywhere.
- Drawing the Heart: If you're not using a heart template, draw a heart on your paper with a pencil. You can draw one large heart or several smaller ones, depending on your preference.
- Applying the Glue: Trace over the pencil lines with white glue. Ensure the glue is not too thin to prevent the salt from falling off.
- Adding the Salt: While the glue is still wet, sprinkle a generous amount of salt over the glue lines. Make sure all the glue is covered. Then, tilt the paper to remove excess salt. Do this part over a tray to catch the salt that falls off.
- Adding Color: Let the glue and salt dry for a moment. Then, dip your paintbrush in water and then in your watercolor paint. Gently tap the paintbrush over the salt-covered glue lines. You'll see the color spread magically along the salt lines!
- Exploring Colors: We used red and pinks for a classic Valentine's look, as you can see in the images. However, feel free to experiment with different colors.
- Drying: Once you’re satisfied with your painting, set it aside to dry completely, at least a day is a good idea before framing or displaying your art.
Notes
- Use a different paintbrush for each color to keep the colors vibrant and prevent them from mixing on the paper.
- For a more controlled application of the watercolor, squeeze the paintbrush to let just a few drops fall on the salt. This will help the color spread more slowly and evenly.
- If you’re doing this craft with very young children, squeeze the glue for them but let them sprinkle the salt and dab on the paint. It’s a great sensory experience!


Agnes Hsu is a mom of three and has been inspiring parents and kids to get creative with easy activities and family friendly recipes for over 10 years. She shares her love for creative play and kids food to her 2MM+ followers online. Agnes' commitment to playful learning and kindness has not only raised funds for charity but also earned features in prestigious nationwide publications.