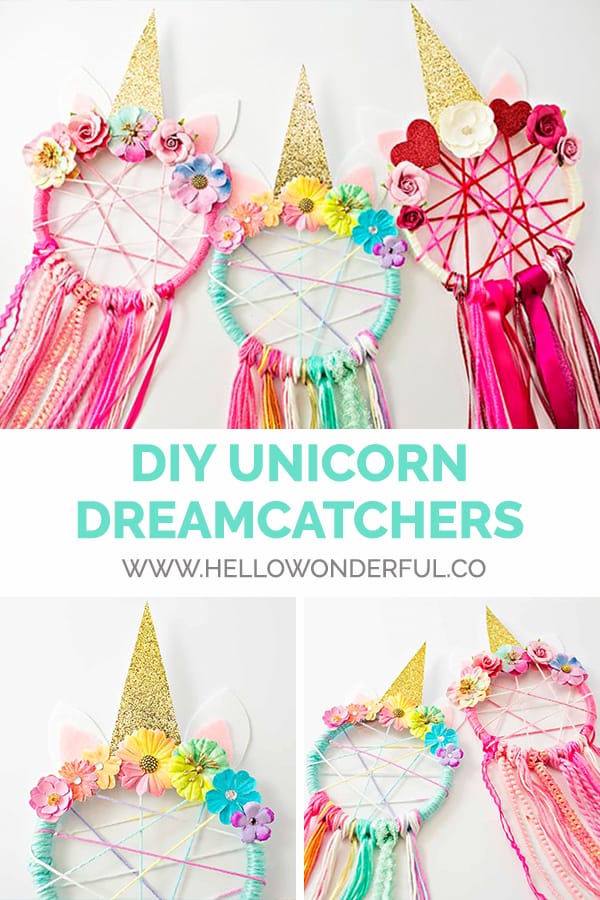
DIY UNICORN DREAMCATCHER
Follow us on Instagram for more fun ideas for kids!
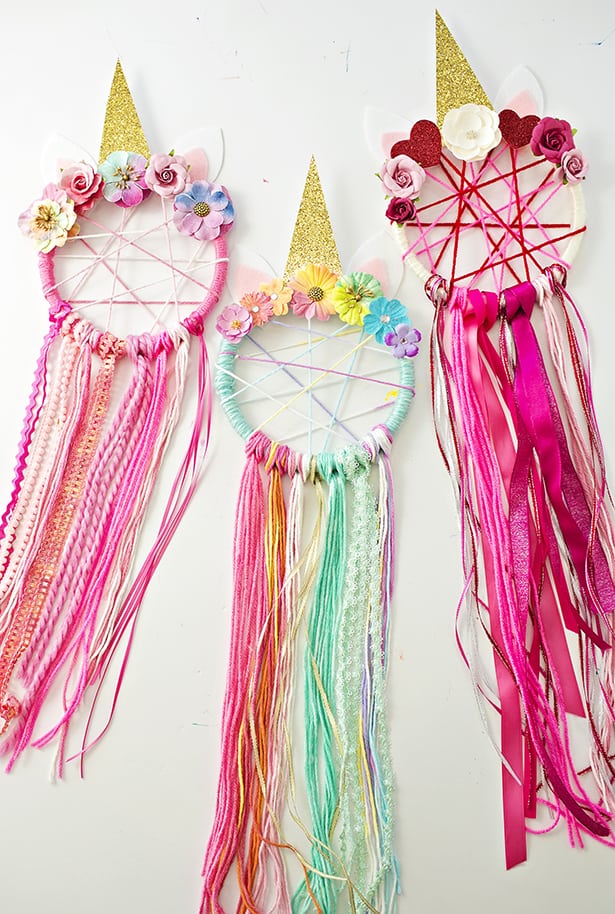
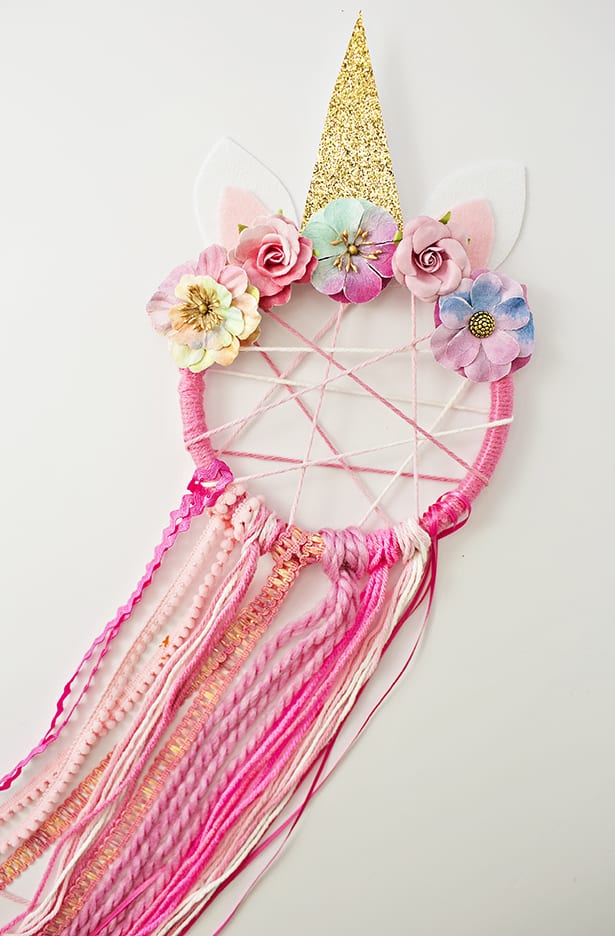
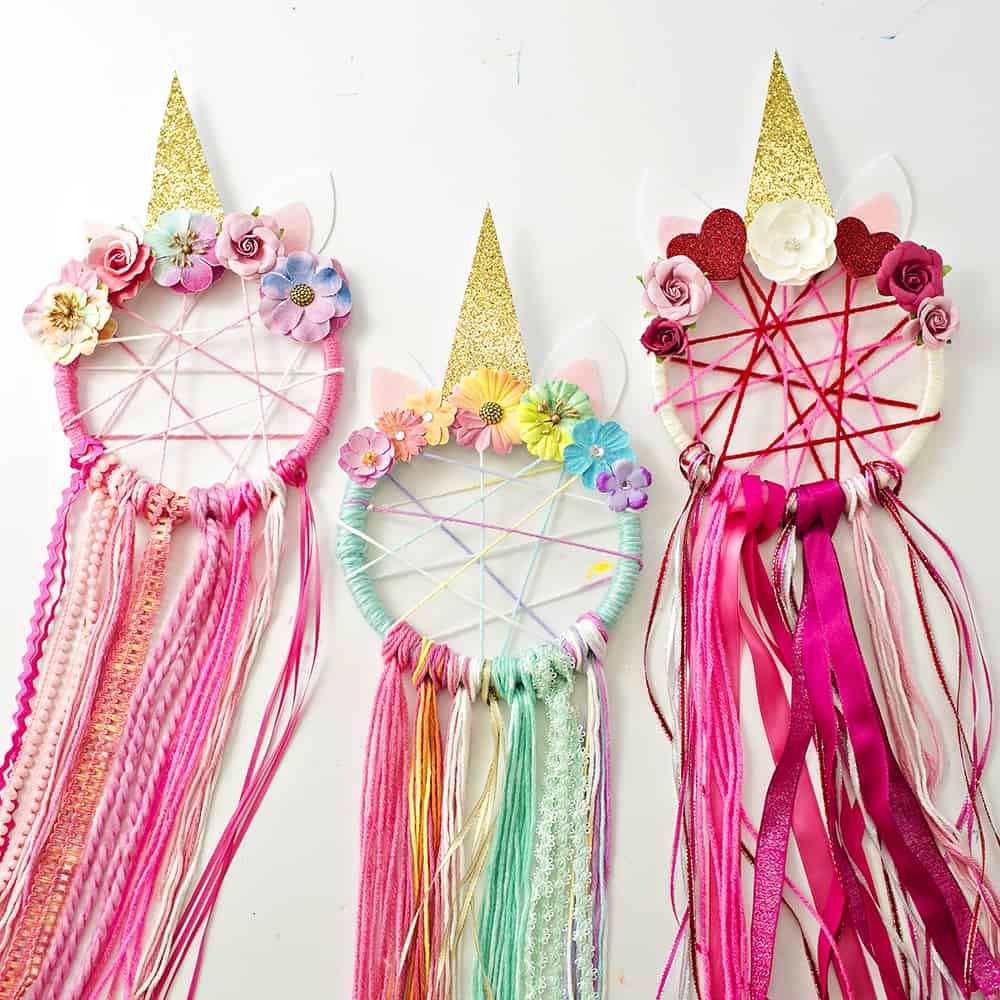
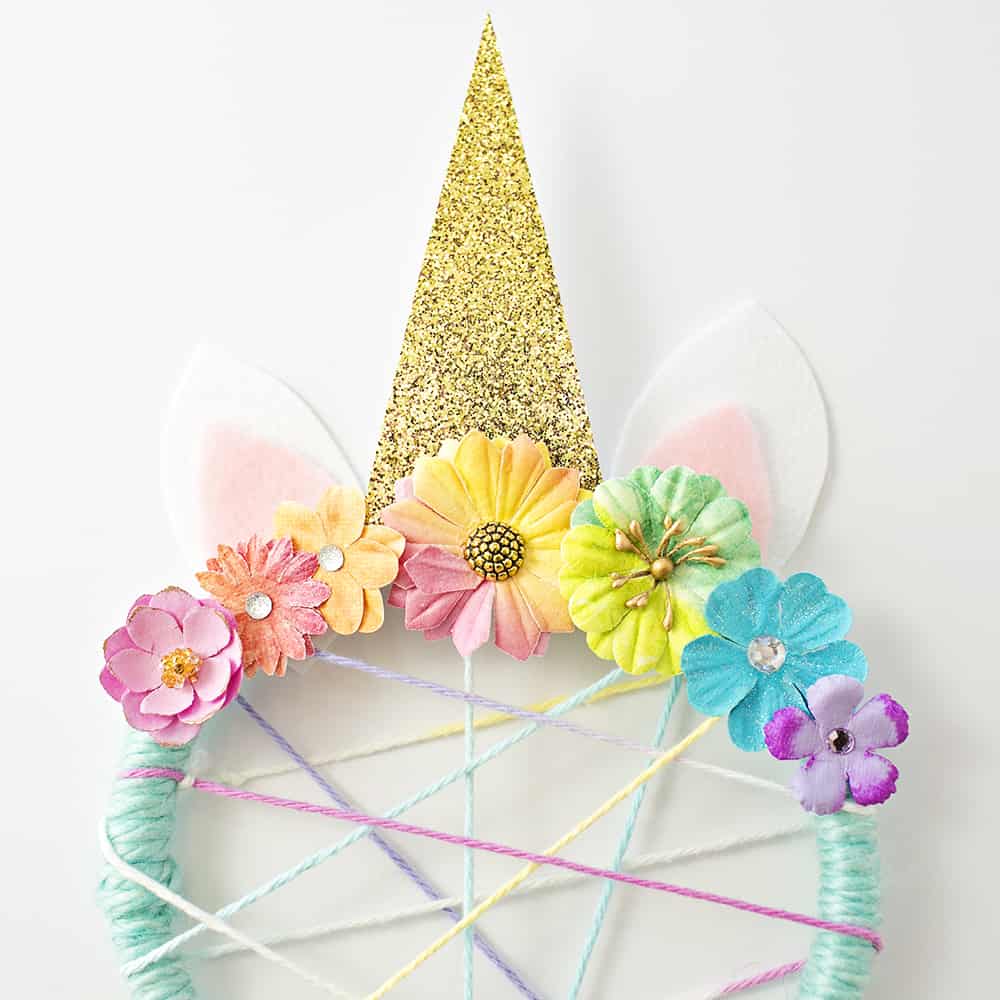
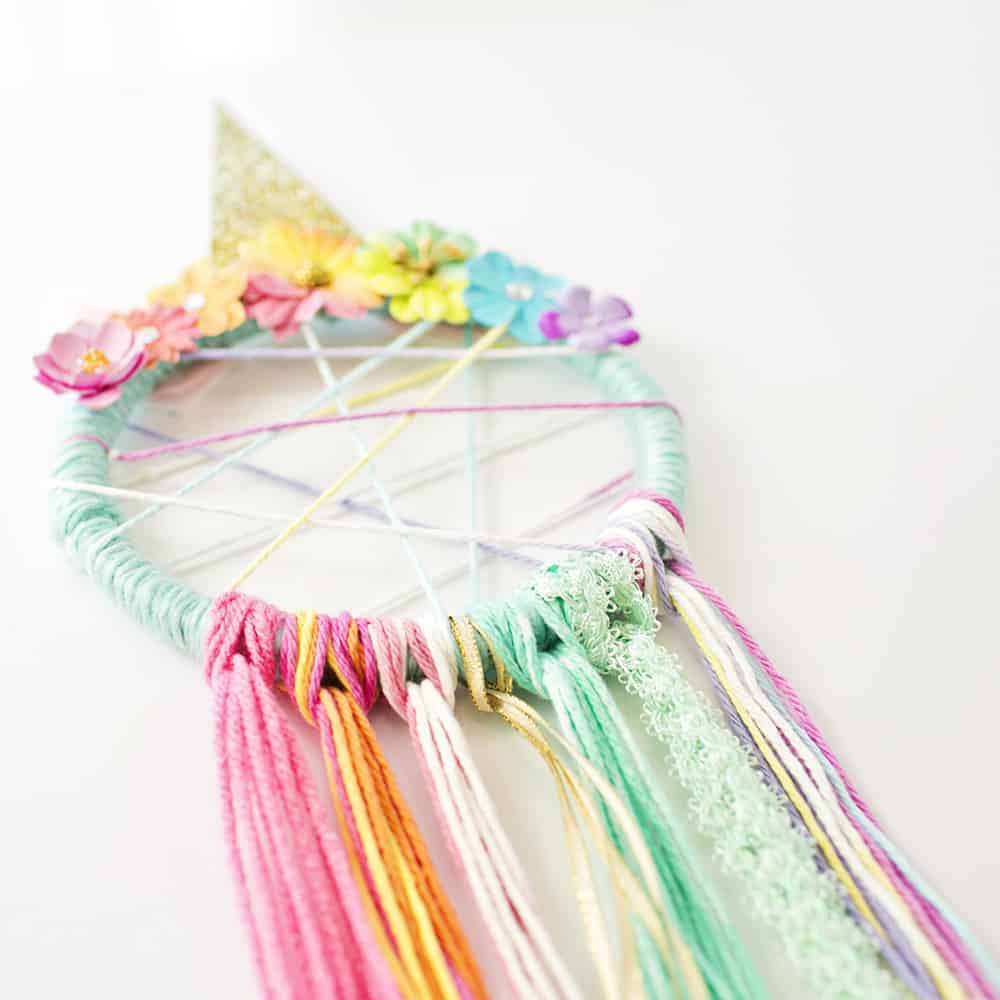
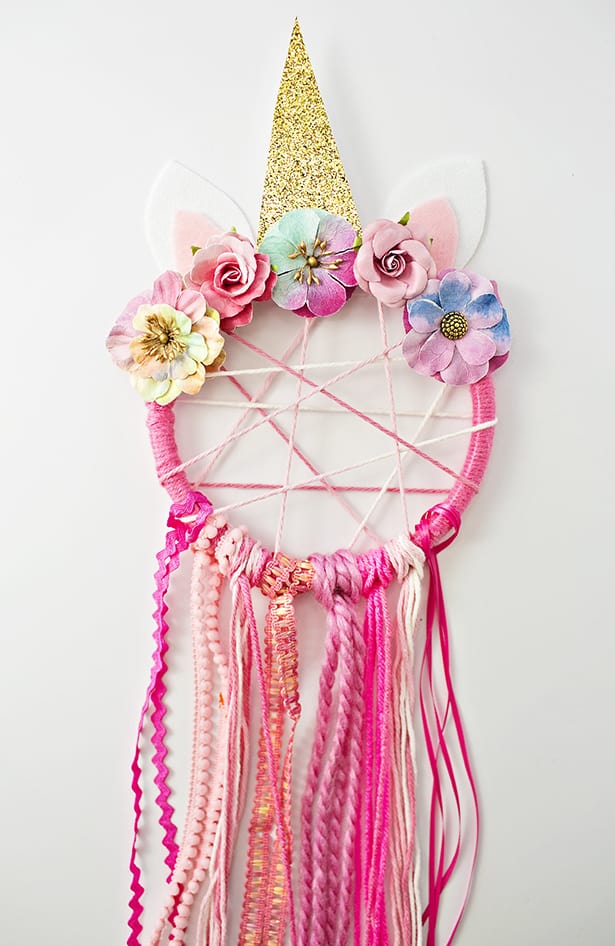
We adore anything unicorns and came up with this easy DIY Unicorn Dreamcatcher inspired craft kids (and adults) can make by stringing yarn around an embroidery hoop (like our string yarn ornaments). Add a glittery horn, felt ears and glued on flowers and you have a beautiful handmade unicorn dreamcatcher. The yarn hangings are just simple loops and you can add lots of texture and variety by choosing various colors, ribbons and yarns.
Scroll down to watch the video to see how to make these beautiful DIY Unicorn Dreamcatchers. Make sure to subscribe to our YouTube channel for more fun videos.
.jpg)
.jpg)
If this DIY Unicorn Dreamcatcher makes you and your little one smile while making, then be sure to a look at my Cute Unicorn Crafts for Kids. You'll see a world of endless possibilities that will make everyone filled with joy.
From Wikipedia: "In some Native American Cultures a dreamcatcher or dream catcher... is a handmade willow hoop, on which is woven a net or web."
Our Unicorn Dreamcatcher is inspired by the many we've seen on Etsy. But as mentioned, we didn't create the traditional webbed string and instead looped yarn around our hoop to keep it simple for kids to make. You can feel free to research the method online in how to make a traditional dreamcatcher webbed version. We chose to still call our craft a "dreamcatcher" because it is inspired by and resembles a traditional one. For our unicorn, we added a glitter paper horn, but you could get fancy and add a felt sewn and stuffed one.
More Cute Unicorn Crafts:
Unicorn Pooping Sprinkles Paper Craft
P.S. These would pair well with our Send a Unicorn Boxes!
.jpg)
.jpg)
.jpg)
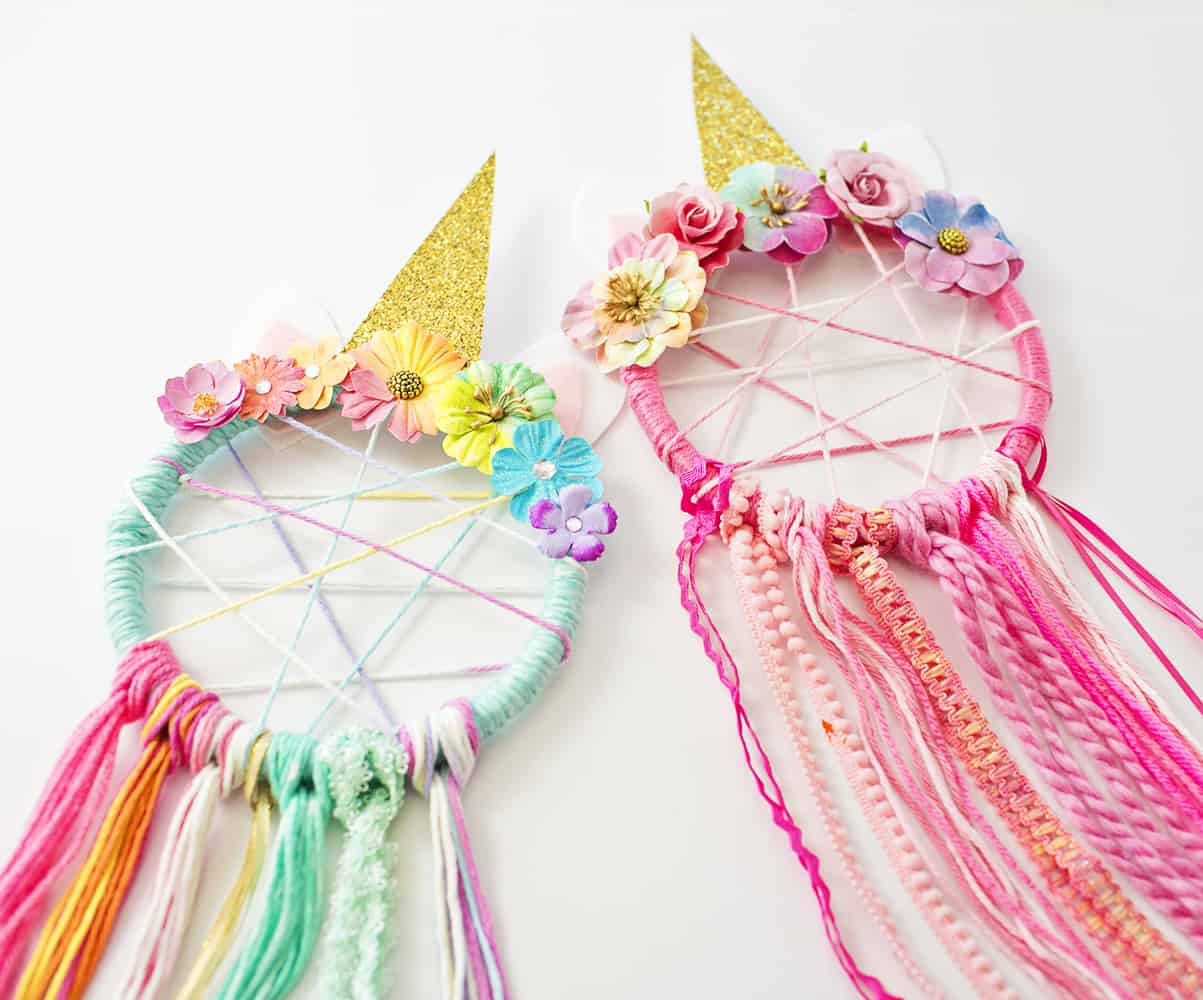
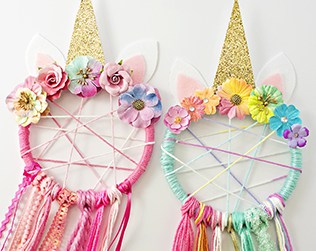
These adorable Unicorn Dreamcatchers make a fun unicorn party craft or playdate activity. We plan on making lots of them at my daughter's upcoming unicorn party paired with magical unicorn foods of course.
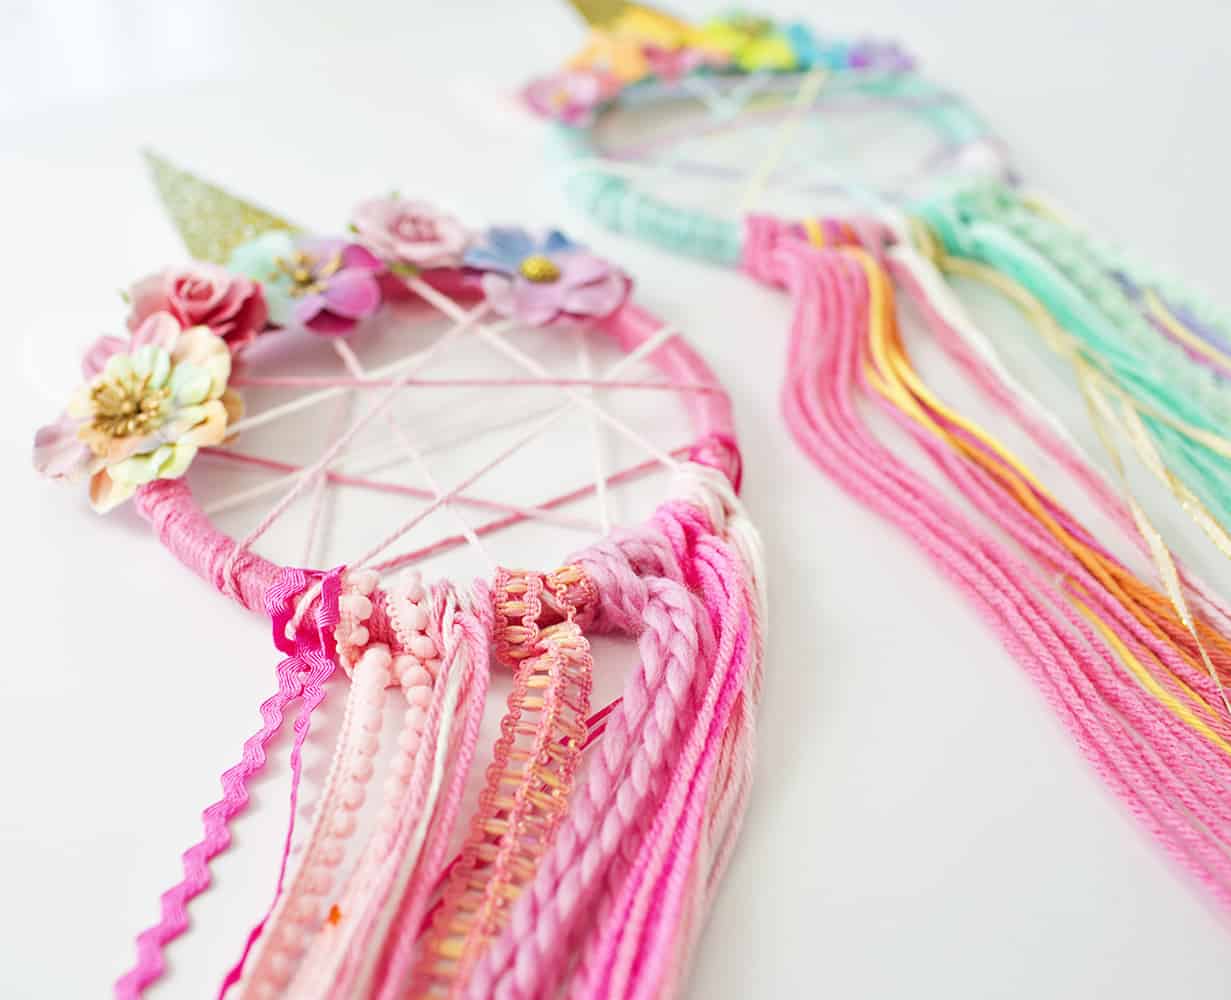
As you can see we made a variety to show how you can make different types, from pink, rainbow, and even a Valentine heart themed one!
.jpg)
She helped in making the ones you see here. The "rainbbow" one is her design!
Watch the video above top of post for the DIY or follow the instructions below to make your own Unicorn Dreamcatcher.
.jpg)
DIY Unicorn Dreamcatcher - Materials:
- 6" Embroidery Hoops
- Yarn and ribbon of various textures and colors
- Hot glue
- Felt (stiff white and light pink)
- Decorative craft flowers
- Glitter paper
- Scissors
* For the Valentine one, use glitter heart stickers and decorative roses.
.jpg)
.jpg)
DIY Unicorn Dreamcatcher - Instructions:
(watch video top of post or follow below for the step-by-step)
Step 1. Wrap yarn around your embroidery hoop and secure with a dab of hot glue when you're done.
Step 2. Tie yarn around one end the hoop and then tie around the hoop, crisscrossing yarn tightly. Tie off the yarn when you are done.
Step 3. Cut out felt outer white ears and inner pink ears. Use a stiffer white felt for the outer ears so they stick up. Hot glue the inner pink ears to the white ears.
Step 4. Cut out a paper horn shape from your glitter paper.
Step 5. Cut out lengths of various colored yarns and ribbons for your hangings (cut as long as you want the yarn to hang, but keep in mind they will be folded over to make a loop)
Step 6. Determine how you want to arrange your flower pattern.
Step 7. Assemble your unicorn dreamcatcher! Hot glue your glitter horn, flowers, and ears to your hoop.
Step 8. Loop your yarn hangings through the embroidery hoop (watch video for this step).
.jpg)
.jpg)
.jpg)
Watch the fun video in action above!
You're done! Which one is your favorite? Hang up your pretty Unicorn Dreamcatcher for a magical decoration. Don't you just want to go make a bunch now? We can't wait to see yours!
Add yarn, a glittery horn, felt ears and glued on flowers to an embroidery hoop for a beautiful handmade unicorn dreamcatcher. Step 1. Wrap yarn around your embroidery hoop and secure with a dab of hot glue when you’re done. Step 2. Tie yarn around one end the hoop and then tie around the hoop, crisscrossing yarn tightly. Tie off the yarn when you are done. Step 3. Cut out felt outer white ears and inner pink ears. Use a stiffer white felt for the outer ears so they stick up. Hot glue the inner pink ears to the white ears. Step 4. Cut out a paper horn shape from your glitter paper. Step 5. Cut out lengths of various colored yarns and ribbons for your hangings (cut as long as you want the yarn to hang, but keep in mind they will be folded over to make a loop) Step 6. Determine how you want to arrange your flower pattern. Step 7. Assemble your unicorn dreamcatcher! Hot glue your glitter horn, flowers, and ears to your hoop. Step 8. Loop your yarn hangings through the embroidery hoop (watch video for this step).DIY UNICORN DREAMCATCHER
Materials
Tools
Instructions
Check out our new shop Send a Unicorn!
Follow us on Instagram for more fun ideas for kids!
______________________________________________________________________________________________________
Disclosure: Some of the links in the post above are "affiliate links." This means if you click on the link and purchase the item, we will receive a small affiliate commission. Regardless, we give our promise that we only recommend products or services we would use personally and believe will add values to our readers.