SHRINK ART SNOW GLOBE ORNAMENT CRAFT
With the donation of a multitude of styrofoam balls some very tiny ones piqued our children's interest. They envisioned making themselves in a snowy scene to add to our Christmas tree!
Shrink Art Snow Globe Ornaments - Materials:
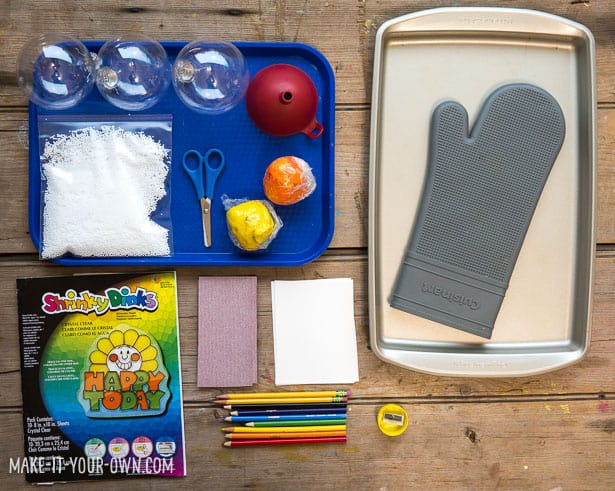
- Clear, plastic ornaments (we looked for ones with wide mouths)
- Artificial snow (you could use flaked versions, glitter, small pom poms etc.)
- Shrink art paper
- Sandpaper
- Pencil/eraser
- Pencil crayons
- Scissors
- Plasticine
- Cookie sheet
- Oven mitt
Directions
- Look at the size of the mouth of your ornament. According to the product directions we knew that our drawing would shrink to approximately to half the size so we slightly less than doubled that width for our shrink art portion and the rough sketch paper.
- Pre-heat your oven according to your product directions.
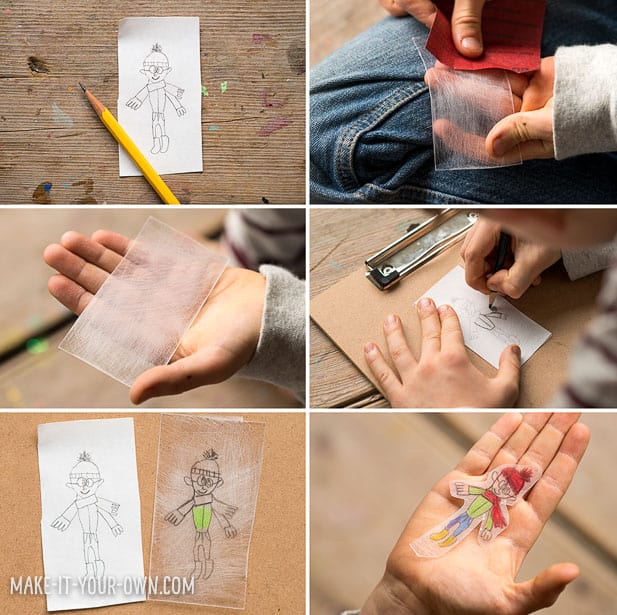
- Draw yourself on your piece of paper.
- Scuff your shrink art paper with your sandpaper (you can also buy it in a pre-done version). Lay it overtop of your drawing and trace it with black pencil crayon, pressing hard to make dark lines. Colour yourself in. We found taping our paper to our work surface and then taping our shrink art paper in place helped with the tracing process.
- Slowly cut yourself out, making a tab at the bottom of your feet. *This is important!* (As you can see a little snip of our accidentally got cut off- try to make it more uniform, for easier placement.)
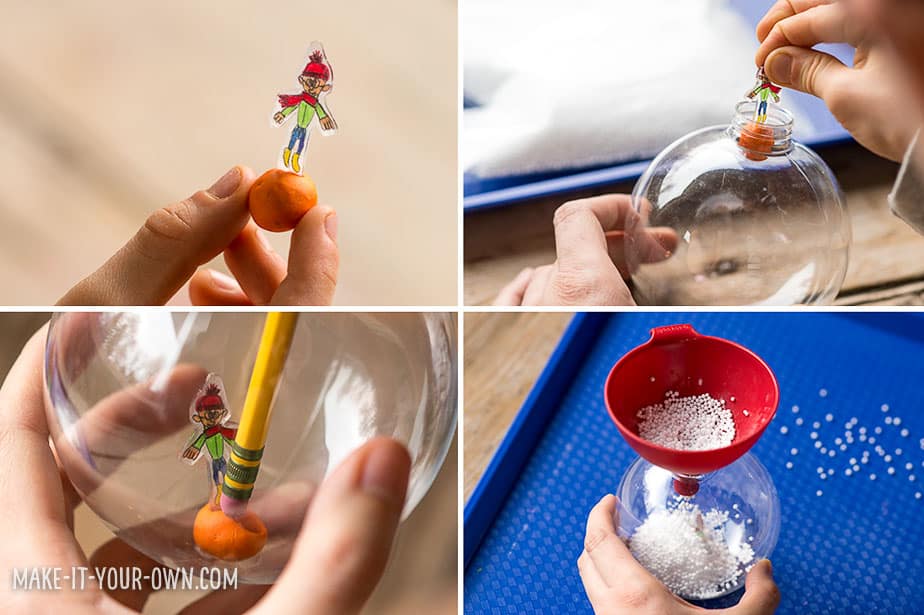
- With an adult, lay your shrink art pieces on a cookie sheet, spacing them apart. Pop them into the oven and follow the product directions for baking. Have an adult remove them from the oven while wearing an oven mitt. Allow the tray to cool and then remove your pieces.

- Roll a ball of your plasticine and insert the tab you made. Drop this into your ornament and then slightly push it down and into place with the eraser on a pencil. (You may need a bit of adult assistance with this!).
- Place your funnel into your ornament and then carefully pour in your snow. (We recommend doing this over a tray or in a bin or box to catch any run-away snowflakes!)
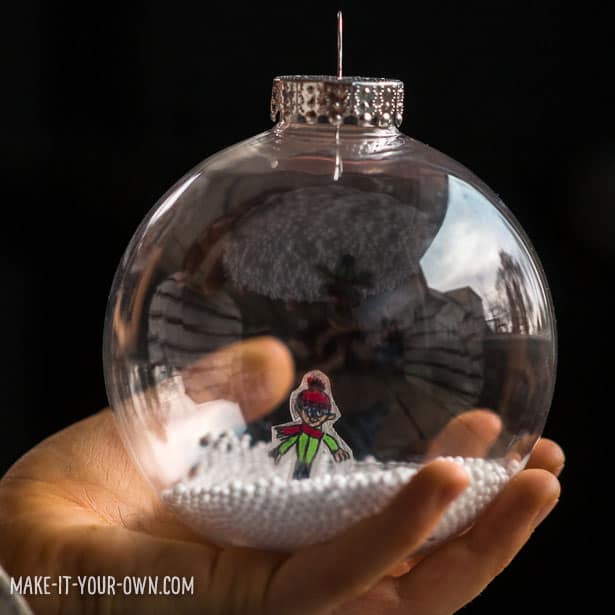
- Have an adult help you place the cap of the ornament back in (this can be slightly tricky!) and hang yourself on the tree.
- You may want to write your name and the year on the bottom of the ornament. Add a ornament hook or a bit of ribbon and then hang it on your tree! Why not make another for Grandma & Grandpa!?
What are your favorite kid-made ornaments?
Check out lots more creative holiday ideas for kids!
(1).jpg)
Make it Your Own is a Canadian children's website. We hope to inspire educators and families with projects to do together, explorations of various mediums and techniques and to get out into nature to source supplies. We love re-imagining items and thinking of new ways to share children's artwork. We are often described as "an educational mom, a digital dad and their three mini-makers.