
Follow us on Instagram for more fun ideas for kids!
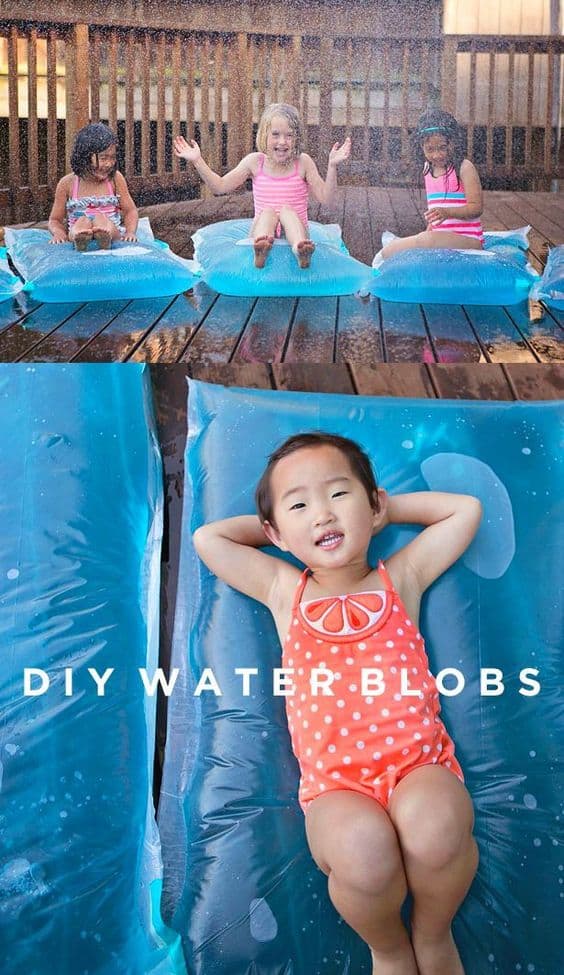
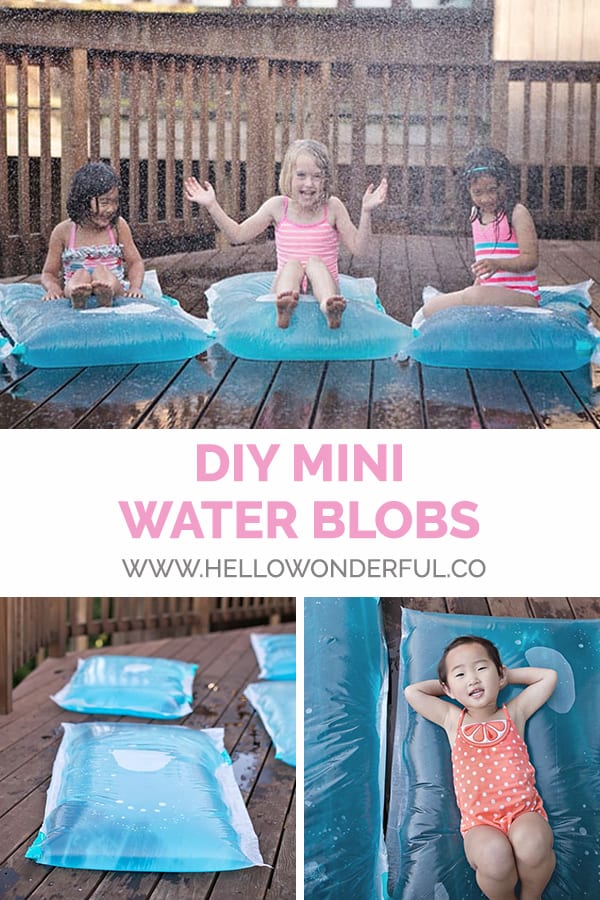
Have you heard of water blobs? They’re plastic sheeting filled with water you can make for kids to slip and side on for some awesome water fun. When we featured this one from Homemade Toast on our round up of fun summer water activities, I just knew I had to try it out for the kids.
I’ve only see water blobs made as one large piece of sheeting so I thought it’d be fun to put a twist on it and make mini water blobs – one for each kid!
Some advantages are:
– easier to iron smaller blobs than one large one
– faster to fill up with water
– each kid gets to take their own water blob home
Read more to find out how to make your own mini water blobs!
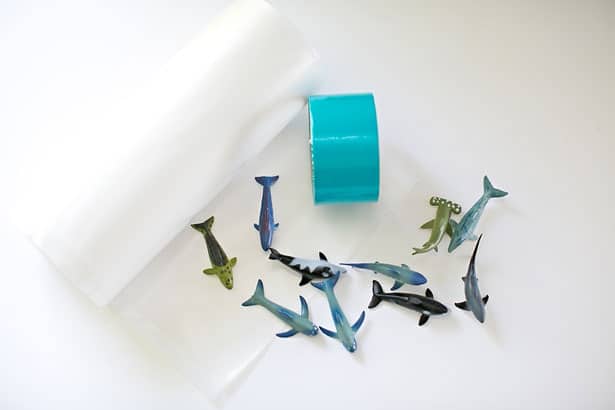
DIY Mini Water Blobs – Materials:
– Plastic sheeting at least 4 mil thick
– Blue food coloring (optional – if you want your water to look blue)
– Measuring tape
– Iron/Ironing board
– Parchment paper
– Plastic toy fish (optional – we placed a few inside to make the blob look like an aquarium just for fun)
Steps:
1. Unroll your plastic sheeting and measure out the width and height you need to cut to size for each kids, allowing at least 3 inches for height. For example, my daughter’s height is 43″ so I cut a length of 46″ for her and her friends who are similar in height. My younger son is 36″ tall so him and his little buddy got 40.” For width, I used a standard size of 2 feet which was plenty of room to move around.
.jpg)
2. Place a piece of parchment paper that is folded up over the seam of the plastic sheeting and on low-medium heat, press down (remember the iron is on top of the parchment paper so it never touches the plastic). Iron over the seam and the plastic will melt fusing the open ends together so it’s leak proof.
Leave a hole at one end so you can place your hose there.

3. Add a few drops of blue coloring inside the bag and place your plastic fish inside (if using). Place your hose inside the hole you left until it’s filled. Have your duct tape ready and patch the hole once the blob is full of water.
*if you get leaks, they can easily be fixed with duct tape. We had a few and they were fine once taped over.
You’re done. Now for some fun water play!
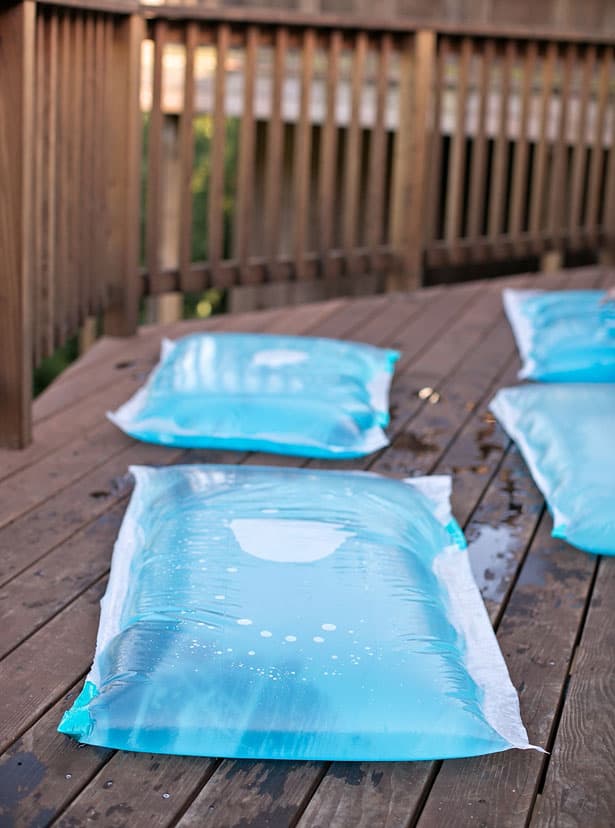
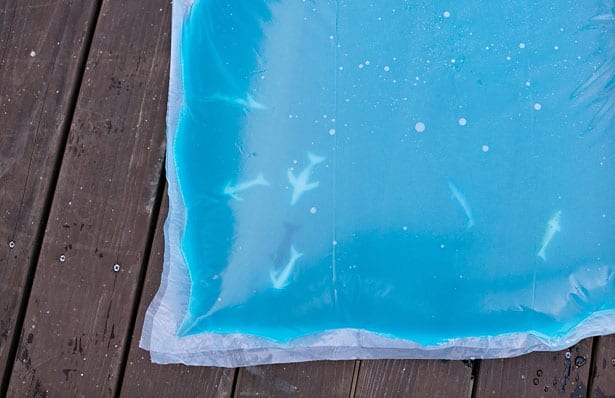
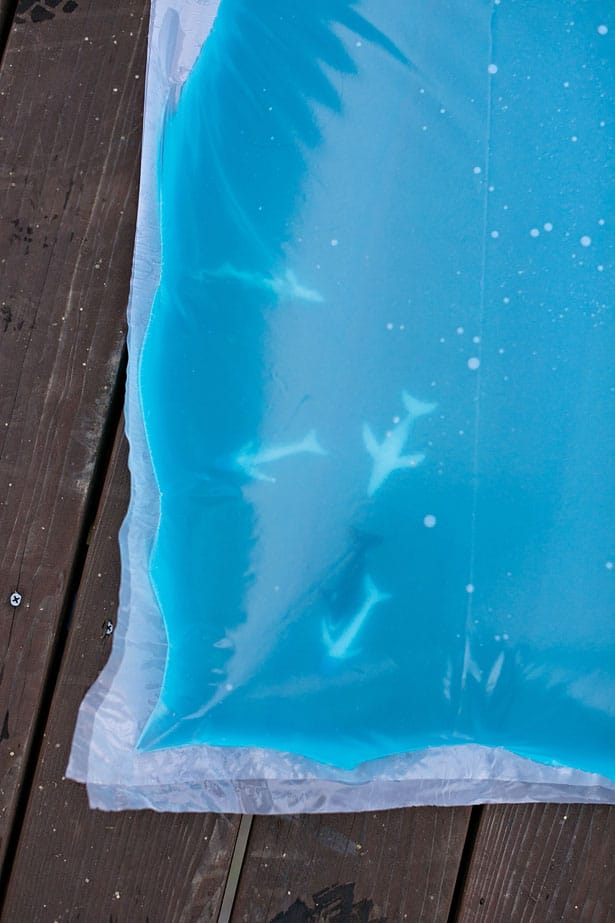
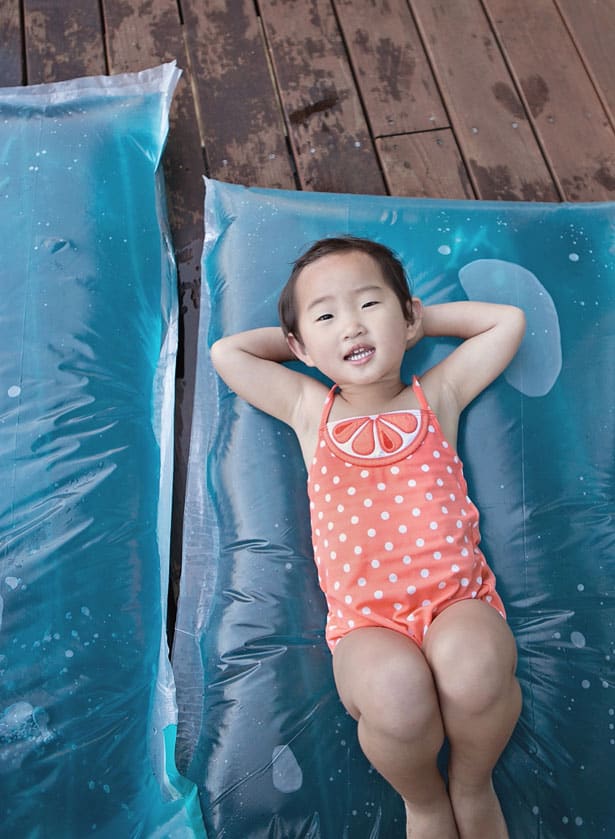
Close up of the fish swimming inside the blobs. Made the blob feel more like an aquarium and was fun for the kids to look inside and point out. You could even add glitter, plastic aquarium leaves, etc, to make it even more aquarium like.
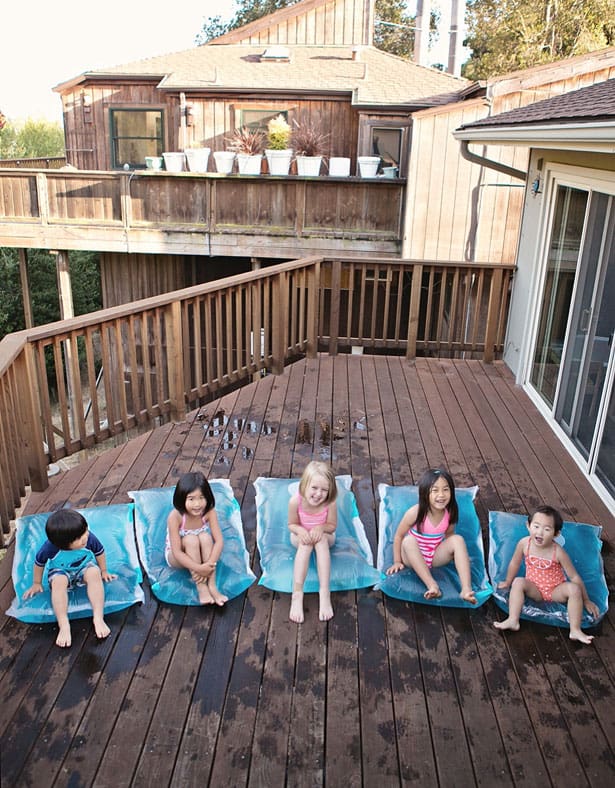
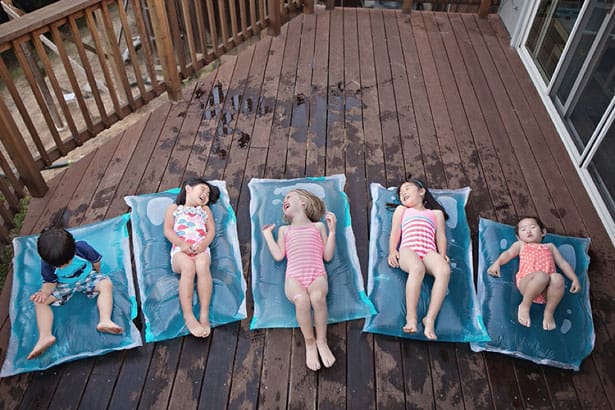
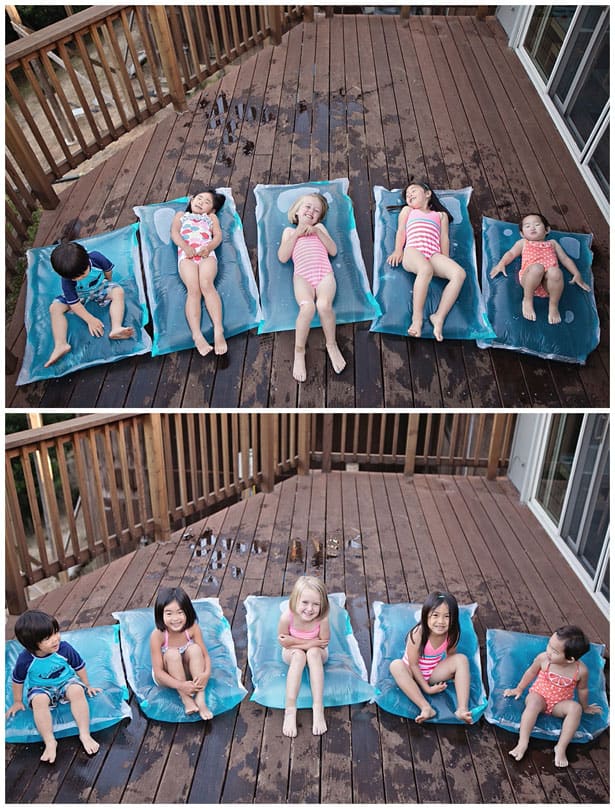
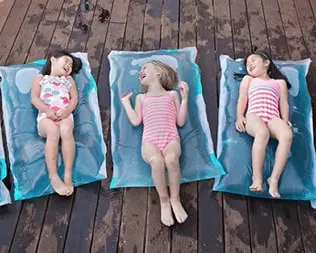
I love how these mini blobs are perfect for lounging and staying cool. It’s almost like all the kids got their own mini pool floaty!
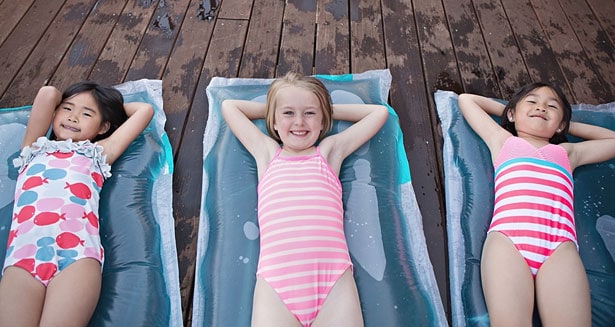
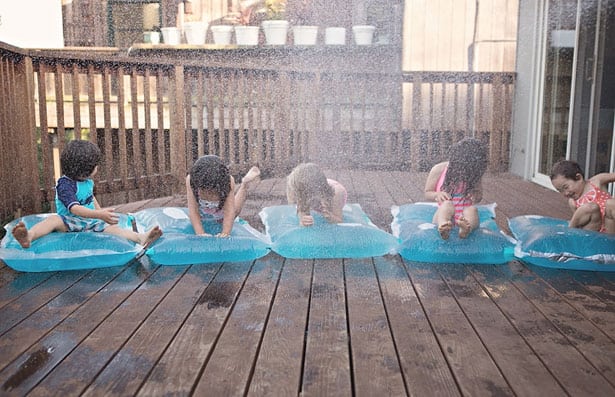
The best part is getting the water blobs slippery so you can slide on them. We sprayed the kids with water and they had a blast!
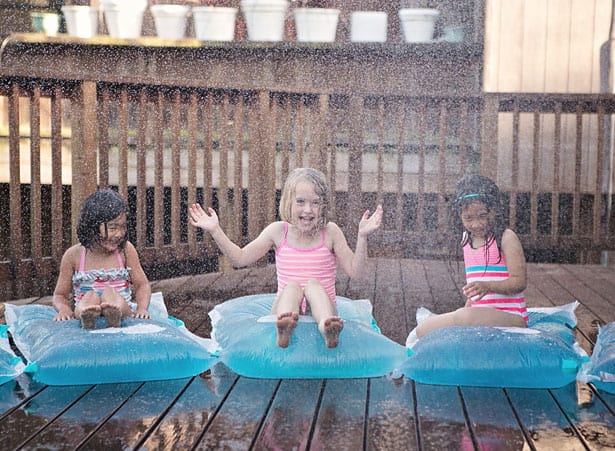

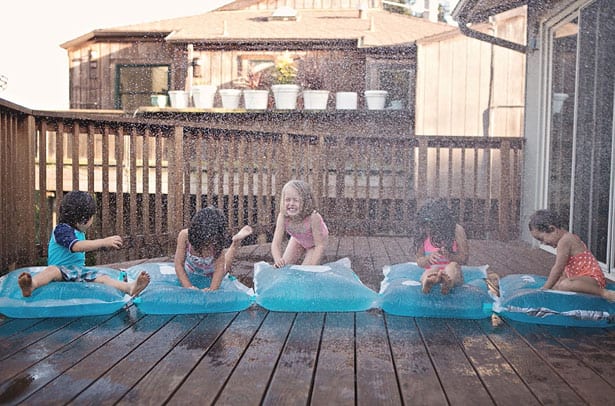
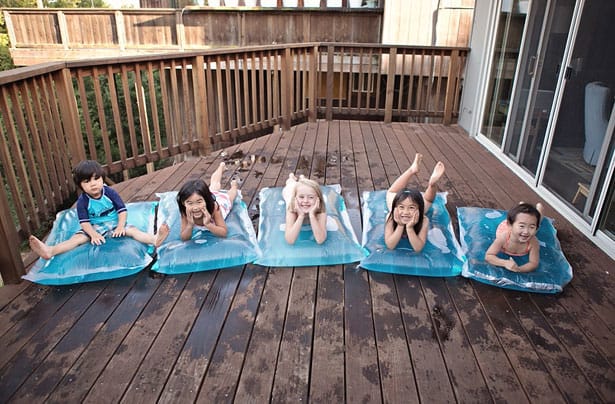
These mini water blobs are so much fun and so easy to make. You can place them in any configuration – for example, side by side to make one large one, or in a zig zag, slide pattern, etc. The best part is each kid got to take one home! It’s definitely a fun project to try at least once this summer.
These mini water blobs are a perfect way for kids to enjoy some summer water fun. Step 1. Unroll your plastic sheeting and measure out the width and height you need to cut to size for each kids, allowing at least 3 inches for height. For example, my daughter’s height is 43″ so I cut a length of 46″ for her and her friends who are similar in height. My younger son is 36″ tall so him and his little buddy got 40.” For width, I used a standard size of 2 feet which was plenty of room to move around. Step 2. Place a piece of parchment paper that is folded up over the seam of the plastic sheeting and on low-medium heat, press down (remember the iron is on top of the parchment paper so it never touches the plastic). Iron over the seam and the plastic will melt fusing the open ends together so it’s leak proof. Leave a hole at one end so you can place your hose there. Step 3. Add a few drops of blue coloring inside the bag and place your plastic fish inside (if using). Place your hose inside the hole you left until it’s filled. Have your duct tape ready and patch the hole once the blob is full of water. *if you get leaks, they can easily be fixed with duct tape. We had a few and they were fine once taped over.DIY MINI WATER BLOBS

Materials
Instructions
Notes
For more summer time fun, see:
8 Awesome Summer Water Activities
10 Outrageously Fun Ways To Play Outdoors
7 Creative Ways to Blow Bubbles
______________________________________________________________________________________________________
Disclosure: Some of the links in the post above are “affiliate links.” This means if you click on the link and purchase the item, we will receive a small affiliate commission. Regardless, we give our promise that we only recommend products or services we would use personally and believe will add values to our readers.


Agnes Hsu is a mom of three and has been inspiring parents and kids to get creative with easy activities and family friendly recipes for over 10 years. She shares her love for creative play and kids food to her 2MM+ followers online. Agnes' commitment to playful learning and kindness has not only raised funds for charity but also earned features in prestigious nationwide publications.