
DIY Shrinky Dink Earth Day Craft
By using this site, you agree to our Terms of Use. This post may contain affiliate links. Read our disclosure policy.
Follow us on Instagram for more fun ideas for kids!
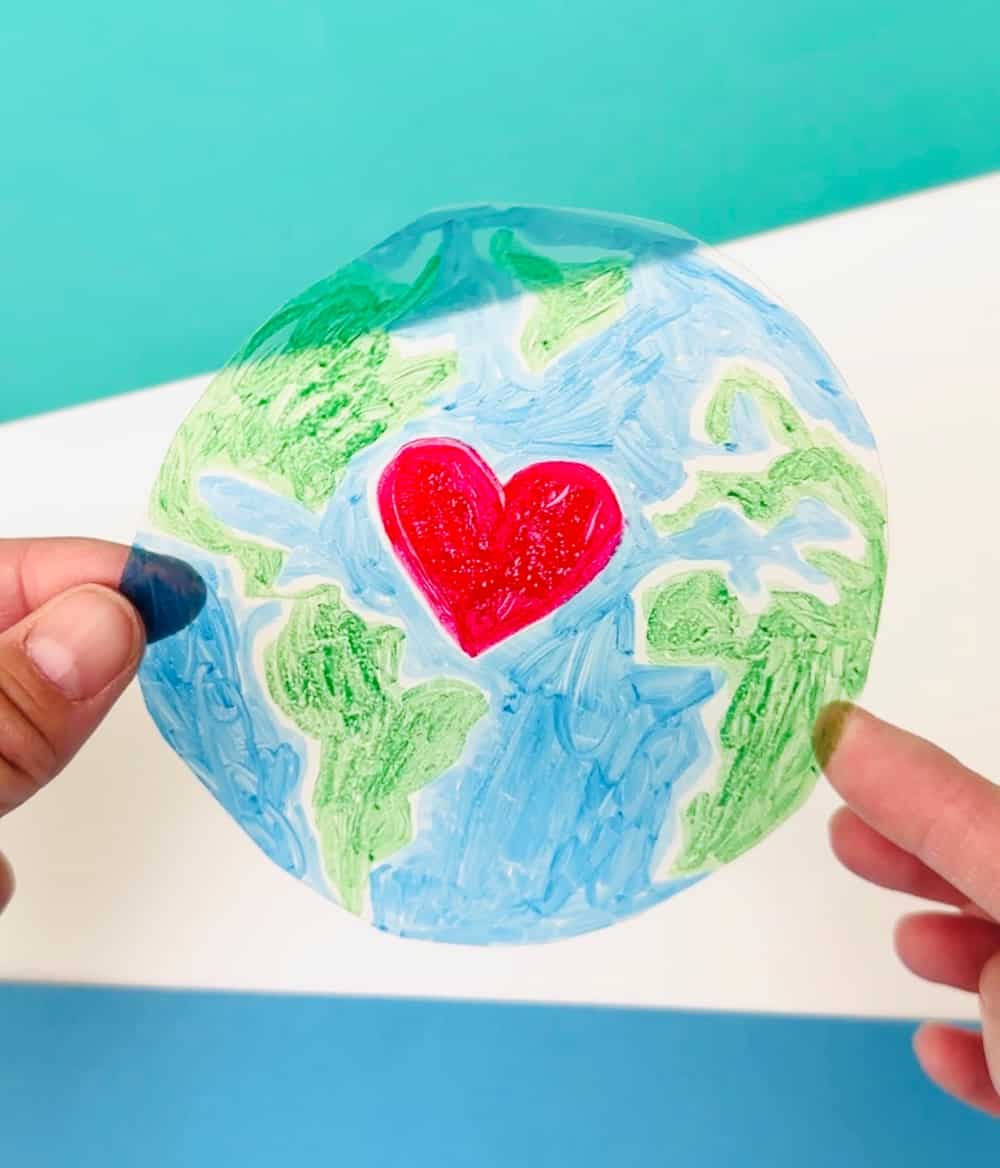
This DIY Shrinky Dink Earth Day craft is a fun way to talk about Earth Day and the importance of recycling since it entails a creative way to reuse plastic!
What can you do with your shrinky dink?
What plastic is used for shrinky dinks?
You can buy thin plastic sheets online or in stores like these shrinky dink sheets. Since this is an earth day craft and especially relevant for the angle of recycling, we recycle clear plastic food containers you can find in most grocery stores that hold bakery items. Make sure they are wiped and cleaned of any food residue before using. This project is an awesome recycled craft for kids!
Make sure the plastic you use is recycled #6. Look for the recycled icon with the number on the clamshell bottom.
How do you melt shrink dinks?
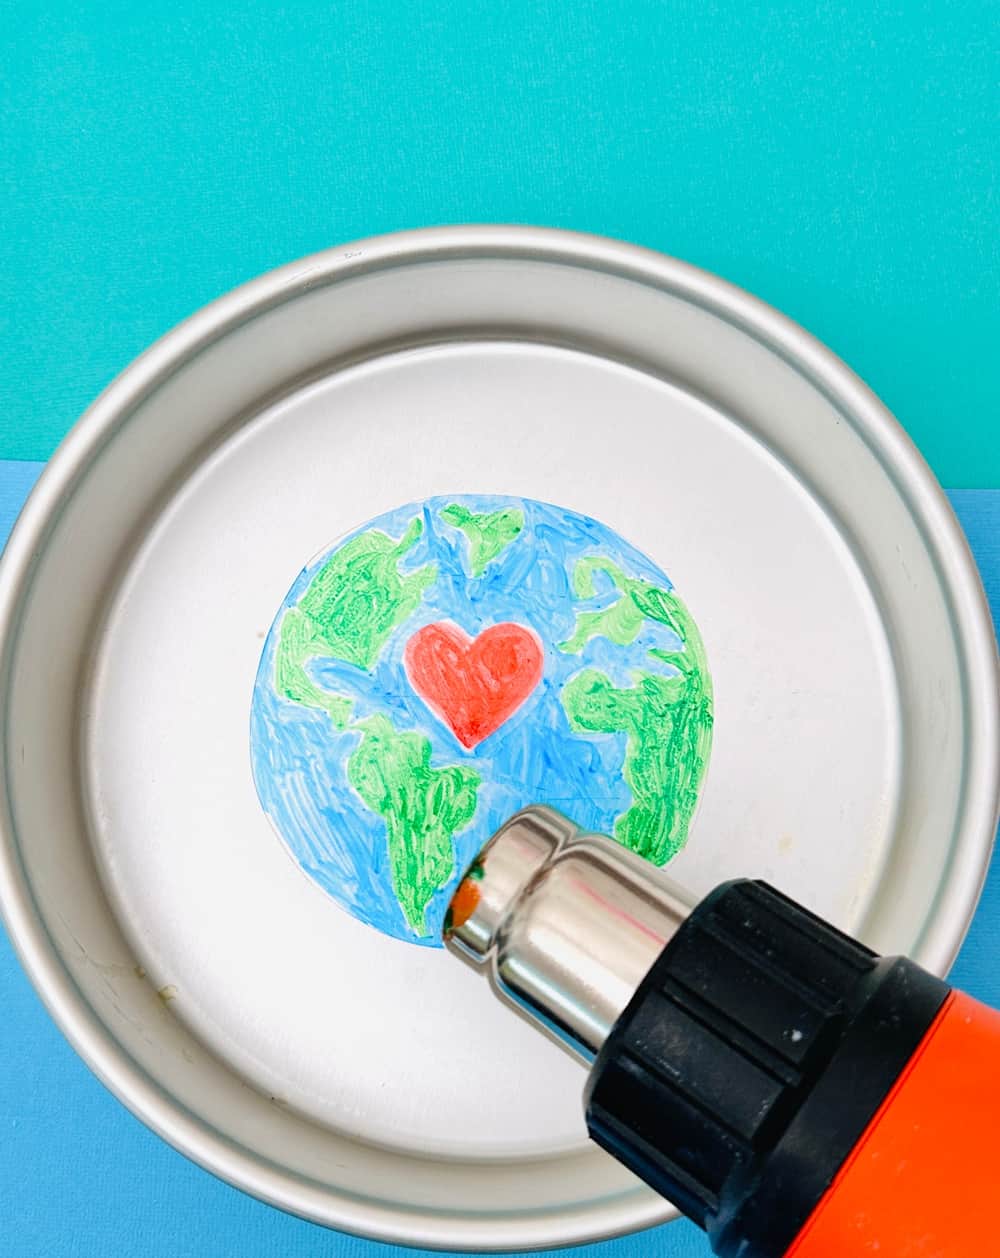
Most methods involve using an oven or toaster oven set around 300-325 degrees. You’ll have to watch vigilantely as it goes quick at 2-3 minutes of melting time. What we have found to be much easier AND quicker is using a heat gun! If you don’t have a heat gun, they are not pricey, you can usually get one for around $25 and they are great for other home uses.

Why should you use a heat gun for melting shrinky dinks?
- The instant visual of the plastic melting and shrinking right before your eyes which takes just around 10 seconds! In an oven, it’s hard to get this close in an oven obviously since the door is closed. Watching the plastic melt into its final shape is mesmerizing for kids! Note: Always have an adult utilize the heat gun and do not let children use the heat gun alone and unsupervised! We did not notice any fumes this process like we mentioned takes 10 seconds. If you are concerned, do this outdoors or in a well ventilated space with a mask on.
- Not having to preheat the oven saves energy and time.
- Creating just one shrinky dink art or multiples at once is a key benefit of using the heat gun. Of course you can do one piece in an oven too, but it’s a lot to heat up for just one piece.
What are the best markers for shrinky dinks?
The best results will be alcohol-based or acrylic markers like Sharpies or these from Arteza. You can also use paint markers or acrylic paint.
Stay away from water based markers or waxy colored pencils or crayons that won’t hold the colors well after heating.
Having said that, we did notice some alcohol markers produce more vibrant colors better than others so you will have to experiment with your set and see!
DIY Shrinky Dinks Valentine Keychains – Materials:
- Recycled #6 plastic (we used recycled food clamshell containers)
- Alcohol-based markers
- Heat gun
- Scissors
- Tape
- Baking Pan
- Thin stick like a chopstick
- Free Printable Earth Day Template (download below in the craft instruction page)
DIY Shrinky Dink Earth Day Craft
Materials
- Recycled #6 plastic (we used recycled food clamshell containers)
- Alcohol-based markers
- Heat gun
- Scissors
- Tape
- Baking Pan
- Thin stick like a chopstick
- Free Printable Earth Day Template
Instructions
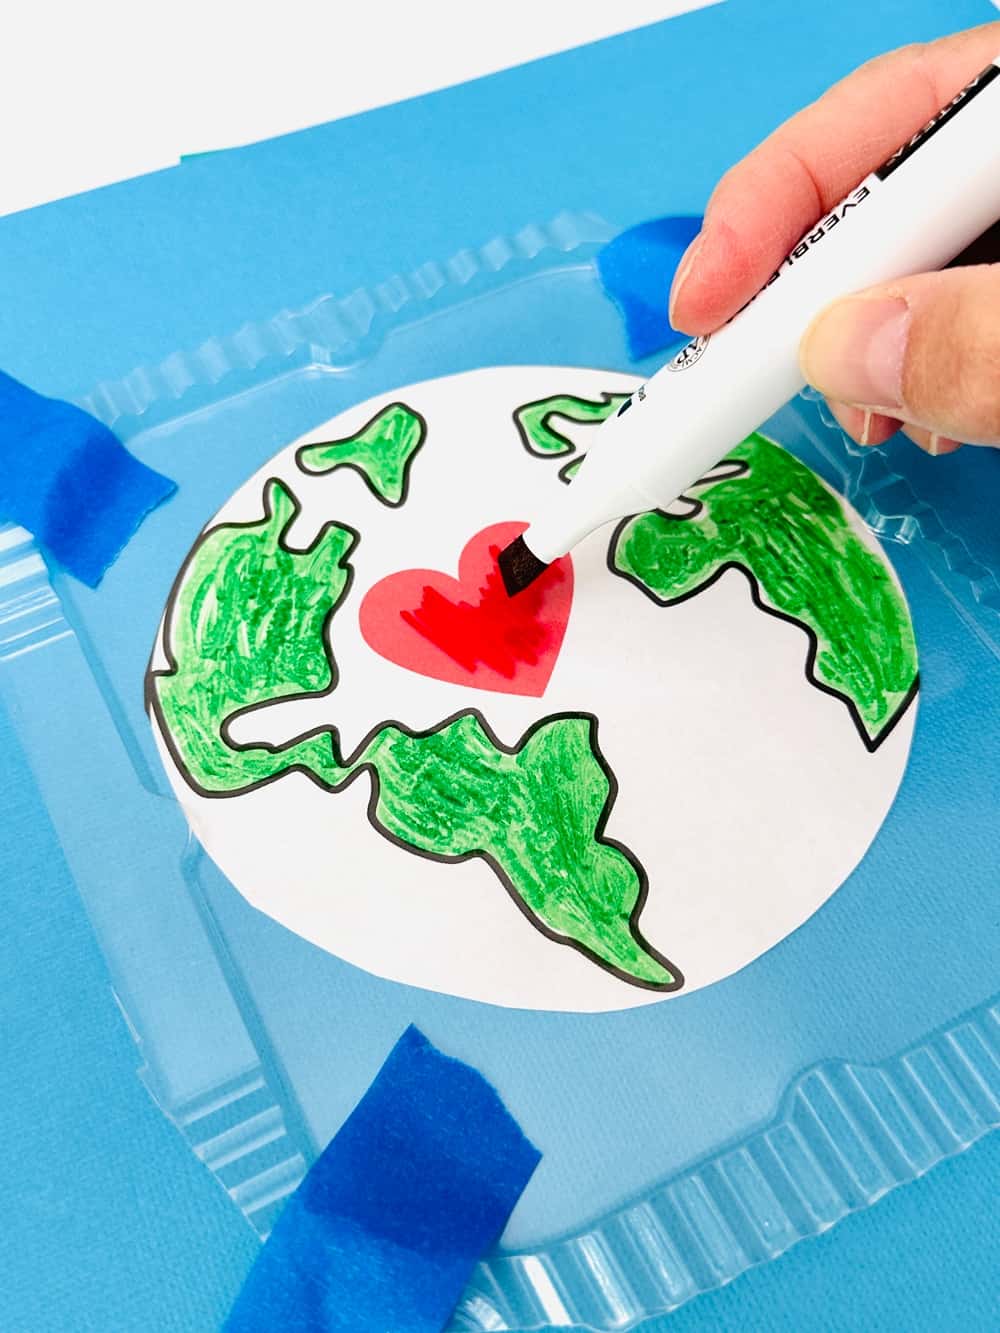
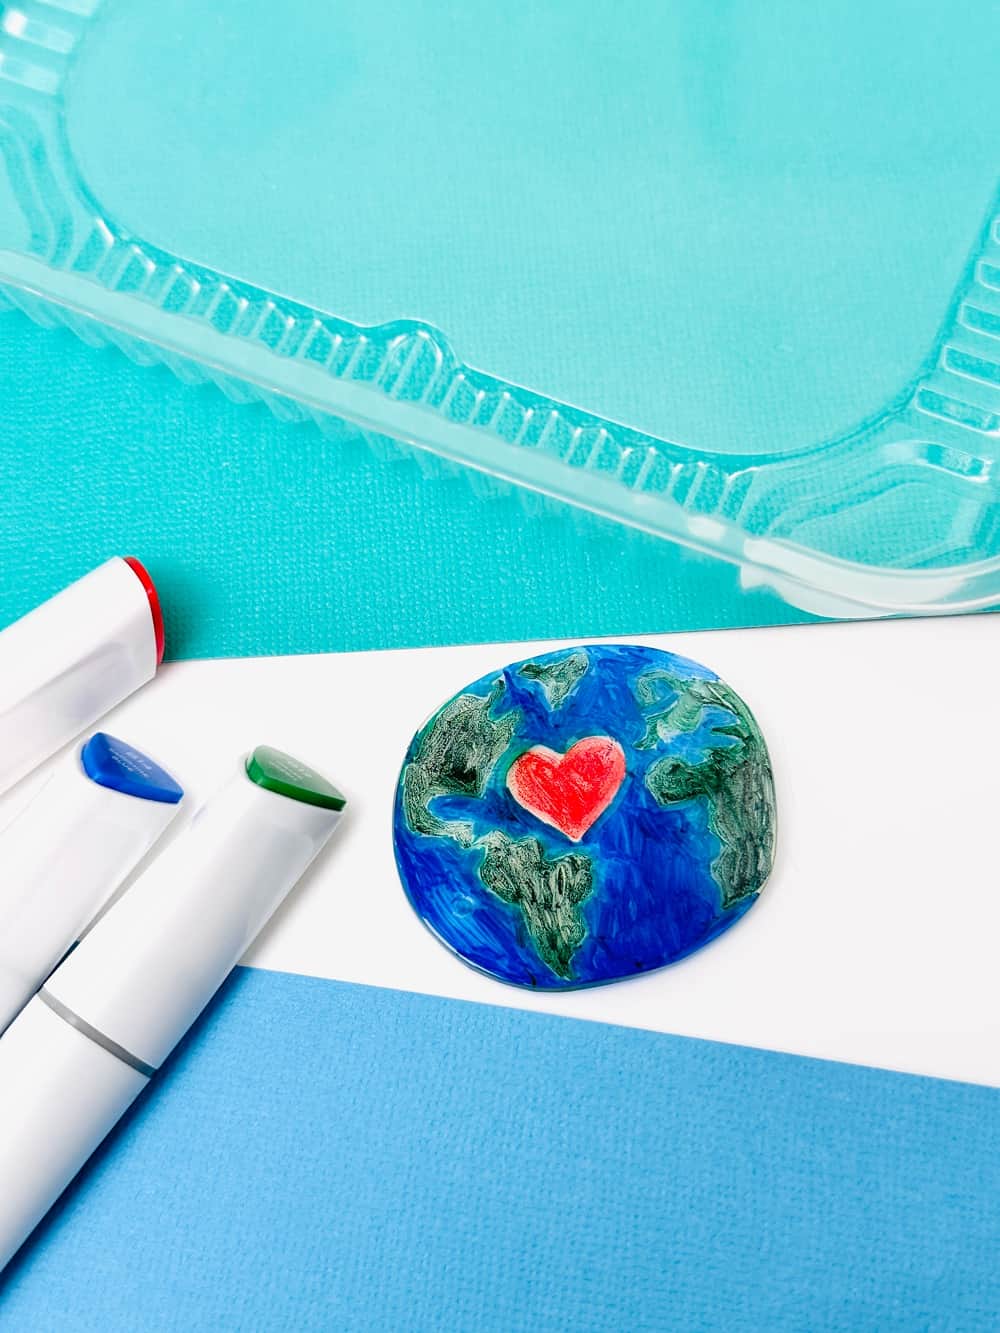
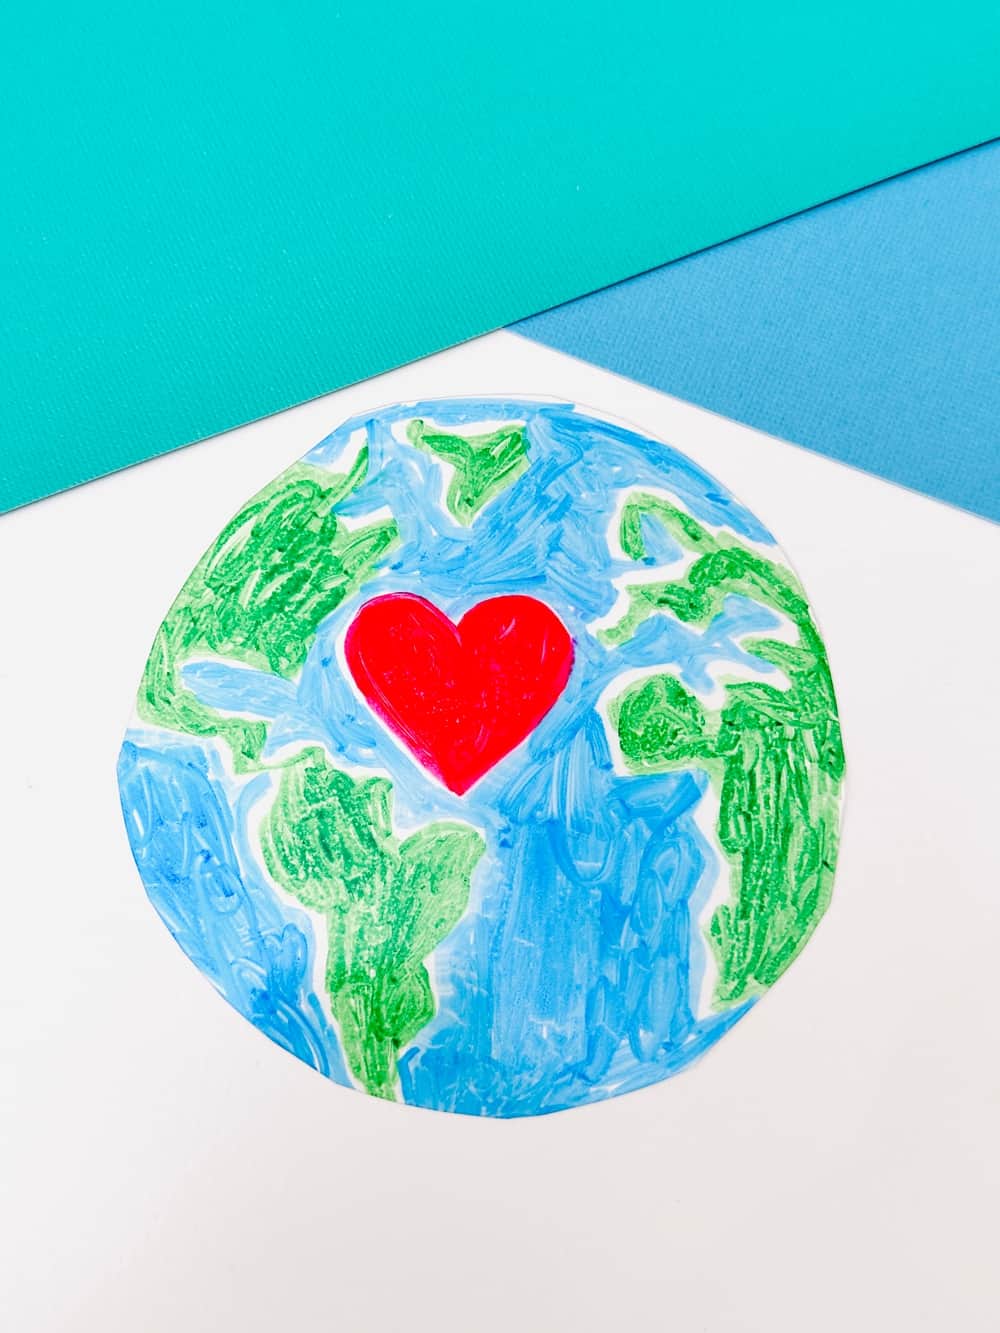
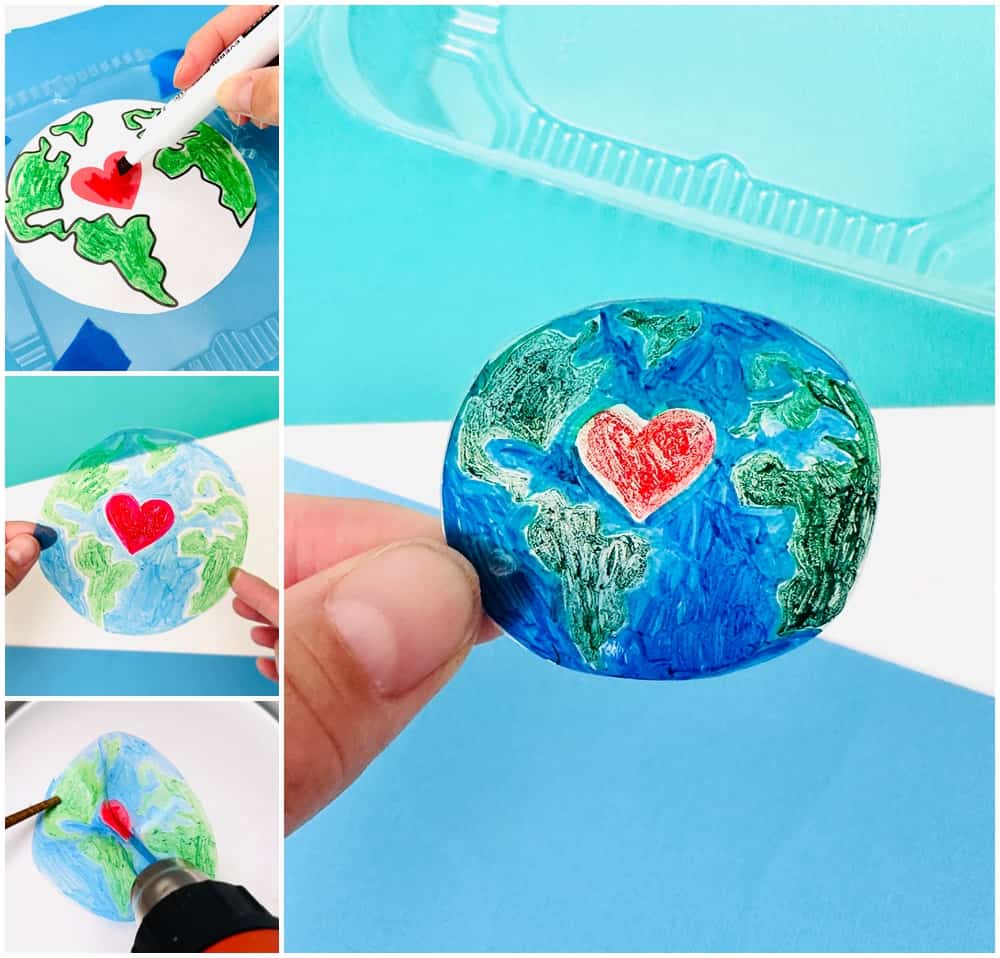
1. Print and cut out the earth day template. Cut out the flat part of your clamshell packaging and place the template UNDER. Tape around the plastic to set in place.
2. Color the earth day template. You are coloring the plastic part (the template is below the plastic to help guide your drawing).
3. Once your coloring is done, cut around the plastic along the earth shape design.
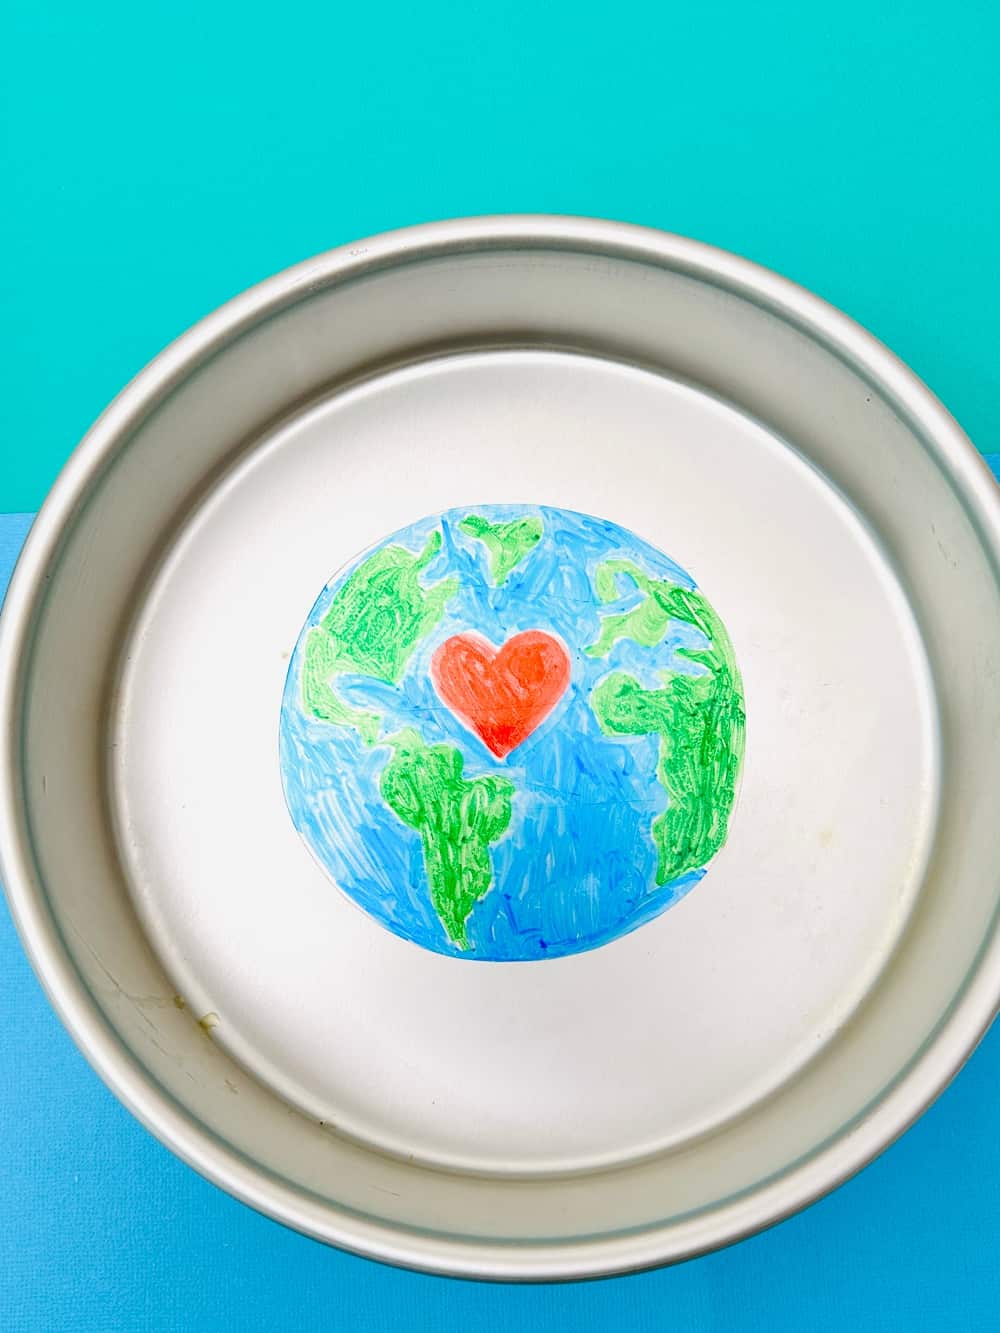
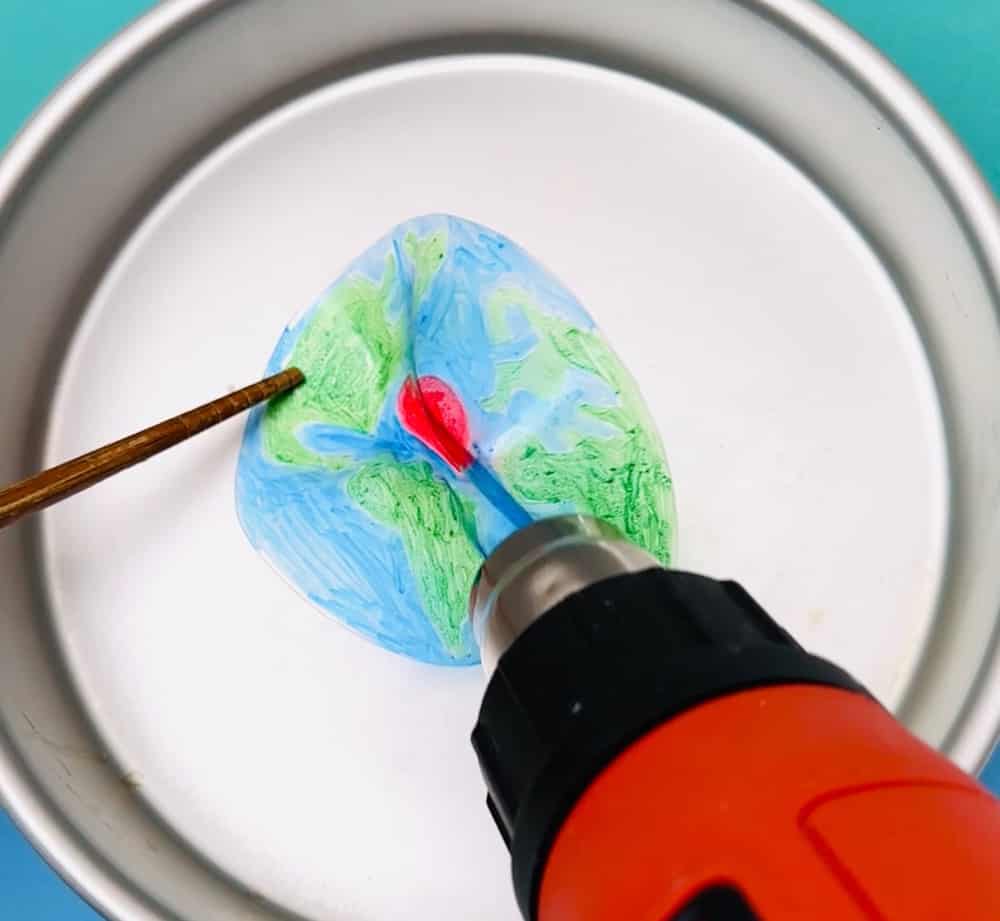
4. Lay your baking sheet on the table with your plastic earth on top. Use a chopstick or skewer stick to hold the plastic in place so it doesn't go flying.
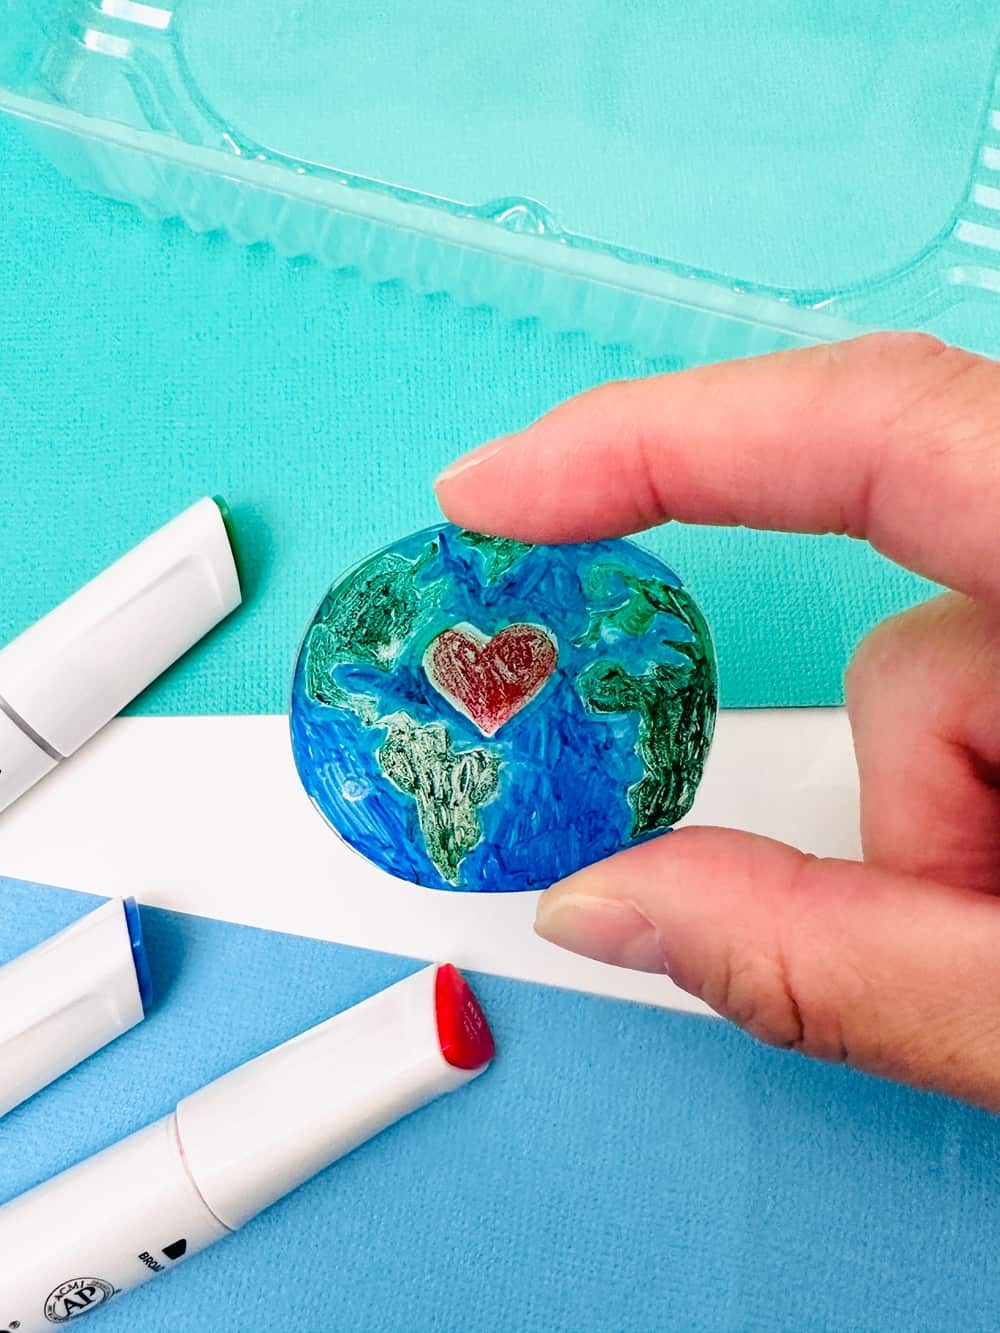
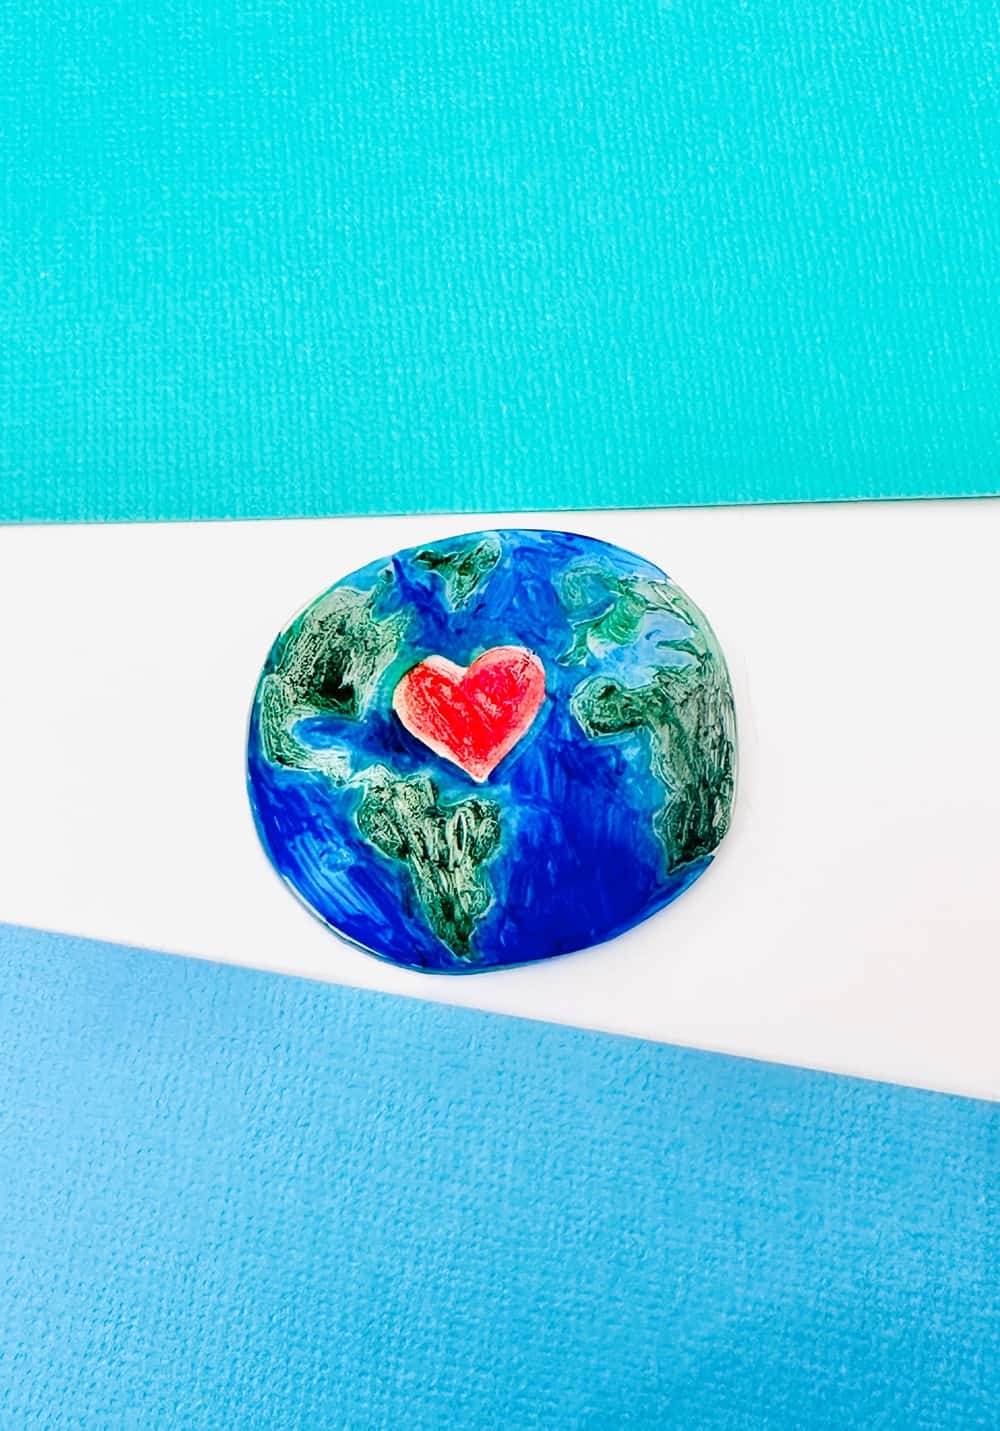
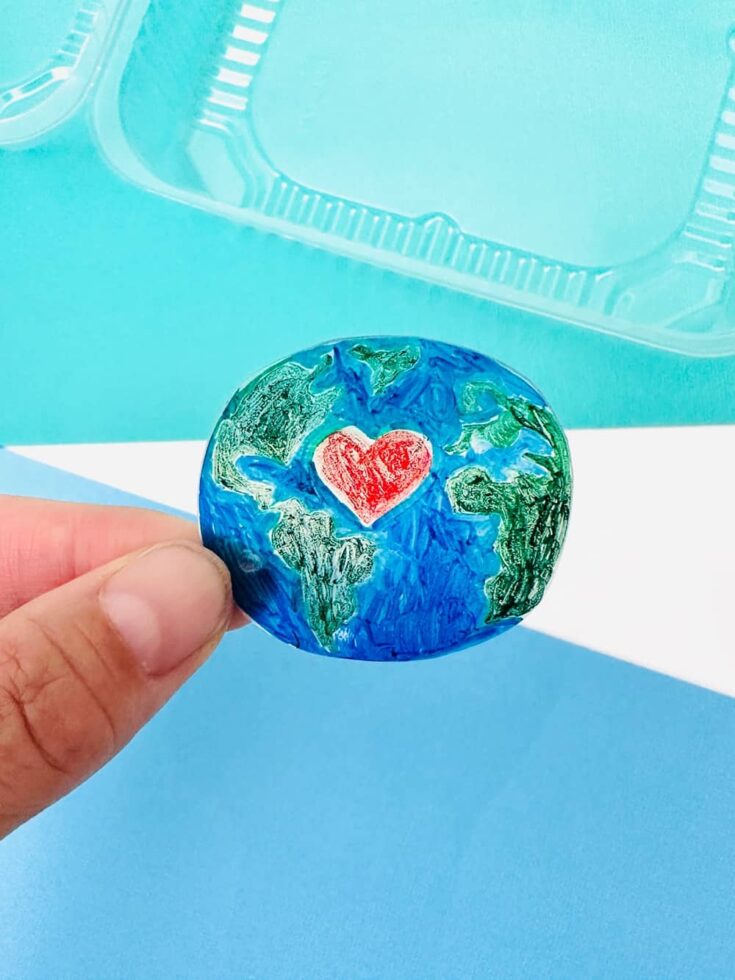
5. Turn your heat gun on and in even rotations, go around your shrink dink art - use the stick to keep it in place. It will first fold into itself and you may think it's getting warped but be patient and apply consistent even heat around. The piece will unshrink and unfold flat. The piece will be much smaller, about ⅓ the size and the plastic hard.
6. Release the stick and if your piece at the top needs more flattening, use a small spatula to flatten it.


