


Create a heartfelt and handmade “I Love You to Pieces” Valentine’s card with kids using our easy printable card. Perfect for encouraging creativity in a fun sensory way!
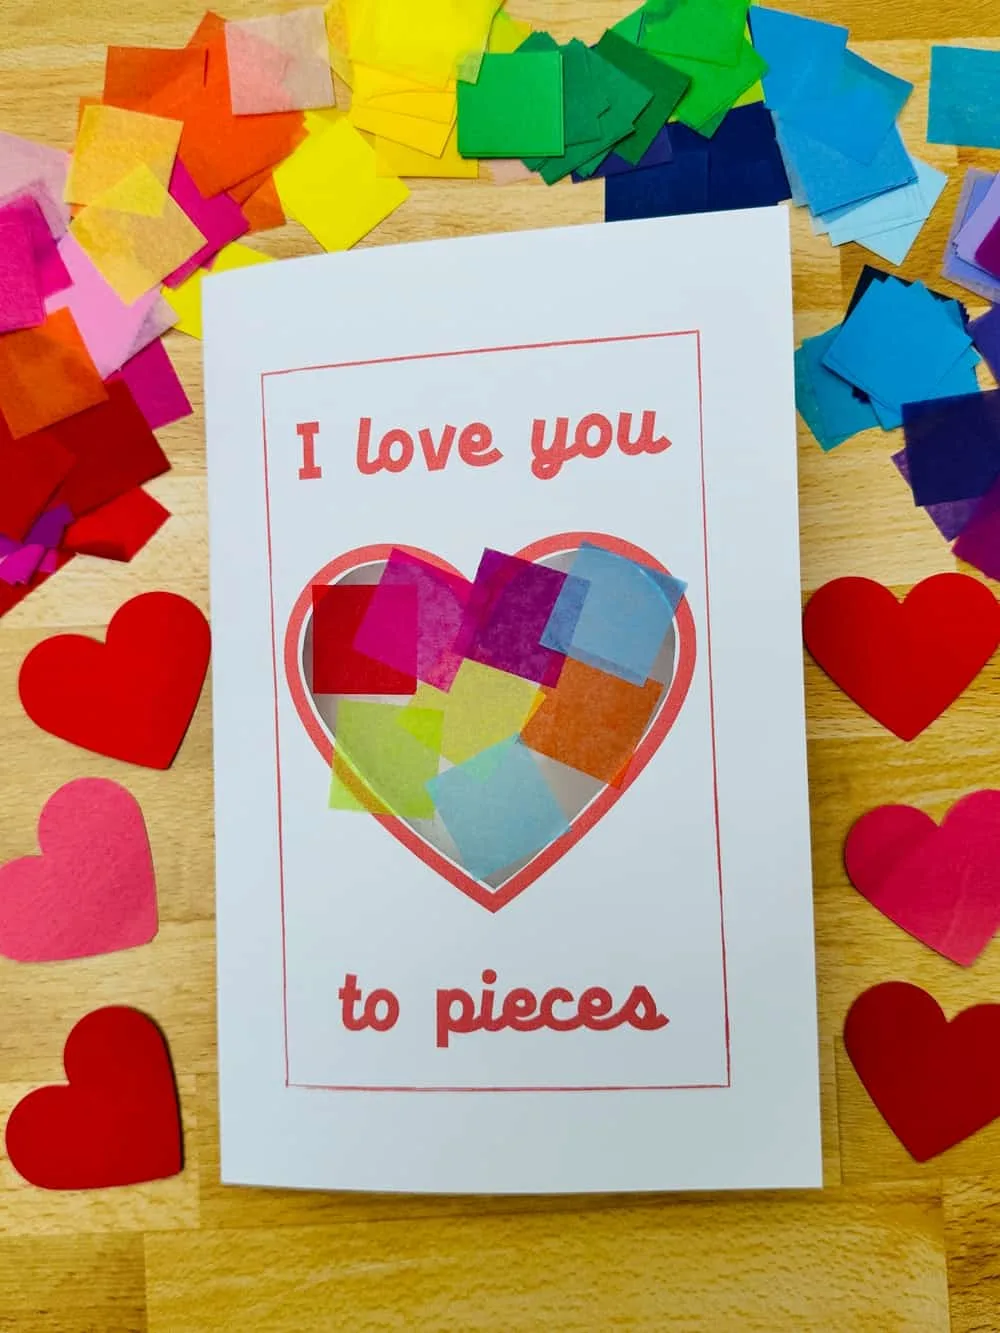
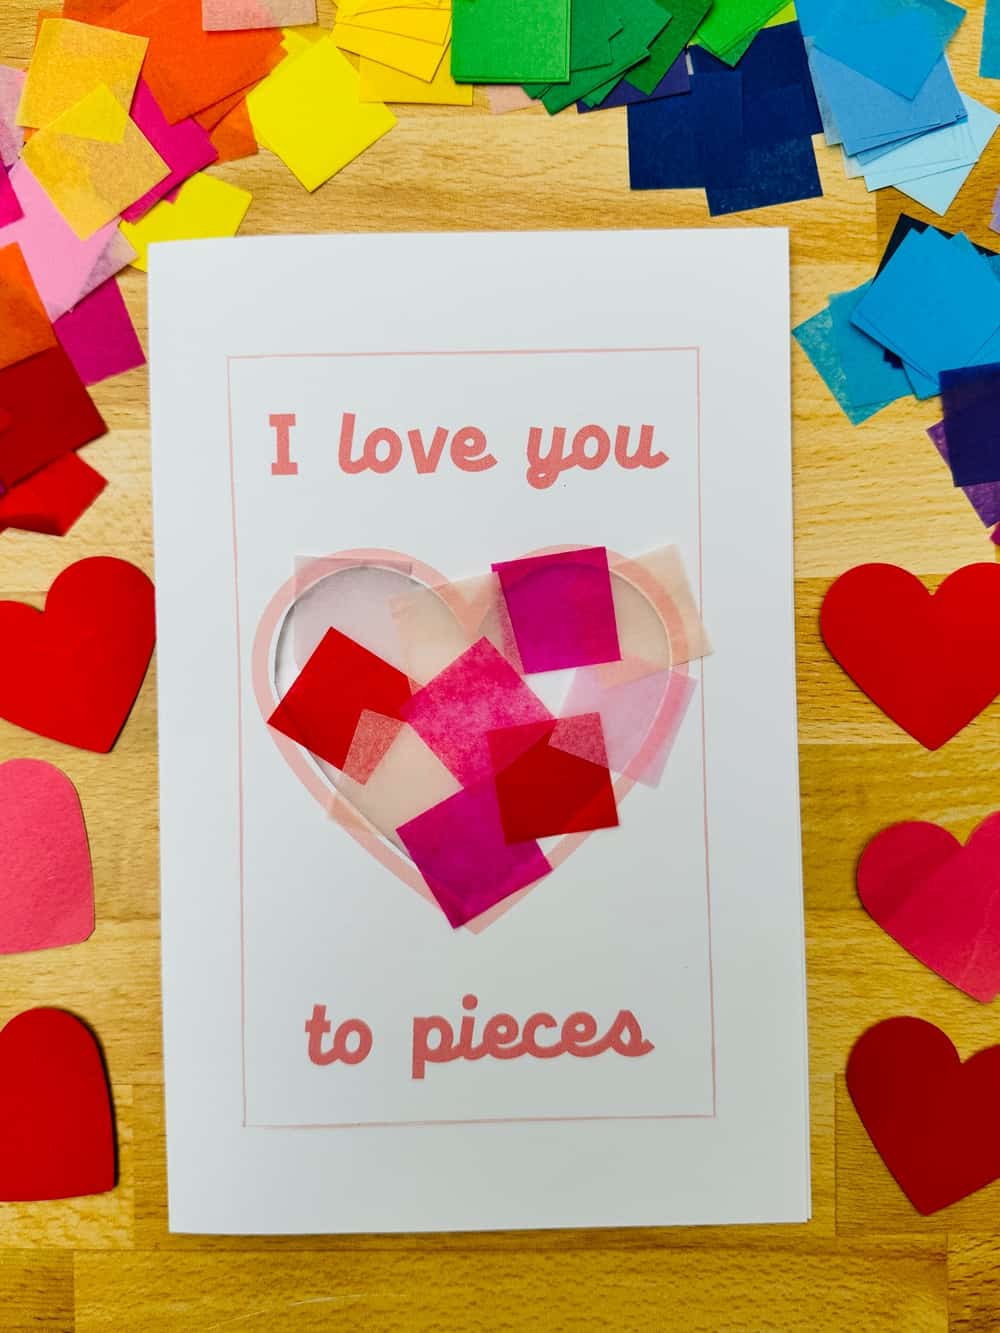
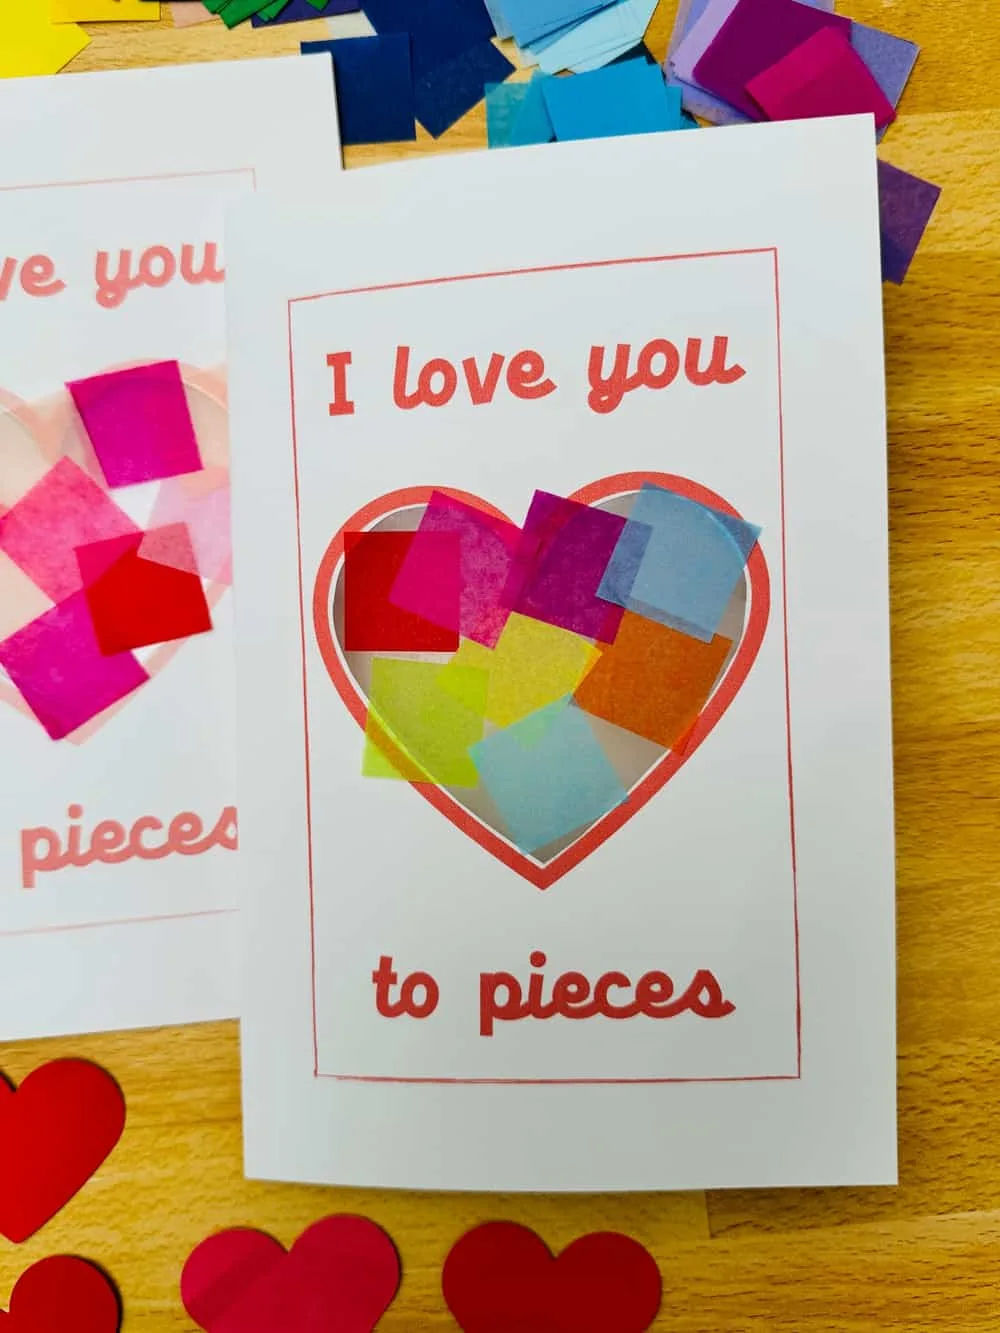
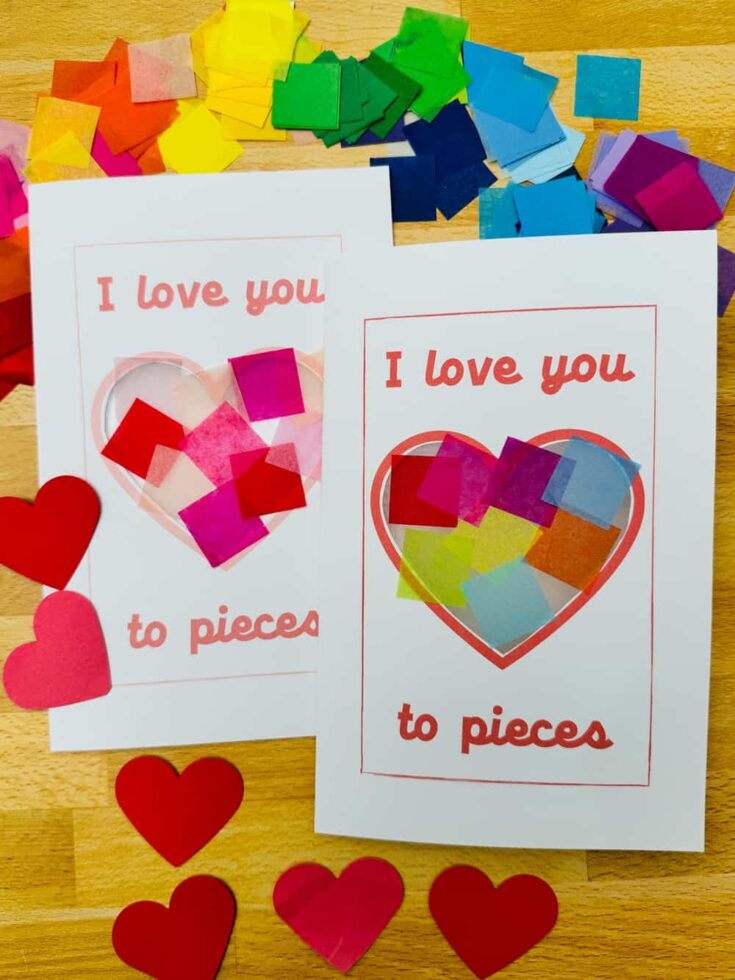
Creating a homemade Valentine’s Day card is a wonderful way for kids to express their affection and creativity. This fun “I Love You to Pieces” Valentine card is not only fun to make but is also a great sensory and fine motor activity! Kids can use tissue paper or shred colored construction paper to fill in the heart! Our adorable card template which comes in two versions (pink and red) is easy to print out so you can get straight to crafting with your little ones! This is the sweetest Valentine craft to make if you need a last-minute card!
Get the Valentine Card Template


“I Love You to Pieces” Valentine’s Card – Materials:
- Our printable “I Love You to Pieces” card template
- White cardstock paper (8.5″ x 11″)
- Scissors
- Clear contact paper
- Assorted tissue paper or colored construction paper (you can also use precut tissue paper squares like we did)
Get the Valentine Card Template


How to make this Valentine Card
- Prepare the Template:
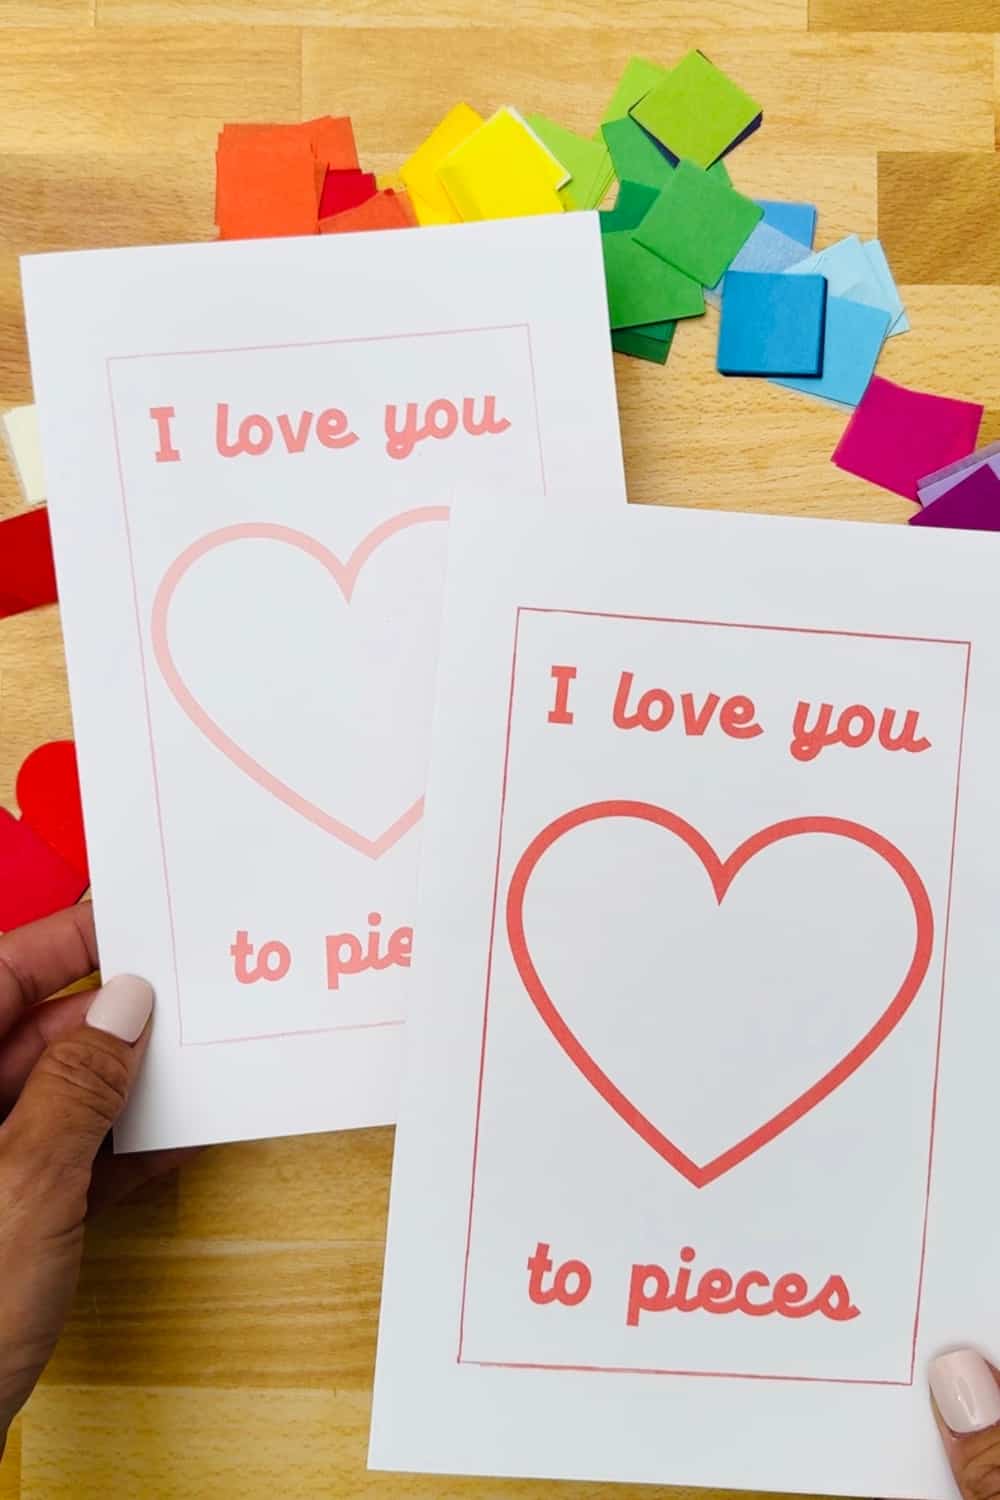
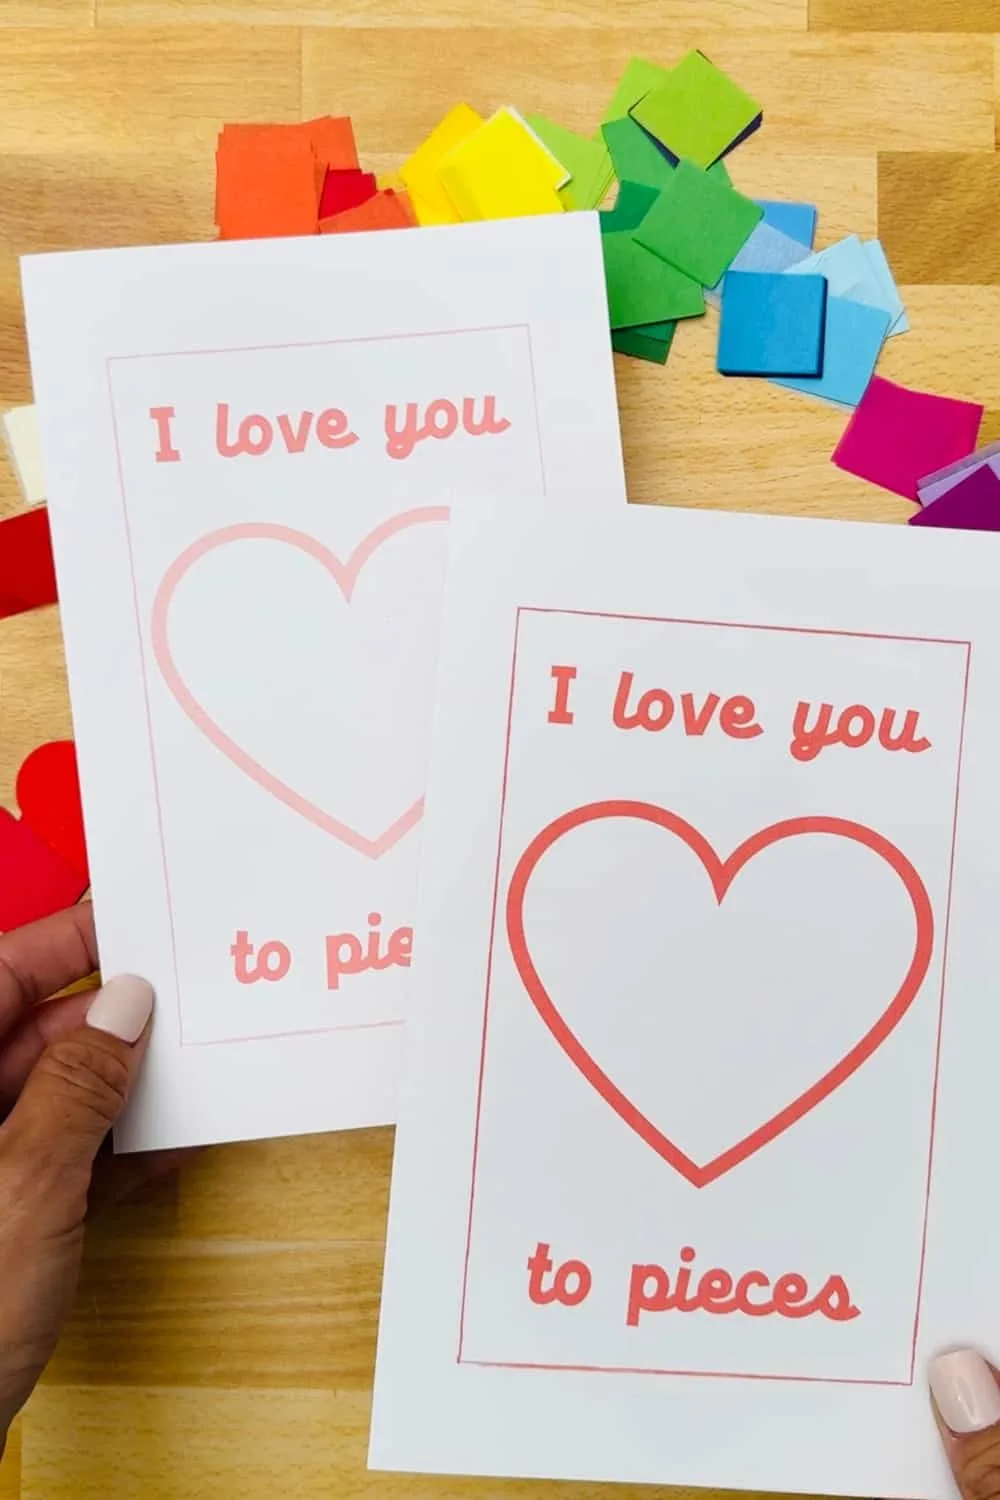
- Start by printing out the card template onto the white cardstock. We offer two versions, pink or red heart.
- Fold and Cut:
- Once printed, fold the card in half. This will create a traditional card shape with the design on the front.
- Carefully cut out the center heart from the front of the card using scissors. Leave the colored heart outline.
- Contact Paper:
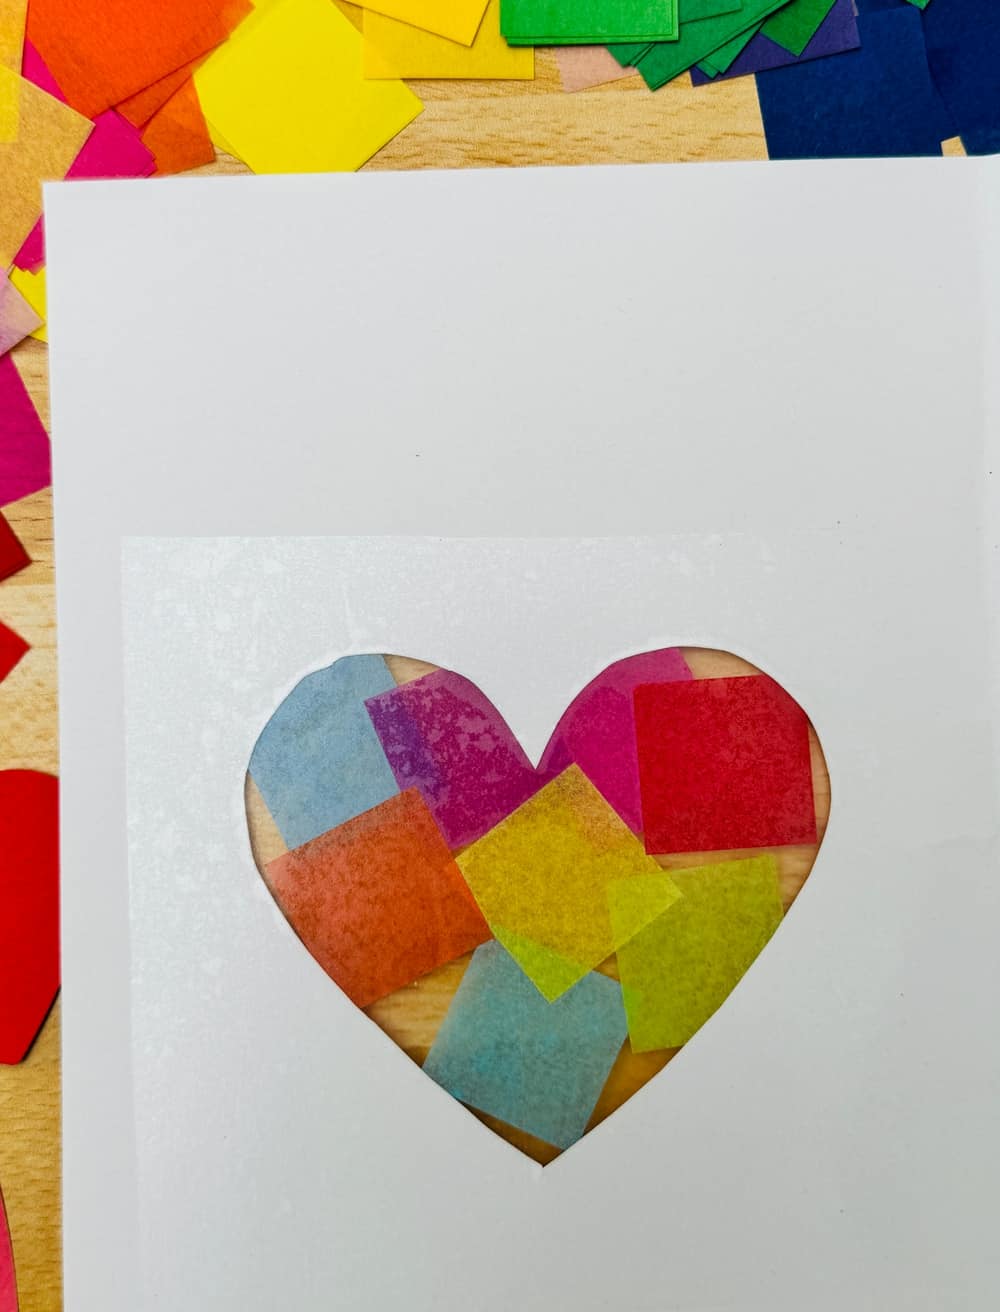
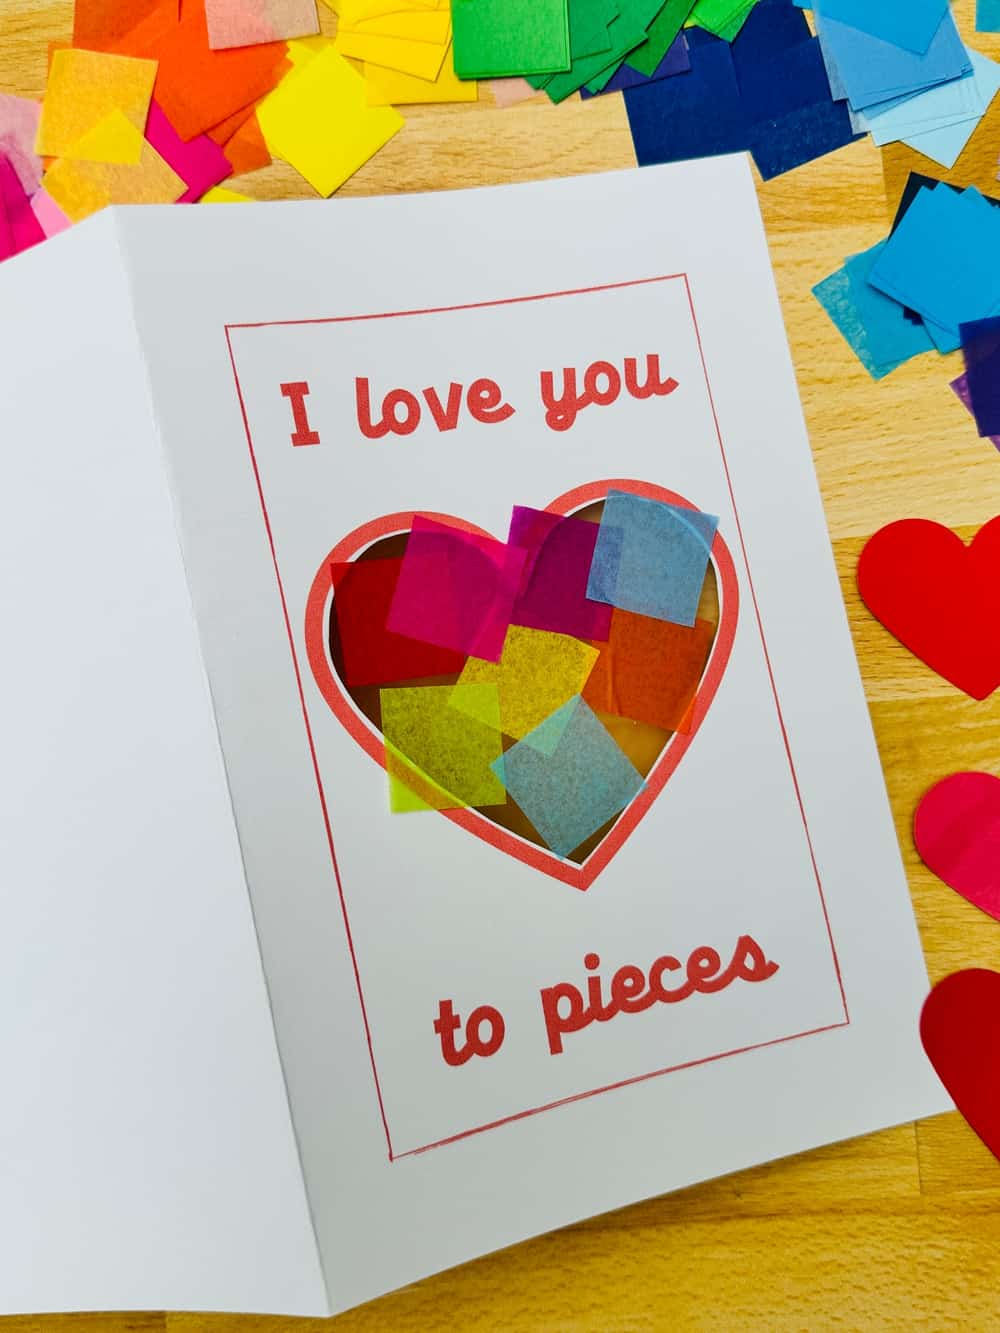
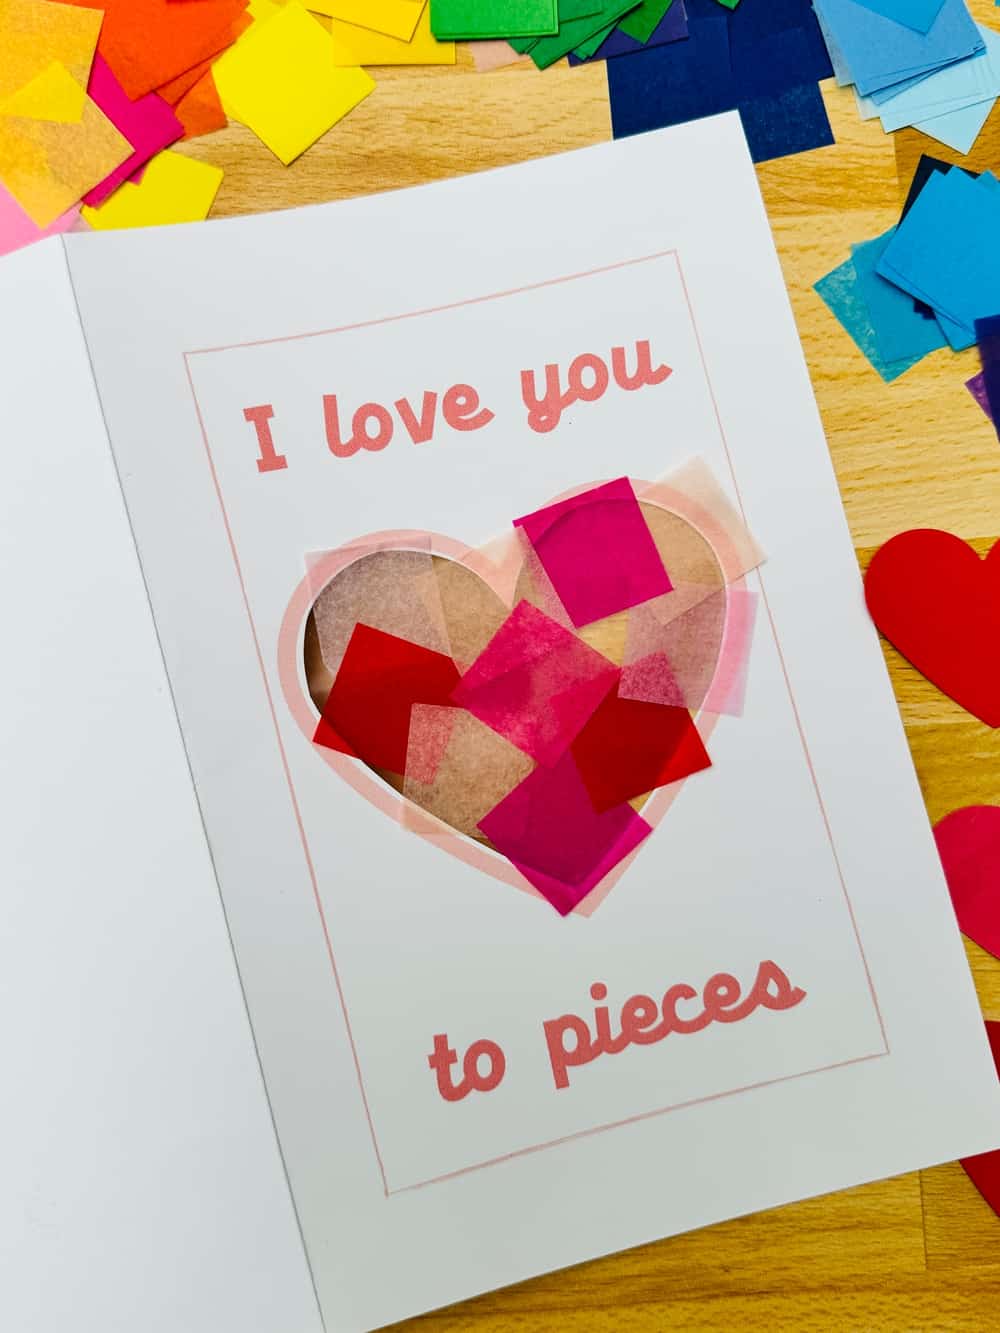
- Cut a piece of clear contact paper that is large enough to cover the heart-shaped cut-out.
- Open your card and place the contact paper over the heart opening, ensuring the sticky side is facing the front of the card. This creates a transparent sticky area for the next step.
- Decorate:
- Now, it’s time to add color and texture! Take your assorted tissue or construction paper and cut or tear it into small squares or random shapes.
- Place these pieces onto the sticky side of the contact paper, covering it as much or as little as you like. You can overlap pieces to create a stained-glass effect or place them side by side for a mosaic look.
- Sign Card:
- Don’t forget the most important part – sign your card! Have your child write their name or a sweet message inside to personalize it.
Get the Valentine Card Template


Final Thoughts
This craft is not only a creative activity but also a great way to develop fine motor skills as children tear small pieces of paper and practice sticking. They’ll be thrilled to give their handmade card to someone they love, conveying the message that they love them “to pieces.”
Feel free to encourage kids to get as creative as they like, choosing their favorite colors or adding additional decorations like glitter, stickers, or drawings.
Happy crafting and Happy Valentine’s Day!
I Love You To Pieces Valentine Card - Printable Template

Materials
Instructions
- Prepare the Template: Start by printing out the card template onto the white cardstock. We offer two versions, pink or red heart.
- Fold and Cut: Once printed, fold the card in half. This will create a traditional card shape with the design on the front.
- Carefully cut out the center heart from the front of the card using scissors. Leave the colored heart outline.
- Contact Paper: Cut a piece of clear contact paper that is large enough to cover the heart-shaped cut-out. Open your card and place the contact paper over the heart opening, ensuring the sticky side is facing the front of the card. This creates a transparent sticky area for the next step.
- Decorate: Now, it's time to add color and texture! Take your assorted tissue or construction paper and cut or tear it into small squares or random shapes. Place these pieces onto the sticky side of the contact paper, covering it as much or as little as you like. You can overlap pieces to create a stained-glass effect or place them side by side for a mosaic look.
- Sign Card: Don't forget the most important part – sign your card! Have your child write their name or a sweet message inside to personalize it.


Agnes Hsu is a mom of three and has been inspiring parents and kids to get creative with easy activities and family friendly recipes for over 10 years. She shares her love for creative play and kids food to her 2MM+ followers online. Agnes' commitment to playful learning and kindness has not only raised funds for charity but also earned features in prestigious nationwide publications.