How to Draw a Butterfly - With Printable Guide
Follow us on Instagram for more fun ideas for kids!
By using this site, you agree to our Terms of Use. This post may contain affiliate links. Read our disclosure policy. As an Amazon Influencer, I earn from qualifying purchases.
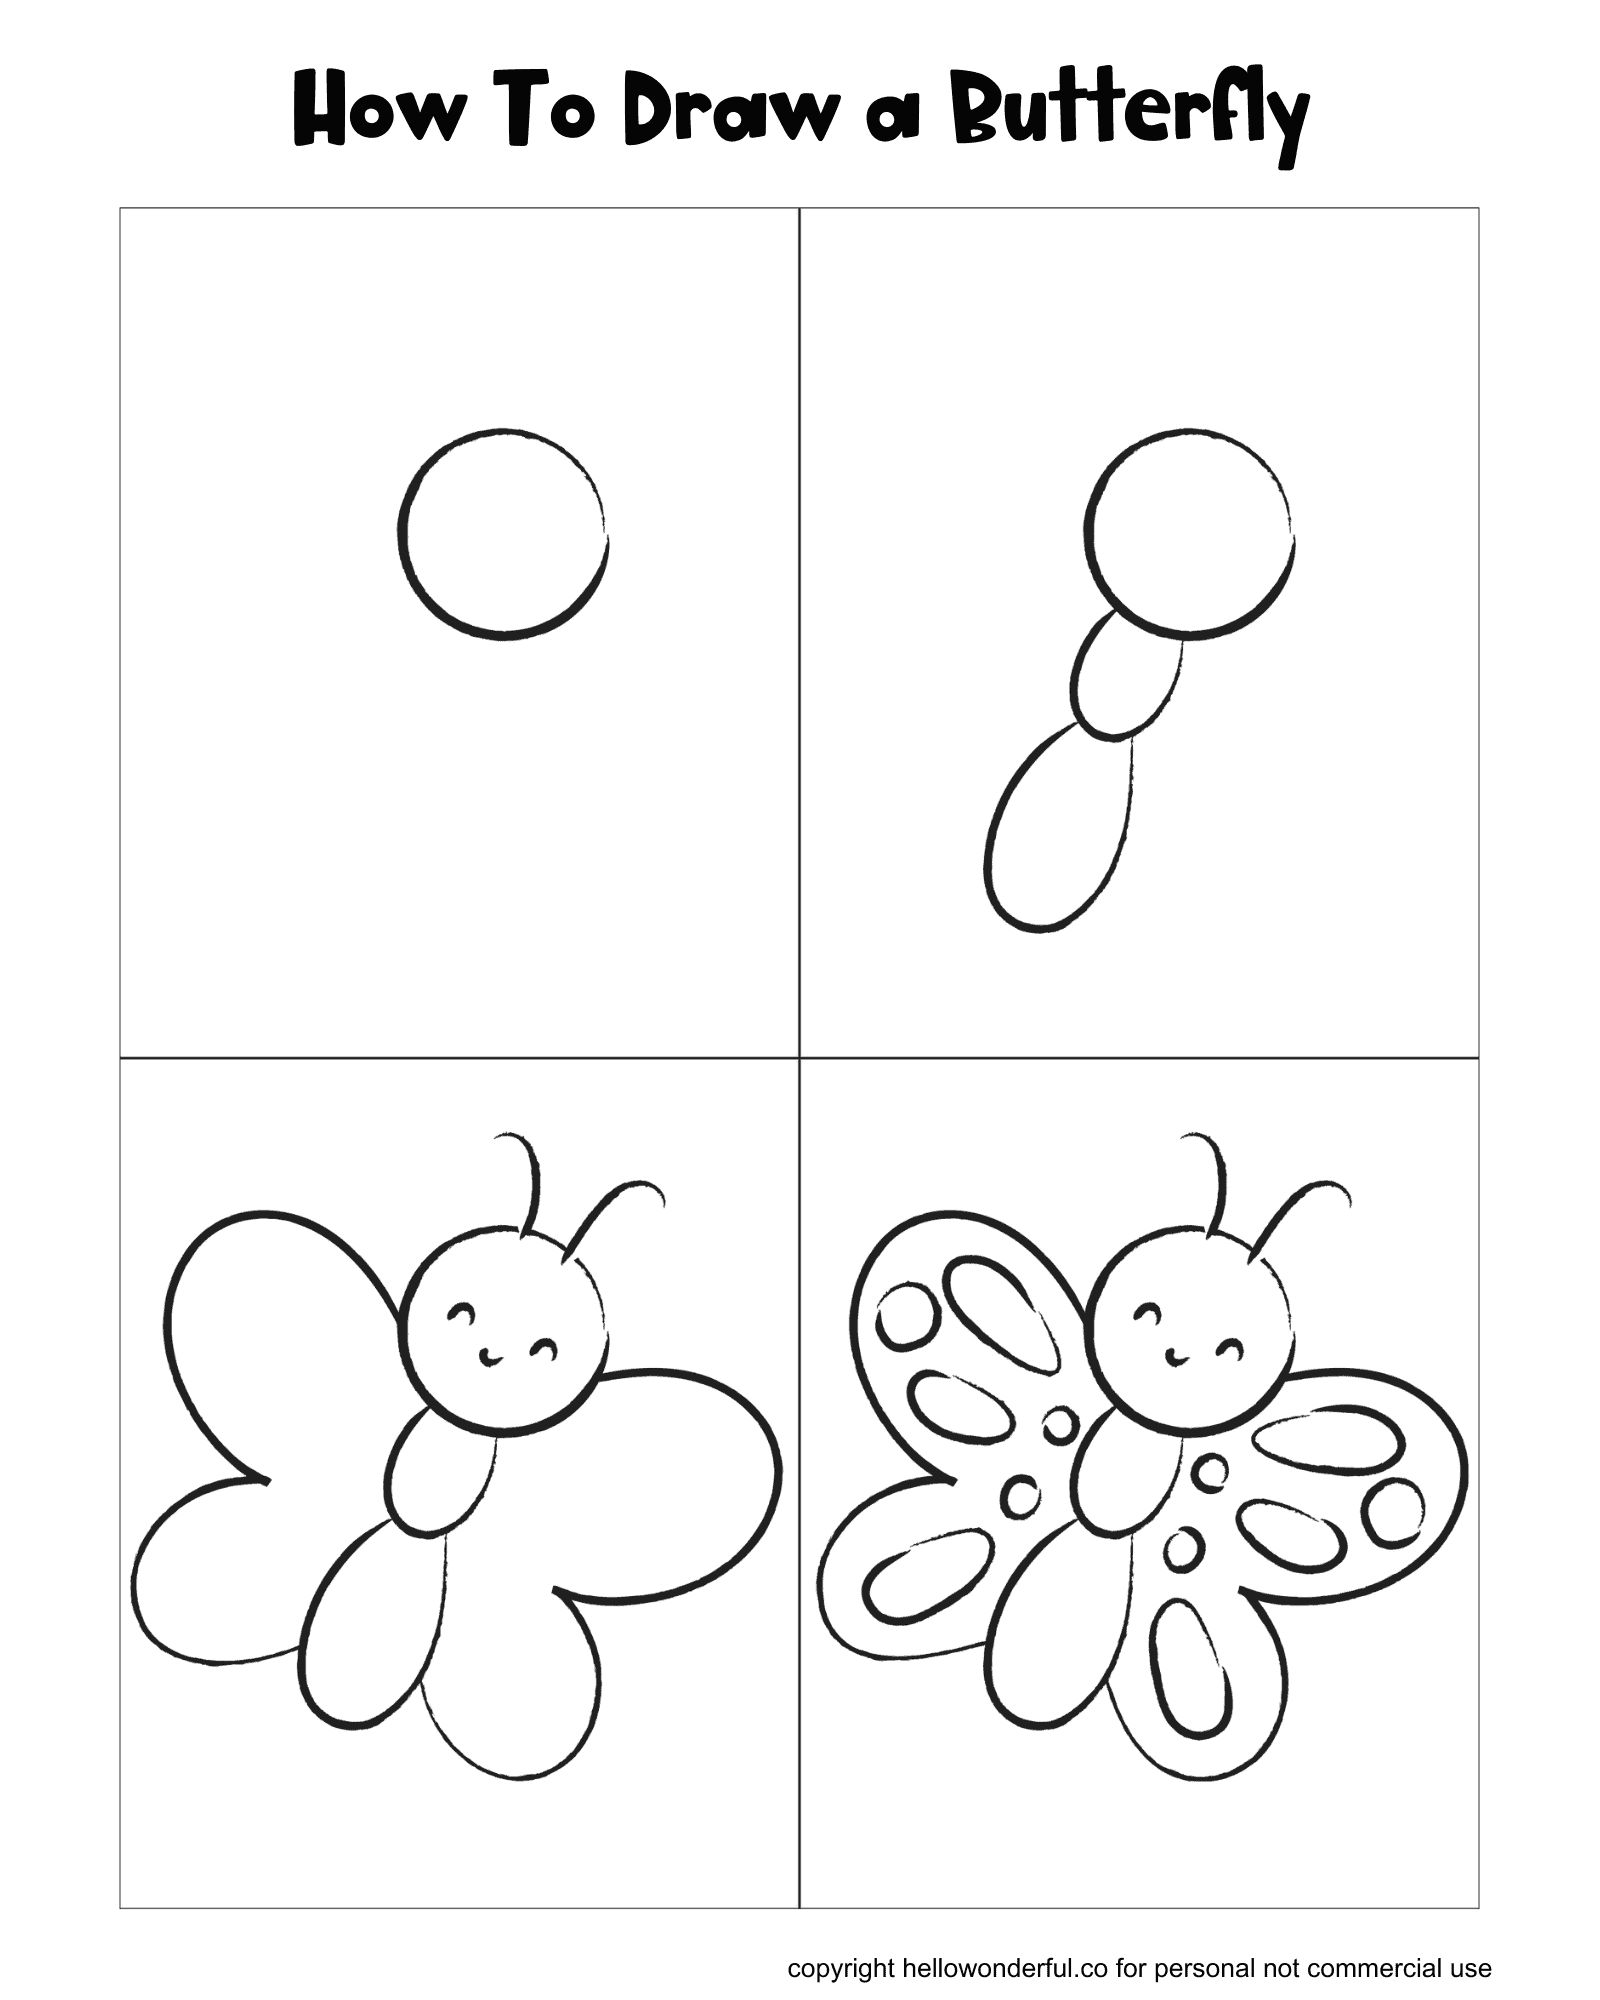
Learn how to draw a cute butterfly in just 4 easy steps with this simple guide for kids. Easy art for beginners using basic shapes and imagination!
Drawing butterflies has always been one of my favorite activities to do with kids—butterflies are cute and kids love them! Whether you're a parent, teacher, or just looking for a fun afternoon project, this step-by-step guide will help your little ones draw a cute butterfly using basic shapes. All you need is paper, a pencil, and a little imagination!
Make sure to scroll down below to grab our free printable art guide!
How to draw butterfly - step by step
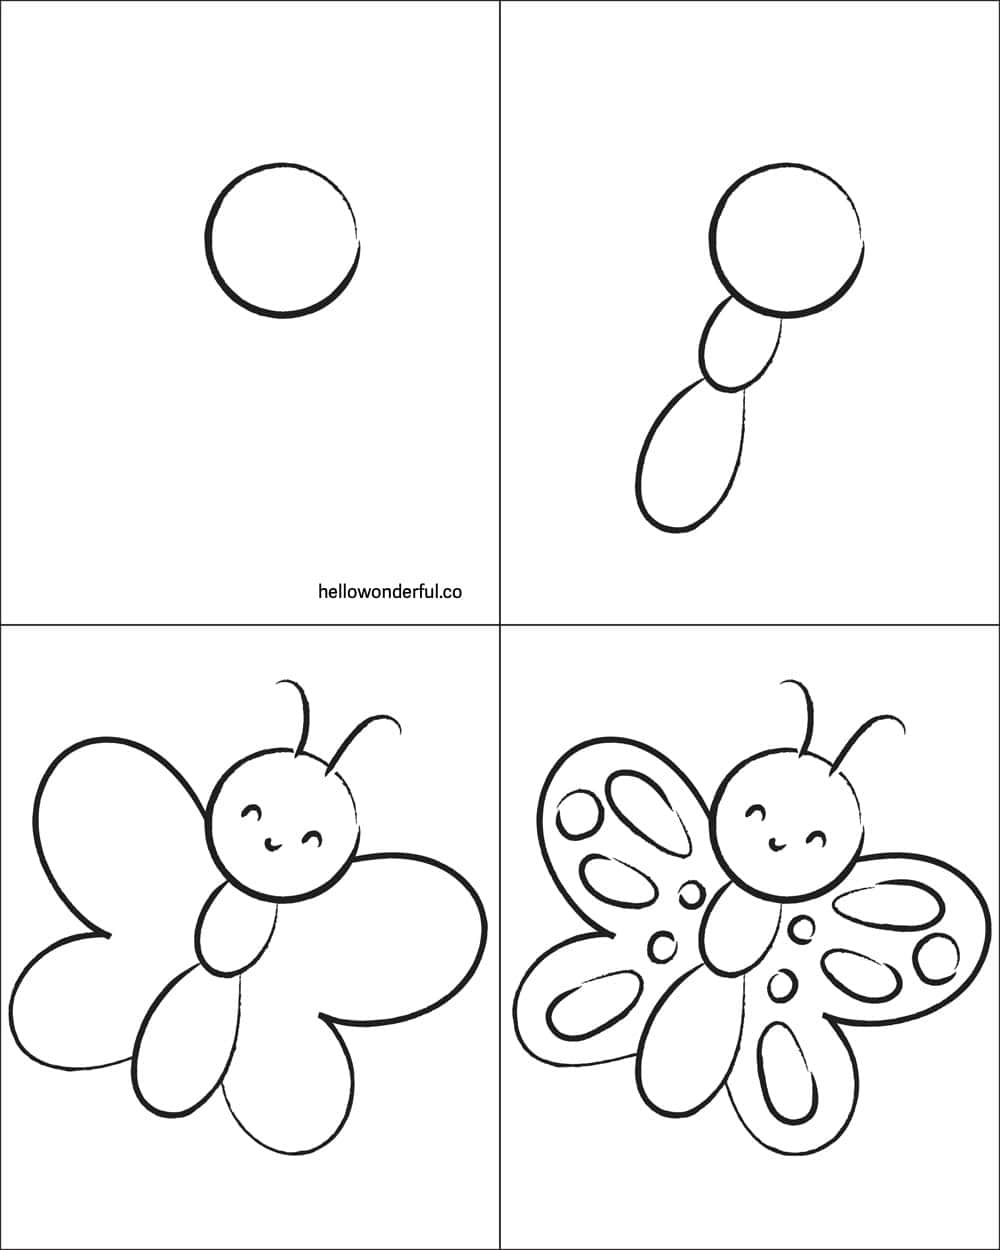
Step 1: Draw the Head – Start with a medium-sized circle near the top of the page. This will be the butterfly's head.

Step 2: Add the Body – Below the head, draw two ovals—one small and one larger. These ovals form the upper and lower parts of the butterfly's body.

Step 3: Draw the Wings and Face – Add two large wings on each side of the body, shaped like big petals or clouds. Draw a smiling face and add two curved antennae on top of the head.

Step 4: Add Wing Patterns – Decorate the wings with smaller oval and circular shapes to make your butterfly more colorful and fun.

Encourage kids to color in their butterfly with bright, cheerful colors. No two butterflies are the same—let their imagination take flight!
Final thoughts
Drawing doesn’t have to be complicated to be fun. With just a few shapes and easy lines, your child can create a beautiful butterfly they’ll be proud of. Encourage them to experiment with colors, patterns, and even makeup stories about their butterfly’s adventures. Most importantly, enjoy the drawing process together!
Get the free printable butterfly guide