

By using this site, you agree to our Terms of Use. This post may contain affiliate links. Read our disclosure policy.
Follow us on Instagram for more fun ideas for kids!
Watch the video below to see this fun Halloween Paper Accordion Craft in action. Make sure to subscribe to our YouTube channel for more fun videos!
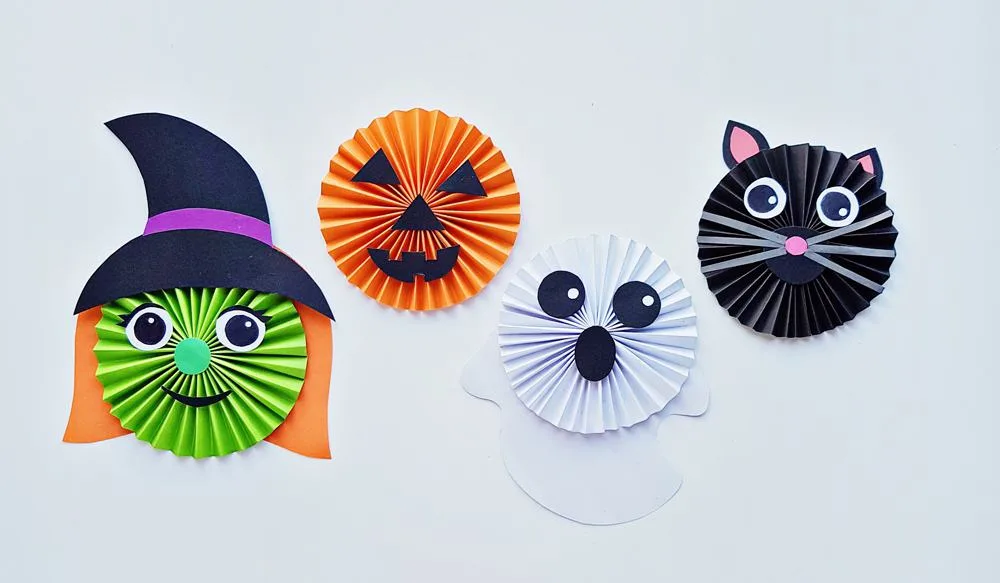
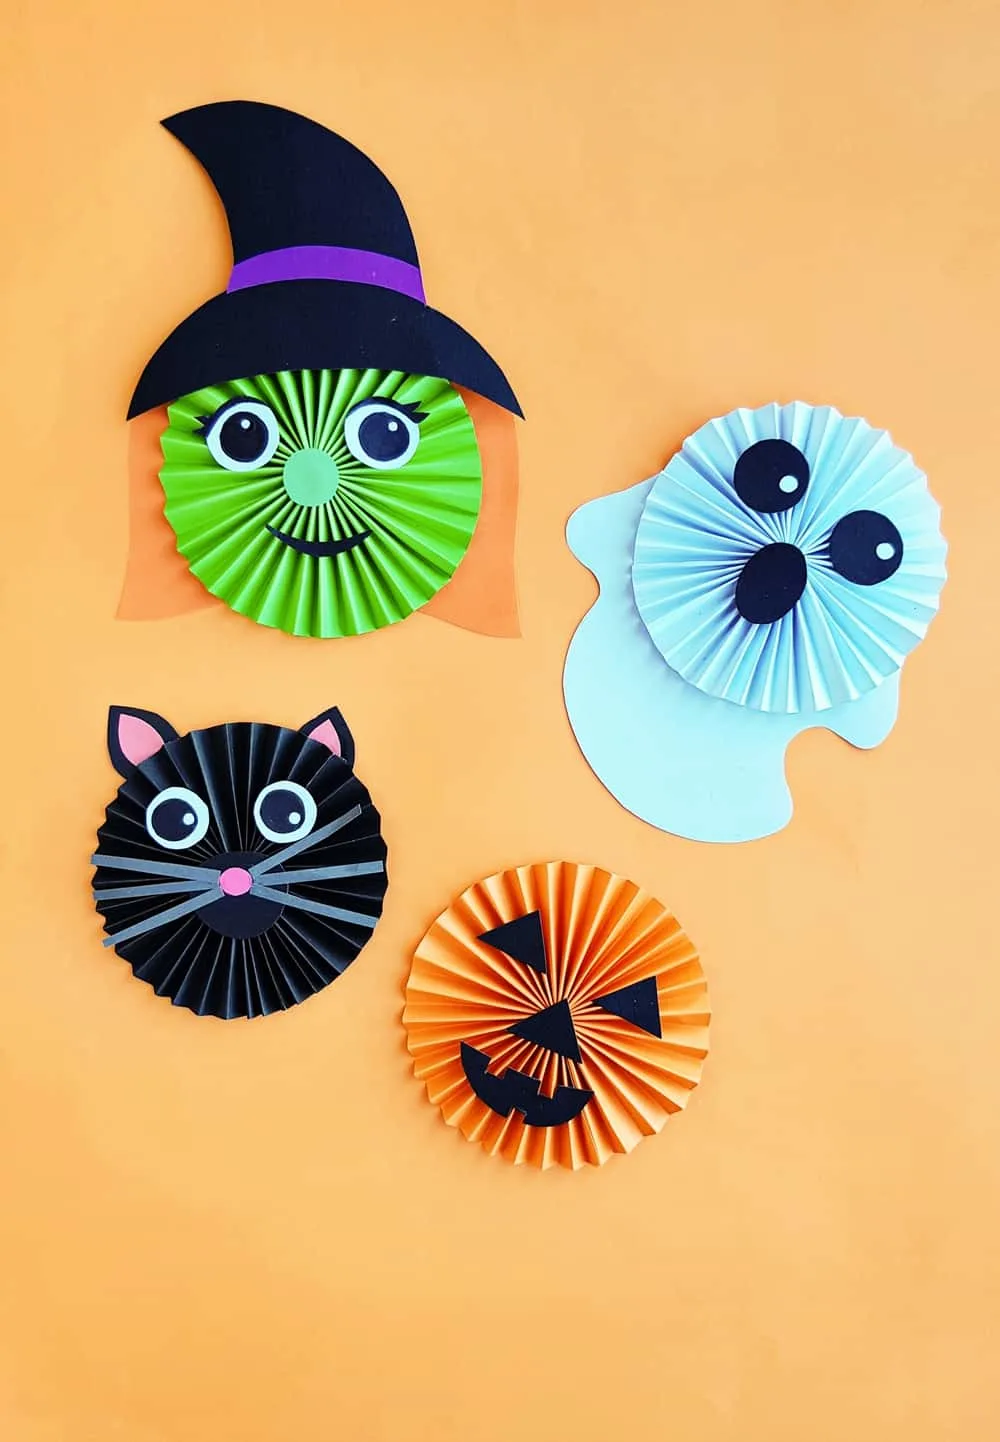
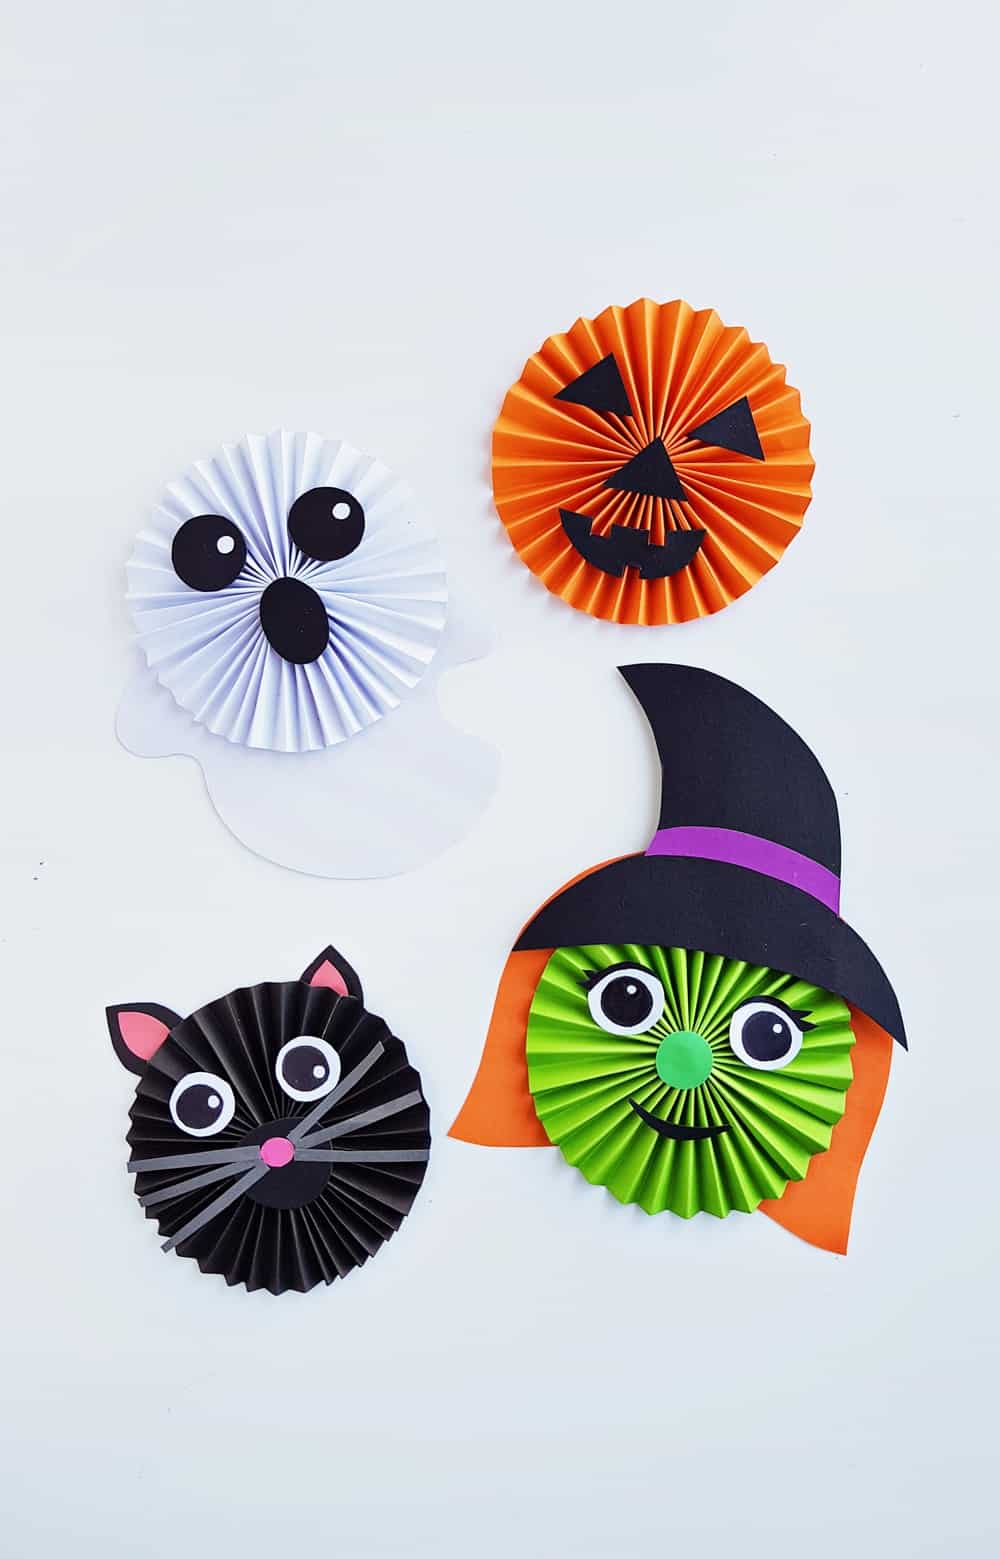
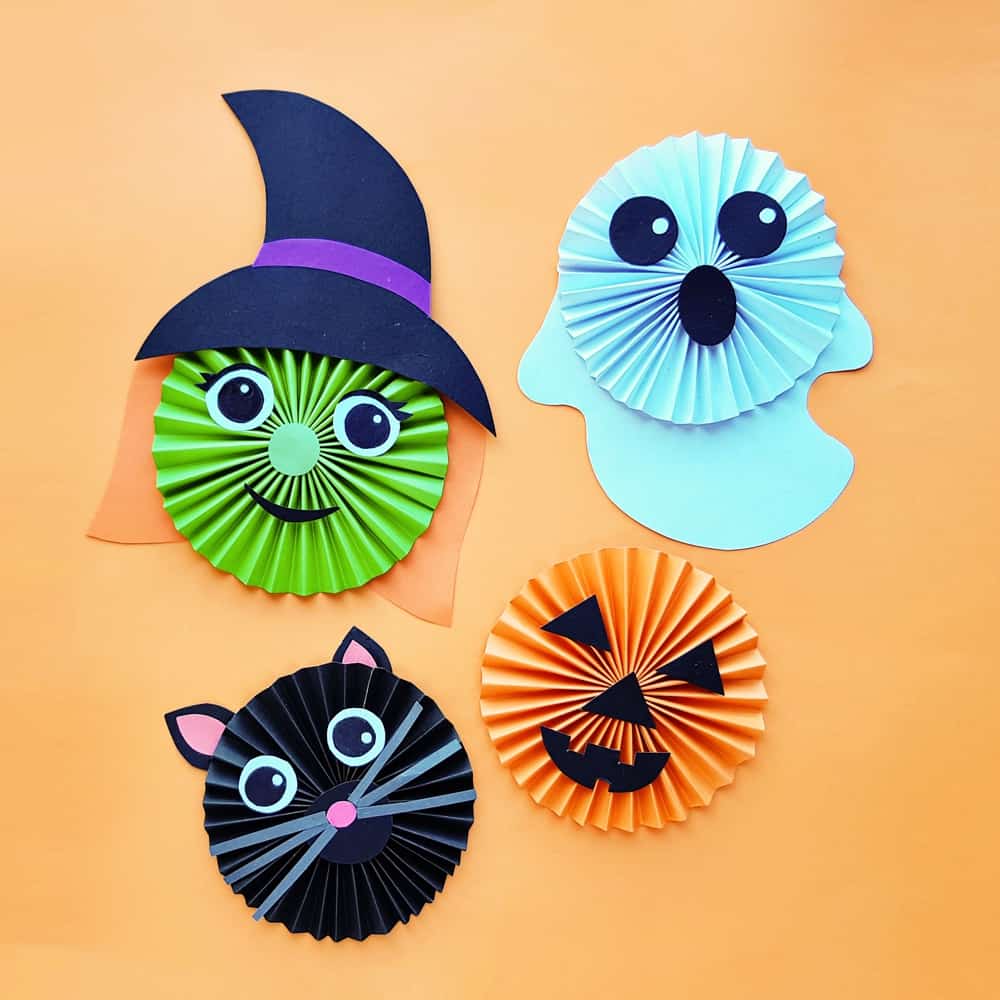
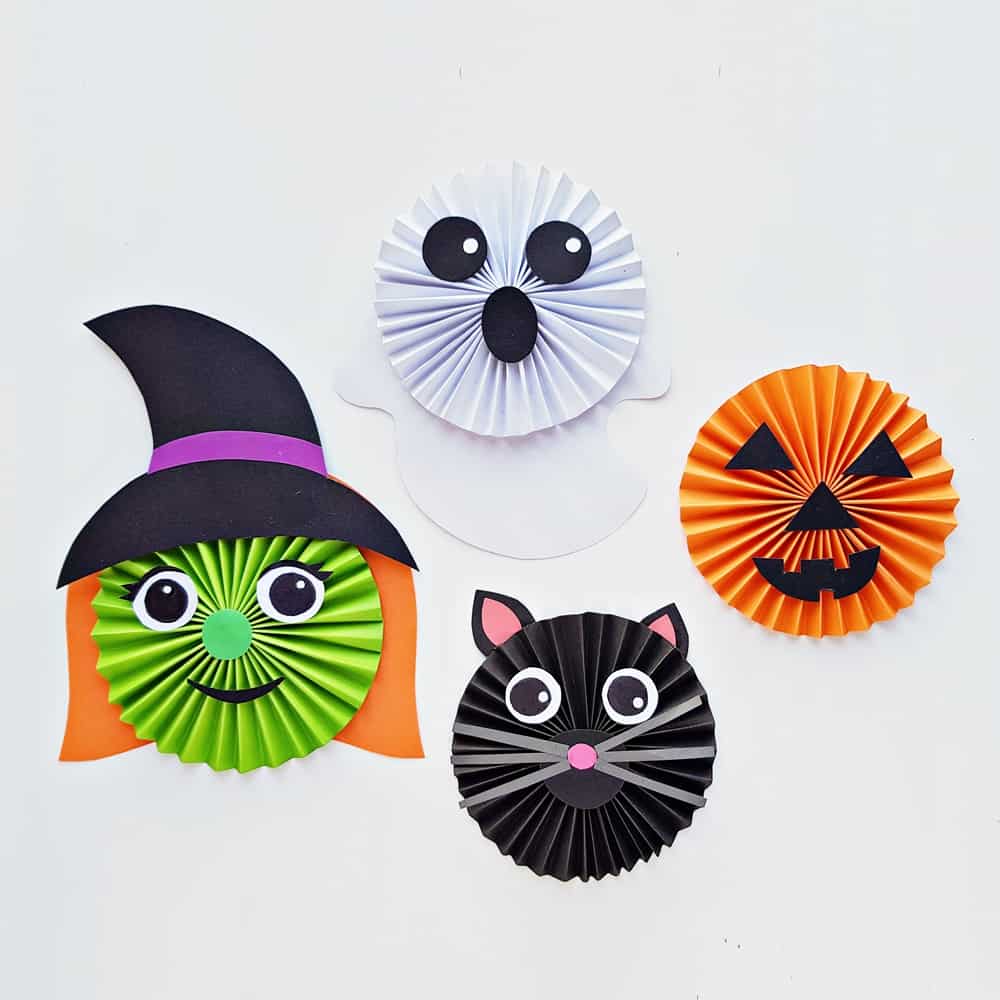
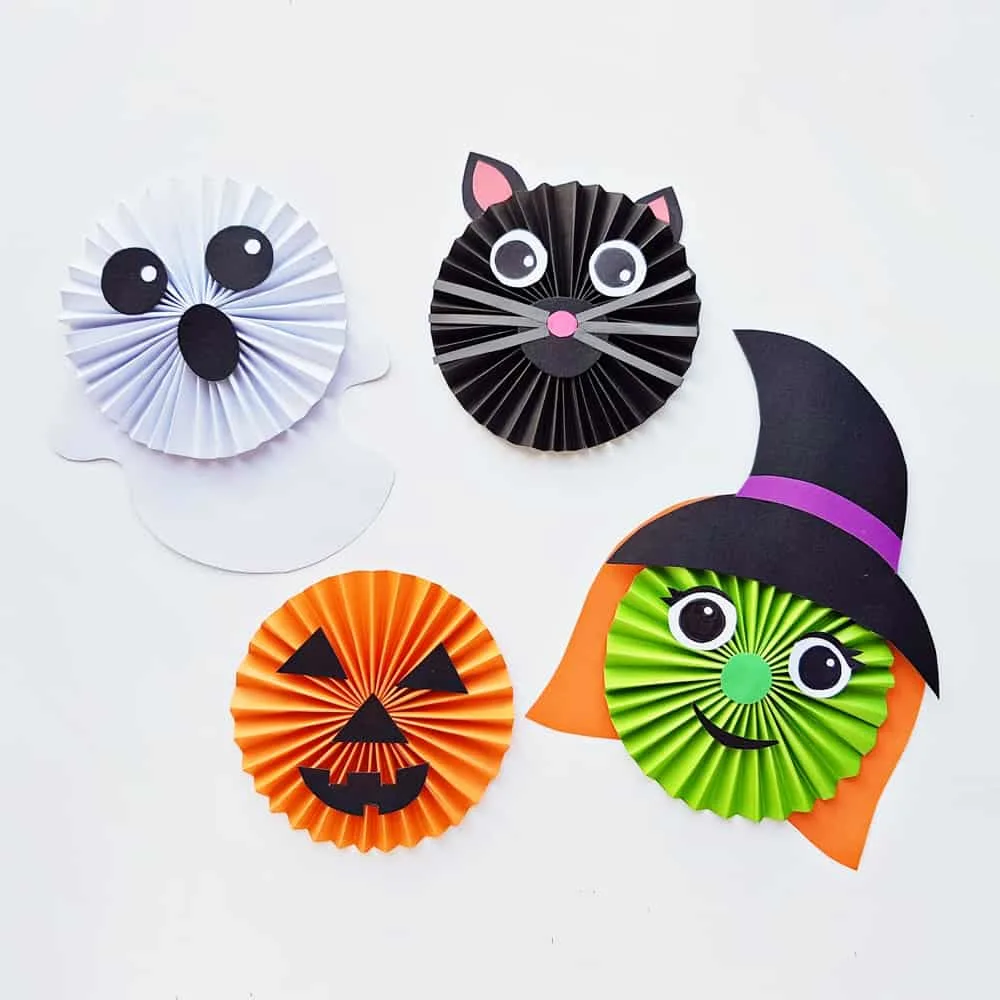
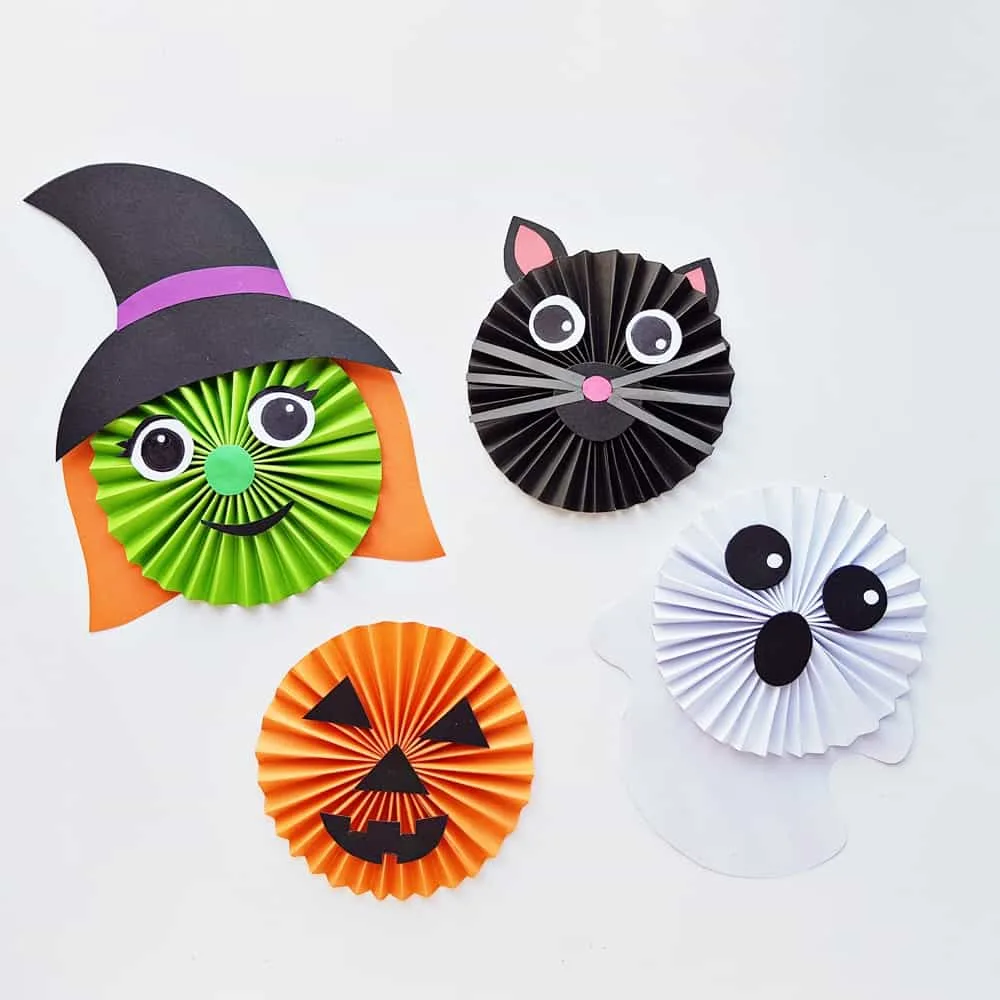
This cute and spooky Halloween Paper Accordion Craft is an easy art project you can whip up with the kids with materials you probably already have on hand.
Get ready to love this simple Halloween craft. It’s so much fun to make and literally takes just moments to do.
The kids and I can sit down and knock out a whole array of these “spooky” fun Halloween crafts easily in one sitting.
Then once we are done, we have a ton of homemade Halloween decorations that we can then sprinkle around the house.
We hang them up on the windows, have them sitting on shelves and have fun putting them in places that we normally wouldn’t think of. (Like sticking them in the kid’s clothing drawers as a fun little Halloween surprise!)
And while these are super fun to make, they’re also working on their hand-eye coordination and their fine motor skills as well. Being able to combine fun and enhancing life skills is always a win in my book.


Get our free printable for this fun Halloween Paper Accordion Craft.
This craft is even easier with our multiple page FREE Halloween printable. They come already colored or blank so you can have the added benefit of kids coloring in the features and details on your Halloween paper craft. We also a few different sizes for the features!
Make sure to scroll all the way down to the how-to card to get the FREE printable templates.


How do you get the accordion paper circle to stay down?
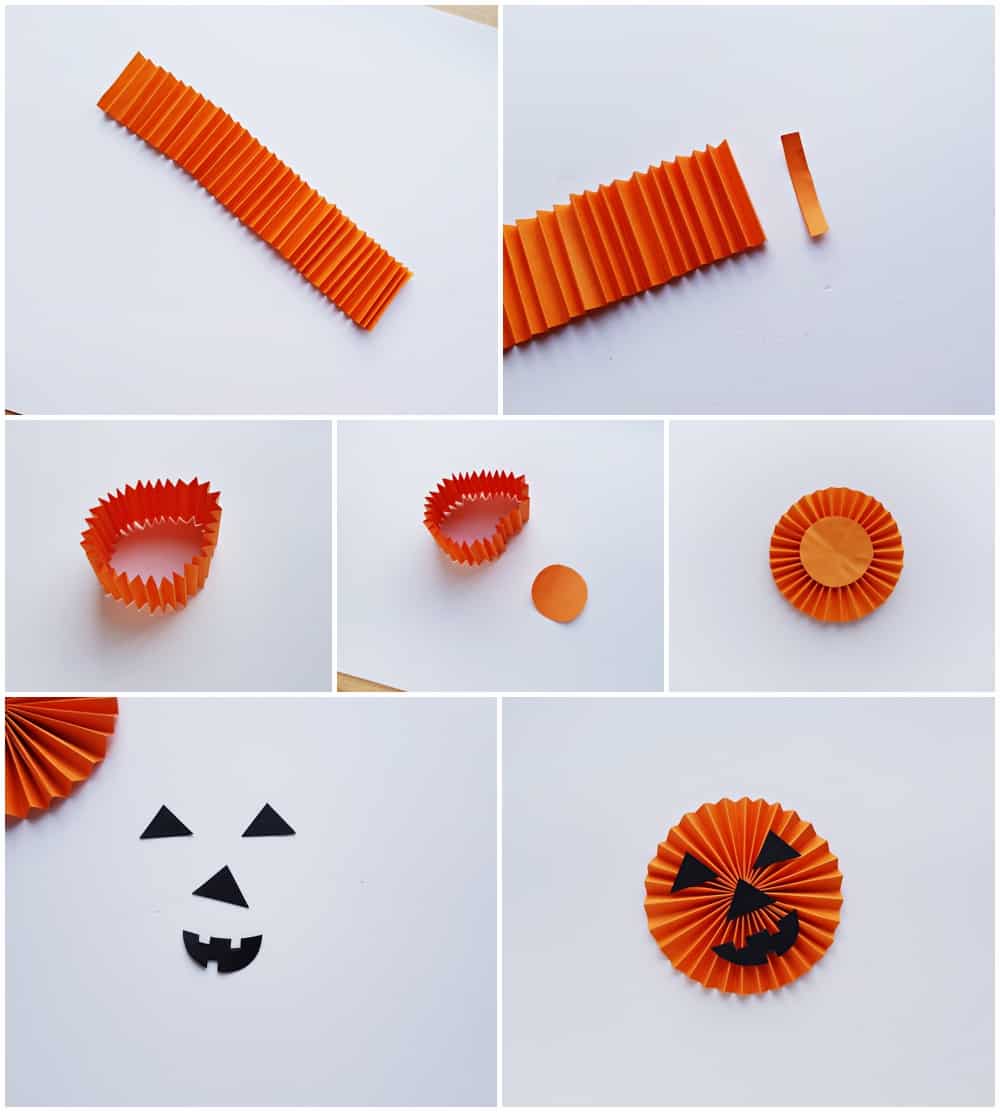
That’s really the hardest part of this craft, but honestly it’s not that hard at all we promise. Once you fold your folded paper into a circle, you have to glue the ends together and have another piece of paper ready, like a round paper cut out to glue to the center. The accordion needs some weight to not “flip up!”
See the pumpkin photos below as an example. Note this extra piece of paper is on the bottom of the face so won’t be shown.
We did not show this in the video because sometimes you can use the paper cut out face features to weight down the accordion and won’t need that additional paper weight.
Or sometimes you want the accordion to pop out a bit like in the ghost shown in the video, we decided to let it pop a bit to give it more of a 3D ghostly feature. In the photos, the ghost is laying flat. So you can see two options.


What type of paper do you need for this Halloween Paper Accordion Craft?
Any type of paper will work, but I prefer using a little bit thicker paper like cardstock because although it’s harder to fold than thinner paper, it tends to hold up longer and the creases stay more prominent.
Construction paper would work great. Printer paper is also fine, but it just may not hold the shape as well as other thicker paper alternatives.
Note thicker paper will need a larger “paper weight” to hold down or larger glued on features.
You can try thick or thin paper and use what you prefer!
Also, keep in mind that you’ll want colored paper as well to really capture the look! You can always try to use whatever paper you have at home before heading out to the store to buy something new.

How to create this Halloween Paper Accordion Craft
Remember earlier when I said that this craft was simple? Get ready to see for yourself! I’m not kidding when I say it’ll take you longer to print and cut out the printable than to create this craft from start to finish. It’s just that simple, and addictive.
So be ready to create more than just one accordion paper Halloween craft!
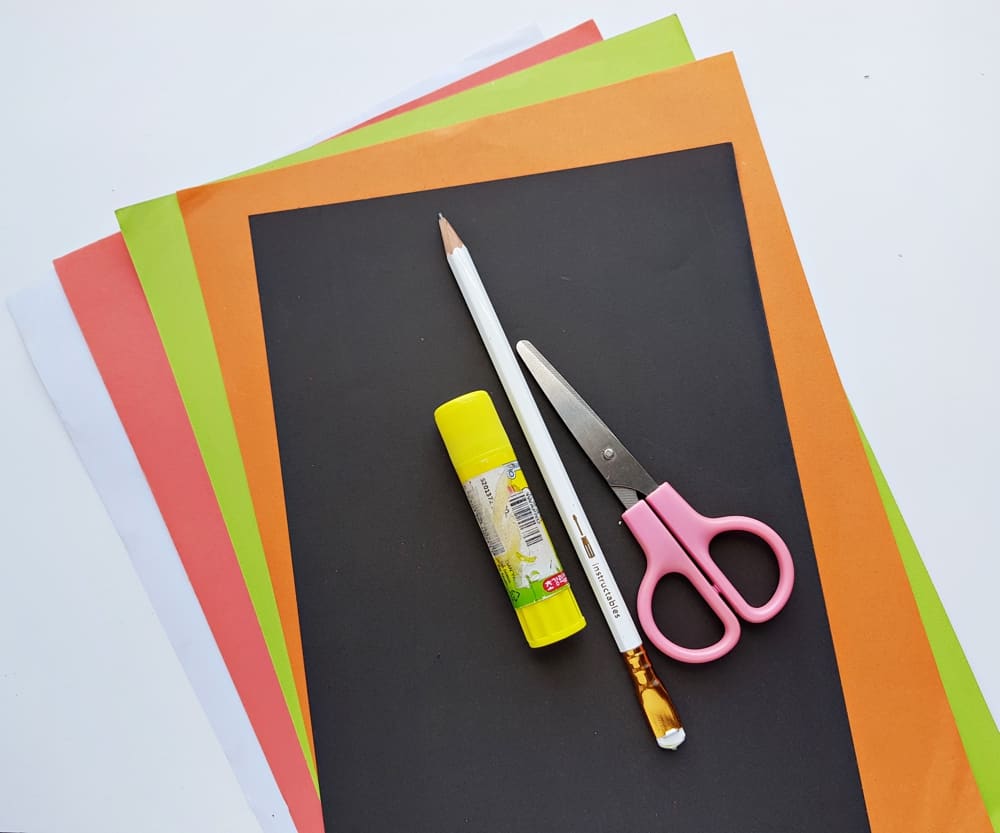
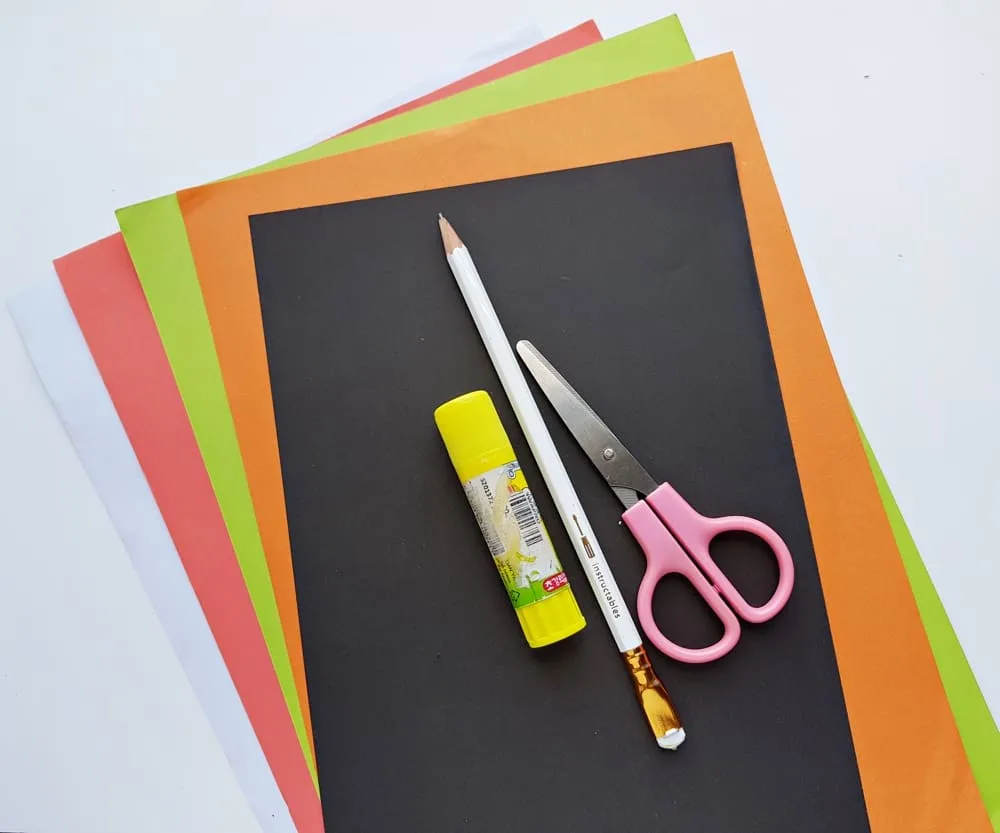
Halloween Paper Accordion Craft – Materials:
-
Colored Paper
-
Glue
-
Tape
-
Scissors
- Free Printable Templates (download below in the how-to card)

If you love this Halloween Paper Accordion Craft, make certain to take a peek at some of our fun Halloween crafts as well.
Pumpkin Owl Craft
DIY Pumpkin Unicorn Witch
Pumpkin Elephant Toothpaste Experiment
Yarn Spider Craft
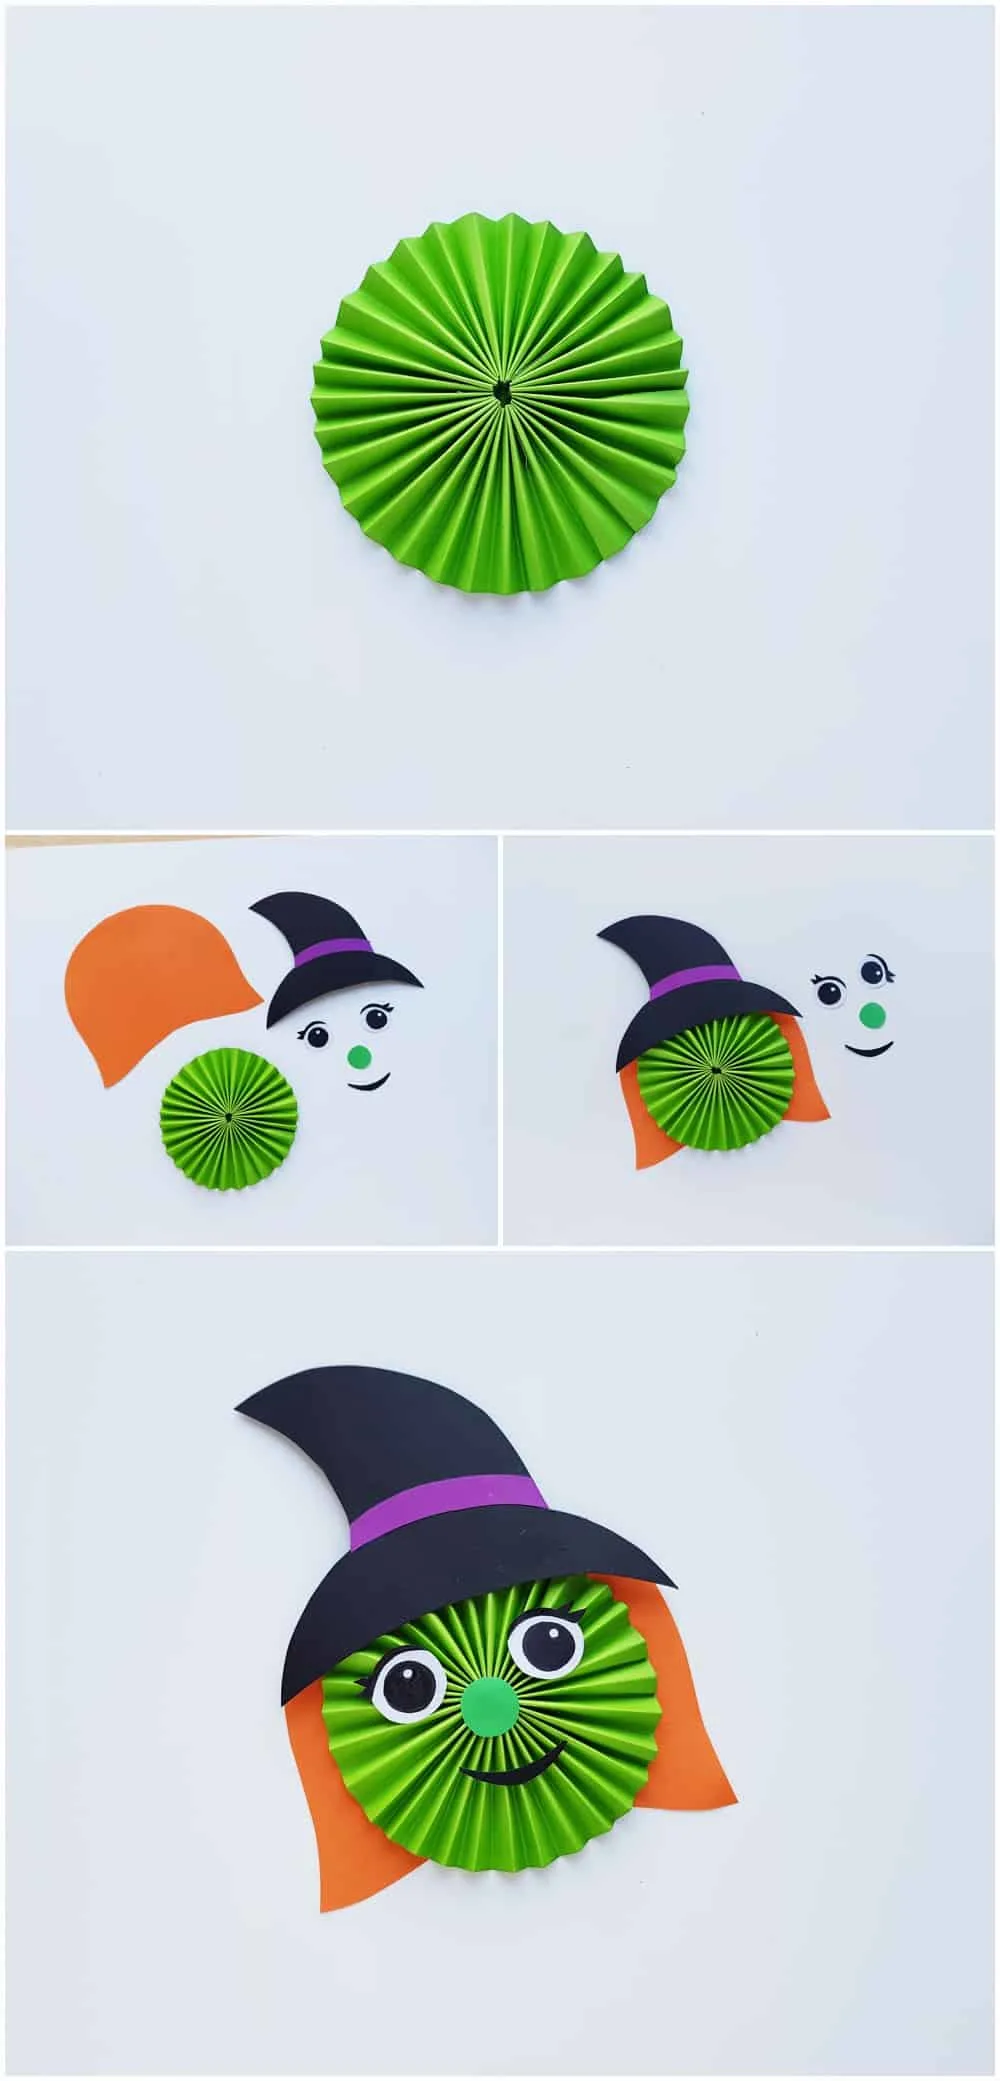
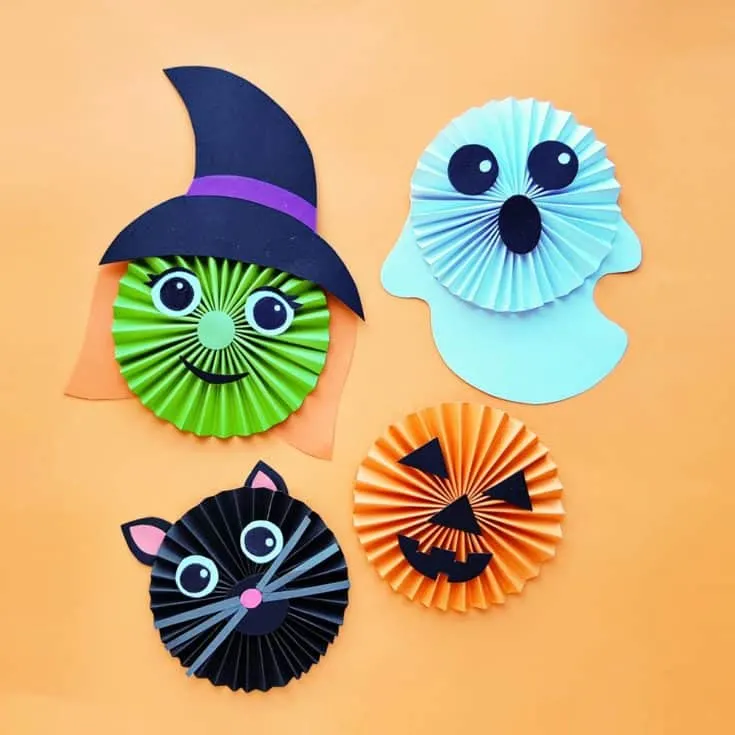
Step -1: Select colored craft papers for each character. Orange for the pumpkin, green for the witch, black for the cat and white for the ghost. Cut all of the selected craft papers into long strips (at least 15 inches long 2 inches wide). Let’s start with the orange colored paper (for the pumpkin craft). Create small and even accordion folds with the orange colored paper strip. Step -2: Use scissors to cut off any one of the thin folds from either open sides. Step - 3: Apply glue and join the 2 open ends of the accordion folded paper. Step - 4: Cut out a small orange colored round paper piece. Step - 5: Keeping the accordion folded paper (after joining the sides) on a standing position, hold all of the folds of the top end and press it towards the center to flatten the accordion folded paper. Attach the round orange paper on the center to secure the flattened pattern. Step - 6: Print and cut out or trace the pumpkin template patterns on black colored craft paper and cut them out nicely. Step - 7: Attach the pumpkin eyes, nose and mouth patterns on the orange accordion folded flat paper to complete the craft. Step - 8: Similarly make the accordion folded ghost and cat. Step - 9: For the witch paper craft; we#;; use green colored craft papers trip to make the flat accordion folded piece. Step - 10: Print and cut out the hair, eyes, nose, mouth and hat patterns of the witch, or trace them on your preferred colored craft papers. Cut out the traced patterns nicely. Step - 11: Place the stitched felt pattern on the top of the back side cut out. Start to stitch around the side. Doing flat blanket stitch for the sides is the best. Step - 12: Continue to stitch until the whole side is covered. Tie a knot after reaching the end. Draw the needle between the 2 big felt pieces and draw it back outside the back felt. Cut off extra thread. Step - 13: Black string looks best for this pendant. Grab some colored wooden beads and thread them into the string. Attach a jump ring with the pendant. Step -14: Insert the pendant into the string through the jump ring. Complete the necklace by adding more beads to the other side. Keep the string long enough so it can be worn through the head, without any closure system. Tie a knot with the 2 open ends of the string and done!HALLOWEEN PAPER ACCORDION CRAFT

Materials
Instructions
Disclosure: Some of the links in the post above are “affiliate links.” This means if you click on the link and purchase the item, we will receive a small affiliate commission. Regardless, we give our promise that we only recommend products or services we would use personally and believe will add values to our readers. As well, as an Amazon Associate I earn from qualifying purchases.


Agnes Hsu is a mom of three and has been inspiring parents and kids to get creative with easy activities and family friendly recipes for over 10 years. She shares her love for creative play and kids food to her 2MM+ followers online. Agnes' commitment to playful learning and kindness has not only raised funds for charity but also earned features in prestigious nationwide publications.