
BUNNY AND CHICK TWIG TREES
Don’t ya’ just love spring? After months of being cooped up indoors, we finally get to go outside and see what nature has brewing for the new season! It might still be cold out, and the flowers might still have some growing to do, but that doesn’t mean we can’t create a little early spring magic of our own. Decorating naturally by bringing the outside in is one of my favorite things, and this time of year provides the perfect opportunity to collect leftover twigs and make them into your own colorful spring trees. Smaller sticks can be turned into tissue paper & twig flowers too! Enjoy an afternoon of fresh air, open-ended art and fresh colors with this fun ode to springtime!
You'll Need:
- A few collected twigs or sticks
- Scissors
- Craft glue or a hot glue gun
- Tape
- Thread or Embroidery Floss
- Watercolor or cardstock paper
- Free printable bunny and chick template (download right below)
Click Here to Get Your Free Printable
Optional:
- Acrylic Paint and a foam brush for painted twigs
- Feathers and pom pom
- Art/Craft supplies for coloring, painting or decorating your ornaments
Instructions:
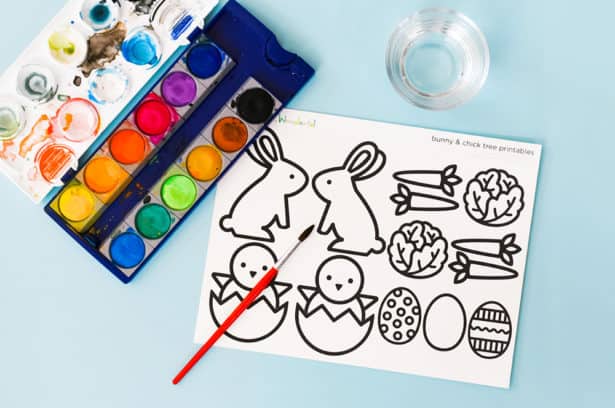
Step 1: Print out the desired pages of our Bunny & Chick Printable onto a heavy cardstock or watercolor paper.
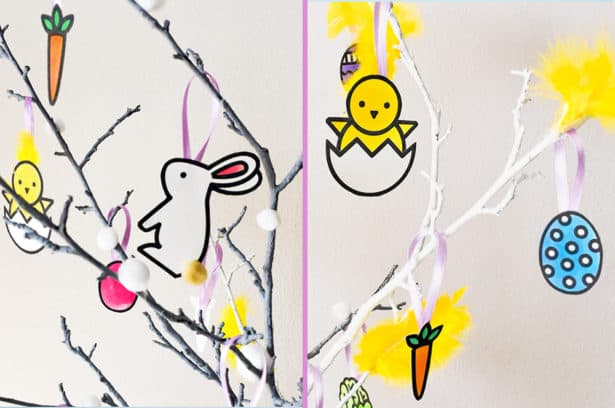
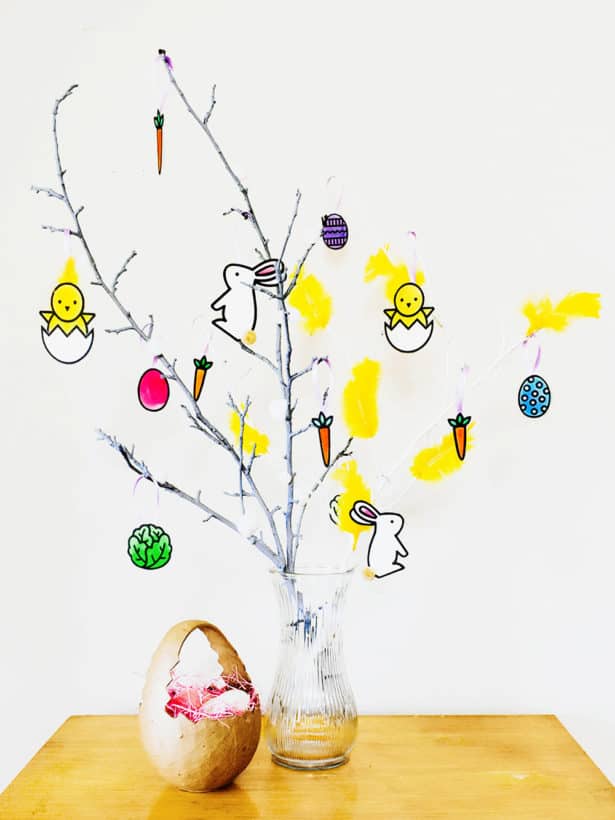
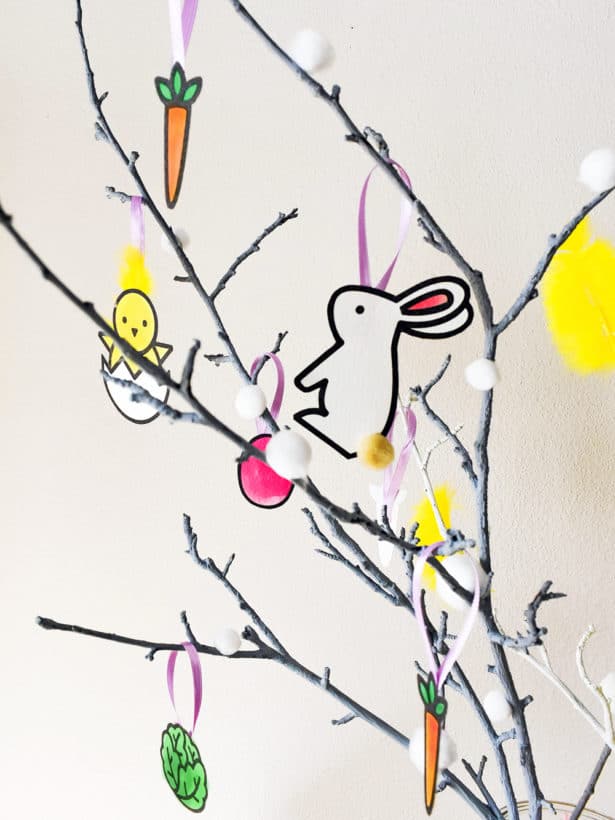
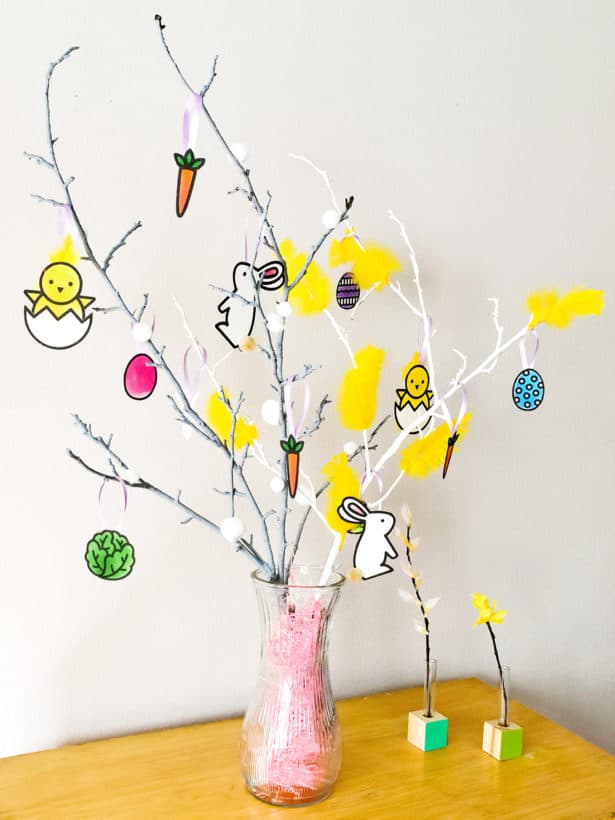
Step 2: Decorate your bunnies, chicks, eggs, carrots and lettuce! I printed mine on watercolor paper and used some watercolors for a soft and colorful spring look, but you can decorate them any way you like. Use crayons, stickers, fabric, paint, glitter, natural or collaged items to make these spring ornaments all your own!
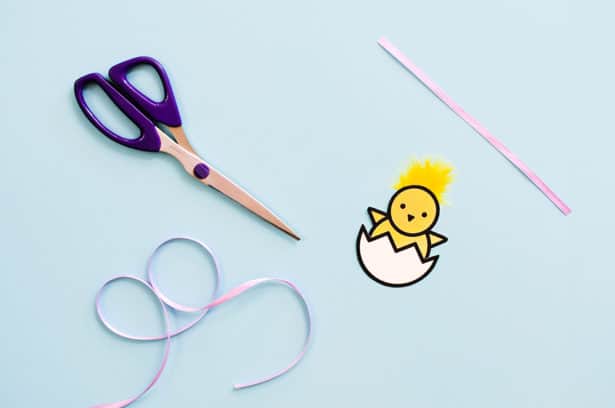
Step 3: Cut out all of your spring ornaments once they’re finished and/or dry. For extra cuteness, I added pom-pom tails and feathers to my bunnies and chicks.
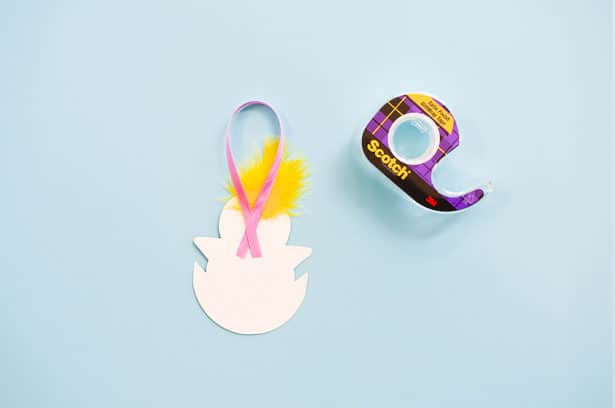
Step 4: Cut 3-4” pieces of twine, ribbon or embroidery floss. Tape or glue both ends to the backs of your decorated bunnies, chicks, eggs and garden vegetables to make a hanging loop for your ornaments.
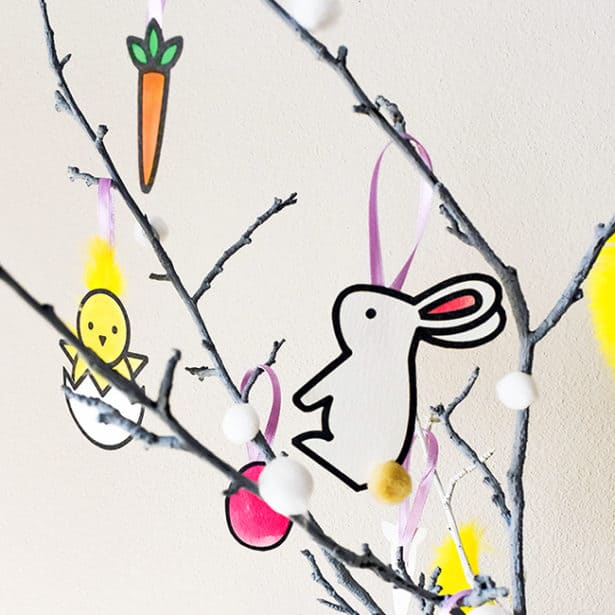
I painted my twigs with acrylic paint to lighten them up a little, but you can skip this step if you’d rather - it looks just as adorable keeping it natural! If you decide you like the painted look, just remember to let them dry completely before decorating (they’re so darn cute, it’s hard to wait!). You can double down on the spring vibe by adding some pom pom “bunny tails” or chick feathers on your trees like I did. Just use a dab of hot glue or craft glue to secure them to your twigs. All that’s left to do is decorate & stand back to admire your darling new spring decor! Suddenly feeling so spring-spired? Download a free mini spring art print to finish off your kid-tastic spring refresh!

Other Ideas for Use:
Draw a basket and fill it with your artistic bunnies and chicks. Laminate these and add a magnet to the back to make adorable spring magnets that can be used on the fridge to tell a springtime story. Or make them into mini greeting cards for friends who need a little early spring cheer!
Check out more fun Easter and spring ideas for kids!
Disclosure: Some of the links in the post above are “affiliate links.” This means if you click on the link and purchase the item, we will receive a small affiliate commission. Regardless, we give our promise that we only recommend products or services we would use personally and believe will add values to our readers.


