DIY DRAWING ROBOT
When we featured electronic bit maker, littleBits, I instantly knew I wanted to make something fun for the kids using the bits. I’m not an engineer by training, nor do I have the technical knowledge to make things from scratch. Which is why I love the idea of circuit boards that snap together – making it fun and easy to build what you want.
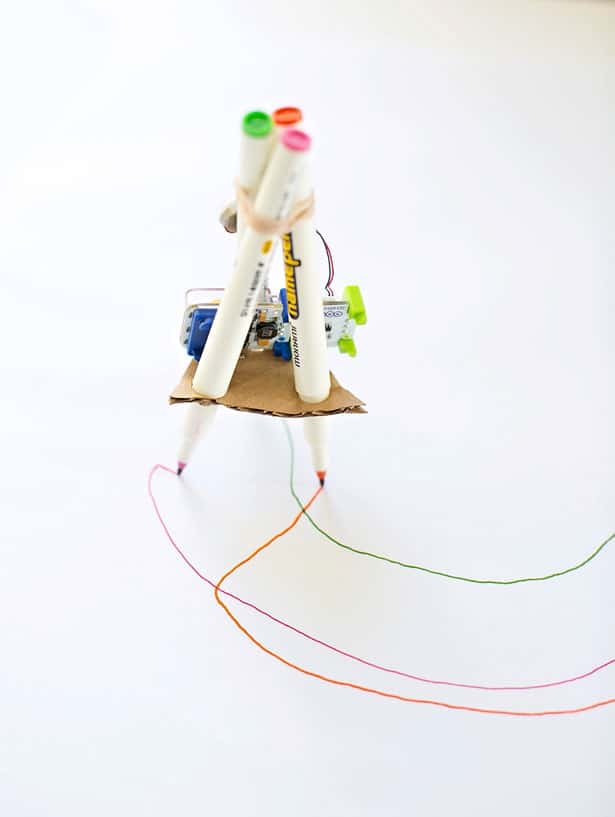
Since my kids are interested in art, we decided to make a drawing robot! This took some thought on how to put together, but once we decided on a plan, it was a breeze to make. Take a look below at how to make your own drawing robot. He is so much fun! We have yet to name him, but some names that have come up are Robbie the Robot and Marker Man.
(Note: this post is not sponsored by littleBits. I happen to think the product is cool and wanted to try it for myself).
DIY Drawing Robot – Materials:
– littleBits coin battery (this is what powers the robot and it’s rechargeable with an included USB cord)
– littleBits vibration motor (this is what makes the robot moves, similar to how a cell phone vibrates)
– small piece of cardboard
– thin markers
– rubber bands
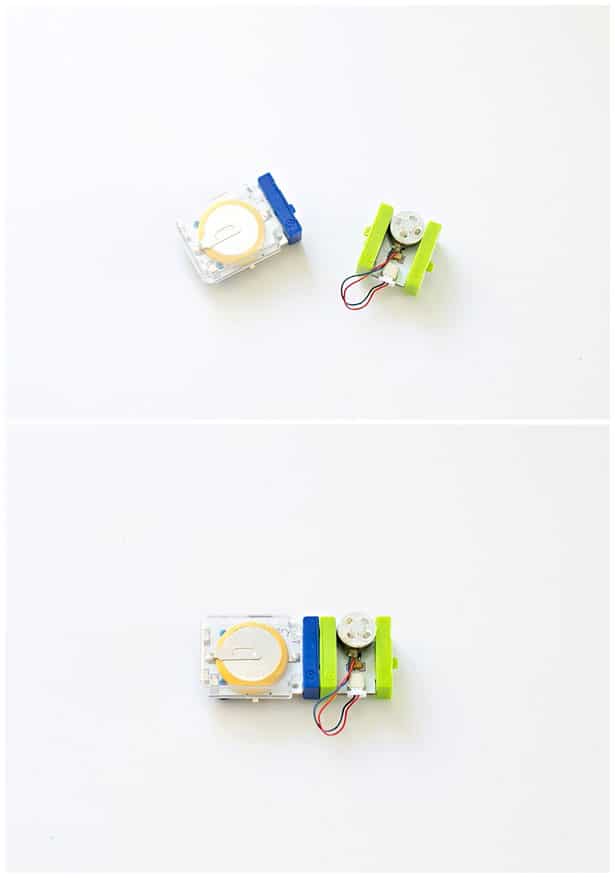
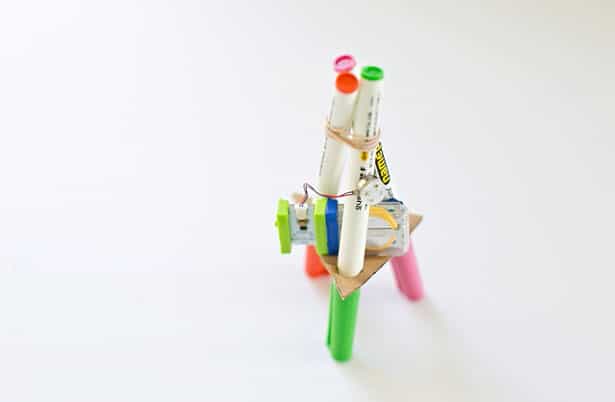
Here is a close-up of the bits. The blue is the coin operated power and the green is the vibration motor. They snap together magnetically and are ready to use! The blue bit has a tiny switch that powers it on.
Steps:
1. We tried many variation of this drawing robot, first using clothespin to hold the markers attached to a wide piece of cardboard, but since the bits are small (hence the heavier the parts, the easier it is to mute the vibration) we realized quickly that we needed to make this as light as possible.
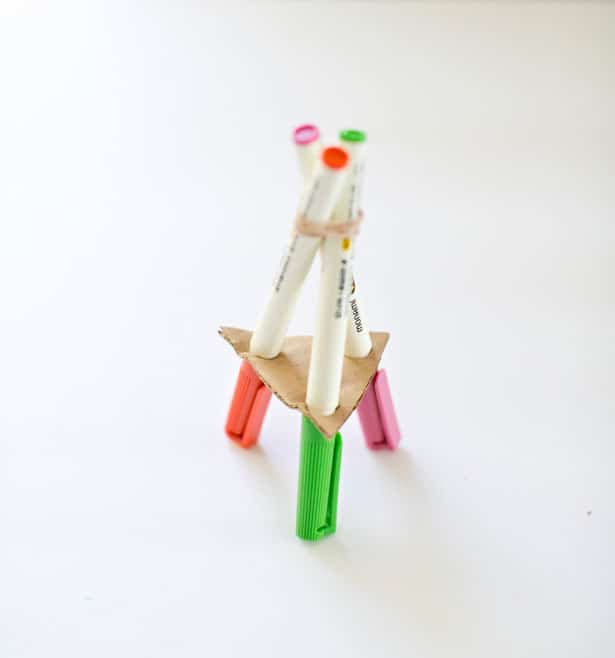
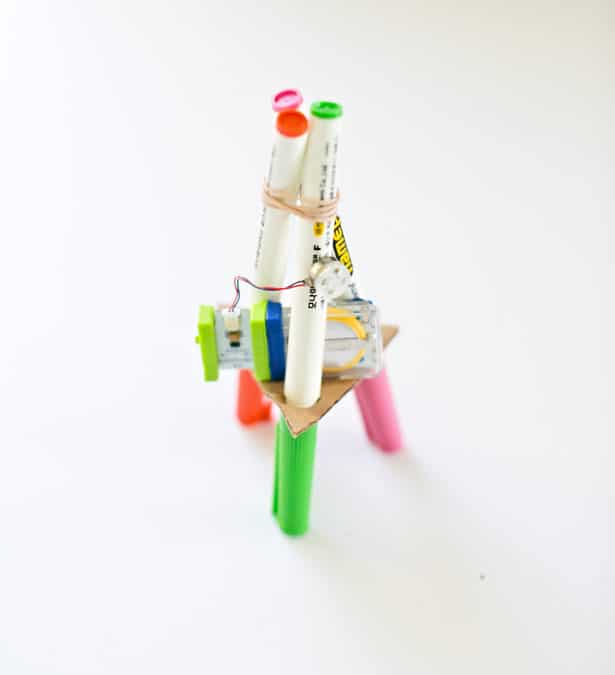
The easiest method was to cut a piece of cardboard into a 2″ triangle and punch three holes to fit each marker through. You want to use fine point, thin markers here, heavier types will not work. Then gather the markers at the top and rubber band them together (see below)
2. Then you want to place the attached bits in the center and place the vibration motor on one of the markers or in the center. There is a bit of adhesive to the motor part that causes vibration (clear circular part) so it attaches itself. Or you can use a tiny bit of double-sided tape.
And you’re done! Now for the fun part…let’s watch the robot draw!
.jpg)

You can switch things up by also making a square base instead of triangle which changes the drawing patterns. Like this below:

An interesting thing we found was that the robot doesn’t always move the same way. For example, the triangle base doesn’t always draw circles (as shown in video at top of post), but the drawing patterns depend on where the vibration circle is placed. Here’s a video of the robot drawing straight lines, for example.
We did try using small paintbrushes instead of markers, but the friction of the paint hitting paper was too heavy for the robot to move much. If anyone has suggestions on doing this with paint, please drop us a comment!

This was fun and educational for both kids and adults. The project provides open-ended thinking, trial and error, and testing hypotheses. For example how could we make this light enough to work? How would different shaped cardboard affect the drawing patterns? Would paint-brushes work?
The neat part about this project is that the bits are not attached to the cardboard (e.g. glued down), so you can definitely use them again in another project. For example, a clothespin moving pom pom caterpillar? Just one of the suggestions that came up next 🙂
Would love to know if you end up doing this project and if so how you’d improve the process. Please share photos if you do!