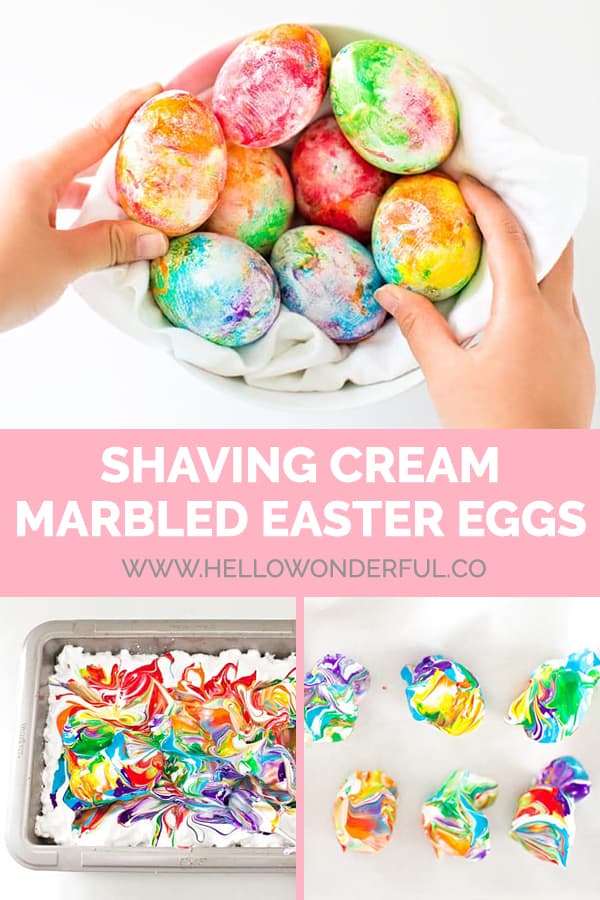
RAINBOW SHAVING CREAM MARBLED EASTER EGGS

We had such a blast with our rainbow shaving cream art that we decided to replicate the process; this time on…Easter eggs!
This colorful art set up is so easy and fun for kids. My kids LOVE shaving cream art and afterwards you’re left with a delicious smelling sensory bin that can be played other small toys.
.jpg)
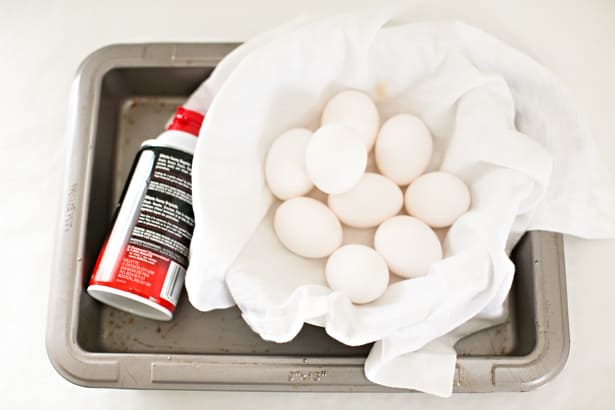
All you need for this simple project are paint, eggs, and shaving cream of course! Check out the step by step tutorial below to make your own gorgeous rainbow marbled eggs.
Rainbow Shaving Cream Easter Eggs:
– White eggs (you can use craft eggs too)
– Shaving cream (make sure it’s the foam kind)
– Paint in rainbow colors (we used washable tempera paints)
– A shallow container or baking pan
– Wooden skewer or stick
– Paper towels
It also helps to lay out parchment paper on a rimmed baking sheet to lay out your eggs to dry.
Instructions:
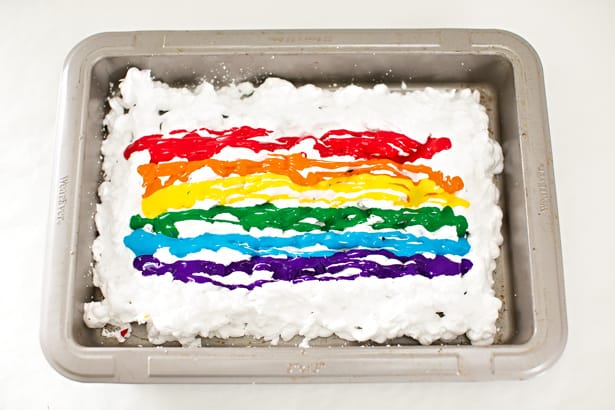
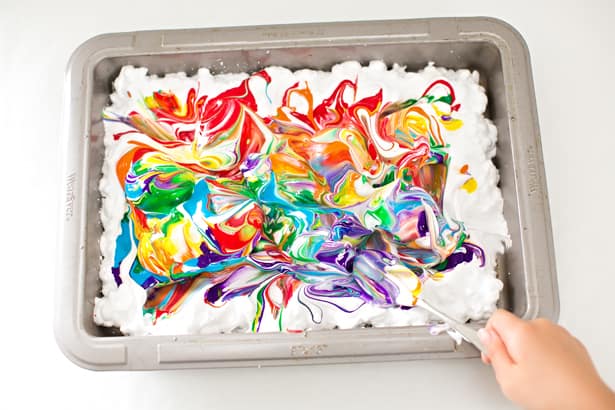
Step 1. Squirt shaving cream in an even layer onto your baking pan. Add paint as shown below in a rainbow pattern.
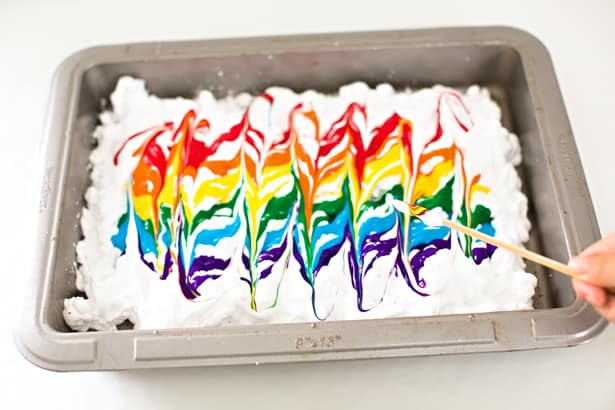
Step 2. Use your wooden skewer to swirl the colors a bit.
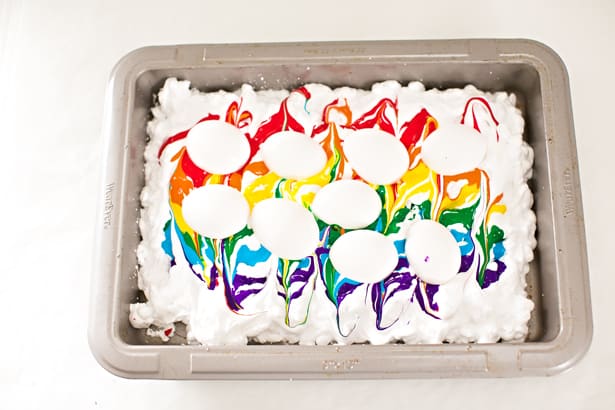
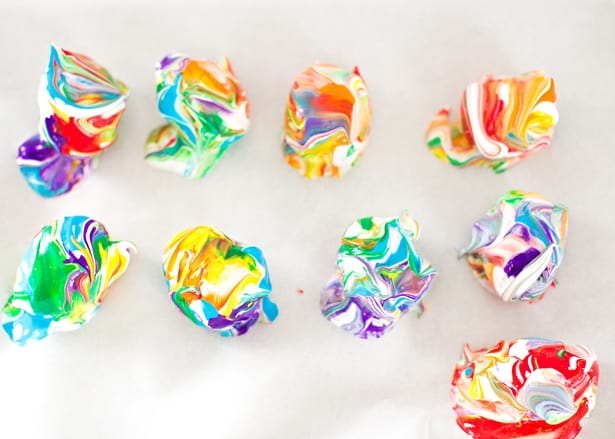
Step 3. Add your eggs. Let them sit a few minutes and then use a spoon to gently turn them over, make sure the sides get some color too. Let them sit for about 10-15 minutes.
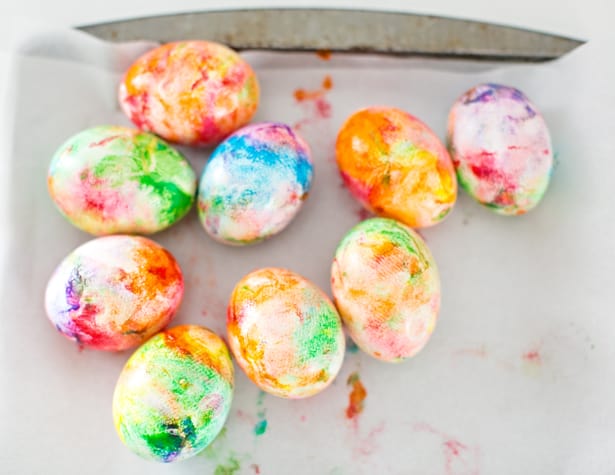
Step 4. Lift the eggs out and place them on a parchment lined baking sheet. Use paper towels to gently wipe them dry. You don’t wan to wipe in broad strokes to help preserve the colors. Take off most of the shaving cream first and then gently dab the excess shaving cream away.
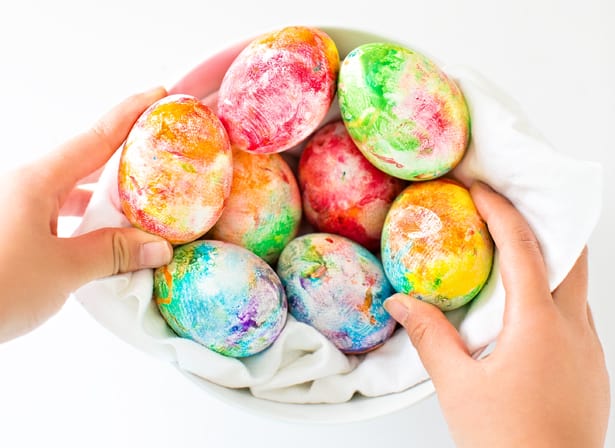
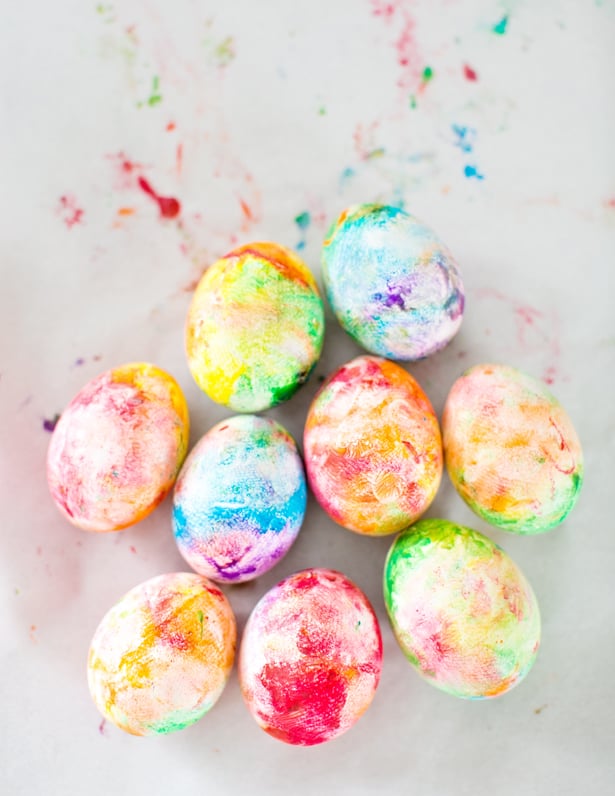
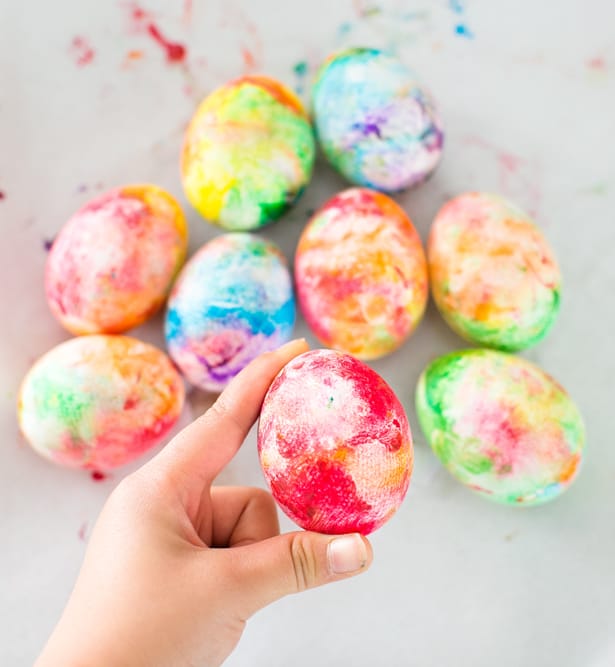
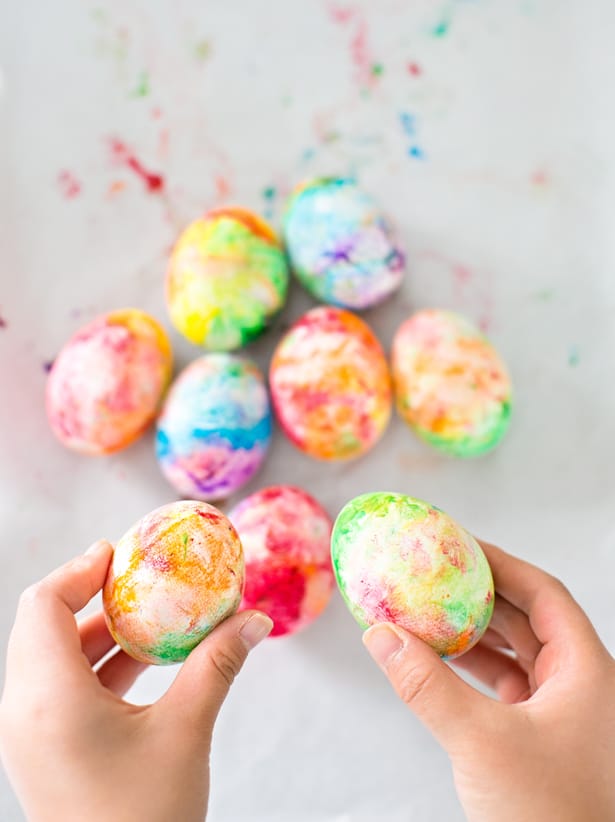
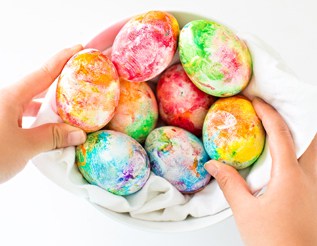
Allow to dry completely and you’re left with pretty, colorful swirled Easter eggs. Wasn’t that easy?
Afterwards, use your rainbow shaving cream bin for some sensory play with the kids!
.jpg)
What are your favorite ways to decorate Easter eggs? Check out more creative Easter ideas for kids!
Make your own gorgeous marbled Easter eggs with a colorful shaving cream art set up that is so easy and fun for kids! Step 1. Squirt shaving cream in an even layer onto your baking pan. Add paint as shown below in a rainbow pattern. Step 2. Use your wooden skewer to swirl the colors a bit. Step 3. Add your eggs. Let them sit a few minutes and then use a spoon to gently turn them over, make sure the sides get some color too. Let them sit for about 10-15 minutes. Step 4. Lift the eggs out and place them on a parchment lined baking sheet. Use paper towels to gently wipe them dry. You don’t wan to wipe in broad strokes to help preserve the colors. Take off most of the shaving cream first and then gently dab the excess shaving cream away. Allow to dry completely and you’re left with pretty, colorful swirled Easter eggs. Wasn’t that easy?RAINBOW SHAVING CREAM MARBLED EASTER EGGS
Materials
Instructions
______________________________________________________________________________________________________
Disclosure: Some of the links in the post above are “affiliate links.” This means if you click on the link and purchase the item, we will receive a small affiliate commission. Regardless, we give our promise that we only recommend products or services we would use personally and believe will add values to our readers.