MAKE RECYCLED HANGING RAINBOWS
Somewhere over the rainbow…it’s 2015 and I’m so happy to be over here at hello, Wonderful again sharing this super happy art project for kids. What’s better than battling the winter blues than making recycled hanging rainbows? Aren’t they just beautiful? In one of my art classes the kids take turns choosing the projects from week to week. One little little girl wanted to make rainbows, so we made rainbows. Hanging Recycled Rainbows! Here’s how you can do this with kids of all ages, even the little ones.
Start by saving a cardboard box from your next package. If you have a child that can already draw a curved line, show them how to make several big curves, one under another on a big piece of cardboard. We used chalk to draw our rainbows. You could use pencil, marker, pastels, whatever you have on hand. If your child isn’t able to draw a curved line yet, you can do this part for them or do it together and they can point to where they want the rainbow lines. It’s nice to involve your child in as much of the process as possible. It would sound something like this. “Let’s make a rainbow together. I really need your help. Where can I draw the first line. Do you want a big rainbow or a small rainbow? Oh, ok, right here? That’s a great spot for a rainbow.”
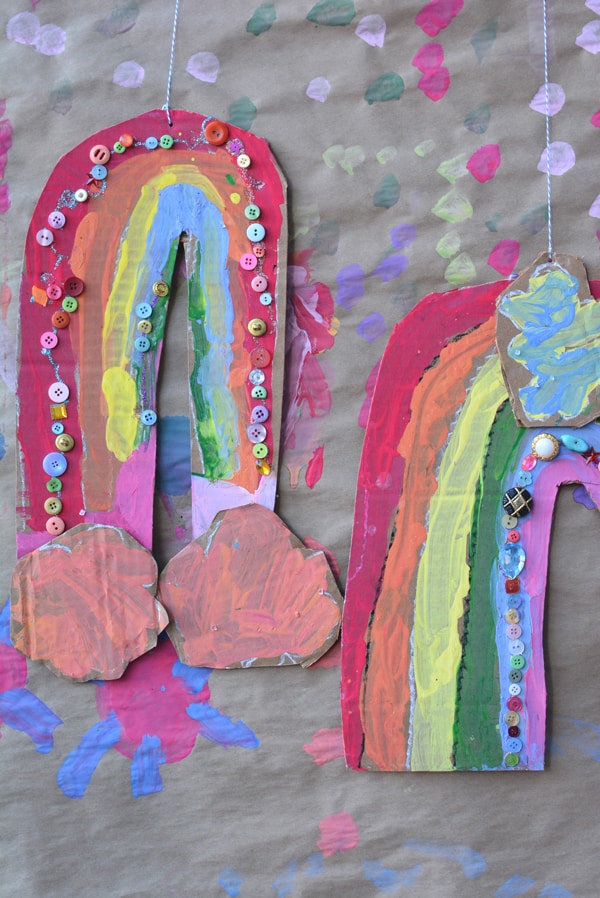
Once you have the rainbow, you may want to draw some puffy clouds on another piece of cardboard. I demonstrate first drawing small curves to look sort of like a piece of popcorn. You want to remind kids to make them on the bigger side so they aren’t so hard to cut out. Take a box cutter and cut around the rainbow shape and the clouds. You can also use a scissor but a box cutter is waaaay easier. Now, you are ready for painting.
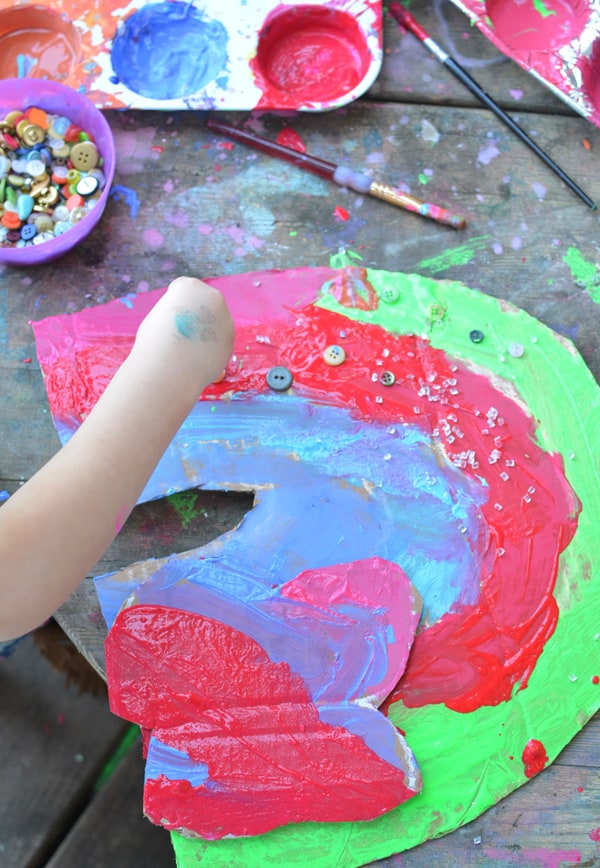
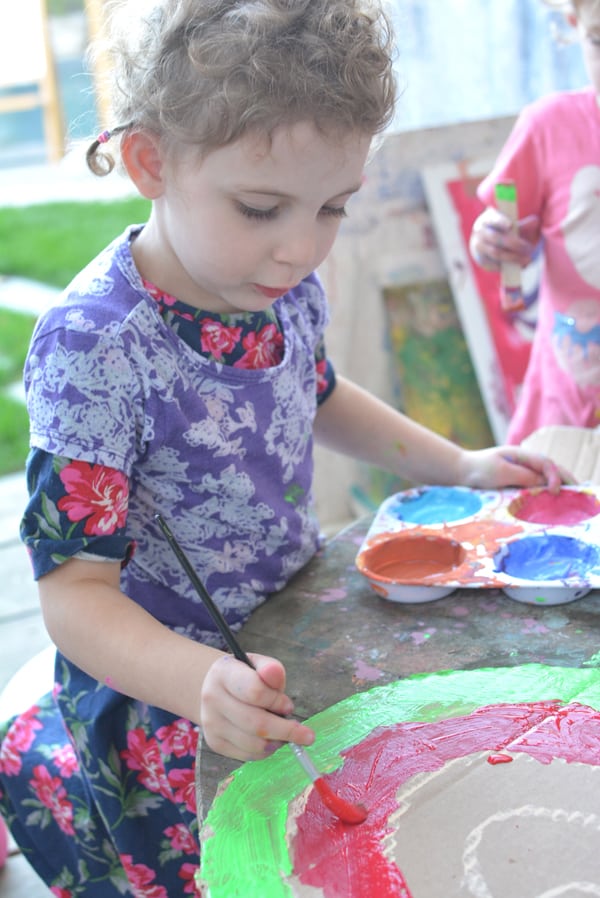
When it comes to painting, I think it’s really fun to mix your own paints and kids love to do it. It teaches color theory and colors look amazing. We don’t even bother buying different color paints anymore. We stick with white and the primary colors, red, yellow and blue. Here’s a great starter kit. I put each color in a squeeze bottle, get a paint tray or baby jar and invite kids to pick two primary colors and white to squeeze into the tray. The white is just something I encourage the kids to do to make the colors look extra beautiful. Trust me, they do!
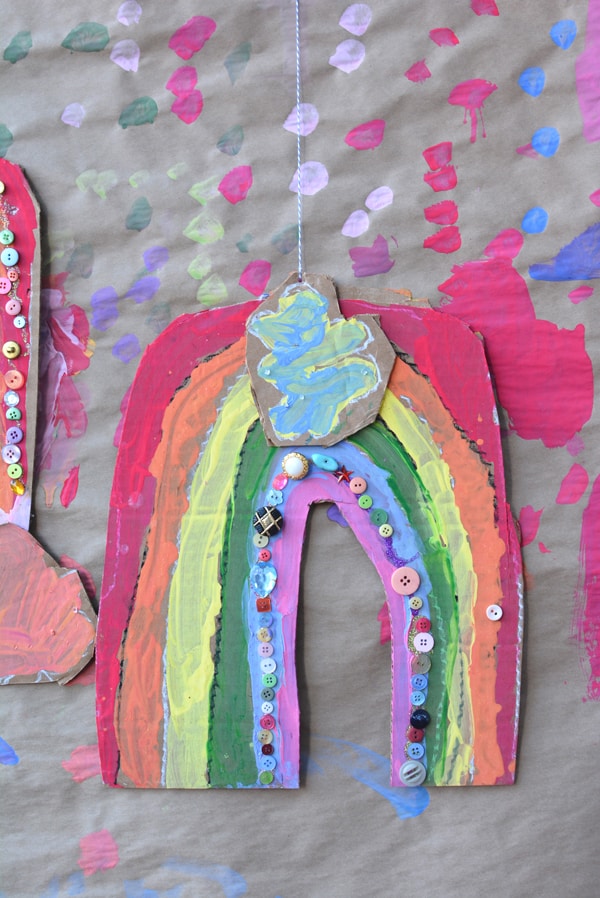
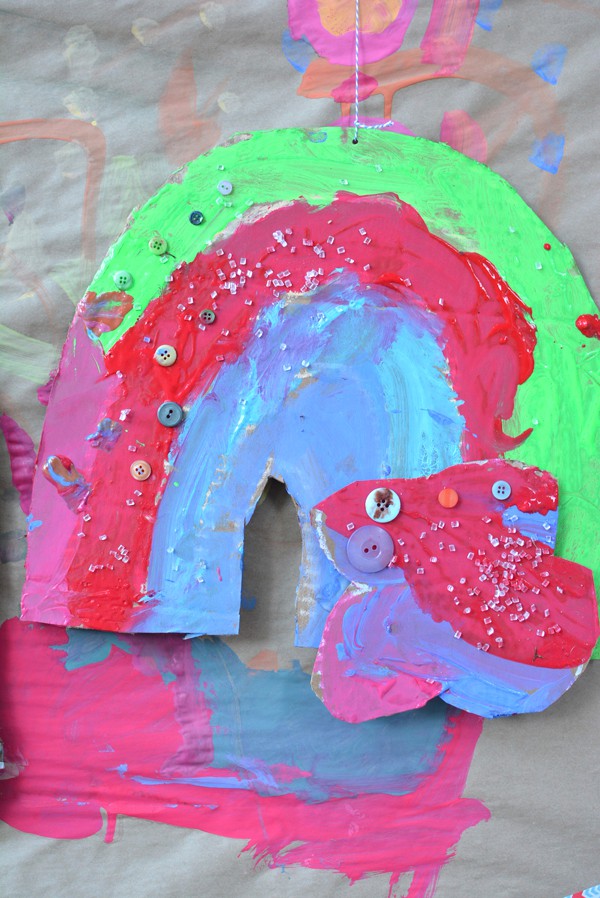
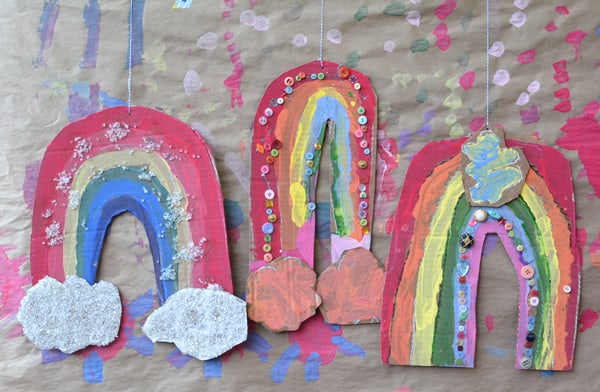
Once you have a tray filled with various rainbow colors, start painting. I like to give kids total freedom on the colors they choose. It’s their rainbow, after all. Even the clouds can turn different colors or feel free to stick to white or light blue. If your child is a stickler for the rules, try downloading a rainbow picture or looking at a book to see the order of the colors. Once everything is painted, glue the clouds to the rainbow wherever desired. Now we get to the really fun part.
.jpg)
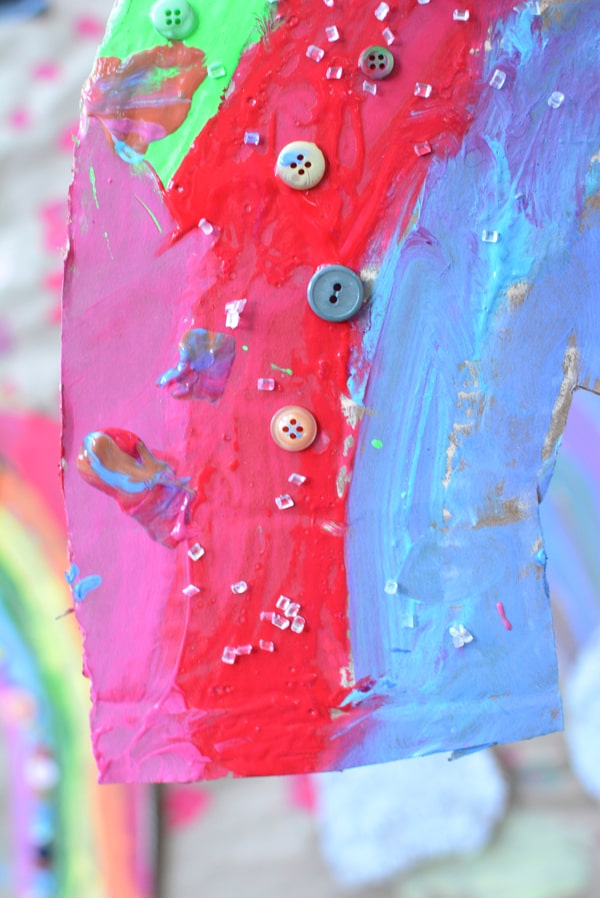
In small bowls (these are my favorite) you can set out buttons, glitter glue, beads and anything else you think would be fun. I demonstrate how to place the different special items along my rainbow. I think it’s important to explain that artists take their time and often have a plan when they are creating. I might demonstrate a color pattern or a way to follow the lines of my rainbow. It might sound something like this, “Artists are really smart because they take their time to care for their art and often have a plan. Here’s one idea, you can make a pattern with your beads. Or maybe you want to match the red buttons to the red on your rainbow. You’re an artist so I’m sure you’ll have your own ideas about what to do. I’m excited to watch you create your rainbow.”
Note – The glitter glue is great for adding the details. If the paint is wet it can also act as glue.
The final step is to punch a whole in the top of the rainbow and tie a string for hanging. These rainbows make great wall art or you can hang them from the ceiling. I hope they bring some sunshine to your winter days. Thanks for having me over today. xo Meri Cherry
Meri Cherry, yes, that’s her real name, is an arts and crafts blogger at mericherry.com. She lives in Los Angeles with her husband and two daughters. Meri works as an art teacher. She is passionate about the process of art, thrift stores, and the Reggio approach to learning.