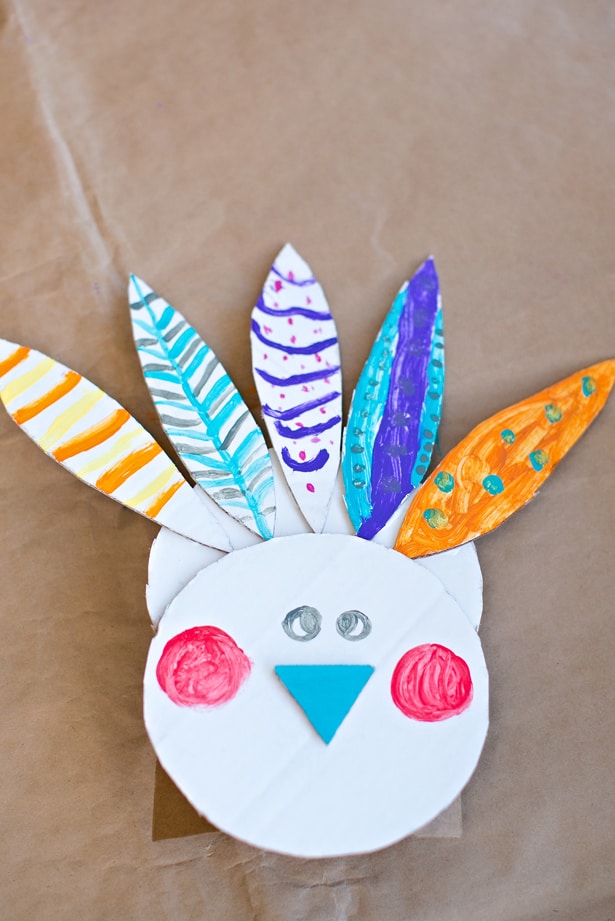
EASY PAINTED CARDBOARD TURKEY CRAFT
Looking for one more easy turkey craft? Take a look at how we made this cute cardboard bird with painted feathers. Not only is this a fun Thanksgiving craft, it’s a simple art project kids will have fun painting.
Easy Painted Cardboard Turkey Craft – Materials:
– 2 cardboard circles (about 6 inches each in diameter)
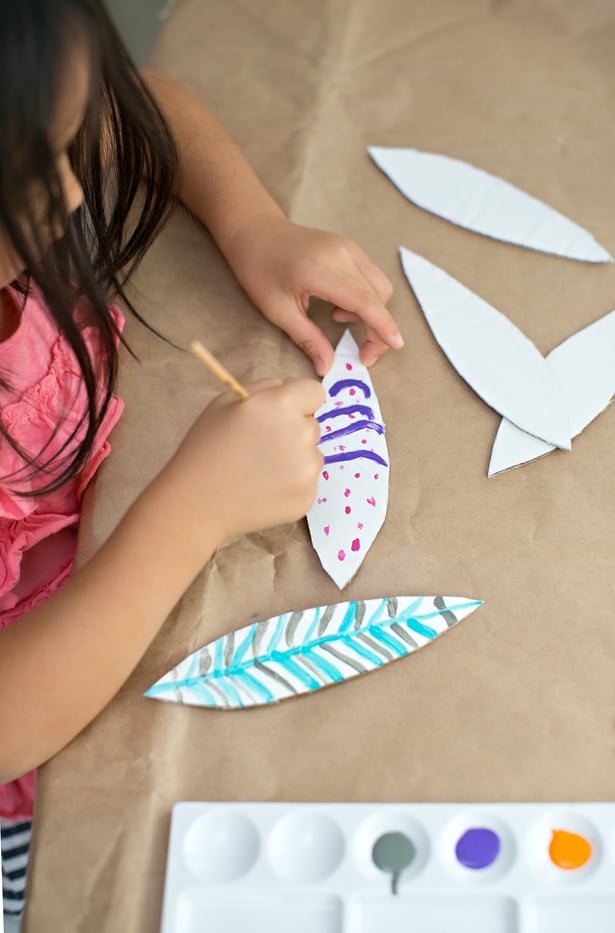
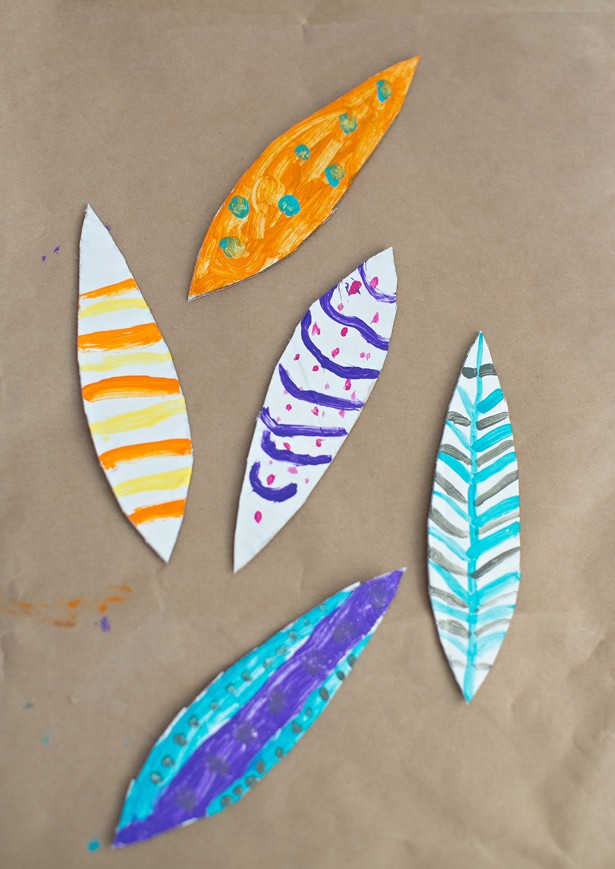
– 5 cardboard feathers (6″ long, you can draw these free-hand or find a feather image online, resize and use it as a template)
– 1 small piece of cardboard cut into a triangle (1.75″) for the nose
– White paint (or spray paint)
– Various colors of paint (we used acrylic)
– Small paint brushes
– Glue
Instructions:
Step 1. Paint all cardboard pieces white and allow to dry.
Step 2. Have your child paint designs on the feathers.
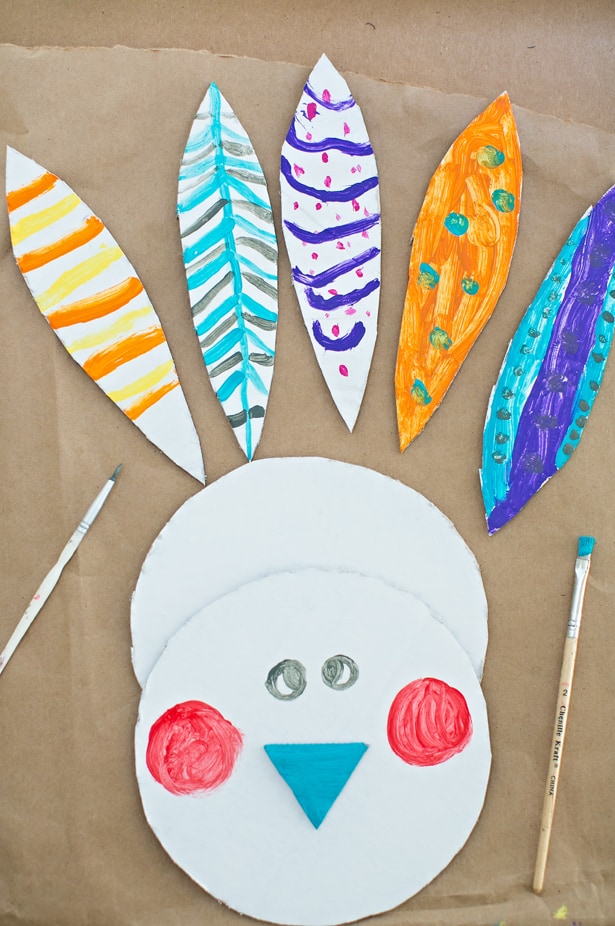
Step 3. Paint the nose (triangle) and add cheeks and eyes with paint.
Step 4. Glue the two circles together, overlapping so one circle is more prominent on top. Glue the nose and the feathers on the back. You’re done!

If you’d like, you can fold a piece of cardboard in half and glue on the back to make the turkey stand.
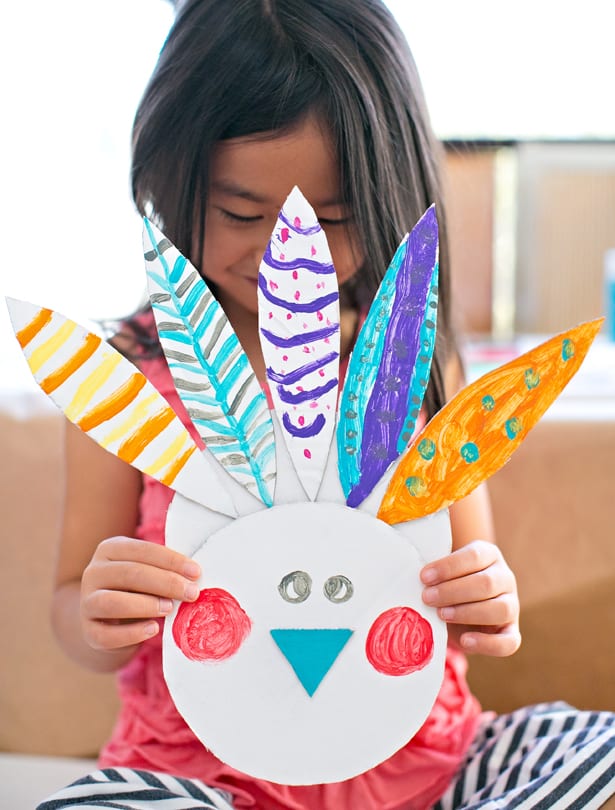
I love the bright colors and how no two feathers are alike. Painting the turkey white really makes the colors stand out. My daughter really enjoyed this easy art activity and now we have a pretty and chic turkey centerpiece for our Thanksgiving dinner!
What are some of your favorite turkey crafts? Take a look here for lots more creative Thanksgiving ideas.