
Wach the video above to see how to make Hot Pumpkin
Melted Crayon Art and make sure to subscribe to our YouTube channel for more fun videos!
Have you ever tried melted crayon art? We’ve done it before by gluing crayons to a blank canvas and melting with a blowdryer. You can see plenty of other examples of that online if you search for melted crayon art.
We’ve also seen melted crayon rocks before as shown here, here and here.
The melted crayon art on rocks was our inspiration for our Hot Pumpkin Melted Crayon Art this Halloween.
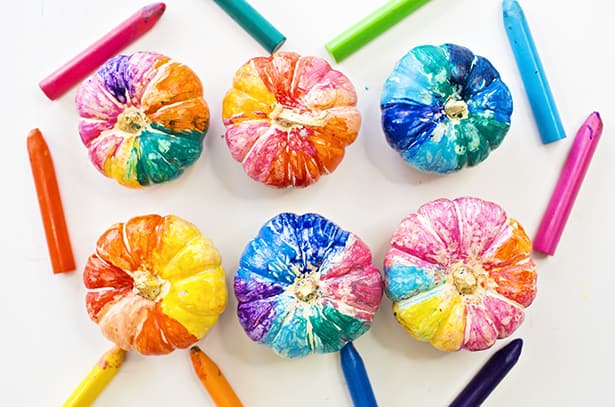
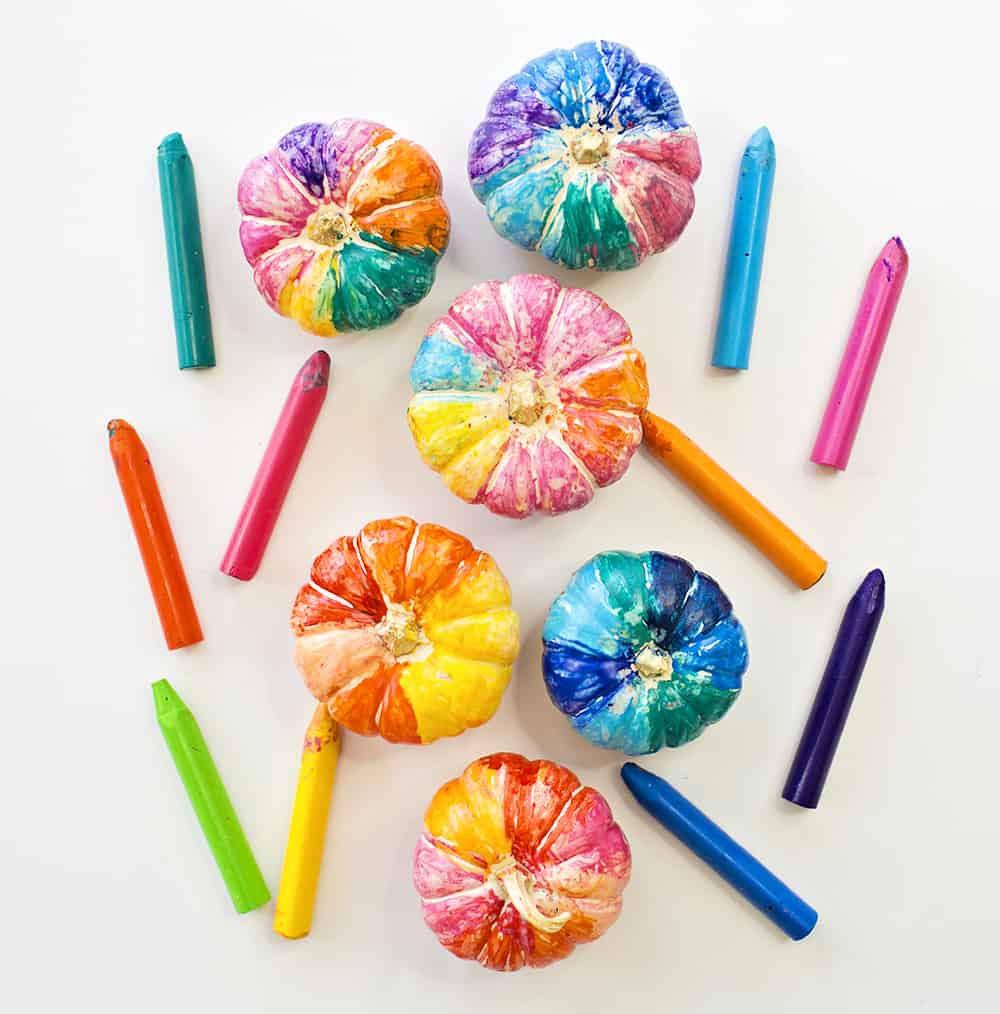
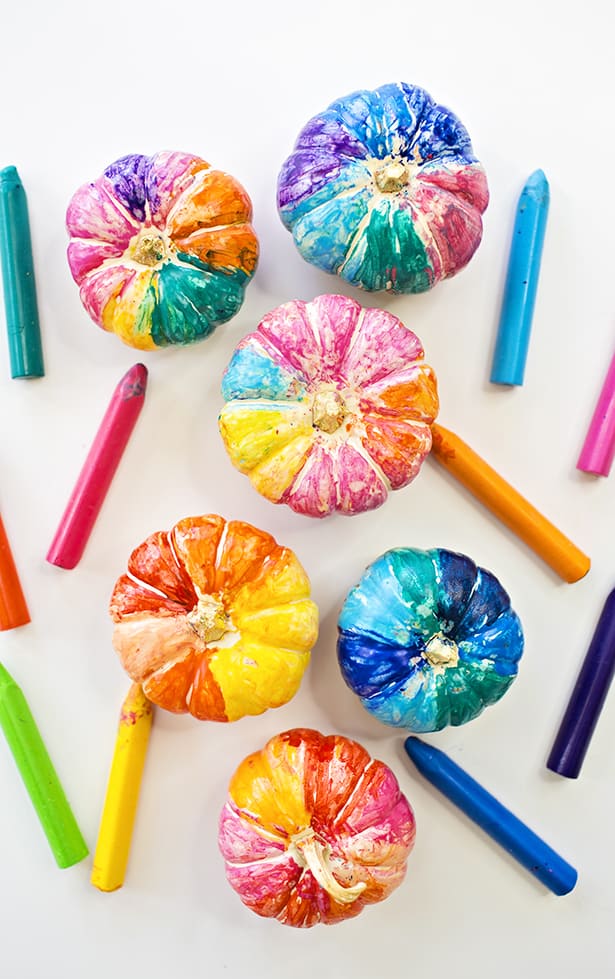
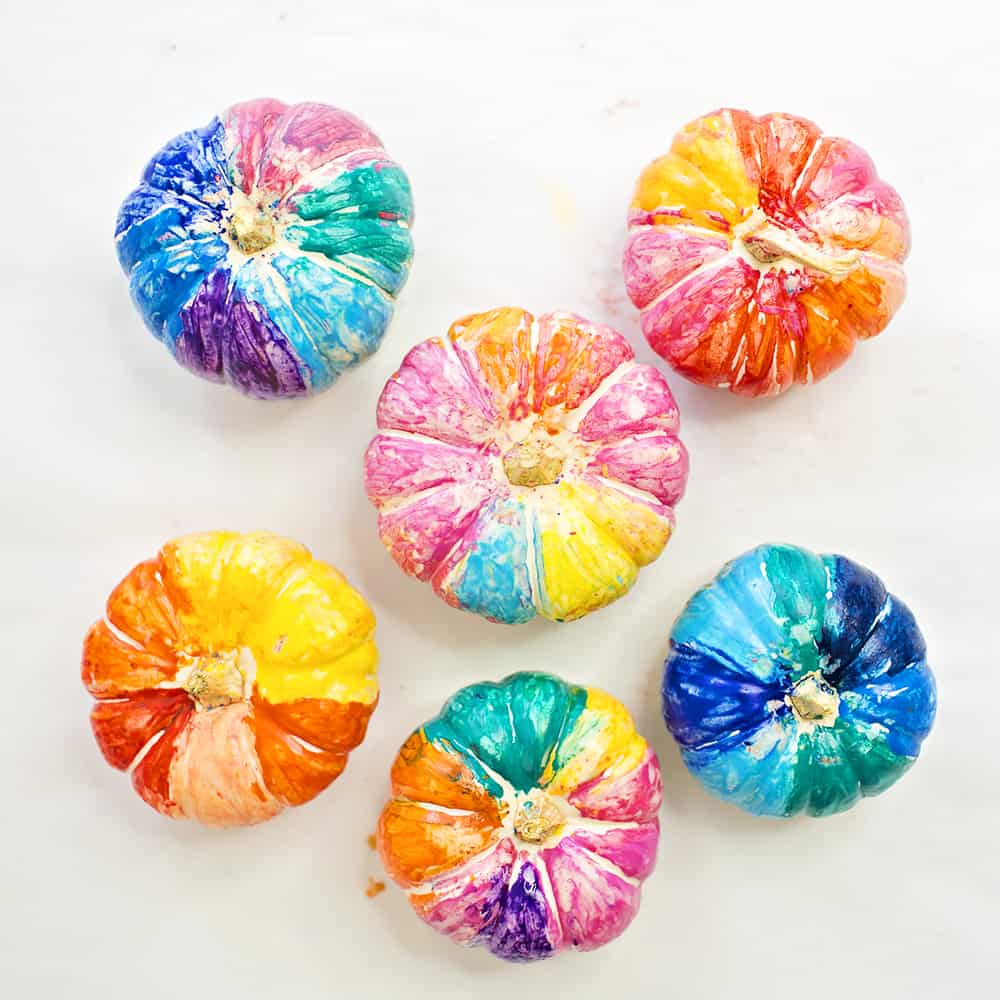
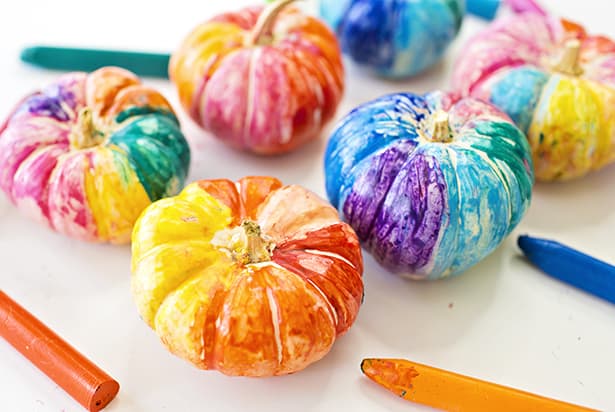
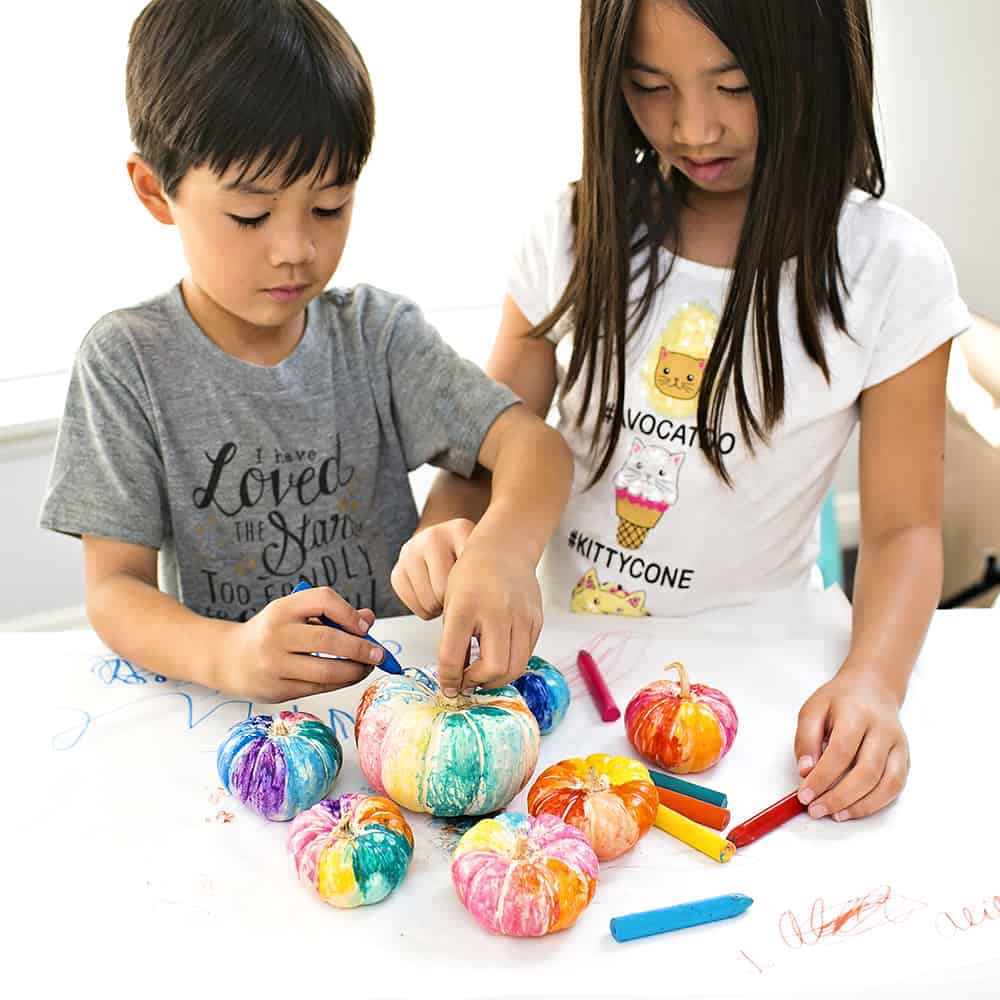
This is a super fun, no-carve pumpkin art and decorating ideas for kids. The waxy melting of the crayons on warm pumpkins leads to a swirly watercolor effect.
You definitely need adult supervision for this project though as the pumpkins need to be warmed up in the oven first.
Get the tutorial and tips below to make your own pumpkin melted crayon art. Or watch the fun video above!
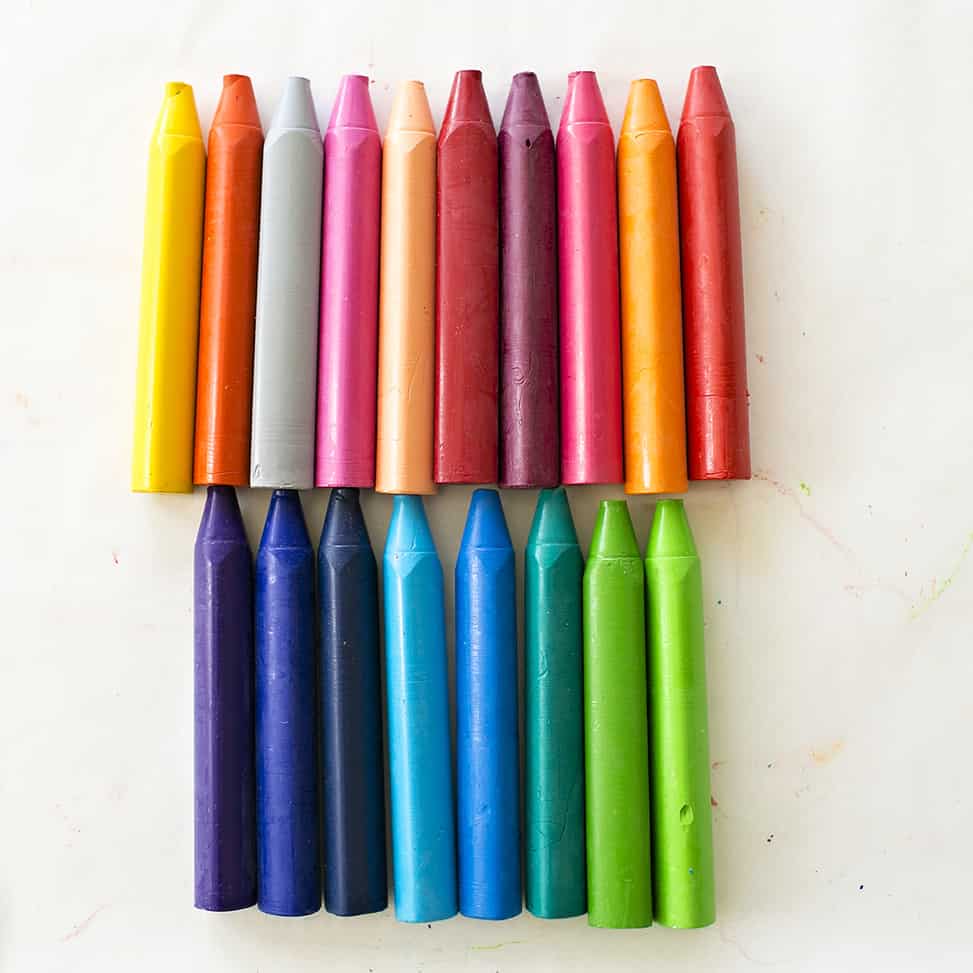
Hot Pumpkin Melted Crayon Art – Materials:
– Small white pumpkins (you can find these at most grocery stores)
– Parchment paper or foil
– Crayons (to keep it safe, we recommend thick crayons not tiny broken pieces. We love these brilliant colored thick crayons from OOLY)
Instructions:
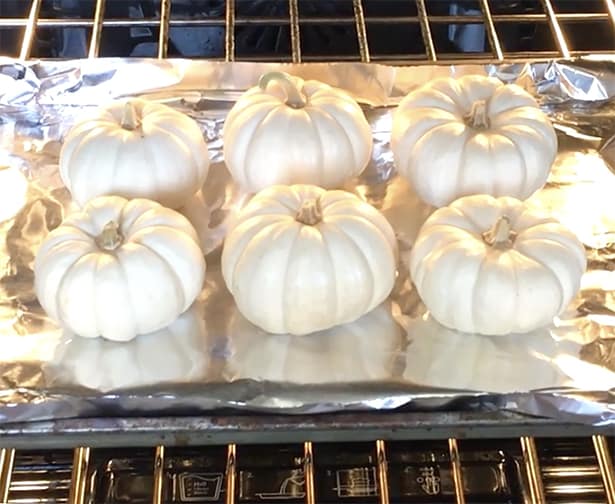
Step 1. Warm up your pumpkins on a preheated 300 degree oven for about 15 minutes (note we don’t want to “cook” the pumpkins” so make sure they don’t turn soft). This really depends on the size of your pumpkins. We chose small ones so they would warm up quickly.
Step 2. Set up parchment paper or foil on a table. Use tongs to carefully place your hot pumpkins on the paper. Start slowly gliding a crayon over the sides of the pumpkin, letting the wax melt. Repeat with more colors.
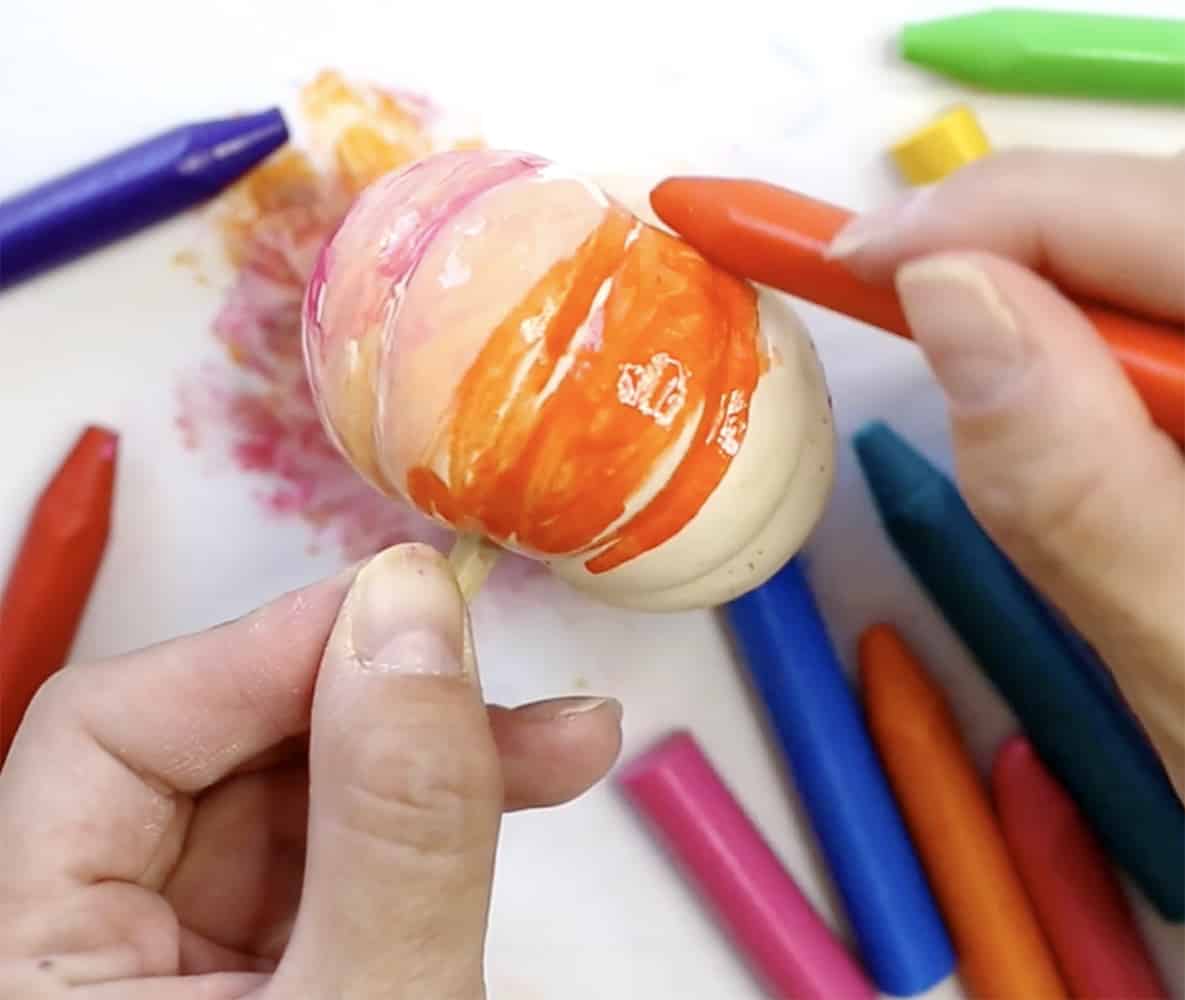
Over time, we were able to pick up the stem which wasn’t as hot as the pumpkin to make decorating the sides easier. You can also cover the stem with foil to pick it up with less heat.
For kids, you can turn the pumpkin upside down and/or give them a slightly larger one to decorate with a wider surface area.
Another tip is – if your pumpkin turns cool, set it in the microwave for just 15-20 seconds on top of a paper napkin. This will warm it up quickly without having to go back in the oven.
*Make sure there is always adult supervision and have cool cloths or a bowl of cool water nearby just in case.
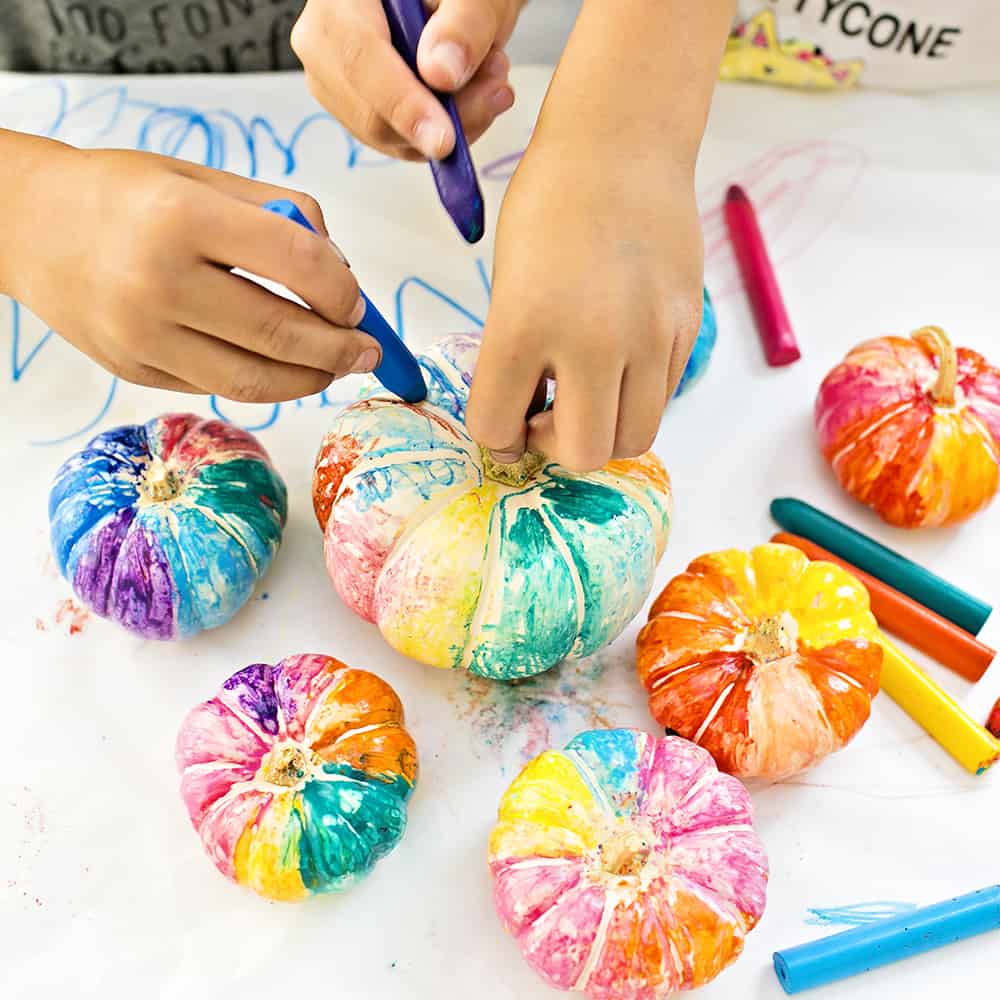

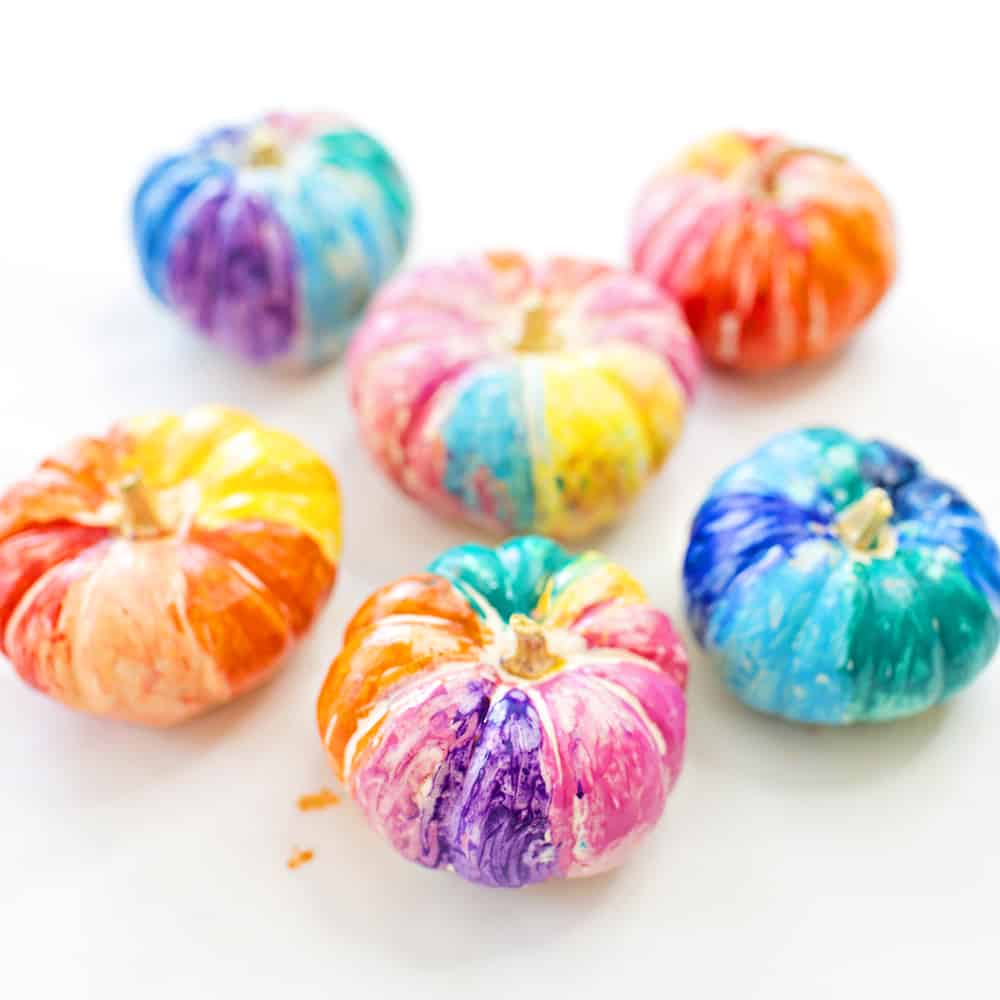
We love the bright waxy colors from the crayons and how beautiful our hot pumpkin melted crayon art turned out!
What are your favorite ways to decorate pumpkins?
Check out our Squeeze Paint Pumpkins, 25 No Carve Pumpkin Ideas for Kids, and Artsy Pumpkins.
TONS more creative Halloween ideas for kids HERE.
______________________________________________________________________________________________________
Disclosure: Some of the links in the post above are “affiliate links.” This means if you click on the link and purchase the item, we will receive a small affiliate commission. Regardless, we give our promise that we only recommend products or services we would use personally and believe will add values to our readers.