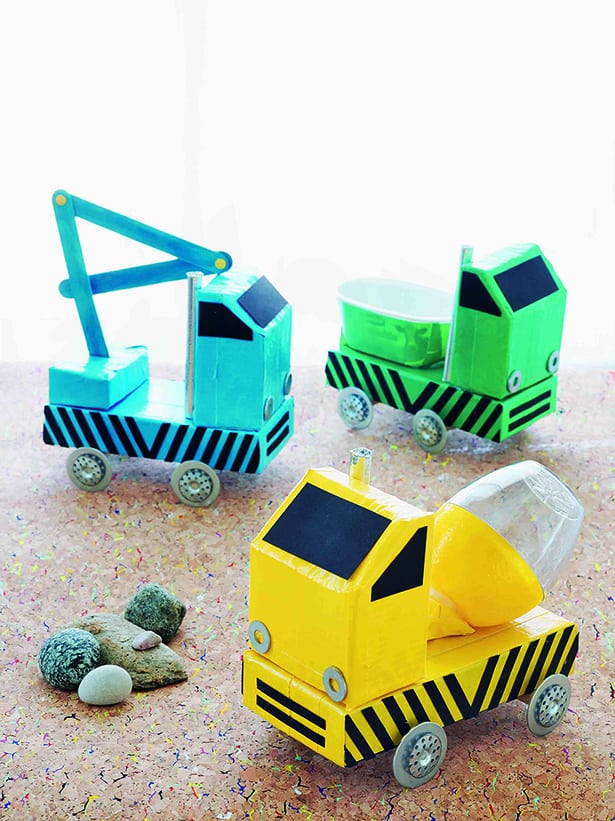
DIY CUSTOM CONSTRUCTION VEHICLE CRAFT
As a mom to a 6-year-old boy that loves all things that go, we have made a lot of vehicle crafts together. I've learned (the hard and time-consuming way) that they need to do just that...GO! Ever since he could wield a glue stick, he's wanted to make things that fly, sail, or zoom, and that was a huge consideration as I crafted over 60 projects for Project Kid: Crafts that Go!
.jpg)
Excerpted from Project Kid: Crafts that Go! by Amanda Kingloff (Artisan Books). Copyright © 2016. Photographs by Alexandra Grablewski.
When it came to the Dirt chapter, I knew I had to build some hard-working construction vehicles, but I was challenged by how to make them out of different materials. And then it dawned on me that if I created one simple structure, a kid could choose which truck he wanted to make: a dump truck, a cement mixer, or a crane truck. And then to build the fleet of vehicles, he'd be an expert by number three.
I hope you and your little engineers enjoy making (and playing with) these as much as we have!
Excerpted from Project Kid: Crafts that Go! by Amanda Kingloff (Artisan Books). Copyright © 2016. Photographs by Alexandra Grablewski.
Excerpted from Project Kid: Crafts that Go! by Amanda Kingloff (Artisan Books). Copyright © 2016. Photographs by Alexandra Grablewski.
Custom Construction Vehicle
Build the same base for each truck, then see below to outfit your vehicle of choice.
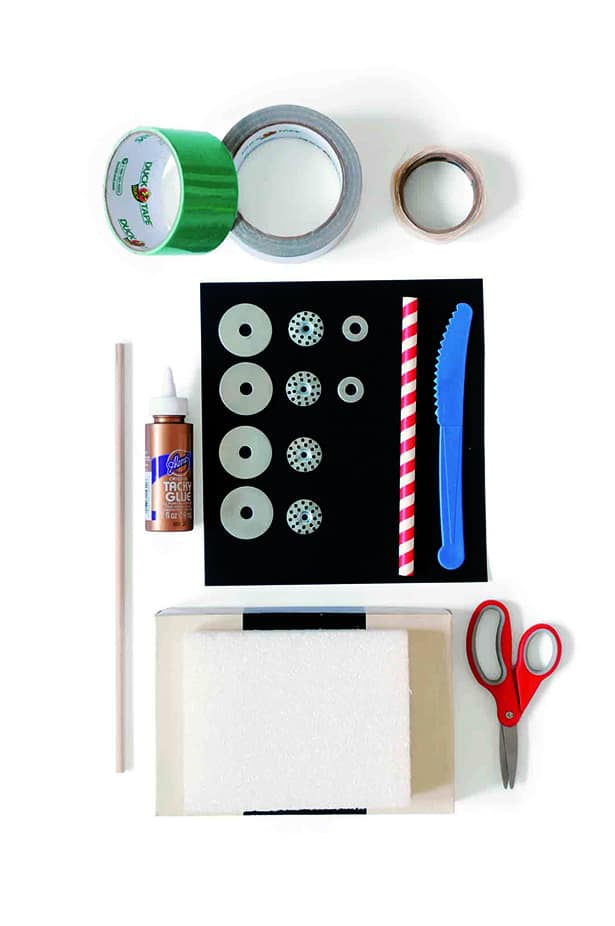
What you’ll need:
• 1 child-sized shoe box lid
• Duct tape: colored (to match your choice of truck, below) and silver
• Black paper
- Scissors
• Tacky glue
• One 1⁄4-inch balsa-wood dowel
• 6 metal washers
- four 11⁄2-inch and two 1⁄2-inch
• Four 1-inch plastic washers
• One 2-inch-thick piece of Styrofoam
• Plastic knife
• Wide smoothie straw
For the Dump Truck
• Plastic butter container
• Green duct tape
For the Cement Truck
• One 1-by-1-by-1-inch block of Styrofoam
• Yellow duct tape
• Tacky glue
• Adhesive Velcro
• Lemon saver (available from BedBathand.com)
For the Crane Truck
• One 1-by-2-inch piece of Styrofoam, the width of your shoe box
• Blue duct tape
• 3 blue tongue depressors
• 1⁄8-inch hole punch
• 2 yellow metal fasteners
Instructions:
1. To create the truck’s flatbed, cover the shoe box lid in colored duct tape.
2. Cut ¼-inch-wide strips of black paper and glue them about ¼ inch apart along each long side of the lid, half running diagonally from the right and half diagonally from the left. To create the truck’s bumpers, cut four ¼-inch-wide-by-2-inch-long strips and glue two to the front and two to the back sides of the lid.
3. To make the truck’s wheel axles, score two dowels with scissors and break to about
½ inch wider than your box lid. To add the wheels, twist a 1½-inch metal washer onto both ends of each dowel, and then glue the plastic washers on top.
4. While the wheel glue is drying, make the truck’s cab by cutting the Styrofoam with a plastic knife into a rectangle that is 4 inches tall and the width of your box lid. Slice off one corner diagonally to create the surface for the windshield. Cover the Styrofoam in colored duct tape.
5. Cut a rectangle from black paper about 1 inch shorter than the width of the cab as the windshield, and two 1-inch right triangles for the side windows and cut off the top points. Glue onto the Styrofoam with tacky glue.
6. To make the truck’s exhaust pipe, cut the straw so that it’s about ½ inch taller than the Styrofoam block. Tear a piece of silver duct tape that’s a bit longer than the straw and roll the straw in the tape. Push the excess into either end of the straw.
7. To attach the wheel axles, turn the box top over. Tear two 4-inch pieces of duct tape and fold in half lengthwise to create 4-by-1-inch strips. Lay the dowels across the edges of the lid, about 1 inch from either end. Adhere the duct-tape strips over the dowels to the underside of the box with small pieces of duct tape.
8. To make the headlights, glue the ½-inch metal washers to the bottom corners of the truck’s cab. Glue the cab onto the front of the box top and glue the exhaust pipe against the back of the cab.
Dump Truck
1. To create the dumping bed, cover the outside of the butter container in duct tape.
2. Line up the edge of the dumping bed with the back edge of the flatbed and attach it down the back with a vertical piece of colored duct tape. Tilt the dumping bed back and adhere another piece of tape underneath, sealing the hinge and securing it to the flatbed.
Cement Truck
1. Using a plastic knife, cut the 1-inch-square piece of Styrofoam in half diagonally. Cover it with yellow duct tape.
2. Glue the wedge to the flatbed of the truck with the angled edge pointing toward the back of the truck.
3. To make the mixing drum, adhere Velcro to the angled edge of the Styrofoam wedge and to the bottom of the lemon saver. Attach the lemon saver to the Styrofoam triangle.
Crane Truck
1. Cover the piece of Styrofoam in blue duct tape and glue this piece to the back edge of the flatbed.
2. Use the blade of a pair of scissors to cut a small slit toward the cab in the middle of this new piece of Styrofoam.
3. To create the crane’s boom and jib, have an adult punch holes in one end of two tongue depressors, and both ends of one depressor.
4. Attach the pieces of the crane together with metal fasteners. Insert one end of the boom into the slit and move into the desired position.

Amanda Kingloff is the author of Project Kid and the former lifestyle director at Parents magazine, where she oversaw all DIY content for the brand. Before joining Parents, Kingloff worked as a crafter and producer for lifestyle personality Katie Brown. She now posts fresh craft ideas weekly at ProjectKid.com and regularly contributes to a multitude of national magazine publications. She lives with her husband and two children in Brooklyn, New York. Projectkid.com @amandakingloff
______________________________________________________________________________________________________
Disclosure: Some of the links in the post above are "affiliate links." This means if you click on the link and purchase the item, we will receive a small affiliate commission. Regardless, we give our promise that we only recommend products or services we would use personally and believe will add values to our readers.