
EASY “SCREEN PRINTING” WITH PLAY BLOCKS
I recently came across a cool product called Inkodye which is “a creative tool that allows you to print photographic images & patterns onto fabric with natural sunlight. Here is more information what the product is all about.
You can do so many cool things with Inkodye such as print negatives and transfer onto shirts, cushions, basically any natural fabric or even a canvas.
I was most intrigued by being able to easily replicate “screen printing” at home by placing shapes onto an article of clothing, inspired by this example.
The process is very simple so I thought it would make for a fun DIY with my daughter, Alia. We thought of what we could use to create “shapes” and came up with play blocks! We have so many from various sets that it was easy to pick some favorites.
We were so happy with the results and it was exciting to see the ink “develop” before our very own eyes. The best part was that Alia was so proud to have “designed” clothing for herself and brother.
Easy “Screen Printing” With Play Blocks – Materials Needed:
1. Plain articles of clothing (we bought the dress and shirt from Old Navy on sale for under $8 each).
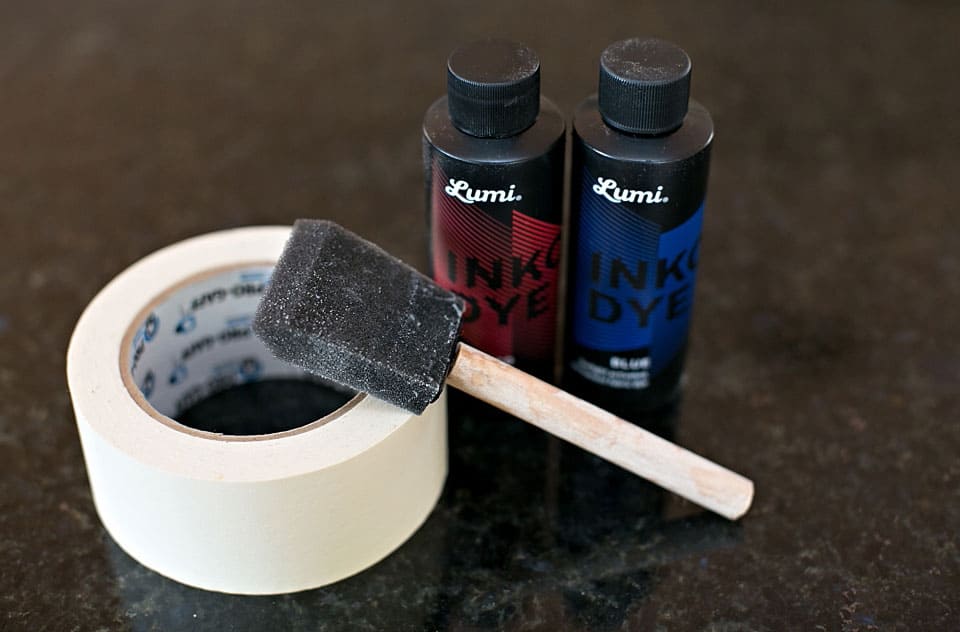
2. Inkodye (it comes in 3 colors – blue, orange and red – but we only used the blue and red).
3. Cardboard to place inside the shirt so the dye doesn’t seep through
4. Masking tape
5. Play blocks
Steps:
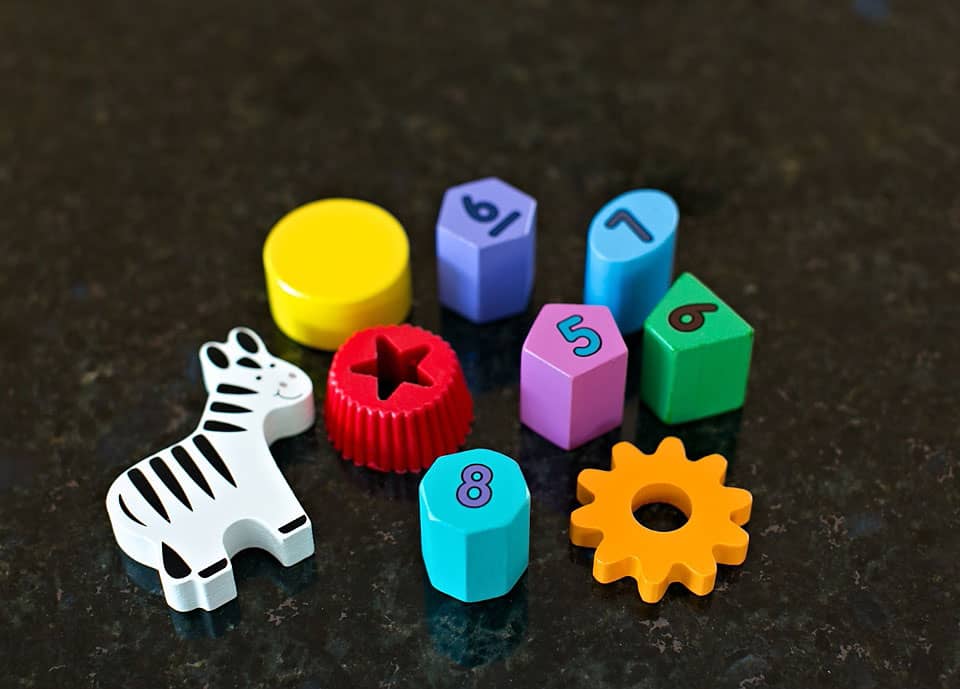
1. Lay out your materials and pick out various play blocks to use. Decide on how you want them to look agains the shirt so you have your “pattern” ready.
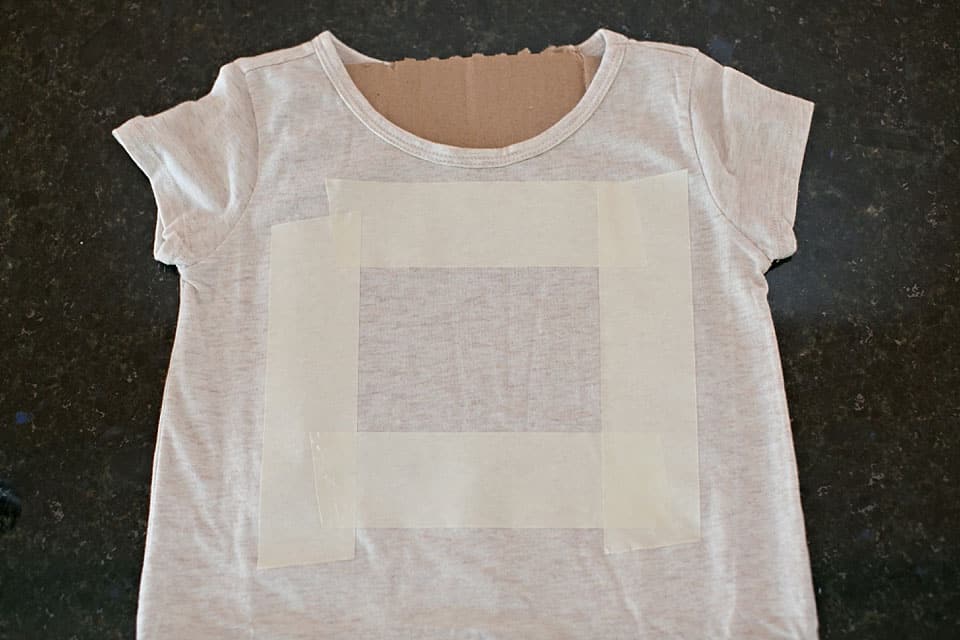
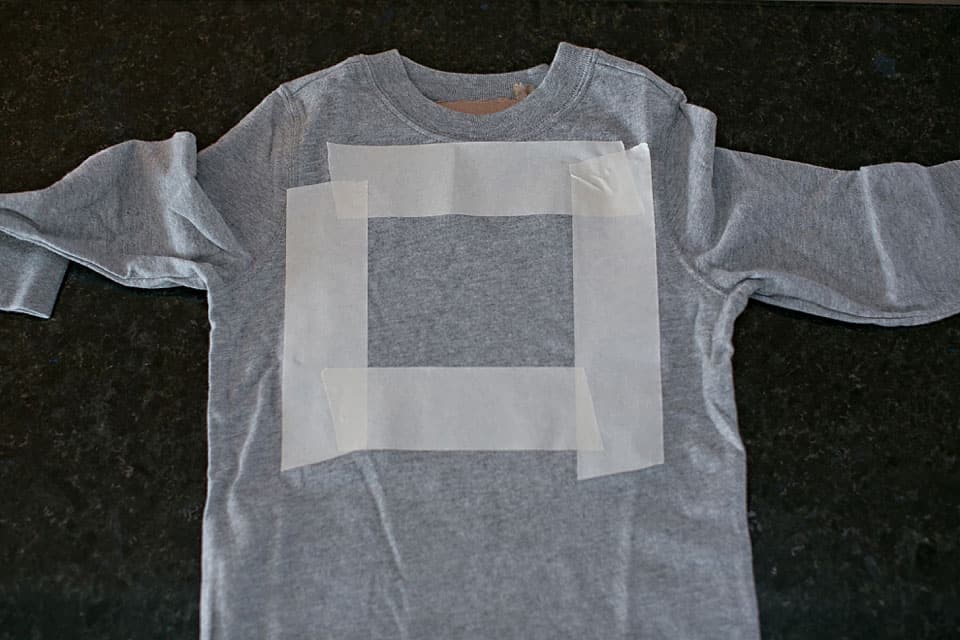
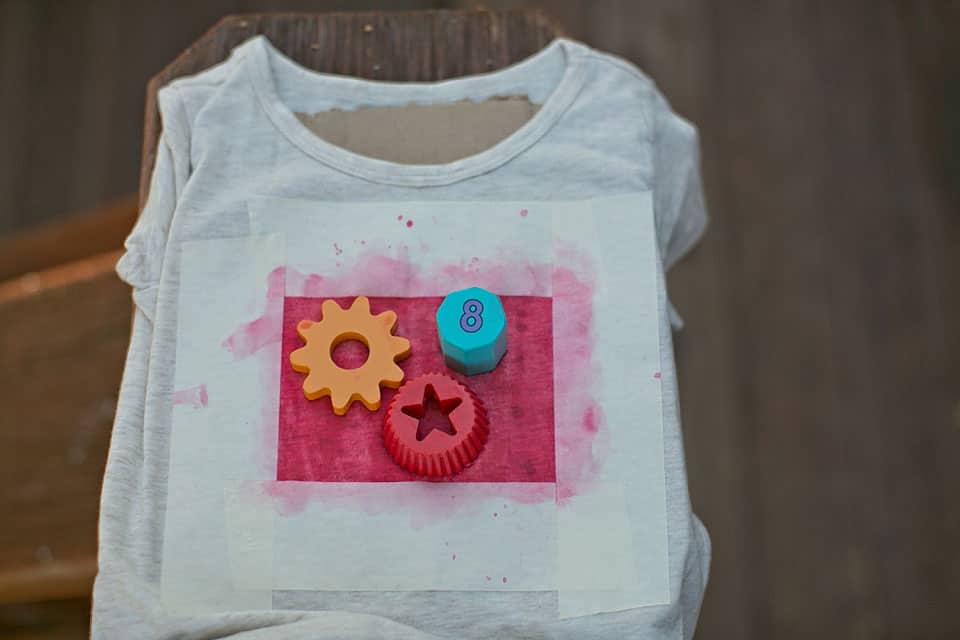
2. Mask off the area you want to Inkodye with masking tape and place the cardboard inside the shirt to cover the area to make sure the ink doesn’t seep through the other side.
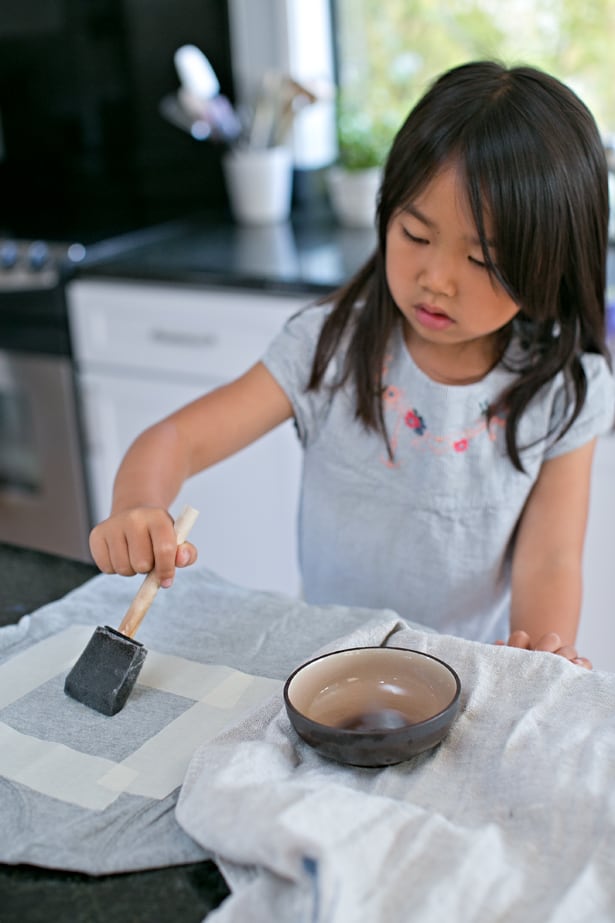
3. Place inkodye into a bowl. It’s very concentrated so we diluted with water so the ink wouldn’t be too bright since we wanted lighter colors. We used red for the dress and blue for the long sleeve shirt.
Brush Inkodye over the taped off area making sure to cover the area. Work quickly and in not too bright of a space since the ink “develops” in natural sunlight. Once you’re done applying, blot off any excess with a paper towel.
.jpg)
4. Place your block design quickly over the Inkodye. Note: the Inkodye is clear when you apply it and before it starts changing color.
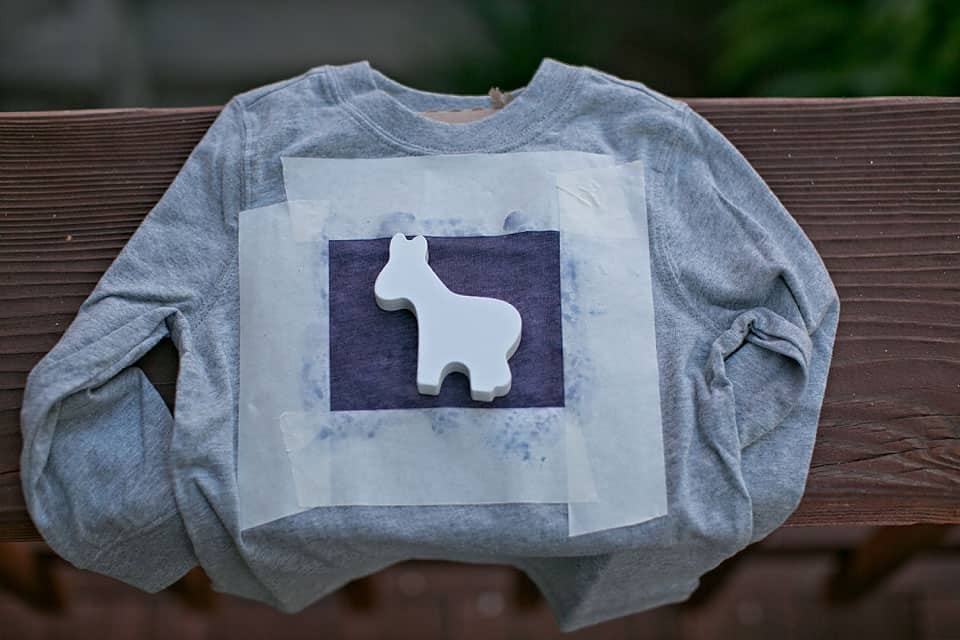
5. Move the clothing outdoors where there is sun, make sure it’s not under trees or any items that would cast weird shadows onto the dye. We didn’t pin down the blocks so we just walked carefully, making sure not to move the blocks.
Within 15 minutes, you can see the ink has developed and turned a nice color. The longer you leave it out, the darker it will get.
When you’re satisfied with the color, bring the clothing inside, remove blocks and tape and wash with soap and warm water to remove any excess dye. Inkodye recommends running under a wash and dryer to remove the extra ink, but we did this step over the sink with no issues.
We later washed with other clothing in our washer and had no issues with bleeding since we had already washed off the excess ink over the sink.
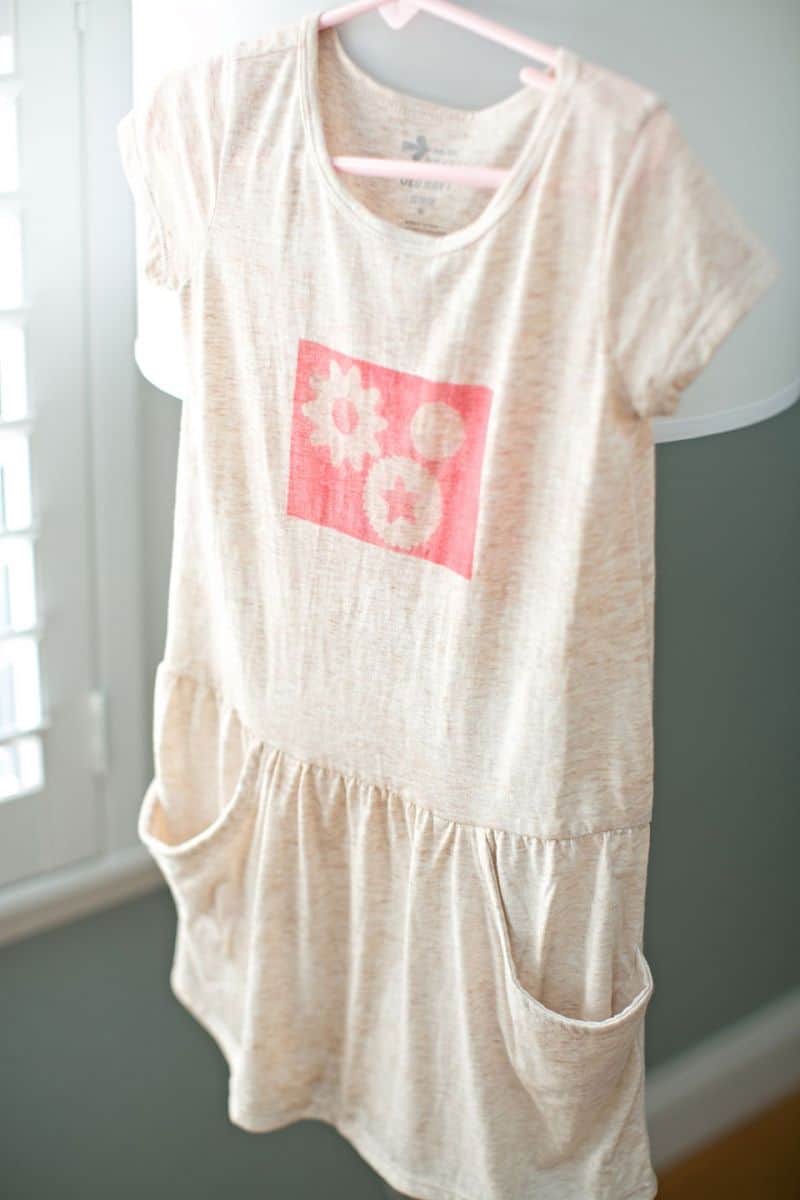
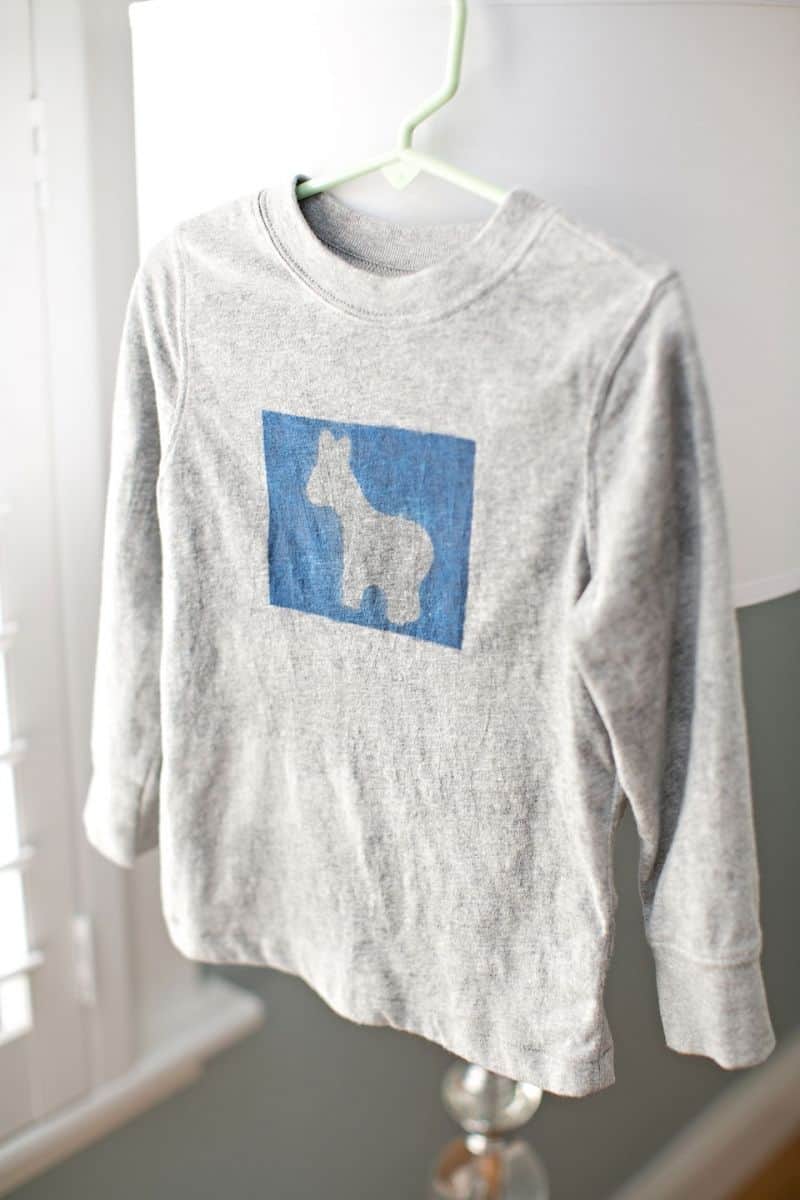
Here are the finished products. They turned out so great!
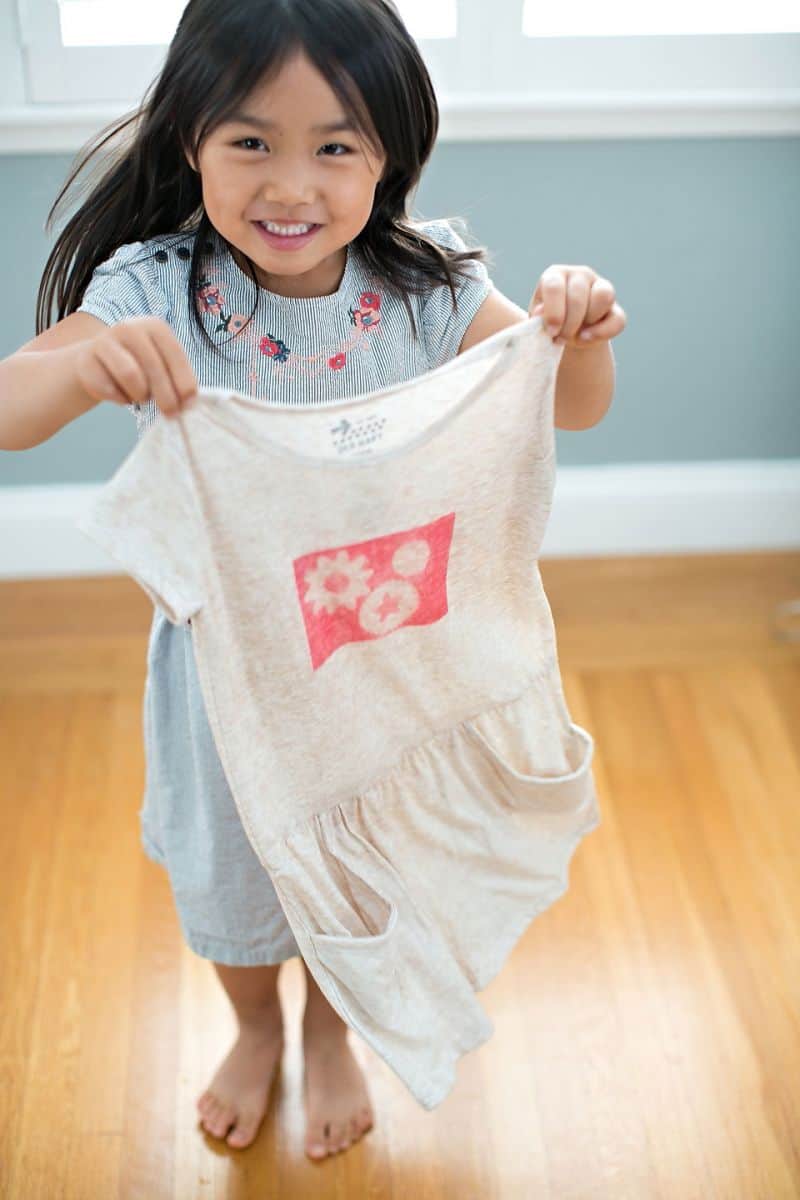
Alia was very excited about “designing” her first dress.

And making a special shirt for little brother (you might notice a dark spot right above the top of the animal design but that’s not from the ink – the shirt was still slighty damp after we washed it over the sink).
Have you ever used Inkodye before? It’s such an awesome product with many creative applications. We will definitely be making more cool things with it!
UPDATE 11/22/13 – {Giveaway} When Lumi, the company behind Inkodye found out about our easy screen printing on kids’ clothes using play blocks and Inkodye, they generously offered to giveaway a Red Starter Kit. This kit has everything you need to create your first awesome Inkodye project: 4 oz red color, 4 oz detergent, inkcap roller, instruction guide, test negative, and blank fabric swatches. It makes 4 prints at 12″ x 12.”
To enter, like our Facebook giveaway post or enter a comment below. Contest ends 11/27 at Wed 1pm PST and a winner will be chosen at random, announced on our Facebook page. Make sure to check back Wed 11/27 after 1pm PST here and on our fan page to see if you’ve won!
Update 11/27/13 – the giveaway is now closed and the winner is Kelleigh Kelley. Congrats Kelleigh!
______________________________________________________________________________________________________
Disclosure: Some of the links in the post above are “affiliate links.” This means if you click on the link and purchase the item, we will receive a small affiliate commission. Regardless, we give our promise that we only recommend products or services we would use personally and believe will add values to our readers.


