
DIY SIDEWALK CHALK POPSICLES
Follow us on Instagram for more fun ideas for kids!
Watch the video below to see how to make DIY Sidewalk Chalk Popsicles in action. Make sure to subscribe to our YouTube channel for more fun videos!
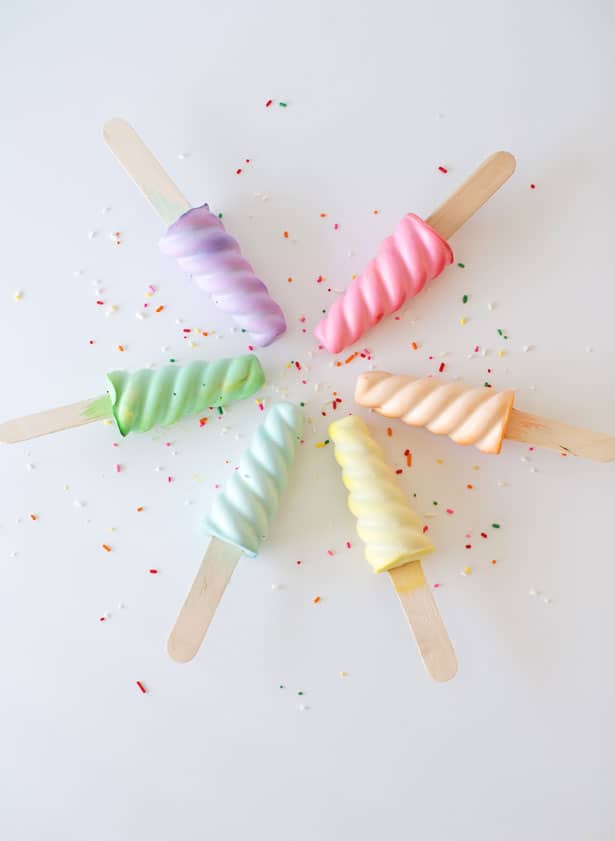
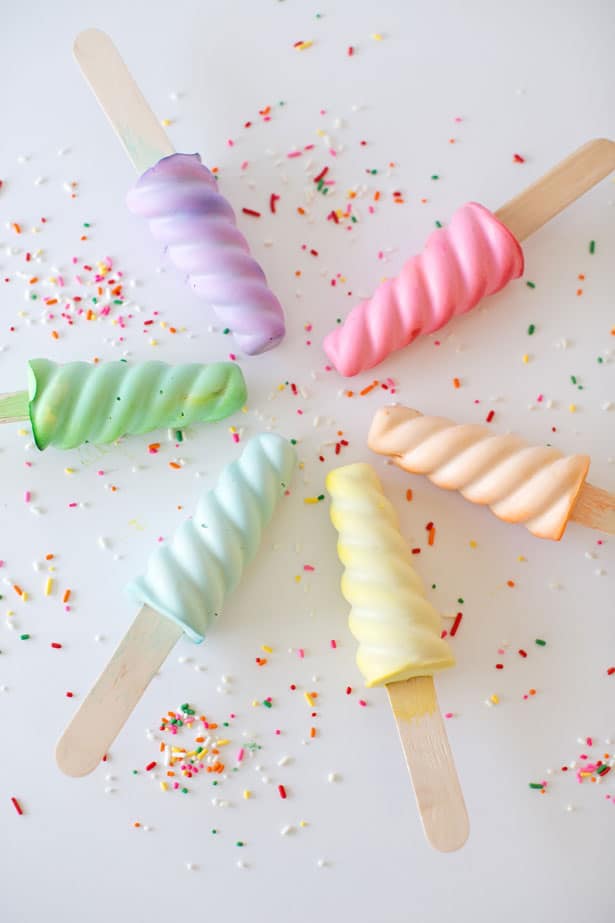
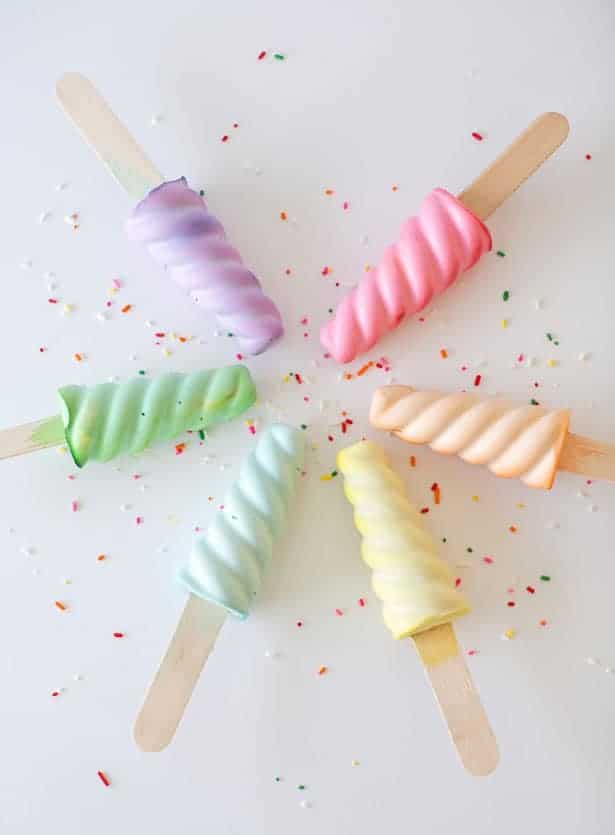
These DIY Sidewalk Chalk Popsicles are a fun summer outdoor art activity for kids that can keep them busy creating.
It's also quite simple to make with just a few items. Given the warmer summer days ahead, I decided to make some sidewalk chalk for my kids and get them excited to play outside.
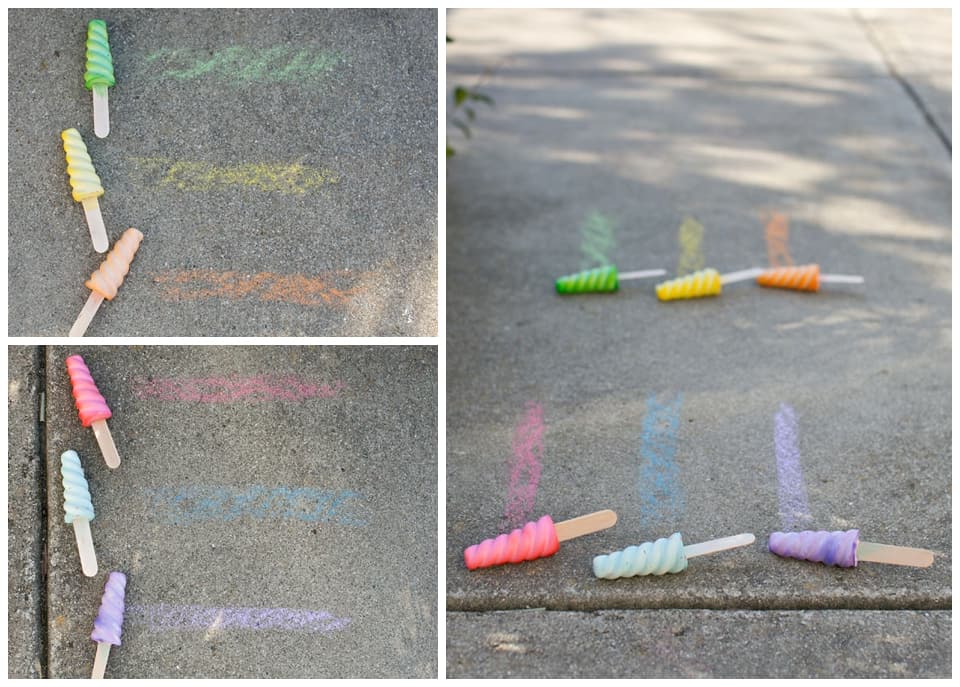
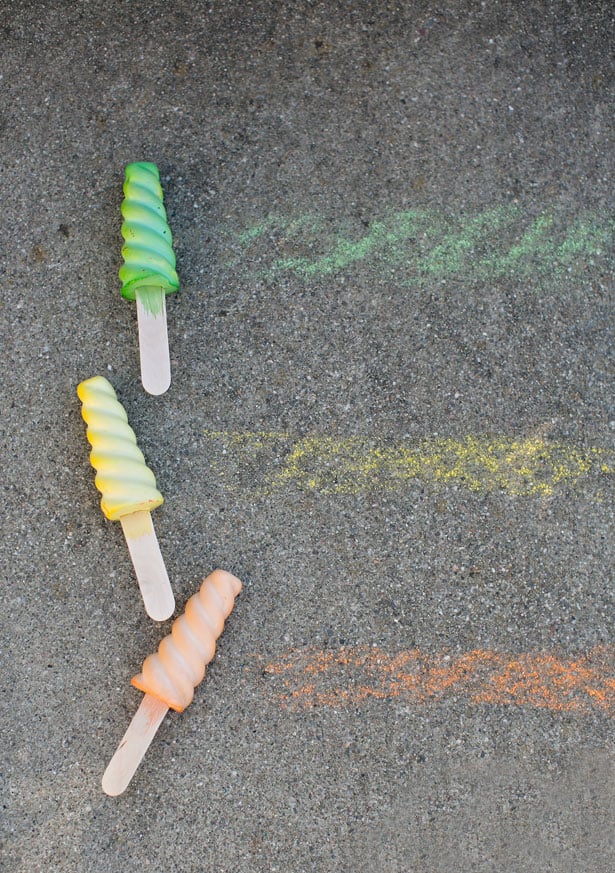
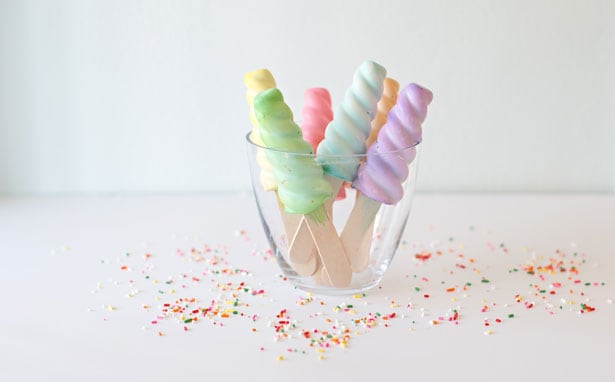
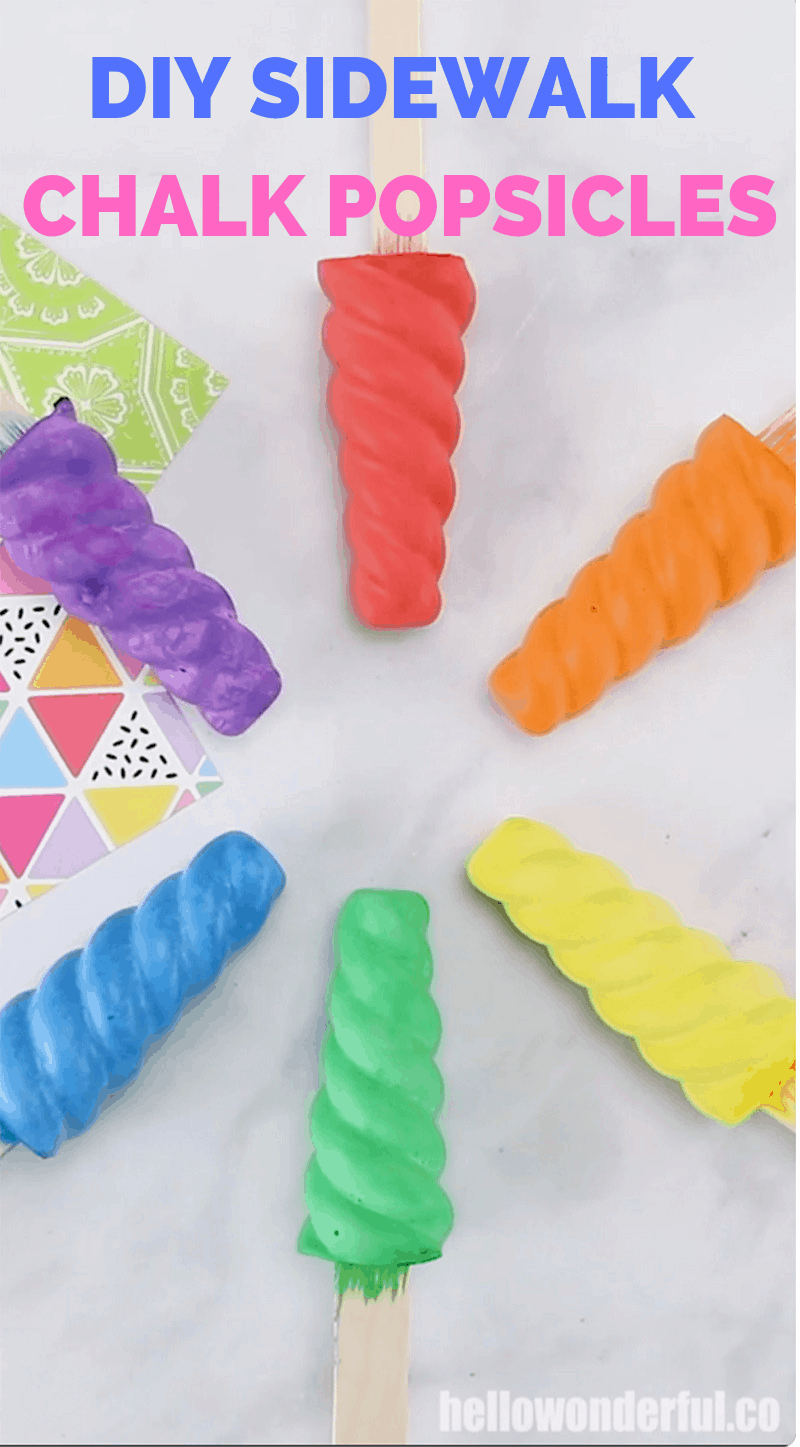
To put a fun twist on it, we made them in popsicle molds. Not only do they look more fun (and almost good enough to eat) the stick provides and additional "handle" that's easy for little fingers to hold!
We loved this so much we also made freezer popsicle paints!
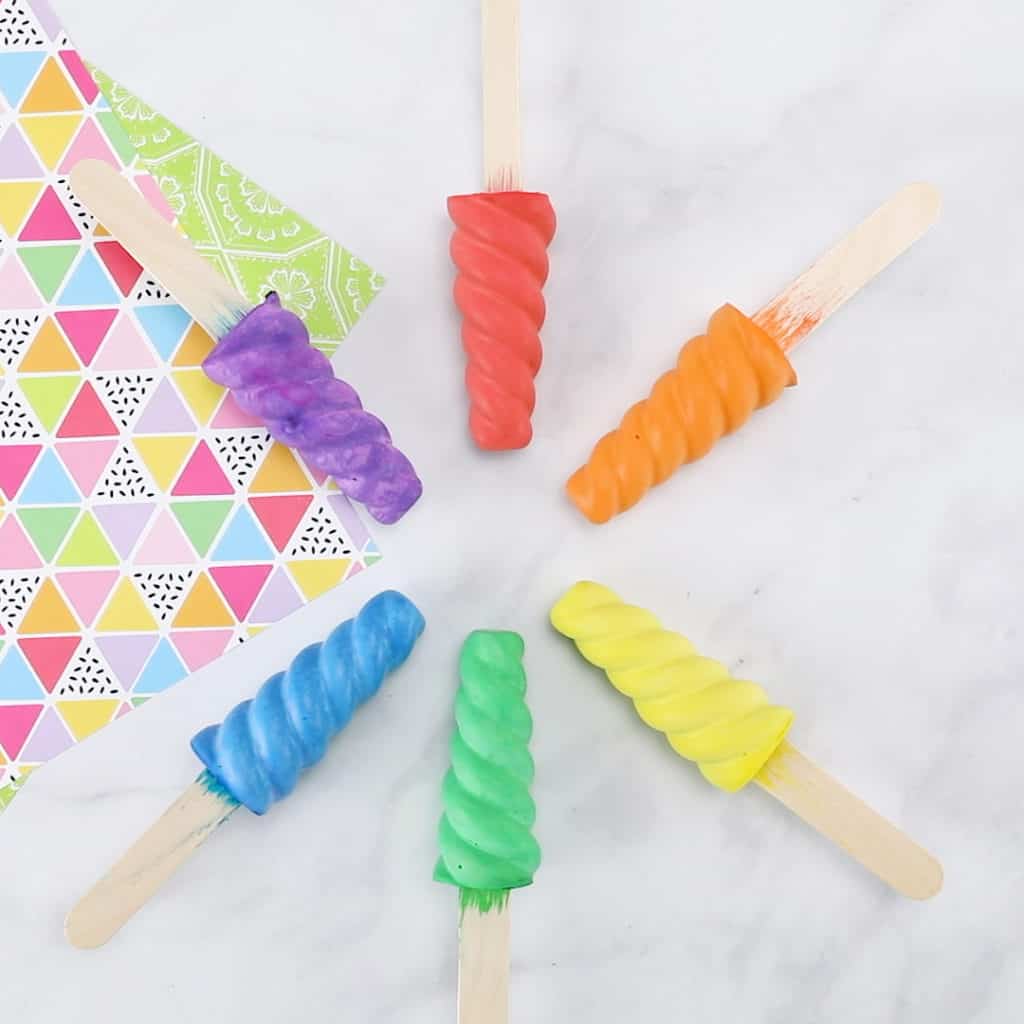
Scroll down to see our updated post with vibrant colors and video tutorial!
Sidewalk Chalk Popsicles - Materials:
(**Recipe below is per color, make as much as you need per how many colored popsicles you make)
- ½ Cup + 3 Tablespoons of Plaster of Paris
- ⅓ Cup of water
- Few drops of food coloring (make sure it is the gel kind, liquid food coloring won't work)
- Popsicle silicone mold (this is the one we used)
- Large popsicle sticks
- Plastic cups and spoons
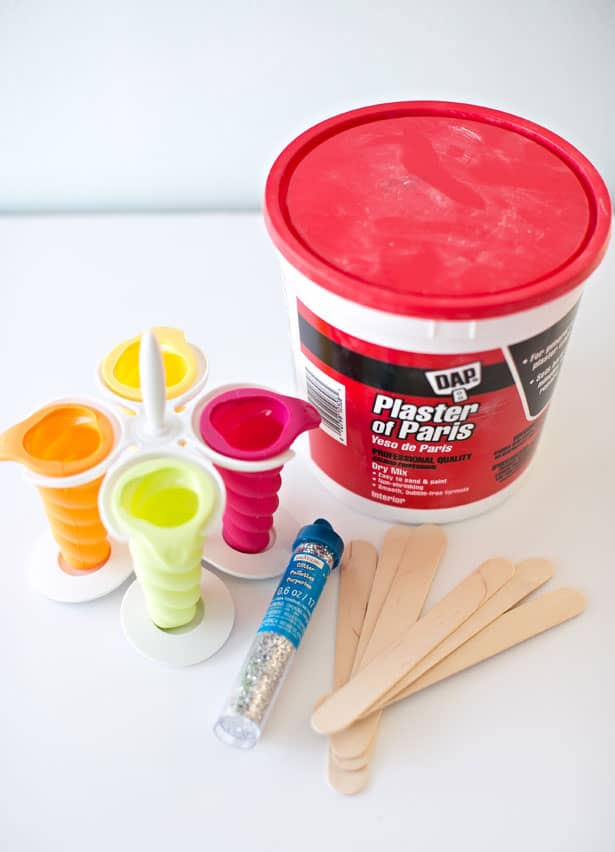
(Note: glitter is pictured in the above photo. We thought it would add some sparkle to the chalk but it didn't "stick" so well once mixed in so we omitted it.)
Steps:
1. Gather your materials - plaster, water, food coloring.
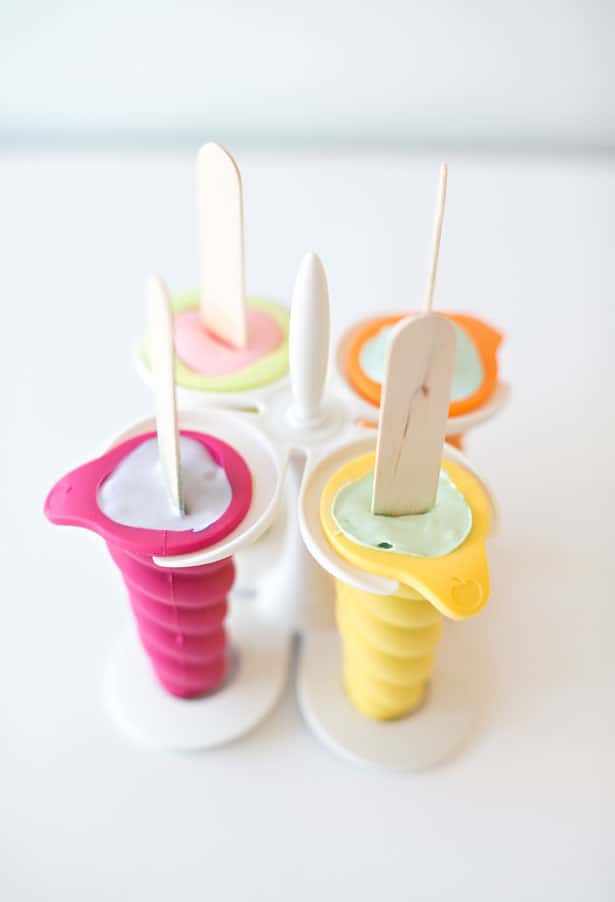
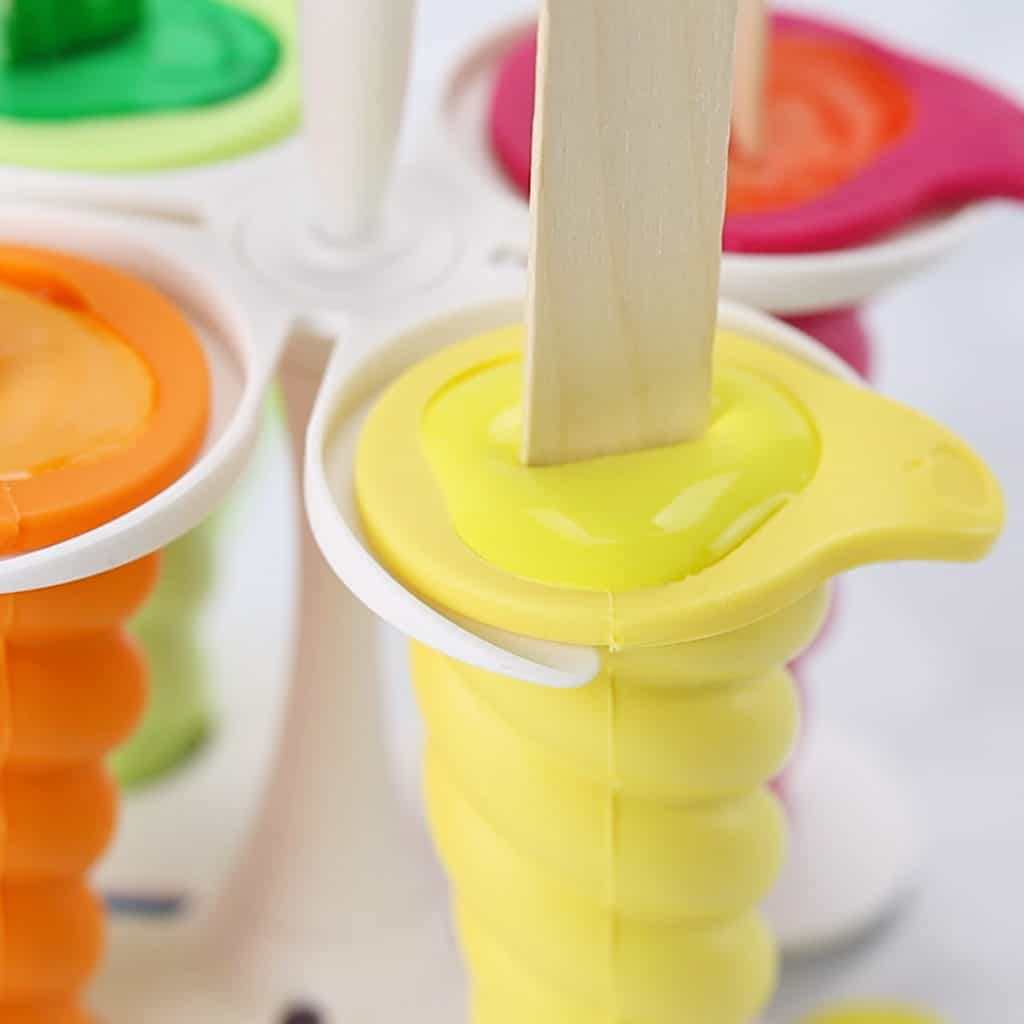
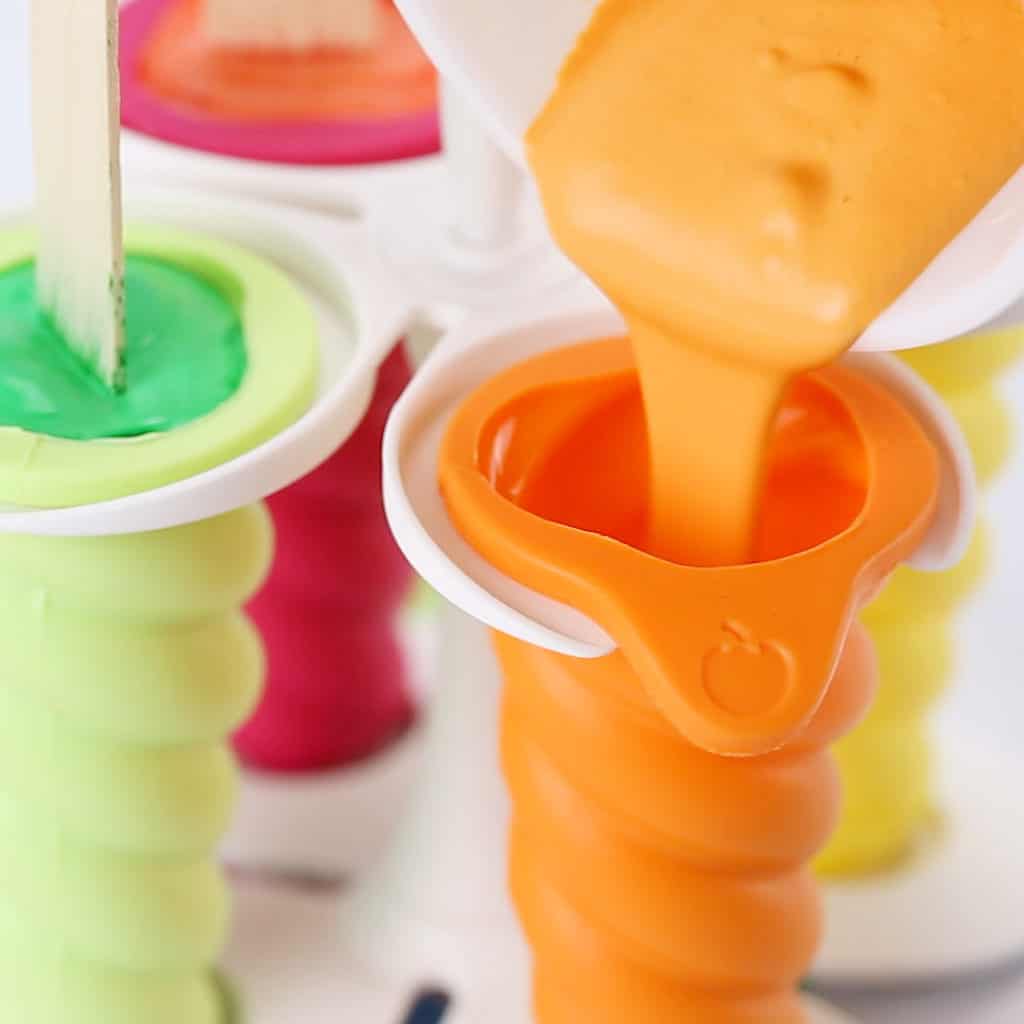
2. Use one plastic cup per color and mix the plaster and water until a paste forms, it will resemble frosting. Mix in the food coloring until you get the desired color you like.
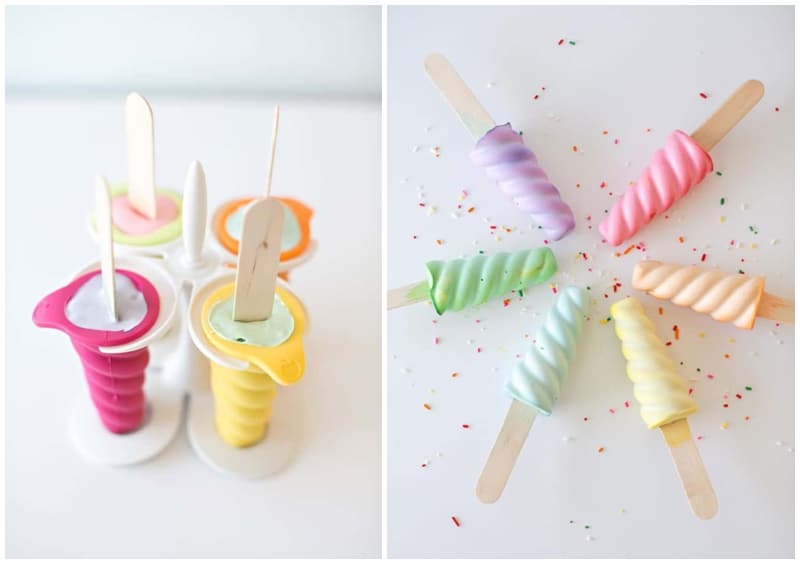
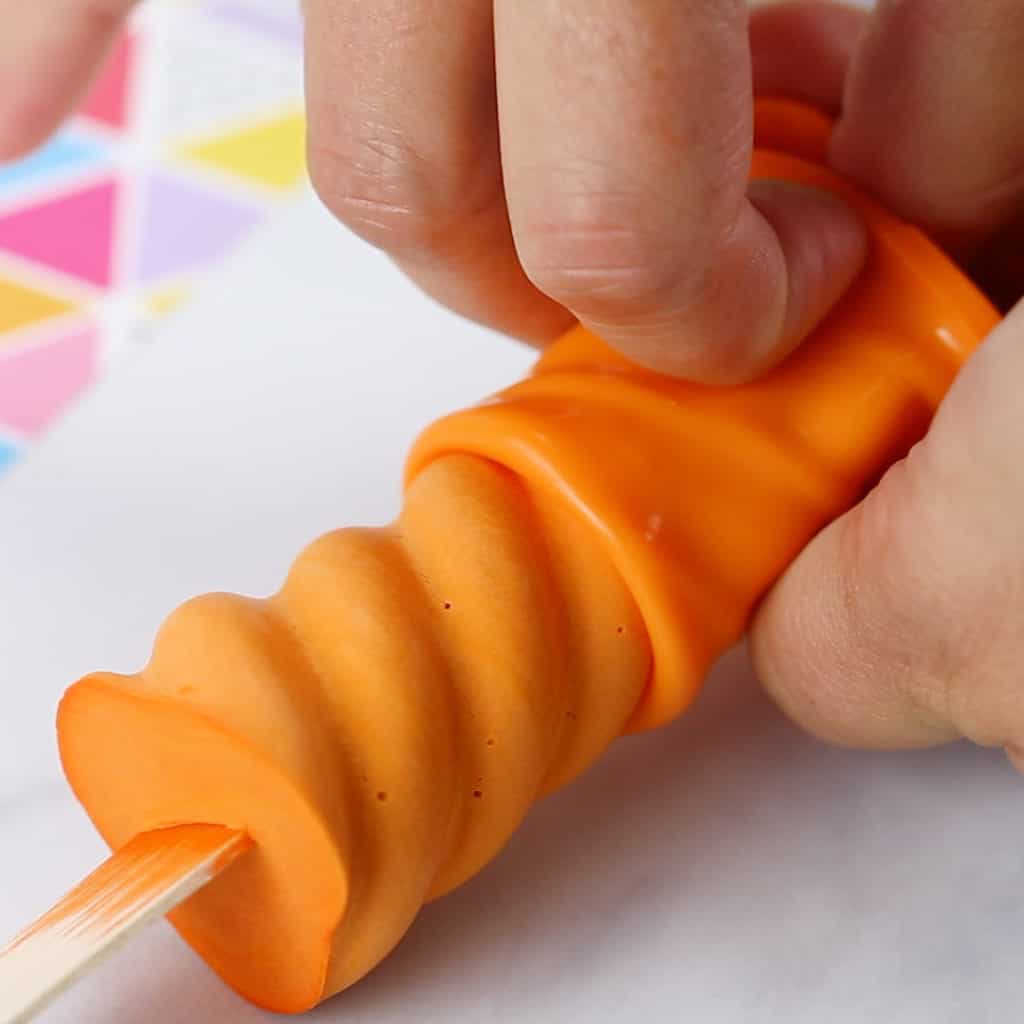
3. Using a plastic spoon, place the plaster mix inside the mold, add a popsicle stick in the middle, placing down as far as possible.
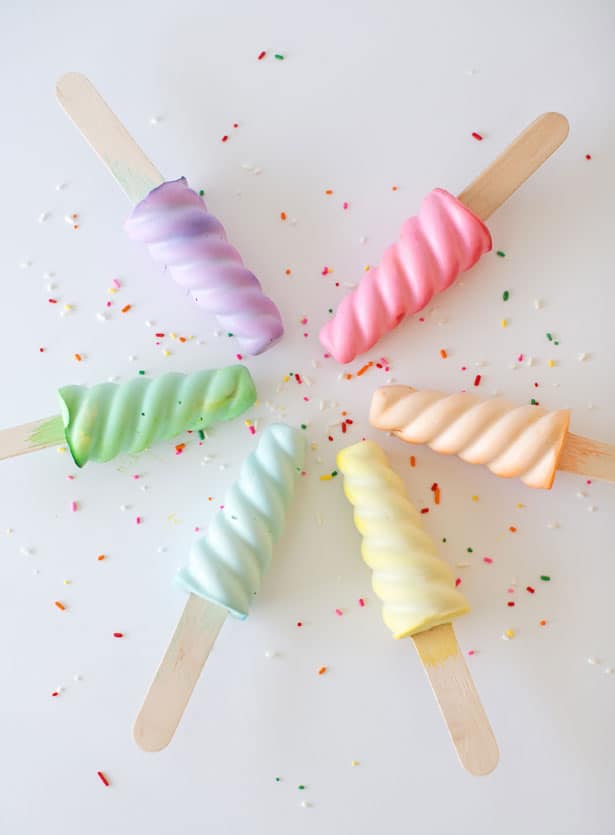
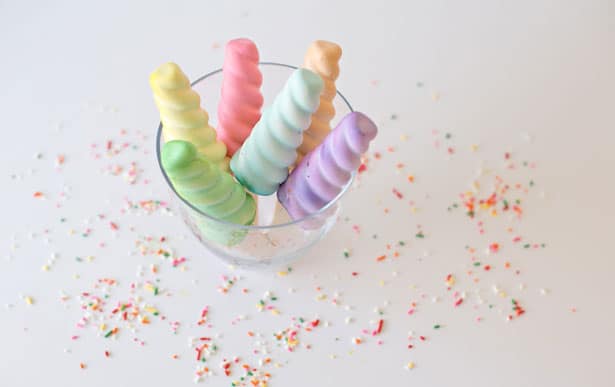
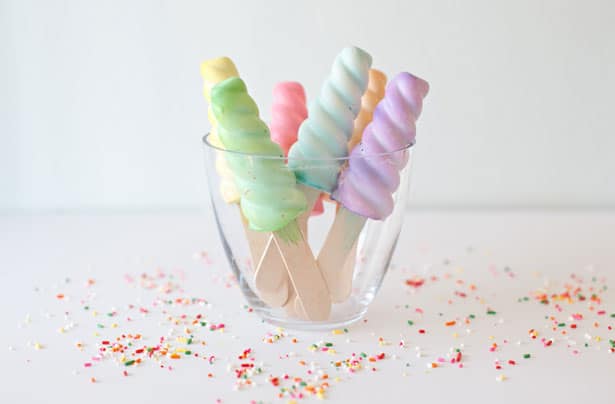
4. After 45 minutes, the popsicle chalks were hard enough to take out of the silicone molds. Allow them to dry upright in a cup until they are completely hardened. We did end up using them just a few hours after they were made, but you could wait until the next day to make absolutely sure.
NOTE: Don't store these next to each other or the colors will bleed onto each other! They look cool this way too but if you want single colors, store like colors together!
I love the pastel colors and how they played off against the popsicle theme. These were so fun and easy to make! The kids helped by picking out the colors they wanted, mixing the plaster and also placing the sticks inside the molds.
.jpg)
.jpg)
The sticks make it easy to store the chalk upright and and have ready for whenever the inspiration strikes to have some fun outdoors.
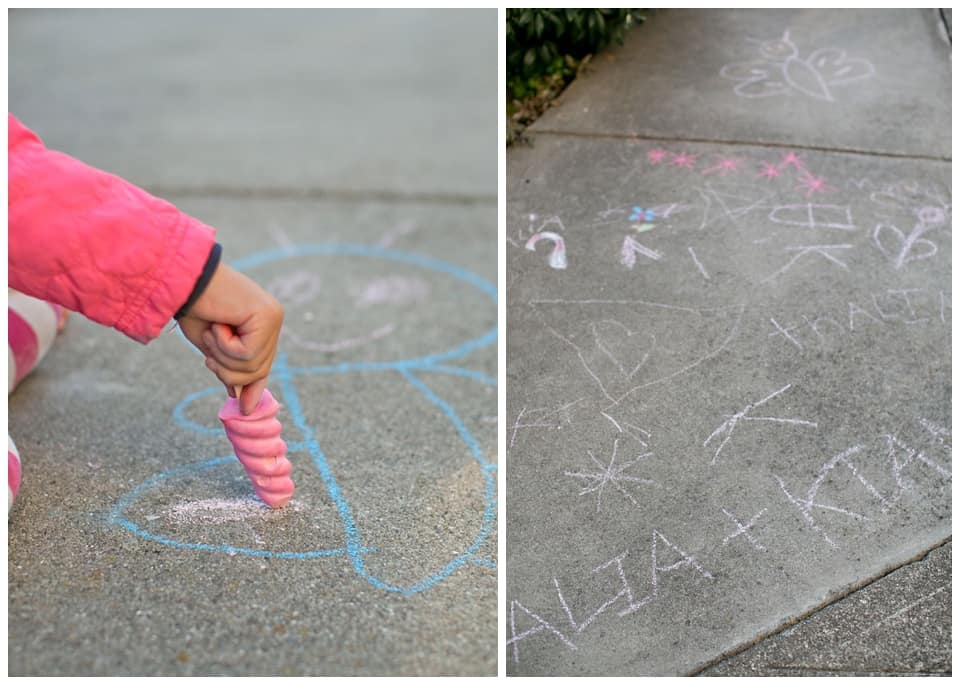
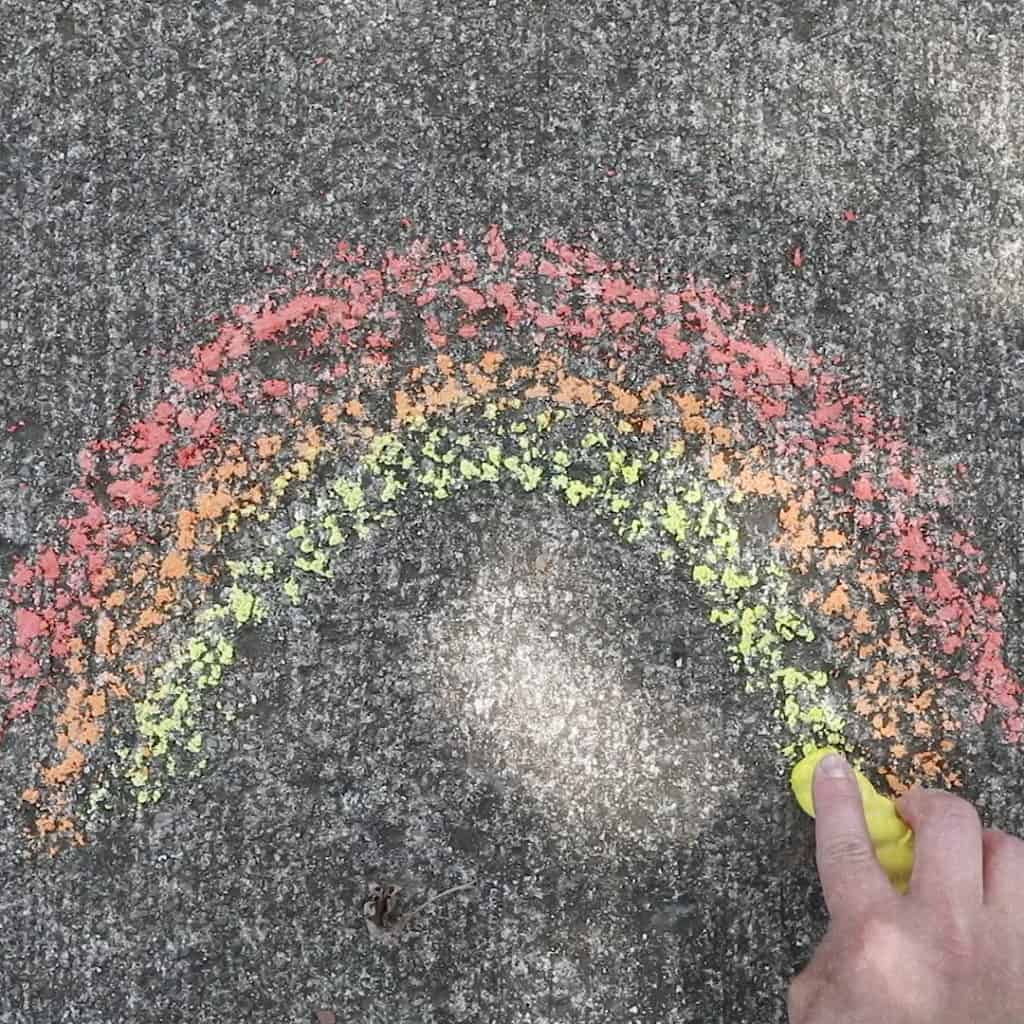
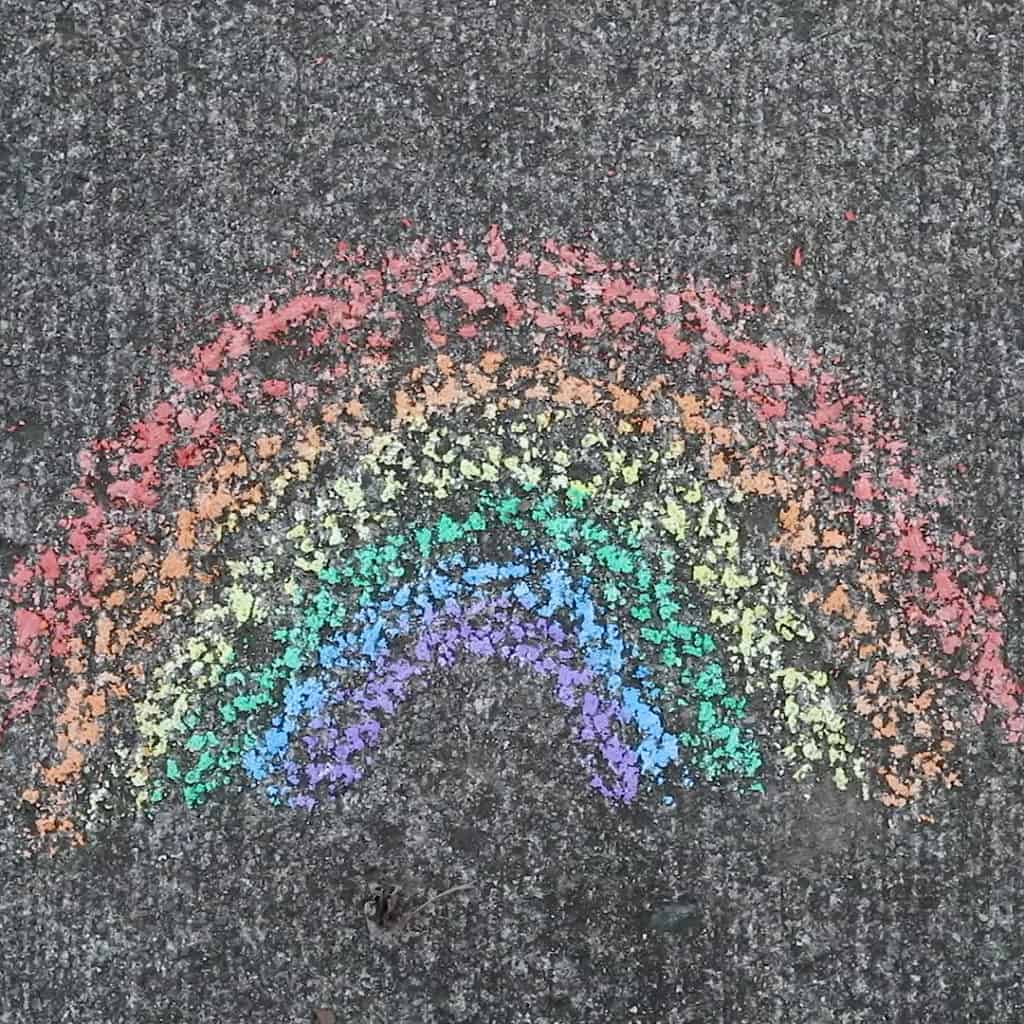
The kids immediately had to test these out to start making some creative chalk art.
I think these fun "chalk-sicles" would look also look great as individual party favors wrapped up in a clear bag and ribbon for an ice cream social or sweets/candy themed party.
Have you ever made sidewalk chalk before?
Check out more creative ideas for kids!
DIY SIDEWALK CHALK POPSICLES
These DIY Sidewalk Chalk Popsicles are a fun summer outdoor art activity for kids that can keep them busy creating.
Materials
- ½ Cup + 3 Tablespoons of Plaster of Paris
- ⅓ Cup of water
- Few drops of food coloring (make sure it is the gel kind, liquid food coloring won't work)
- Popsicle silicone mold (this is the one we used)
- Large popsicle sticks
- Disposable cups and spoons
Instructions
Steps:
1. Gather your materials - plaster, water, food coloring.
2. Use one plastic cup per color and mix the plaster and water until a paste forms, it will resemble frosting. Mix in the food coloring until you get the desired color you like.
3. Using a plastic spoon, place the plaster mix inside the mold, add a popsicle stick in the middle, placing down as far as possible.
4. After 45 minutes, the popsicle chalks were hard enough to take out of the silicone molds. Allow them to dry upright in a cup until they are completely hardened. We did end up using them just a few hours after they were made, but you could wait until the next day to make absolutely sure.
See our new updated photos and video in more vibrant colors for these DIY Sidewalk Chalk Popsicles!
______________________________________________________________________________________________________
Disclosure: Some of the links in the post above are "affiliate links." This means if you click on the link and purchase the item, we will receive a small affiliate commission. Regardless, we give our promise that we only recommend products or services we would use personally and believe will add values to our readers


