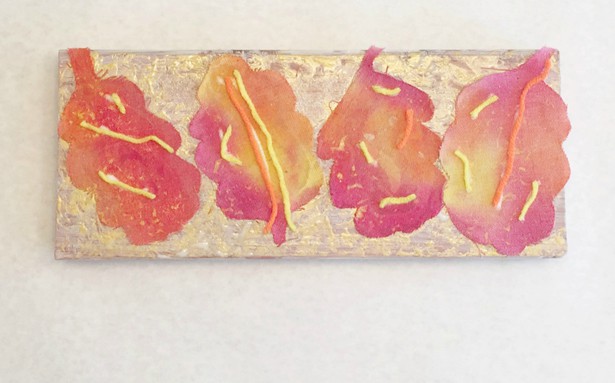
WATERCOLOR FALL LEAF COLLAGE
Who says child art has to be boring? Spruce up your autumn décor and dive into a bit of fabulously fun process art with this Water Color Leaf Collage. The use of multiple mediums and a variety of techniques will keep any young artist interested. Plus, your family will get to enjoy a work of art that feels both substantial and worthy of a spot on the mantle to celebrate the change of seasons.
Whether you work on this project all at once or spread it out over several days, follow these steps to create a wonderful and memorable art experience.
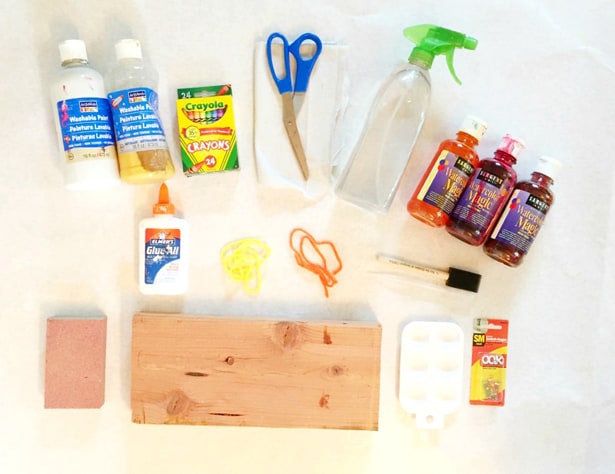
Water Color Fall Leaf Collage Material List:
- Solid piece of wood cut to 6” X 12” (pine or redwood works best)
- Sandpaper block
- Scissors
- Piece of Canvas Fabric 12” X12” (I love to use drop cloths from Home Depot that we cut down to size.)
- Washable white Tempera Paint
- Sponge Brush
- 1 Pipet or eye dropper
- Spray Bottle
- Crayons (you can select colors red, yellow, and orange to continue to work in warm tones, or choose cooler tones like blues, purples, and greens to work on contrast).
- Red, Yellow, and Orange Liquid Water Colors
- Elmer’s white School Glue
- Paint pallet or container to put your paint in
- Gold or metallic washable paint
- A piece of aluminum foil
- Sawtooth Picture Hanger and hammer (optional)
Instructions:
.jpg)
Step 1: First, Have your child sand the edges of their wood block using the sandpaper foam block. Sand until the edges and corners are smooth (an adult should check the edges and sand any of the remaining right parts before starting the next step).

Step 2: Blow away or push aside the dust from sanding, and using the foam brush and white tempera paint cover the wood block with the white paint. This will provide a clean and bright background.
Step 3: Set aside the now painted wood block to dry. While the wood dries pull out the piece of canvas fabric, eye dropper/pipet, and liquid water colors and painters pallet.
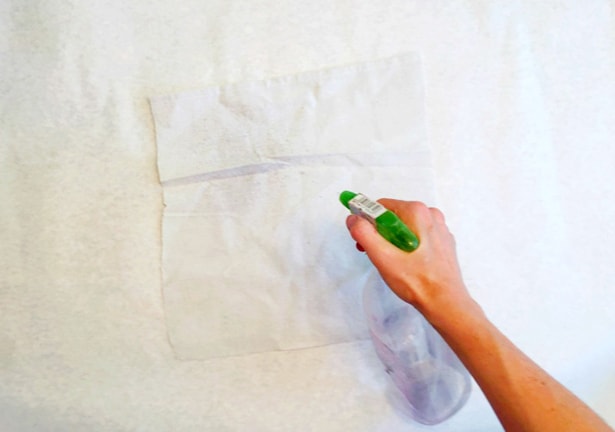
Step 4: Lay out your cut piece of canvas material flat on your work surface and using the spray bottle spray the canvas material until it is wet, but not soaking. This will help the paints spread.
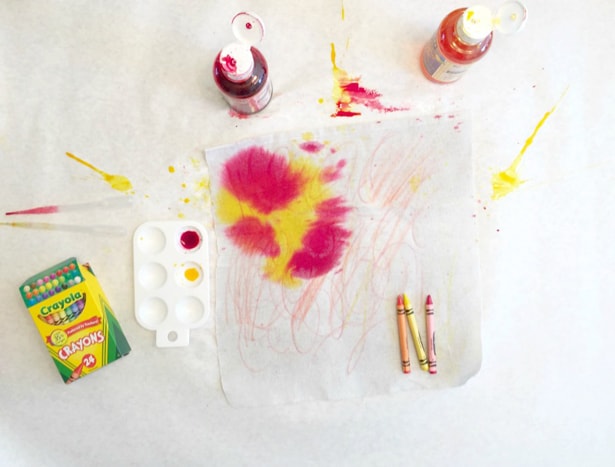
Step 5: Using the crayons draw or scribble all over the wet fabric. This will create an intriguing layer to your leaves.
Step 6: Fill your painter’s pallet with each color of the liquid water color (full concentration). No need to water down the colors, as you will want the full saturation.
Step 7: Using the eye droppers drip-drop the liquid water colors onto the canvas until the canvas fabric is completely, or mostly, dyed (Use the spray bottle to keep the canvas wet so the colors continue to easily spread). Once painted with the water colors, lay the canvas out to dry.
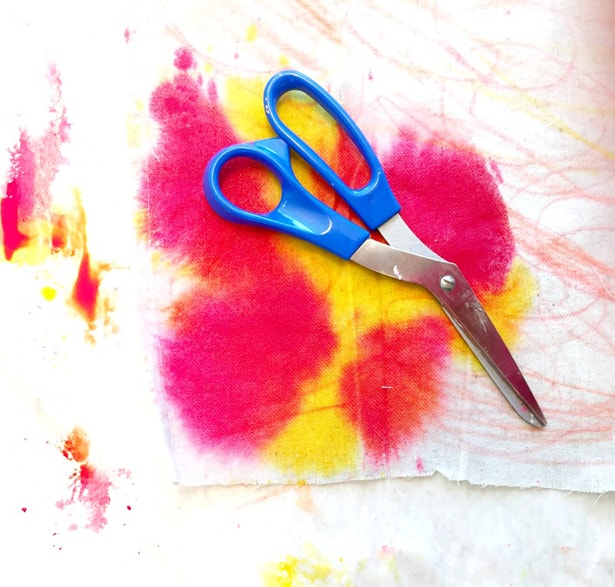

Step 8: Once your canvas is dry, use scissors to cut out leaf shapes from your dyed canvas. Cut the leaf shapes so they are 3-5 inches long and about 2 inches wide. You can use real leaves as stencils, or draw on leaf shapes by hand.
Step 9: While you cut out your leaves your young artist can “gold leaf” the wood block. Crumple up a piece of aluminum foil into a loose ball. Use the aluminum foil ball to dip into a bit of gold washable tempera paint. Press the dipped aluminum foil ball gently all over the wood block to add a bit of faux gold leafing. Allow to dry for a few minutes.
.jpg)
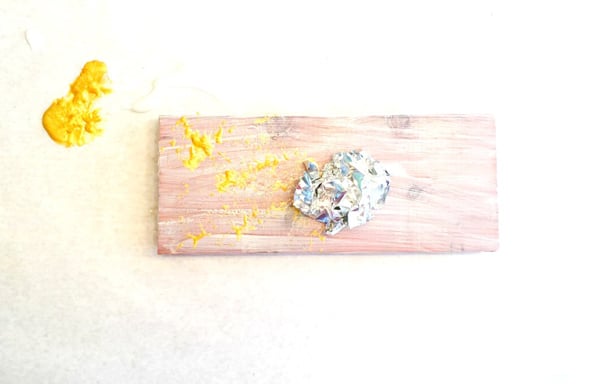
Step 10: Using the white glue, glue on the cut-out water colored leaves onto your now gold-leafed wood block.
.jpg)
Step 11: Using the same aluminum foil ball, add a little more gold leafing on top of your leafs you have just glued onto your wood block.
Step 12: Cut bits of yellow, orange, and red yarn into small pieces. Use the glue to collage your yarn pieces on top of your water colored leaves. Let dry completely.
.jpg)
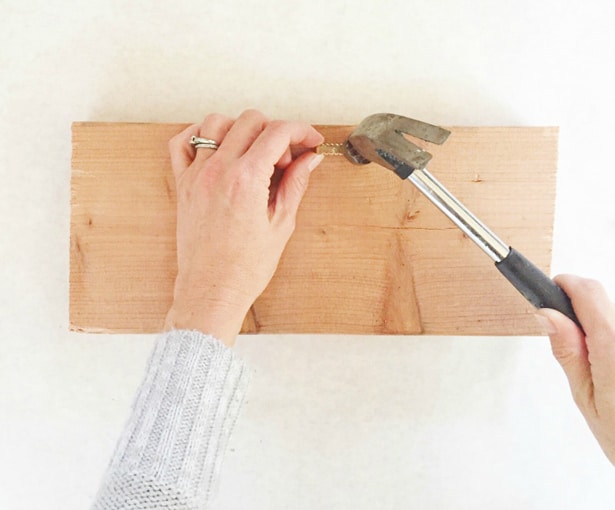
Optional Step 13: You can easily add a way to hang your artwork by adding a sawtooth hanger. First, choose whether you want to hang your piece vertically or horizontally. Turn your artwork over so you can work on the back. Use a ruler to find the center of the back of your artwork. Use a hammer to gently tap the sawtooth hanger into place. Hang your artwork and enjoy!
Something Extra!
As part of our art classes we always love to tie in songs and books to our art projects. One of our favorite themes to focus on is the change of seasons. Below is a list of a few of our favorite fall books to read before or after you create your leaf project:
The Busy Little Squirrel, Nancy Tafuri
Mouse’s First Fall, Lauren Thompson
Red Leaf, Yellow Leaf, Lois Ehlert
Leaf Jumpers, Carole Gerber and Leslie Evans
.jpg)
Julia holds a degree in Theatre Arts and English Education. She believes every art activity is even better when the art supplies are serenaded and the projects are taught through story. Julia earned her Girl Scout Gold Award and gives credit to the Girl Scouts of the USA for encouraging her creative interests at a young age. It was her experience of working as a Camp Director and a professional camp educator Julia hopes to inspire creative curiosity in educators and families. Providing wonderful opportunities to create for even the youngest of artists. Julia resides in the SF Bay Area with her husband and two wildly creative kids. You can follow Julia on her blog, CutOutsKids, on Instagram and check out her art classes.