
DIY HALLOWEEN TREAT CUPS
This post is sponsored by Crunch.
Halloween is upon us once again and the fun part is figuring out how to hand out all those spooky treats!
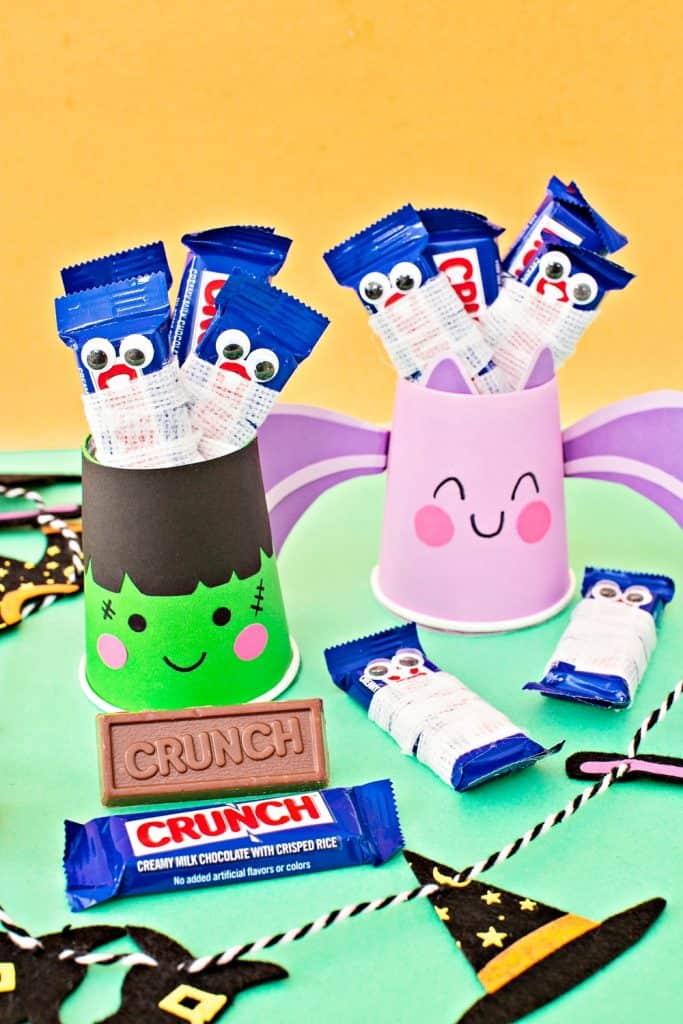
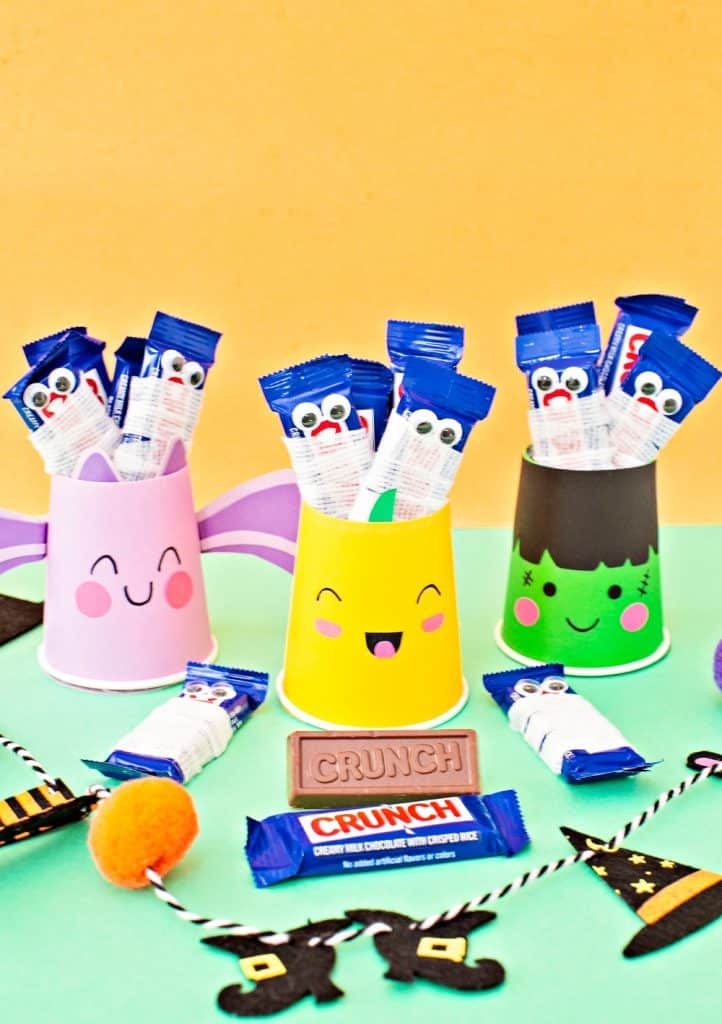
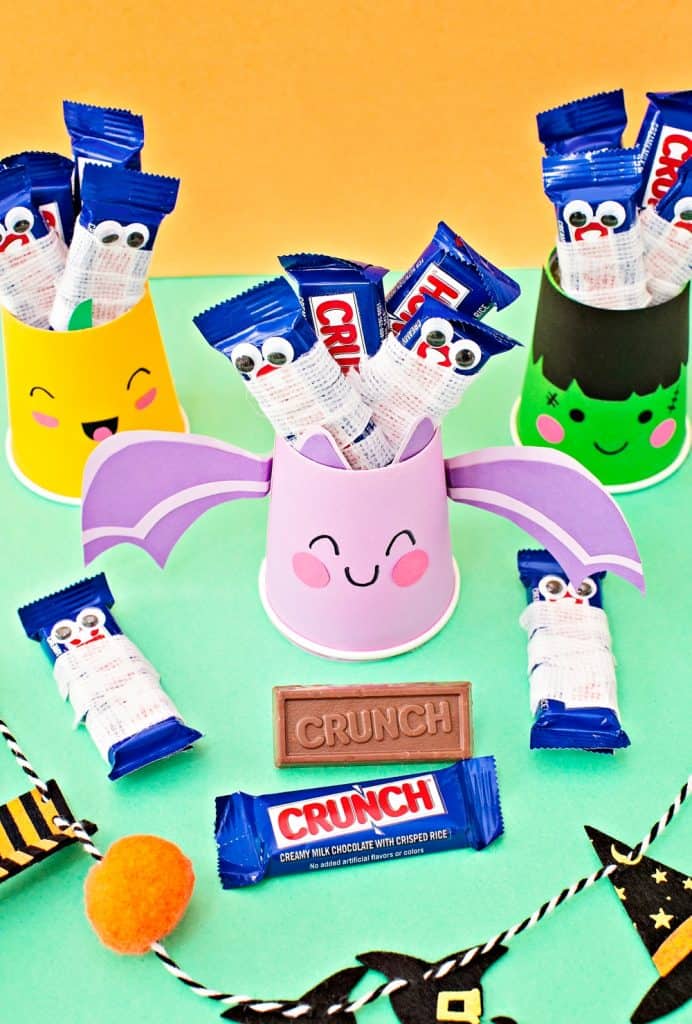
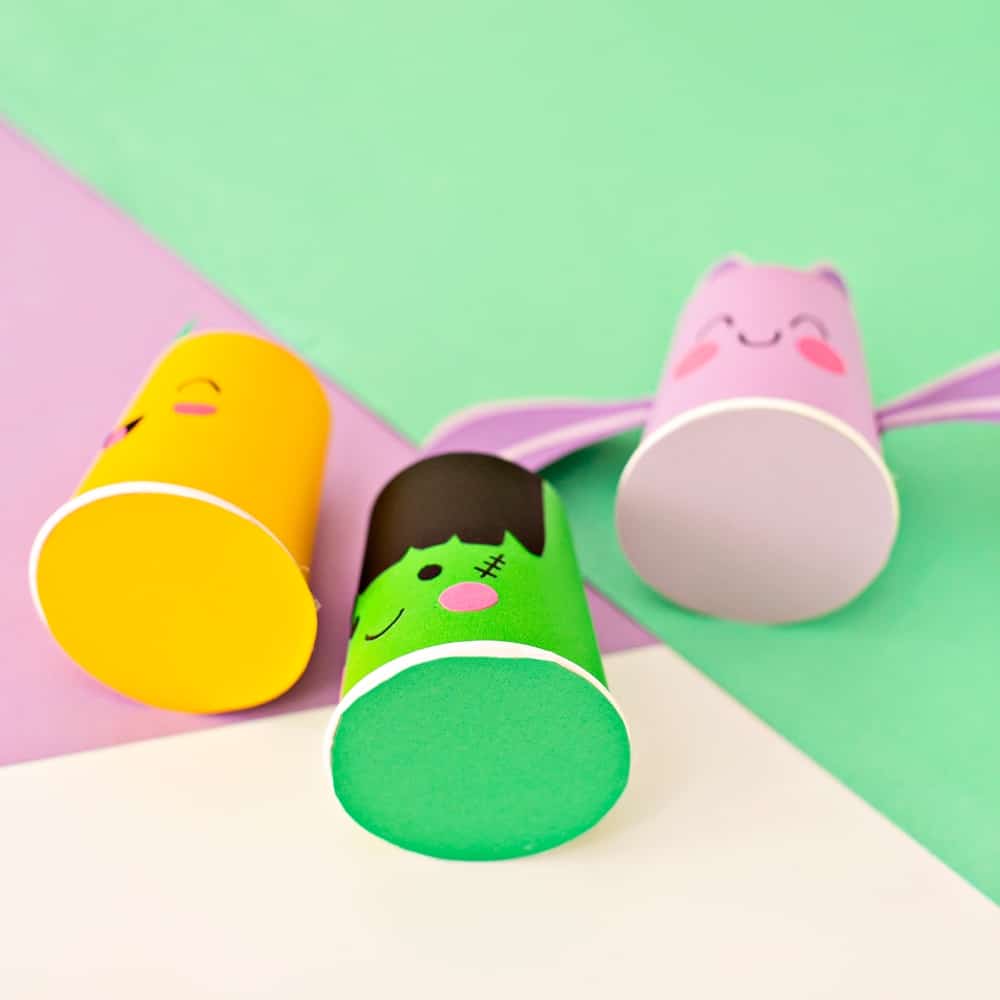
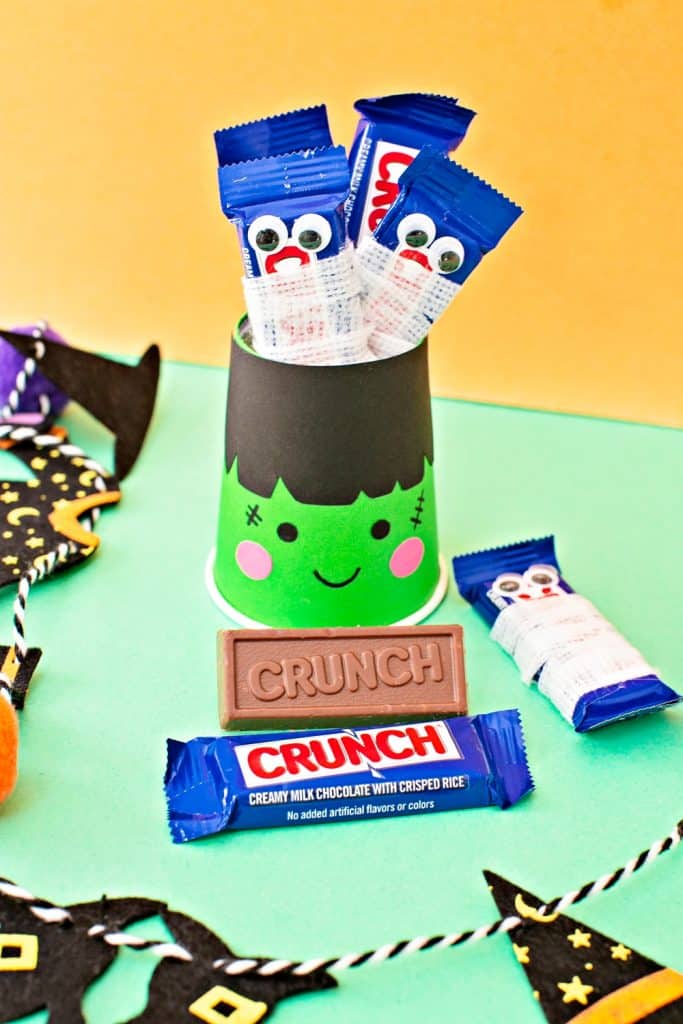
We love making handmade favor containers with the kids like these spooky cute DIY Halloween Treat Cups. All you need are colored paper cups and paper to make fun characters like a bat, Frankenstein, and pumpkin.
And of course you need your favorite treats! One of ours are Crunch Fun Size mini bars which are the perfect combination of 100% real milk chocolate and crisped rice. Growing up, Crunch was one of my favorite Halloween candy brands and I’m so happy it’s my kids’ too!
To keep these Halloween treats not too ghoulish we made the faces friendly for little trick or treaters. See how to make them below.
DIY Halloween Treat Cups – Materials
- Paper cups in purple, orange and green (if you don’t have colored cups, you can take white ones and cover with colored cardstock or paint)
- Colored cardstock in black, pink, light and dark purple, green, orange
- Food safe craft glue
- Black marker
- Craft knife
- Crunch Fun Size Bars
- Gauze
- Scissors
- Plastic googly eyes
INSTRUCTIONS: (refer to images for the designs)
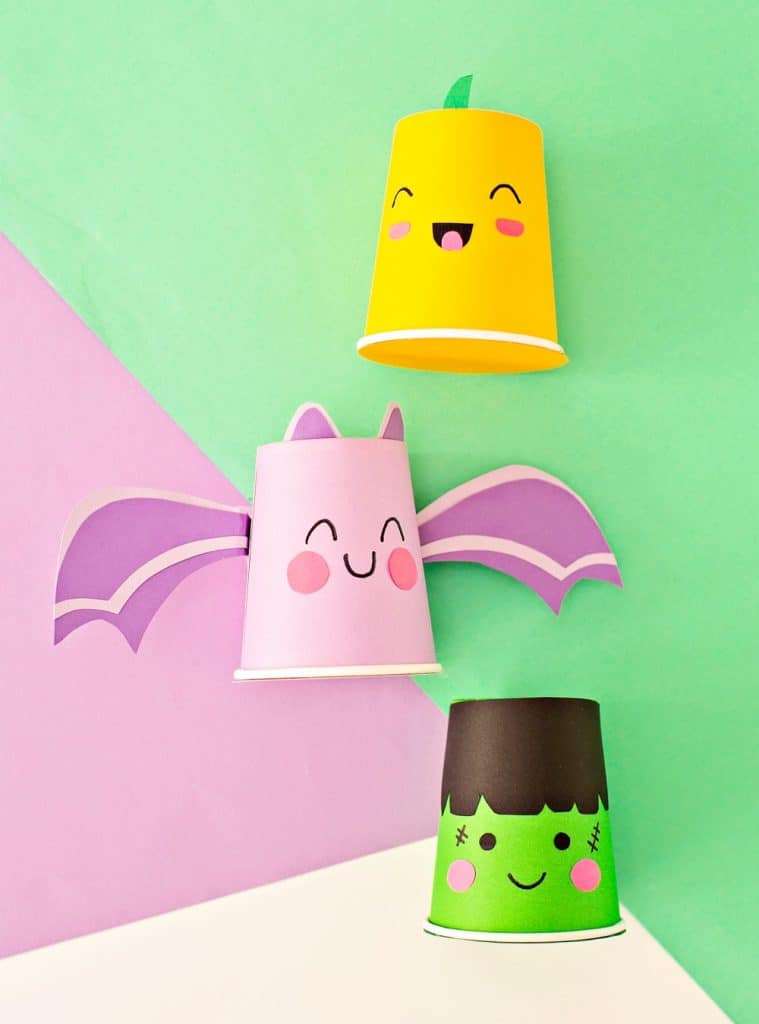
Bat Paper Cup
Step 1. You’ll need a purple paper cup, light and dark purple cardstock and pink cardstock.
Step 2. Cut out bottom circle of cup.
Step 3. Trace the top circle of cup into same color of the cup, in this case purple. Glue paper to cup (this becomes your bottom).
Step 4. Draw the bat face (eye sand mouth) using a black marker.
Step 5. Cut out two pink circles for cheeks and glue to cup.
Step 6. Cut out two bat ears in the light purple and then two smaller inner ears. Glue together then glue to the cup.
Step 7. Cut out two bat wings in the dark purple and add lined details in light purple. Glue batwing parts together and final wings to the cup.

Frankenstein Paper Cup
Step 1. You’ll need a green paper cup, black, pink and green cardstock.
Step 2. Cut out bottom circle of cup.
Step 3. Trace the top circle of cup into same color of the cup, in this case green. Glue paper to cup (this becomes your bottom).
Step 4. Using black cardstock, cut out hair and glue to cup.
Step 5. Cut out two pink circles for cheeks and glue to cup.
Step 6. Use a black marker to add a smile and scar lines.
Pumpkin Paper Cup
Step 1. You’ll need an orange paper cup, black, pink and orange cardstock.
Step 2. Cut out bottom circle of cup.
Step 3. Trace the top circle of cup into same color of the cup, in this case orange. Glue paper to cup (this becomes your bottom).
Step 4. Draw eyes on cup using a black marker.
Step 5. Cut out two pink circles for cheeks and glue to cup.
Step 6. For the mouth, cut out a semi circle in black cardstock and a smaller pink half circle for tongue. Glue together and then glue mouth to the cup.
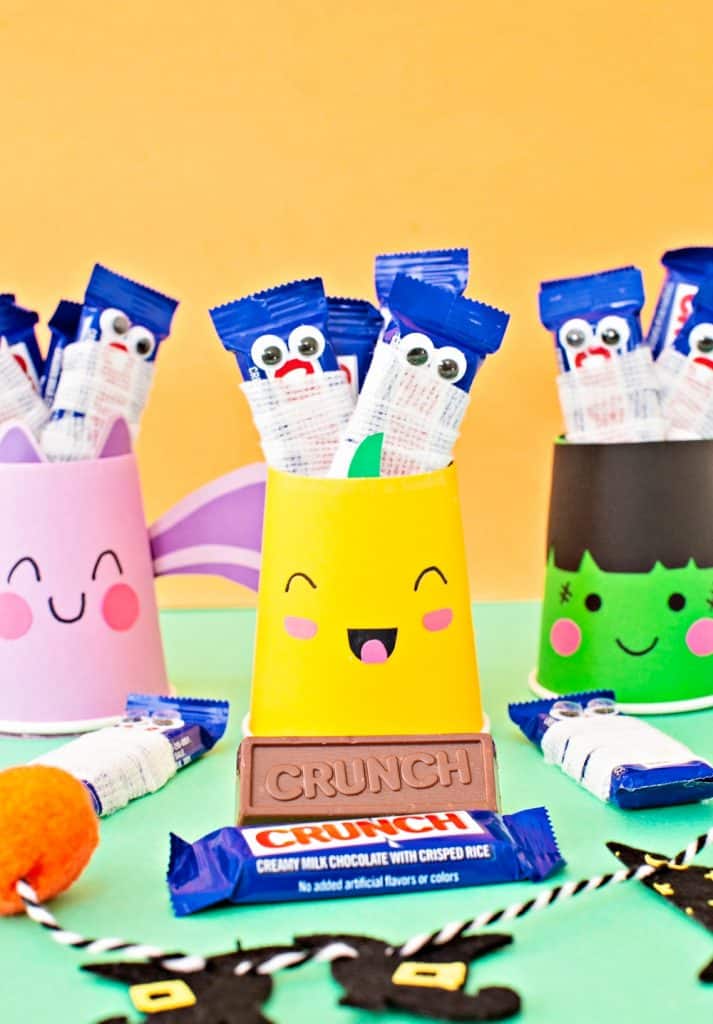
How to Mummify Your Crunch Bars
Step 1. Take small pieces of gauze and cut into strips.
Step 2. Glue two plastic googly eyes on top of the Crunch bars with food safe glue.
Step 3. Glue gauze strips in zig zagging designs on the Crunch bars below the eyes with food safe glue.
Once all your treat cups are created, add your mummy Crunch bars on top!


