
.jpg)
I think given the opportunity, our kids could eat ice cream every day! Are your children like this? If so, here is the perfect project for celebrating a favorite summer snack!
Beaded Ice Cream Necklaces – Materials
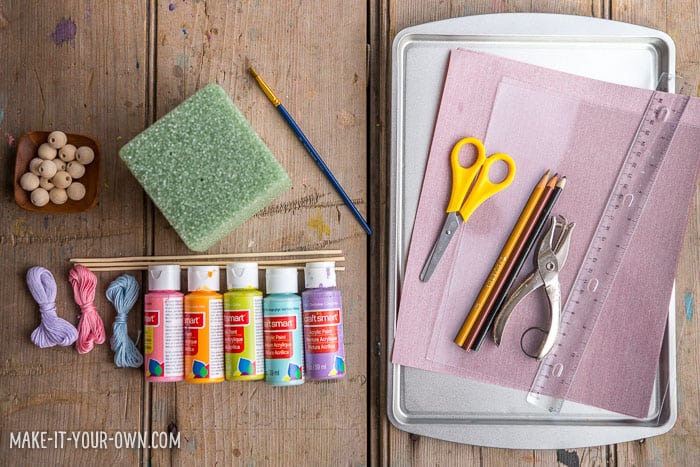
- Wooden beads
- Acrylic paint
- Embroidery floss or you could use cord
- Wooden skewers (with the sharp ends cut off by an adult)
- Floral foam
- Paintbrush
- Cookie sheet
- Sandpaper
- Pencil crayons
- Scissors
- Hole punch
- Shrink art sheets (You can purchase these at craft stores)
* We also provide alternate materials in the directions if you don’t have some of these items or want to simplify a step*
We always find these items helpful too:
.jpg)
- Smock
- Craft tray
Directions
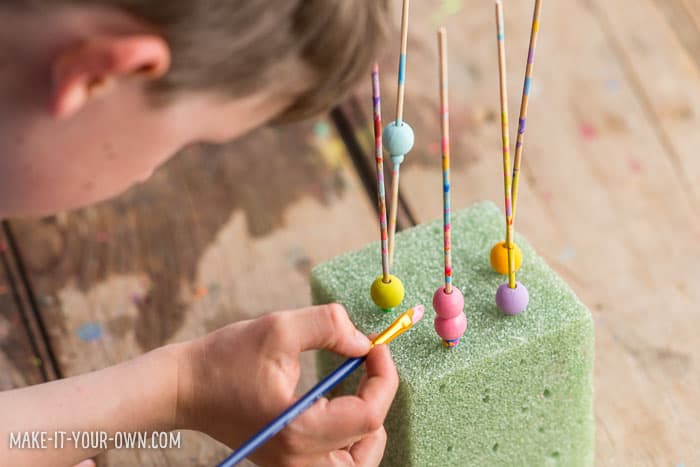
- Don your smock. Insert your skewers into your floral foam and lace on your beads. (Depending on the size of the hole of your bead, you may need to add something like a pony bead onto the skewer first to anchor it in place.)
- Paint your beads and allow them to dry overnight. You may need more than one coat of paint. You can often buy pre-painted beads if you want to skip this step or use pom-poms for the ice cream, simply using a needle to string the pom-poms onto your embroidery floss.
- Have an adult pre-heat the oven for you according to the product directions in the shrink art packet.
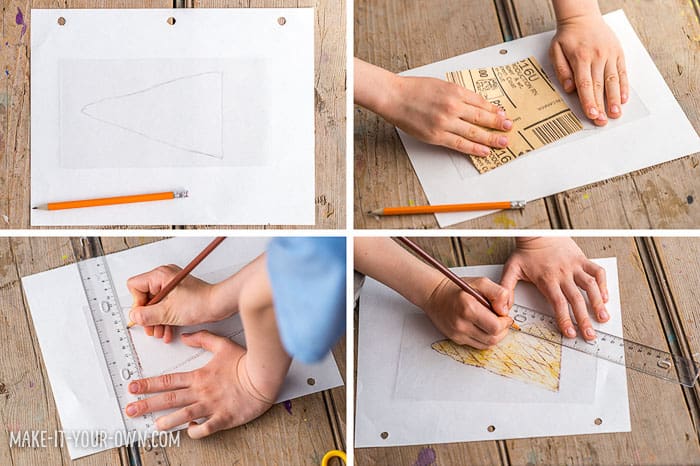
- Draw out your ice cream cone onto a sheet of paper. We found that the size of the shrink art was reduced by a little more than half. We then scuffed our plastic with a piece of sandpaper and traced our cone in a dark colour, using pencil crayons. We coloured it in, added a few diagonal lines to give it an authentic appearance and then cut around the shape. Punch a hole in your cone so you can lace through your cord or embroidery floss once you are done. Place your cone(s) on your cookie tray. Don’t have shrink art? You could use craft foam (draw the lines with a ballpoint pen or permanent marker).
- Have an adult put the cookie sheet into the oven and watch the transformation if you like as it shrinks. Have an adult remove the sheet from the oven, using oven mitts. Allow the tray to completely cool before removing your shrink art and don’t forget to shut off your oven!
.jpg)
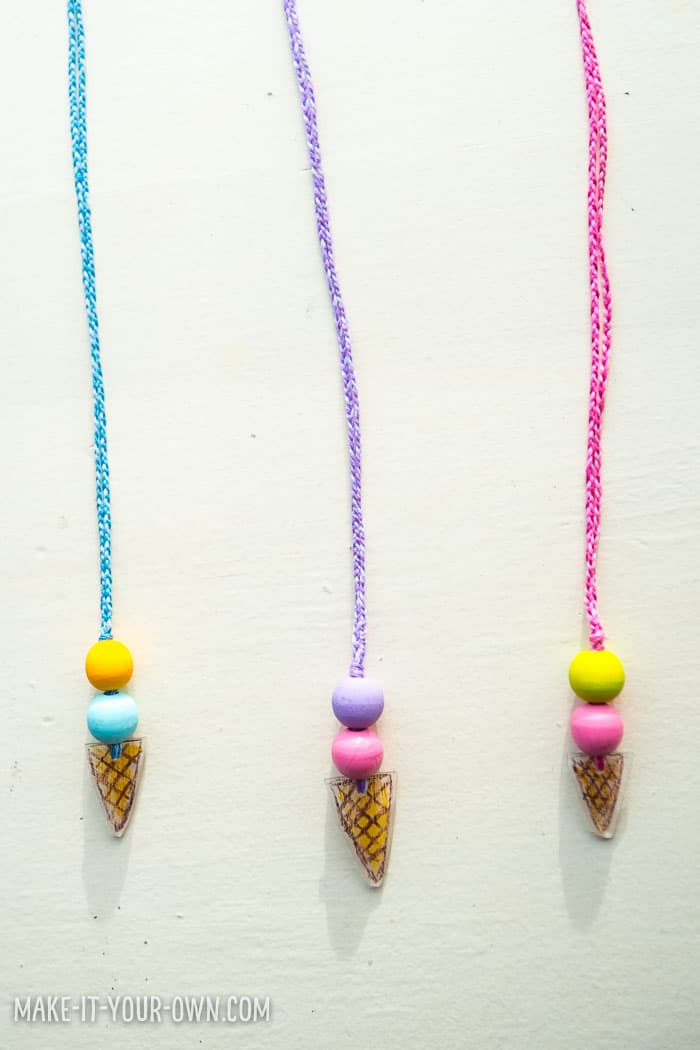
- Choose your cord or embroidery floss. We went with three equal strands, the width of the children’s arm span, in different shades to make it easier to braid.
- Lace your cord or embroidery floss through the hole in your cone, putting your two ends together, once done. Lace the beads on down the cord or floss (as seen in the photo). We find that the skewer is helpful if you find it gets stuck in pushing it through.

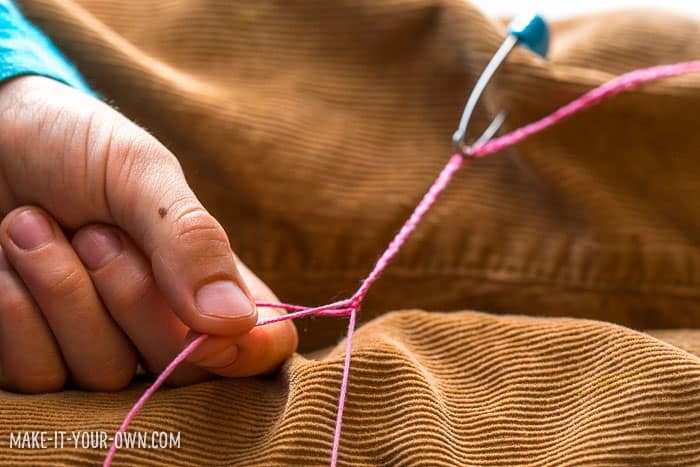
- Once your ice cream beads are on the cone, tie a knot at the top of the scoops. We then separated the strands of floss into two groups of three and braided them, knotting and trimming the ends. If your child is learning how to braid, anchoring the project to the thigh of their pants might be helpful or you could do this with a pillow and set it on their lap. We used a baby diaper pin so it stayed safely shut. They could sit on your lap and you could guide their hands to start, lessening the assistance until they could do it on their own. We say out load, “Right to the middle, left to the middle, right to the middle, left to the middle” which seems to help them keep organized.
- Voila- your necklace is complete! Put it on or give it to a friend!
What are your favorite ice cream crafts? Check out more fun ice cream projects for kids!
Purpose
- Developing fine motor skills (lacing, painting, cutting, braiding etc.)
Safety Notes
- We suggest that you wear a smock and use a craft tray to protect your clothing and surfaces.
- Use scissors, sandpaper, a pin and an oven with care and direct adult supervision.
- Cord, yarn etc. can be a strangulation hazard, therefore be sure to use with direct supervision and for its intended purpose.
- Beads can be a choking hazard, therefore be sure to keep them out of the reach of children ages 0-3 years of age or those that tend to put things into their mouths.
- Remove a necklace for play and if you prefer attach a magnetic, safety clasp on the ends of the cord for easy release.
- Follow product directions and use suggested safety gear (e.g., oven mitts).
.jpg)
Make it Your Own is a Canadian children’s website. We hope to inspire educators and families with projects to do together, explorations of various mediums and techniques and to get out into nature to source supplies. We love re-imagining items and thinking of new ways to share children’s artwork. We are often described as “an educational mom, a digital dad and their three mini-makers.


Agnes Hsu is a mom of three and has been inspiring parents and kids to get creative with easy activities and family friendly recipes for over 10 years. She shares her love for creative play and kids food to her 2MM+ followers online. Agnes' commitment to playful learning and kindness has not only raised funds for charity but also earned features in prestigious nationwide publications.