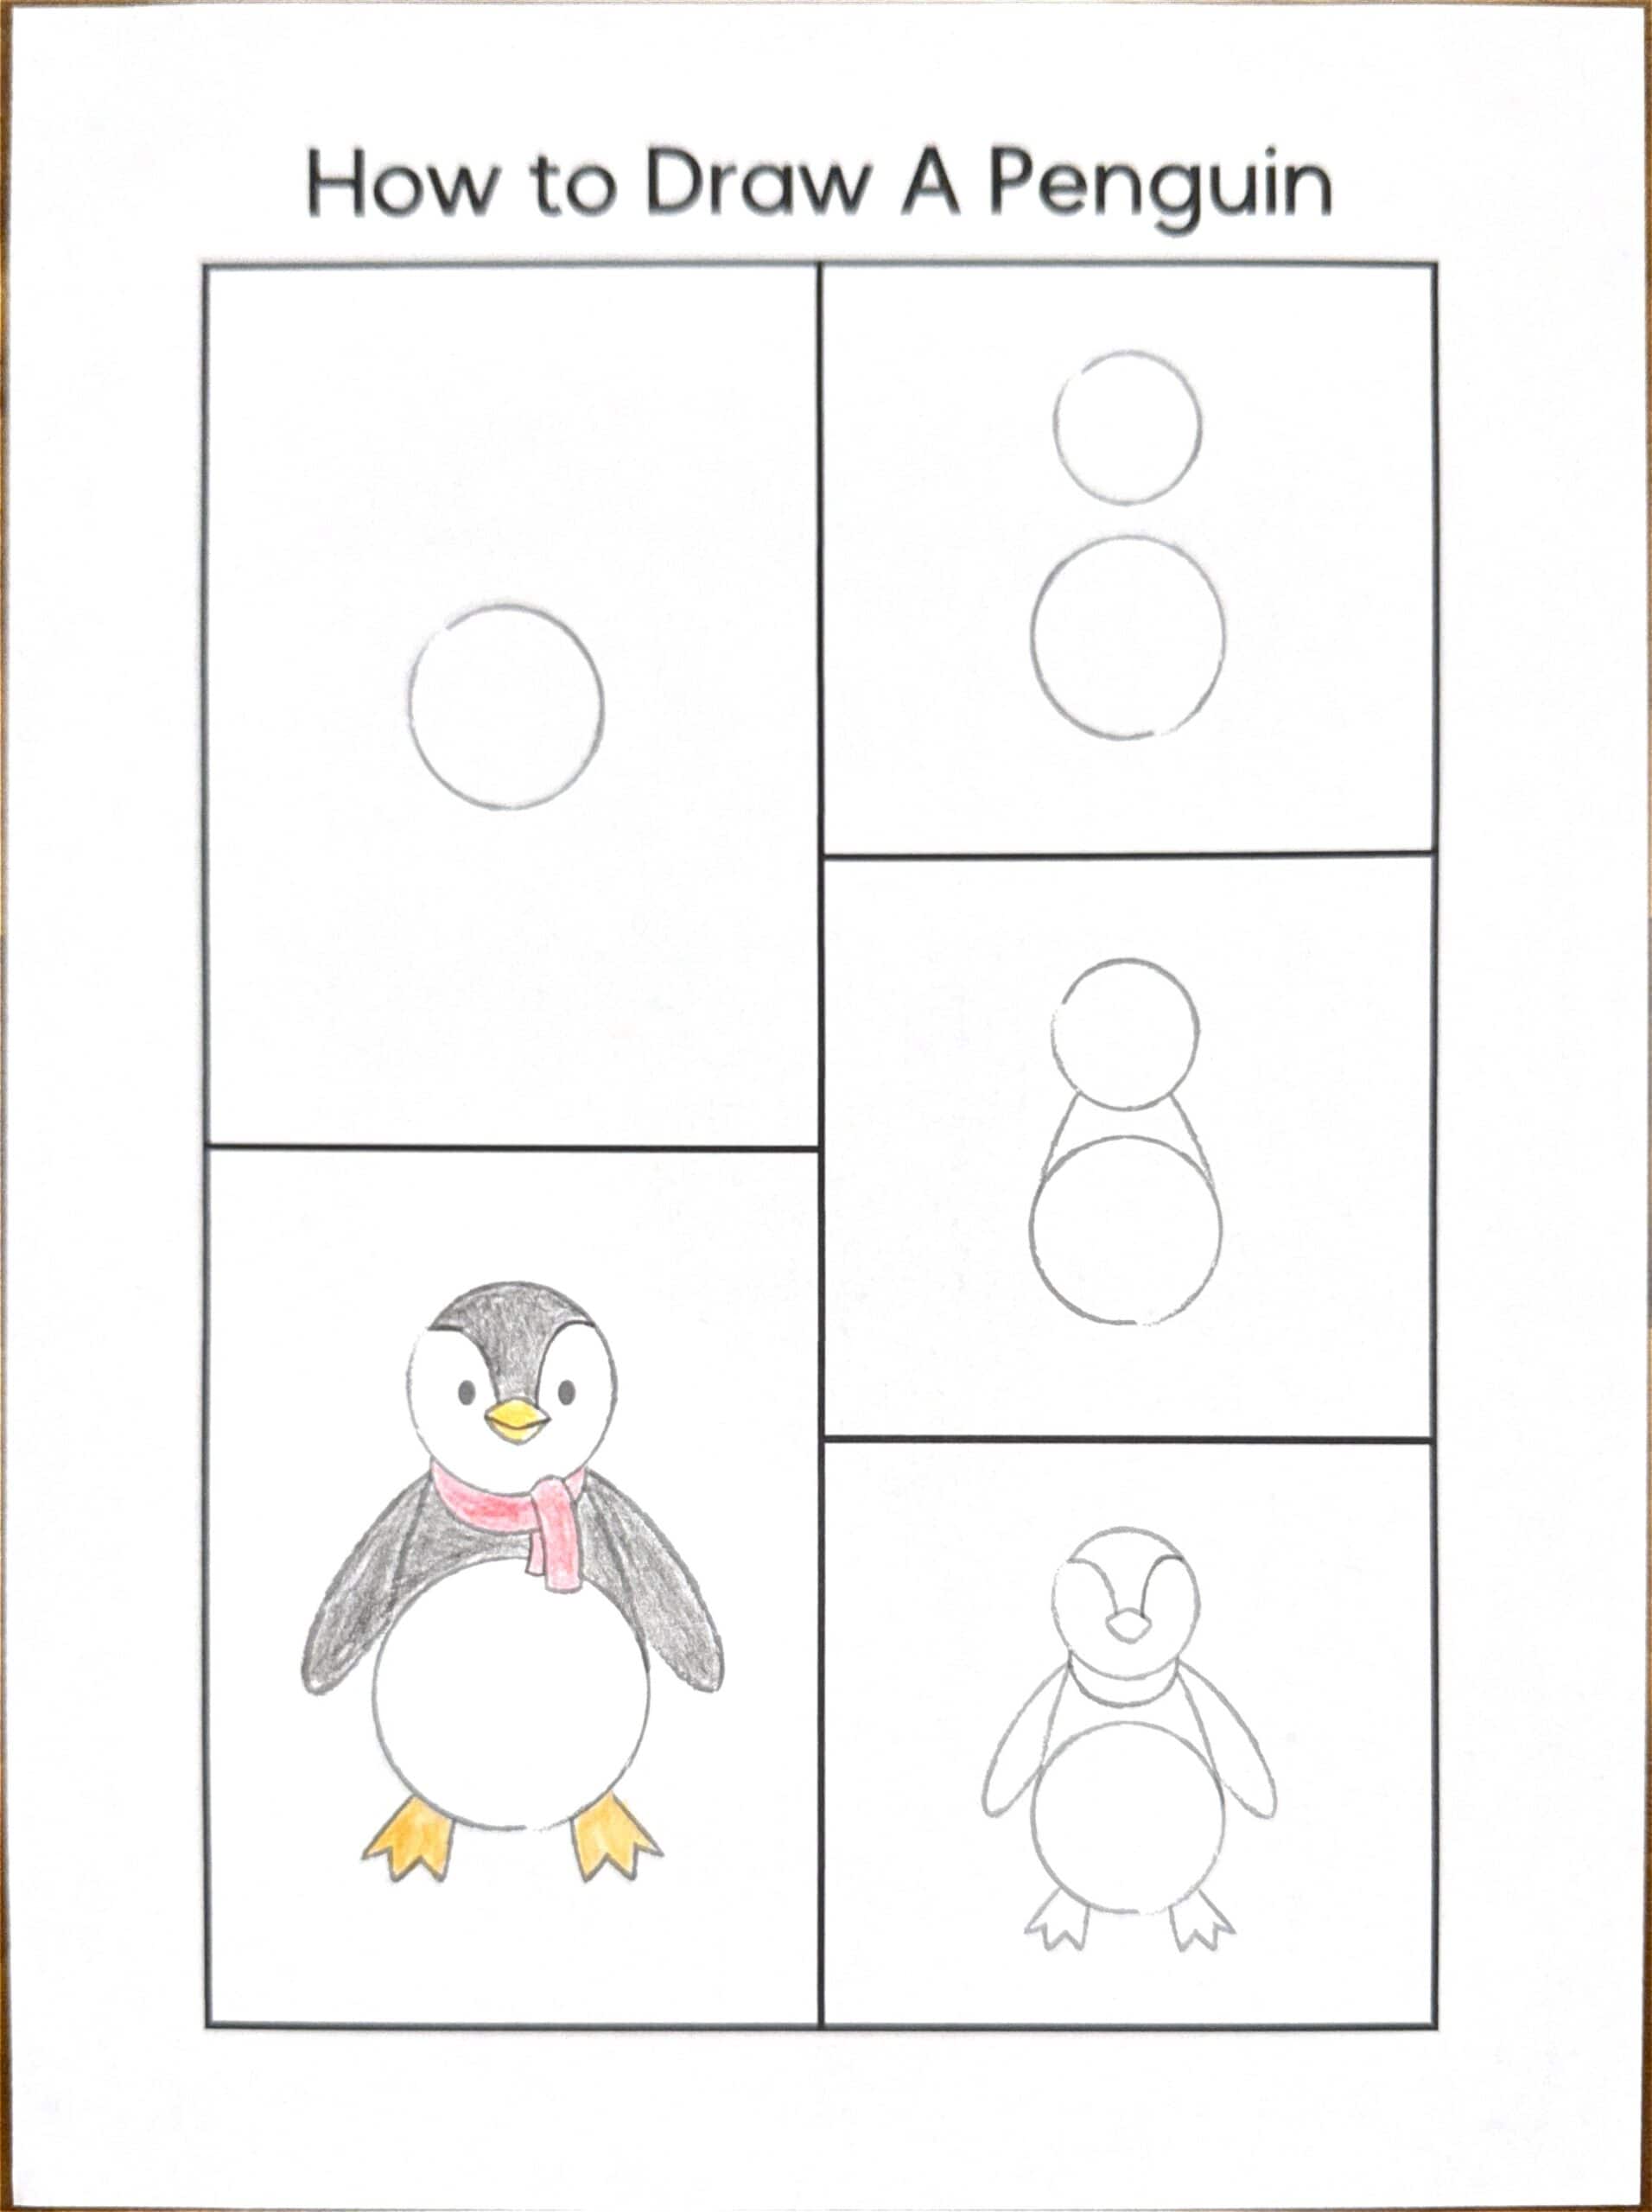
How to Draw a Penguin – Free Template
Follow us on Instagram for more fun ideas for kids!
By using this site, you agree to our Terms of Use. This post may contain affiliate links. Read our disclosure policy. As an Amazon Influencer, I earn from qualifying purchases.
Learn how to draw a cute penguin with this easy step-by-step guide for kids! Perfect for beginners, this activity adds creativity and is simple to follow!
Do you love penguins? These adorable, waddling birds are fun to draw, and with this simple step-by-step guide, you’ll be able to create your own cute penguin in no time! Whether you’re a beginner or an experienced artist, this easy tutorial will help you bring your penguin to life.
Grab the free printable guide below, Grab your pencil, paper, and let’s get started!
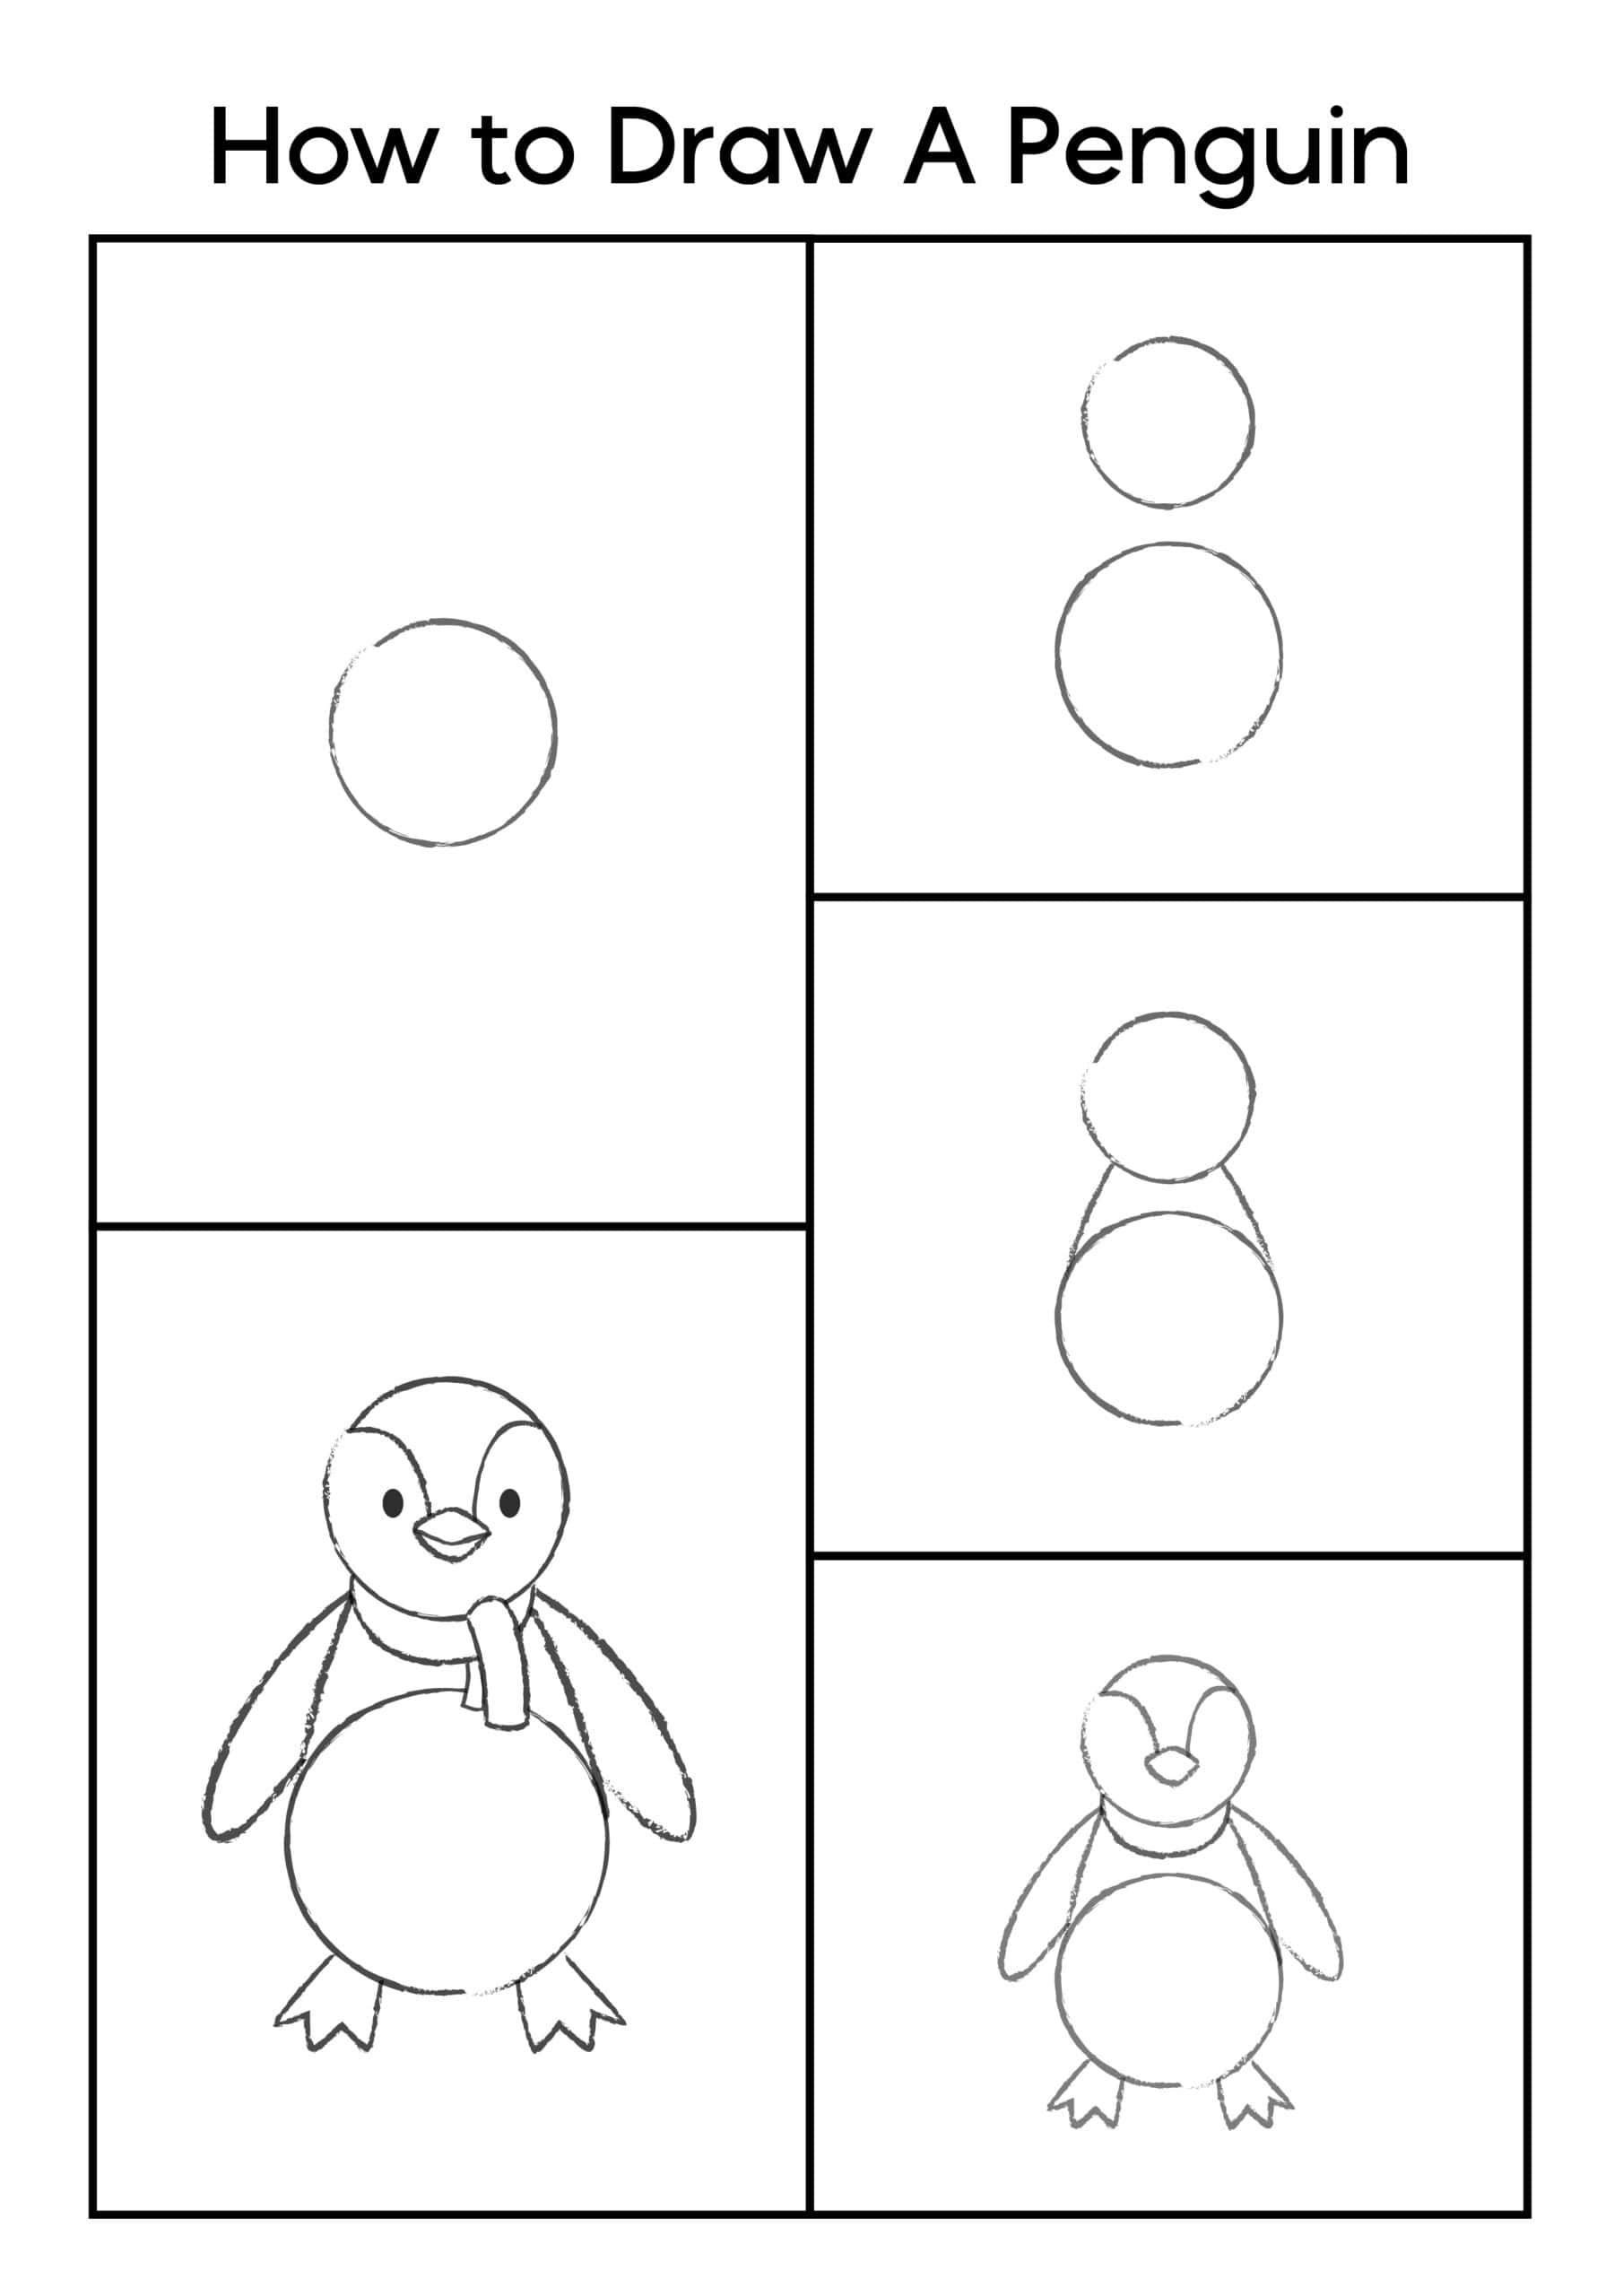
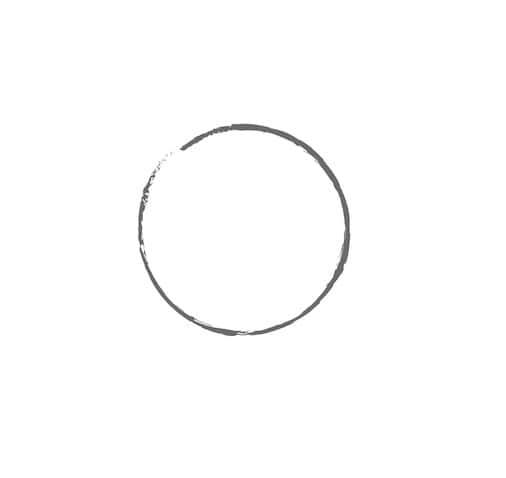
Step 1: Draw the Head
Start by drawing a simple circle. This will be the penguin’s body.
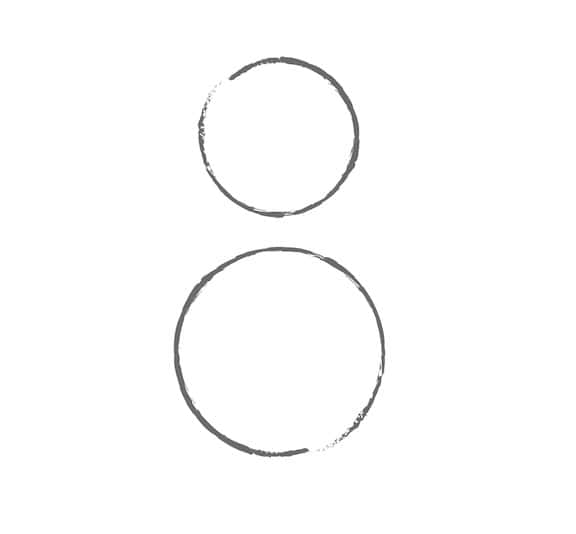
Step 2: Add the Body
Draw a smaller head above the penguin’s body. Make sure the circles don’t touch and there is a small gap in between.
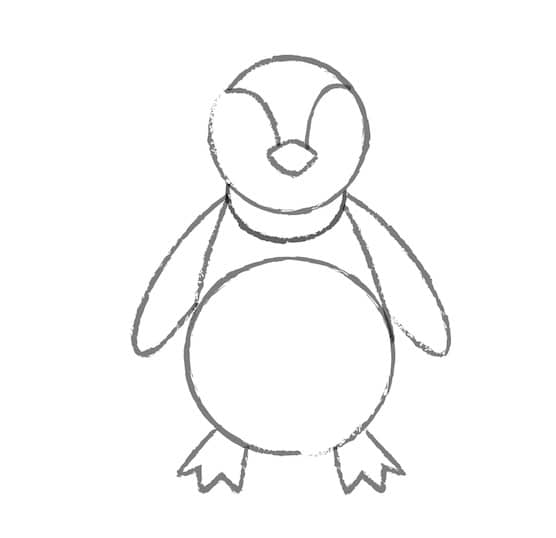
Step 3: Outline the Penguin’s Body Shape
Now, refine the shape by adding curved lines on each side to connect the head and body. This will give your penguin a more natural, rounded form.

Step 4: Draw the Body and Flippers and Feet
Sketch the middle part of the penguin’s head, add the beak, curved flippers and feet. Add a collar for a scarf.
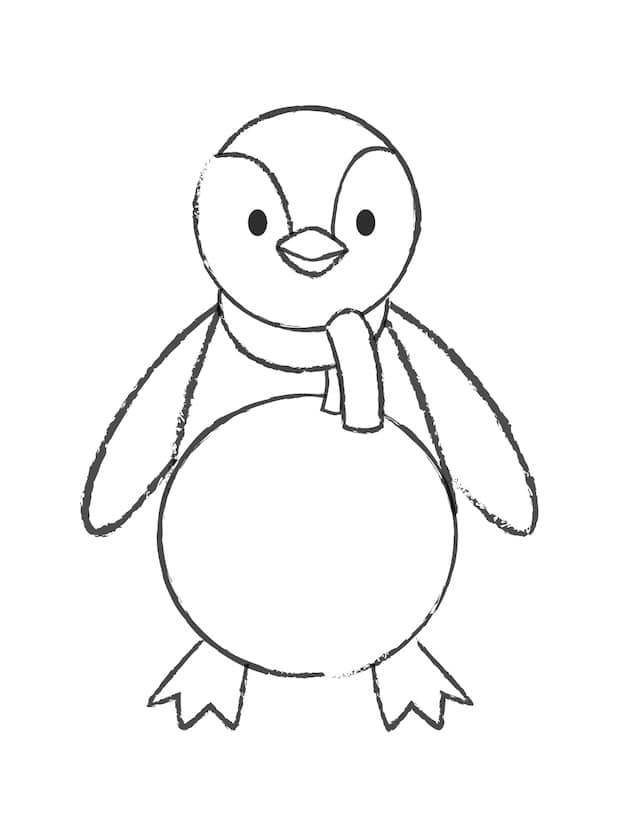
Step 6: Final Details and Coloring
Add final details like the eyes, beak details, and scarf. You can color your penguin in now to make it even more cute and colorful!
Final Thoughts
Drawing a penguin is easy when you break it down into simple steps! With practice, you can customize your penguin by adding different poses, expressions, or accessories. Try experimenting with colors and backgrounds to make your drawing unique.
Have fun drawing your penguin, and don’t forget to share your creations with friends and family!
Get the free printable How to Draw A Penguin Guide